For 1990-2009 cars only
Removal Procedure
Notice: Refer to Brake Fluid Effects on Paint and Electrical Components Notice in the Preface section.
- Remove the driver side instrument panel insulator. Refer to Instrument Panel Insulator Panel Replacement - Left Side .
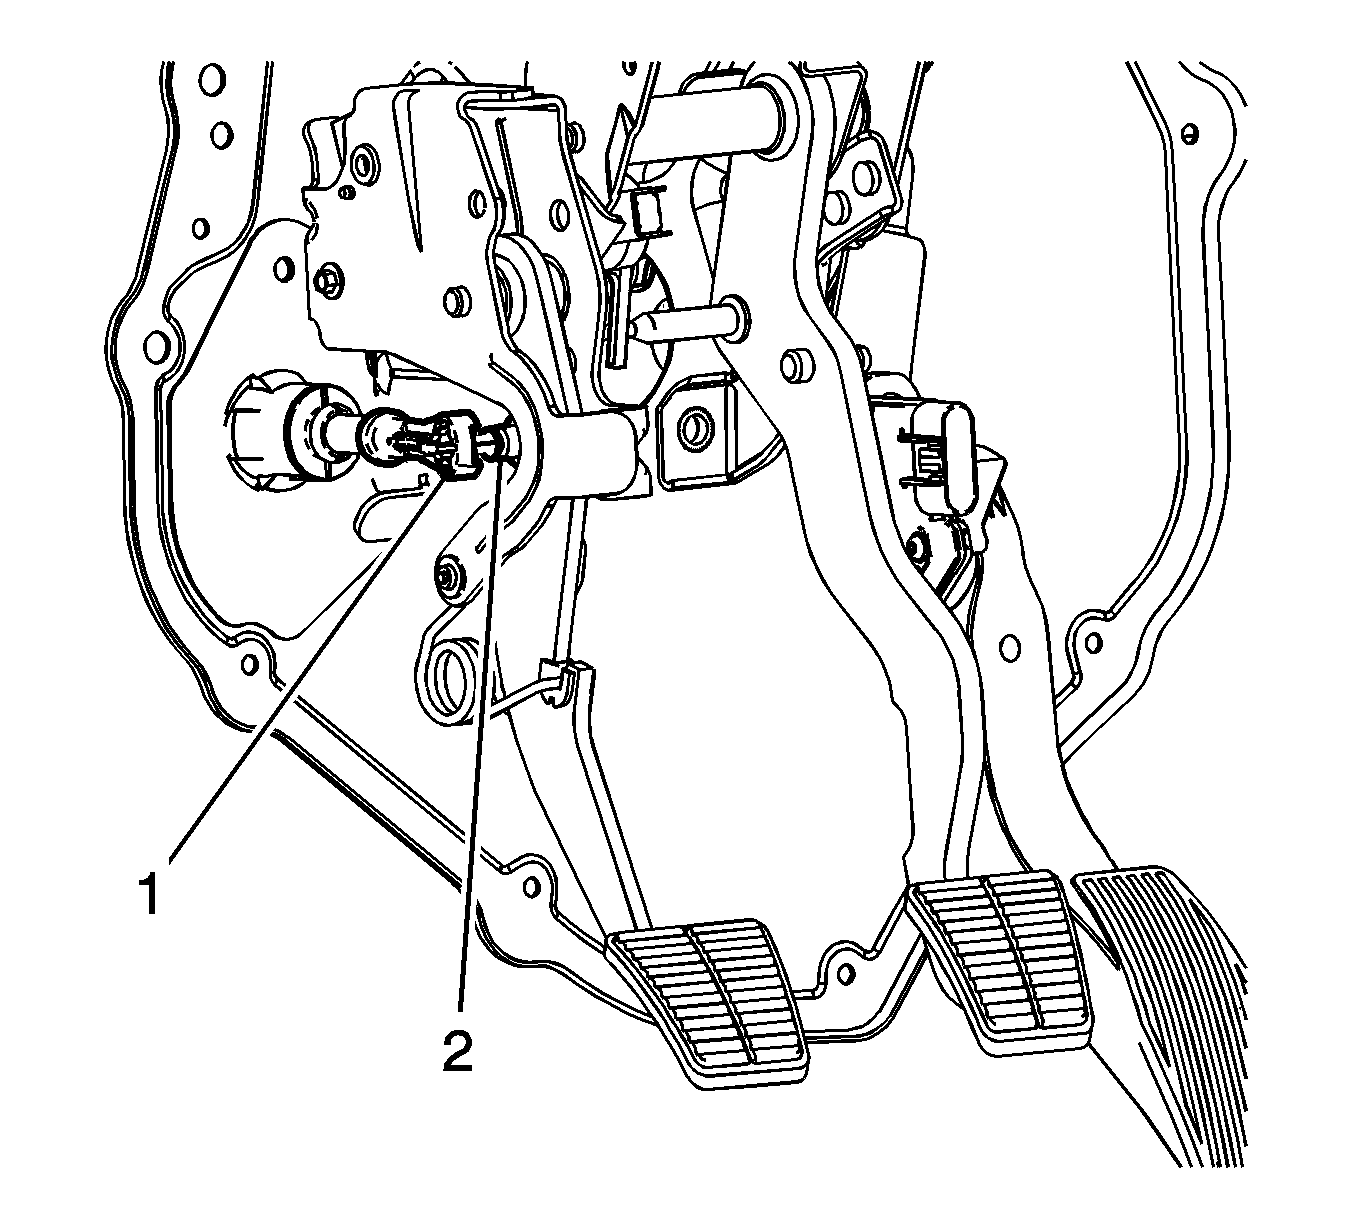
- Disconnect the clutch master cylinder push rod (1) from the clutch pedal pin (2).
- Remove the clutch fluid reservoir retaining nut (2).
- Remove the clutch fluid reservoir (1) from the strut tower stud (3).
- Remove the air cleaner outlet duct. Refer to Air Cleaner Outlet Duct Replacement .
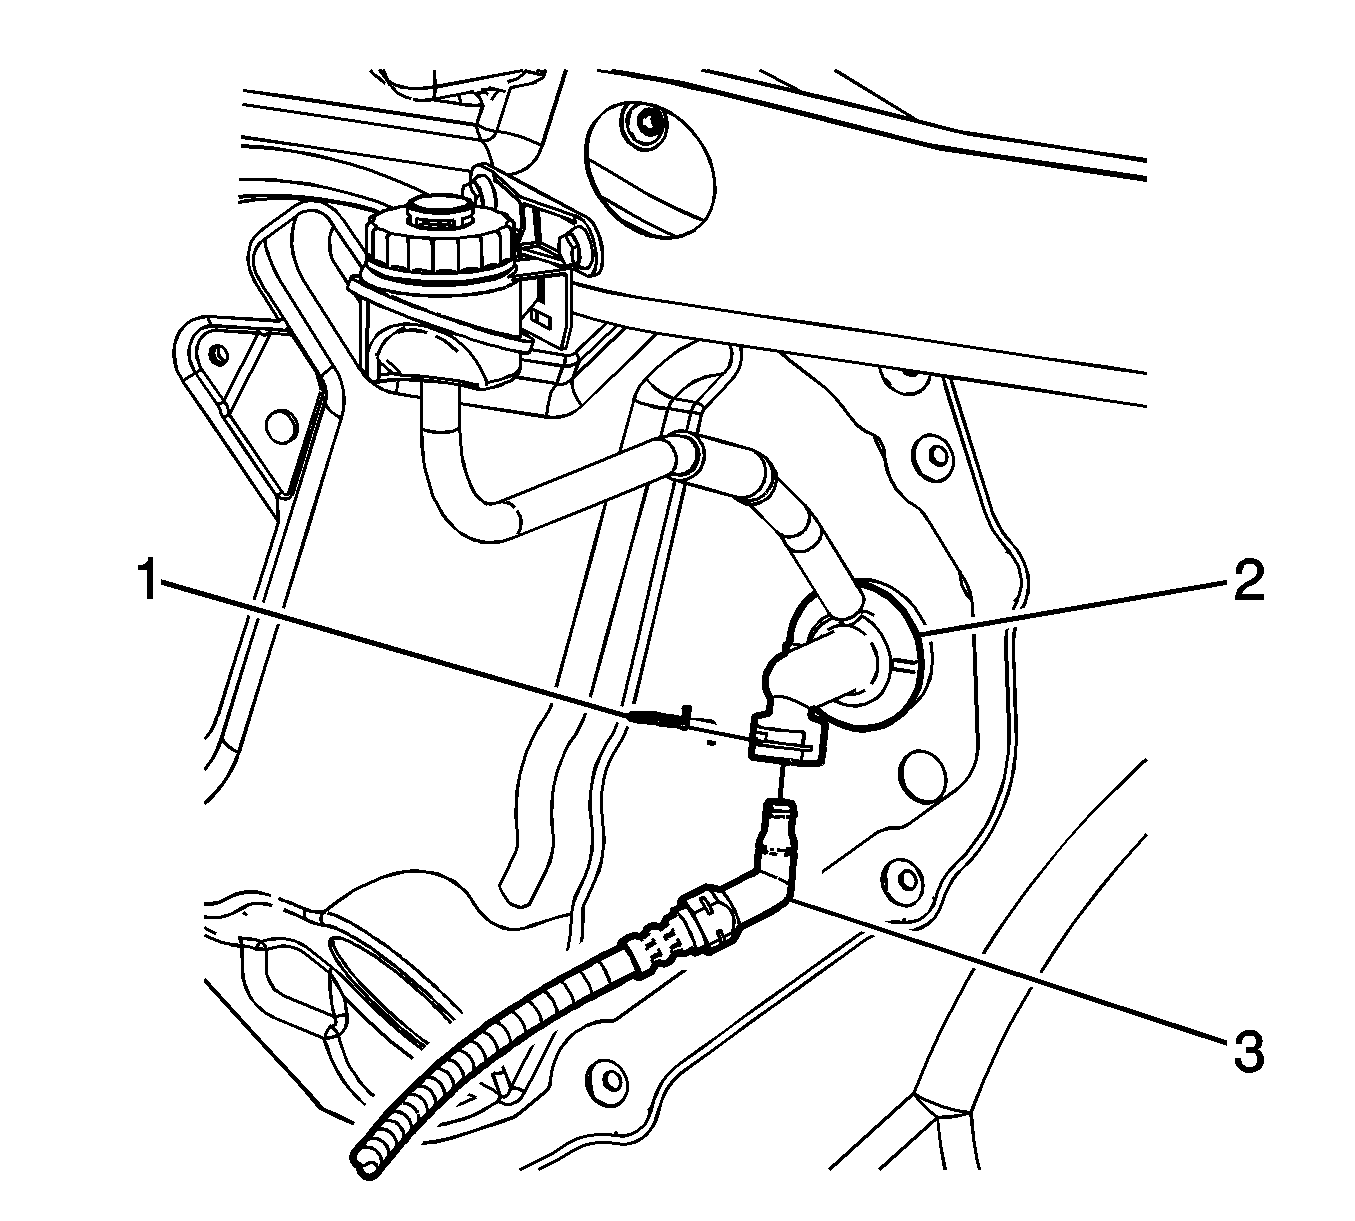
- Remove the clutch hose retaining clip (1).
- Disconnect the clutch hydraulic hose (3) from the clutch master cylinder (2).
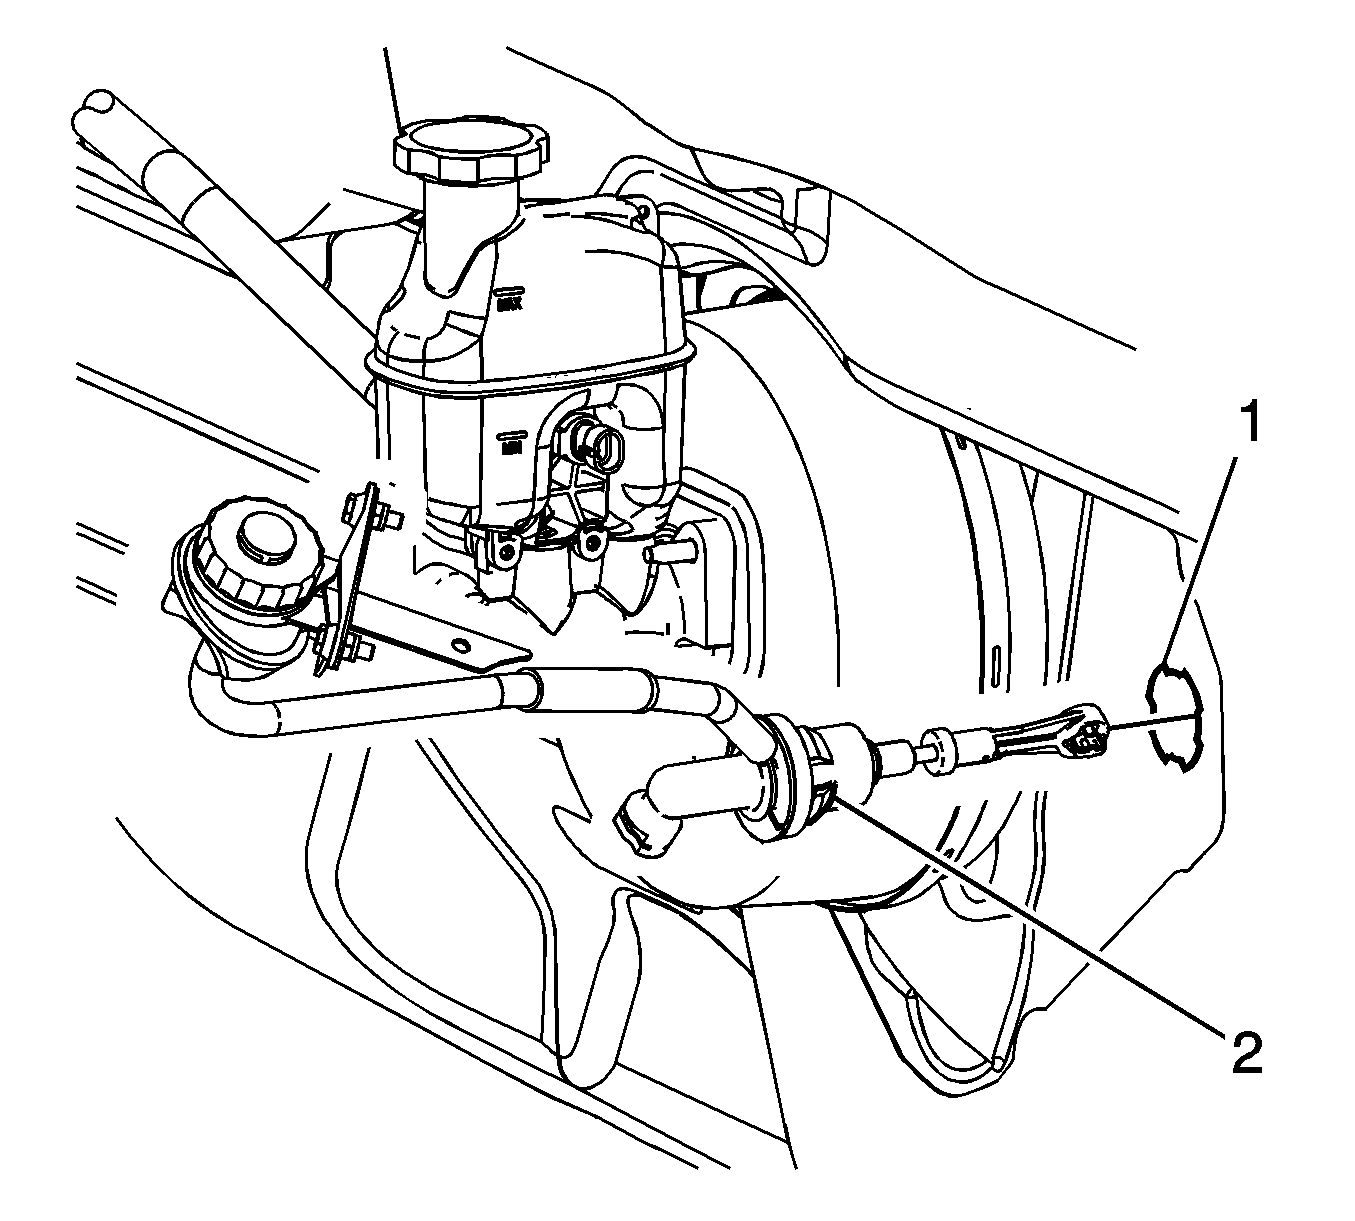
- Rotate the clutch master cylinder (2) clockwise 1/8 turn.
- Remove the clutch master cylinder (2) from the cowl (1).

Important: Install a rubber cap over the exposed hose fitting in order to prevent fluid loss and contamination.
Installation Procedure
- With the clutch fluid reservoir connection at 2 o'clock position, insert the clutch master cylinder (2) into the cowl (1).
- Align the keys (2) of the clutch master cylinder housing with the tabs (1) on the cowl.
- Rotate the clutch master cylinder (2) counter clockwise approximately 1/8 turn until fully seated. The clutch fluid reservoir hose connection will be at vertical 12 o'clock position when the clutch master cylinder is properly installed.
- Connect the clutch hydraulic hose (3).
- Install the air cleaner outlet duct. Refer to Air Cleaner Outlet Duct Replacement .
- Install the clutch fluid reservoir (1) to the strut tower stud (3).
- Install the clutch fluid reservoir nut (2).
- Position the clutch master cylinder push rod (1) to the clutch pedal pin (2).
- Push the clutch master cylinder push rod (1) onto the clutch pedal pin (2) to secure.
- Install the driver side instrument panel insulator. Refer to Instrument Panel Insulator Panel Replacement - Left Side .
- Bleed the clutch hydraulic system. Refer to Hydraulic Clutch Bleeding .
Notice: Refer to Fastener Notice in the Preface section.
Tighten
Tighten the nut to 21 N·m (15 lb ft).
