Removal Procedure
Caution: Refer to Brake Fluid Irritant Caution in the Preface section.
Notice: Refer to Brake Fluid Effects on Paint and Electrical Components Notice in the Preface section.
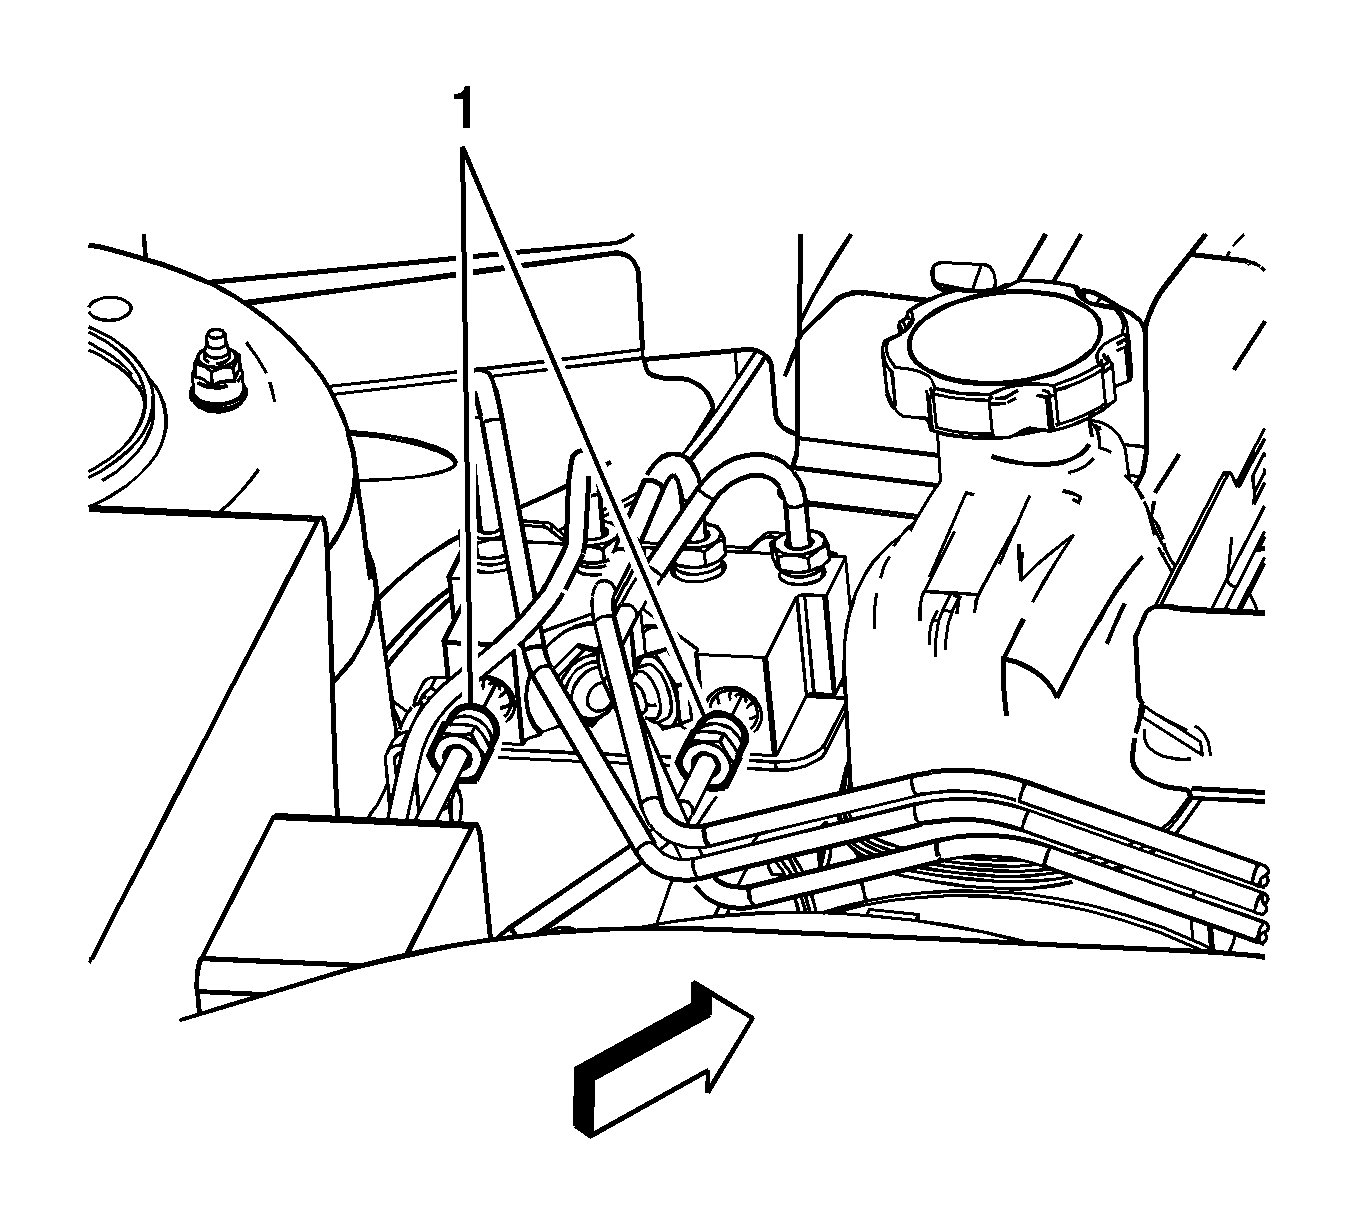
- Disconnect the 2 brake pipes (1) from the proportioning valve. Use bleeder valve caps or similar caps to plug the ends of the brake pipes in order to prevent brake fluid from draining out of the pipes and to avoid brake fluid contamination.
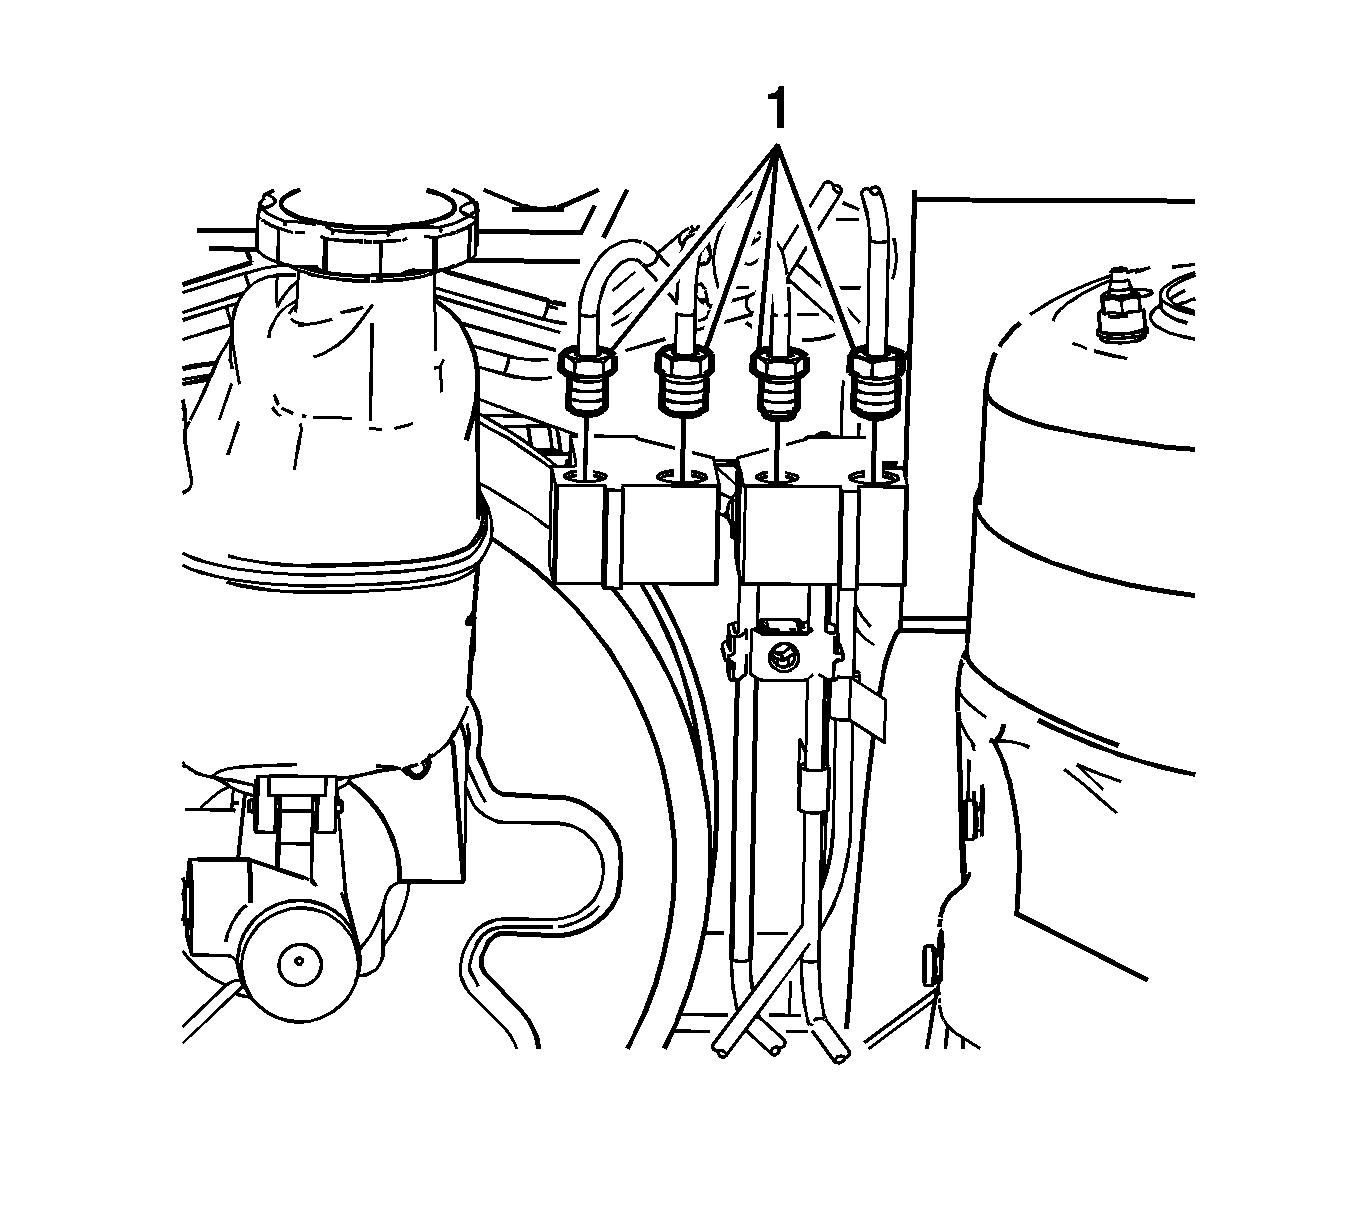
- Disconnect the 4 brake pipes (1) from the proportioning valve. Use bleeder valve caps or similar caps to plug the ends of the brake pipes in order to prevent brake fluid from draining out of the pipes and to avoid brake fluid contamination.
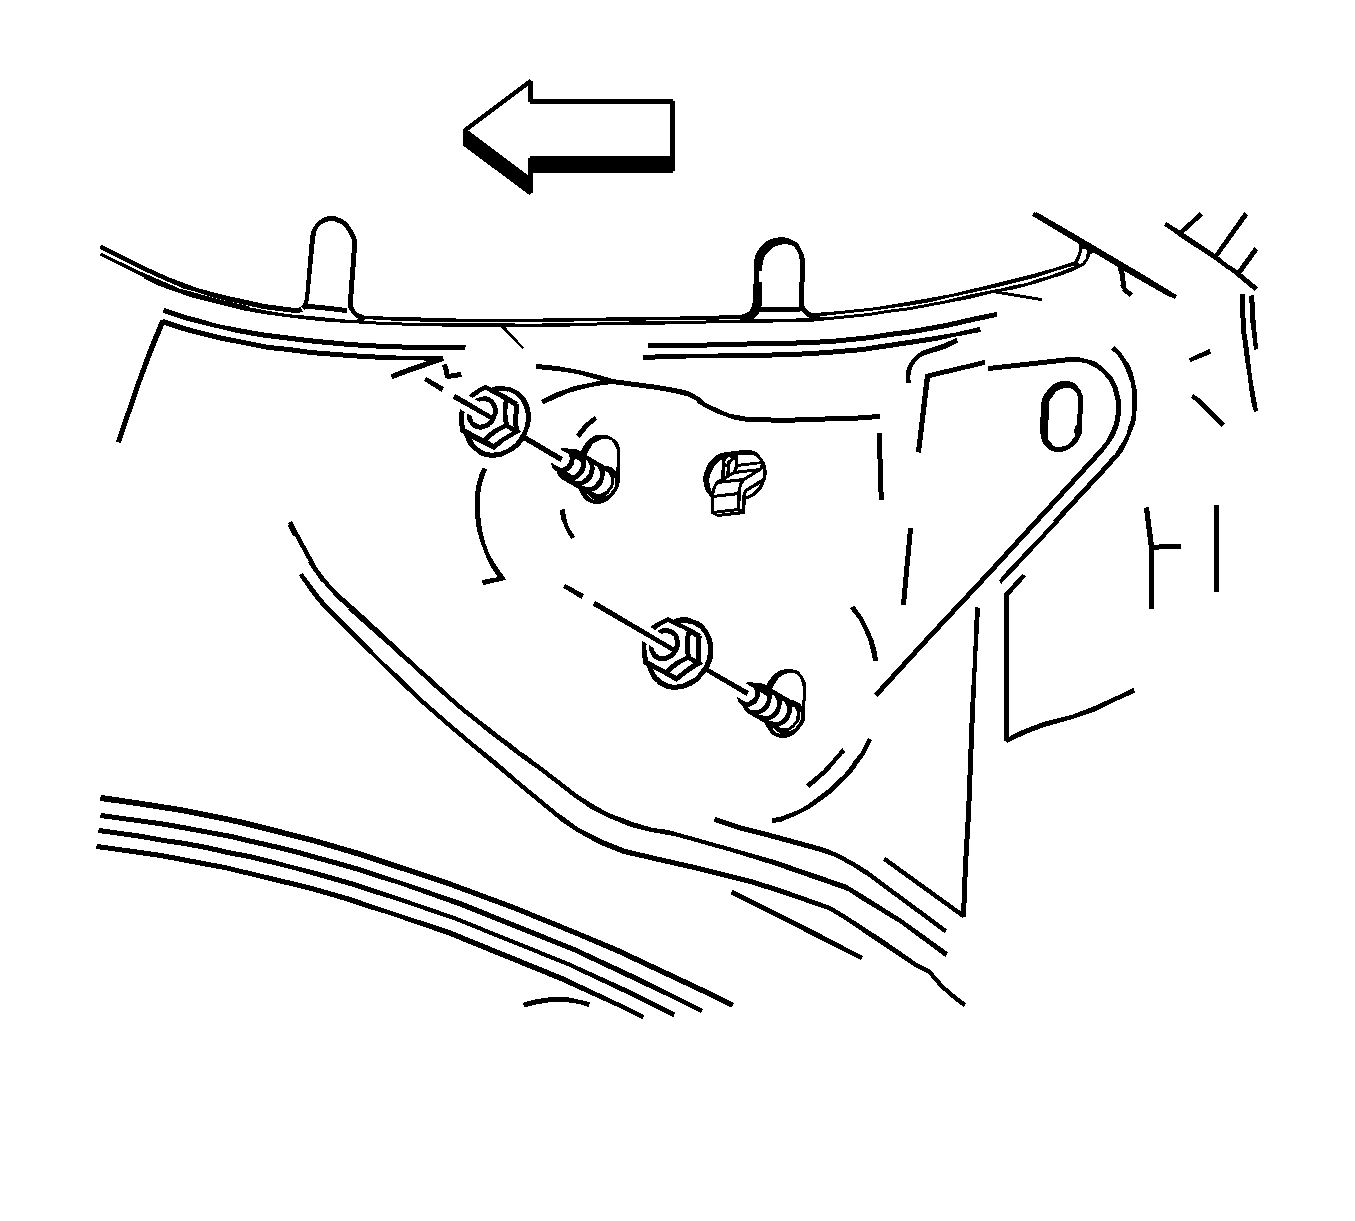
- Remove the 2 proportioning valve bracket nuts and remove the proportioning valve assembly from the vehicle.
Important: Use tape to label and mark the locations of the brake pipes in order to aid in installation.
Installation Procedure
- Install the proportioning valve assembly and the 2 proportioning valve bracket nuts.
- Remove the tape that marked the locations of the brake pipes.
- Remove the caps from the 4 brake pipes (1) and install the 4 brake pipes (1) to the proportioning valve.
- Remove the caps from the 2 brake pipes (1) and install the 2 brake pipes (1) to the proportioning valve.
- Bleed the brake system. Refer to Hydraulic Brake System Bleeding .
Notice: Use the correct fastener in the correct location. Replacement fasteners must be the correct part number for that application. Fasteners requiring replacement or fasteners requiring the use of thread locking compound or sealant are identified in the service procedure. Do not use paints, lubricants, or corrosion inhibitors on fasteners or fastener joint surfaces unless specified. These coatings affect fastener torque and joint clamping force and may damage the fastener. Use the correct tightening sequence and specifications when installing fasteners in order to avoid damage to parts and systems.
Tighten
Tighten the 2 proportioning valve bracket nuts to 10 N·m (89 lb in).
Caution: Make sure brake pipes are correctly connected to brake pressure modulator valve. If brake pipes are switched by mistake, wheel lockup will occur and personal injury may result. The only two ways this condition can be detected are by using a Scan Tool or by doing an Antilock stop.
Tighten
Tighten the brake pipe fittings to 20 N·m (15 lb ft).
Tighten
Tighten the brake pipe fittings to 20 N·m (15 lb ft).
