For 1990-2009 cars only
Removal Procedure
Important: Place the valve train components in a rack in order to ensure that the components are installed in the same location from which they were removed.
- Remove the valve rocker arm covers. Refer to Valve Rocker Arm Cover Replacement - Left Side or Valve Rocker Arm Cover Replacement - Right Side .
- Remove the valve rocker arm bolts.
- Remove the rocker arms.
- Remove the pushrods.
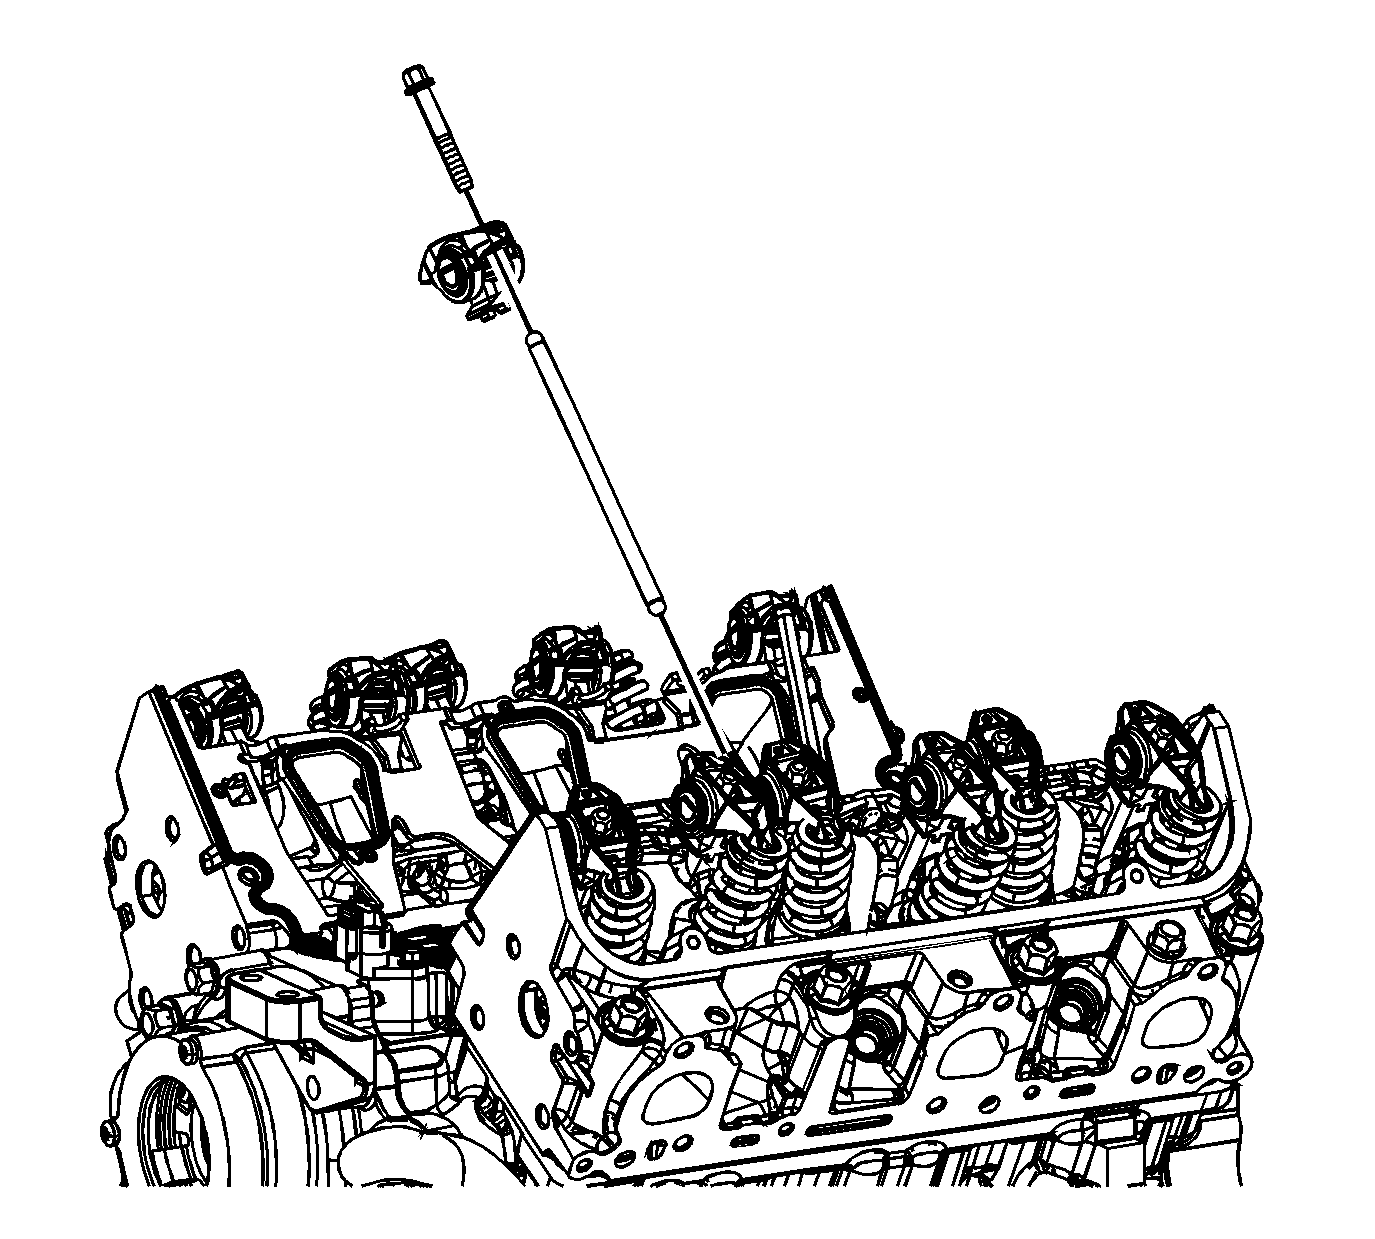
| • | The intake push rods measure 147.51 mm (5.81 in). |
| • | The exhaust push rods measure 154.87 mm (6.1 in). |
Installation Procedure
- Coat the ends of the pushrods using prelube. Refer to Adhesives, Fluids, Lubricants, and Sealers .
- Install the pushrods.
- Ensure that the pushrods seat in the lifter bore.
- Coat the rocker arm friction surfaces using prelube. Refer to Adhesives, Fluids, Lubricants, and Sealers .
- Install the rocker arms.
- Install the rocker arm bolts.
- Install the valve rocker arm covers. Refer to Valve Rocker Arm Cover Replacement - Left Side or Valve Rocker Arm Cover Replacement - Right Side .
| • | The intake pushrods are identified with blue stripes. |
| • | The exhaust pushrods are identified with yellow stripes. |
Important: Shims (88894006) may be required under the valve rocker arm pedestals if reconditioning has been performed on the cylinder head or its components.
Notice: Refer to Fastener Notice in the Preface section.
Tighten
Tighten the bolts to 34 N·m (25 lb ft).
