For 1990-2009 cars only
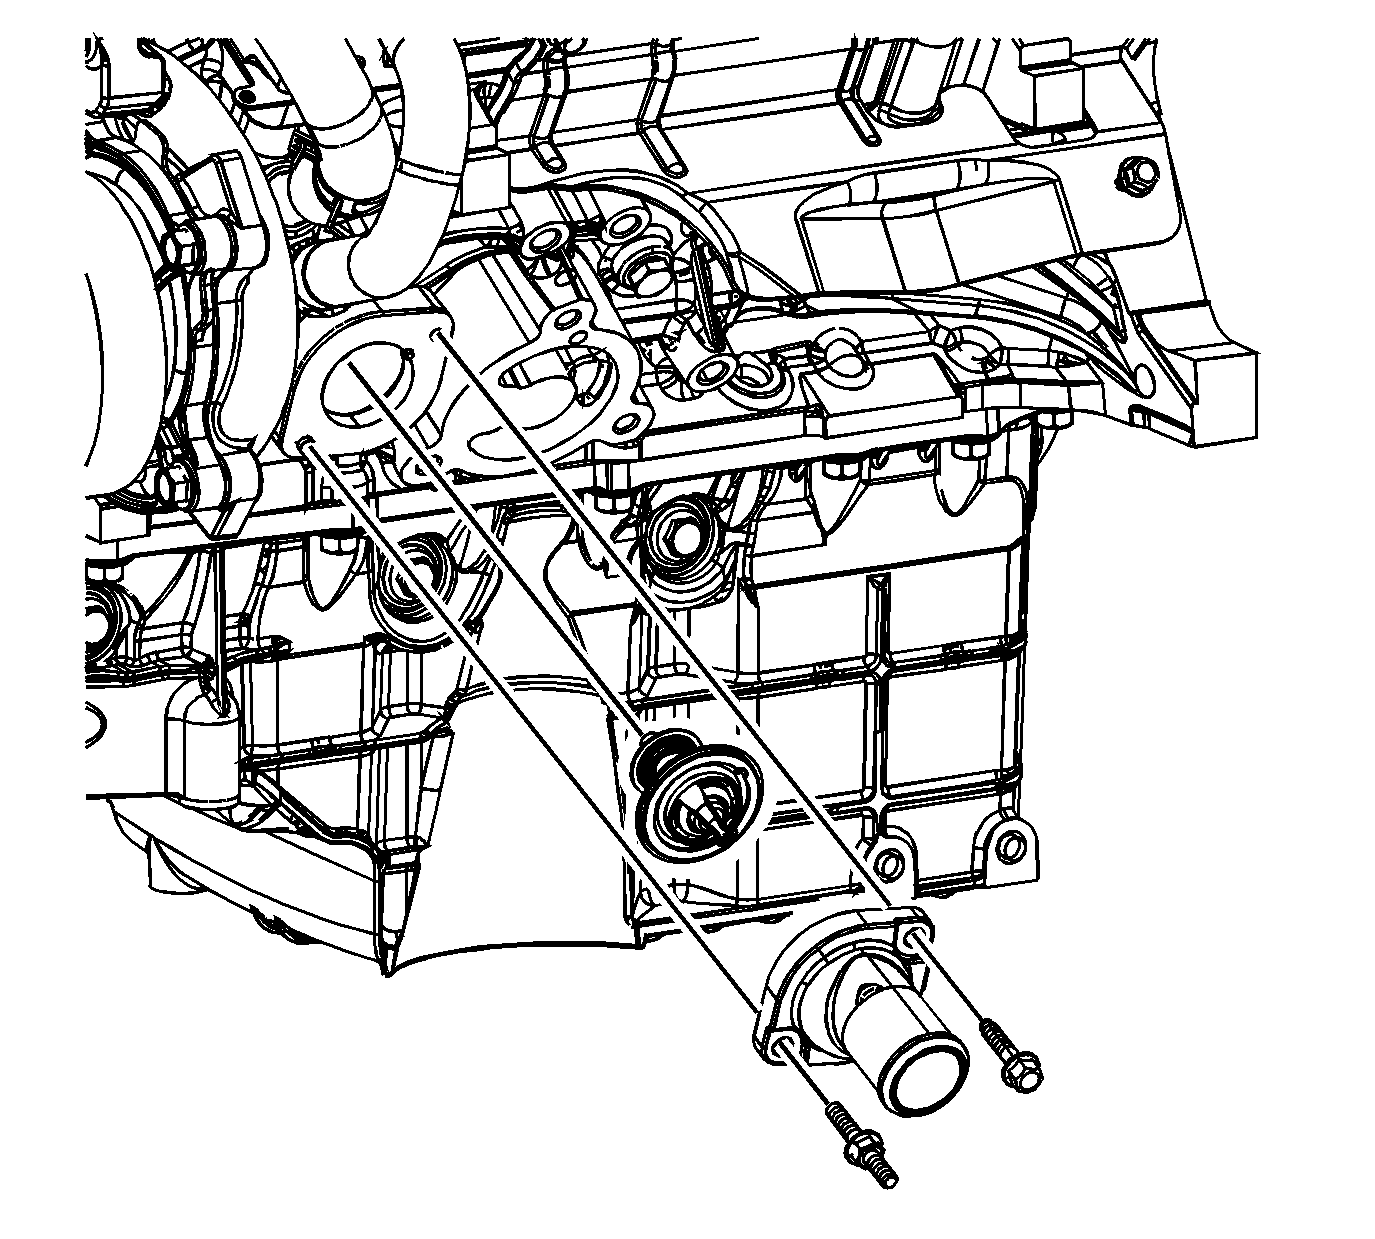
Engine Coolant Thermostat Replacement LX9
Tools Required
J 38185 Hose Clamp Pliers
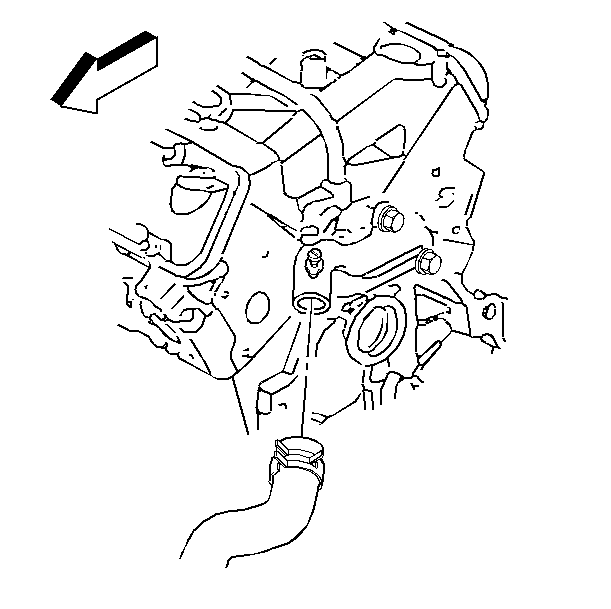
Removal Procedure
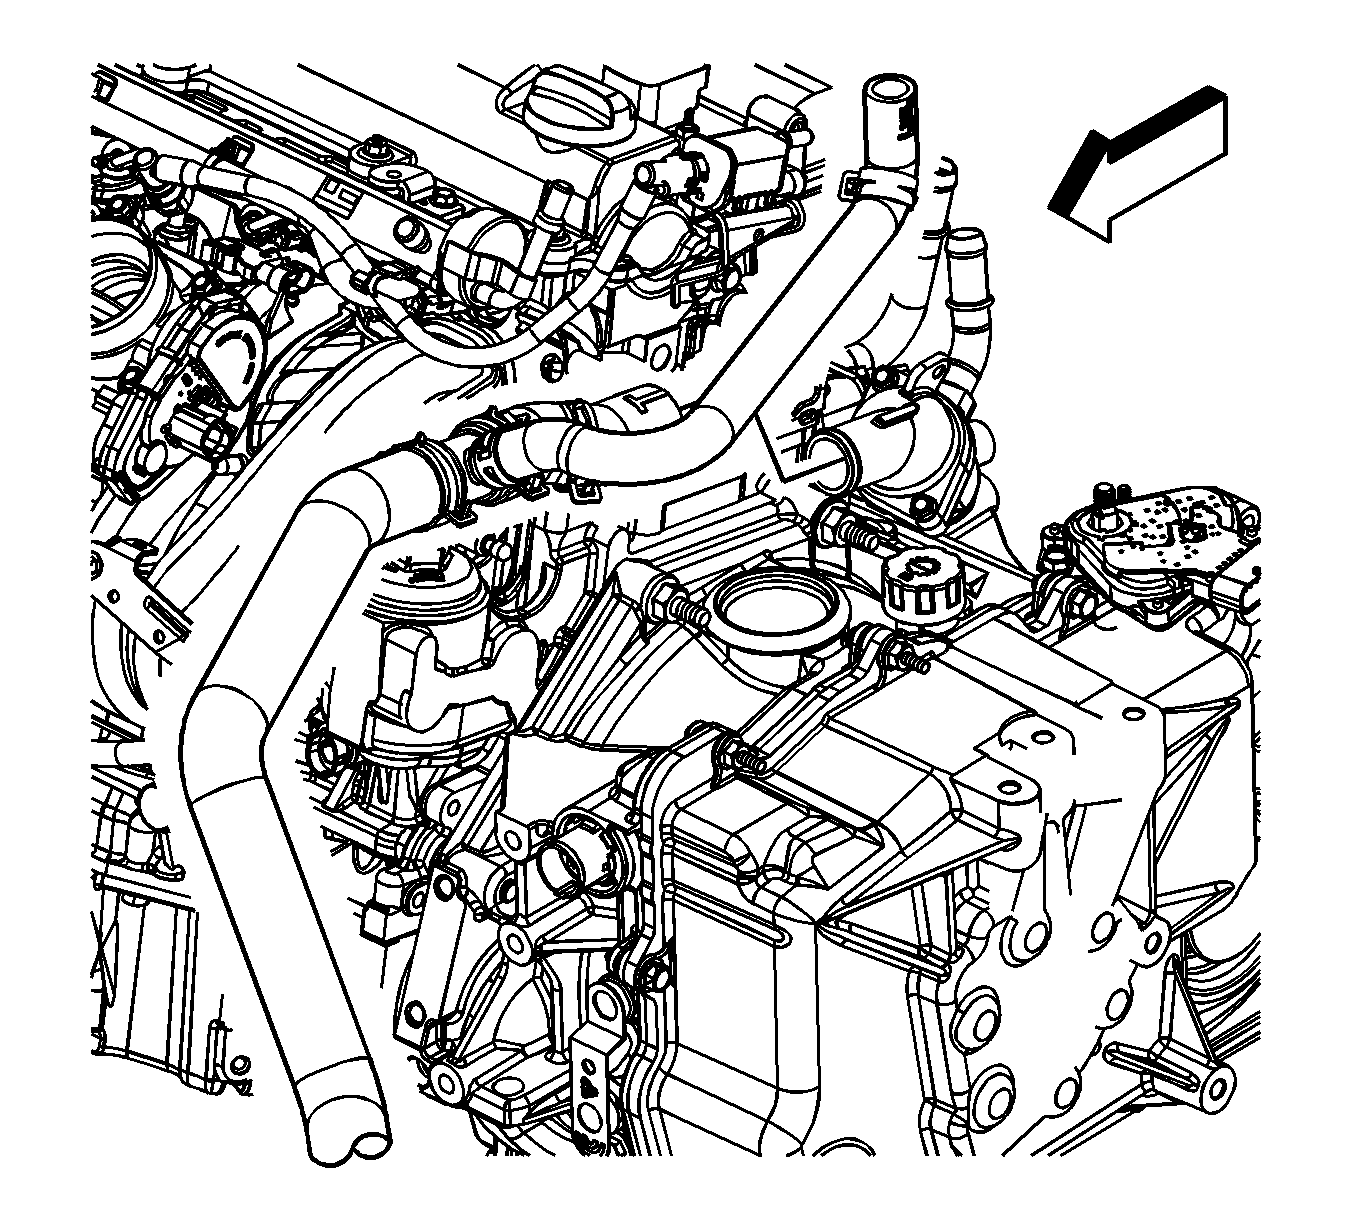
- Remove the air cleaner intake duct. Refer to Air Cleaner Inlet Duct Replacement for the 3.5L (LX9) engine.
- Partially drain the cooling system. Refer to Cooling System Draining and Filling .
- Use the J 38185 in order to reposition the hose clamp from the thermostat housing.
- Remove the radiator inlet hose from the thermostat housing.
- Remove the thermostat housing bolts.
- Remove the thermostat housing .
- Remove the thermostat.
- Clean and inspect the thermostat housing gasket mating surfaces.
Installation Procedure
- Install the thermostat.
- Install the thermostat housing.
- Install the thermostat housing bolts.
- Install the radiator inlet hose to the thermostat housing.
- Use the J 38185 in order to reposition and install the hose clamp to the thermostat housing.
- Install the air cleaner intake duct. Refer to Air Cleaner Inlet Duct Replacement for the 3.5L (LX9) engine.
- Fill the cooling system. Refer to Cooling System Draining and Filling .
Notice: Refer to Fastener Notice in the Preface section.
Tighten
Tighten the bolts to 25 N·m (18 lb ft).
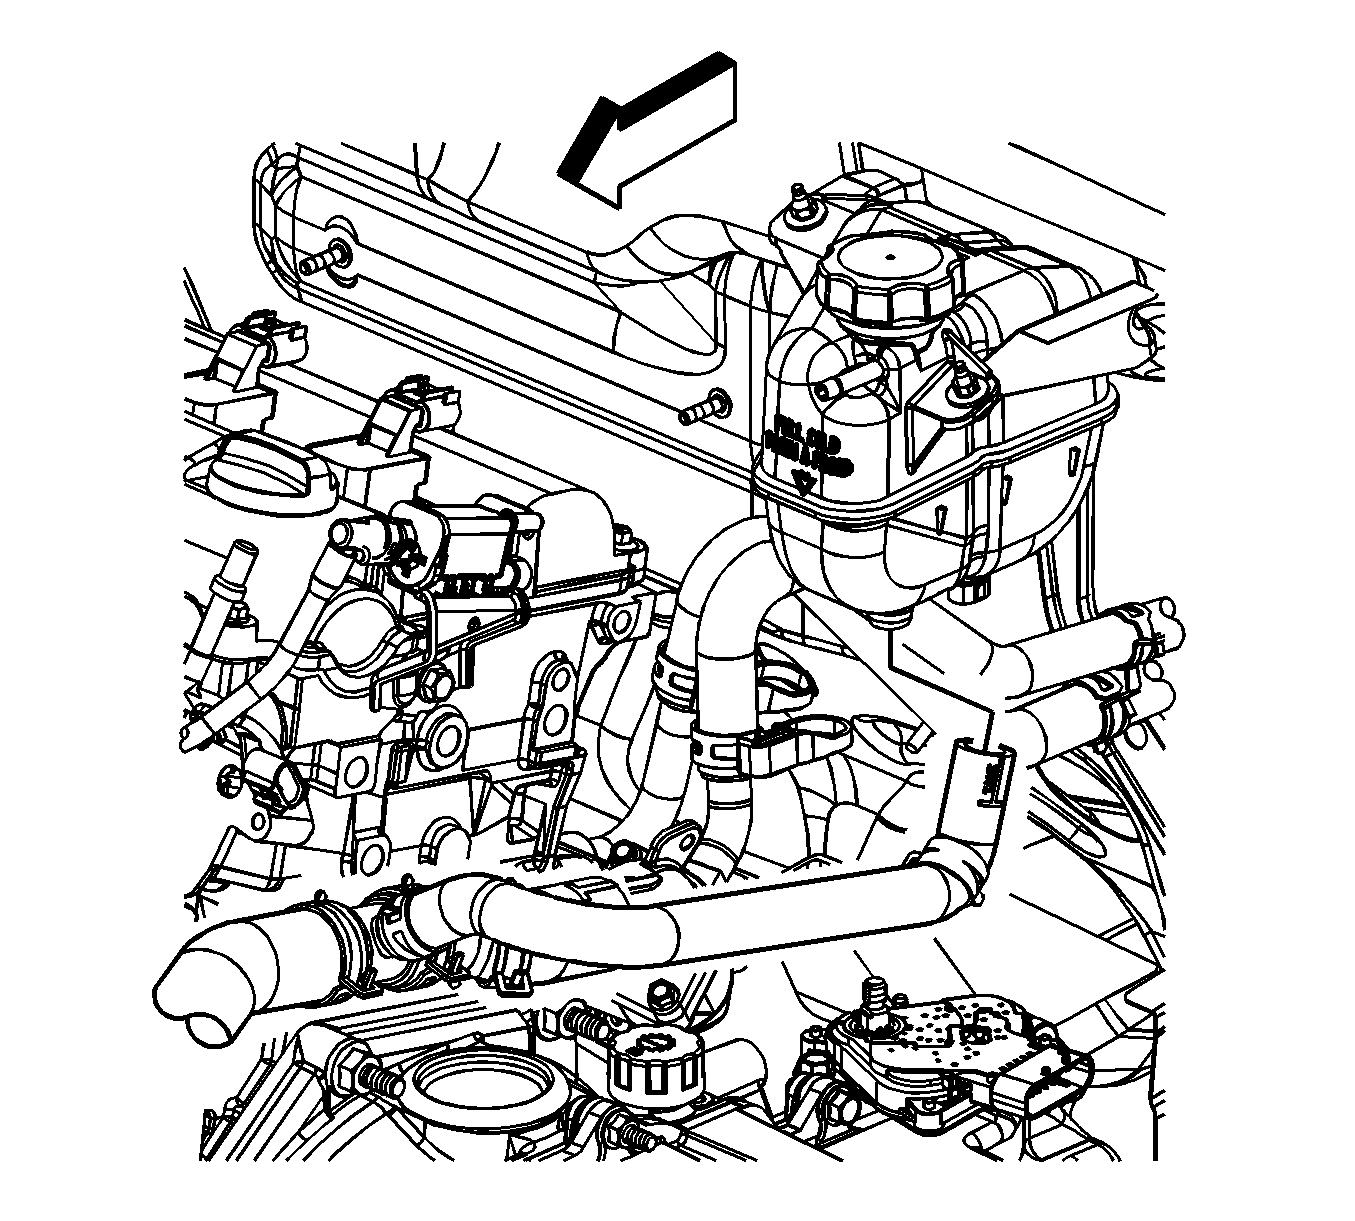
Engine Coolant Thermostat Replacement LE5
Removal Procedure
- Drain the cooling system. Refer to Cooling System Draining and Filling .
- If the vehicle is not equipped an engine oil cooler proceed with the following steps, otherwise proceed to step 7.
- Reposition the radiator outlet hose clamp at the surge tank.
- Remove the radiator outlet hose from the surge tank.
- Reposition the radiator outlet hose clamp at the thermostat housing.
- Remove the radiator outlet hose from the thermostat housing. Proceed to step 11.
- If the vehicle is equipped with a engine oil cooler, reposition the radiator outlet hose clamp at the thermostat housing.
- Remove the radiator outlet hose from the thermostat housing.
- Reposition the surge tank outlet hose clamp at the thermostat housing.
- Remove the surge tank outlet hose from the thermostat housing.
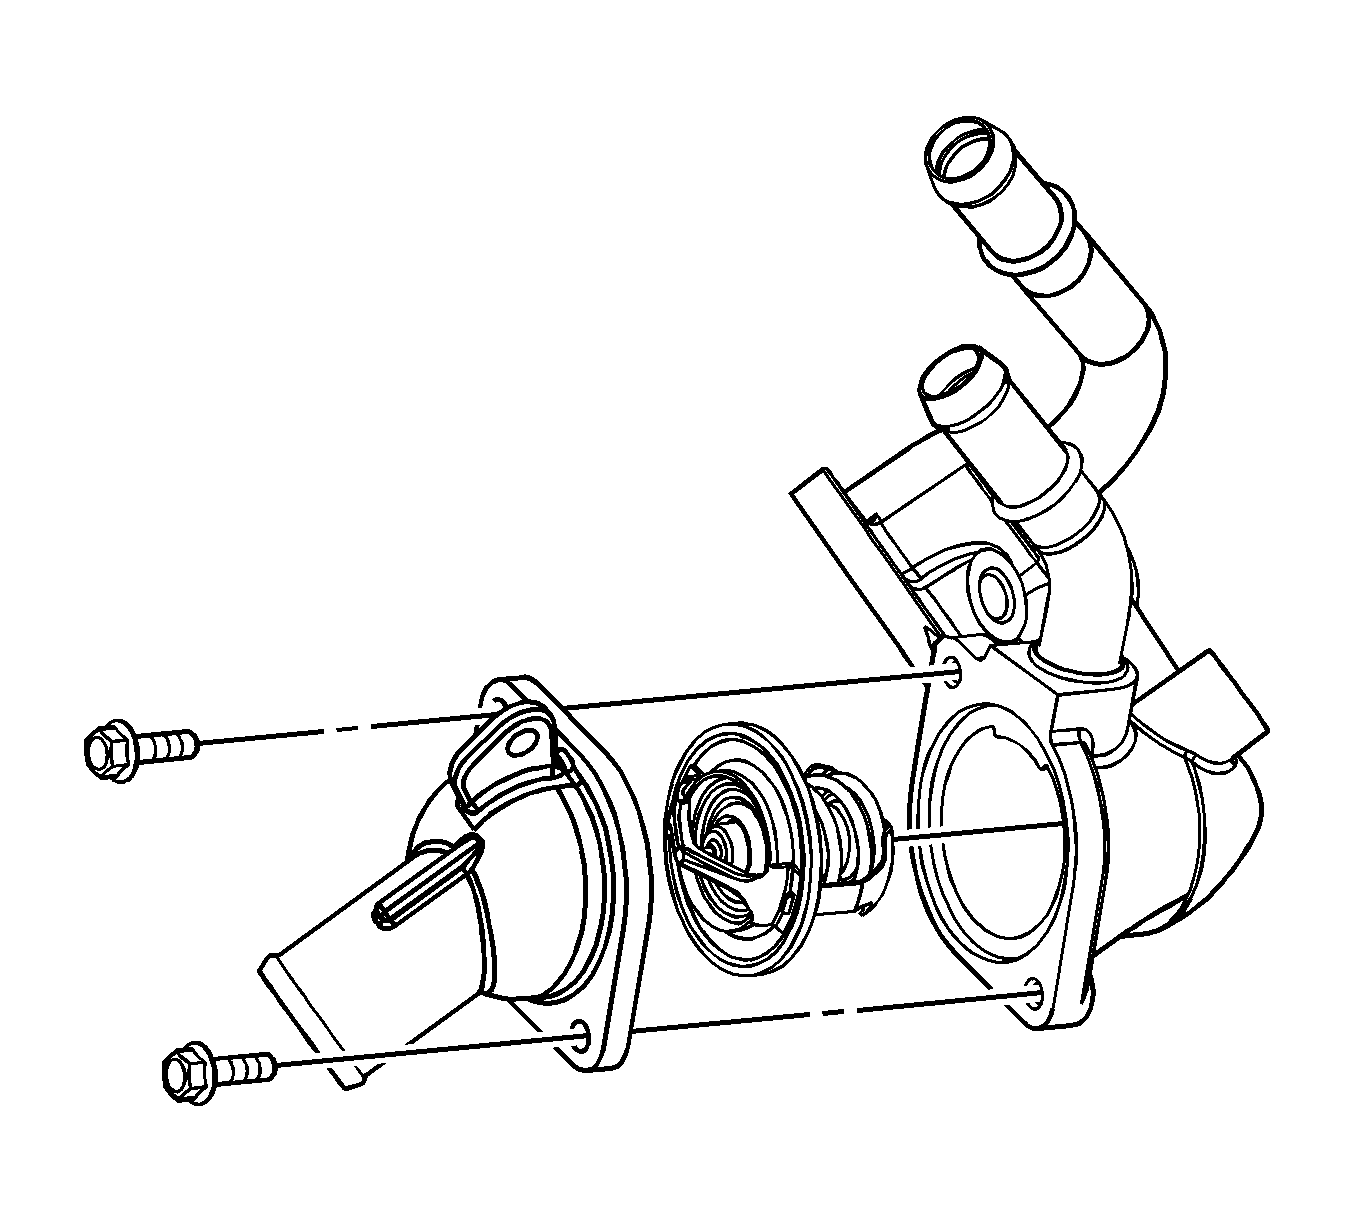
- Remove the thermostat housing cover bolts and cover.
- Remove the thermostat.
- Remove and discard the thermostat housing O-ring seal.

Installation Procedure
- Install a NEW thermostat housing cover O-ring seal.
- Install the thermostat.
- Install the thermostat housing cover bolts.
- If the vehicle is equipped with an engine oil cooler proceed with the following steps, otherwise proceed to step 9.
- Install the radiator outlet hose to the thermostat housing.
- Position the radiator outlet hose clamp at the thermostat housing.
- Install the surge tank outlet hose to the thermostat housing.
- Position the surge tank outlet hose clamp at the thermostat housing. Proceed to step 13.
- If the vehicle is not equipped an engine oil cooler, install the radiator outlet hose to the thermostat housing.
- Position the radiator outlet hose clamp at the thermostat housing.
- Install the radiator outlet hose to the surge tank.
- Position the radiator outlet hose clamp at the surge tank.
- Fill the cooling system. Refer to Cooling System Draining and Filling .
Notice: Refer to Fastener Notice in the Preface section.
Tighten
Tighten the bolts to 10 N·m (89 lb in).
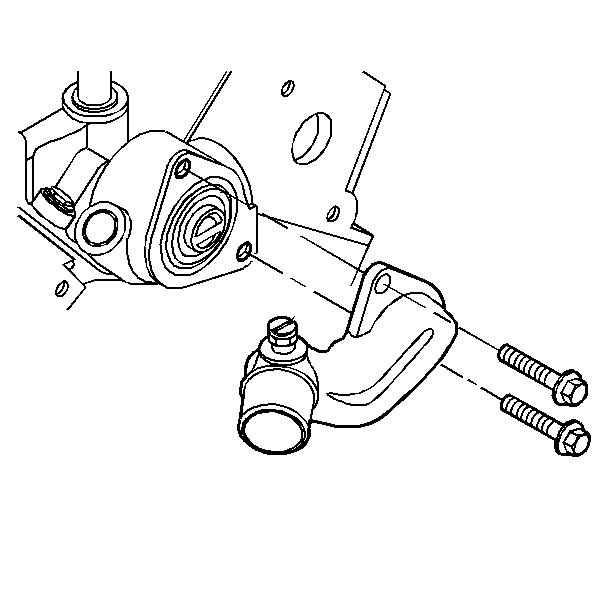
Engine Coolant Thermostat Replacement LZ9
Removal Procedure
- Drain the cooling system. Refer to Cooling System Draining and Filling .
- Remove the air cleaner outlet duct. Refer to Air Cleaner Outlet Duct Replacement .
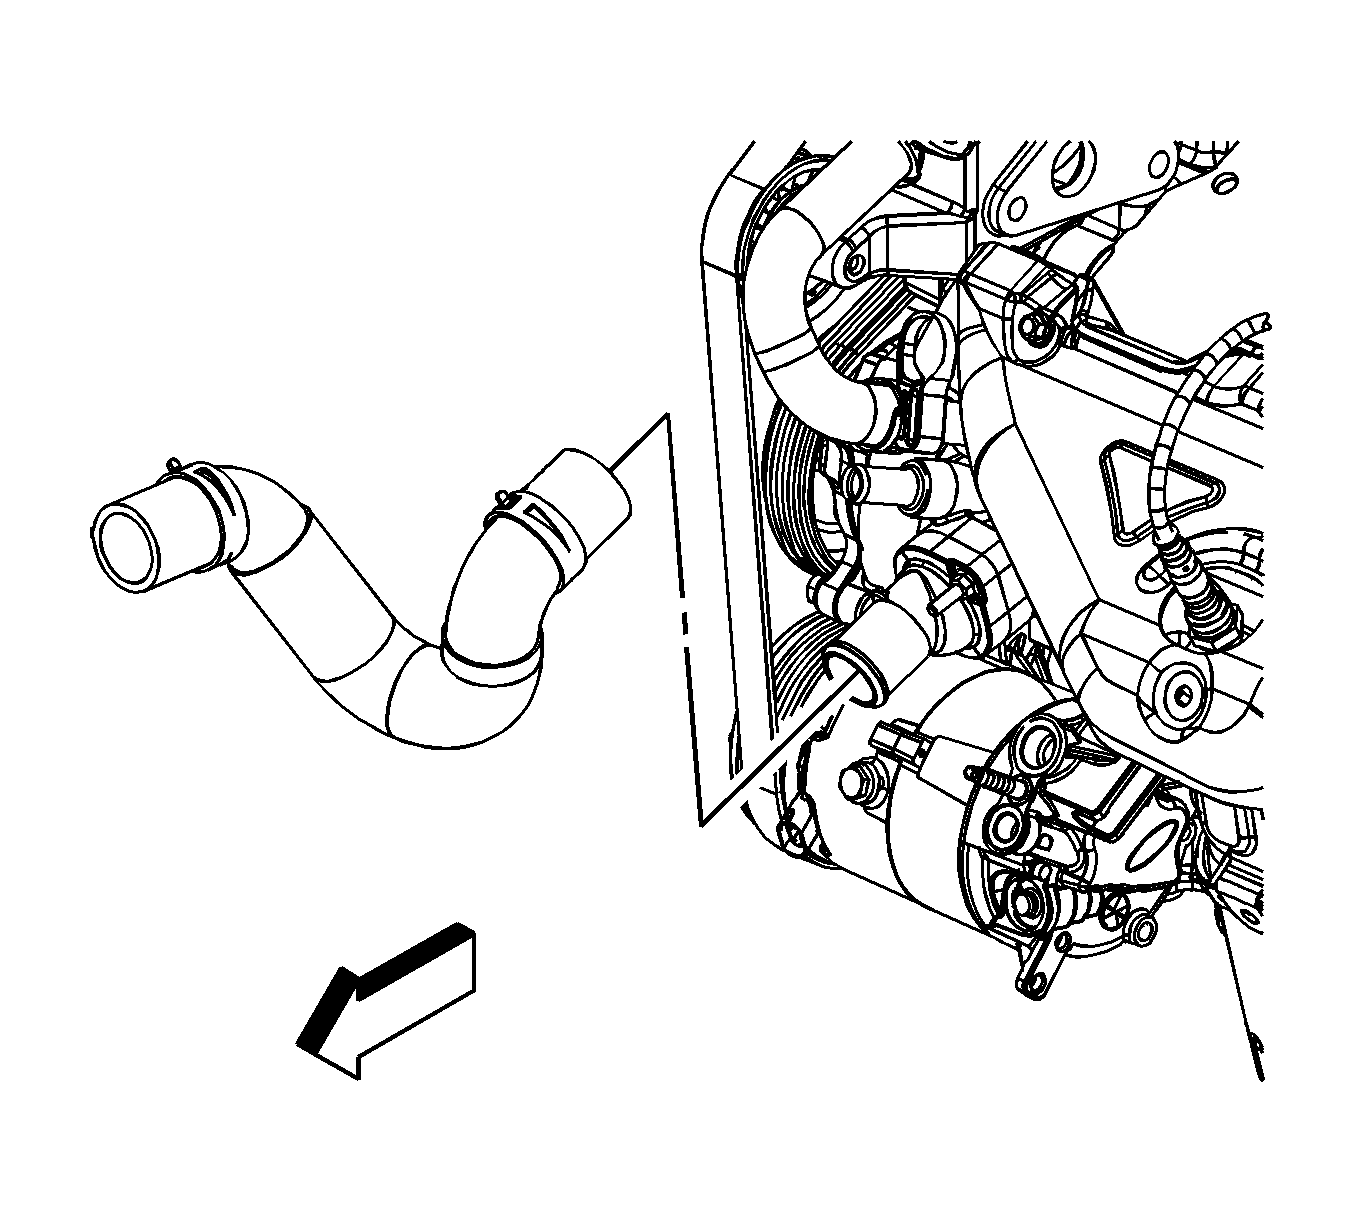
- Reposition the radiator outlet hose clamp at the thermostat housing.
- Remove the radiator outlet hose from the thermostat housing.
- Remove the thermostat housing bolt/stud.
- Remove the thermostat housing and gasket.
- Remove the thermostat.
- Clean the gasket surfaces.
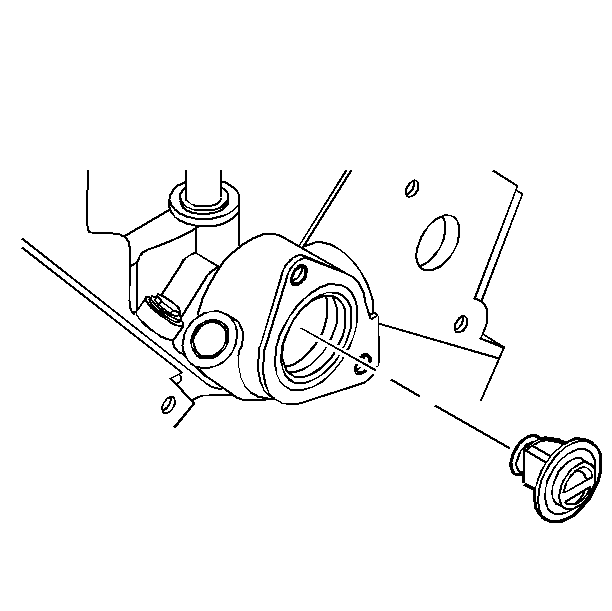
Installation Procedure
- Install a NEW thermostat.
- Position a NEW gasket and the thermostat housing to the engine block.
- Install the thermostat housing bolt/stud.
- Install the radiator outlet hose to the thermostat housing.
- Position the radiator outlet hose clamp at the thermostat housing.
- Install the air cleaner outlet duct. Refer to Air Cleaner Outlet Duct Replacement .
- Fill the cooling system. Refer to Cooling System Draining and Filling .
- Inspect the system for leaks.
Notice: Refer to Fastener Notice in the Preface section.
Tighten
Tighten the bolt/stud to 10 N·m (89 lb in).
