For 1990-2009 cars only
Removal Procedure
- Raise and support the vehicle. Refer to Lifting and Jacking the Vehicle.
- Remove the rear wheels. Refer to Tire and Wheel Removal and Installation.
- Disconnect the left and right rear brake pipes from the rear brake hoses at the axle.
- Disconnect the brake hoses from the axle brake hose bracket.
- Plug the brake pipes and hoses in order to prevent additional brake fluid loss.
- Disconnect both rear parking brake cables at the rear brake. Refer to Parking Brake Rear Cable Replacement.
- If applicable, disconnect the antilock brake system (ABS) harness connectors and disconnect from the axle.
- Support the rear axle with a hydraulic lift table.
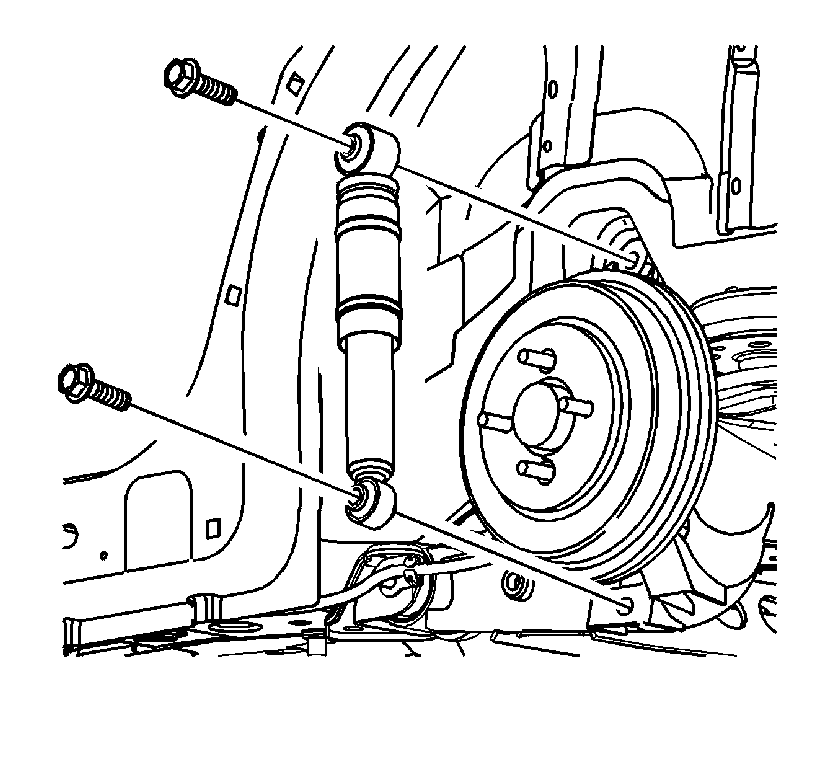
- Remove the lower shock bolts. Refer to Shock Absorber Replacement.
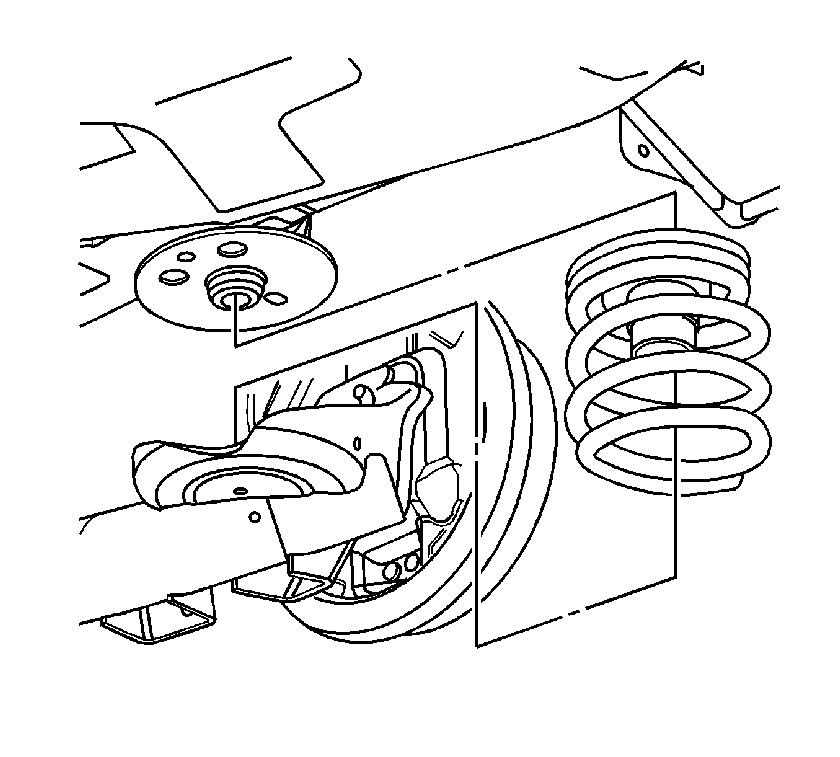
- Lower the hydraulic lift table and remove the rear coil springs. Refer to Coil Spring Replacement.
- Disconnect the park brake cables from the cable brackets.
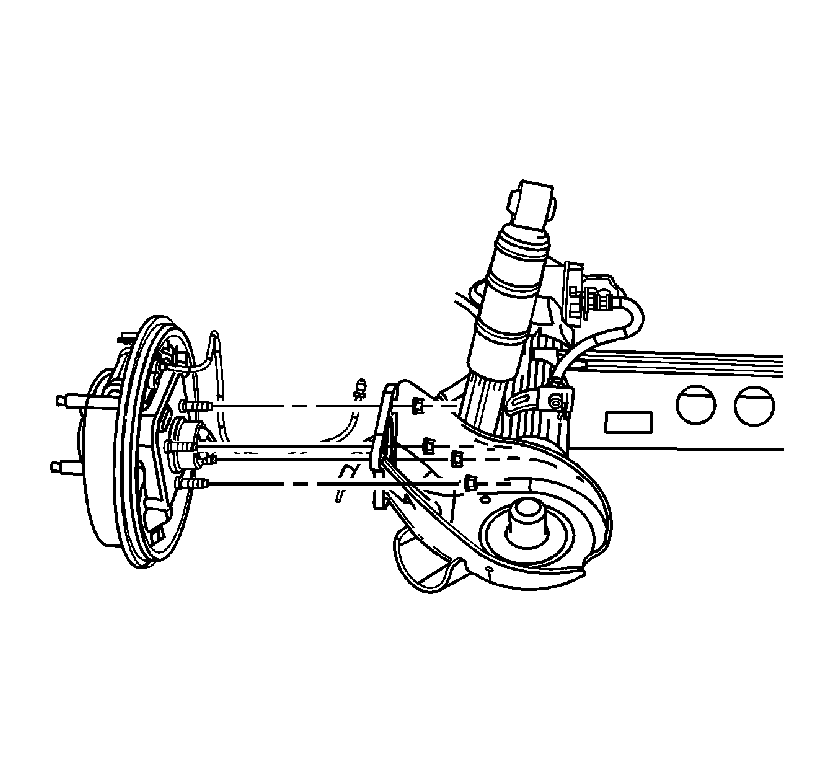
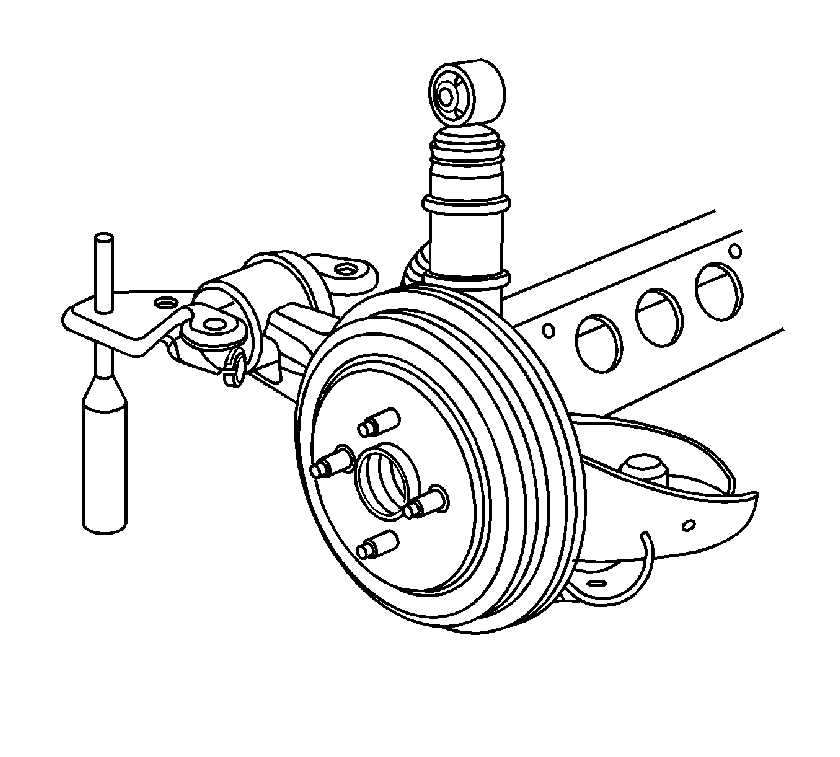
- Remove the wheel bearing/hub retaining nuts from both sides.
- Remove the wheel bearing/hubs, with the brakes and backing plate as an assembly.
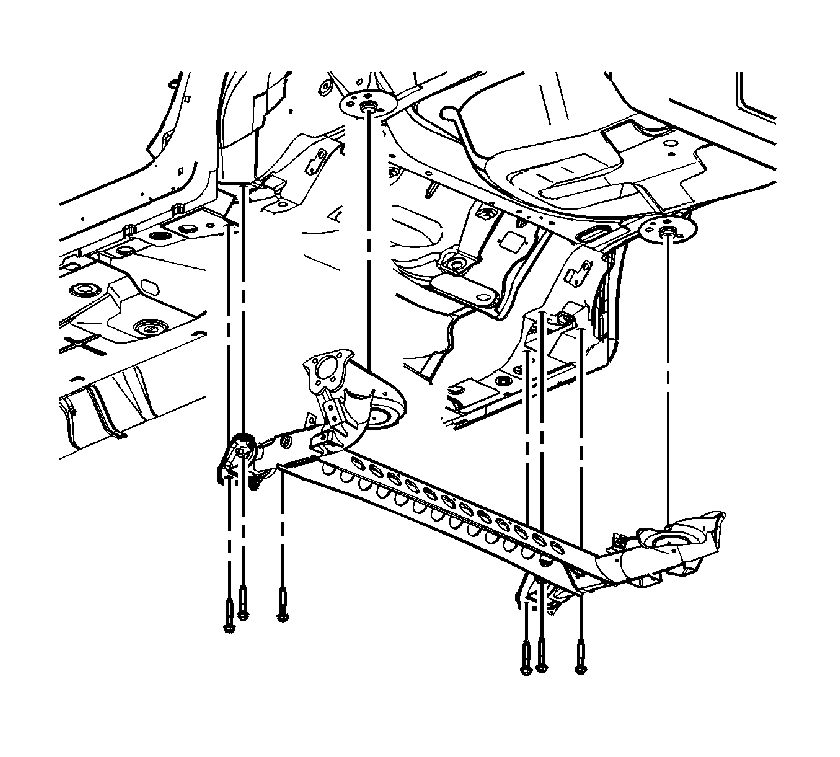
- Remove all rear axle bushing bracket bolts.
- Use the hydraulic lift table to lower the rear axle from the vehicle.
- Remove the rear axle bushing through bolts and the park brake cable brackets.
- Remove the rear coil spring lower seat from the axle.
Installation Procedure
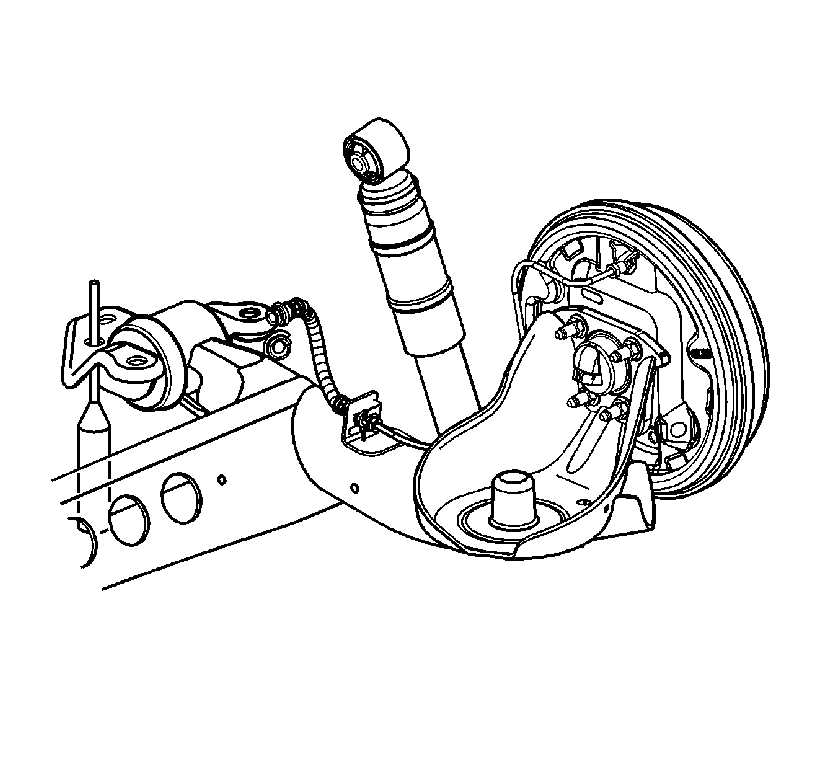
- Install the rear coil spring lower insulators to the axle.
- Install the axle brackets to the axle bushings, with the alignment slot on the outboard side.
- Loosely install the bushing bolts and nuts.
- Place the axle on the hydraulic lift table.
- Raise the axle into position.
- Hand tighten the axle bracket to body bolts just enough to hold the brackets flush to the body.
- Using the lift table, raise the axle to the proper trim height specification by measuring the vertical distance between the bottom edge of the upper spring seat and the bottom of the notch in the lower spring seat. Refer to Trim Height Inspection for D height measurement.
- Tighten the axle bushing through bolts.
- Insert two 12 mm diameter pins through the axle brackets into the underbody.
- Align the left side axle bracket and snug down the bolts.
- Align the right side axle bracket and snug down the bolts.
- Tighten all the bracket to body bolts.
- Install the wheel bearing/hubs, with the brakes and backing plate assemblies.
- Install the bearing/hub nuts.
- Connect the brake hoses to the rear axle brackets.
- Connect the brake pipes to the brake hoses at the axle.
- Install the rear coil springs. Refer to Coil Spring Replacement.
- Install the lower shock bolts. Refer to Shock Absorber Replacement.
- Lower and remove the hydraulic lift table.
- If applicable, connect the ABS sensor harness connector and harness to axle retainer.
- Connect the park brake cables to the axle brackets and rear brakes. Refer to Parking Brake Rear Cable Replacement.
- Bleed the brake system. Refer to Hydraulic Brake System Bleeding.
- Install the rear wheels. Refer to Tire and Wheel Removal and Installation.
- Verify the rear wheel alignment. Refer to Wheel Alignment Specifications.
- Lower the vehicle.
Note: The axle bushing through bolts must be installed with the bolt head facing inboard.
Note: The axle through bolts must be tightened with the axle at the correct trim height and prior to torquing the axle bracket to body bolts.
Caution: Refer to Fastener Caution in the Preface section.
Tighten
Tighten the bolts to 90 N·m (66 lb ft) plus 60 degrees.
Tighten
Tighten the bolts to 90 N·m (66 lb ft) plus 45 degrees.
Tighten
Tighten the nuts to 45 N·m (33 lb ft) plus 30 degrees.
Tighten
Tighten the brake pipe fittings to 19 N·m (14 lb ft).
