For 1990-2009 cars only
Fuel Filter Replacement RPO NT7
Removal Procedure
Caution: Refer to Gasoline/Gasoline Vapors Caution in the Preface section.
- Keep a shop cloth and a container ready to capture any spilled fuel.
- Relieve the fuel system pressure. Refer to Fuel Pressure Relief .
- Raise and support the vehicle. Refer to Lifting and Jacking the Vehicle .
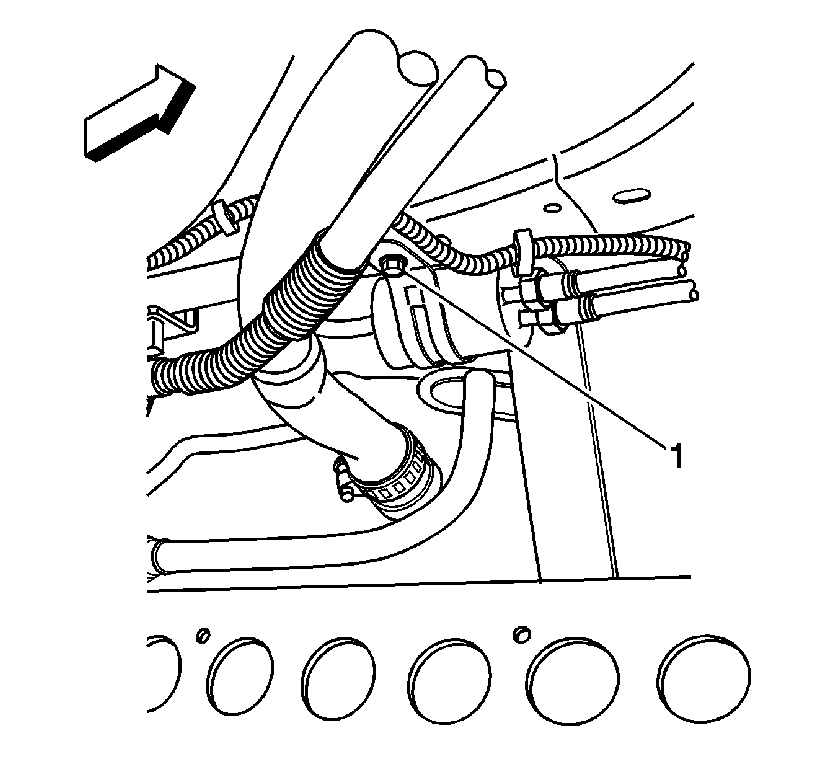
- Remove the fuel filter bracket bolt (1).
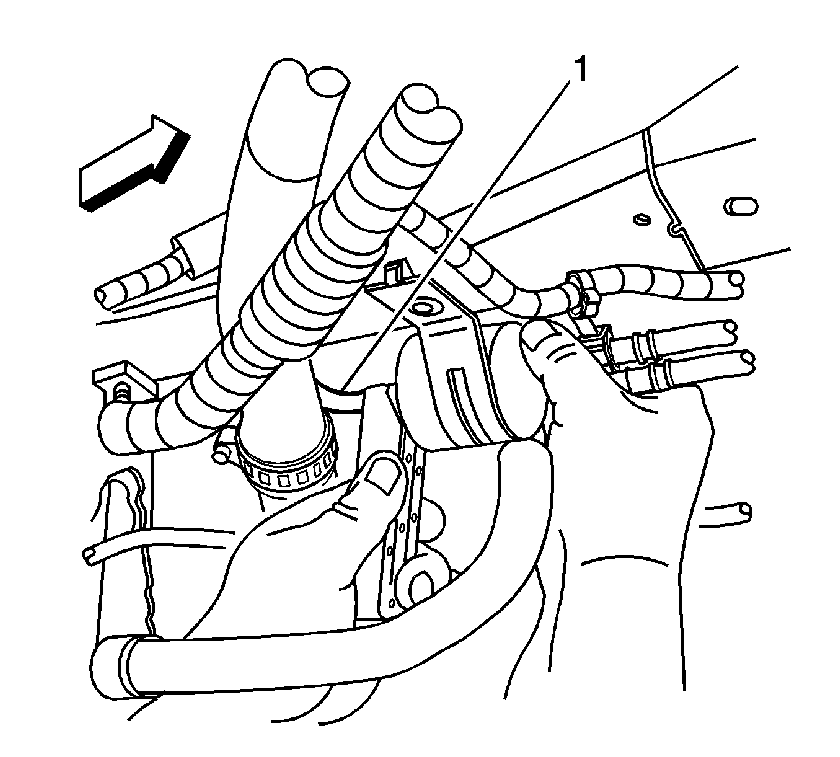
- Disconnect the fuel filter from the engine fuel feed pipe (1). Refer to Metal Collar Quick Connect Fitting Service .
- Tilt the fuel filter downward and drain off the fuel into an approved fuel container.
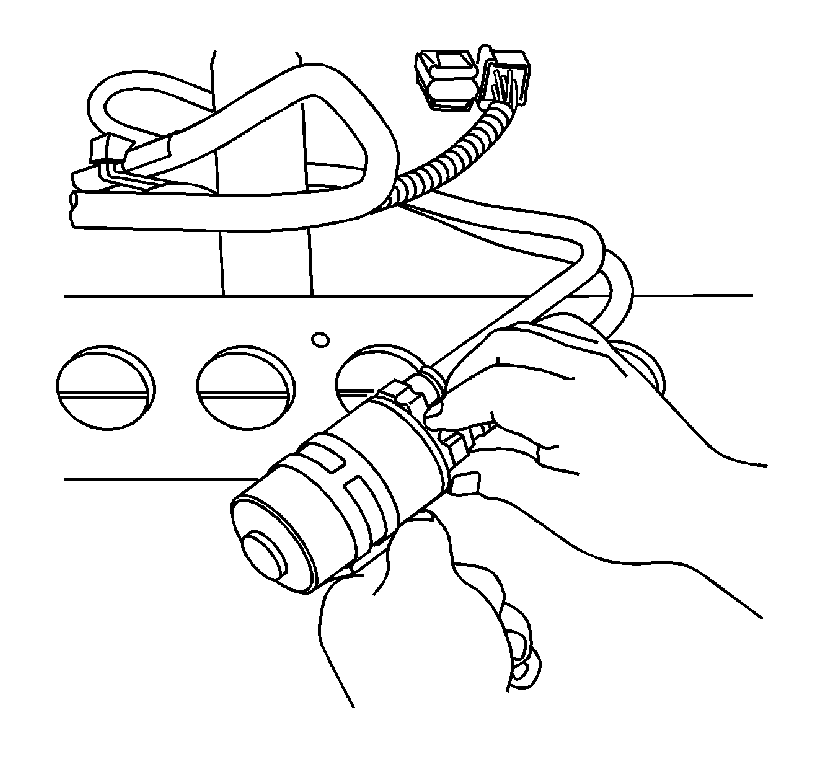
- Disconnect the fuel tank feed and return hose fittings from the fuel filter. Refer to Plastic Collar Quick Connect Fitting Service .
- Drain any remaining fuel into an approved fuel container.
- Discard the fuel filter into an approved container.
Installation Procedure
- Remove the protective caps from the new fuel filter.
- Connect the fuel tank feed and return hose fittings to the fuel filter. Refer to Plastic Collar Quick Connect Fitting Service .
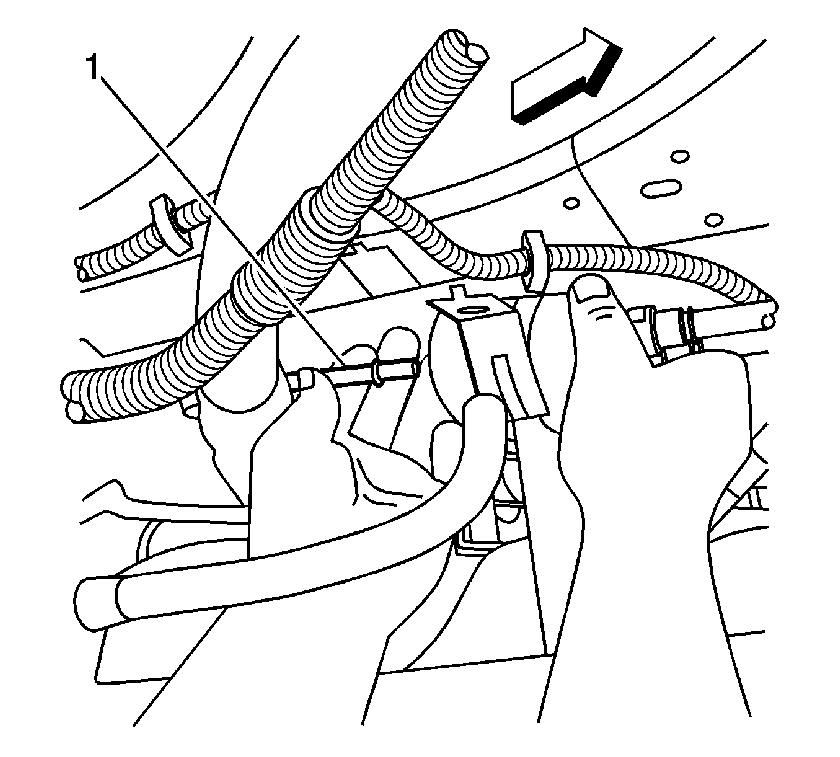
- Connect the fuel filter to the engine feed fuel pipe (1). Refer to Metal Collar Quick Connect Fitting Service .
- Install the fuel filter bracket bolt (1).
- Lower the vehicle.
- Connect the negative battery cable. Refer to Battery Negative Cable Disconnection and Connection .
- Inspect for fuel leaks using the following procedure:
Notice: Refer to Fastener Notice in the Preface section.

Tighten
Tighten the bolt to 10 N·m (89 lb in).
| 7.1. | Turn ON the ignition, with the engine OFF for 2 seconds. |
| 7.2. | Turn OFF the ignition for 10 seconds. |
| 7.3. | Turn ON the ignition, with the engine OFF. |
| 7.4. | Inspect for fuel leaks. |
Fuel Filter Replacement RPO NU6
Tools Required
J 45722 Fuel Sender Lock Ring Wrench
Removal Procedure
Caution: Refer to Gasoline/Gasoline Vapors Caution in the Preface section.
Caution: In order to reduce the risk of fire and personal injury that may result from a fuel leak, always replace the fuel sender gasket when reinstalling the fuel sender assembly.
- Remove the fuel tank. Refer to Fuel Tank Replacement .
- Using the J 45722 , unlock the fuel sender lock ring.
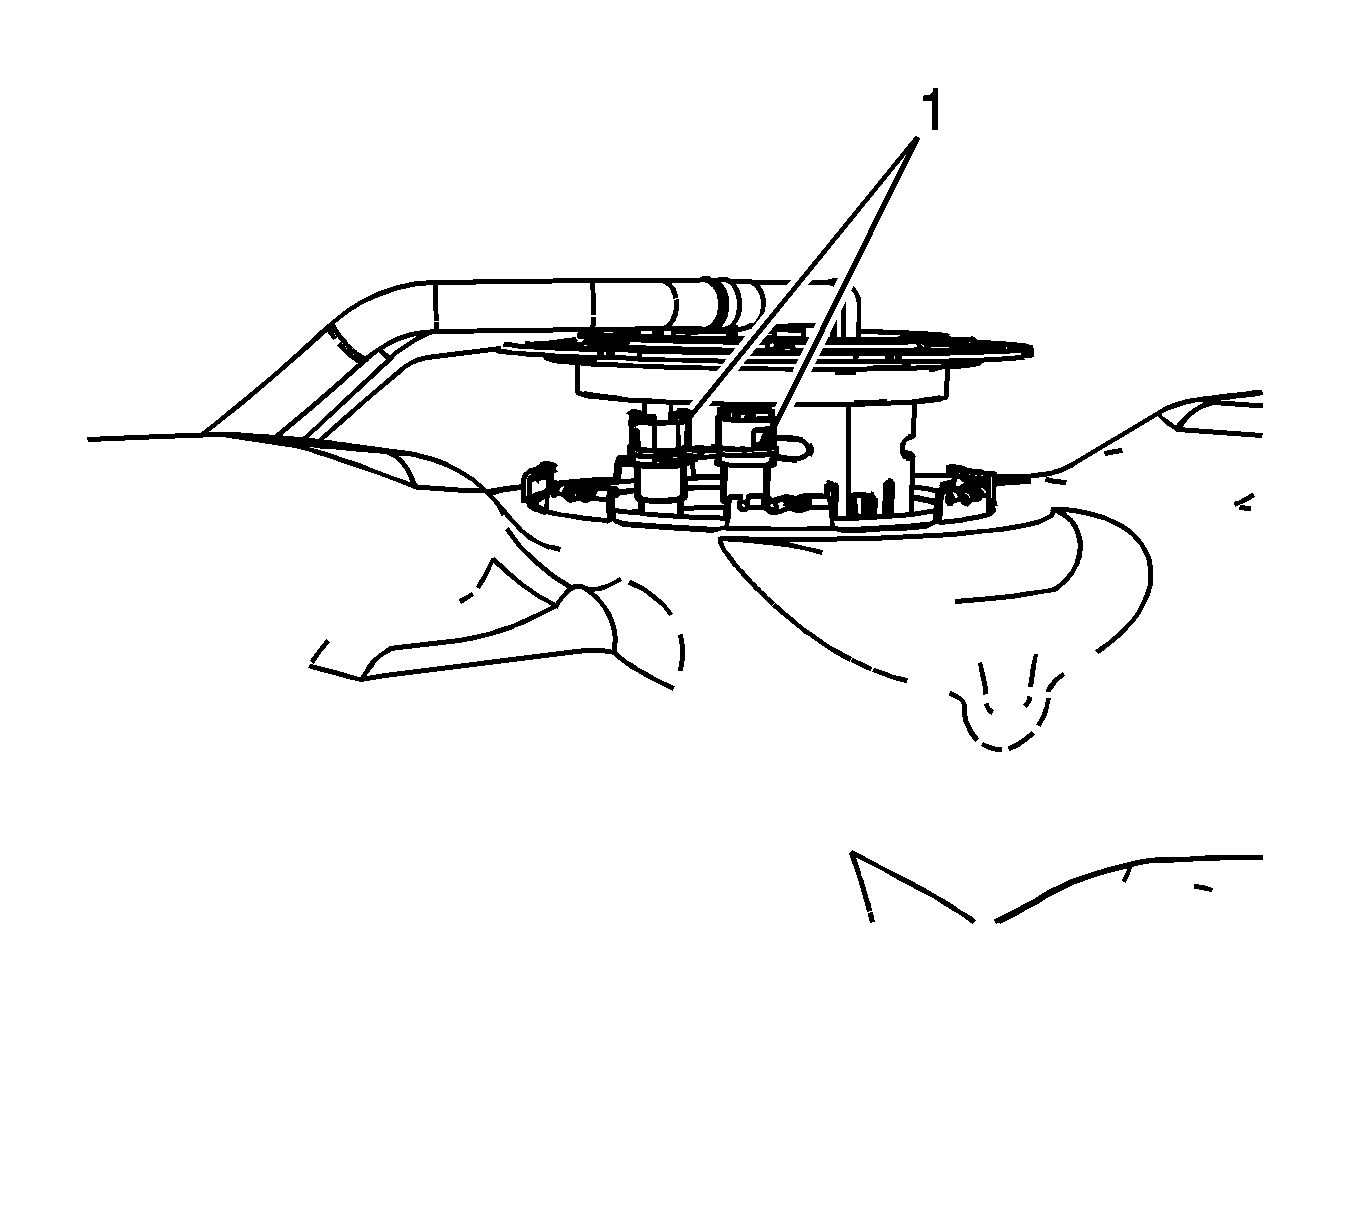
- Slowly lift the fuel pump flange up until the quick connect fittings (1), fuel pump electrical connector, and fuel level sensor electrical connector are just visible.
- Disconnect the fuel level sensor electrical connector from the fuel pump flange.
- Disconnect the fuel tank vent valve and the fuel filter quick connect fittings (1) from the fuel pump flange. Refer to Plastic Collar Quick Connect Fitting Service .
- Disconnect the fuel pump electrical connector from the fuel pump by depressing the lock tab on top of the electrical connector.
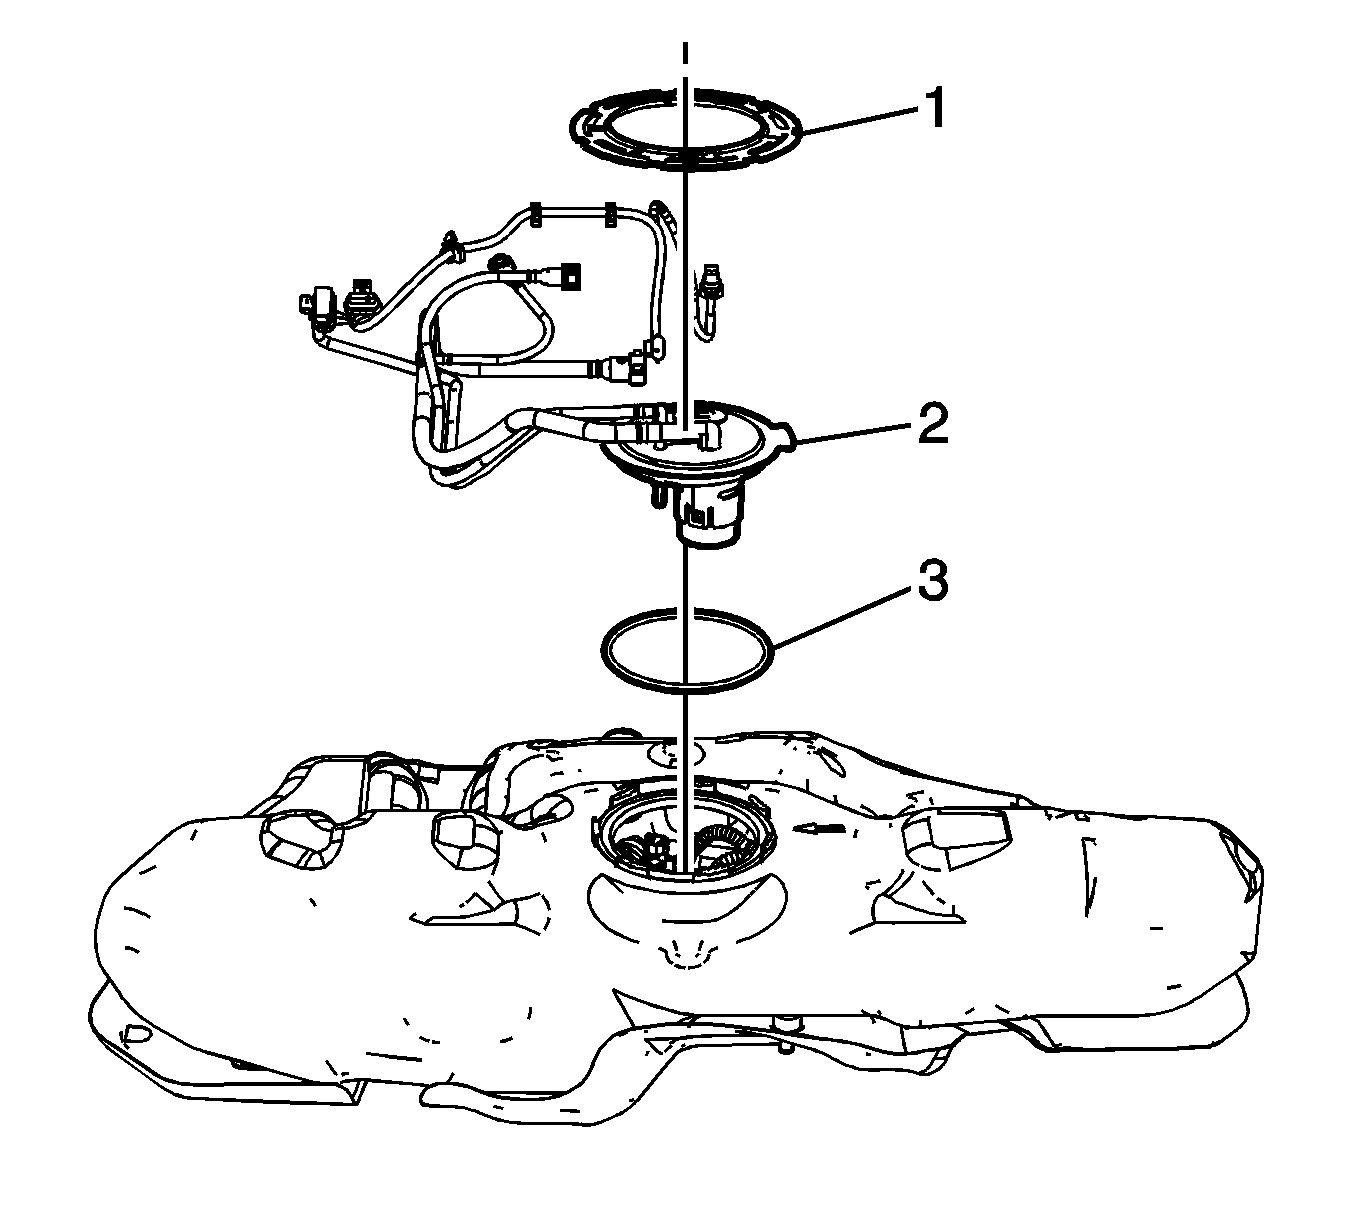
- Remove the fuel pump flange lock ring (1) and fuel pump flange (2). If required, remove the lock ring from the flange.
- Remove and discard the fuel pump flange seal (3).
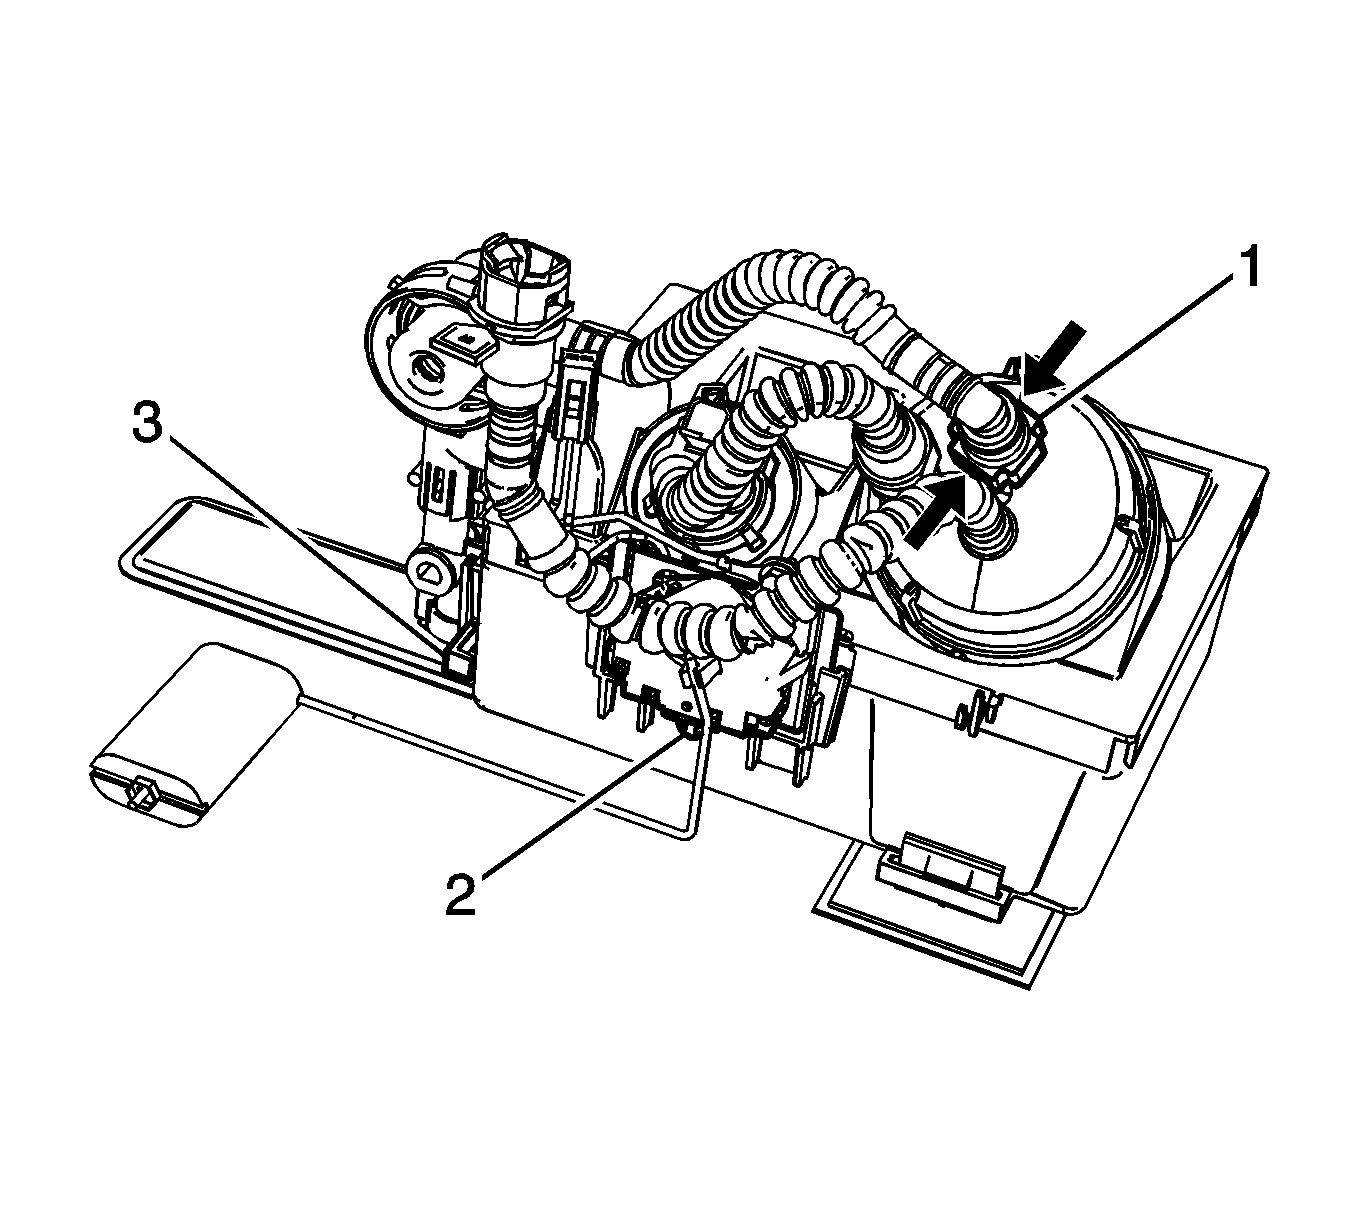
- Squeeze the sides of the fuel pump fuel reservoir pump fuel strainer quick connect fitting together (1) in order to remove the fitting from the fuel filter. Refer to Plastic Collar Quick Connect Fitting Service .
- Reposition the fuel pump fuel reservoir pump fuel strainer line.
- Squeeze the fuel pump quick connect fitting retainer (3) together in order to remove the fitting from the fuel filter. Refer to Plastic Collar Quick Connect Fitting Service .
- Reposition the fuel pump line.
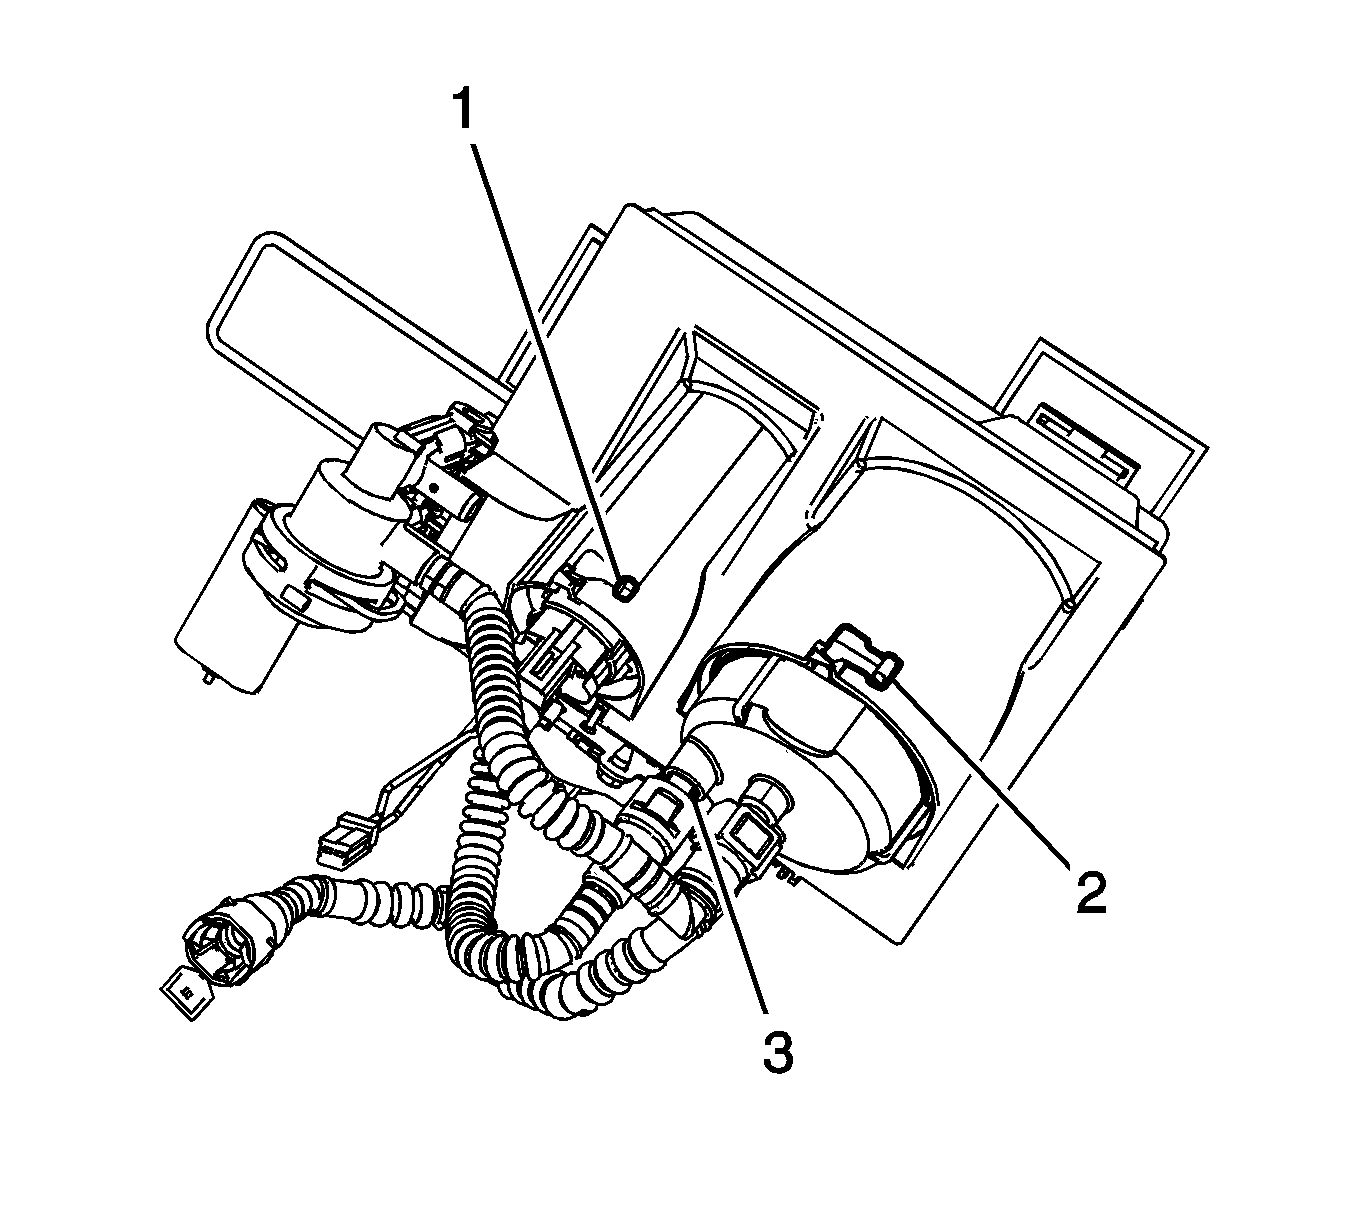
- Rotate the fuel filter to the left until the tab (2) is aligned with the opening in the fuel pump module.
- Remove the fuel filter from the fuel pump module.
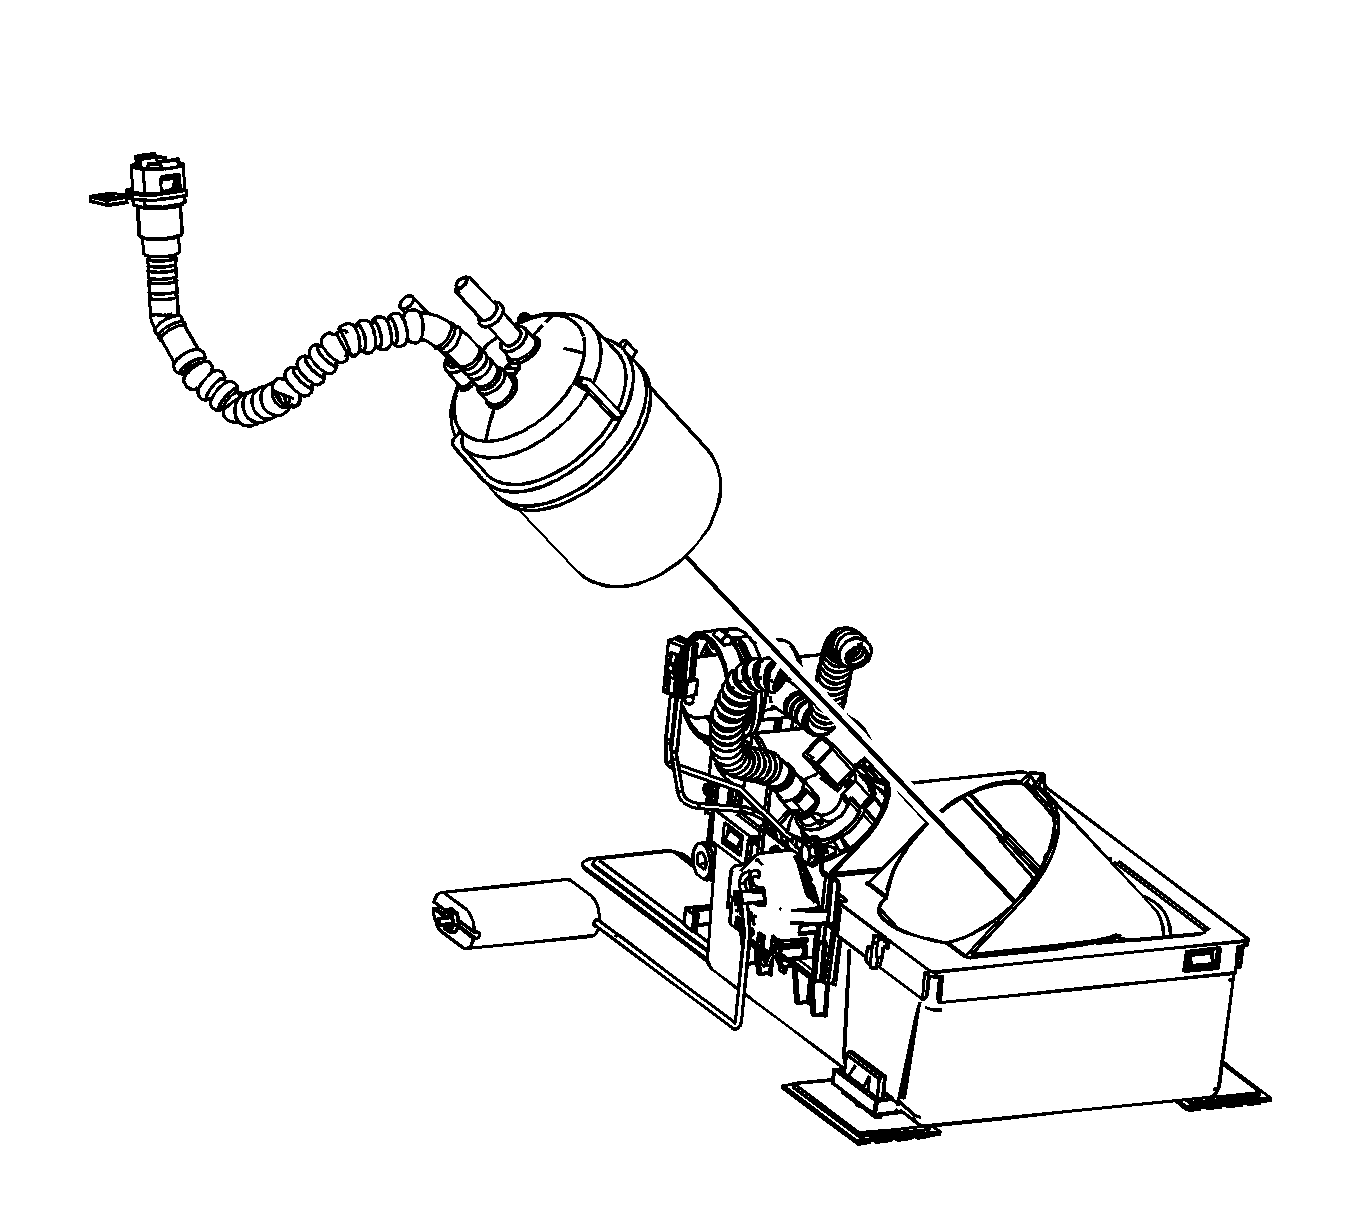
Installation Procedure
- Align the fuel filter tab with the opening in the fuel pump module.
- Install the fuel filter to the fuel pump module.
- Rotate the fuel filter to the right until the tab (2) is locked into the fuel pump module.
- Position the fuel pump line.
- Install the fuel pump quick connect fitting (3) to the fuel filter. Refer to Plastic Collar Quick Connect Fitting Service .
- Position the fuel pump fuel reservoir pump fuel strainer line.
- Install the fuel pump fuel reservoir pump fuel strainer quick connect fitting (1) to the fuel filter. Refer to Plastic Collar Quick Connect Fitting Service .
- Position a NEW fuel pump flange seal (3) onto the fuel tank.
- If required, install the lock ring onto the flange. Position the fuel pump flange (2) and lock ring (1) over the fuel tank opening.
- Ensure that the fuel pump flange tab is aligned with the arrow on the fuel tank.
- Connect the fuel tank vent valve and the fuel filter quick connect fittings (1) to the fuel pump flange. Refer to Plastic Collar Quick Connect Fitting Service .
- Connect the fuel pump electrical connector to the fuel pump.
- Connect the fuel level sensor electrical connector to the fuel pump flange.
- Slowly lower the fuel pump flange into the fuel tank.
- Using the J 45722 , lock the fuel sender lock ring.
- Install the fuel tank. Refer to Fuel Tank Replacement .


