For 1990-2009 cars only
Removal Procedure
- Raise and support the vehicle. Refer to Lifting and Jacking the Vehicle .
- Position a drain pan under the transaxle cooler pipes.
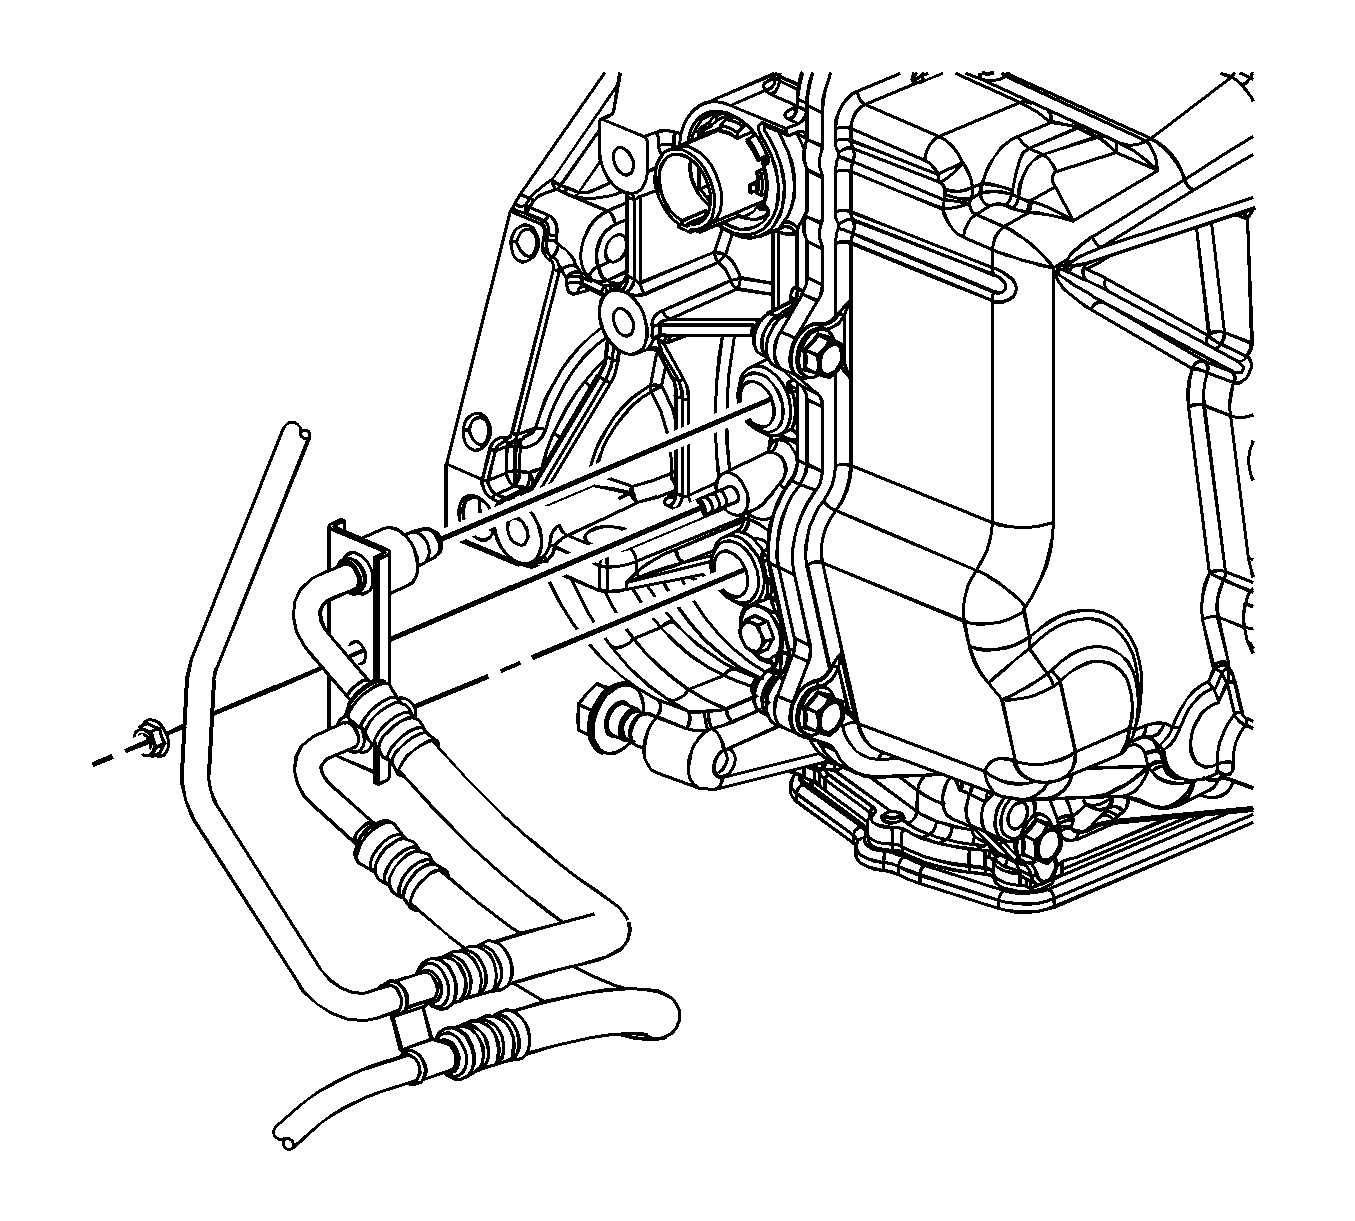
- Remove the transaxle oil cooler pipes retaining nut from the transaxle.
- Remove the transaxle oil cooler pipes from the transaxle.
- Using J 41623-B remove the transaxle oil cooler pipes from the fittings at the radiator.
- Remove the transaxle oil cooler pipe from the retaining clip at the radiator.
- Remove the transaxle oil cooler pipes from the vehicle.
Notice: Allow sufficient clearance around the transaxle oil cooler pipes and around the hoses to prevent damage or wear which may cause fluid loss.

Installation Procedure
- Install the transaxle oil cooler pipes to the vehicle.
- Install the transaxle oil cooler pipes to the fittings at the radiator.
- Install the transaxle oil cooler pipe to the retaining clip at the radiator.
- Install the transaxle oil cooler pipes to the transaxle.
- Install the transaxle oil cooler pipe retaining nut.
- Remove the drain pan.
- Lower the vehicle.
- Adjust the transmission fluid level. Refer to Transmission Fluid Check .
- Inspect for fluid leaks.
Notice: Refer to Fastener Notice in the Preface section.
Tighten
Tighten the nut to 7 N·m (62 lb in).
Notice: Do NOT overfill the transaxle. The overfilling of the transaxle causes foaming, loss of fluid, shift complaints, and possible damage to the transaxle.
