Removal Procedure
- Raise and support the liftgate window panel.
- Remove the headliner trim finishing panel. Refer to Headlining Trim Panel Replacement .
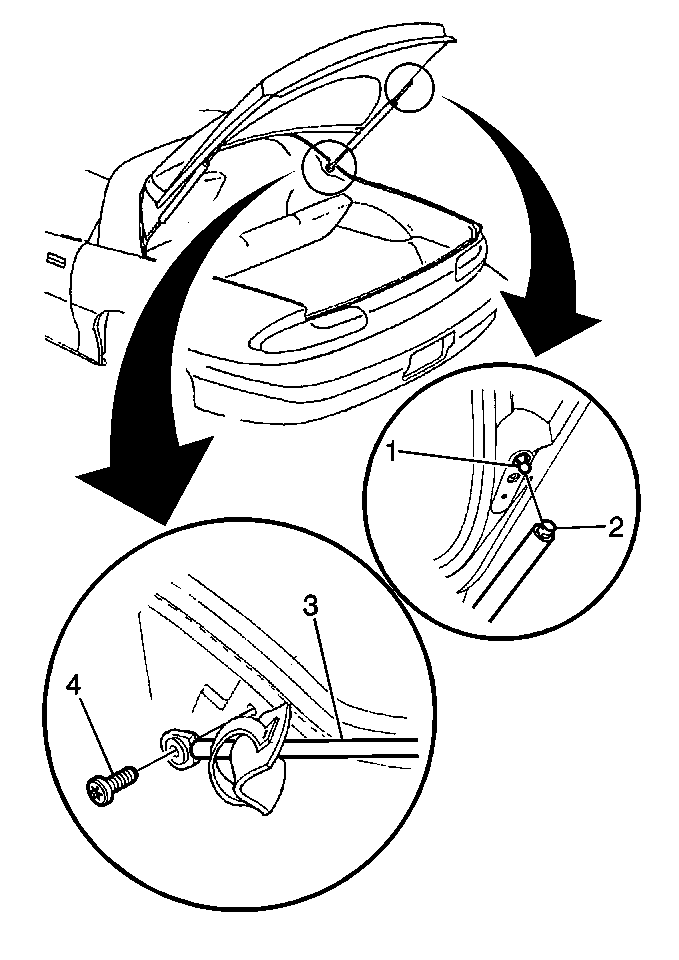
- Remove the liftgate strut ends (2) from the liftgate mounts (1) and allow the struts to rest in the rear compartment.
- Remove the harness conduit (2) from the vehicle body (3).
- Disconnect the liftgate electrical connectors (4) from the body harness.
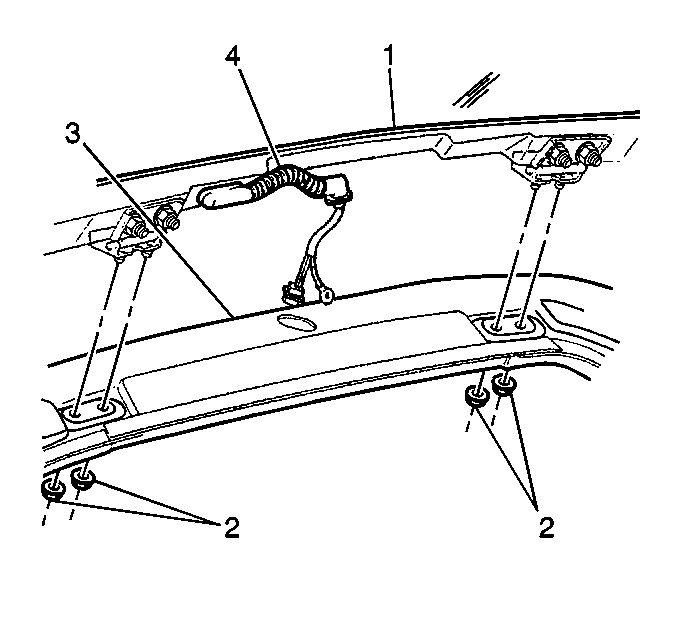
- Remove the nuts (2) from the liftgate studs (1).
- Remove the gaskets from the hinges and remove the liftgate from the vehicle.
Important: When replacing the liftgate panel, remove the hinges and the spoiler and transfer to the new assembly.
Installation Procedure
- Install the gaskets to the hinges.
- Align the studs on the hinges with the holes and install the liftgate to the vehicle. Support the front of the liftgate until the struts are reattached.
- Install the nuts (2).
- Connect the liftgate electrical connectors (4) to the body harness.
- Reinstall the harness conduit by performing the following steps:
- Install the liftgate strut ends (2) to the liftgate mounts (1).
- Install the headliner trim finishing panel. Refer to Headlining Trim Panel Replacement .
Notice: Use the correct fastener in the correct location. Replacement fasteners must be the correct part number for that application. Fasteners requiring replacement or fasteners requiring the use of thread locking compound or sealant are identified in the service procedure. Do not use paints, lubricants, or corrosion inhibitors on fasteners or fastener joint surfaces unless specified. These coatings affect fastener torque and joint clamping force and may damage the fastener. Use the correct tightening sequence and specifications when installing fasteners in order to avoid damage to parts and systems.
Tighten
Tighten the nuts to 25 N·m (18 lb ft).
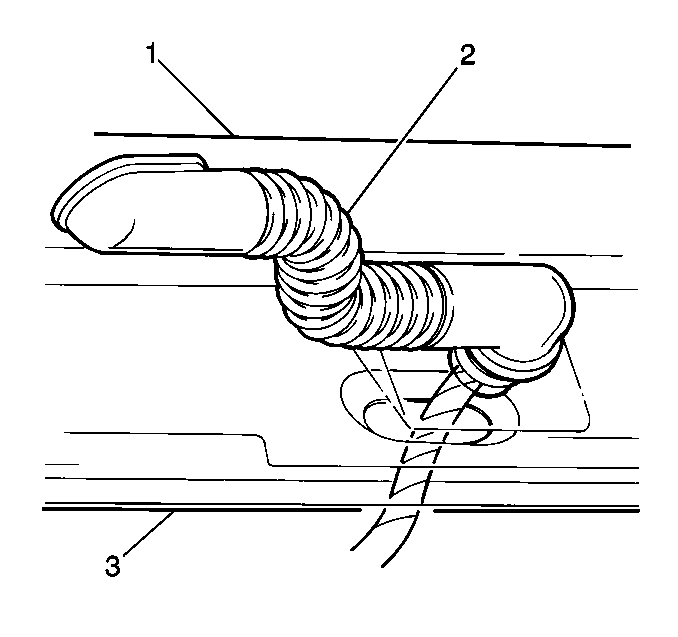
| 5.1. | Route the harness (4). |
| 5.2. | Apply a soap solution to the grommet (2). |
| 5.3. | Seat the conduit at the window panel and roof frame (1). |
Important: A snap should be heard when the strut ends are fully seated. Verify that the strut ends are securely installed by tugging firmly on the strut ends.
