For 1990-2009 cars only
Test Procedure
- Start the engine.
- Activate the rear window defogger system.
- Ground one test lamp lead.
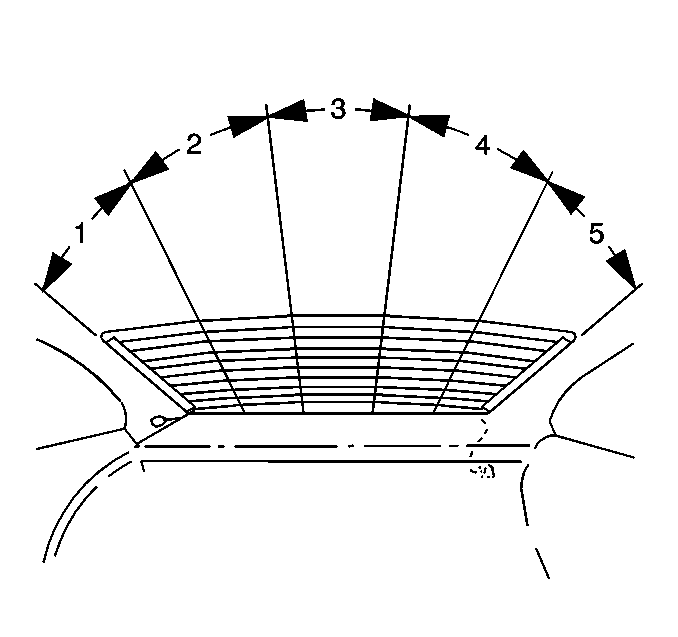
- Contact the other test lamp lead to each of the grid lines at points 1 through 5 as shown in the figure.
- No Bulb Brilliance (1)
- 1/4 Bulb Brilliance (2)
- 1/2 Bulb Brilliance (3)
- 3/4 Bulb Brilliance (4)
- Full Bulb Brilliance (5)
- Compare the test lamp brilliance pattern with the normal test lamp brilliance in order to check for proper grid operation:
Specification Normal Test Lamp Brilliance
Important: The lamp brilliance will decrease proportionately to the increased resistance in the grid line as the probe is moved from the feed bus wire to the ground bus wire. Test all of the grid lines in at least two places in order to eliminate the possibility of bridging a break. The range of test lamp brilliance may vary from one window to another.
| • | If the test lamp shows full brilliance at both ends of the grid lines, inspect for a loose ground wire contact to body ground. |
| • | If an abnormal lamp reading is apparent on a specific grid line, place the test lamp lead on that grid at the feed bus bar and move the lead toward the ground bus bar until the lamp goes out. This will indicate the location of the break. |
