Front Floor Console Trim Plate Replacement Automatic
Removal Procedure
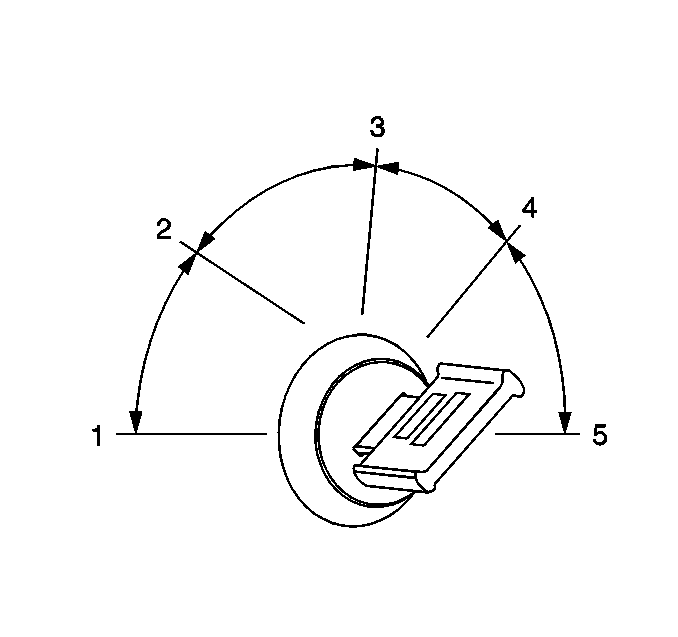
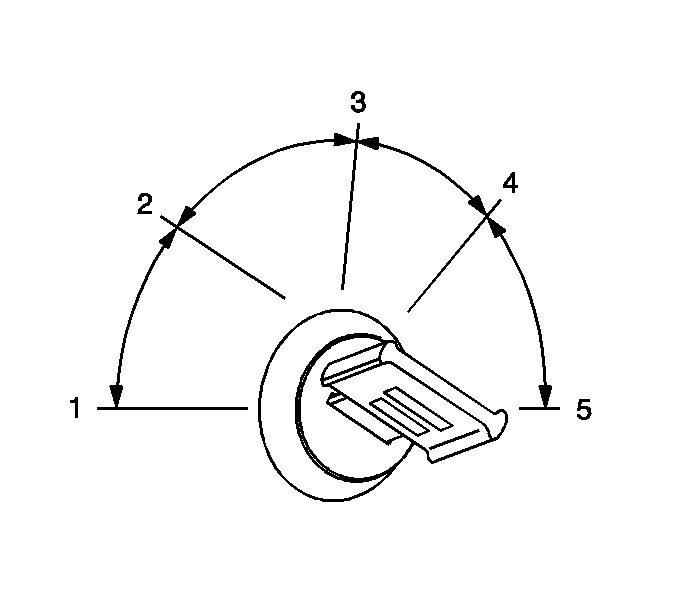
- Turn the ignition key to the RUN position (4).
- Place the shift lever in the NEUTRAL position.
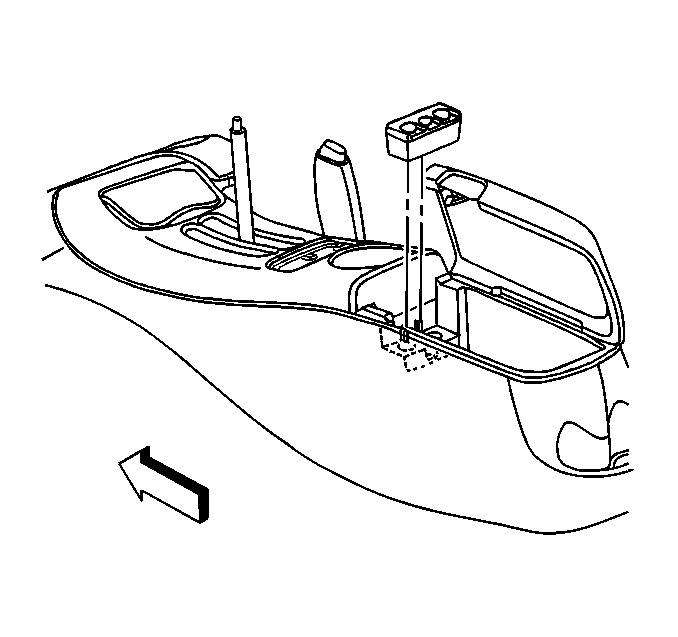
- Remove the shift control knob. Refer to Floor Shift Control Knob Replacement in Automatic Transmission-4L60-E.
- Open the console armrest door.
- Remove the coin holder from inside the console.
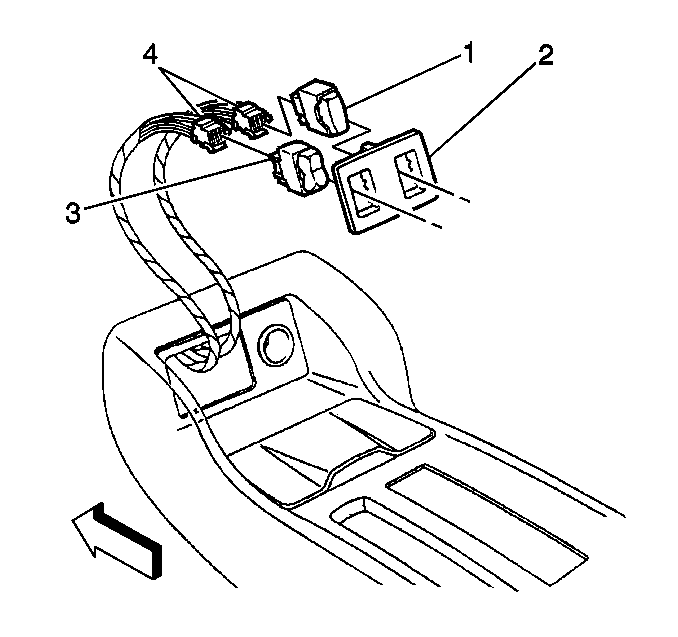
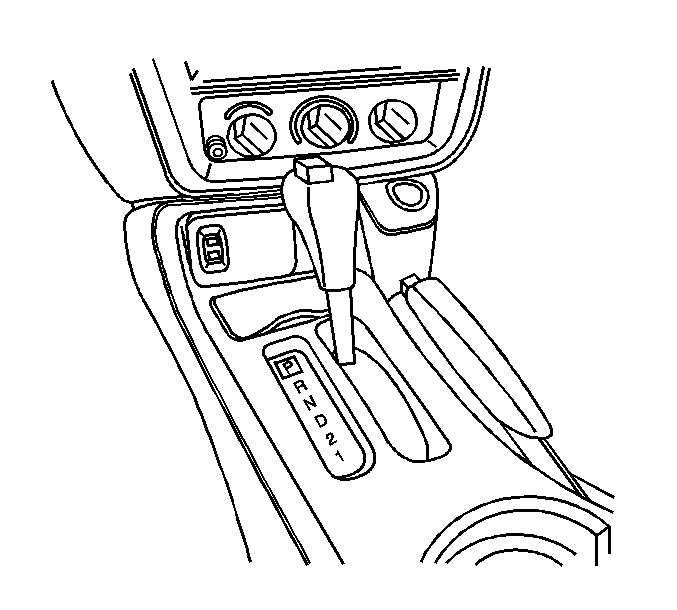
- Unsnap the switch plate (2) from the floor console.
- Disconnect the electrical connectors (4) from the switches (1, 3), if equipped.
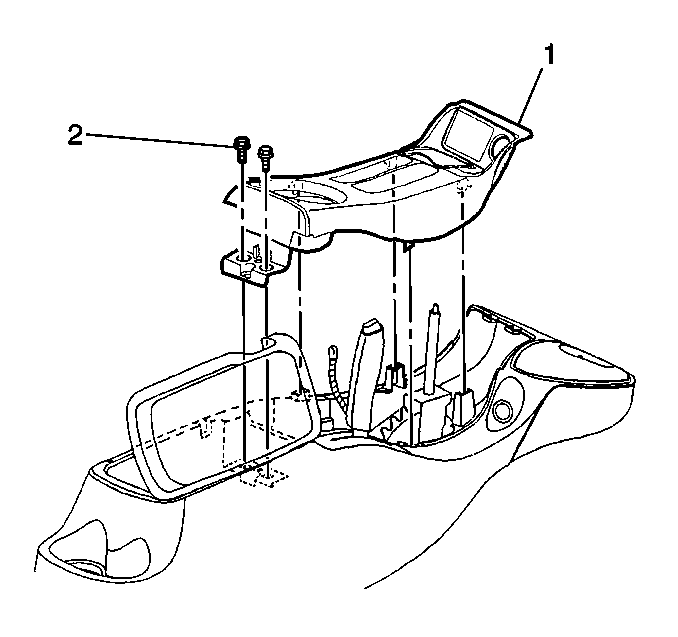
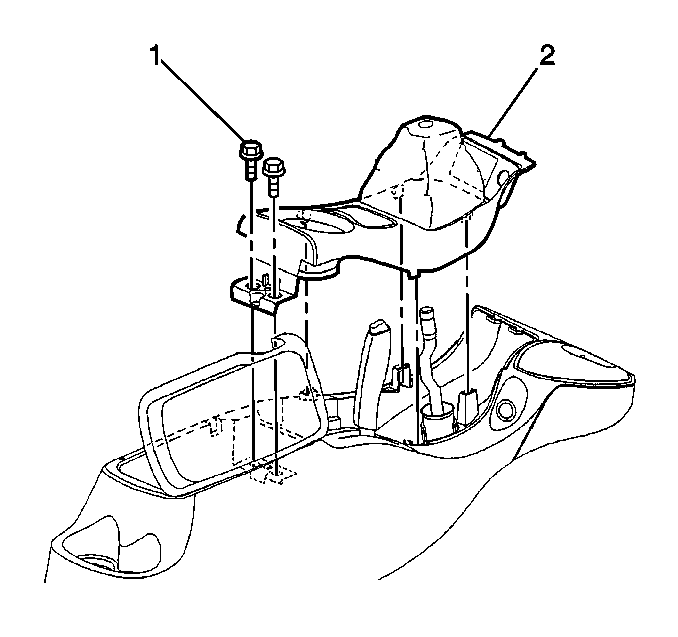
- Remove the console trim plate bolts (2).
- Disconnect the PRNDL lamp connector.
- Disconnect the cigarette lighter electrical connector.
- Remove the console trim plate (1).

Installation Procedure
- Position the console trim plate (1) over the shift lever.
- Connect the cigarette lighter electrical connector.
- Connect the PRNDL lamp connector.
- Insert the forward end of the trim plate (1) into the console.
- Apply pressure to the console trim plate (1) and snap the trim plate (1) into place.
- Install the console trim plate bolts (2).
- Snap the switch plate (2) to the floor console.
- Connect the electrical connectors (4) to the switches (1, 3), if equipped.
- Install the coin holder to inside the console.
- Close the console armrest door.
- Install the shift control knob. Refer to Floor Shift Control Knob Replacement in Automatic Transmission-4L60-E.
- Place the shift lever in the PARK position.
- Turn the ignition key to the OFF position (2).
Notice: Use the correct fastener in the correct location. Replacement fasteners must be the correct part number for that application. Fasteners requiring replacement or fasteners requiring the use of thread locking compound or sealant are identified in the service procedure. Do not use paints, lubricants, or corrosion inhibitors on fasteners or fastener joint surfaces unless specified. These coatings affect fastener torque and joint clamping force and may damage the fastener. Use the correct tightening sequence and specifications when installing fasteners in order to avoid damage to parts and systems.
Tighten
Tighten the bolts to 2 N·m (18 lb in).
Front Floor Console Trim Plate Replacement Manual
Removal Procedure
- Remove the shift lever knob. Refer to Transmission Control Lever Knob Replacement in Manual Transmission - M49 or Transmission Control Lever Knob Replacement in Manual Transmission - MM6.
- Open the console armrest door.
- Remove the coin holder from inside the console.
- Unsnap the switch plate from the floor console.
- Disconnect the electrical connectors from the switches, if equipped.
- Remove the console trim plate bolts (1).
- Disconnect the ashtray lamp connector.
- Disconnect the cigarette lighter electrical connector.
- Remove the console trim plate (2).
Lift the trim plate up.
Installation Procedure
- Position the trim plate (2) over the shift lever.
- Connect the cigarette lighter electrical connector.
- Connect the ashtray lamp connector.
- Insert the forward end of the trim plate (2) into the console.
- Apply pressure to the console trim plate (2) and snap the trim plate (2) into place.
- Install the console trim plate bolts (1).
- Connect the electrical connectors to the switches, if equipped.
- Snap in the front floor console accessory trim plate.
- Install the coin holder to the inside of the console.
- Close the console armrest door.
- Snap the console accessory bin to the console, if equipped.
- Install the shift lever knob. Refer to Transmission Control Lever Knob Replacement in Manual Transmission - M49 or Transmission Control Lever Knob Replacement in Manual Transmission - MM6.
Notice: Use the correct fastener in the correct location. Replacement fasteners must be the correct part number for that application. Fasteners requiring replacement or fasteners requiring the use of thread locking compound or sealant are identified in the service procedure. Do not use paints, lubricants, or corrosion inhibitors on fasteners or fastener joint surfaces unless specified. These coatings affect fastener torque and joint clamping force and may damage the fastener. Use the correct tightening sequence and specifications when installing fasteners in order to avoid damage to parts and systems.
Tighten
Tighten the bolts to 2 N·m (18 lb in).
