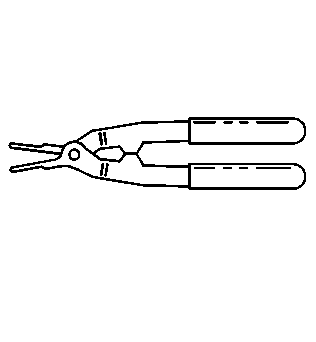
Tools Required
| • | J 39232 Wiper Transmission Separator |
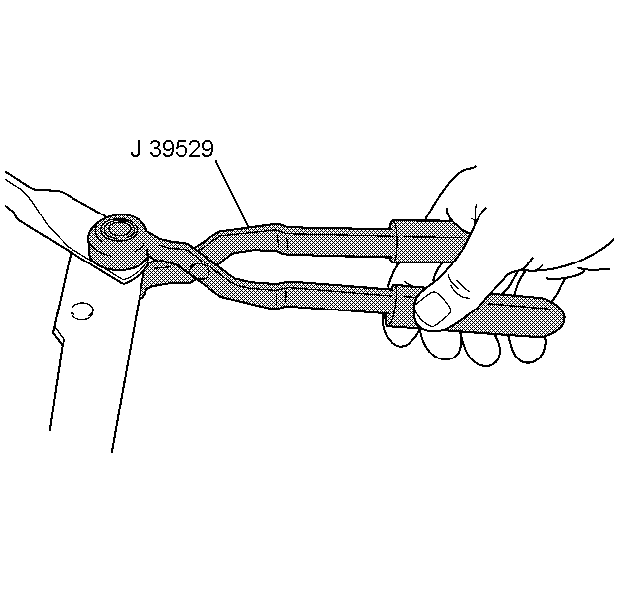
| • | J 39529 Wiper Transmission Installer |
Removal Procedure
- Remove the wiper arms. Refer to Windshield Wiper Arm Replacement .
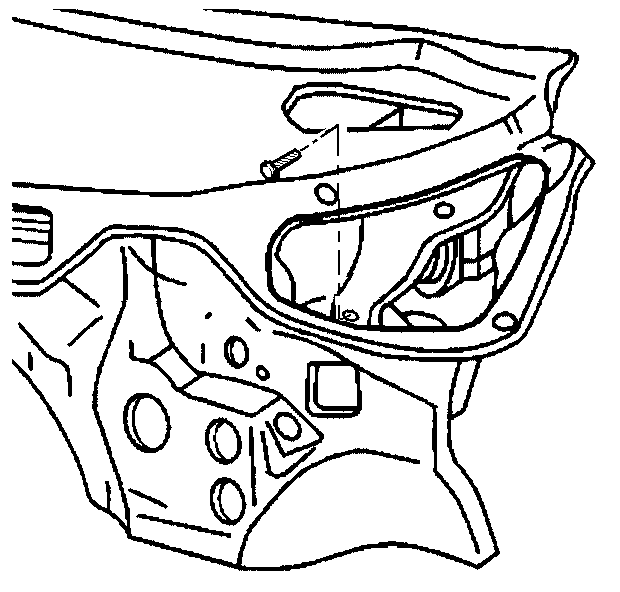
- Remove the air inlet grille panel. Refer to Air Inlet Grille Panel Replacement in Body Front End.
- Remove the water shield.
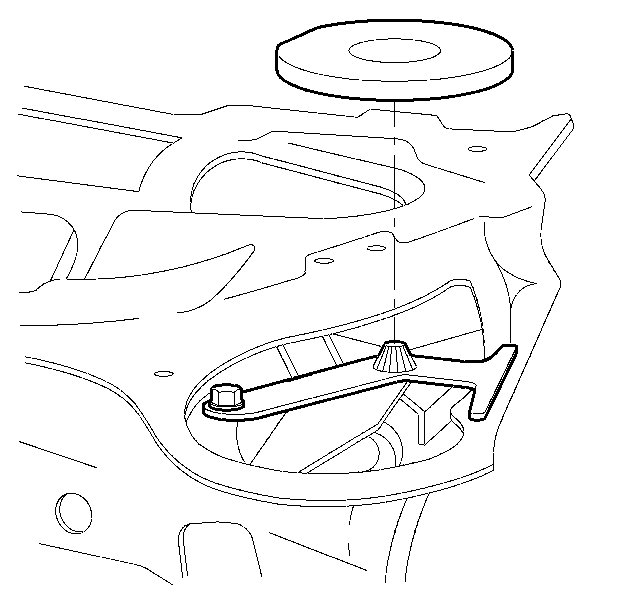
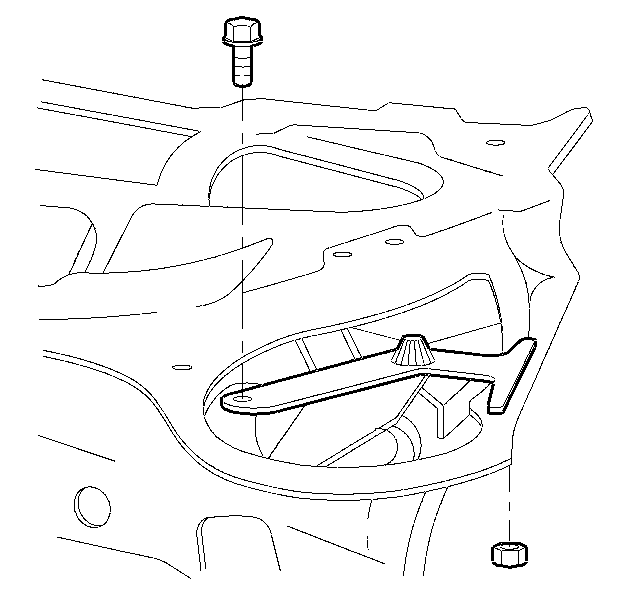
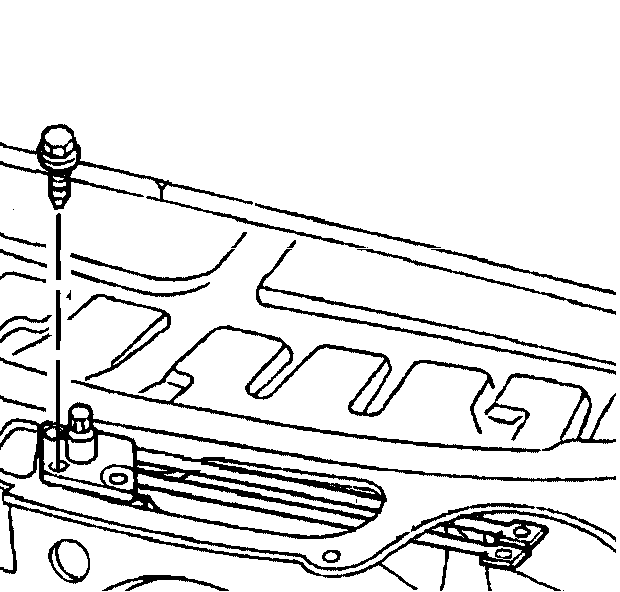
- Remove the screw and nut.
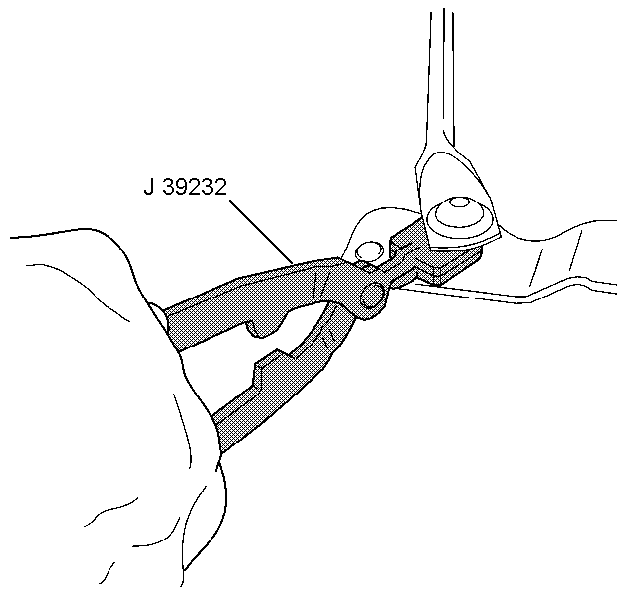
- Disconnect the RH linkage assembly from the LH linkage assembly with the J 39232 .
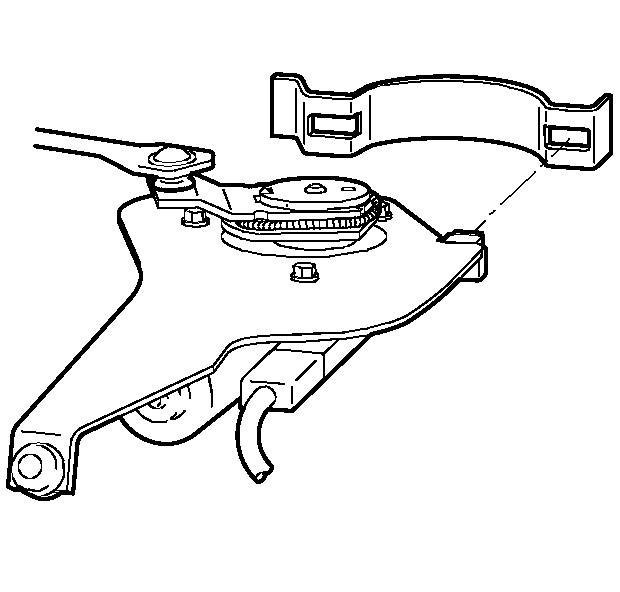
- Remove the LH linkage assembly.
- Remove the screw from the wiper motor.
- Pull the wiper motor free from the slots of the bracket.
- Disconnect the RH linkage assembly from the wiper motor with the J 39232 .
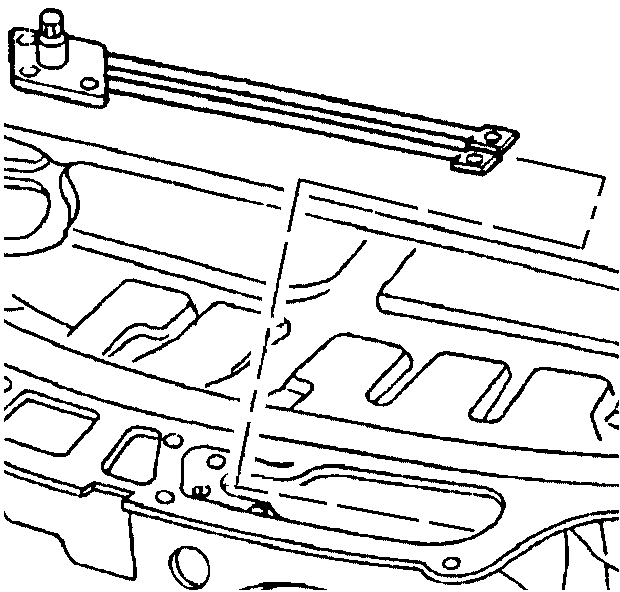
- Remove the three screws from the RH linkage assembly.
- Remove the RH linkage assembly from the plenum access hole.
Installation Procedure
- Install the RH linkage assembly through the plenum access hole.
- Connect the RH linkage assembly to the wiper motor with the J 39529 .
- Install the wiper motor with two locator pads pressed into the slots of the bracket.
- Install the screw.
- Connect the RH linkage assembly to the LH linkage assembly with the J 39529 .
- Install the LH linkage with the screw and the nut.
- Install three screws to the RH linkage assembly.
- Install the water shield on the LH linkage assembly with the flat side of the water shield under the windshield.
- Install the air inlet grille panel. Refer to Air Inlet Grille Panel Replacement in Body Front End.
- Install the wiper arms. Refer to Windshield Wiper Arm Replacement .
Important: When installing the wiper motor, be sure that the crank arm is in the innerwipe position. The crank arm drive pin must be engaged in the cam pocket.
Notice: Use the correct fastener in the correct location. Replacement fasteners must be the correct part number for that application. Fasteners requiring replacement or fasteners requiring the use of thread locking compound or sealant are identified in the service procedure. Do not use paints, lubricants, or corrosion inhibitors on fasteners or fastener joint surfaces unless specified. These coatings affect fastener torque and joint clamping force and may damage the fastener. Use the correct tightening sequence and specifications when installing fasteners in order to avoid damage to parts and systems.
Tighten
Tighten the screw to 10 N·m (7.5 lb ft).
Tighten
Tighten the screw and the nut to 10 N·m (7.5 lb ft).
Tighten
Tighten the screws to 10 N·m (7.5 lb ft).
