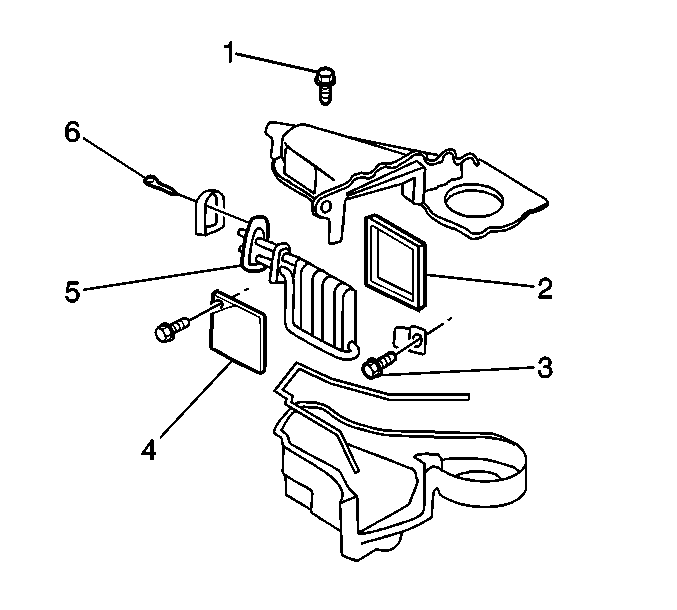
- Install the NEW A/C evaporator
(6).
- install a NEW A/C evaporator seal.
- Apply sealer between the evaporator upper and lower case.
Do not use epoxy glue as a sealer.
- Install the bolts to the engine side of the A/C evaporator upper
and lower case.
Tighten
Tighten the A/C evaporator upper and lower case bolts to 2 N·m
(18 lb in).
- Install the A/C evaporator bracket.
- Install the A/C evaporator bracket bolt (1).
Tighten
Tighten the A/C evaporator bracket bolt (1) to 2 N·m (18 lb in).
- Position the perforated section of the evaporator module.
Use epoxy glue in order to adhere the perforated section to the module.
Allow the epoxy to dry.
- Use your thumb in order to grade the sealant on the inside and
the outside in order to ensure a water-tight seal.
- Use the following steps in order to install the heater rear case
(4):
| 9.1. | Slide the heater rear case upward into position until the upper
clip engages. |
| 9.2. | Engage the snap on the left edge of the heater rear case to the
distributor case. |
| 9.3. | Install the bolts to the heater rear case. |
Tighten
Tighten the heater rear case bolts to 2.0 N·m (18 lb in).
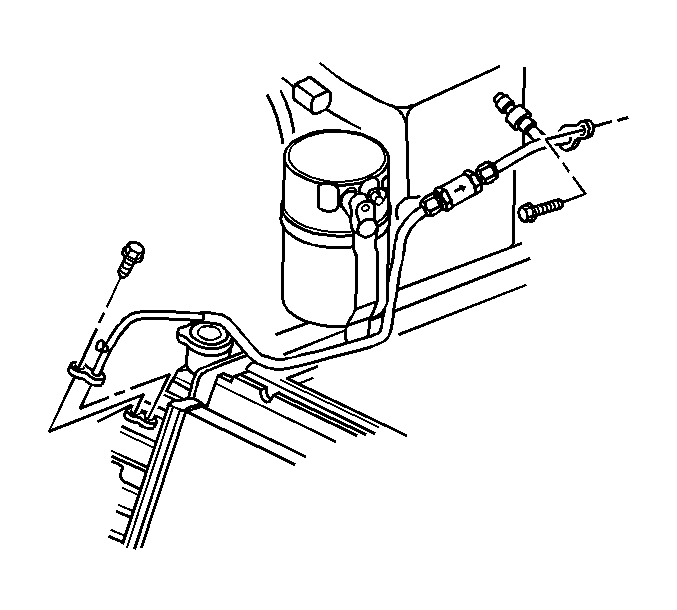
- Install a new O-ring seal.
- Install the A/C evaporator tube bolt at the module.
Tighten
Tighten the A/C evaporator tube bolt to 16 N·m (12 lb ft).
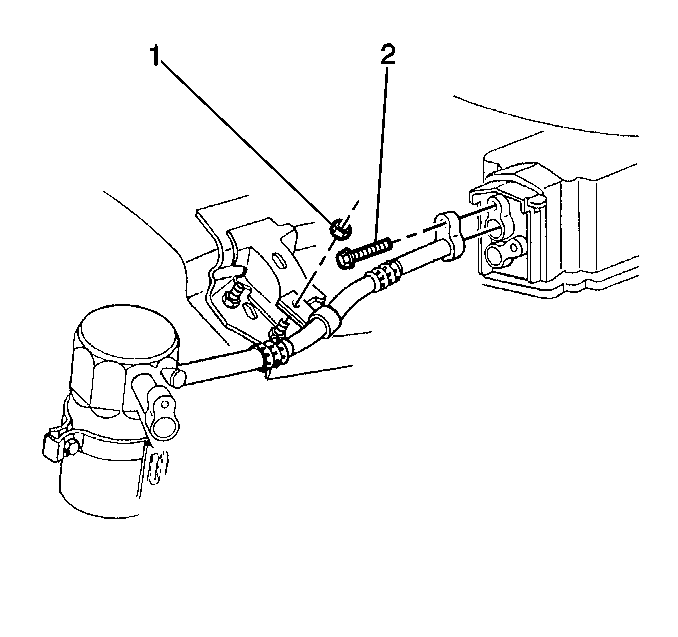
- Install a new O-ring seal.
- Install the accumulator bolt at the module.
Tighten
Tighten the accumulator bolt (2) to 16 N·m (12 lb ft).

- Install the temperature
control cable to the module.
- install the temperature control cable bolt.
Tighten
Tighten the temperature control cable bolt to 1.9 N·m (17 lb in).
- Install the heater core. Refer to
Heater Core Replacement
.
- Recharge the refrigerant. Refer to Refrigerant
Recovery and Recharging
.
- Refill the cooling system. Refer to
Cooling System Draining and Filling
in Engine Cooling.
