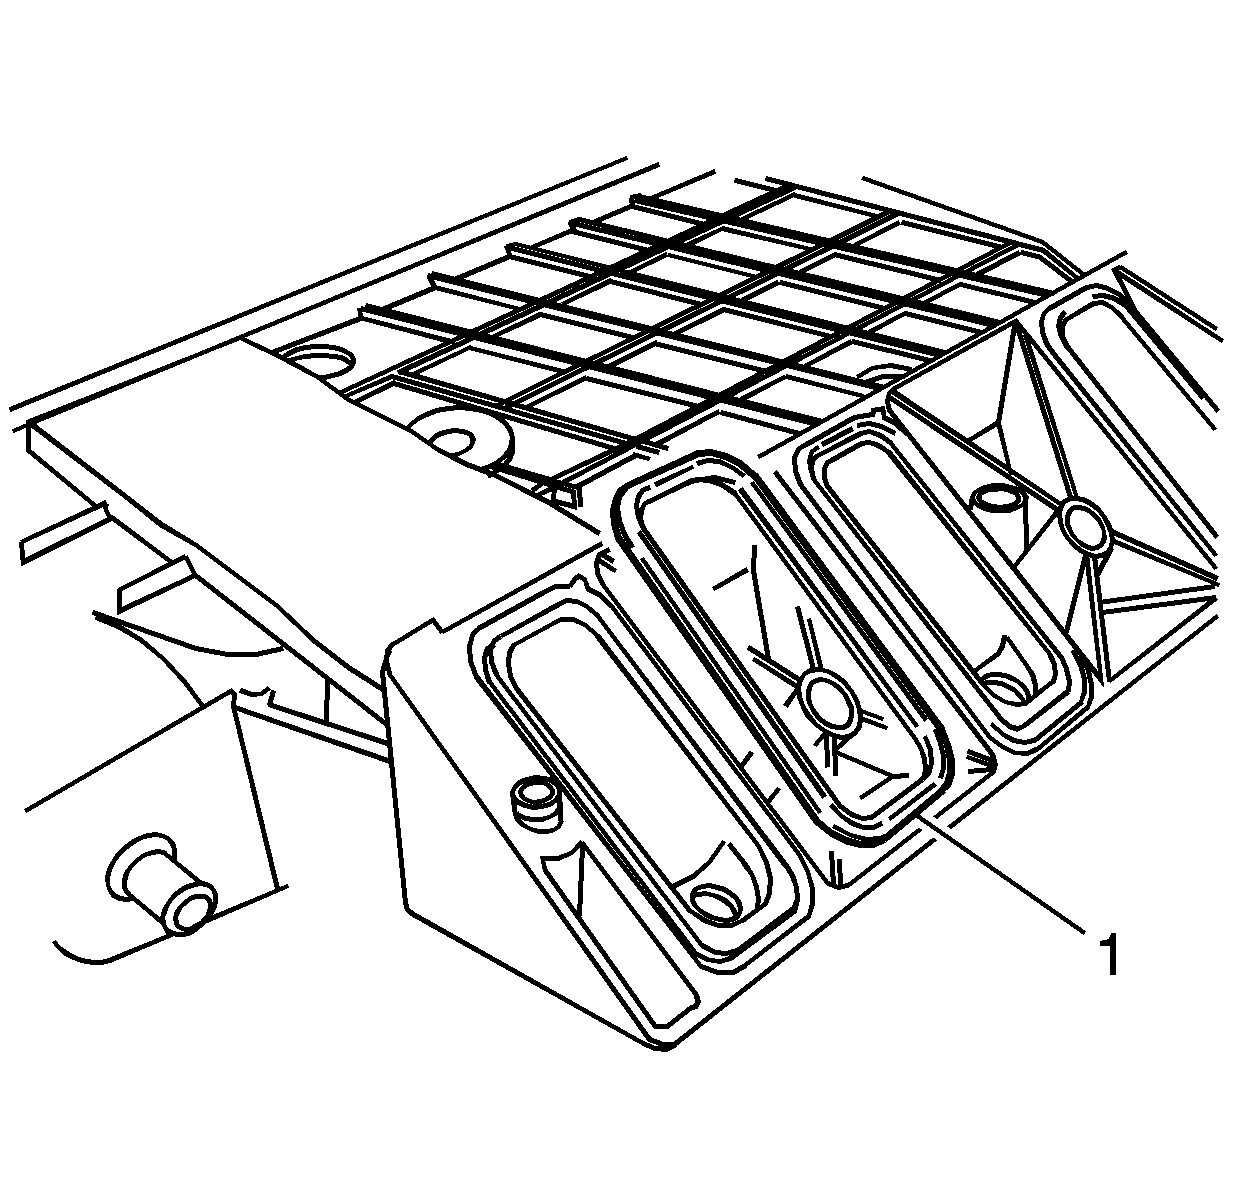
- Install NEW intake manifold-to-cylinder head gaskets (1).
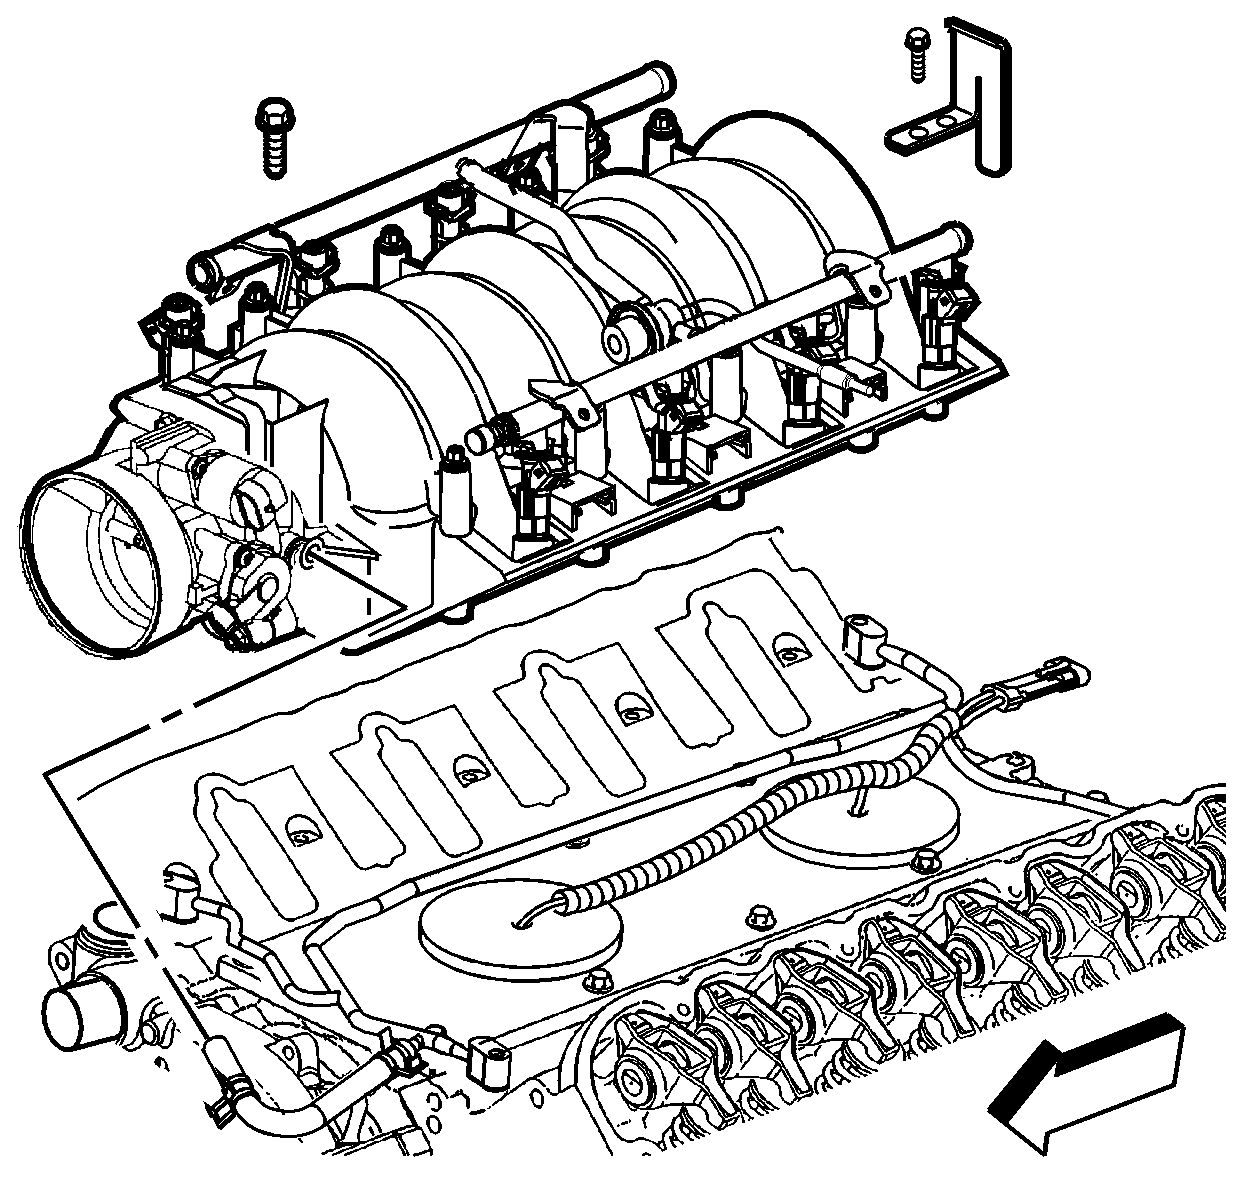
- Install the manifold to the engine.
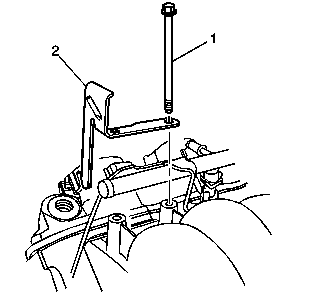
- Apply threadlock GM P/N 12345382 or equivalent to the threads of the intake manifold bolts (1).
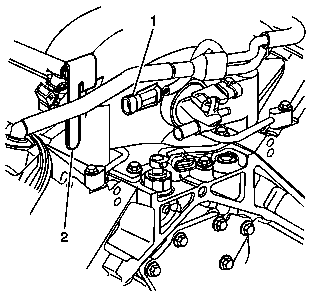
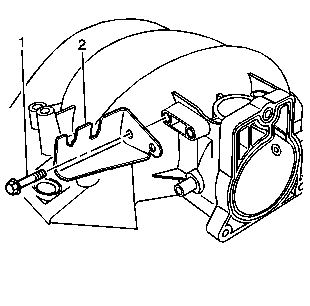
- Install the fuel rail stop bracket (2).
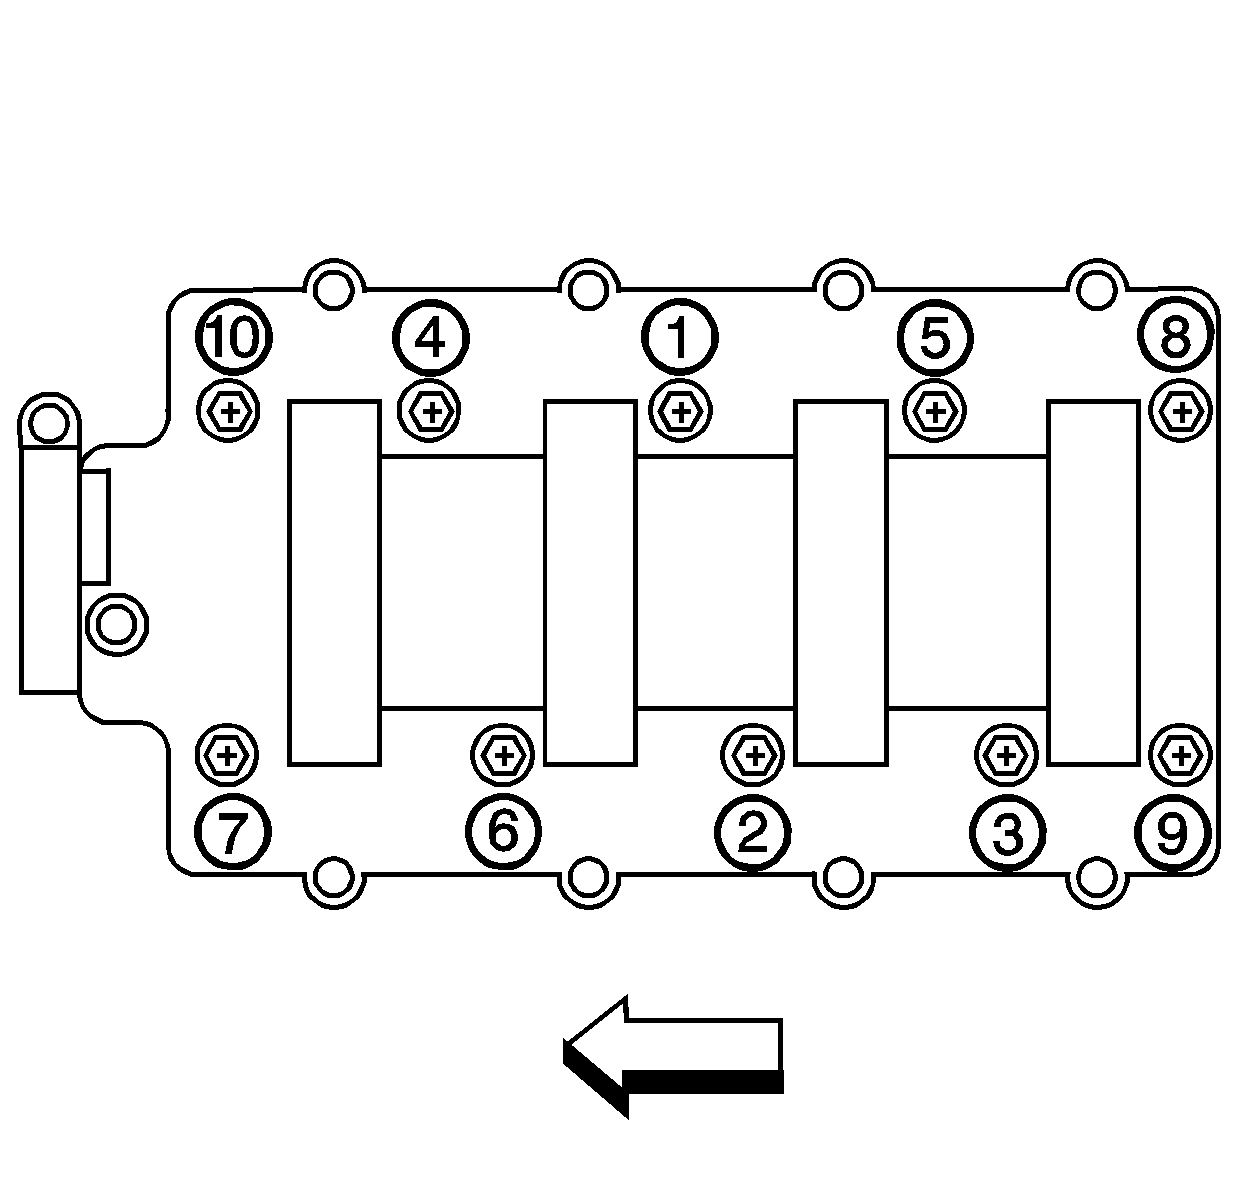
- Install the intake manifold bolts.
- Tighten the intake manifold bolts a first pass in sequence to 5 N·m (44 lb in).
- Tighten the intake manifold bolts a final pass in sequence to 10 N·m (89 lb in).
- Install the knock sensor wire harness connector (1) onto the fuel rail stop bracket (2).
- Install the Manifold Absolute Pressure (MAP) sensor (if previously removed).
- Install the accelerator control cable bracket (2) and bolts (1).
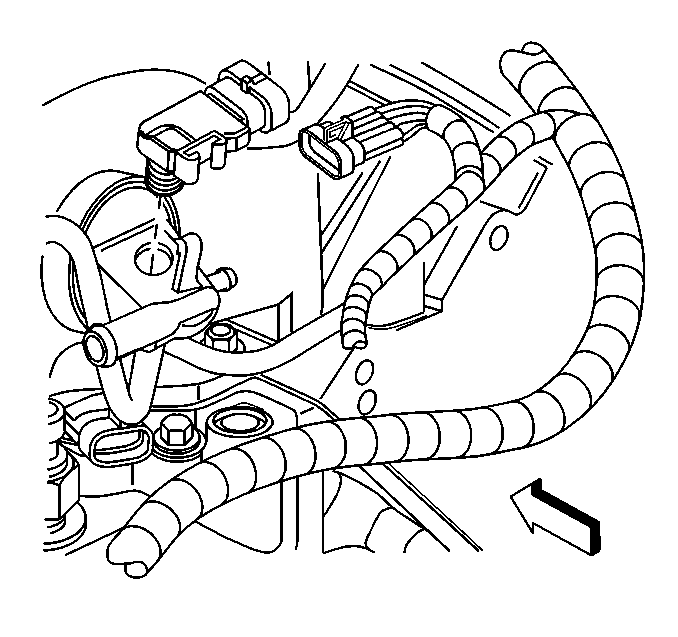
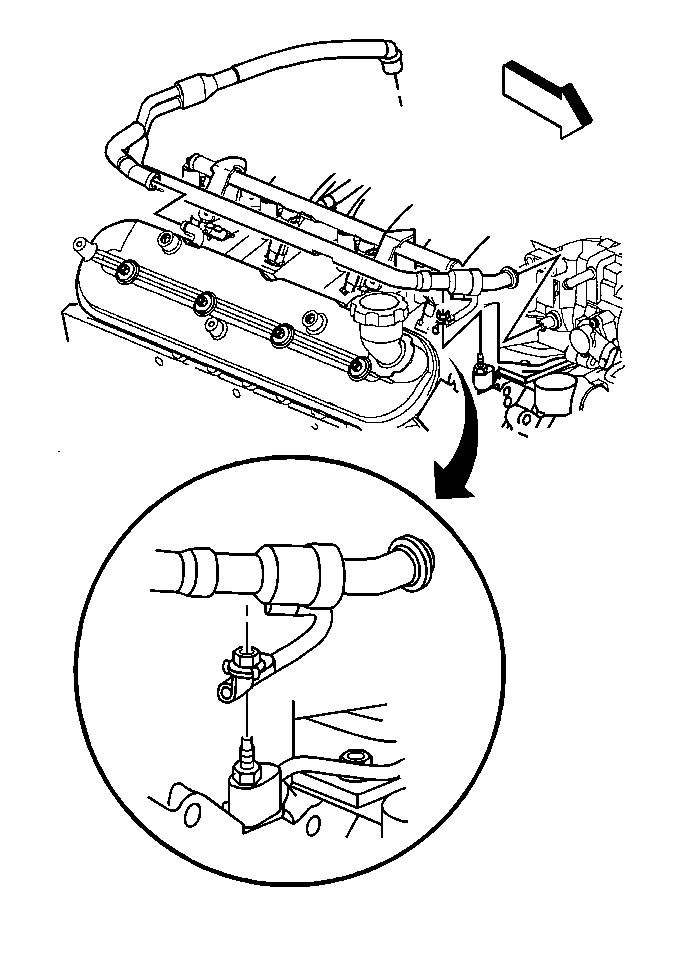
- Install the Positive Crankcase Ventilation (PCV) valve pipe to the right rocker cover and intake manifold.
- Install the PCV strap and nut onto the right front vapor vent pipe stud.
- Install the PCV valve pipe to the left rocker cover.
Important: The intake manifold, throttle body, fuel injection rail and fuel injectors may be removed as an assembly. If not servicing the individual components, install the intake manifold as a complete assembly.
Refer to Sealers, Adhesives, and Lubricants .
Caution: The fuel rail stop bracket must be installed onto the engine assembly. The stop bracket serves as a protective shield for the fuel rail in the event of a vehicle frontal crash. If the fuel rail stop bracket is not installed and the vehicle is involved in a frontal crash, fuel could be sprayed possibly causing a fire and personal injury from burns.
Notice: Use the correct fastener in the correct location. Replacement fasteners must be the correct part number for that application. Fasteners requiring replacement or fasteners requiring the use of thread locking compound or sealant are identified in the service procedure. Do not use paints, lubricants, or corrosion inhibitors on fasteners or fastener joint surfaces unless specified. These coatings affect fastener torque and joint clamping force and may damage the fastener. Use the correct tightening sequence and specifications when installing fasteners in order to avoid damage to parts and systems.
Tighten
Tighten
Tighten the bracket bolts to 10 N·m (89 lb in).
Tighten
Tighten the PCV strap nut to 12 N·m (106 lb in).

