SERVICE MANUAL UPDATE-SEC. 7A TRANSMISSION UNIT REPAIR

Subject: SERVICE MANUAL UPDATE - SECTION 7A TRANSMISSION UNIT REPAIR Models Affected: 1993 FIREBIRD MODELS WITH 4L60 TRANSMISSION (MD8)
TRANSMISSION MODELS: All
BULLETIN COVERS:
New Product Information for 1993 HYDRA-MATIC 4L60 transmissions. This information has been updated since publication of the 1993 Service Manual and should be noted accordingly. Be certain to familiarize yourself with these updates to properly repair the 1993 HYDRA-MATIC 4L60 transmission.
DATE OF PRODUCTION CHANGE:
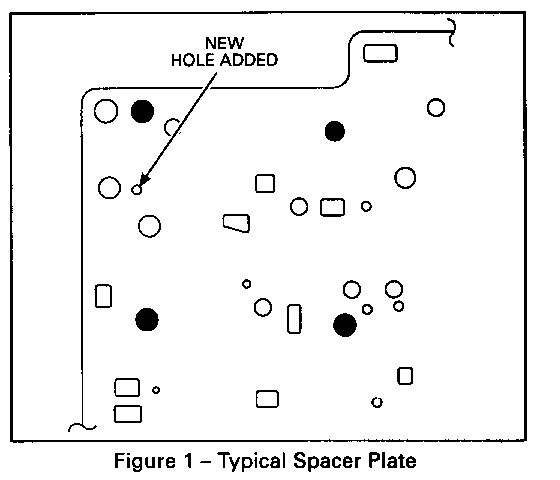
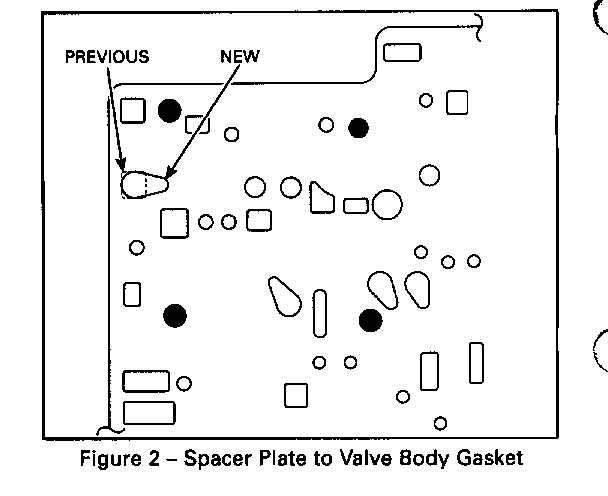
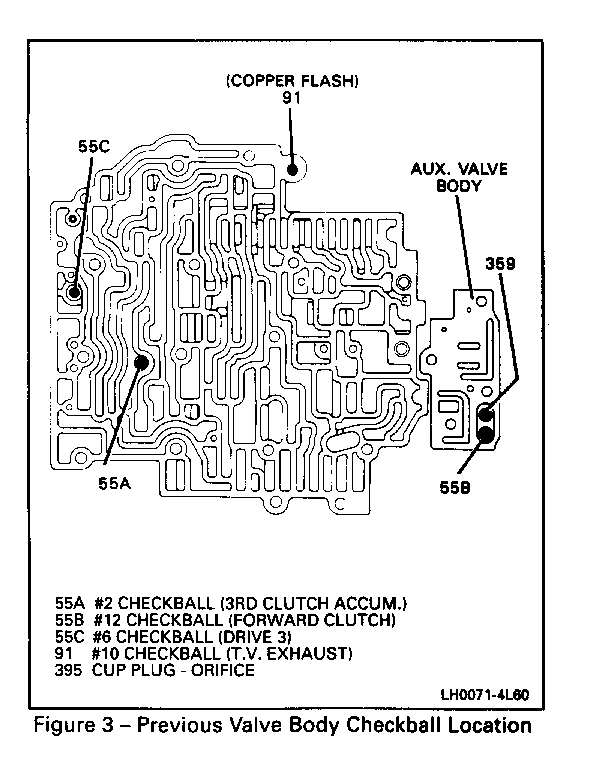
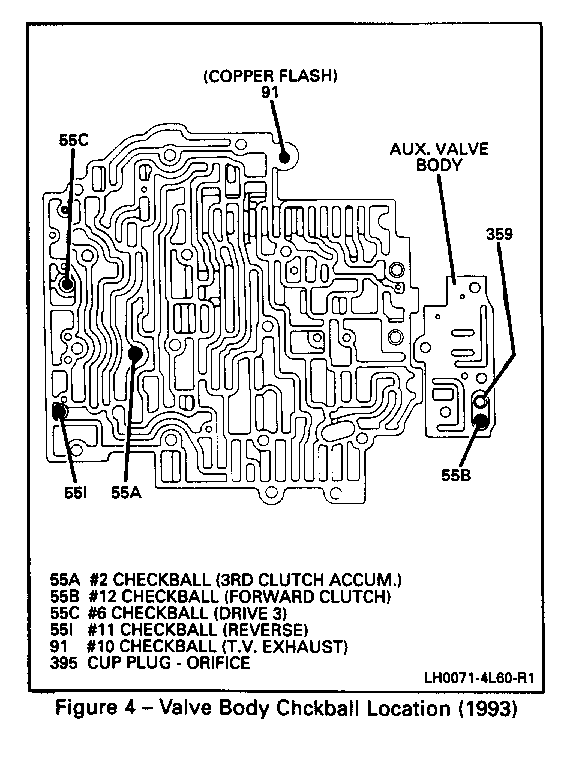
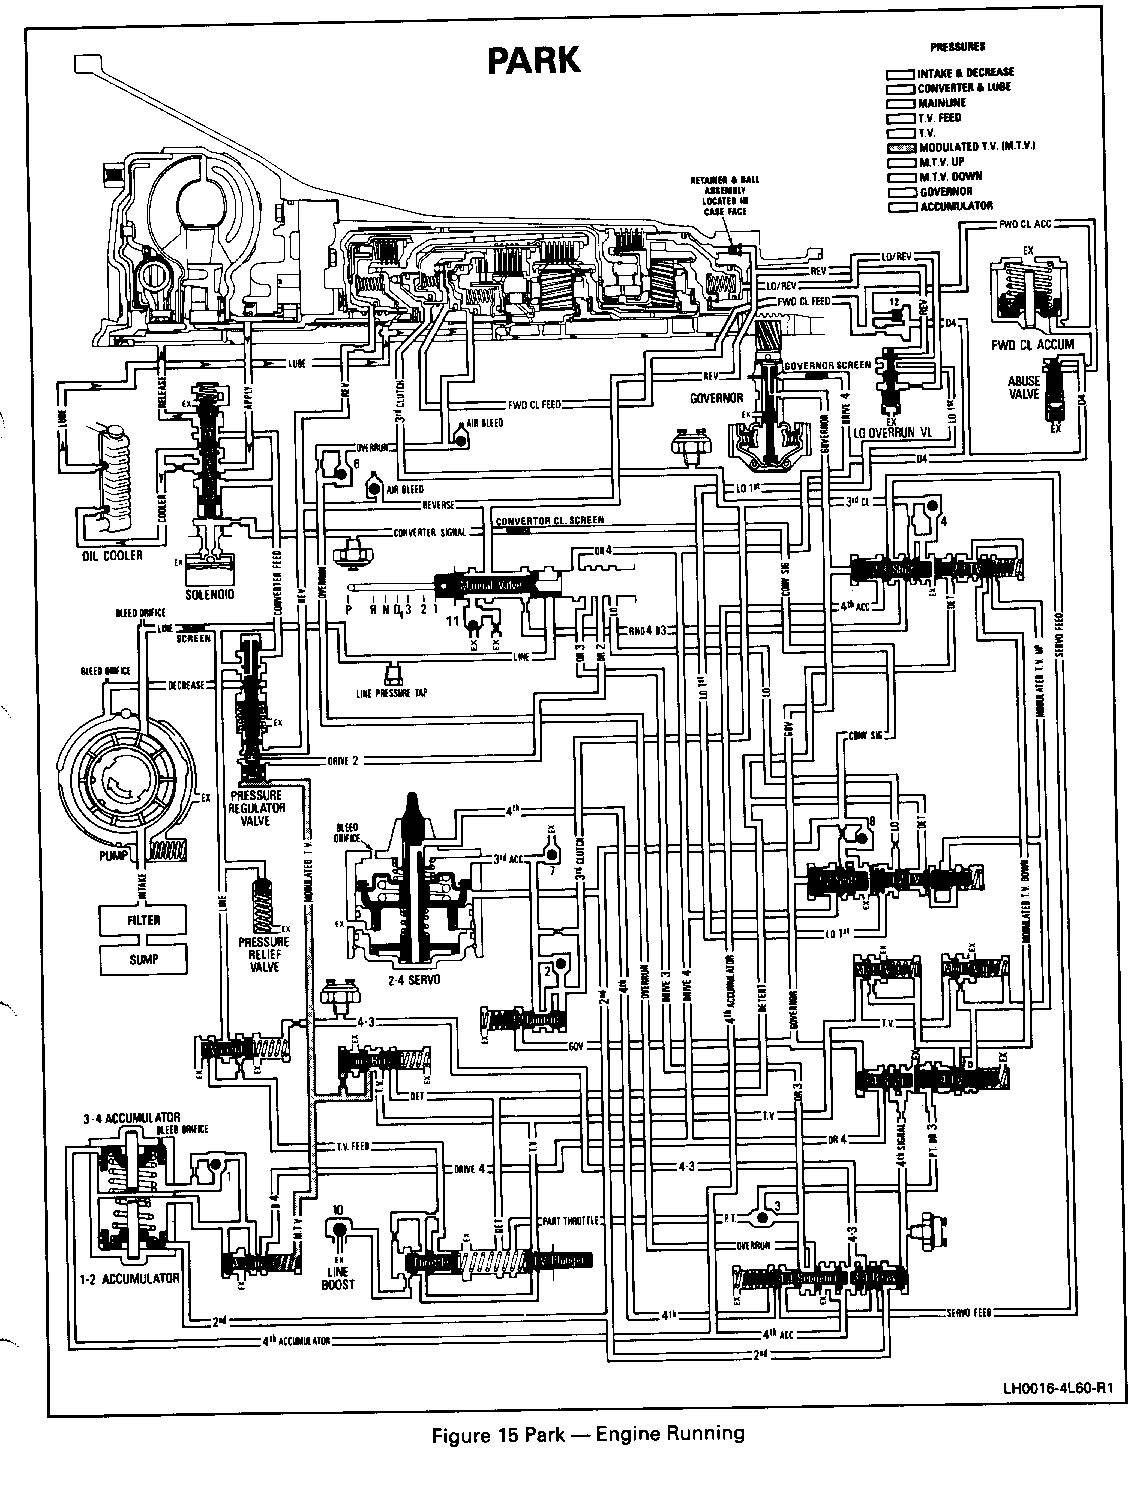
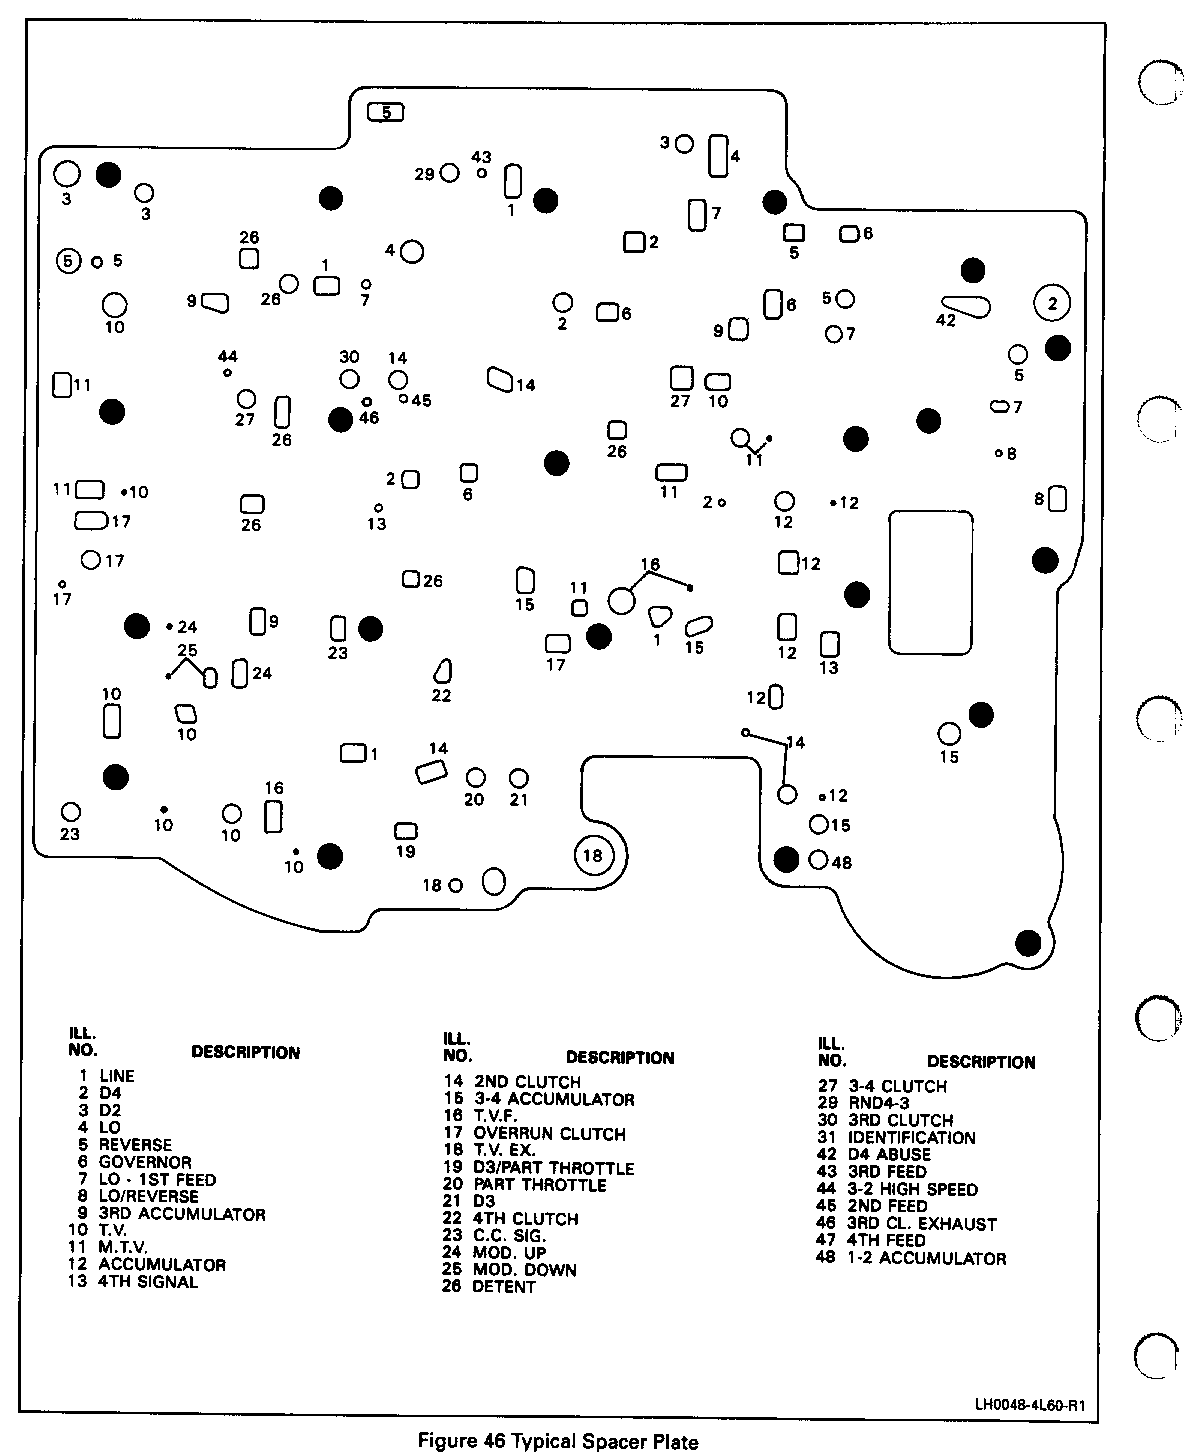
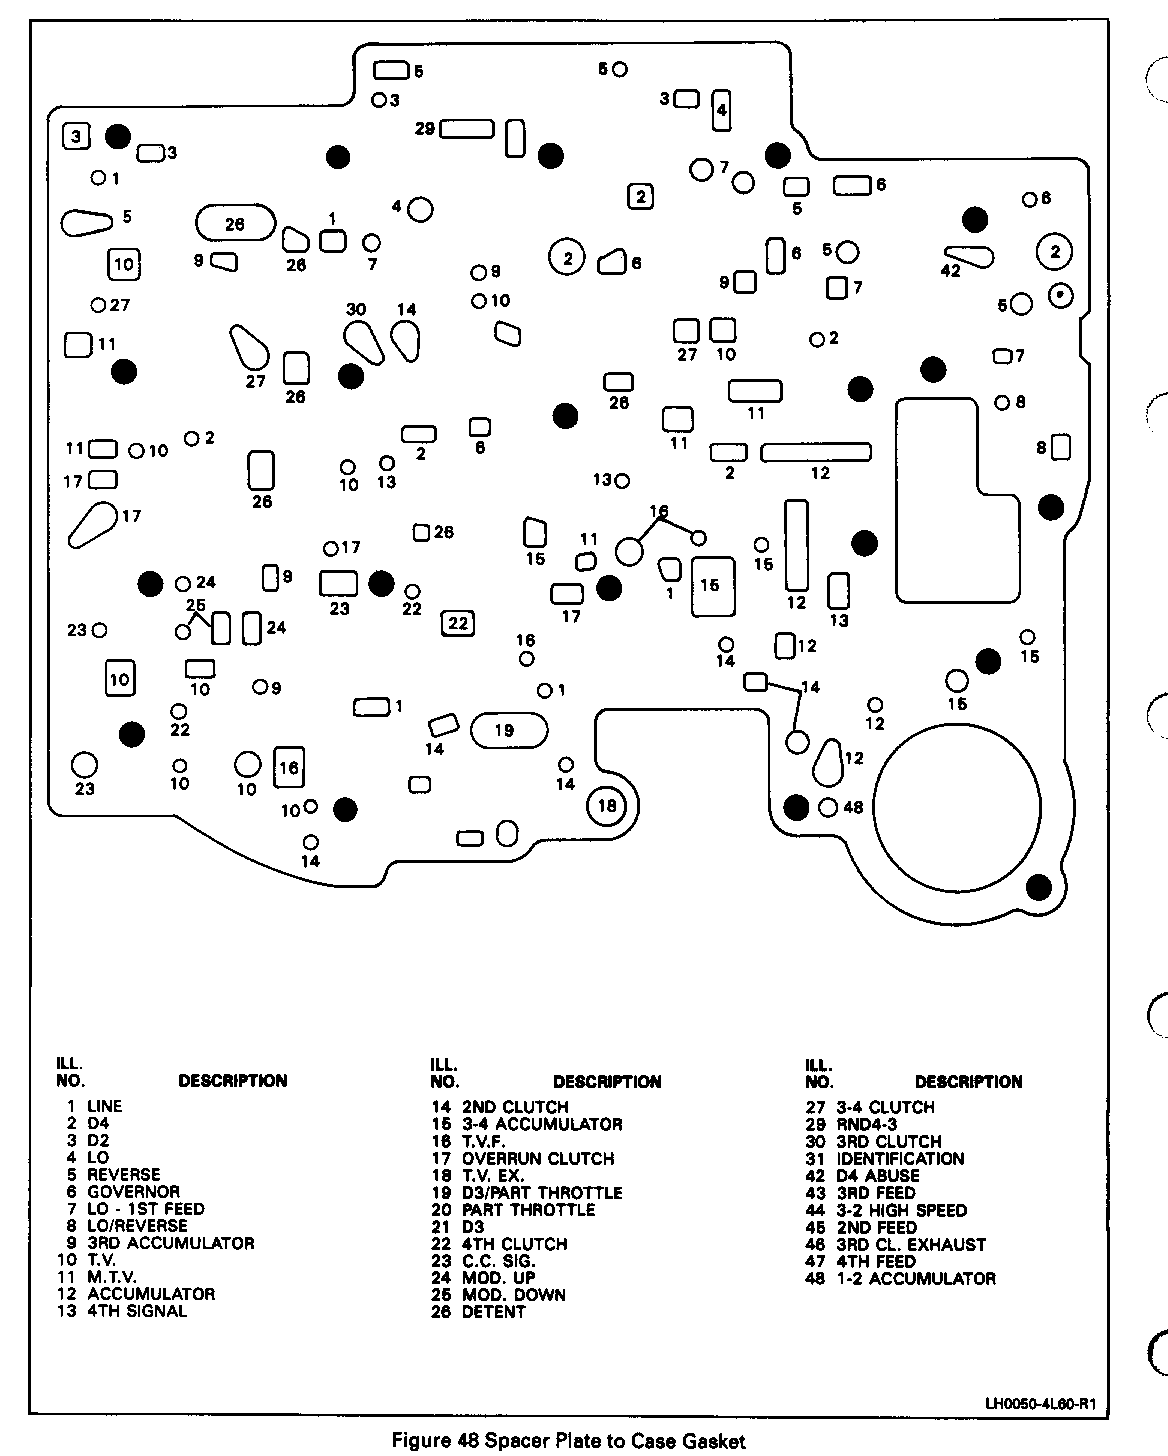
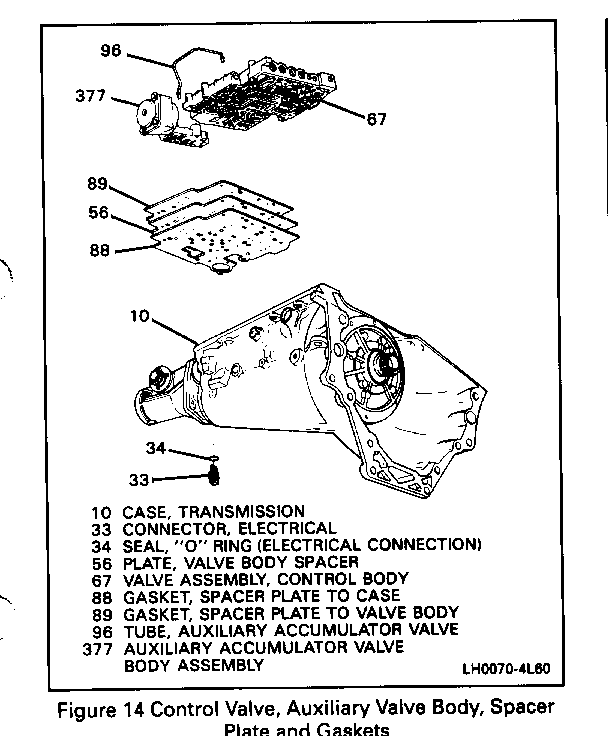
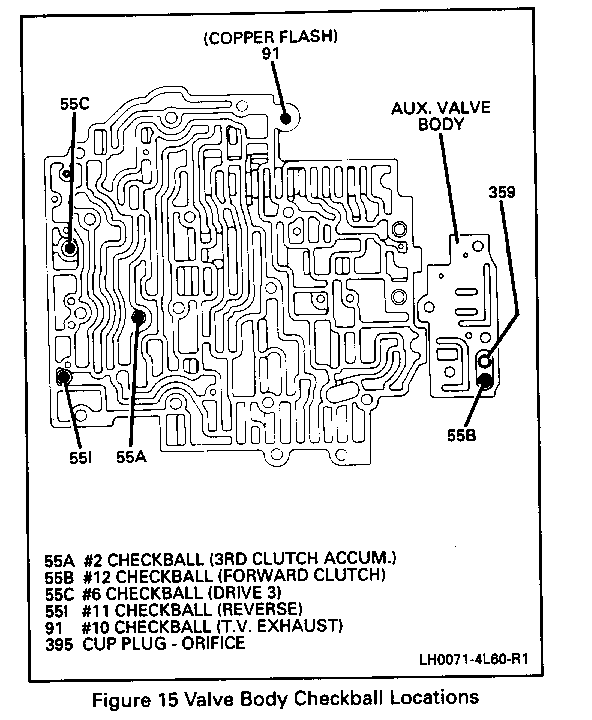
Beginning with Start of Production 1993, HYDRA-MATIC 4L60 transmissions were built with an improved park to reverse engagement. An added check ball in the reverse passage of the valve body (55I) and new spacer plate to case gasket (Ill. 88) and a new spacer plate to valve body gasket (Ill. 89) were all needed for this improvement.
NOTE: It is very important that the new spacer plate gaskets with the tear drop hole are used for the 1993 HYDRA-MATIC 4L60. If a previous gasket is used on the 1993 models it can block the reverse apply orifice.
SERVICE MANUAL REFERENCE:
Update your 1993 Service Manual with the following six (6) pages.
Inspect 0 All valves and bushings for: - Porosity. - Scoring. - Nicks. - Scratches. 0 Springs for damaged or distorted coils. 0 Valve body casting for: - Porosity. - Cracks. - Interconnected oil passages. - Damaged machined surfaces.
Assemble Figure 112 0 Control valve assembly (67) exactly as shown. - Notice the position of the valve lands and bushing passages.
Install or Connect Figures 113 and 115 1. Four checkballs (55A), (55C), (551) and (91) into the valve body assembly. Checkball (9 1) is 0 Retain with TRANSJEL J 36850 or equivalent. 2. Valve body assembly (67). 0 Connect the manual valve link (705) to the inside detent lever (703).
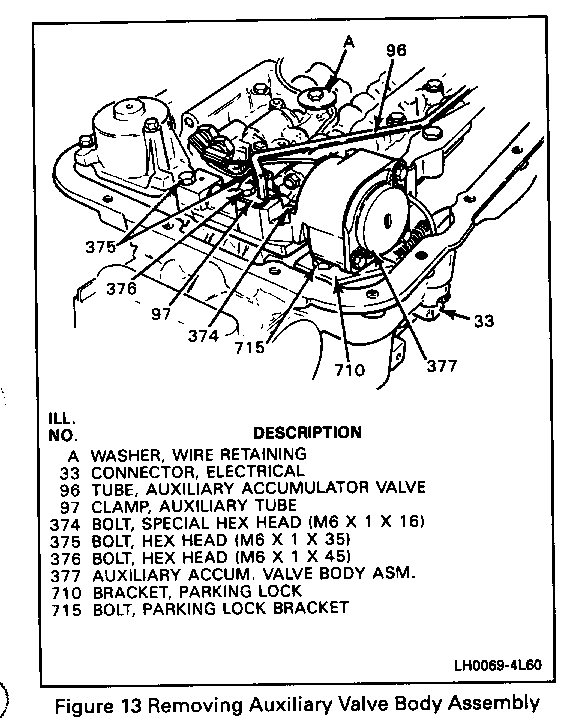
Auxiliary Accumulator Valve Body Assembly
Figures 108, 109, 114, 117, 118 and 119 Tools Required: #3 Screw Extractor 9.5 mm (3/8 inch) rod
Clean Figure 114 0 Auxiliary valve assembly (377) thoroughly in clean solvent - Move the valves with a pick or small screwdriver to dislodge any dirt or debris that may have accumulated. - Air dry.
Disassemble Figure 114 1. (3) Bolts (373). 2. Cover (371) and accumulator piston spring (370). Important 0 Cover (371) is under spring pressure. 3. Piston (367). 4. Piston oil seal ring (53).
Disassemble Figure 114
Position the auxiliary accumulator valve body on a clean surface. Remove valve trains beginning with the lower left hand comer. NOTE: valves are under pressure-cover bores while removing the roll pin. Important 0 Valves and springs must be laid out on a clean surface in the exact sequence as they are removed.

General Motors bulletins are intended for use by professional technicians, not a "do-it-yourselfer". They are written to inform those technicians of conditions that may occur on some vehicles, or to provide information that could assist in the proper service of a vehicle. Properly trained technicians have the equipment, tools, safety instructions and know-how to do a job properly and safely. If a condition is described, do not assume that the bulletin applies to your vehicle, or that your vehicle will have that condition. See a General Motors dealer servicing your brand of General Motors vehicle for information on whether your vehicle may benefit from the information.
