Step | Action | Yes | No |
|---|---|---|---|
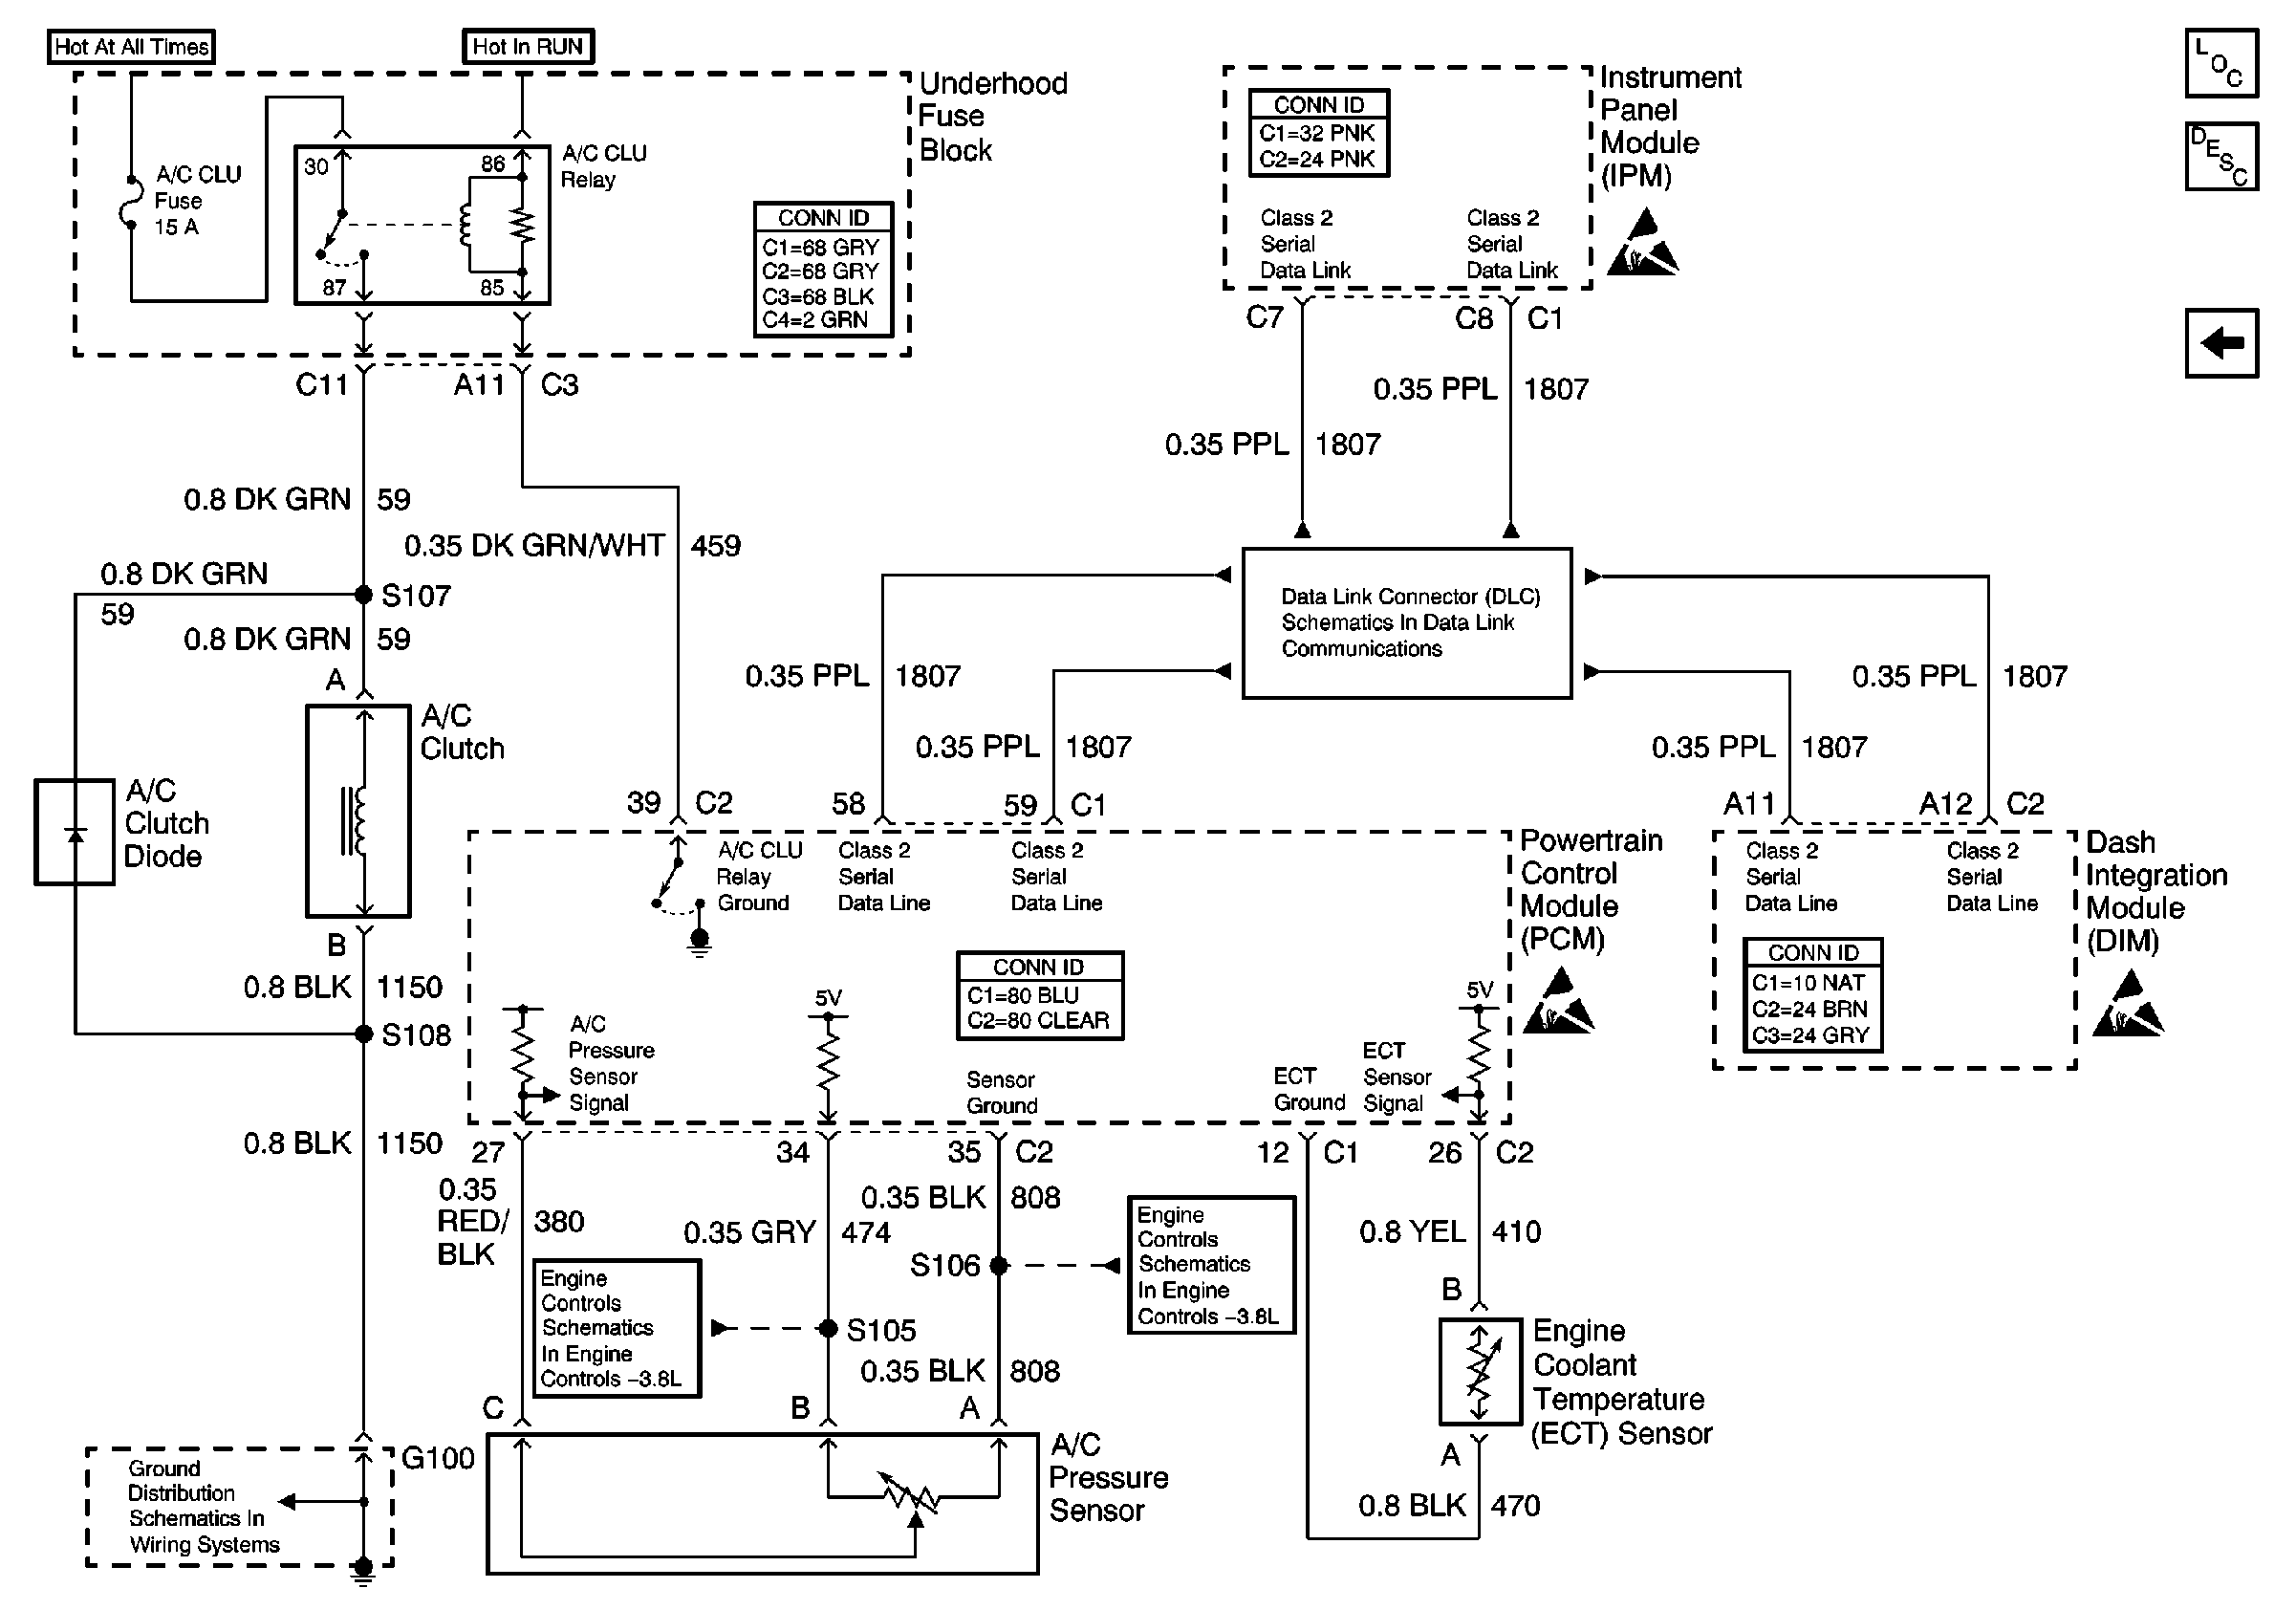
SCHEMATIC REFERENCE:
| |||
1 | Did you perform the HVAC Diagnostic System Check? | Go to Step 2 | Go to Diagnostic System Check |
2 |
Does the A/C clutch engage and disengage with each command? | Go to Step 3 | Go to Step 4 |
3 |
IMPORTANT: Indicated outside air temperature must be above 7°C (45°F).
Does the scan tool display ON? | Go to Step 20 | Go to Step 11 |
4 |
Does the test lamp illuminate? | Go to Step 5 | Go to Step 6 |
5 | Connect a test lamp between the switched input circuit of the A/C relay and the switched output circuit of the A/C relay. Does the test lamp illuminate? | Go to Step 16 | Go to Step 7 |
6 | Repair the switched input circuit of the A/C relay. Refer to Wiring Repairs in Wiring Systems. Did you complete the repair? | Go to Step 25 | -- |
7 |
Does the test lamp illuminate? | Go to Step 17 | Go to Step 8 |
8 |
Does the test lamp illuminate? | Go to Step 9 | Go to Step 10 |
9 | Repair the input circuit of the A/C compressor clutch. Refer to Wiring Repairs in Wiring Systems. Did you complete the repair? | Go to Step 25 | -- |
10 | Repair the ground circuit of the A/C compressor clutch. Refer to Wiring Repairs in Wiring Systems. Did you complete the repair? | Go to Step 25 | -- |
11 | With a scan tool, observe the Control Head (Desired) parameter in the DIM A/C Information list. Does the scan tool display A/C ON? | Go to Step 12 | Go to Step 15 |
12 | With a scan tool, observe the A/C Clutch (Desired) parameter in the DIM A/C Information list. Does the scan tool display ON? | Go to Powertrain On Board Diagnostic (OBD) System Check in Engine Controls-3.8L | Go to Step 13 |
13 | With a scan tool, observe the Clutch Voltage parameter in the DIM A/C Information list. Does the scan tool display Normal? | Go to Step 14 | Go to Diagnostic System Check - Engine Electrical in Engine Electrical |
14 | With a scan tool, observe the Pressure Status parameter in the DIM A/C Information list. Does the scan tool display Normal? | Go to Step 19 | Go to System Performance Test |
15 | With a scan tool, observe the A/C Requested parameter in the IPM HVAC System Data list. Does the scan tool display Yes? | Go to Step 19 | Go to Step 18 |
16 | Replace the A/C relay. Did you complete the replacement? | Go to Step 25 | -- |
17 | Inspect for poor connections at the harness connector of the A/C compressor clutch. Refer to Testing for Intermittent Conditions and Poor Connections and Connector Repairs in Wiring Systems. Did you find and correct the condition? | Go to Step 25 | Go to Step 21 |
18 | Inspect for poor connections at the harness connector of the instrument panel module. Refer to Testing for Intermittent Conditions and Poor Connections and Connector Repairs in Wiring Systems. Did you find and correct the condition? | Go to Step 25 | Go to Step 22 |
19 | Inspect for poor connections at the harness connector of the dash integration module. Refer to Testing for Intermittent Conditions and Poor Connections and Connector Repairs in Wiring Systems. Did you find and correct the condition? | Go to Step 25 | Go to Step 23 |
20 | Inspect for poor connections at the harness connector of the powertrain control module. Refer to Testing for Intermittent Conditions and Poor Connections and Connector Repairs in Wiring Systems. Did you find and correct the condition? | Go to Step 25 | Go to Step 24 |
21 | Replace the A/C compressor clutch. Refer to Compressor Clutch Coil Removal (V5 - Conventional Mount) . Did you complete the replacement? | Go to Step 25 | -- |
22 | Replace the instrument panel module. Refer to Instrument Panel Module Replacement in Body Control System. Did you complete the replacement? | Go to Step 25 | -- |
23 | Replace the dash integration module. Refer to Dash Integration Module Replacement in Body Control System. Did you complete the replacement? | Go to Step 25 | -- |
24 | Replace the powertrain control module. Refer to Powertrain Control Module Replacement/Programming in Engine Controls-3.8L. Did you complete the replacement? | Go to Step 25 | -- |
25 | Operate the system in order to verify the repair. Did you correct the condition? | System OK | Go to Step 2 |