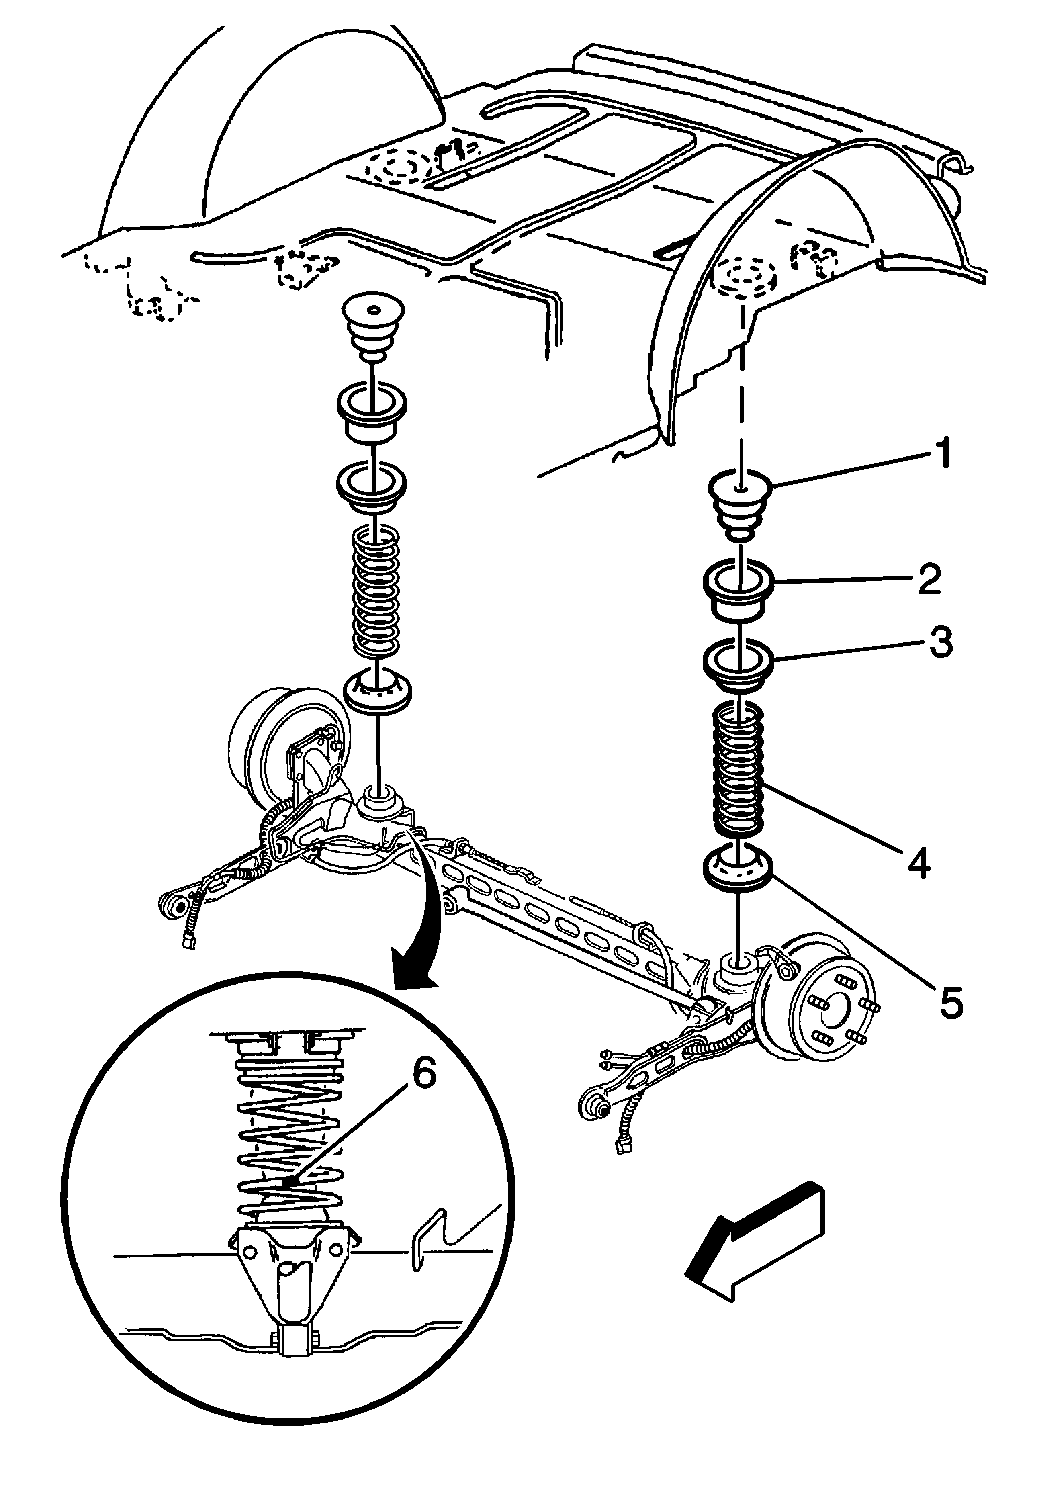
Coil Spring Replacement Front Wheel Drive with Axle
Removal Procedure
Caution: When removing the rear springs, do not use a twin-post type hoist. The swing arch tendency of the rear axle assembly when certain fasteners are removed may cause it to slip from the hoist which may cause personal injury.
- Raise and support the vehicle. Refer to Lifting and Jacking the Vehicle in General Information.
- Use the utility stand in order to support the center of the rear axle.
- Remove the shock absorber lower bolts and nuts. Refer to Shock Absorber Replacement .
- Remove the rear axle tie rod from the rear axle. Refer to Tie Rod Replacement .
- Use the utility stand in order to lower the rear axle.
- Remove the springs (4) and the insulators (5).
Notice: Do not suspend the rear axle by the brake hoses. Damage to the brake hoses may result.
Notice: Care should be taken to avoid chipping or scratching the coating when handling the suspension coil spring. Damage to the coating can cause premature failure.
Installation Procedure
- Install the springs (4) and the insulators (5) to the rear axle.
- Use the utility stand in order to raise the rear axle.
- Install the rear axle tie rod to the rear axle. Refer to Tie Rod Replacement .
- Install the shock absorbers to the rear axle. Refer to Shock Absorber Replacement .
- Remove the utility stand.
- Lower the vehicle.
Notice: Care should be taken to avoid chipping or scratching the coating when handling the suspension coil spring. Damage to the coating can cause premature failure.
Important: Position the spring so that the paint stripe (6) is facing rearward and centered to the shock absorber.
Coil Spring Replacement Front Wheel Drive without Axle
Tools Required
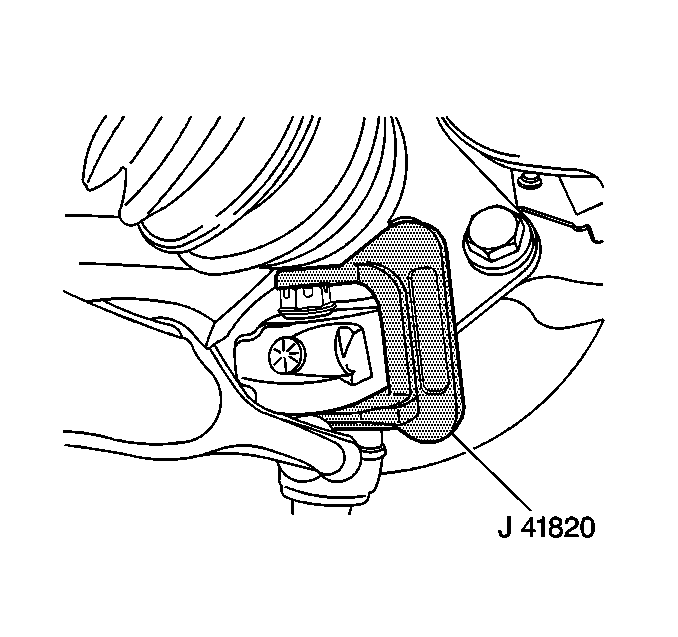
J 41820 Ball Joint/Stud Separator
Removal Procedure
- Raise and support the vehicle. Refer to Lifting and Jacking the Vehicle .
- Remove the rear wheel. Refer to Tire and Wheel Removal and Installation .
- Inspect the rear ball joints. Refer to Ball Joint Inspection .
- Remove the brake caliper and support the brake caliper. Do not disconnect the brake hose. Refer to Rear Brake Caliper Replacement .
- Disconnect the tie rod from the knuckle. Refer to Tie Rod Replacement .
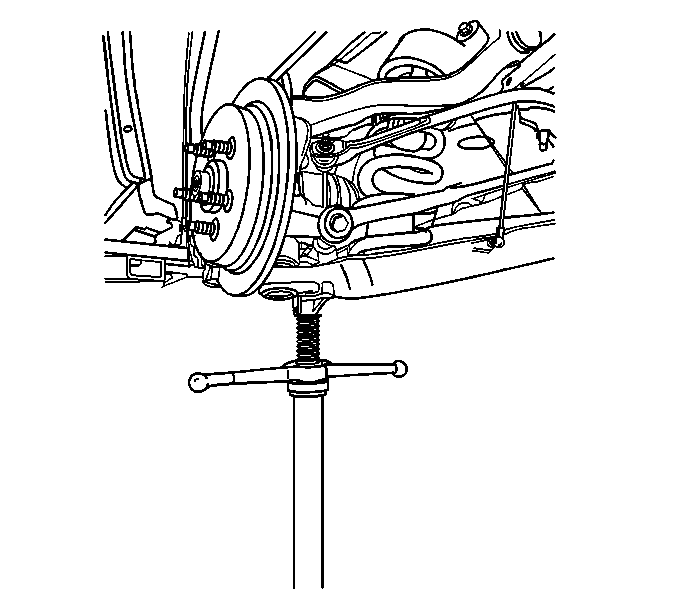
- Use a utility stand in order to support the lower control arm.
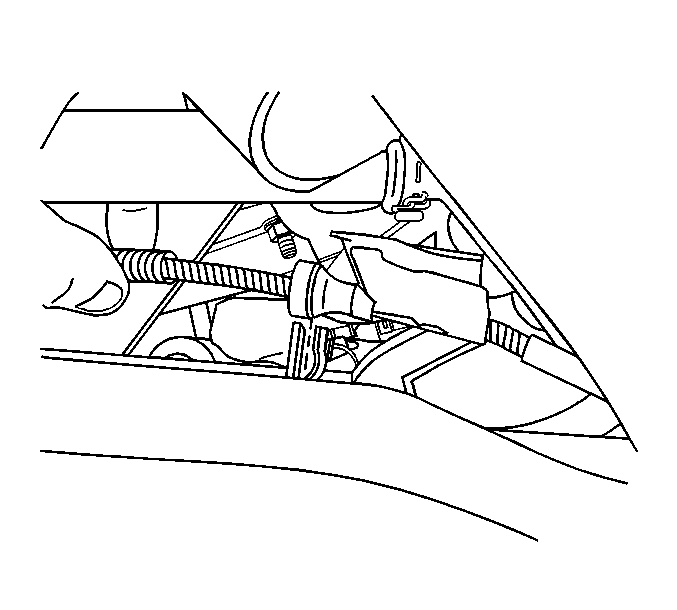
- Disconnect the height sensor link from the lower control arm as necessary.
- Disconnect the speed sensor harness from the control arm.
- Remove the speed sensor connector mounting bracket.
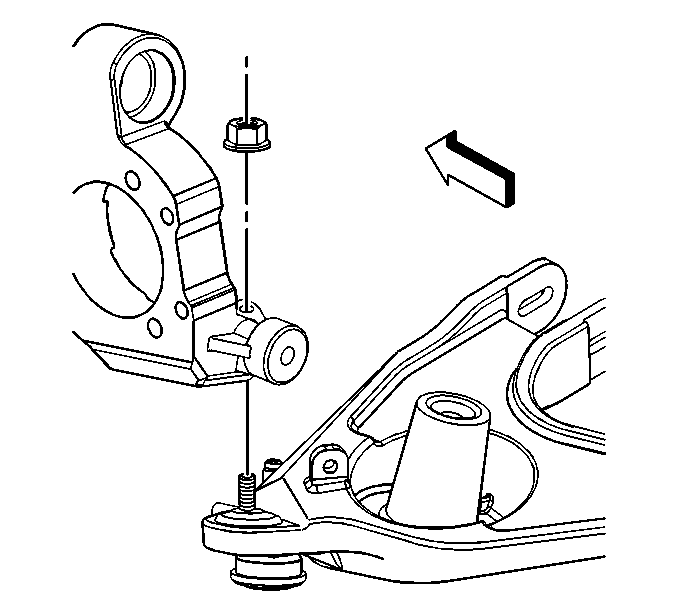
- Remove the stabilizer shaft link from the lower control arm. Refer to Stabilizer Shaft Link Replacement .
- Disconnect the shock absorber from the lower control arm. Refer to Shock Absorber Replacement .
- Use the J 41820 in order to disconnect the ball joint from the knuckle.
- Remove the lower ball joint nut.
- Use the utility stand in order to lower the lower control arm and relieve the coil spring tension.
- Remove the utility stand.
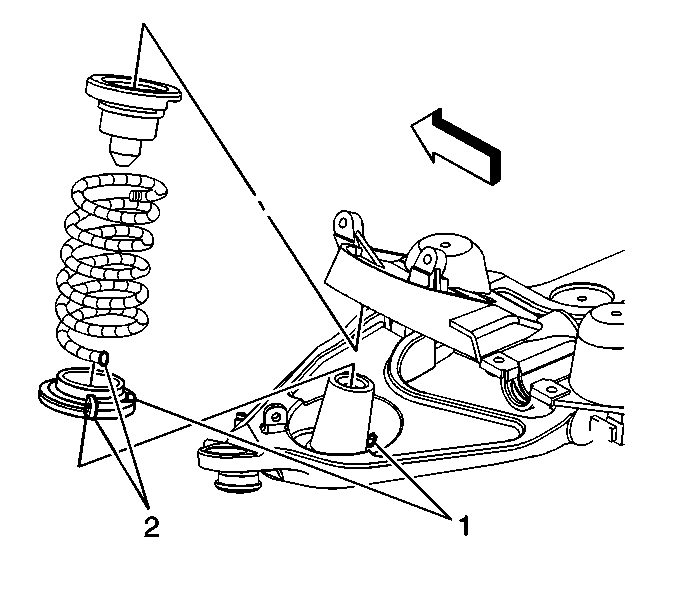
- Carefully remove the coil spring (2).
Notice: Care should be taken to avoid chipping or scratching the spring coating when handling the rear suspension coil spring. Damage to the coating can cause premature failure.
Installation Procedure
- Install the spring jounce bumper to the spring.
- Index and install the spring insulator to the spring (2).
- Index and install the spring assembly to the control arms (1).
- Use the utility stand in order to raise the lower control arm.
- Install the lower ball joint to the knuckle.
- Install the lower ball joint nut.
- Install the stabilizer shaft link to the lower control arm. Refer to Stabilizer Shaft Link Replacement .
- Connect the tie rod to the knuckle. Refer to Tie Rod Replacement .
- Install the speed sensor connector mounting bracket.
- Connect the speed sensor harness to the control arm.
- Connect the speed sensor harnesses .
- Connect the shock absorber to the lower control arm. Refer to Shock Absorber Replacement .
- Connect the height sensor link to the lower control arm as necessary.
- Install the brake caliper . Refer to Rear Brake Caliper Replacement .
- Install the rear wheel. Refer to Tire and Wheel Removal and Installation .
- Lower the vehicle.
Notice: Refer to Fastener Notice in the Preface section.
Tighten
Tighten the lower ball joint nut to 35 N·m (26 lb ft) plus 130 degrees.
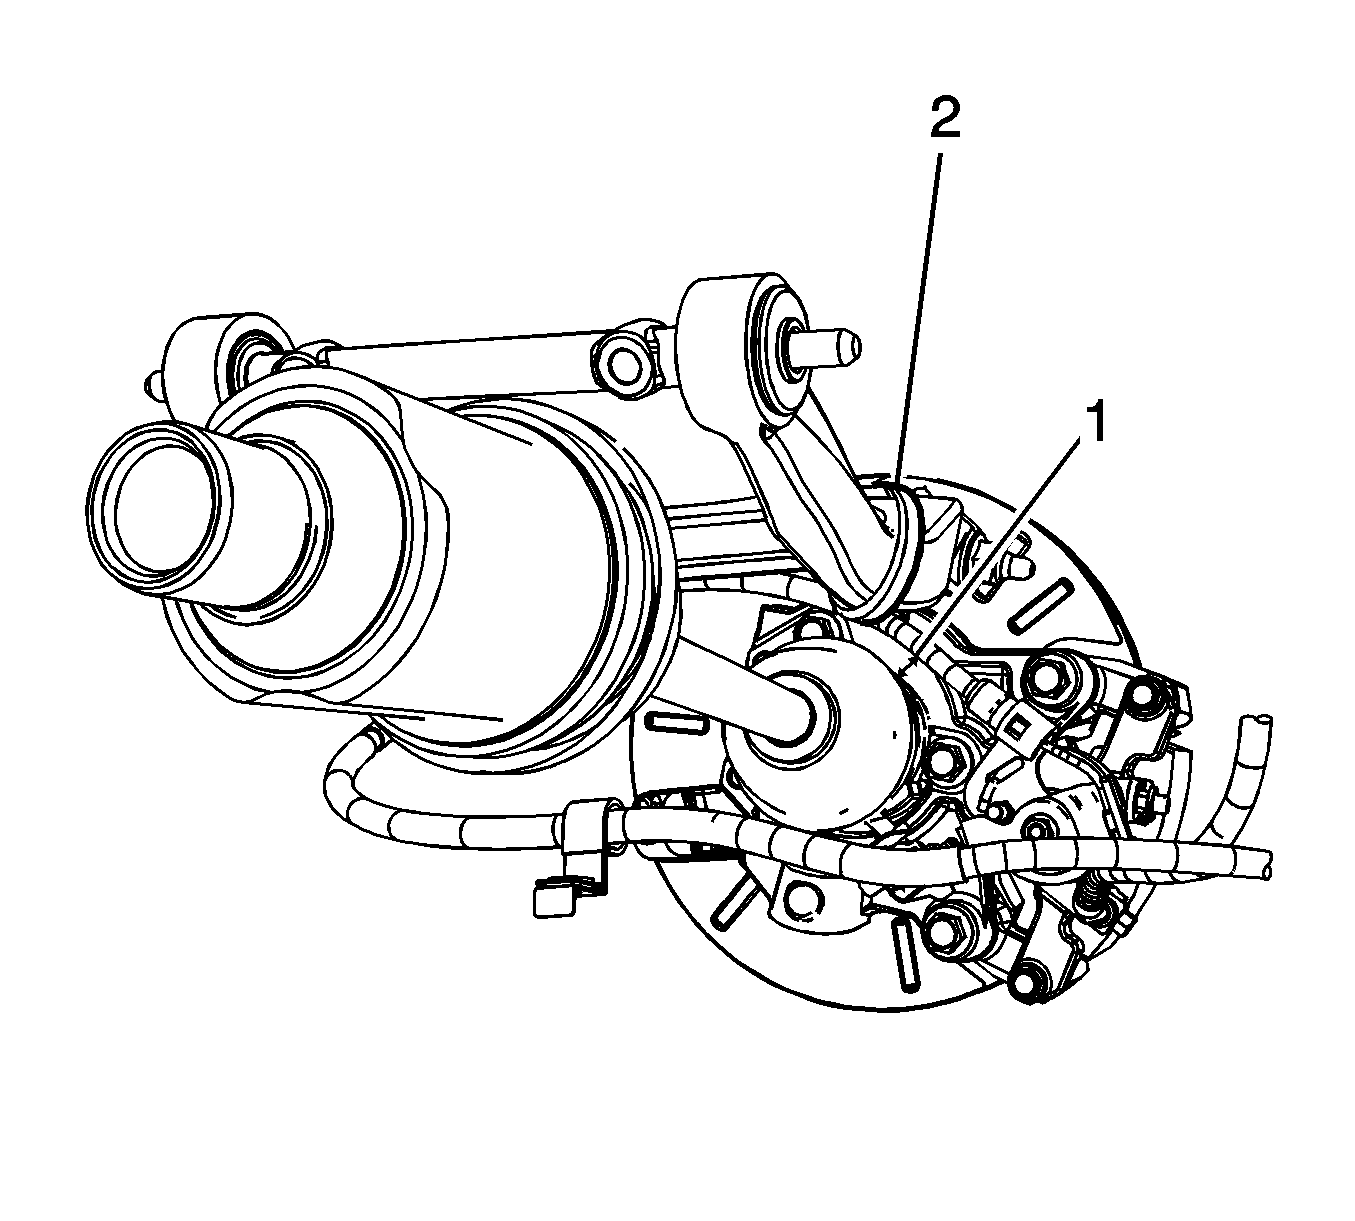
Important: Maintain proper rear park brake cable routing and clearances. Verify the rear park brake cables have a minimum of 10 mm and a maximum of 12 mm of clearance to the wheel drive shafts (1). Maintain this clearance using retention straps or equivalent retention (2).
