For 1990-2009 cars only
Rear Axle Lower Control Arm Bushing Replacement Front Bushing - IRS
Tools Required
| • | J 21474-01 Control Arm Bushing Set |
| • | J 45411 Lower Control Arm Bushing Receiver |
Removal Procedure
- Raise and support the vehicle. Refer to Lifting and Jacking the Vehicle in General Information.
- Remove the wheel and tire assemblies. Refer to Tire and Wheel Removal and Installation in Tires and Wheels.
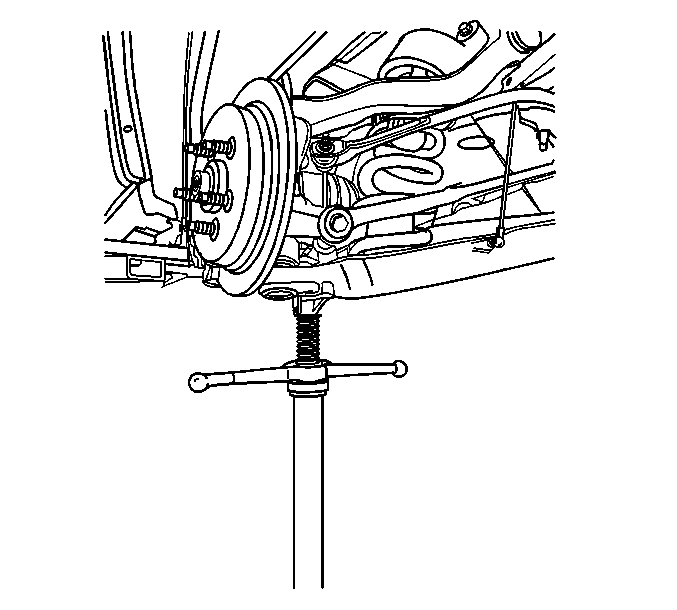
- Use a utility stand in order to support the lower control arm.
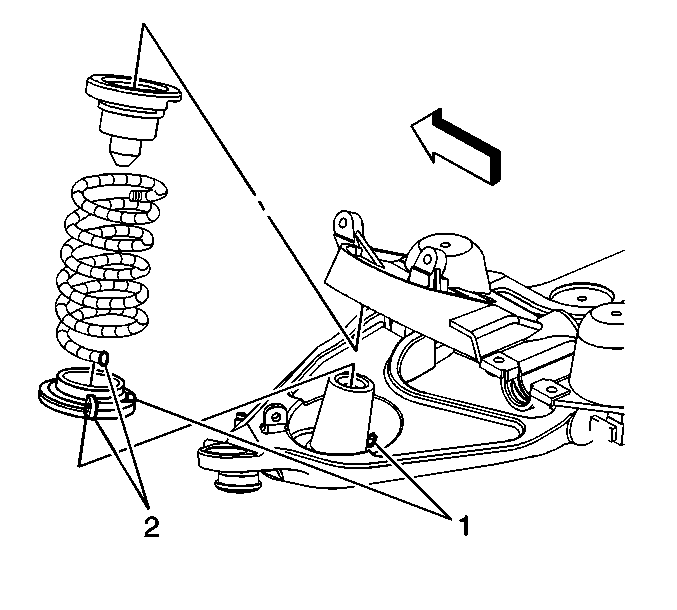
- Remove the coil spring 2. Refer to Coil Spring Replacement .
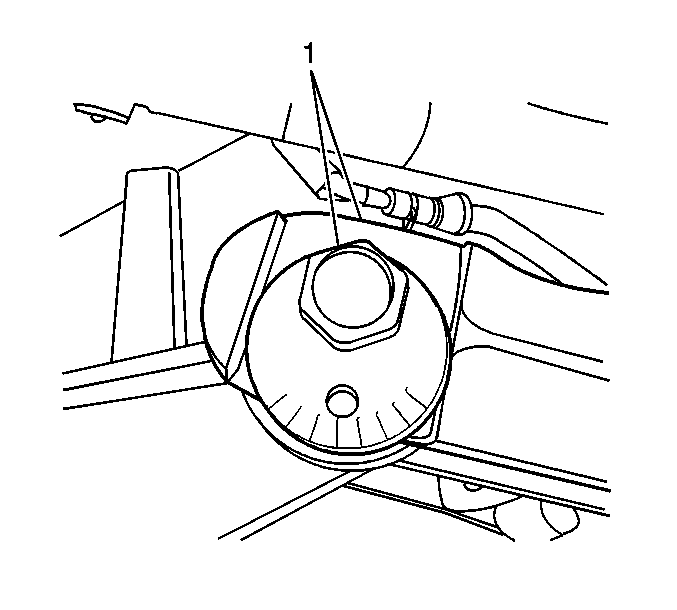
- Make a mark on the lower control arm at the cam indicator.
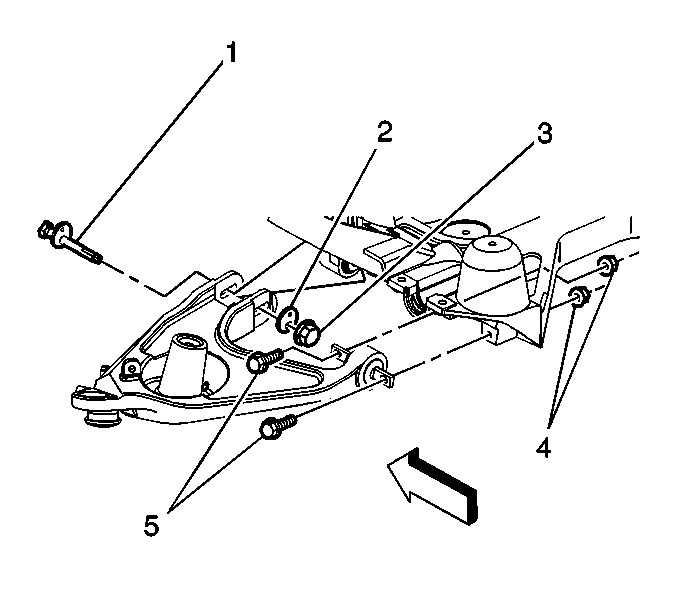
- Remove the lower control arm to crossmember mounting bolts (1, 5) .
- Remove the bushing from the crossmember.
- In order to remove the bushing from the crossmember, use the following tools from the J 21474-01 :
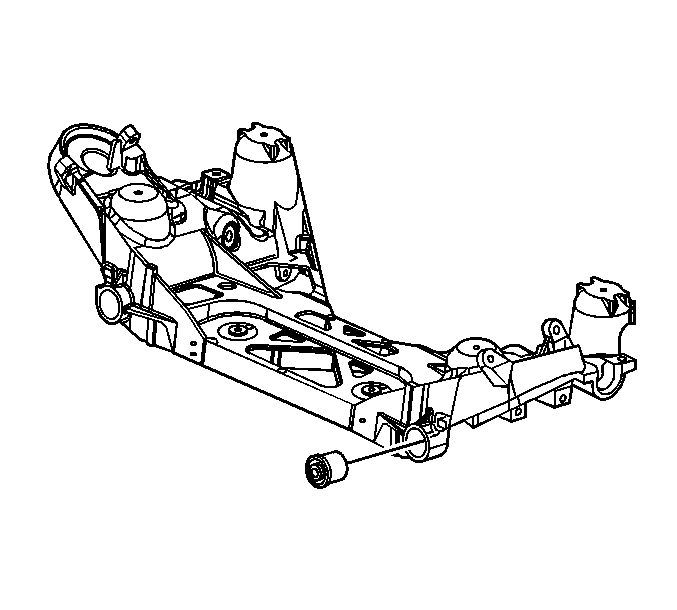
Important: Identify the orientation of the voids in the bushing to the crossmember.
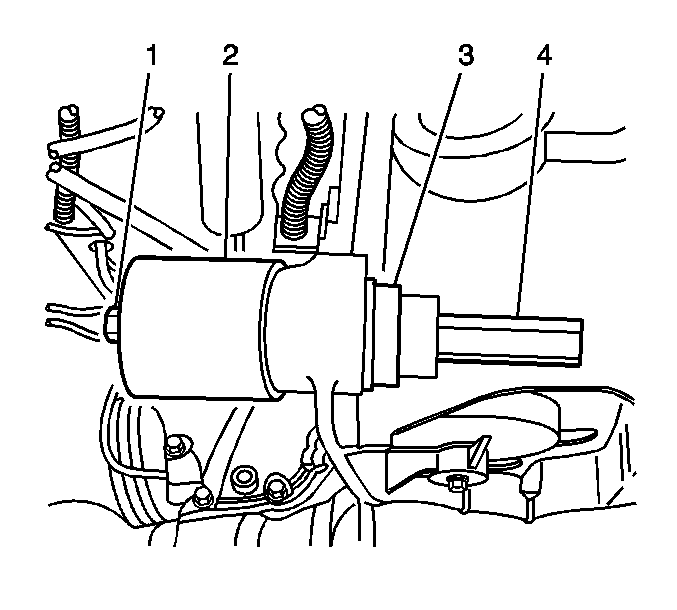
| • | J-6627-4 (1) |
| • | J-45411 (2) |
| • | J-21474-8 (3) |
| • | J-21474-4 (4) |
Installation Procedure
- Use the J 21474-01 in order to install the bushing to the crossmember.
- Install the lower control arm and mounting bolts (1, 5 ) to the crossmember. Refer to Rear Axle Lower Control Arm Replacement in Rear Suspension.
- Line up the mark on the lower control arm at the cam indicator (1) .
- Install the coil spring 2. Refer to Coil Spring Replacement .
- Install the tire and wheel assemblies. Refer to Tire and Wheel Removal and Installation in Tires and Wheels.
- Inspect the rear camber and toe angles and adjust as necessary. Refer to Rear Camber Adjustment and Rear Toe Adjustment in Wheel Alignment .
- Lower the vehicle. Refer to Lifting and Jacking the Vehicle in General Information .
Important: Install the new bushing to the crossmember in the same mannerism as/was the old bushing noting the voids.


Rear Axle Lower Control Arm Bushing Replacement Rear Bushing - All Wheel Drive
Removal Procedure
- Raise and support the vehicle. Refer to Lifting and Jacking the Vehicle in General Information.
- Remove the wheel and tire assemblies. Refer to Tire and Wheel Removal and Installation in Tires and Wheels.
- Remove the coil spring (2). Refer to Coil Spring Replacement .
- Remove the lower control arm to crossmember mounting bolts (1, 5). Refer to Rear Axle Lower Control Arm Replacement .
- Measure and record the installation depth of the bushing in the control arm.
- Make a mark on the control arm in line with the flat edge of the bushing flange in order to identify the rotational orientation of the bushing in the control arm.
- Use a press in order to remove the bushing.


Installation Procedure
- Make a mark on the bushing at the same installation depth and orientation as the old bushing.
- Use a press in order to install the bushing to the control arm.
- Install the lower control arm and mounting bolts (1, 5). Refer to Rear Axle Lower Control Arm Replacement .
- Install the coil spring (2). Refer to Coil Spring Replacement .
- Install the wheel and tire assemblies. Refer to Tire and Wheel Removal and Installation in Tires and Wheels.
- Inspect the rear camber and toe angles and adjust as necessary. Refer to Rear Camber Adjustment and Rear Toe Adjustment in Wheel Alignment.
- Lower the vehicle. Refer to Lifting and Jacking the Vehicle in General Information.


