Cooling System Draining and Filling LDE/A16XER, 2H0/A18XER, LBW/A28NET
Procedure
Warning: With a pressurized cooling system, the coolant temperature in the radiator can be considerably higher than the boiling point of the solution at atmospheric pressure. Removal of the surge tank cap, while the cooling system is hot and under high pressure, causes the solution to boil instantaneously with explosive force. This will cause the solution to spew out over the engine, the fenders, and the person removing the cap. Serious bodily injury may result.
- Vehicles with air condition: switch air conditioning off.
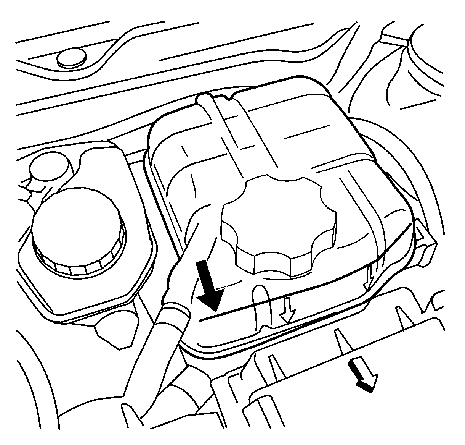
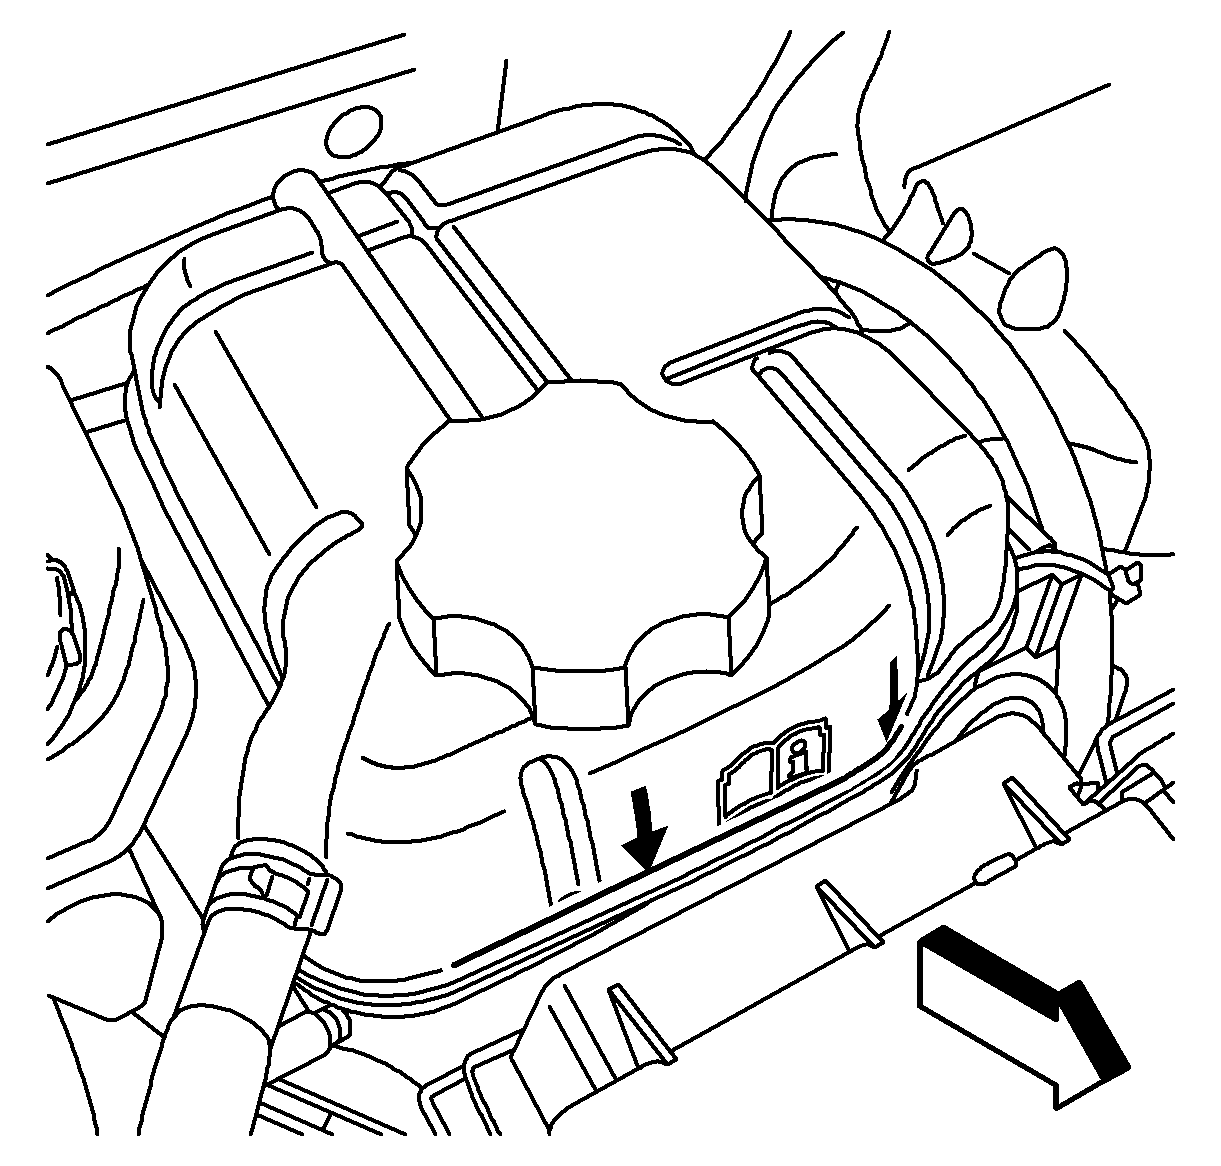
- Open cooling system. Unscrew coolant surge tank cap.
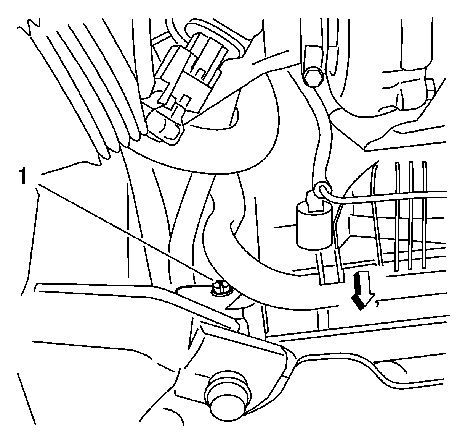
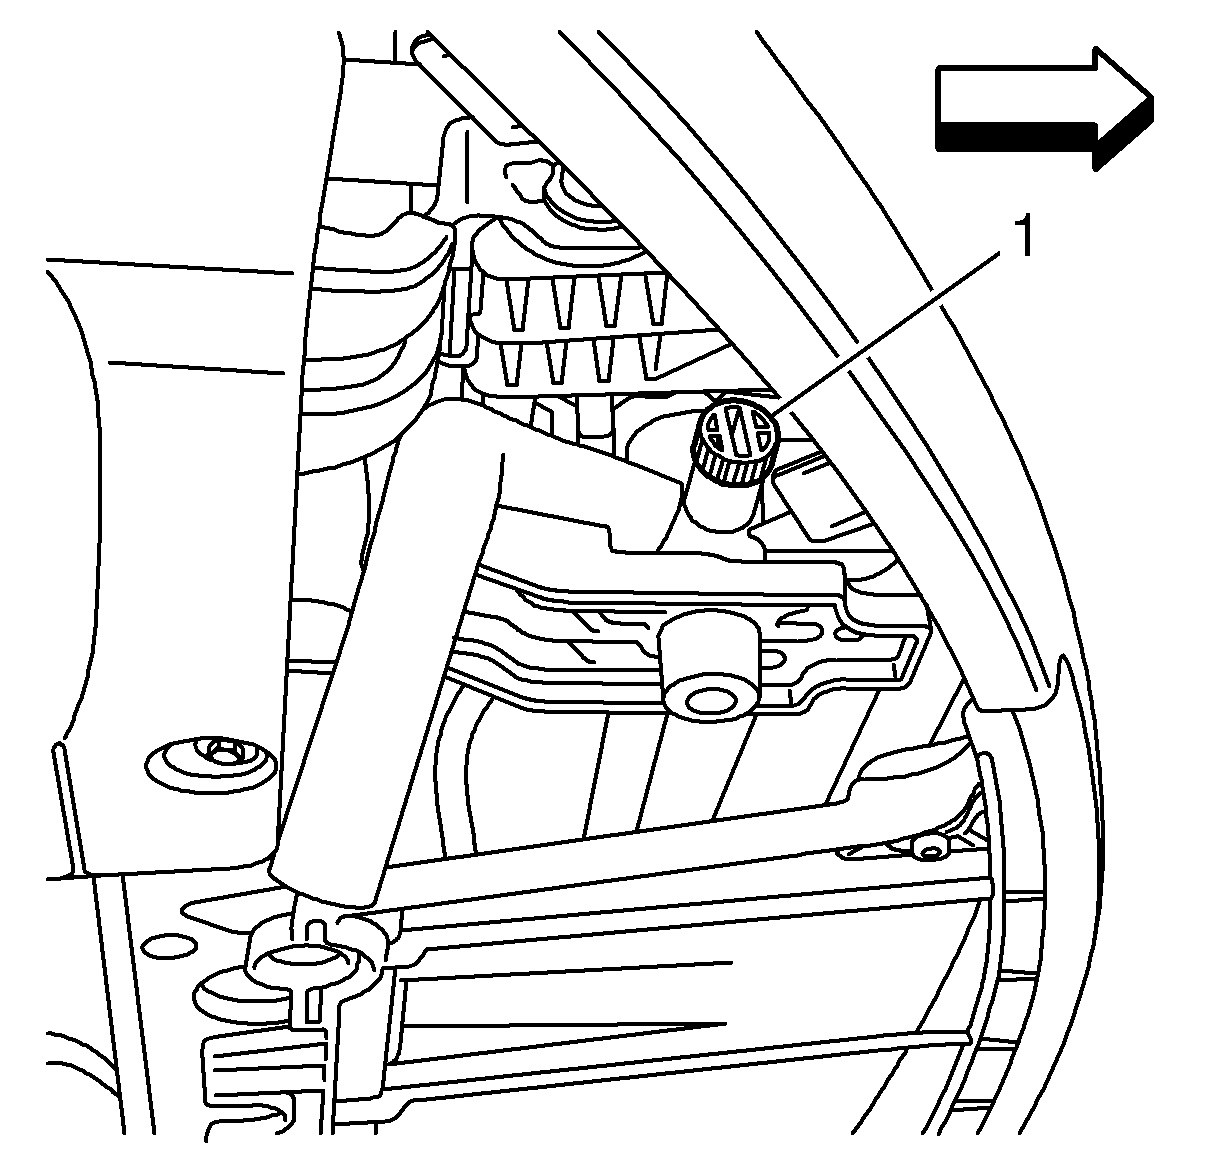
- Open vent screw (1) on radiator.
- Top up coolant up to the bottom line of the bleed nozzle on the coolant surge tank.
- Cap the cooling system screw in coolant surge tank cap.
- Start and warm up the engine.
- Vent cooling system
- Switch the engine off and let the engine cool down.
- Check coolant level and correct the coolant to "COLD" mark if necessary.
Note: Close vent screw when coolant flows out on the loosen vent screw.
Note: After removing the heater core (located in passenger room) the following additional work has to be done:
Immediately after the engine starts kick the accelerator pedal 3 times - thereby the engine speed should not exceed 2500 rpm.Warm up engine at idle speed up to 2500 rpm until first radiator fan setting switches on.
Note: After removing the heater core (located in passenger room) let the engine run for 2 minutes at 2000 to 2500 rpm. This ensures complete venting of the cooling system.
Kick the accelerator pedal 3 times - thereby the engine speed should not exceed 2500 rpm.
Note: After a test drive let the engine cool down and check the coolant level again. Adjust the coolant level to "Cold" mark if necessary.
Cooling System Draining and Filling LDK/A20NHT
Procedure
Warning: With a pressurized cooling system, the coolant temperature in the radiator can be considerably higher than the boiling point of the solution at atmospheric pressure. Removal of the surge tank cap, while the cooling system is hot and under high pressure, causes the solution to boil instantaneously with explosive force. This will cause the solution to spew out over the engine, the fenders, and the person removing the cap. Serious bodily injury may result.
- Vehicles with air condition: switch air conditioning off.
- Open cooling system. Unscrew coolant surge tank cap.
- Disconnect the quick fitting (1) on the t-connector of the engine feeding hose.
- Insert a hose with a funnel (1) in the opening of the T-connector (2) and top up with coolant.
- Connect the quick fitting bleeding hose to the T-connector of the engine feeding hose.
- Top up coolant up to the "COLD" mark of the coolant surge tank.
- Cap the cooling system. Screw in coolant surge tank cap.
- Start and warm up the engine.
- Vent cooling system
- Switch the engine off and let the engine cool down.
- Check coolant level and correct the coolant to "COLD" mark if necessary.

Note: After removing the heater core (located in passenger room) the following additional work has to be done:
Immediately after the engine starts kick the accelerator pedal 3 times - thereby the engine speed should not exceed 2500 rpm.Warm up engine at idle speed up to 2500 rpm until first radiator fan setting switches on.
Kick the accelerator pedal 3 times - thereby the engine speed should not exceed 2500 rpm.
Cooling System Draining and Filling LCD/A20DTC, LBX/A20DTJ, LBS/A20DTH
Procedure
Warning: With a pressurized cooling system, the coolant temperature in the radiator can be considerably higher than the boiling point of the solution at atmospheric pressure. Removal of the surge tank cap, while the cooling system is hot and under high pressure, causes the solution to boil instantaneously with explosive force. This will cause the solution to spew out over the engine, the fenders, and the person removing the cap. Serious bodily injury may result.
- Vehicles with air condition: switch air conditioning off.
- Open cooling system. Unscrew coolant surge tank cap.
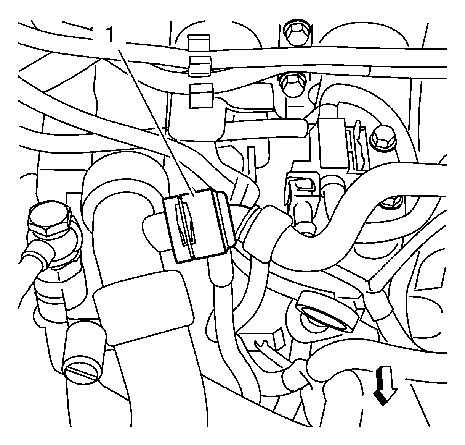
- Open vent screw (1) on radiator.
- Open vent screw (1) on thermostat housing.
- Top up coolant up to the bottom line of the bleed nozzle on the surge tank.
- Cap the cooling system screw in coolant expansion tank cap.
- Start and warm up the engine.
- Vent cooling system
- Switch the engine off and let the engine cool down.
- Check coolant level and correct the coolant to "COLD" mark if necessary.

Note: Close vent screw of radiator and thermostat-housing when coolant flows out on that loosen vent screw.
Note: After removing the heater core (located in passenger room) the following additional work has to be done:
Immediately after the engine starts kick the accelerator pedal 3 times - thereby the engine speed should not exceed 2500 rpm.Warm up engine at idle speed up to 2500 rpm until first radiator fan setting switches on.
Note: After removing the heater core (located in passenger room) let the engine run for 2 minutes at 2000 to 2500 rpm. This ensures complete venting of the cooling system.
Kick the accelerator pedal 3 times - thereby the engine speed should not exceed 2500 rpm.
Note: After a test drive let the engine cool down and check the coolant level again. Adjust the coolant level to "Cold" mark if necessary.
