For 1990-2009 cars only
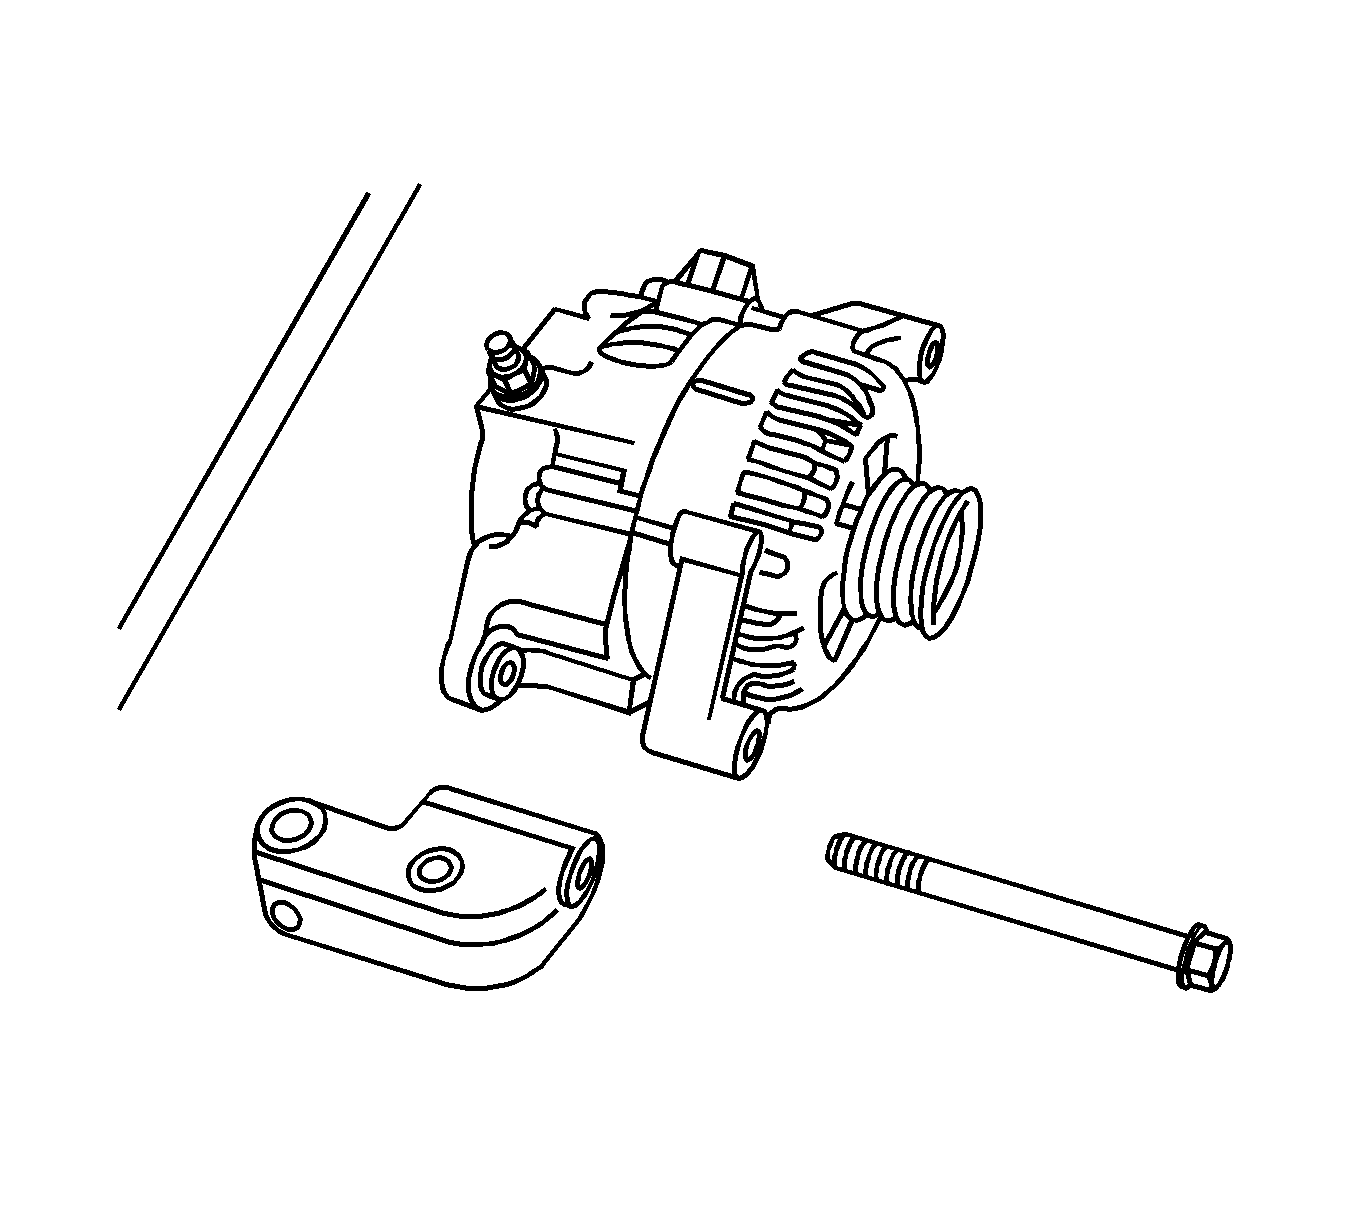
Generator Replacement With 3.2L
Removal Procedure
- Disconnect the negative battery cable.
- Remove the fuel injector sight shield. Refer to Fuel Injector Sight Shield Replacement
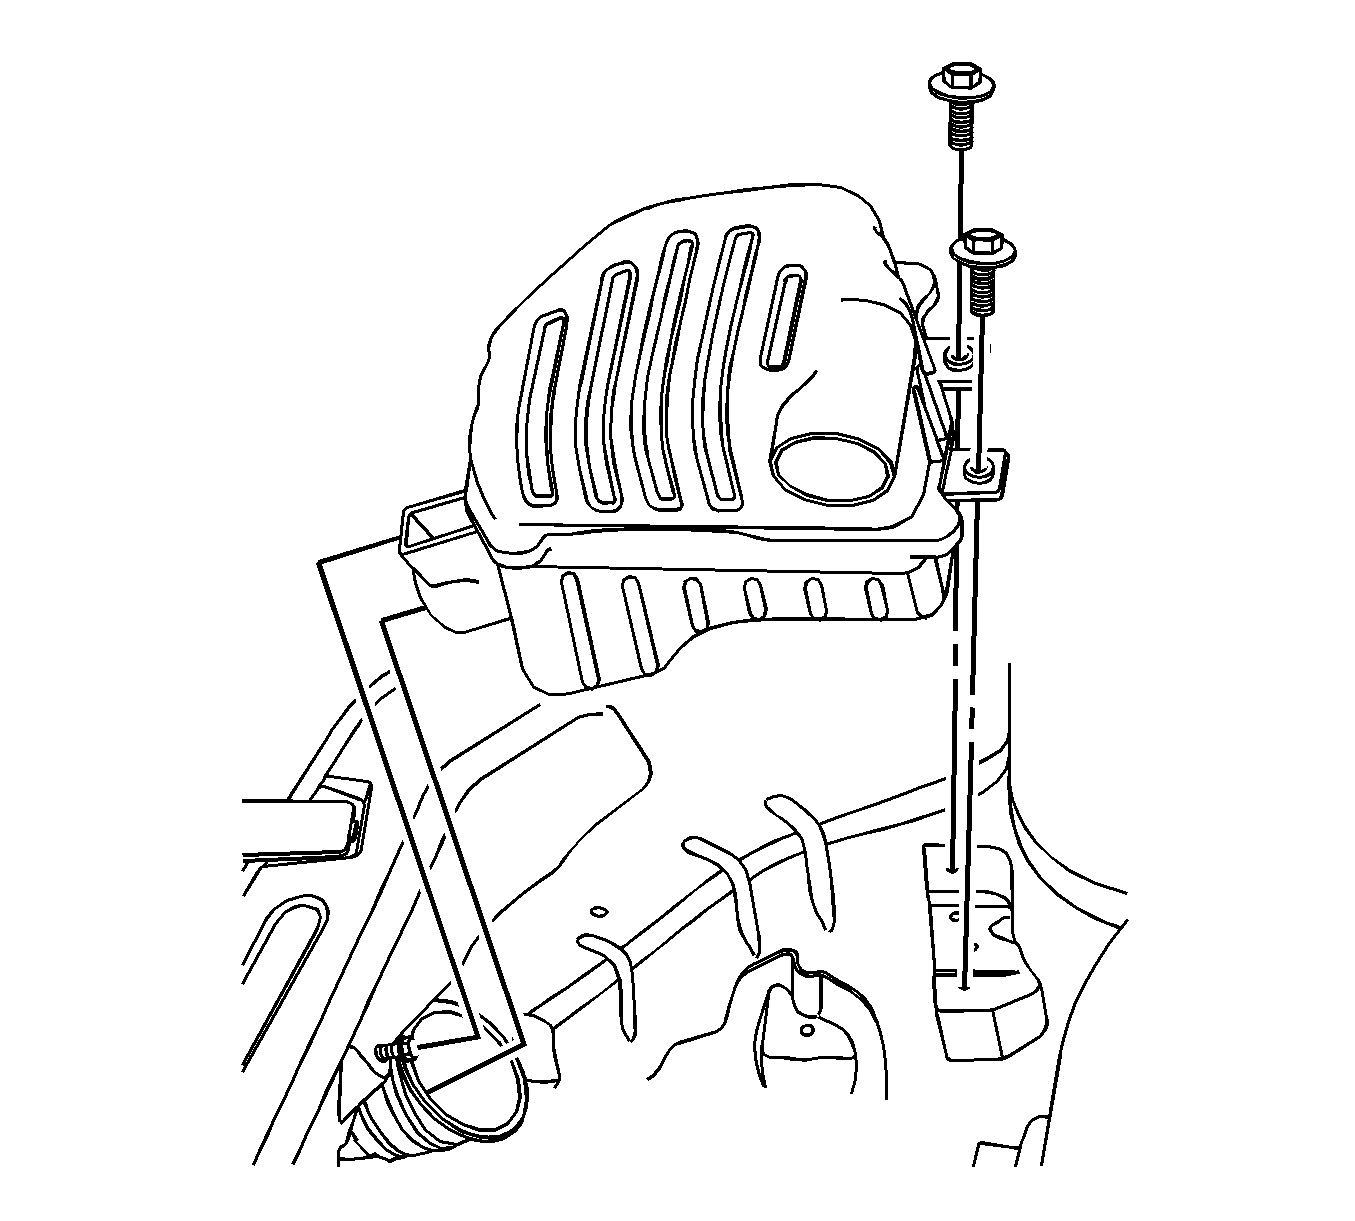
- Remove the air cleaner assembly. Refer to Air Cleaner Assembly Replacement
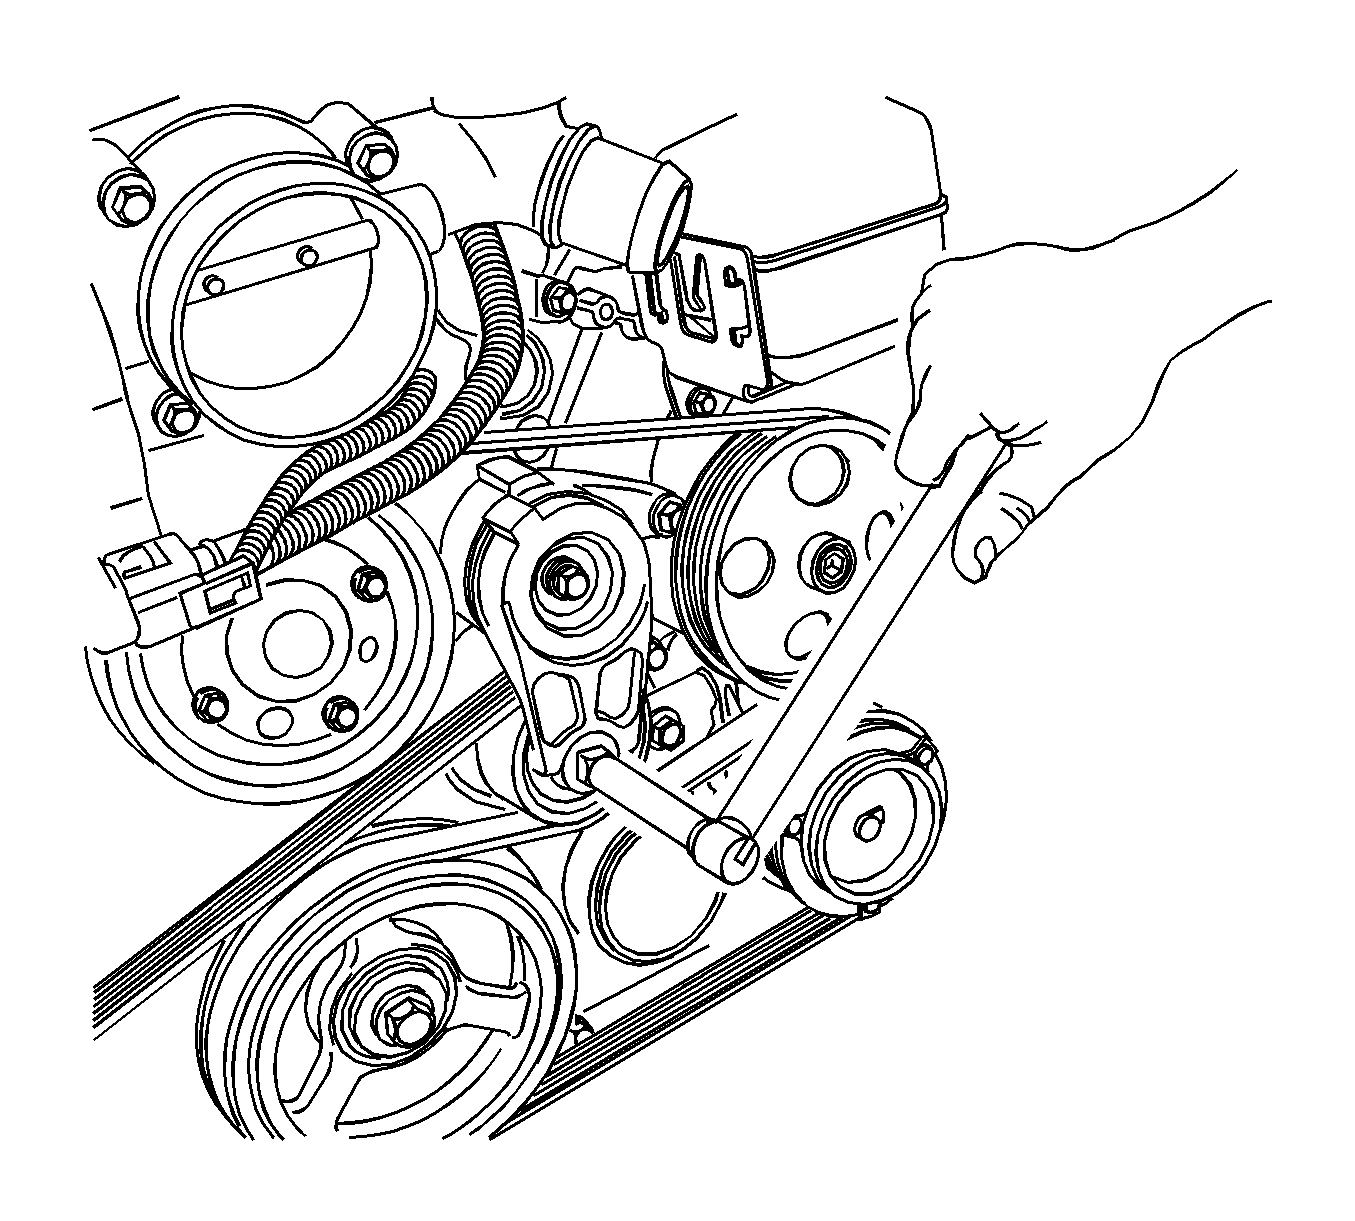
- Rotate the accessory drive belt tensioner clockwise to reduce the belt tension.
- While holding the tensioner in the reduced tension position, disconnect the belt.
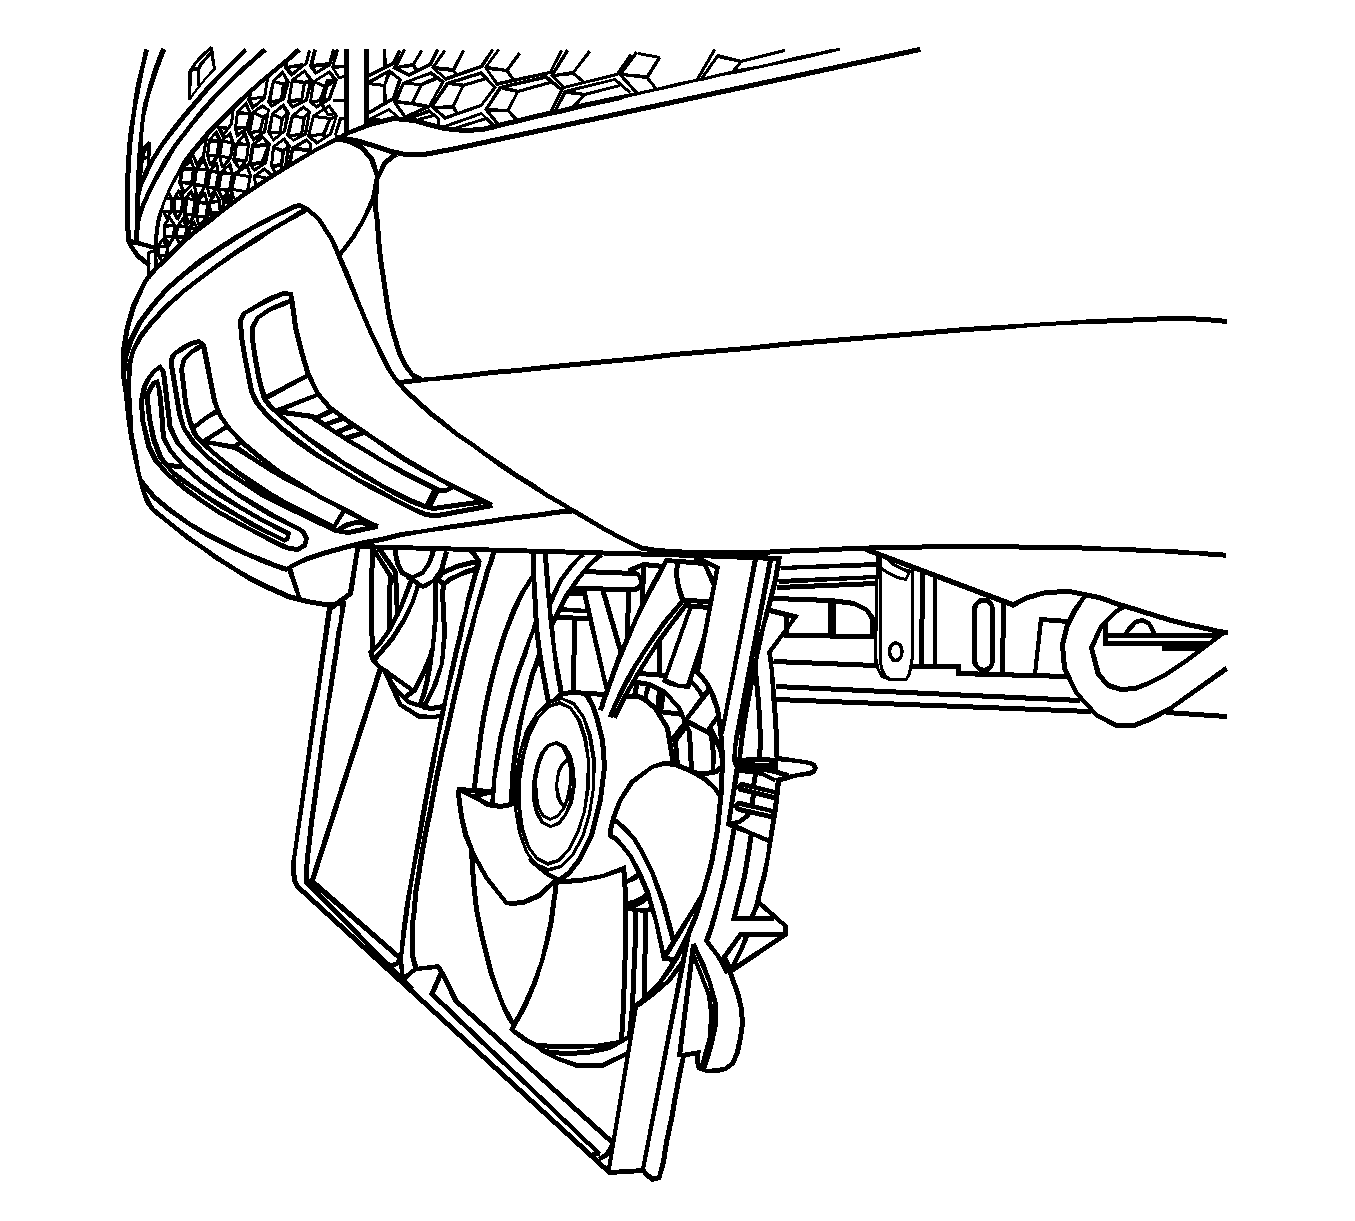
- Remove the cooling fan assembly. Refer to Engine Coolant Fan Replacement
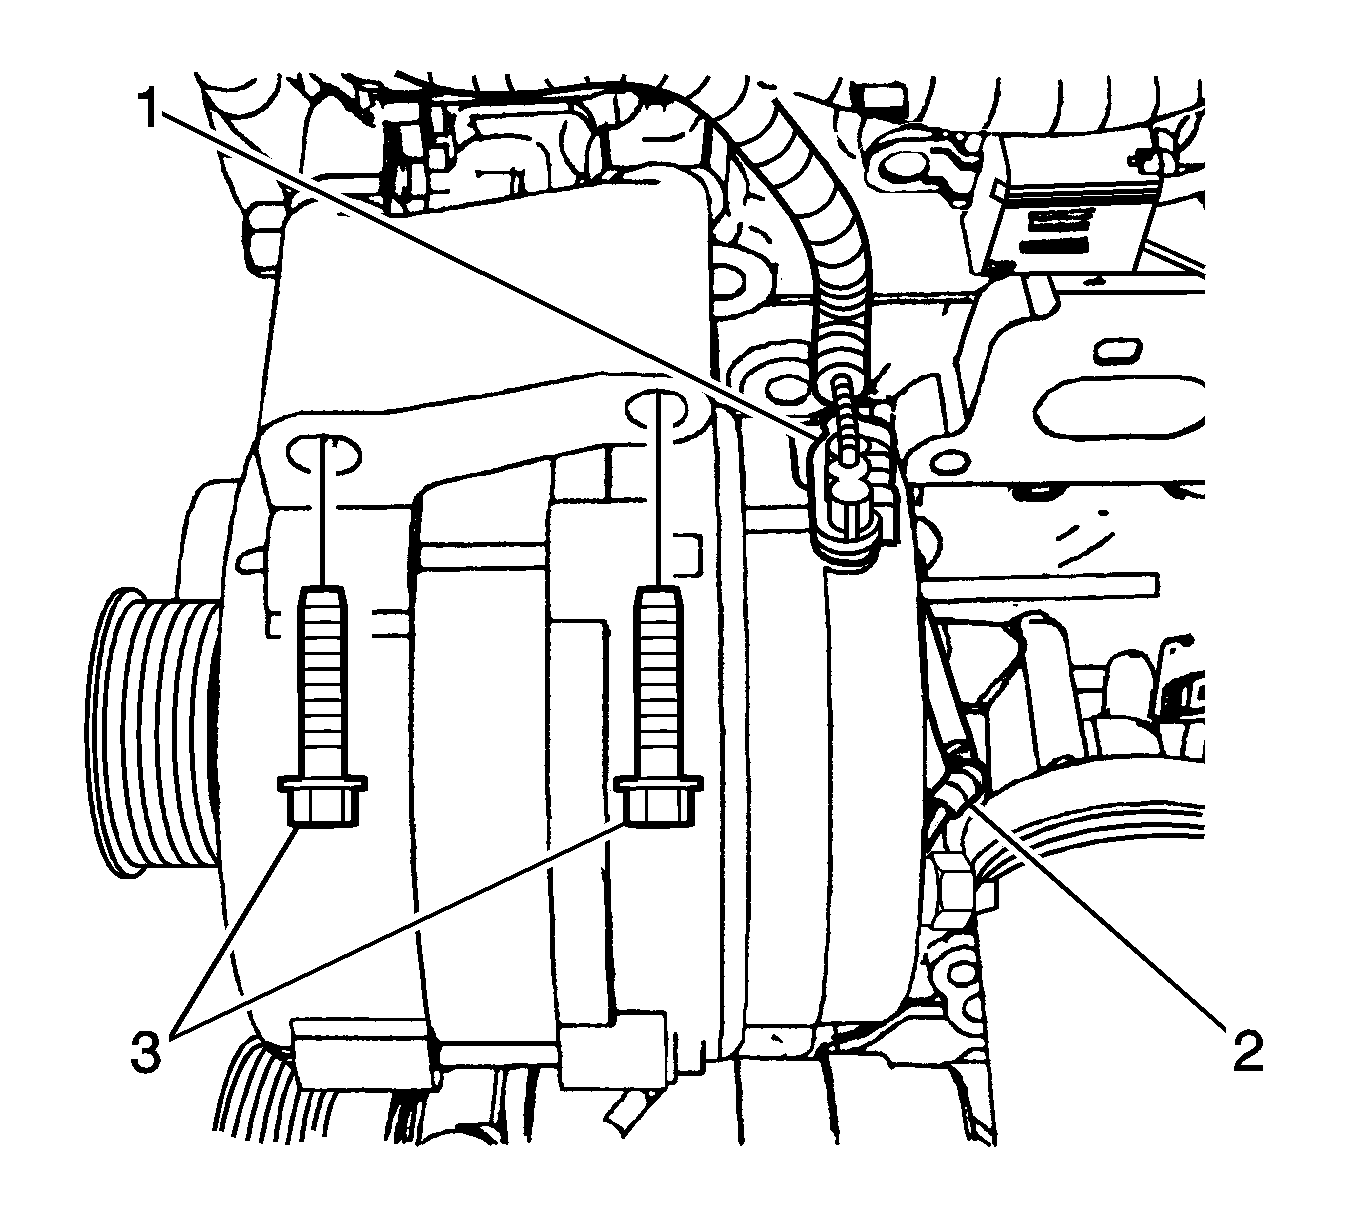
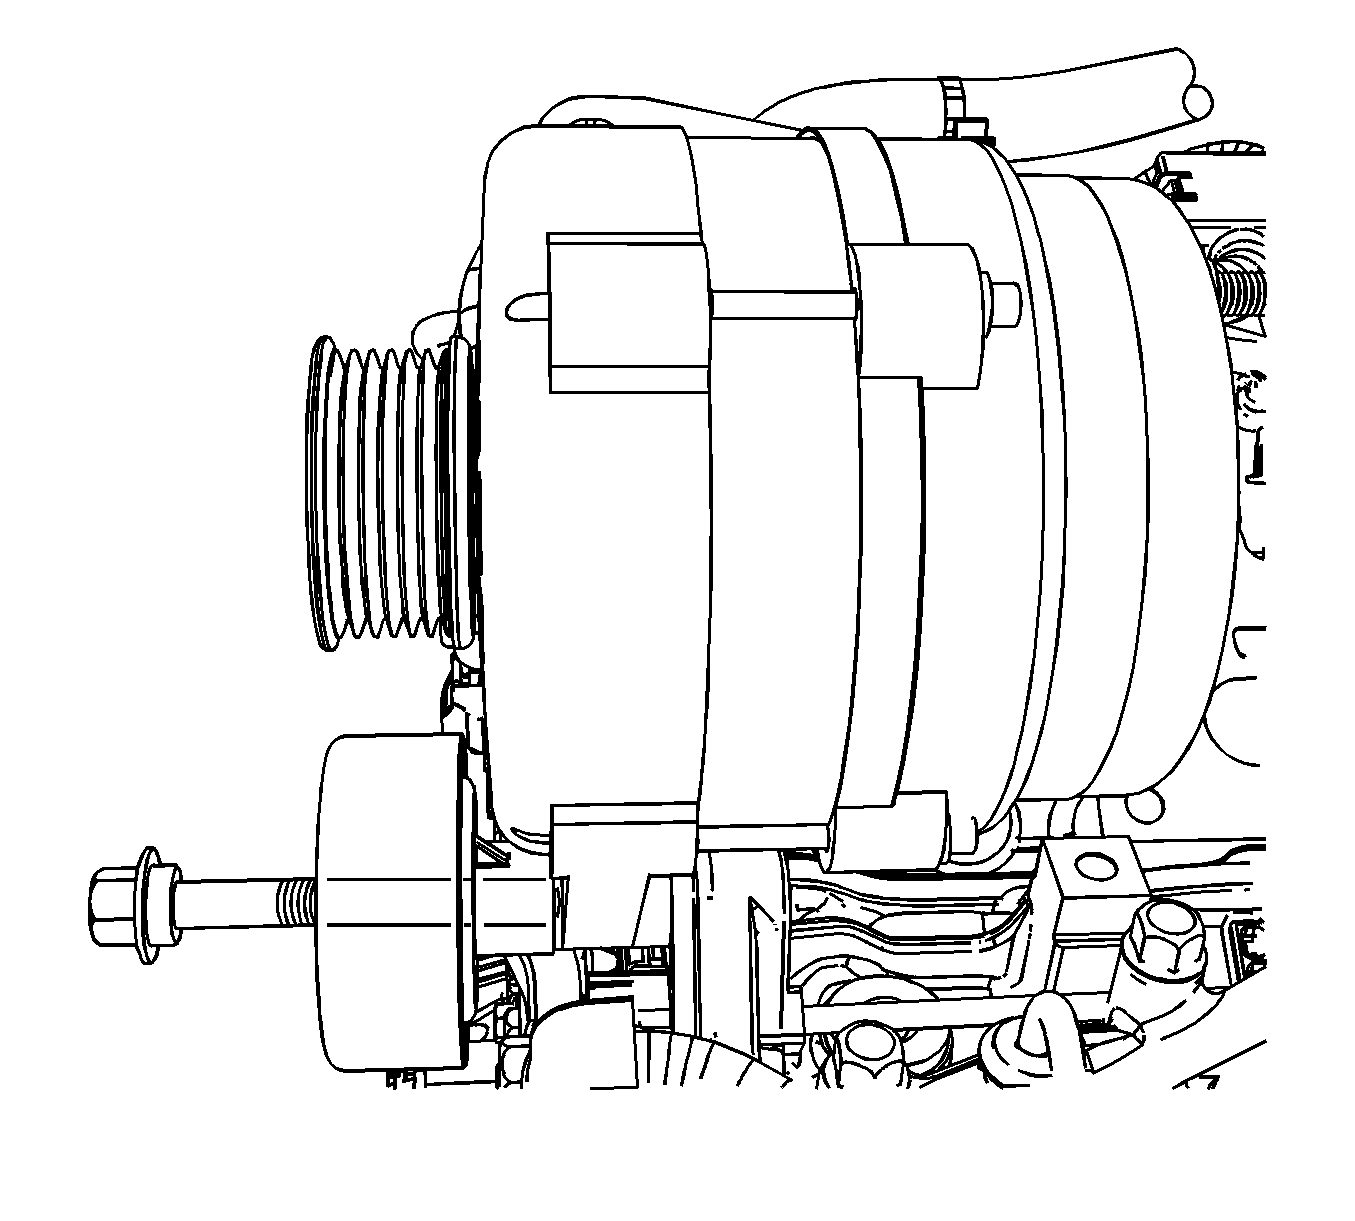
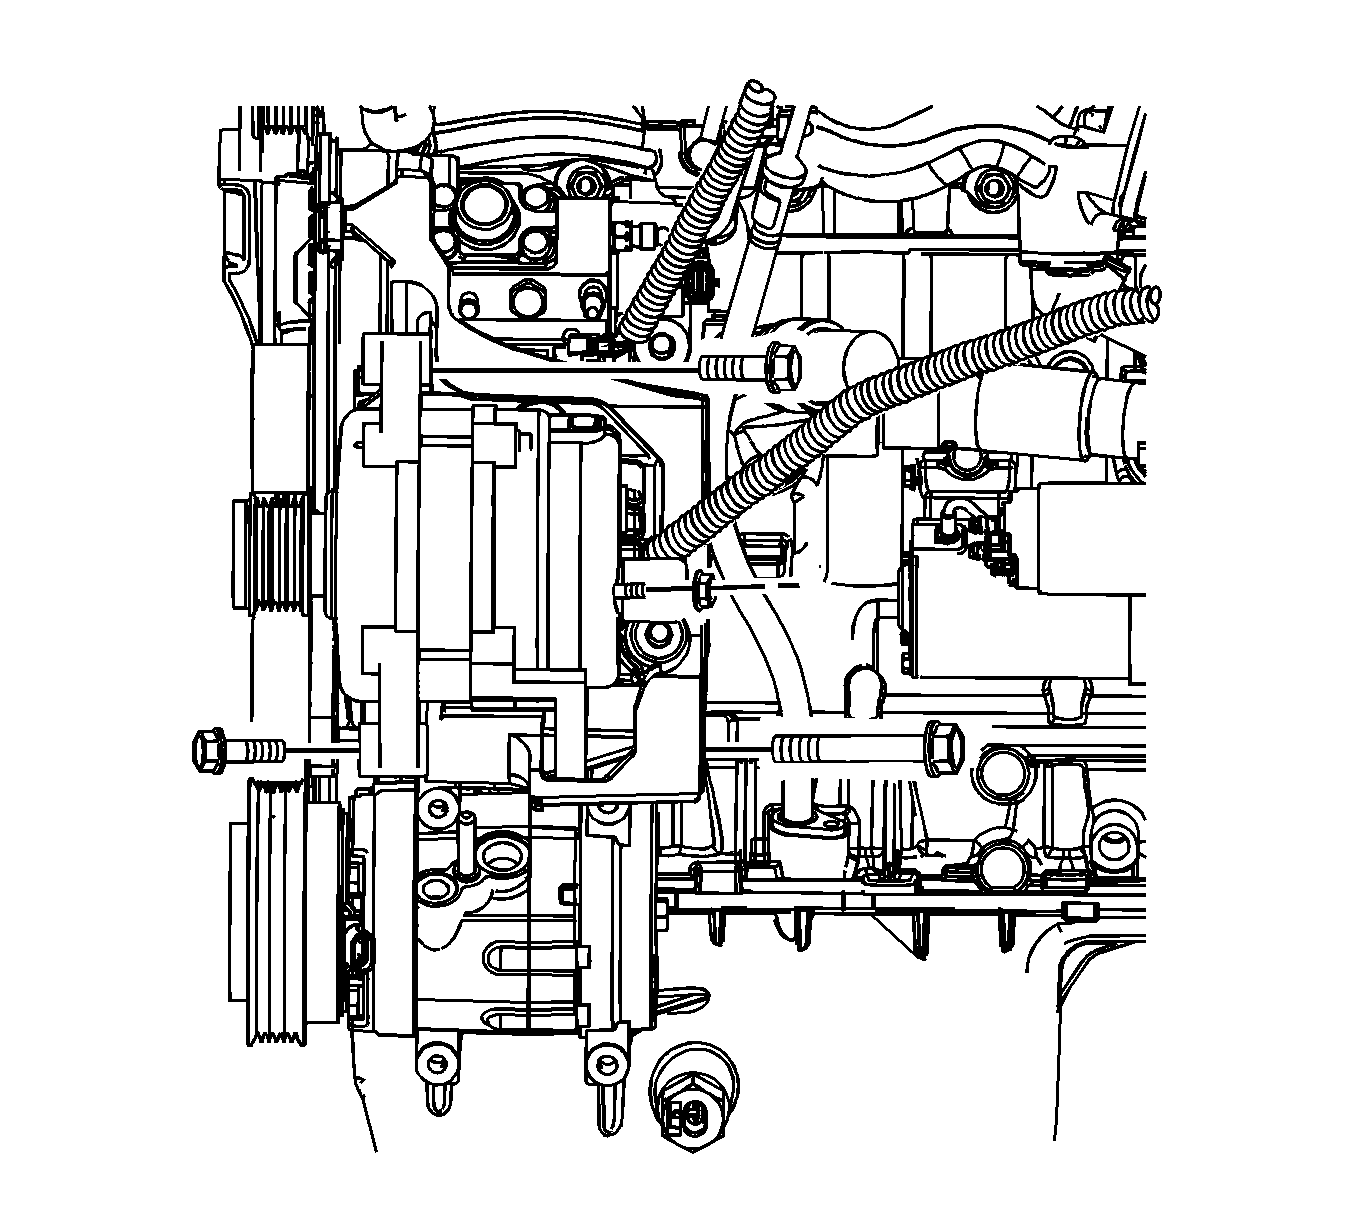
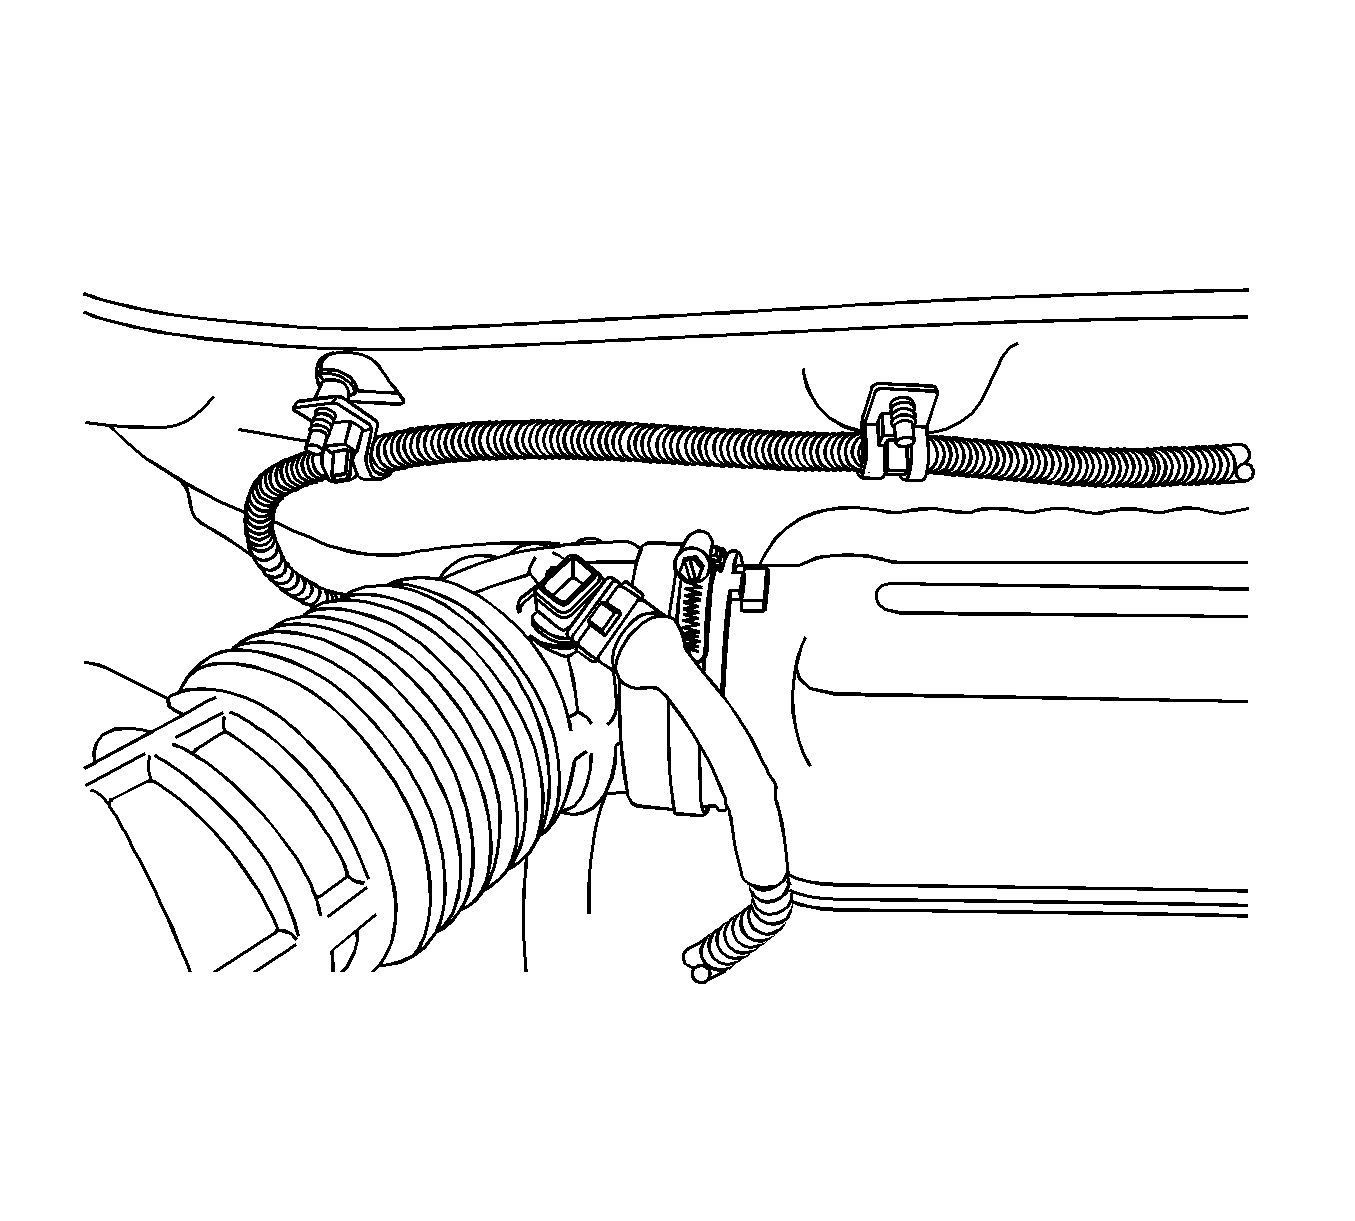
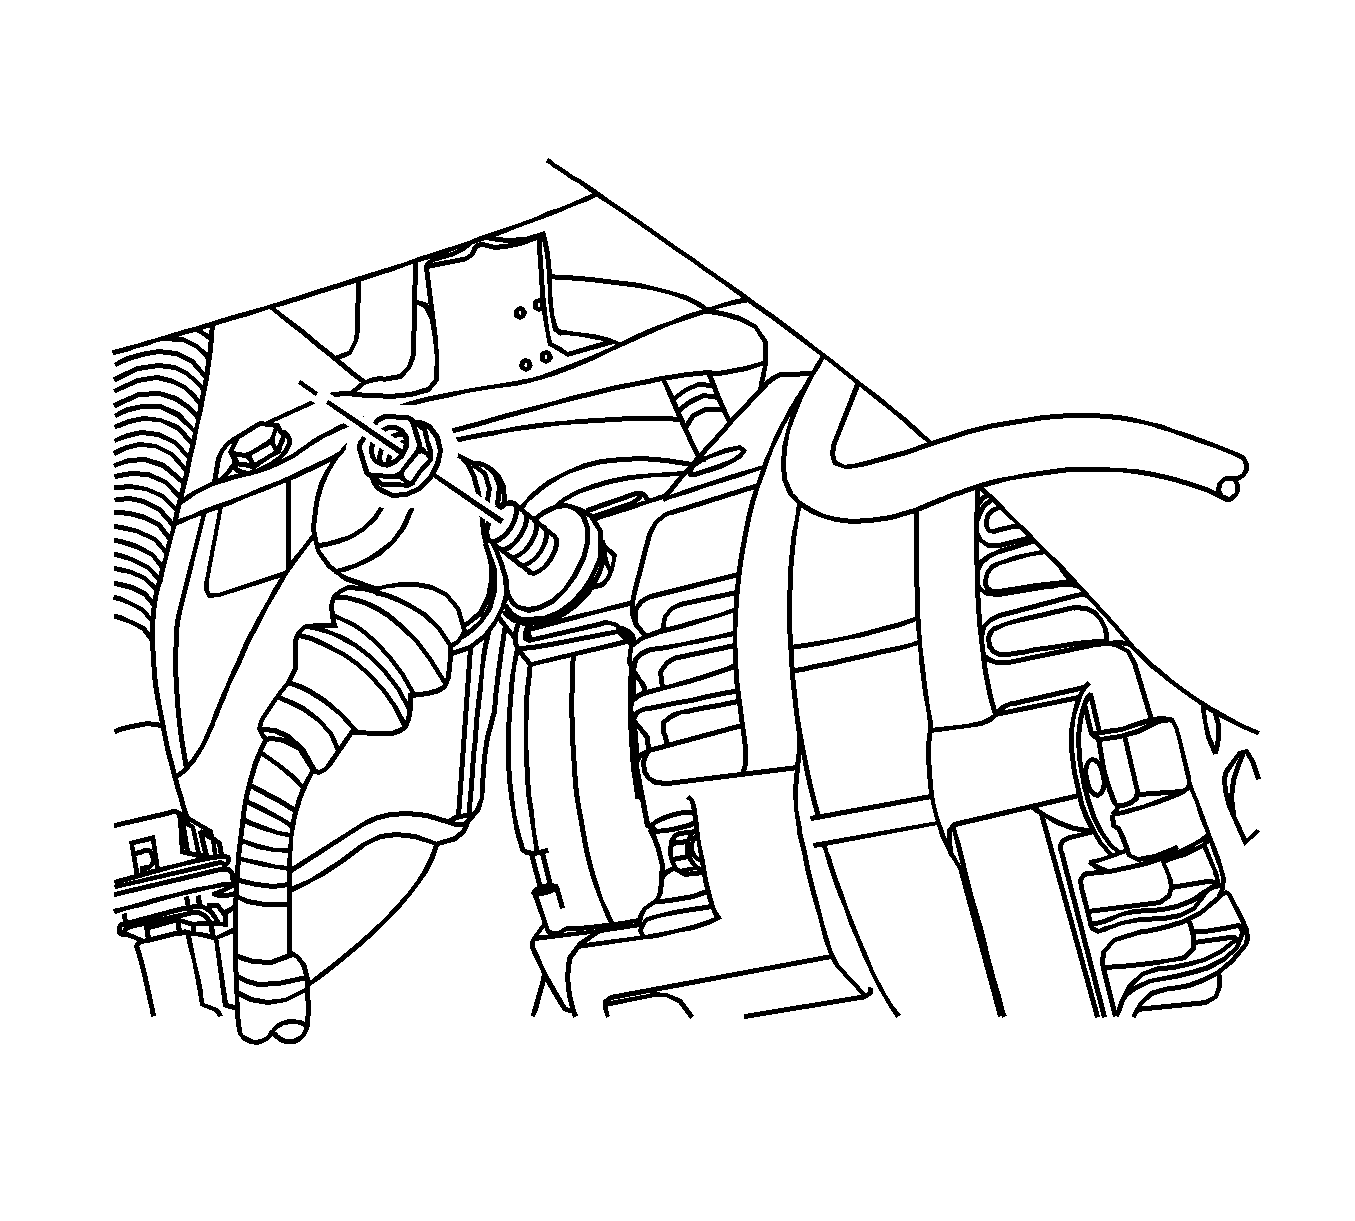
- Remove the nut which secures the generator-to-battery lead wire (1) from the generator.
- Disconnect the wiring harness connector (2) from the generator.
- Remove the generator upper mounting bolts.
- Loosen the accessory drive belt idler.
- Support the generator and remove the through bolt.
- Remove the generator.
Warning: Refer to Battery Disconnect Warning in the Preface section.
Installation Procedure
- Position the generator and hand tighten the accessory drive belt pulley-to-generator through bolt.
- Install the generator upper mounting bolts (3) and tighten.
- Install the generator-to-battery lead wire (1) retaining nut to the generator and tighten the lead wire retaining nut to 15 N·m (11 lb in).
- Connect the wiring harness connector (2) to the generator.
- Rotate the accessory drive belt tensioner clockwise.
- While holding the tensioner in the reduced tension position, install the belt.
- Install the cooling fan assembly. Refer to Engine Coolant Fan Replacement
- Install the air cleaner assembly. Refer to Air Cleaner Assembly Replacement
- Install the fuel injector sight shield. Refer to Fuel Injector Sight Shield Replacement
- Connect the battery negative cable.
Note: Do not tighten the accessory drive belt idler pulley-to-generator through bolt at this stage.
Caution: Refer to Fastener Caution in the Preface section.
| • | The generator-to-battery lead wire retaining nut to 58 N·m (43 lb ft). |
| • | The accessory drive belt idler pulley-to-generator through bolt to 50 N·m (37 lb ft). |
Generator Replacement 2.0L Diesel
Removal Procedure
- Disconnect the battery negative cable.
- Remove the engine cover. Refer to Engine Cover Replacement.
- Remove the charge air cooler inlet hoses. Refer to Charge Air Cooler Inlet Pipe and Outlet Pipe Replacement.
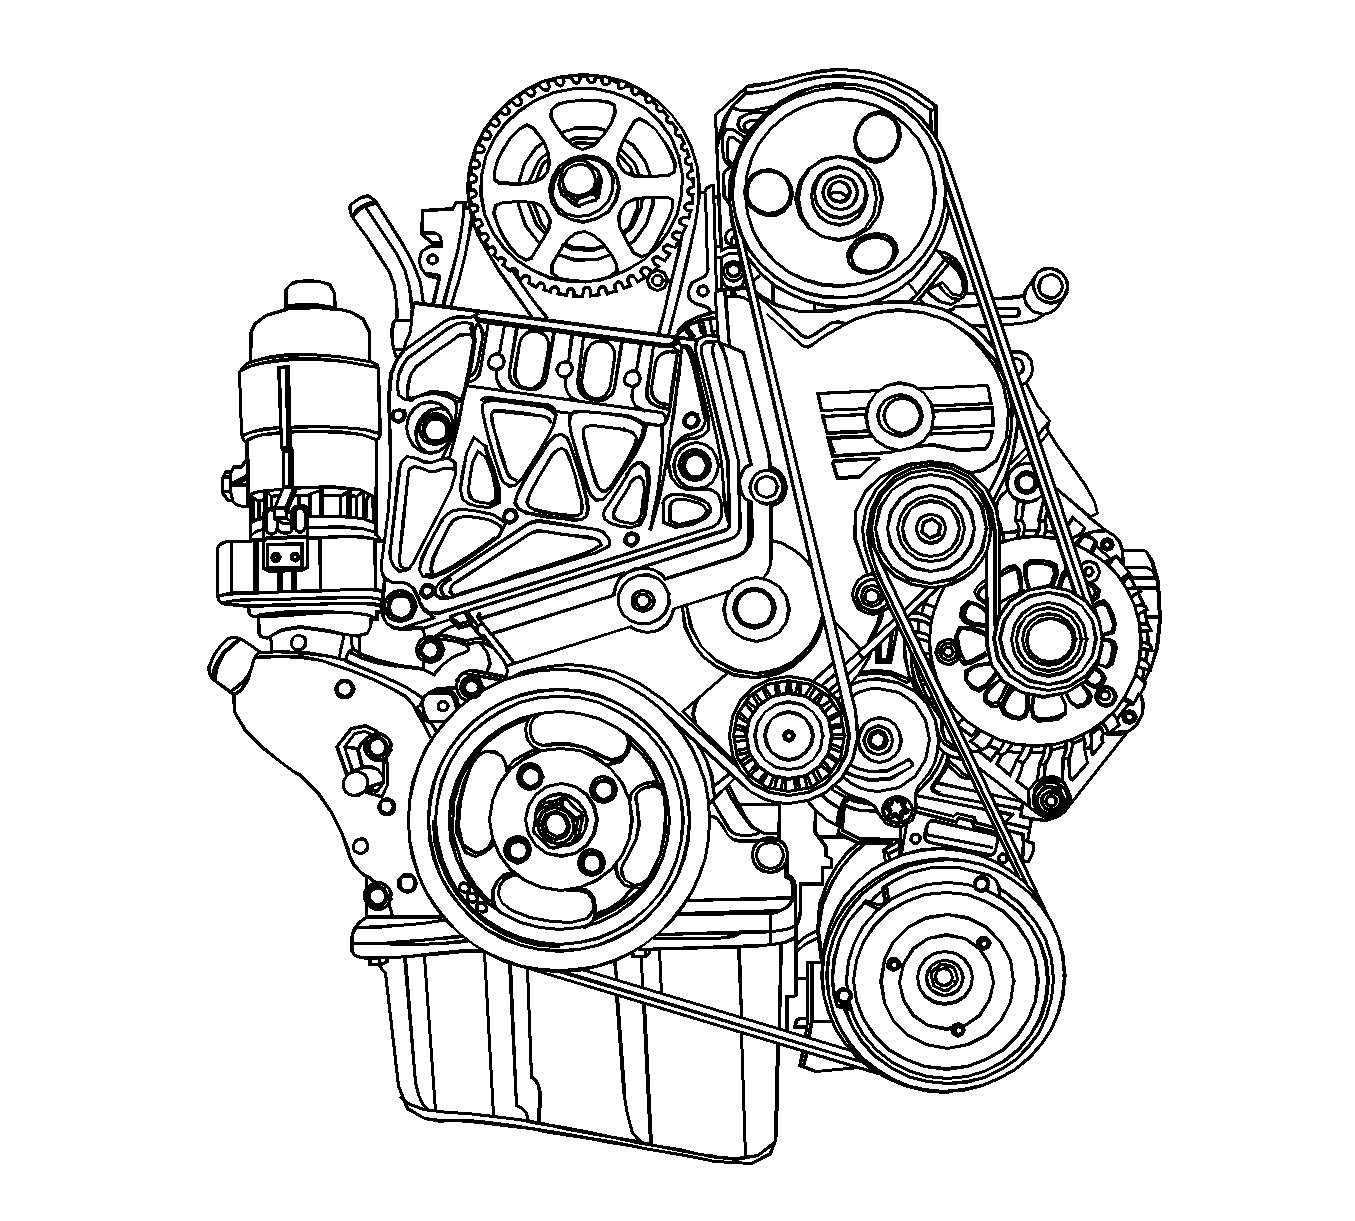
- Remove the accessory belt. Refer to Drive Belt Replacement.
- Disconnect the generator connector.
- Remove the generator B+ wiring harness.
- Remove the generator.
Warning: Refer to Battery Disconnect Warning in the Preface section.
Installation Procedure
- Install the generator.
- Install the generator lead-to-starter motor wire retaining nut and tighten.
Caution: Refer to Fastener Caution in the Preface section.
| • | The generator bolt to 30 N·m (22.1 lb ft). |
| • | The generator B+ wiring harness retaining nut to 25 N·m (18.4 lb ft). |
Generator Replacement 2.4L
Removal Procedure
- Disconnect the negative battery cable.
- Disconnect the intake air temperature (IAT) sensor connector.
- Remove the air cleaner assembly. Refer to Air Cleaner Assembly Replacement.
- Disconnect the harness connector from the generator.
- Remove the generator upper bracket mounting bolts and the generator-to-intake manifold strap bracket bolts.
- Raise and suitably support the vehicle. Refer to Lifting and Jacking the Vehicle.
- Remove the serpentine accessory drive belt. Refer to Drive Belt Replacement.
- Disconnect the generator lead-to-starer motor wire from the generator.
- Loosen the nut and washers which hold the generator lower bracket-to-generator bolt.
- Remove the generator lower support bracket bolts.
- Carefully remove the generator with the lower support bracket.
- Remove the generator-to-lower support bracket through bolt, nut and washer.
Warning: Refer to Battery Disconnect Warning in the Preface section.

Note: Do not remove the generator through bolt, nut and washers at this stage.
Installation Procedure
- Install the generator lower support bracket to the generator and insert the through bolt.
- Install the generator and the lower support bracket assembly to the engine block and tighten bolts to 25 N·m (18 lb ft).
- Tighten the generator-to-generator lower support bracket through bolt and tighten to 40 N·m (30 lb ft).
- Connect the generator lead-to-starer motor wire to the generator.
- Install the serpentine accessory drive belt. Refer to Drive Belt Replacement.
- Lower the vehicle.
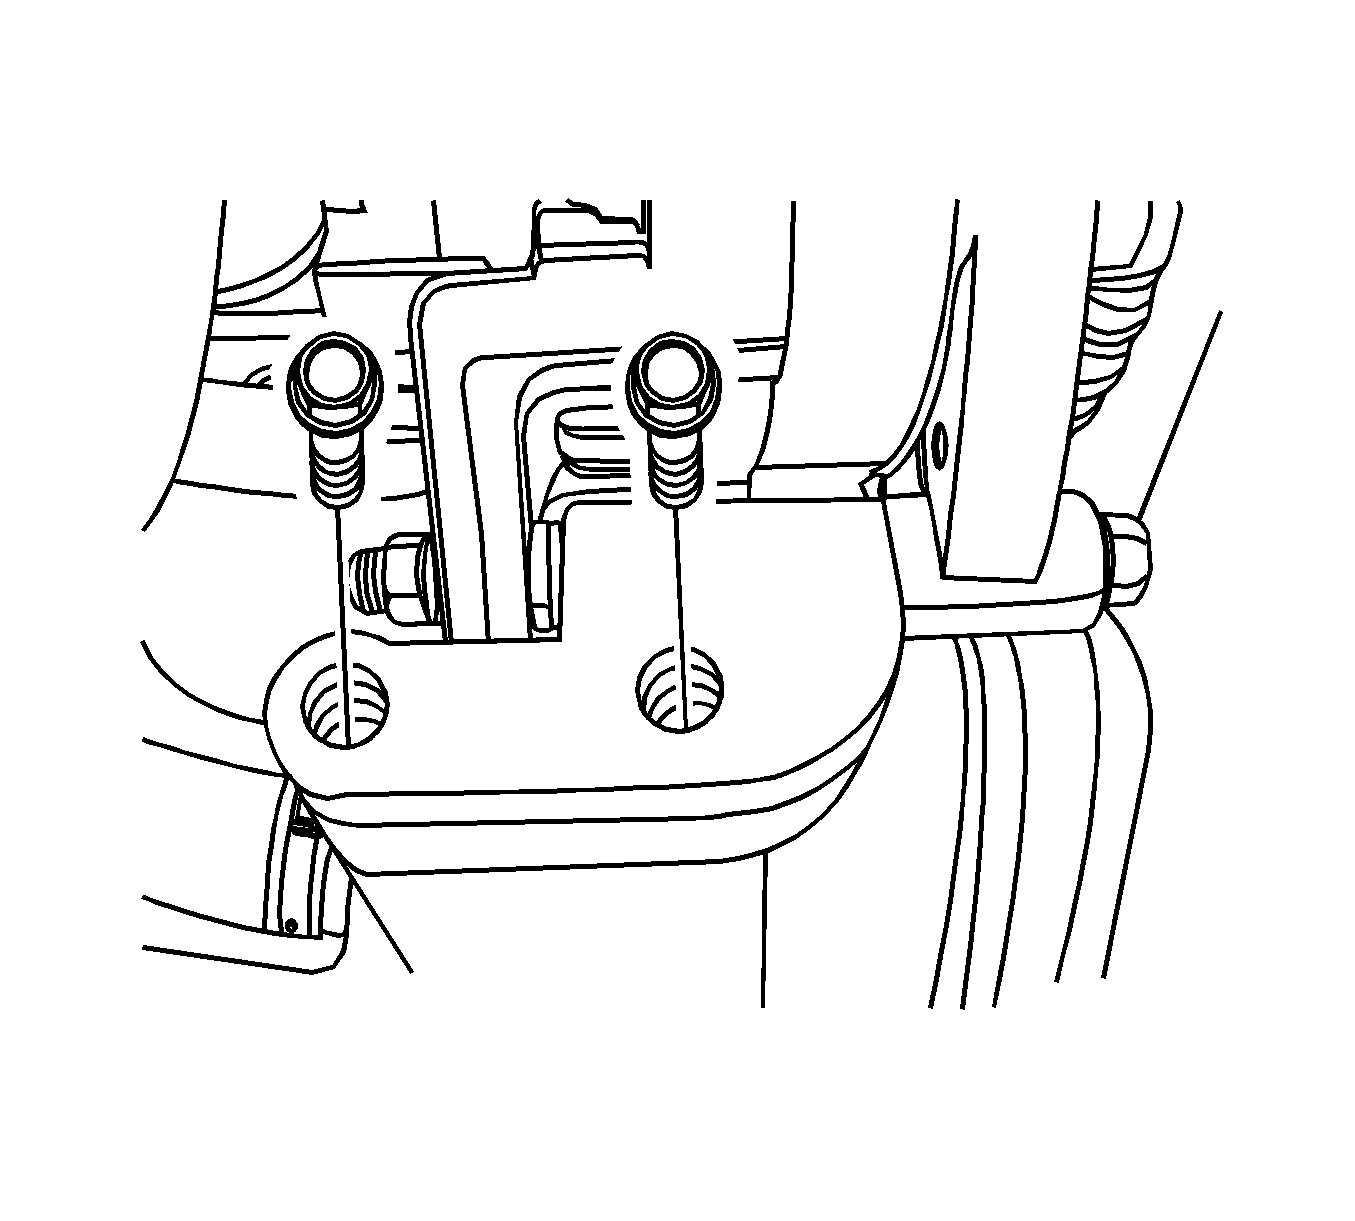
- Install the generator upper bracket and the generator-to-intake manifold strap bracket.
- Install the generator upper bracket mounting bolts and the generator-to-intake manifold strap bracket bolts and tighten.
- Connect the harness connector to the generator.
- Install the air cleaner assembly and connect the IAT sensor connector. Refer to Air Cleaner Assembly Replacement.
- Connect the negative battery cable.
Note: Do not tighten the generator through bolt at this stage.
Caution: Refer to Fastener Caution in the Preface section.
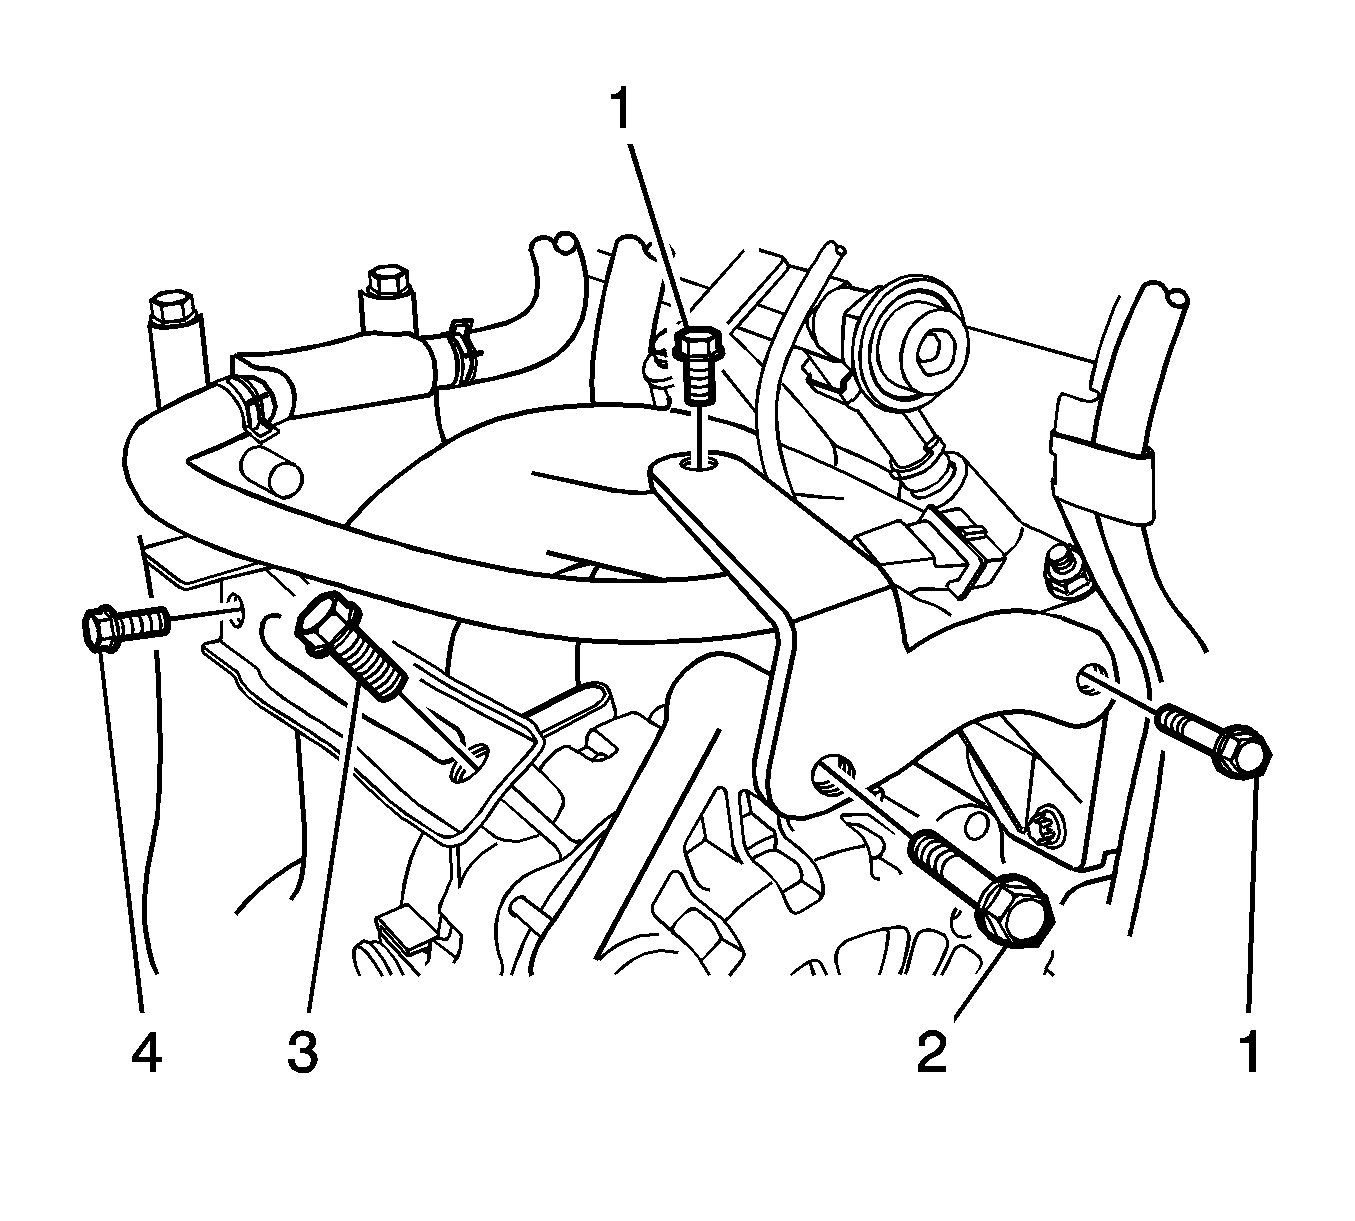
| • | The generator upper bracket retaining bolts (1) to 25 N·m (18 lb ft) and the bolt (2) to 35 N·m (26 lb ft). |
| • | The generator-to-intake manifold strap bracket retaining bolt (3) to 35 N·m (26 lb ft) and the bolt (4) to 25 N·m (18 lb ft). |

