Removal Procedure
- Remove the wheel cover, if equipped.
- Use paint or a felt tipped pen in order to mark the relationship of the wheel to the hub.
- Loosen the wheel nuts.
- Raise and support the vehicle. Refer to
Lifting and Jacking the Vehicle.
- Remove the wheel nuts.
Warning: If penetrating oil gets on the vertical surfaces between the wheel and the rotor or drum it could cause the wheel to work loose as the vehicle is driven, resulting in loss of control and an injury
accident.
Caution: Removing the wheel may be difficult because of foreign materials or a tight fit between the wheel and the hub/rotor. Slightly tap the tire side wall with a rubber mallet in order to remove
the wheel. Failure to follow these instructions may result in damage to the wheel.
- If the tire and wheel assembly is difficult to remove, perform the following steps:
| 6.1. | Install the wheel nuts. |
| 6.2. | Loosen each wheel nut 2 revolutions. |
| 6.4. | Rock the vehicle from side to side. |
| 6.6. | Drive the vehicle forward slightly. |
| 6.7. | Apply the brakes quickly and firmly. |
| 6.8. | Drive the vehicle backward slightly. |
| 6.9. | Apply the brakes quickly and firmly. |
| 6.10. | Remove the wheel nuts. |
| 6.11. | Repeat this procedure if necessary. |
- Remove the tire and wheel assembly from the vehicle.
Installation Procedure
Warning: Before installing the wheels, remove any buildup of corrosion on the wheel mounting surface and brake drum or disc mounting surface by scraping and wire brushing. Installing wheels with poor metal-to-metal
contact at the mounting surfaces can cause wheel nuts to loosen. This can cause a wheel to come off when the vehicle is moving, causing loss of control and possibly personal injury.
- Remove any corrosion or foreign material from the wheel and the hub. Clean the following surfaces:
| • | The hub mounting surface |
| • | The brake rotor mounting surface |
| • | The wheel mounting surface |
| • | The threads on the studs |
| • | The threads on the wheel nuts |
- Verify the nuts turn freely on the stud.
- Replace any nut that does not turn freely on the stud.
- If a NEW nut does not turn freely on the stud, replace the 5 studs on the hub. Refer to
Wheel Stud Replacement in order to replace the front wheel studs. Refer to
Wheel Stud Replacement in order to replace the rear wheel studs.
- Align the match marks and install the tire and wheel assembly to the hub.
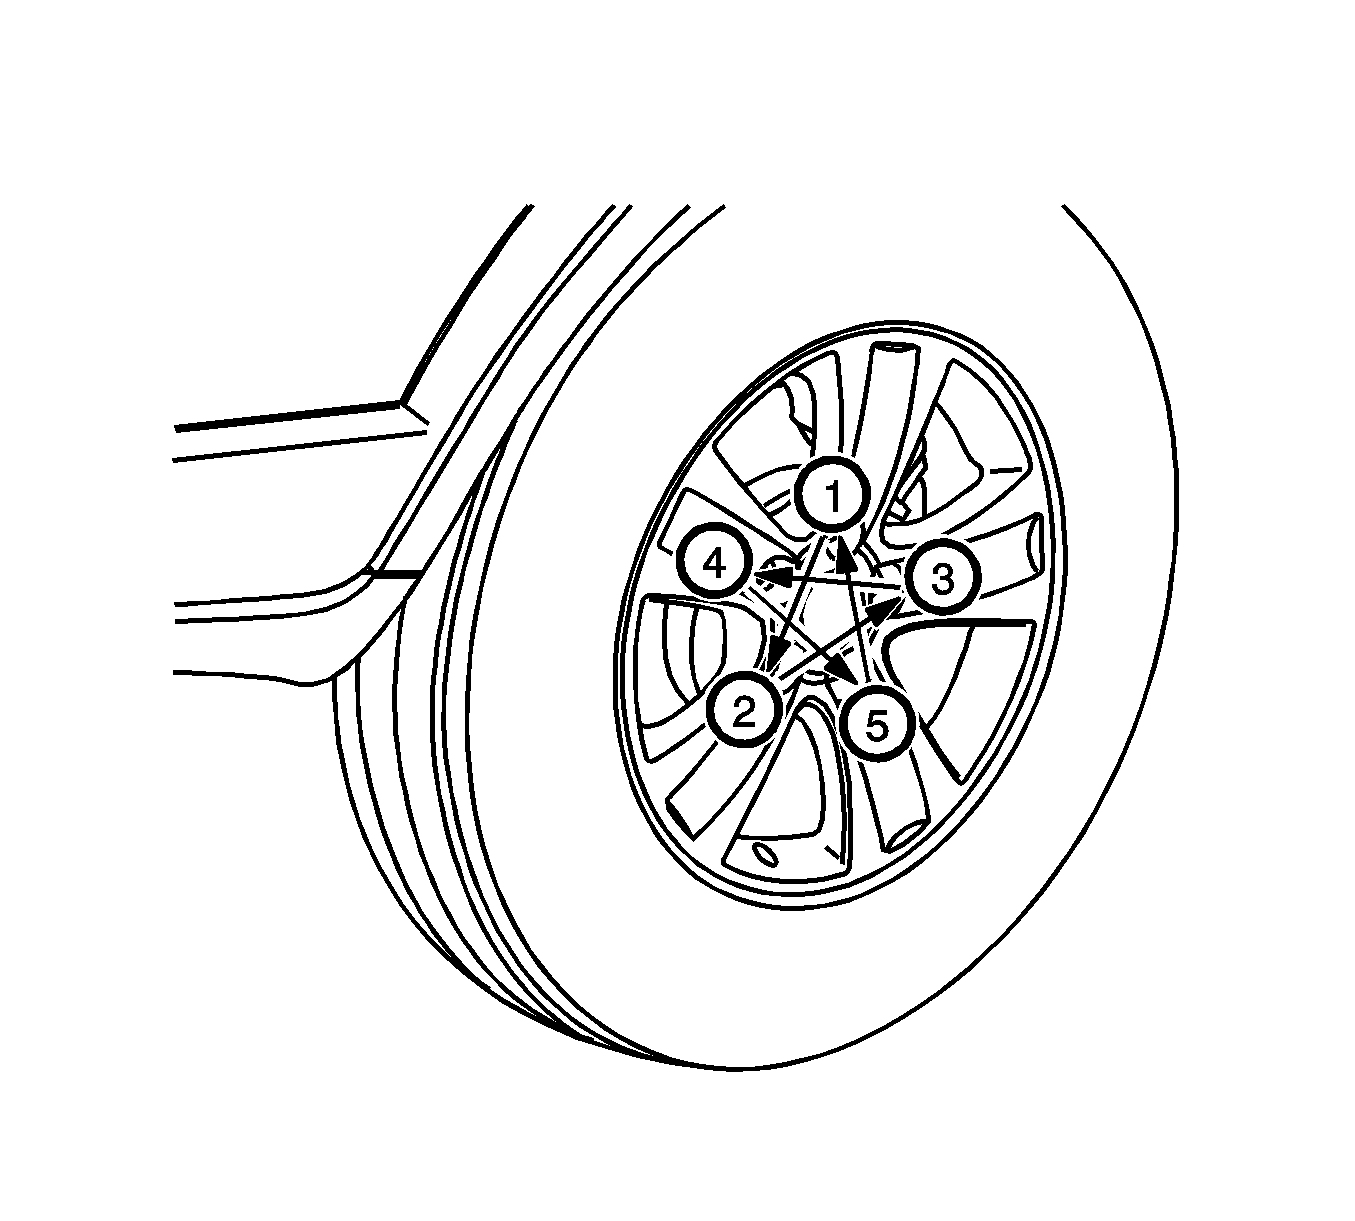
Warning: Never use oil or grease on studs or nuts. Tighten the wheel nuts with your fingers until they are snug. Then, tighten the nuts (in the sequence shown) to the fastener tightening specification
shown in Specifications in this Section. Improperly tightened wheel nuts could eventually allow the wheel to come off while the vehicle is moving, possibly causing loss of control, personal injury, and property damage.
Caution: Improperly tightened wheel bolts or nuts can lead to brake pulsation and rotor damage. In order to avoid expensive brake repairs, evenly tighten the wheel bolts or nuts to the proper torque specification.
- Install the wheel nuts in the sequence shown. Do not tighten the wheel nuts.
- Lower the vehicle.
Caution: Refer to Fastener Caution in the Preface section.
- Tighten the wheel nuts in the sequence shown to
125 N·m (92 lb ft).
- Install the wheel cover, if equipped.
