For 1990-2009 cars only
Removal Procedure
- Drain the differential lubricant. Refer to Lubricant Change in Rear Drive Axle.
- Disconnect the clutch pump check valve electrical connector.
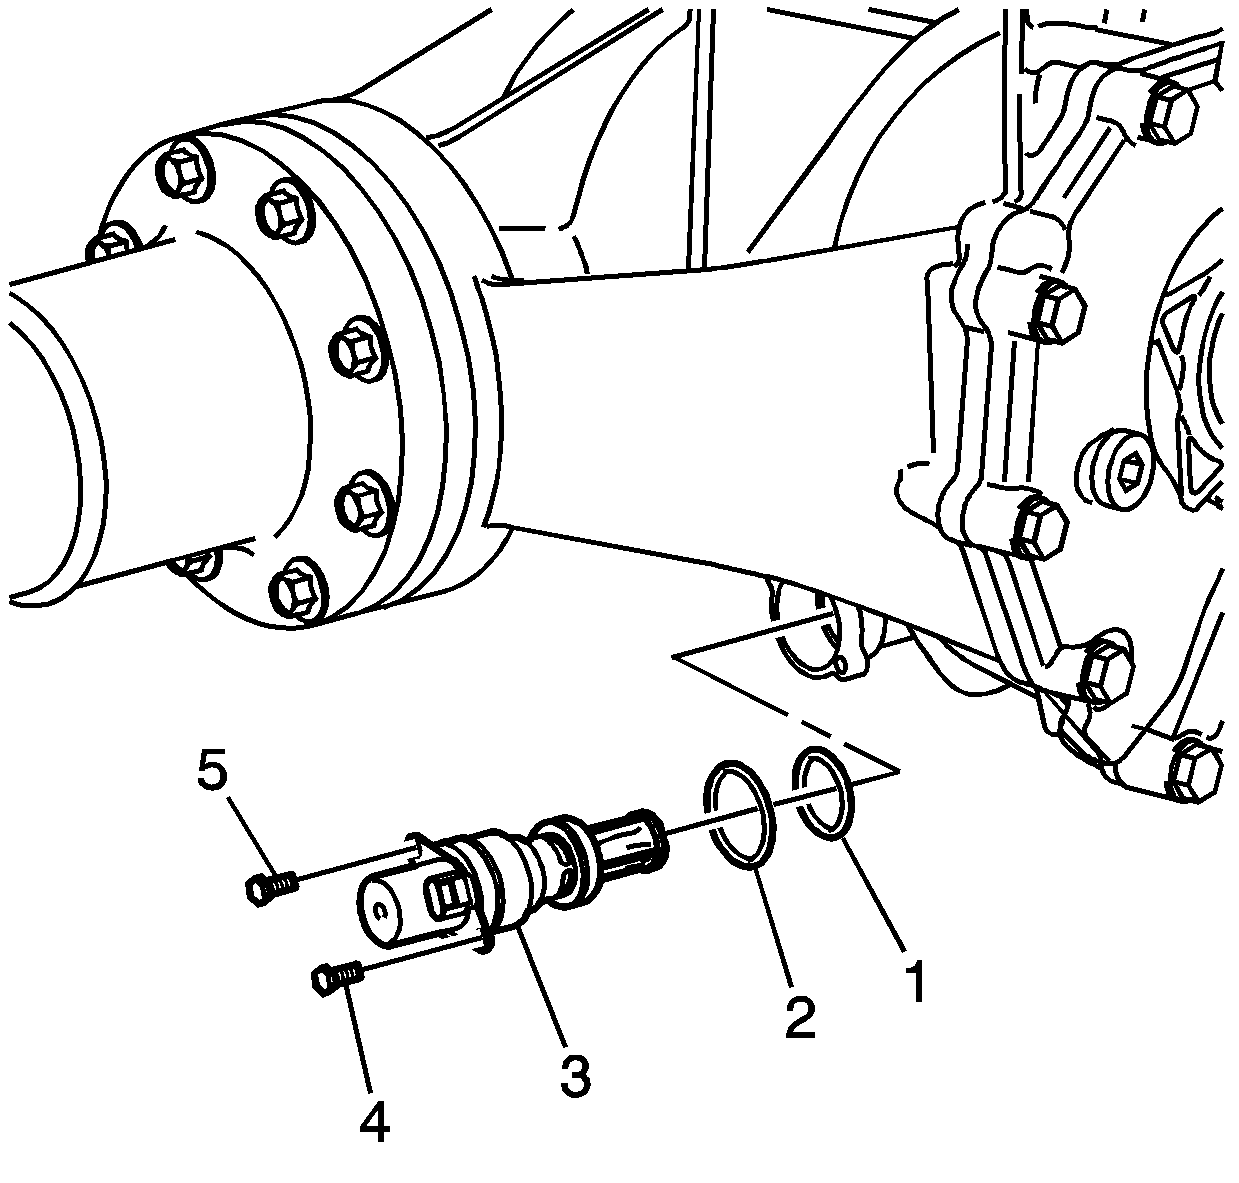
- Remove the clutch pump check valve mounting bolts (4, 5).
- Remove the clutch pump check valve (3) by carefully pulling straight out of the differential carrier.
- Remove the O-ring seals (1, 2) from the valve. The O-ring seals may be reused if not cut or damaged.

Installation Procedure
- Lubricate the O-ring seals (1, 2) with synthetic gear oil GM P/N 12378514 (Canadian P/N 88901045) or equivalent.
- Install the O-ring seals to the valve.
- Install the clutch pump check valve to the differential carrier by carefully pushing the valve straight in until fully seated.
- Install the clutch pump check valve mounting bolts (4, 5).
- Connect the clutch pump check valve electrical connector.
- Fill the rear differential lubricant. Refer to Lubricant Change in Rear Drive Axle.

Important: Inspect the clutch pump check valve O-ring seals in order to ensure they are not cut or damaged. Replace cut or damaged O-ring seals with new seals.
Notice: Refer to Fastener Notice in the Preface section.
Tighten
Tighten the bolts to 10 N·m (89 lb in).
