Removal Procedure
Notice: Care should be taken to avoid chipping or scratching the coating when handling the suspension coil spring. Damage to the coating can cause premature failure.
- Raise and support the vehicle. Refer to Lifting and Jacking the Vehicle in General Information.
- Remove the tire and wheel. Refer to Tire and Wheel Removal and Installation in Tires and Wheels.
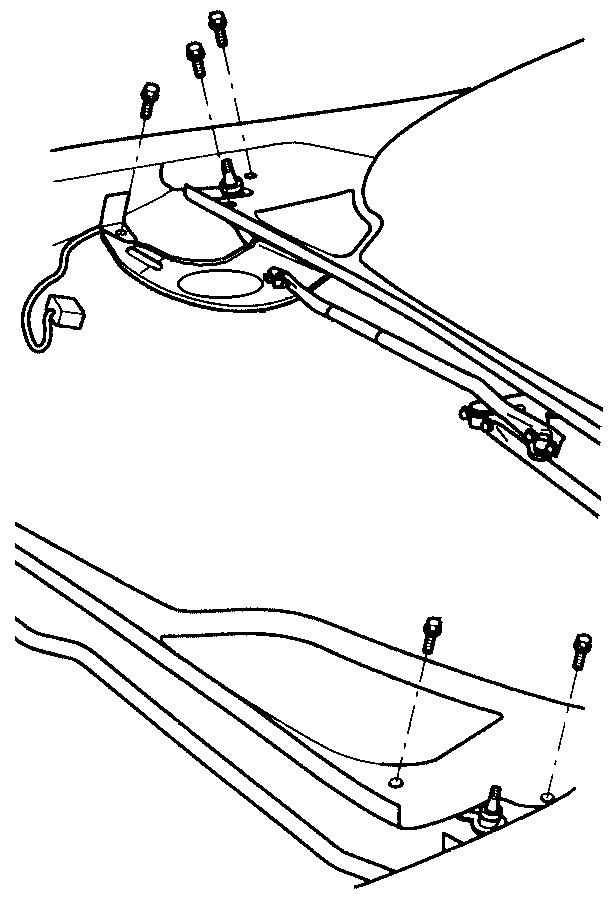
- Remove the wiper module. Refer to Windshield Wiper System Module Replacement .
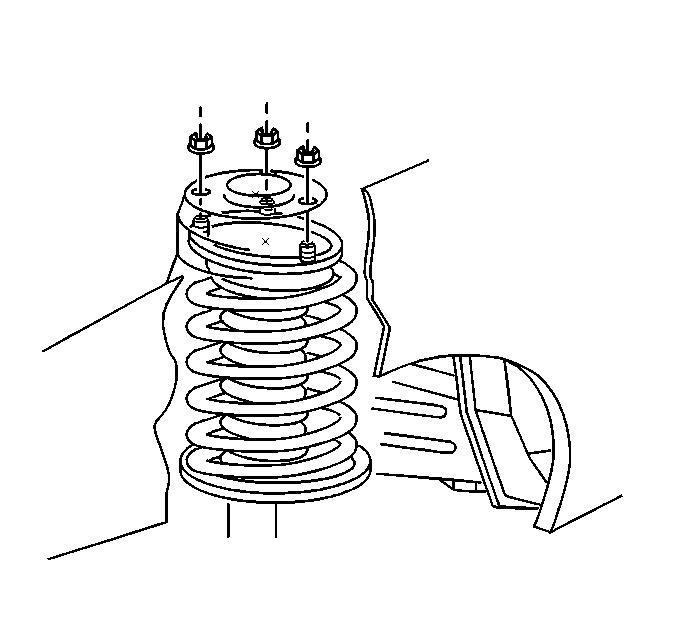
- Remove the strut upper nuts.
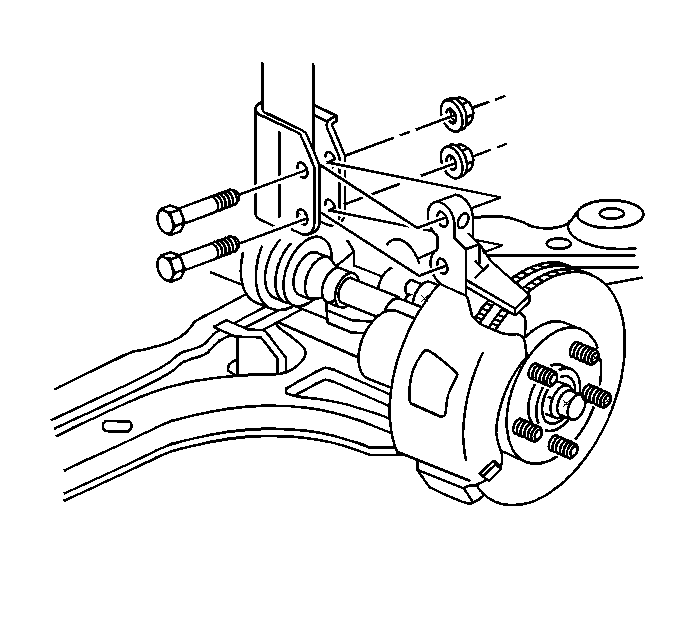
- Scribe the strut to the knuckle.
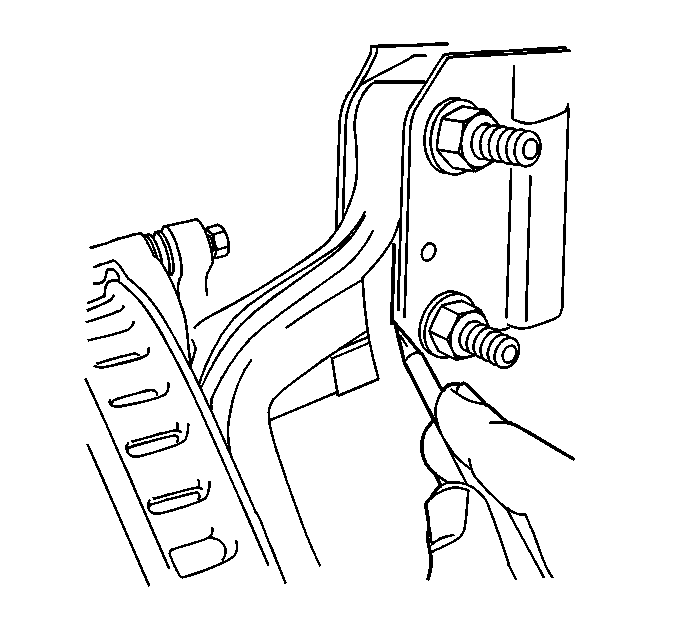
- Remove the strut lower bolts and nuts.
- Remove the strut.
Important: Lift the vehicle using ONLY a frame-contact vehicle lift. Do NOT lift the vehicle using a suspension-contact vehicle lift.
Installation Procedure
- Install the strut.
- Install the strut upper nuts.
- Install the wiper module. Refer to Windshield Wiper System Module Replacement .
- Install the strut lower bolts and nuts.
- Align the strut to the mark on the knuckle.
- Install the tire and wheel. Refer to Tire and Wheel Removal and Installation in Tires and Wheels.
- Lower the vehicle.
Notice: Care should be taken to avoid chipping or scratching the coating when handling the suspension coil spring. Damage to the coating can cause premature failure.
Notice: Use the correct fastener in the correct location. Replacement fasteners must be the correct part number for that application. Fasteners requiring replacement or fasteners requiring the use of thread locking compound or sealant are identified in the service procedure. Do not use paints, lubricants, or corrosion inhibitors on fasteners or fastener joint surfaces unless specified. These coatings affect fastener torque and joint clamping force and may damage the fastener. Use the correct tightening sequence and specifications when installing fasteners in order to avoid damage to parts and systems.
Tighten
Tighten the strut upper nuts to 41 N·m (30 lb ft).
Important: This is a prevailing torque type fastener. This fastener may be reused
ONLY if:
• The fastener and its counterpart are clean and free from rust. • The fastener develops 3 N·m (27 lb in)
of torque/drag against its counterpart prior to the fastener seating.
Tighten
Tighten the strut lower nuts to 123 N·m (90 lb ft).
