Refer to
Cell 20: Park/Neutral Position (PNP) Switch -- Buick/Pontiac
or
Cell 20: Park/Neutral Position (PNP) Switch -- Oldsmobile
.
Circuit Description
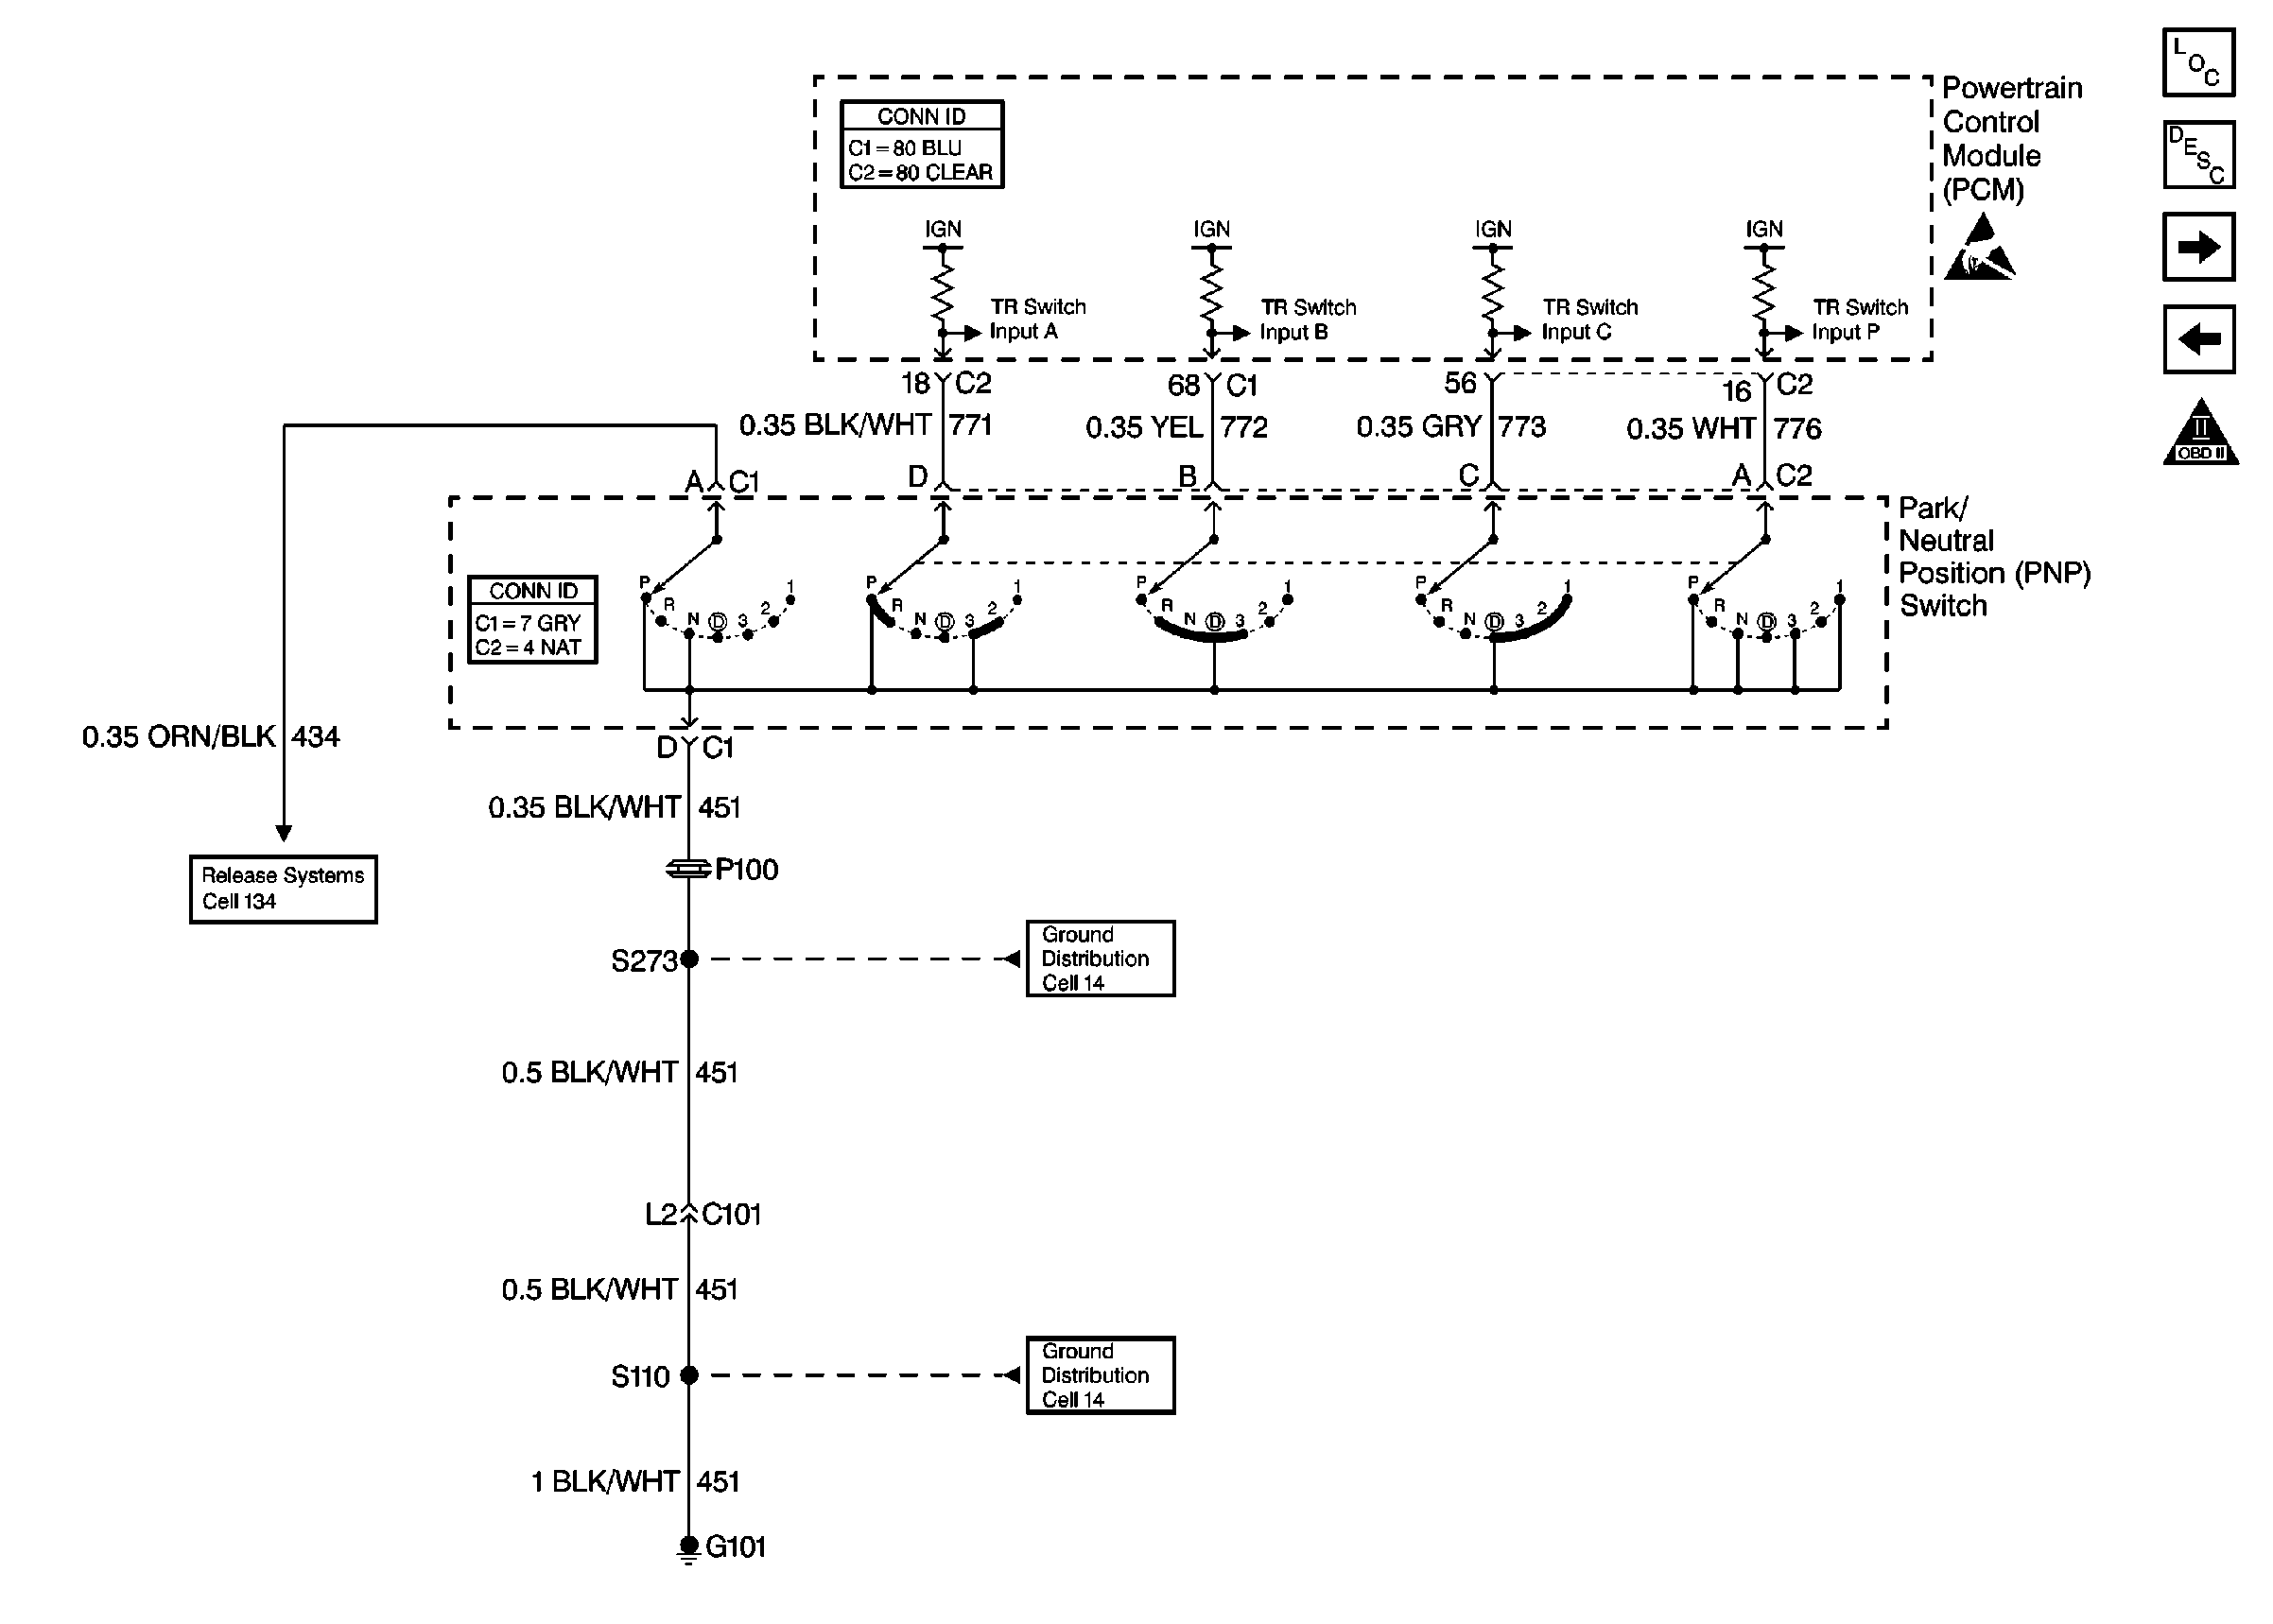
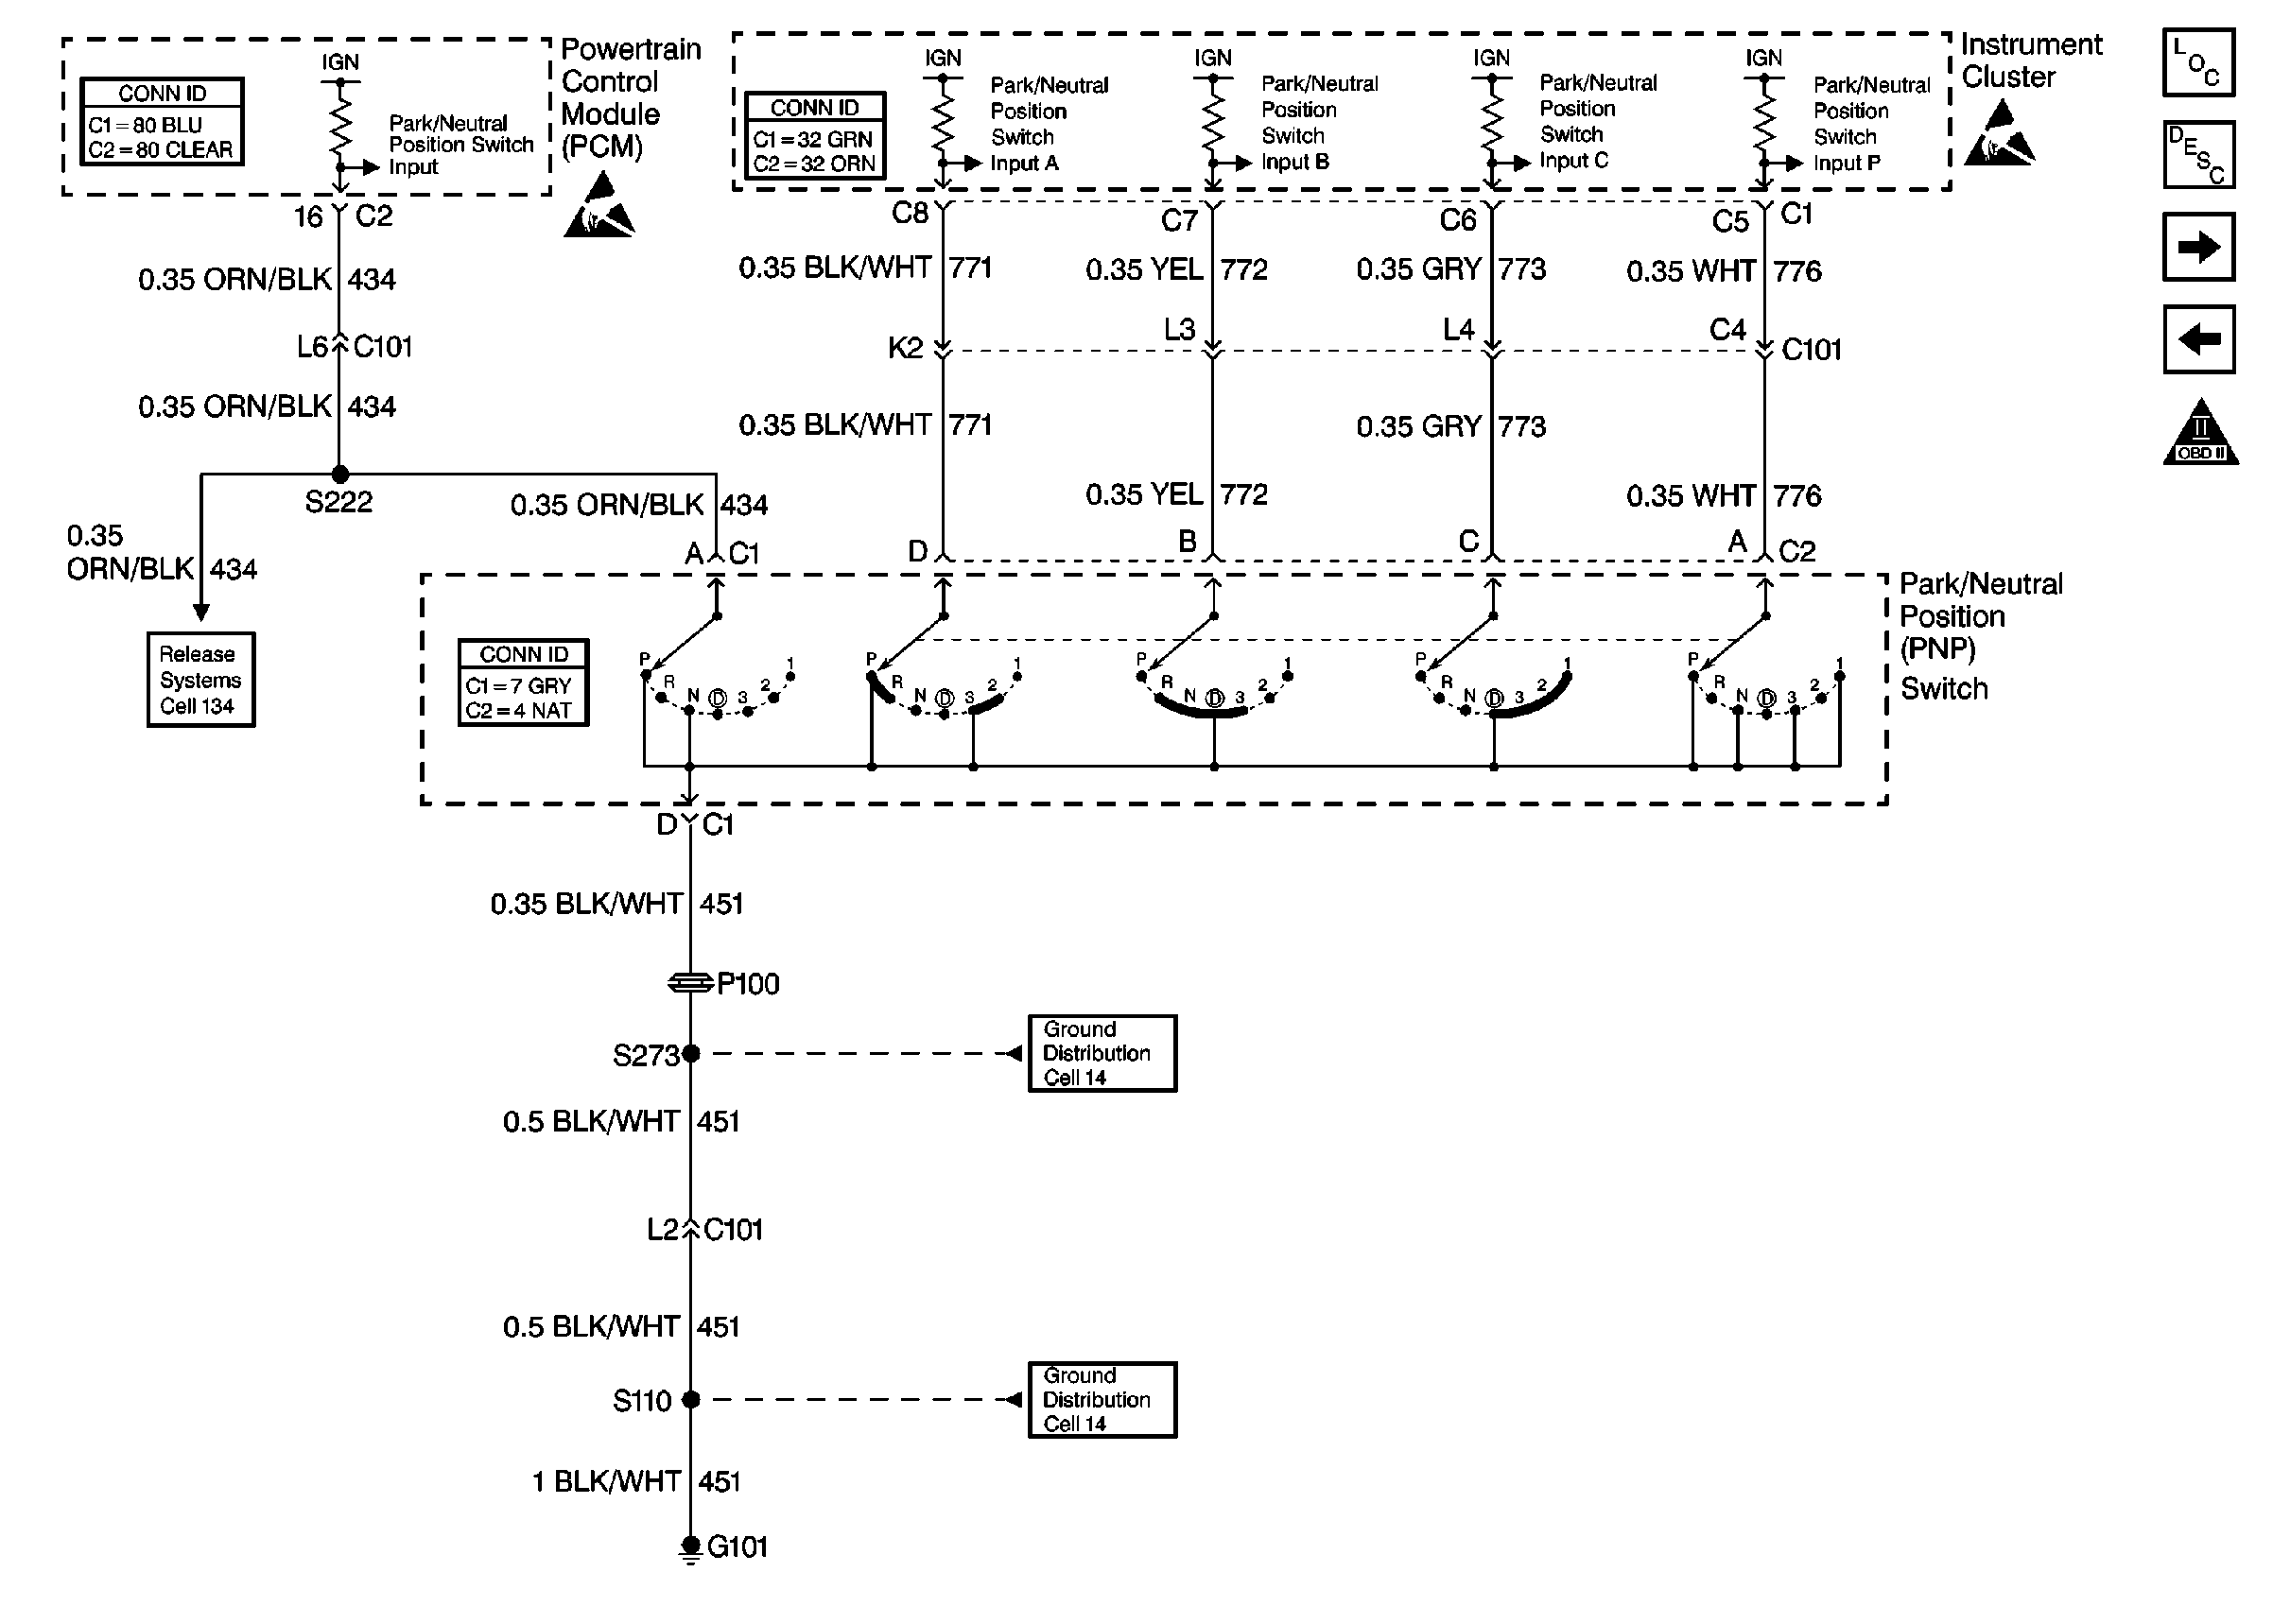
The Park/Neutral Position (PNP) switch is part of the neutral start switch. The PNP switch contacts close the input circuit to the PCM to ground when the transaxle manual shaft is in the park or neutral position. The PNP switch is open when a transaxle drive range is selected. The PCM uses PNP information to perform the following functions:
| • | Control idle speed using the IAC. |
| • | Vehicle Speed Sensor (VSS)/Transaxle Output Speed Sensor (TOSS) diagnostics. |
| • | IC spark advance. |
The PCM supplies 12 volts to the PNP input circuit through a current limiting resistor. The PCM senses a closed switch (Park or Neutral selected) when the voltage on the PNP input circuit drops below 1 volt.
Conditions for Running the DTC
The engine is running.
Conditions for Setting the DTC
The signal on the PNP circuit indicates park or neutral not selected (an open PNP switch) during 3 consecutive startups.
Action Taken When the DTC Sets
The PCM stores conditions which were present when the DTC set as Failure Records only. This information will not be stored as Freeze Frame Records.
Conditions for Clearing the MIL/DTC
| • | The DTC becomes history when the conditions for setting the DTC are no longer present. |
| • | The history DTC clears after 40 malfunction free warm-up cycles. |
| • | The PCM receives a clear code command from the scan tool. |
Diagnostic Aids
An intermittent may be caused by a poor connection, rubbed through wire insulation or a wire broken inside the insulation. Check for the following conditions:
| • | Misadjusted transaxle range switch. |
| Refer to Functional Test . |
| • | Poor connection. |
| Inspect the PCM and PNP switch harness and connectors for improper mating, broken locks, improperly formed or damaged terminals, and poor terminal to wire connection. |
| • | Damaged harness. |
| Inspect the wiring harness for damage. If the harness appears to be OK, disconnect the transaxle range switch 7-way connector, turn ON the ignition switch and observe a voltmeter connected to the PNP circuit at the transaxle range switch 7-way harness connector while moving connectors and wiring harnesses related to the PNP switch. A change in voltage will indicate the location of the malfunction. |
Reviewing the Fail Records vehicle mileage since the diagnostic test last failed may help determine how often the condition that caused the DTC to be set occurs. This may assist in diagnosing the condition.
Step | Action | Value | Yes | No | ||||||
|---|---|---|---|---|---|---|---|---|---|---|
1 | Was the Powertrain On-Board Diagnostic System Check performed? | -- | ||||||||
2 |
Does the scan tool indicate that Park/Neutral is selected? | -- | ||||||||
3 |
Does the scan tool indicate that Park/Neutral is selected? | -- | ||||||||
4 | Observe Park/Neutral Position displayed on the scan tool while selecting D1, D2, D3, D4 and Reverse transaxle positions. Does the scan tool indicate that park or neutral is selected in any of the above positions? | -- | Go to Diagnostic Aids | |||||||
5 |
Is the test lamp ON in Park and Neutral? | -- | ||||||||
6 |
Does the scan tool indicate Park/Neutral? | -- | ||||||||
7 |
Was a problem found? | -- | ||||||||
8 | Attempt to adjust the transaxle range switch. Can the transaxle range switch be adjusted so that the scan tool displays Park/Neutral Position correctly? | -- | ||||||||
9 |
Was a problem found? | -- | ||||||||
10 |
Was a problem found? | -- | ||||||||
11 | Replace the transaxle range switch. Refer to Park/Neutral Position Switch Replacement in Transaxle On-Vehicle Service. Is the action complete? | -- | -- | |||||||
12 | Replace the PCM. Refer to Powertrain Control Module Replacement/Programming . Is the action complete? | -- | -- | |||||||
13 |
Does the scan tool indicate the correct park/neutral status in each gear position? | -- | System OK |
