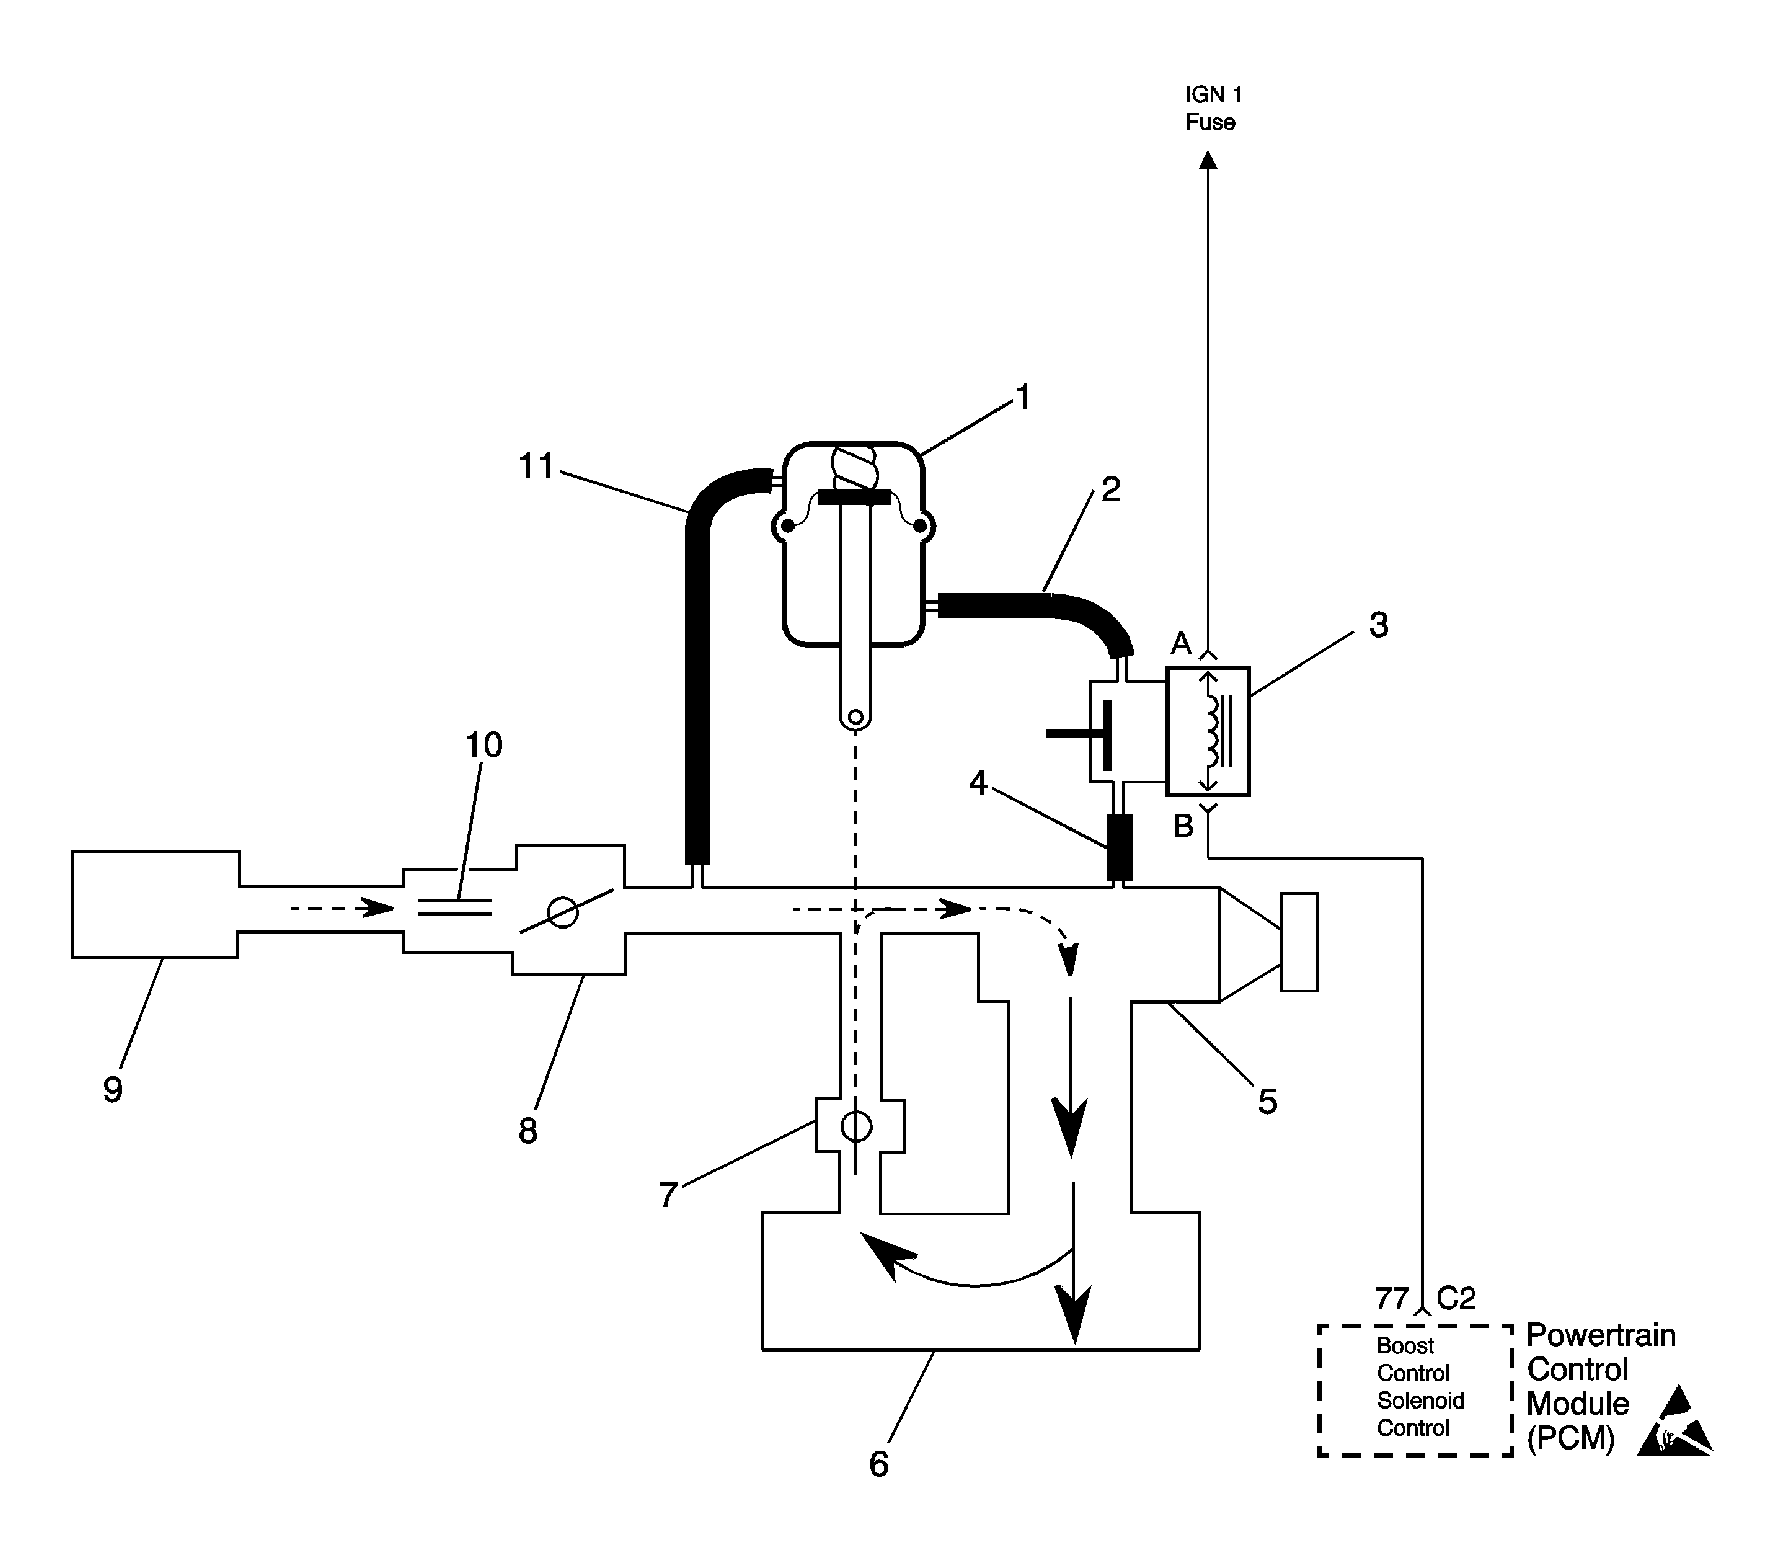
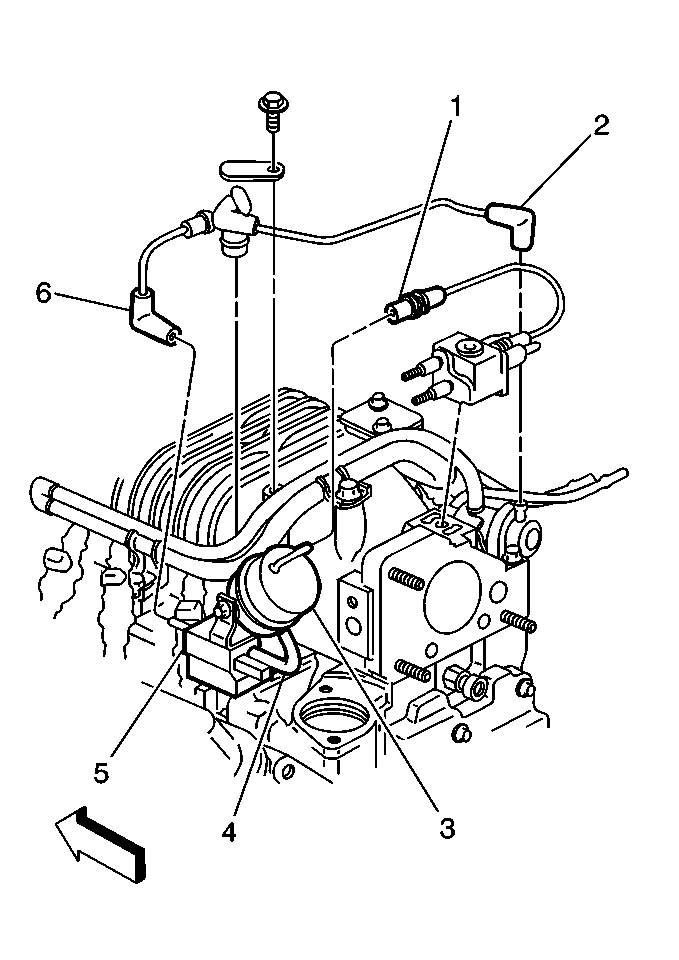
Boost Control System Operation (Bypass Valve Open)

Circuit Description
Under most conditions, the PCM commands the boost control solenoid to operate at a 100 percent PWM to allow full intake boost pressure upon demand. However, if reverse gear is selected, the PCM detects rapid deceleration, or engine load is extremely high, reduced boost pressure is desired. Under these conditions, the PCM commands the boost control solenoid to operate at a 0 percent PWM, which opens the bypass valve to reduce boost pressure by recirculating it back through the supercharger inlet.
Conditions for Running the DTC
Intake air temperature greater than -10°C (14°F).
Conditions for Setting the DTC
| • | Engine torque exceeds a maximum torque threshold value. This value varies depending on commanded gear and engine rpm. |
| • | The above conditions are present for at least 20 seconds. |
Action Taken When the DTC Sets
The PCM stores conditions which were present when the DTC set as Failure Records only. This information will not be stored as Freeze Frame Records.
Conditions for Clearing the MIL/DTC
| • | The DTC becomes history when the conditions for setting the DTC are no longer present. |
| • | The history DTC clears after 40 malfunction free warm-up cycles. |
| • | The PCM receives a clear code command from the scan tool. |
Diagnostic Aids
Check for the following conditions:
| • | Damaged, disconnected, or restricted vacuum lines. |
| Visually and physically inspect for damaged, disconnected, kinked, pinched, or incorrectly routed boost control system hoses. |
| • | Boost Control Solenoid control circuit shorted to ground. Refer to Wiring Repairs . |
| • | Binding Bypass Valve. |
| • | Sticking or misadjusted Bypass Valve Actuator. |
An intermittent may be caused by rubbed through wire insulation.
Intermittent test - Disconnect PCM and install a J 39200 DMM to monitor voltage between the boost control solenoid control circuit at the PCM harness connector and ground. With the key ON, observe voltage while manipulating related connectors and wiring harness. If the failure is induced, the voltage display will change.
Test Description
The numbers below refer to the step numbers on the diagnostic table.
-
Checks the Boost Control Solenoid control circuit. A short to ground in the Boost Control Solenoid control circuit will keep the bypass valve closed when the PCM is commanding it open, possibly causing an overboost condition during high engine load situations.
-
No inlet vacuum to the bypass valve actuator may cause the bypass valve to remain closed during deceleration. This condition may be perceived as a sail-on, possibly accompanied by a rough idle.
-
Checks for a sticking boost control solenoid.
-
This vehicle is equipped with a PCM which utilizes an Electrically Erasable Programmable Read Only Memory (EEPROM). When the PCM is being replaced, the new PCM must be programmed. Refer to PCM Replacement/Programming .
Step | Action | Value(s) | Yes | No | ||||
|---|---|---|---|---|---|---|---|---|
1 | Was the Powertrain On-Board Diagnostic (OBD) System Check performed? | -- | ||||||
2 | Select DTC info, Last Test Fail and record any other DTCs set. Are any other DTCs stored? | -- | Diagnose the other DTC first - Go to Powertrain Control Module Diagnosis | |||||
Is the test lamp ON? | -- | |||||||
Does the vacuum gauge indicate vacuum greater than the specified value? | 12 in. Hg | |||||||
Does the vacuum gauge indicate vacuum greater than the specified value with the Boost Control Solenoid commanded OFF? | 12 in. Hg | |||||||
6 |
Was a problem found? | -- | ||||||
7 |
Was a problem found? | -- | ||||||
8 | Replace the Bypass Valve actuator. Refer to Supercharger Bypass Valve Actuator Replacement . Is action complete? | -- | -- | |||||
9 |
Is the test lamp ON? | -- | ||||||
10 | Locate and repair short to ground in Boost Control Solenoid control circuit. Refer to Wiring Repairs . Is action complete? | -- | -- | |||||
11 | Repair restriction
in inlet vacuum signal hose to the Bypass Valve Actuator or blocked inlet
vacuum source. Refer to
Is the action complete? | -- | -- | |||||
12 |
Was a problem found? | -- | ||||||
|
Important:: The replacement PCM must be programmed. Refer to Powertrain Control Module Replacement/Programming .Replace the PCM. Is the action complete? | -- | -- | ||||||
14 | Replace the Boost Control Solenoid. Refer to Boost Control Solenoid Replacement . Is the action complete? | -- | -- | |||||
15 |
Does the scan tool indicate DTC P1257 failed this ignition? | -- | System OK |

