SERVICE MANUAL UPDATE SEC. 3D REAR SUSPENSION

SUBJECT: MANUAL UPDATE SECTION 3D REAR SUSPENSION (MANUAL LEVEL CONTROL PROCEDURE FOR RPO G66 OPTION)
VEHICLES AFFECTED: 1991 BUICK AND OLDSMOBILE A-CAR
The Manual Level Control option (G66) was added to the 1991 Buick and Oldsmobile A-car. The service information was not able to appear in the 1991 Service Manual, therefore, the following procedures should be added to the Rear Suspension (Section 3D) of the current 1991 Service Manuals.
Manual Level Control
The optional Super Lift air-adjustable shock absorbers allow the vehicle to remain level under various weight loads. Air is added to or released from the system via the air valve located inside the fuel tank filler door. A minimum pressure of 80 kPa (12 psi) must be maintained at all times. Maximum allowable pressure is 620 kPa (90 psi).
NOTICE: DO NOT USE SUPER LIFT SHOCK ABSORBERS TO RAISE THE VEHICLE ABOVE NORMAL RIDING HEIGHT. IF USED IN THIS MANNER, SEVERE DAMAGE MAY RESULT TO SUPER LIFTS, OR TO VEHICLE MOUNTING ASSEMBLIES.
IMPORTANT: Whenever servicing vehicles with Super Lift shocks, bleed air out of the system before disconnecting hoses. After service or repair of Super Lift shocks, pressurize the system to a minimum of 80 kPa (12 psi).
Shock Absorbers
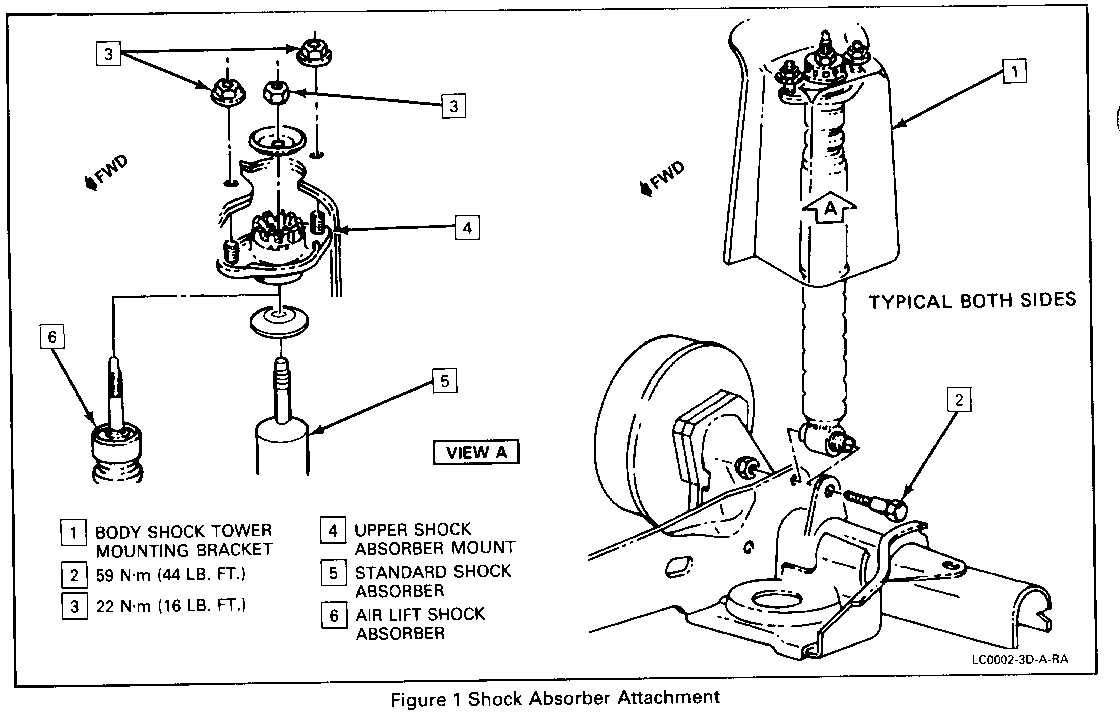
Remove or Disconnect Refer to Figure 1
1. Open rear compartment lid. 2. Trim cover and upper shock attaching nut. 3. Raise vehicle and suitably support. Refer to General Information (Section OA). 4. Support rear axle assembly. 5. Air hose from shock. 6. Lower attaching bolt and nut, remove shock.
Install or Connect
1. Shock at lower attaching nut and bolt. 2. Air hose to shock. 3. Lower vehicle enough to guide upper stud through body opening and install nut loosely.
Tighten Lower nut to 59 N.m (44 ft.lbs.)
4. Lower vehicle so the weight of the vehicle rests on the tires.
Tighten Upper nut to 22 N.m (16 ft.lbs.).
5. Trim cover. 6. Close rear compartment lid.
Upper Shock Absorber Mount
Remove or Disconnect - Refer to Figure 1
1. Shock absorbers upper nut and hand-compress shock until stud clears mount. Air may need to be removed from the Super Lift system to facilitate hand-compression. 2. Nuts securing mount to shock tower. 3. Shock absorber mount.
Install or Connect
1. Shock absorber mount studs into shock tower holes. 2. Mounting nut. 3. Shock absorber stud to mount.
Tighten Nuts to 22 N.m (16 ft.lbs.).
4. Add air to Super Lift. A minimum of 80 kPa (12 psi) must be maintained at all times.
Manual Level Control
Air Valve
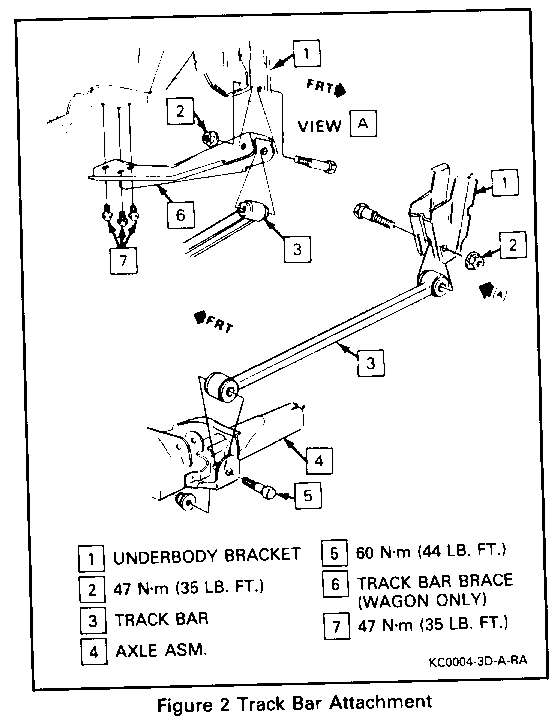
Remove or Disconnect - Refer to Figure 2
1. Screws securing filler neck to upper filler neck support. 2. Upper filler neck support mounting screws and swing support toward filler door. 3. Hose from air valve. 4. Air valve.
Install or Connect
1. Air valve.
Tighten Nut to 6 N.m (53 in.lbs.
2. Air hose to air valve. 3. Filler neck support.
Air Lines
Refer to Figure 2 for air line routing.
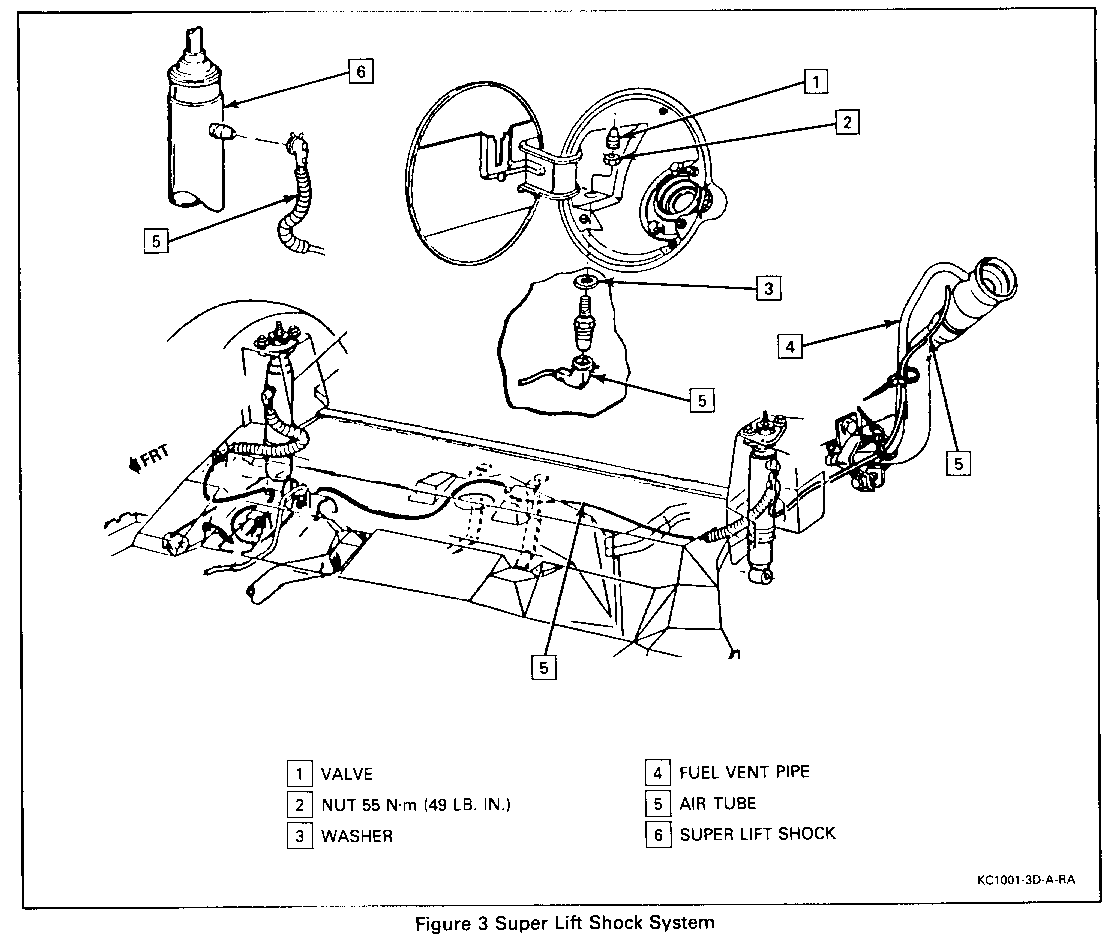
Repairing Air Lines - Refer to Figure 3
The air lines may be repaired by splicing in a coupling at the leaking area using the procedure below:
1. Inflate the system 620 kPa (90 psi). 2. Locate the leaking area using a soap-water solution or a stethoscope 3. Deflate system. 4. Cut and remove the leaking line section. 5. Splice the replacement line to the existing line. A. Remove the plastic retainer pin from one of the nuts and slide the replacement line into the nut until it bottoms in the rubber seal. B. While holding the line in position described in step (A) tighten the nut to 8 N.m (71 in.lbs.). C. Attach original line to other end of coupling as described in step (A) and (B).
6. Reinflate system and check for leaks.

General Motors bulletins are intended for use by professional technicians, not a "do-it-yourselfer". They are written to inform those technicians of conditions that may occur on some vehicles, or to provide information that could assist in the proper service of a vehicle. Properly trained technicians have the equipment, tools, safety instructions and know-how to do a job properly and safely. If a condition is described, do not assume that the bulletin applies to your vehicle, or that your vehicle will have that condition. See a General Motors dealer servicing your brand of General Motors vehicle for information on whether your vehicle may benefit from the information.
