Tools Required
| • | J 39500-B R-134a
Air Conditioning Recovery, Recycling And Recharging System |
Important: Do not change a shaft seal because of small amounts of oil found on
an adjacent surface. The seal allows some oil to pass for lubrication purposes.
Change the shaft seal when the following conditions exist:
| • | A large amount of sprayed oil is found. |
| • | Actual refrigerant leak is found, using a J 39400
or equivalent. |
- Recover the refrigerant using J 39500-B
.
- Loosen the compressor in the mounting brackets. Reposition the
compressor.
- Remove the clutch plate and hub assembly. Refer to
Compressor Clutch Plate and Hub Assembly Removal
.

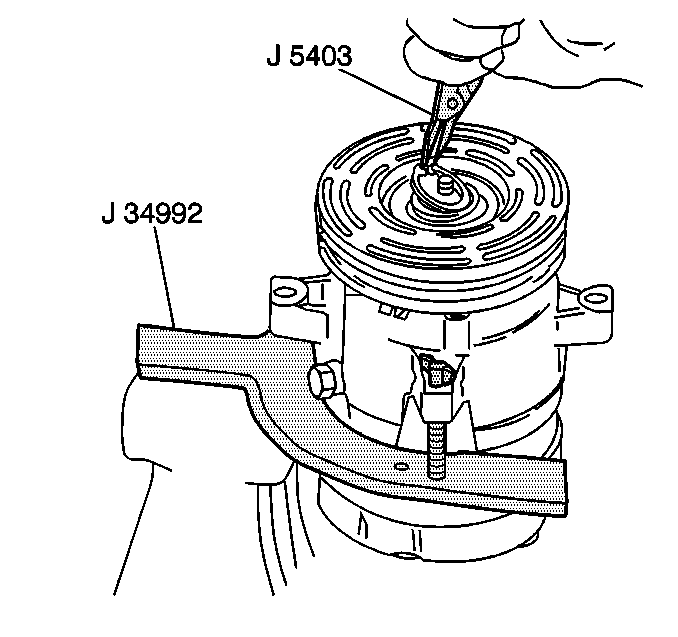
- Remove the shaft seal
retaining ring using J 5403
.
- In order to prevent dirt or foreign material from damaging the
compressor, thoroughly clean the following parts:
| • | The inside of the compressor neck area surrounding the shaft |
| • | The exposed portion of the seal |

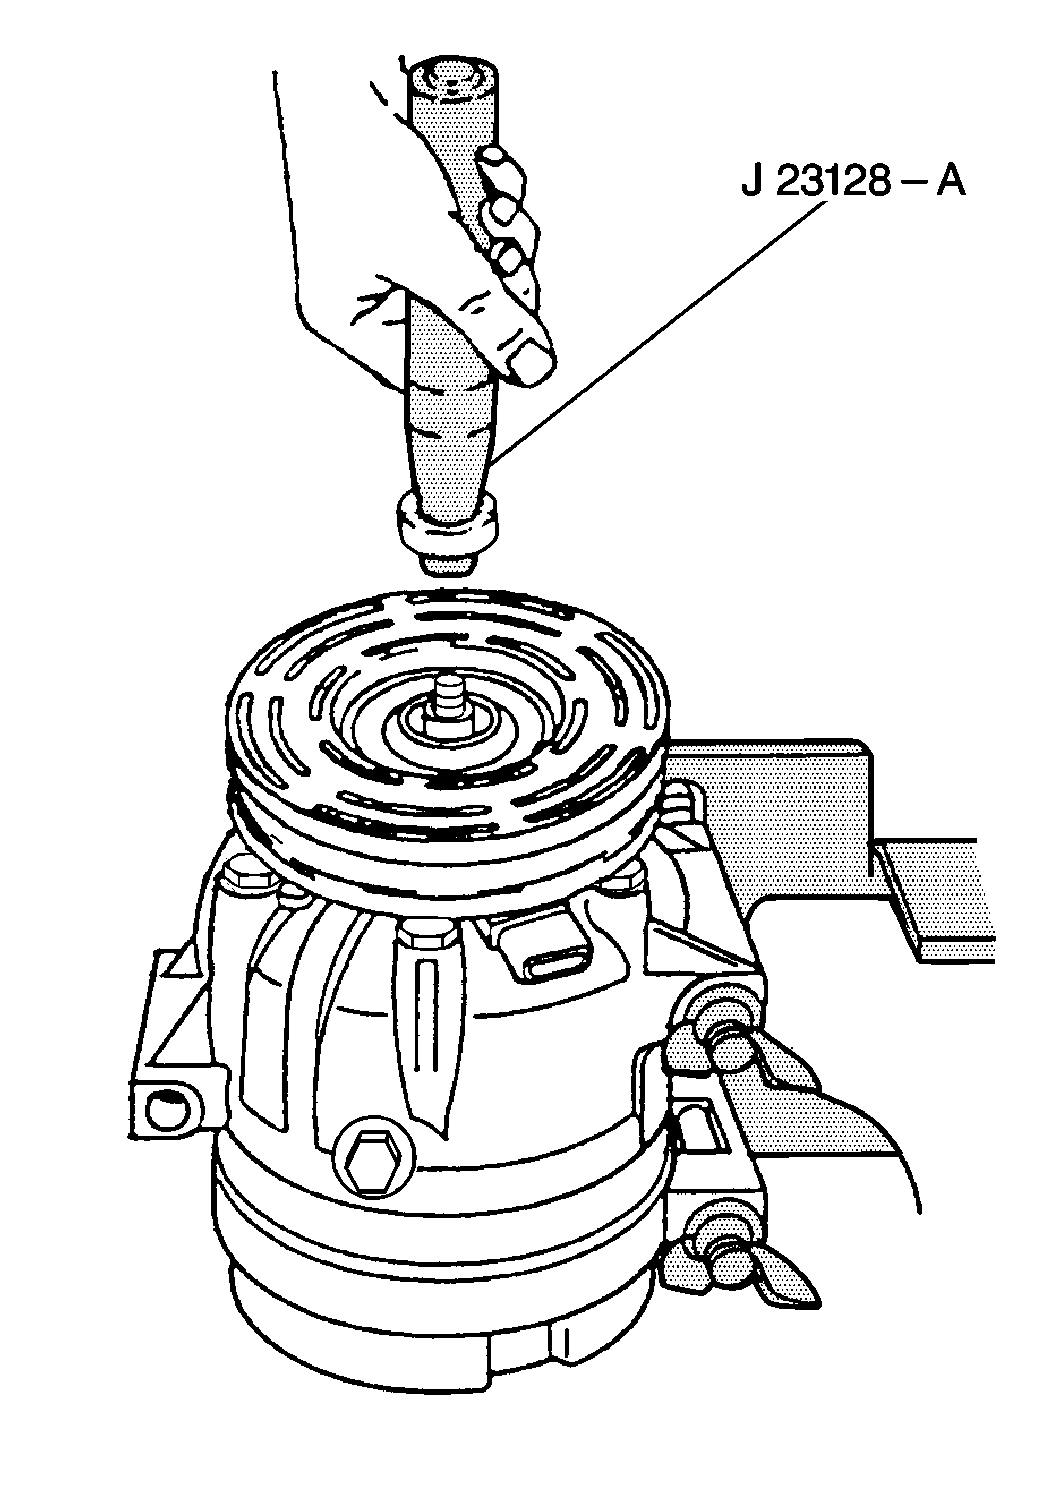
Important: Securely hand-tighten the handle of J 23128-A
. Do not use a wrench or pliers.
- Fully engage the knurled tangs of J 23128-A
into the recessed portion of the seal by turning the handle
clockwise.
- Remove the seal from the compressor using a rotary-pulling motion.
Discard the seal.

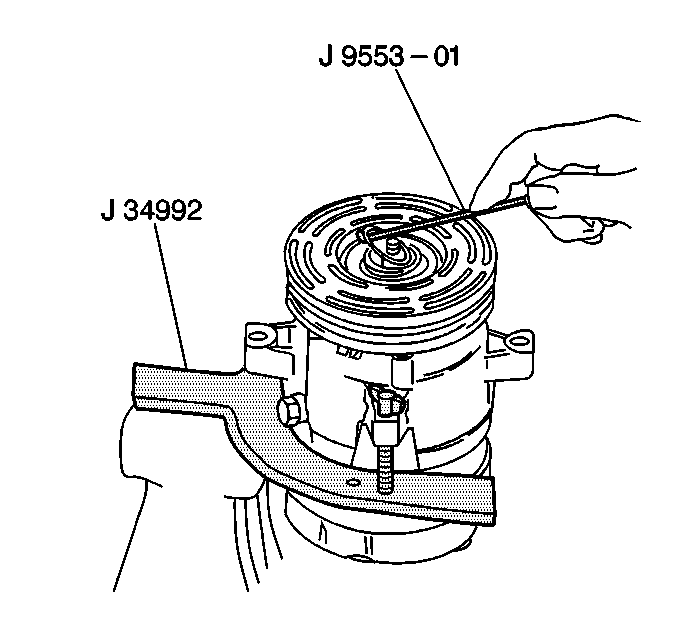
- Remove the seal O-ring from the compressor neck using J 9553-01
. Discard the seal O-ring.
- Inspect the shaft and the inside of the compressor neck again
for dirt and foreign material.
- Clean the shaft and the inside of the compressor neck prior to
installing new parts.


