Removal Procedure
- Relieve the fuel system
pressure. Refer to Fuel Pressure Relief Procedure
.
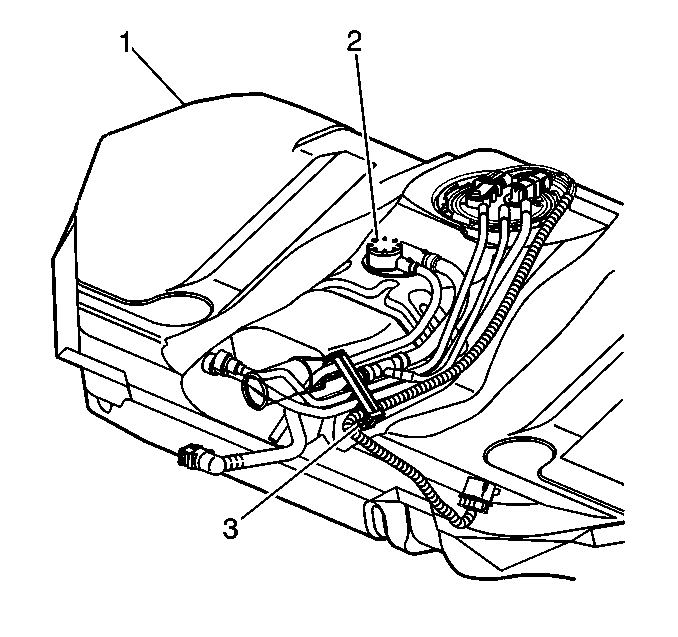
- Drain the fuel tank (1). Refer to Fuel Tank Draining Procedure
.
- Remove the fuel tank. Refer to Fuel Tank Draining Procedure
.
- Disconnect the fuel vapor pipe quick connect from the fuel sender
assembly. Refer to Quick Connect Fitting(s) Service (Metal Collar)
.
- Remove the fuel pipes from the fuel pipe clamp (3).
- Turn the Fill Limiter Vent Valve (FLVV) assembly (2) clockwise
using special tool J 42872.
- Remove the Fill Limiter Vent Valve (FLVV) assembly from the fuel
tank (1).
Installation Procedure
Important: The Fill Limiter Vent Valve (FLVV) O-ring must be replaced if the Fill
Limiter Vent Valve (FLVV) assembly is to be reused.
- Install the Fill Limiter Vent Valve (FLVV) assembly (2) to the fuel
tank (1).
- Turn the Fill Limiter Vent Valve (FLVV) counter-clockwise using
special tool J 42872.
- Reinstall the fuel pipes in the fuel pipe clamp (3).
- Connect the fuel vapor pipe quick connect to the fuel sender assembly
. Refer to Quick Connect Fitting(s) Service (Metal Collar)
.
- Reinstall the fuel tank. Refer to Fuel Tank Replacement
.
- Lower the vehicle.
- Refill the tank and reinstall the fuel filler cap.
- Connect the negative battery cable.
- Inspect for fuel leaks.
| 9.1. | Turn the ignition switch ON for 2 seconds. |
| 9.2. | Turn the ignition switch OFF for 10 seconds. |
| 9.3. | Turn the ignition switch ON. |
| 9.4. | Check for fuel leaks. |
