For 1990-2009 cars only
Removal Procedure
- Remove the left instrument panel (I/P) insulator. Refer to Instrument Panel Insulator Panel Replacement - Left Side in Instrument Panel, Gages, and Console.
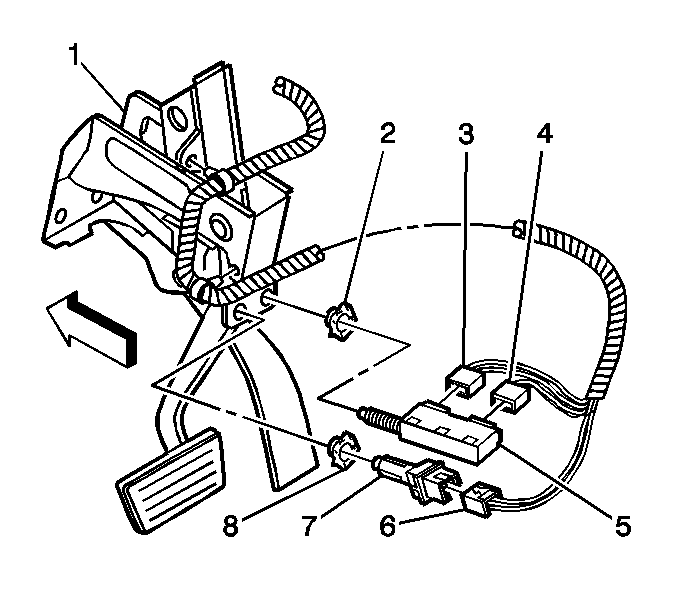
- Disconnect the electrical connectors (3, 4) from the stop lamp switch (5).
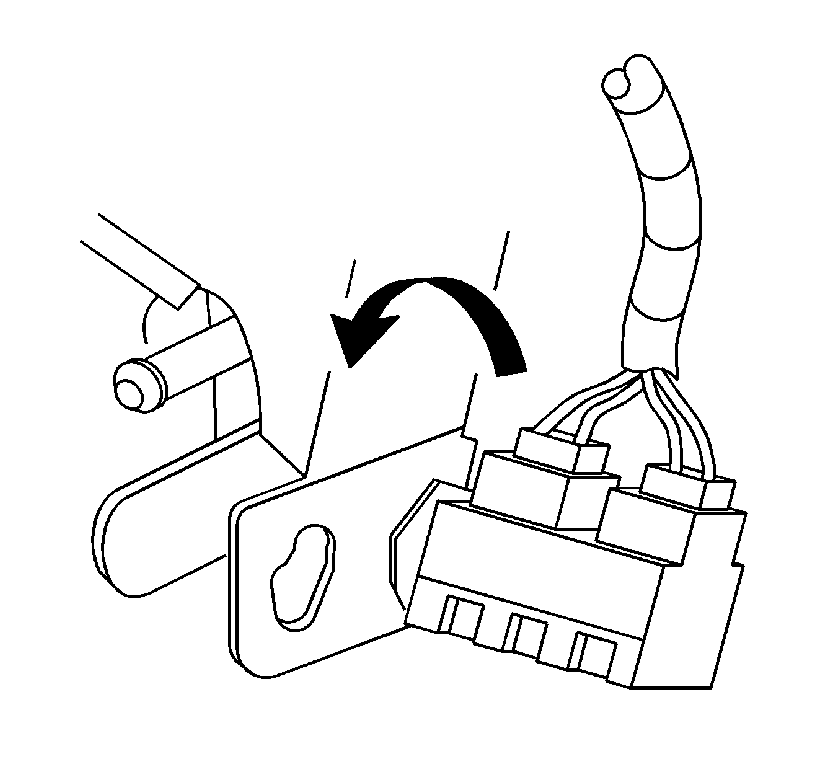
- Rotate the stop lamp switch counterclockwise until the travel stop has been reached.
- Pull the stop lamp switch rearward.
- Remove the stop lamp switch.
Installation Procedure
- With one hand behind the brake pedal striker plate, pull the pedal back toward the rear of the vehicle using 13 N (3 lb) force. Hold the pedal back until brake switch installation is complete.
- With the switch connector oriented toward the 12 o'clock position, push the switch into the retainer until the switch plunger is fully depressed into the switch barrel. Rotate the switch clockwise until the travel stop is reached.
- Release the brake pedal.
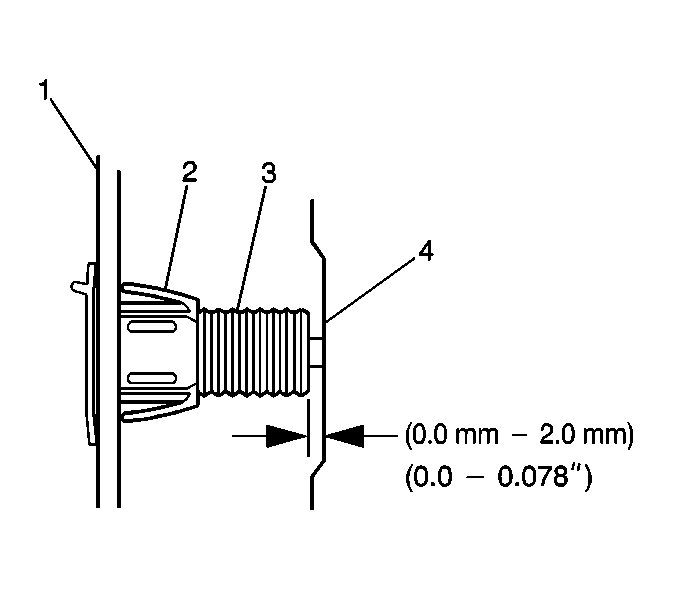
- With a feeler gage measure between the stop lamp switch barrel (3) and the brake pedal (4) to ensure the plunger extension is not less than 0.0 mm (0.0 in), and not greater than 2.0 mm (0.78 in) .
- Connect the electrical connectors (3, 4) to the stop lamp switch (5).
- Install the left I/P insulator. Refer to Instrument Panel Insulator Panel Replacement - Left Side in Instrument Panel, Gages, and Console.
Important: The cruise control release switch must be installed prior to stop lamp switch installation. If necessary, refer to Clutch Pedal Cruise Control Release Switch Replacement in Cruise Control.
Important: The brake pedal must be attached to the power booster rod and the pedal must be pulled back as indicated below. Do not pull the pedal back by the foot rest area or an improperly adjusted switch will result.
Important: Approximately 8-13 N (2-3 lb) force is required to depress the switch plunger flush with the switch barrel. Too much force could flex the brake pedal bracket and result in the stop lamp switch being improperly adjusted.