For 1990-2009 cars only
Tools Required
J 43828 Ball Joint Separator
Removal Procedure
- Raise and support the vehicle. Refer to Lifting and Jacking the Vehicle in General Information.
- Remove the tire and wheel assembly. Refer to Tire and Wheel Removal and Installation in Tires and Wheels.
- Remove the wiring harness from the lower control arm.
- Remove the stabilizer shaft link. Refer to Stabilizer Shaft Link Replacement .
- Remove the cotter pin (1) and the nut (2) from the ball joint stud (3).
- Separate the ball joint stud from the steering knuckle using the J 43828 .
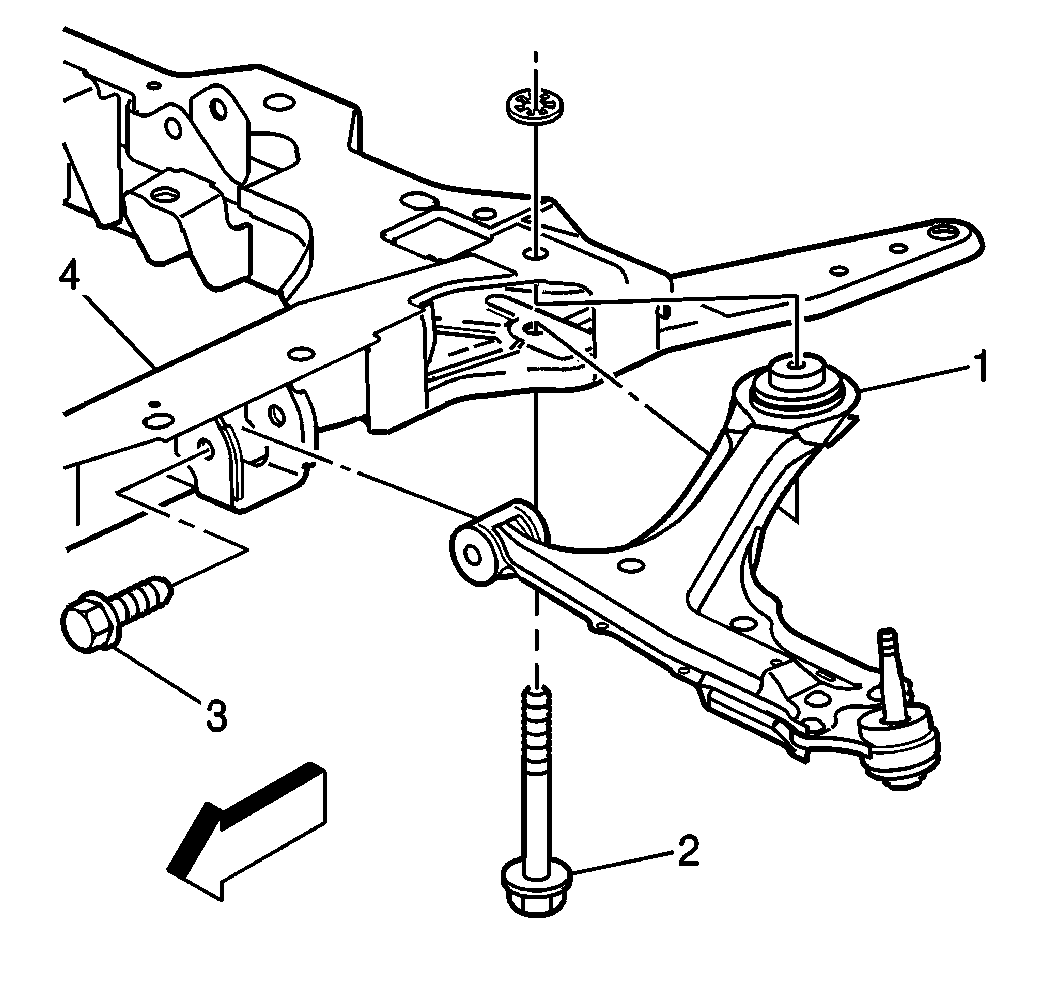
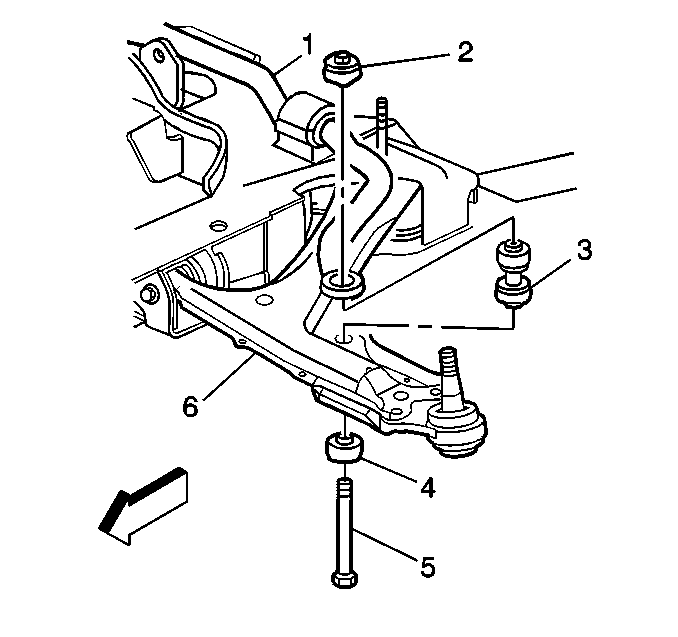
- Remove the bolt (2) attaching the control arm (1) to the front suspension crossmember (4).
- Remove the bolt (3) from the control arm (1).
- Remove the control arm (1) from the vehicle.
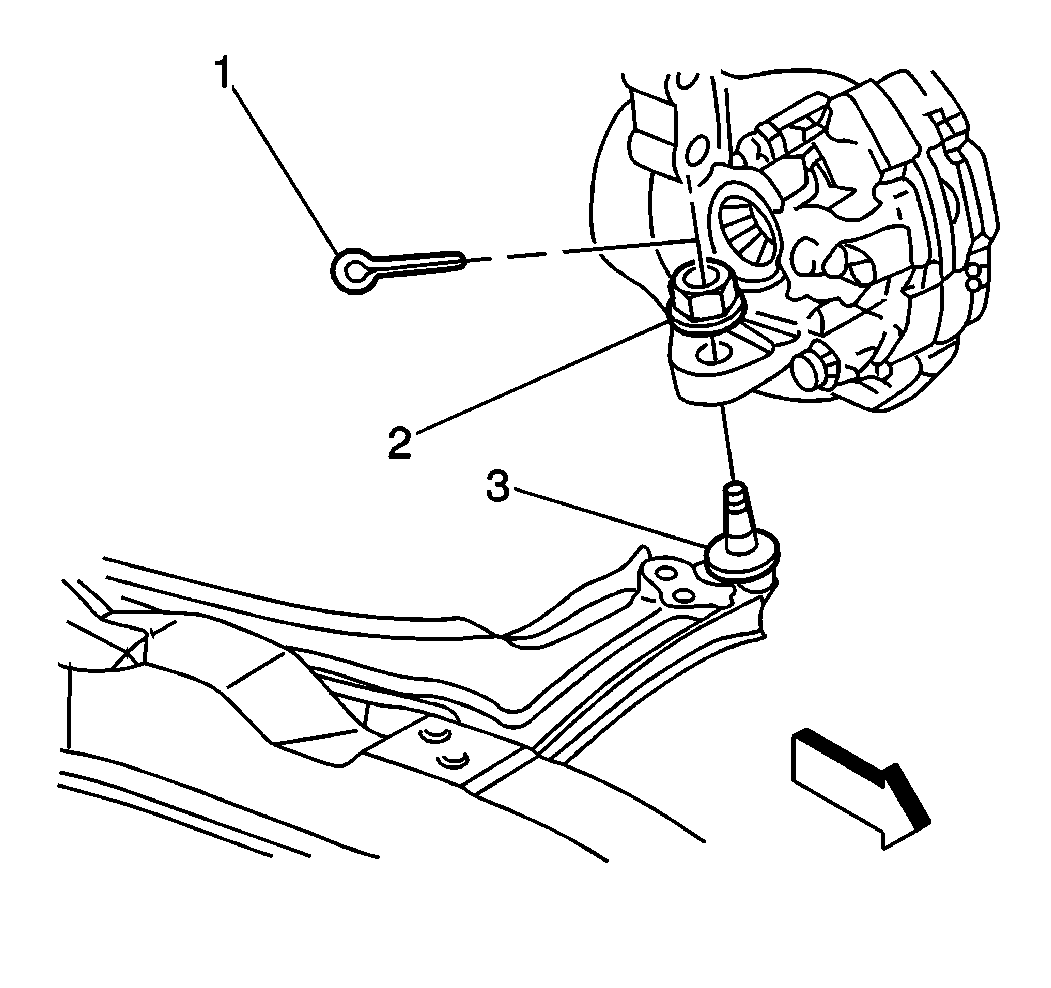
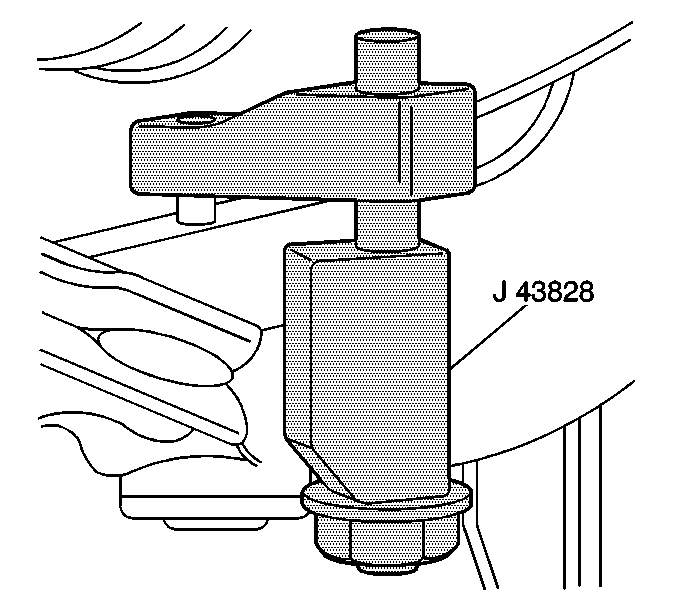
Notice: Use only the recommended tool for separating the ball joint from the knuckle. Failure to use the recommended tool may cause damage to the ball joint and seal.
Installation Procedure
- Install the control arm (1) into position and install the bolt (2) attaching the control arm (1) to the crossmember (4).
- Install the bolt (3) to the control arm (1).
- Install the lower ball joint to the steering knuckle.
- If necessary tighten the ball joint nut enough to align the slots in order to insert the cotter pin.
- Install the cotter pin.
- Install the stabilizer shaft link. Refer to Stabilizer Shaft Link Replacement .
- Slightly raise the vehicle.
- Remove the jack stands from under the crossmember.
- Install the wiring harness to the lower control arm.
- Install the tire and wheel assembly. Refer to Tire and Wheel Removal and Installation in Tires and Wheels.
- Lower the vehicle.
- With the vehicle at curb height, tighten the control arm attaching bolts.
- Check the front wheel alignment. Refer to Wheel Alignment Specifications in Wheel Alignment.
Hand tighten the bolt.
Hand tighten the bolt.
Notice: Refer to Fastener Notice in the Preface section.
Tighten
Tighten the ball stud nut to 10 N·m
(89 lb in) +180°.
Tighten
| • | Tighten the front suspension crossmember front bolt (3) to 60 N·m (45 lb ft) plus 180 degrees rotation. |
| • | Tighten the front suspension control arm to body bolt (2) to 100 N·m (74 lb ft) plus 180 degrees rotation. |
