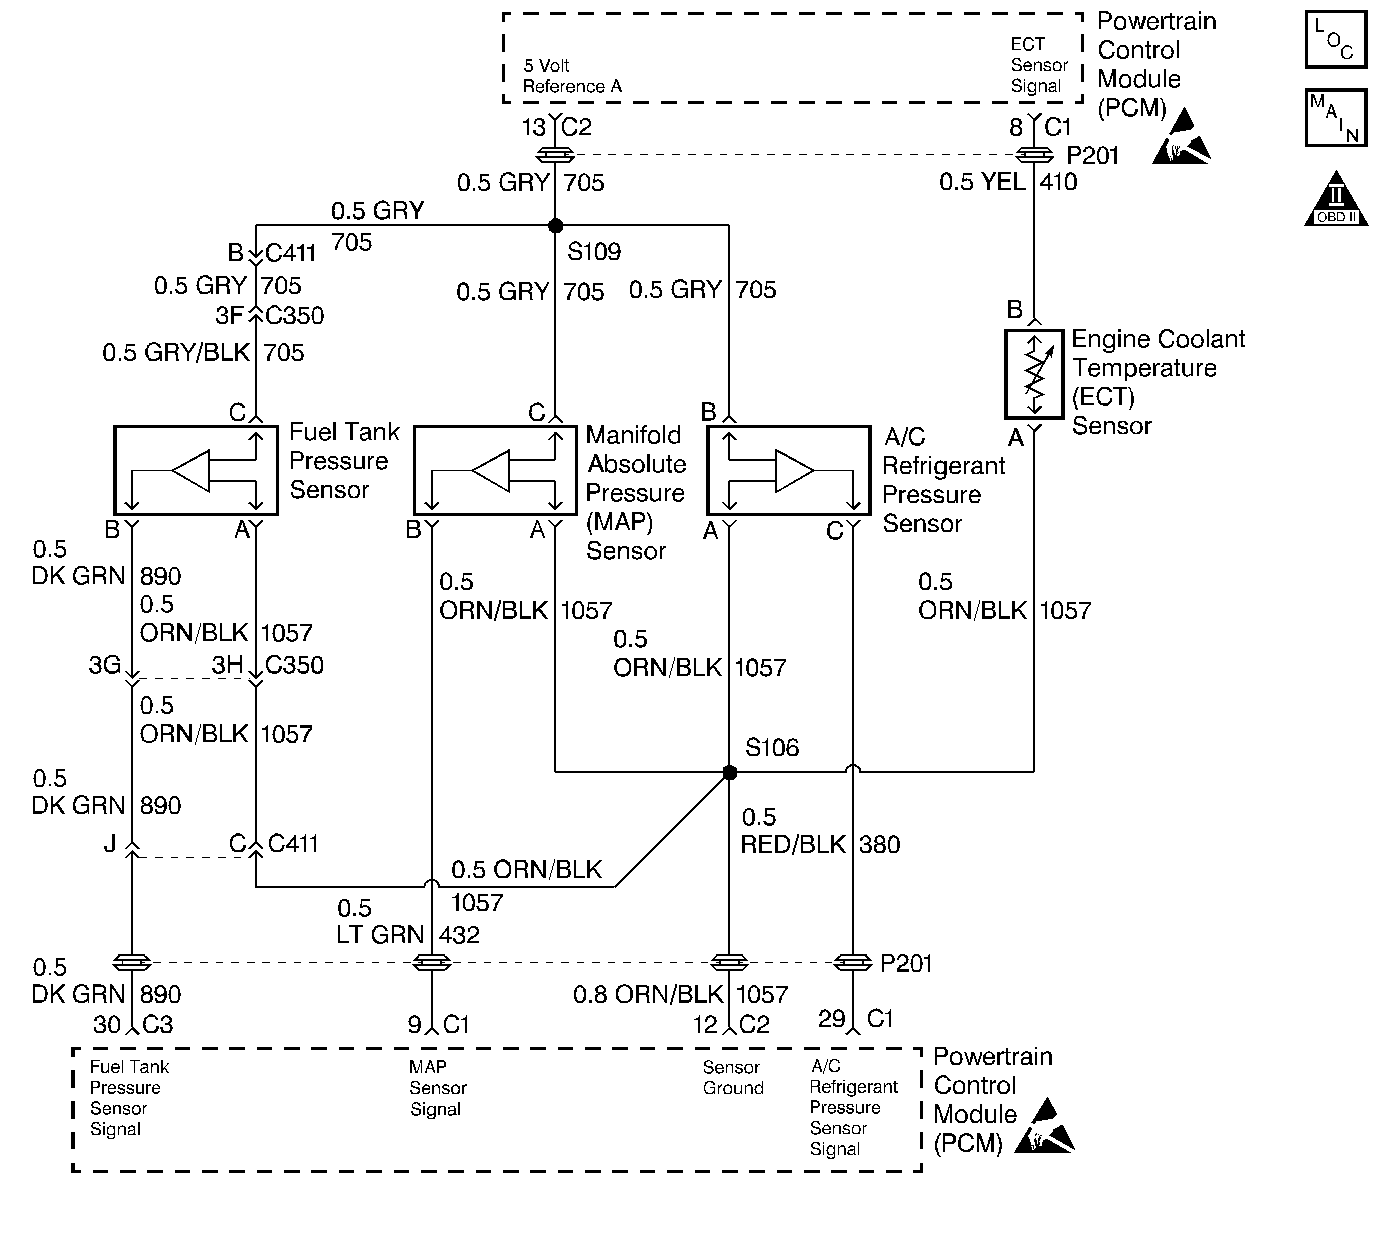
Circuit Description
The manifold absolute pressure (MAP) sensor measures the changes in the intake manifold pressure which result from engine load, or the intake manifold vacuum, and RPM changes, and converts these into a voltage output. The Powertrain Control Module (PCM) sends a 5 volt reference voltage to the MAP sensor. As the manifold pressure changes, the output voltage of the sensor also changes. By monitoring the sensor output voltage, the PCM calculates the manifold pressure. A lower pressure, low voltage, output voltage will be approximately 1.0 to 1.5 volts at idle. Higher pressure, high voltage, output voltage will be approximately 4.5 to 4.8 volts at wide open throttle (WOT). The MAP sensor is also used to measure barometric pressure, allowing the PCM to make adjustments for different altitudes. The PCM uses the MAP sensor to control fuel delivery and ignition timing.
Test Description
Number(s) below refer to the step number(s) on the Diagnostic Table.
Important: Be sure to use the same diagnostic test equipment for all measurements.
-
Applying 34 kPa (10 in of Hg) vacuum to the MAP sensor should cause the voltage to be 1.5 to 2.1 volts less than the voltage at Step 3. Upon applying vacuum to the sensor, the change in voltage should be instantaneous. A slow voltage change indicates a faulty sensor.
-
Check vacuum hose to sensor for leaking or restriction. Be sure that no other vacuum devices are connected to the MAP hose.
-
Important: Make sure electrical connector remains securely fastened.
Move sensor electrical connector by hand (only) while watching scan tool to check for intermittent connection. Output changes greater than 0.10 volt indicate a bad connection. If OK, replace sensor.
Step | Action | Value(s) | Yes | No |
|---|---|---|---|---|
1 | Was the Powertrain On-Board Diagnostic (OBD) System Check performed? | -- | ||
2 | Install scan tool and check for MAP DTCs. Were any MAP DTCs set? | -- | Go to MAP DTC Tables | |
3 |
Are the voltage readings between the 2 vehicles within the specified value? | ± 0.4V | ||
Is the difference greater than the specified value? | 34 kPa (10 in of Hg) 1.5V | |||
5 | Replace MAP sensor. Is the action complete? | -- | -- | |
Check MAP sensor vacuum source for leakage or for a restriction and be sure that the vacuum source supplies the MAP sensor only. Was a problem found? | -- | |||
Check MAP sensor electrical connector terminals and repair as necessary. Was a repair necessary? | -- | |||
8 | Repair leakage or restriction in MAP sensor vacuum source. Is the action complete? | -- |
| |
9 | Operate vehicle within the conditions under which the original symptom was noted. Does the system now operate properly? | -- | System OK |
