Tools Required
| • | J 8062 Valve Spring Compressor |
| • | J 38820 Valve Stem Seal Installer |
Checking Valve Spring Installed Height
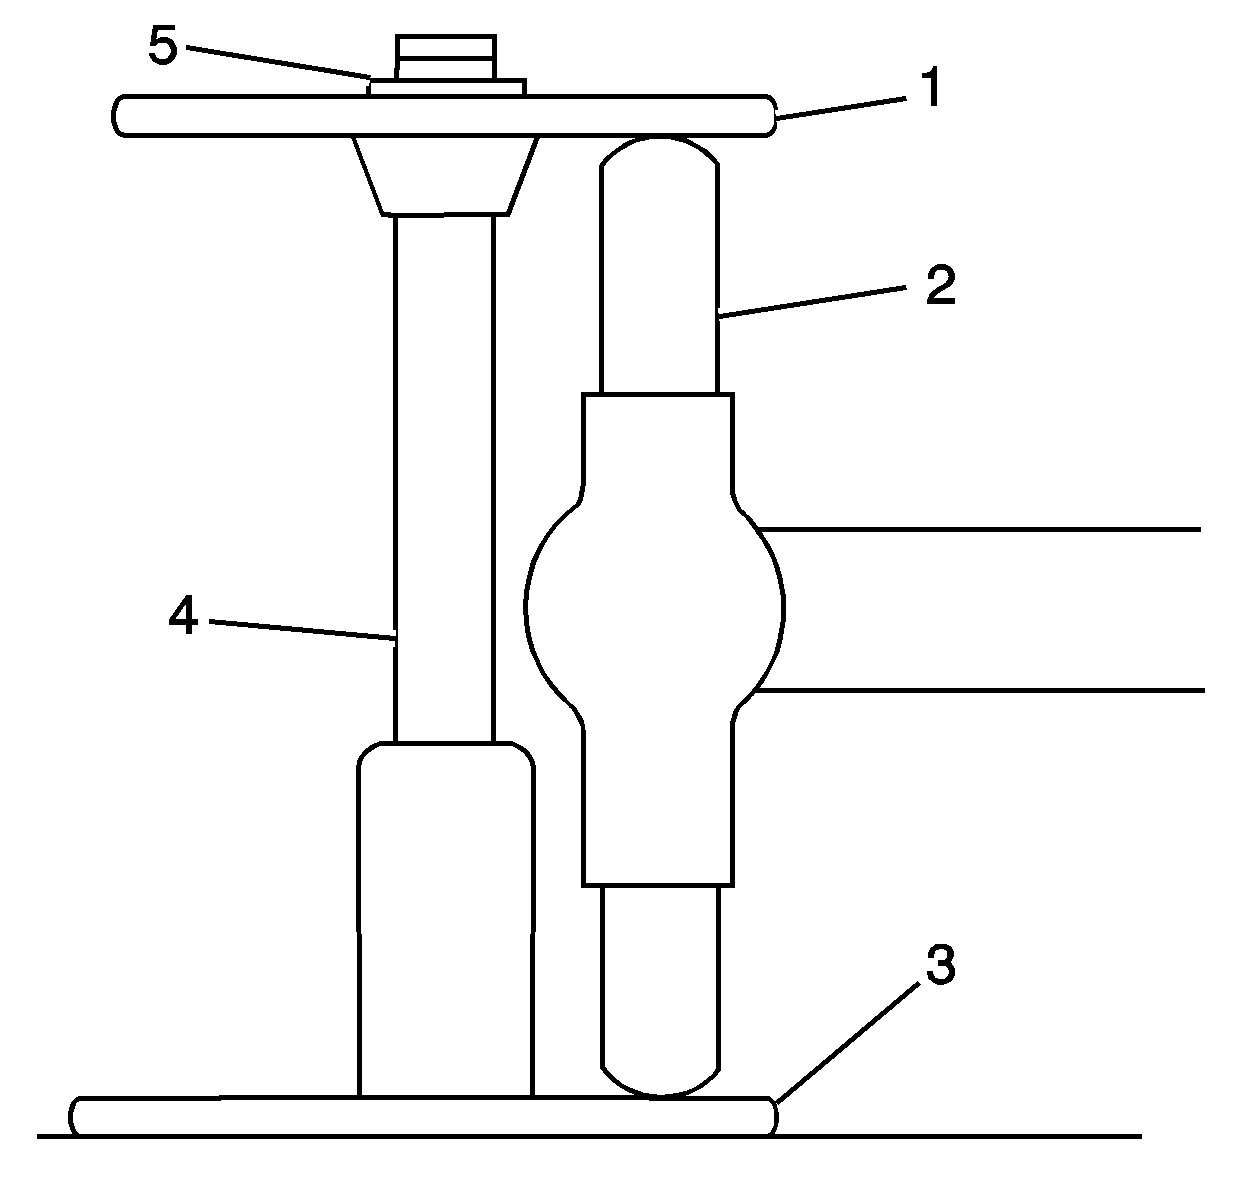
- Install the valve rotator (3), the valve (4), the valve spring cap (1) and the valve stem keys (5) into the cylinder head.
- Using a snap gauge (2) or inside micrometer, measure the distance from the top of the valve rotator to the bottom of the valve spring cap.
- Install a valve spring seat shim if the valve spring installed height measurement is above the specification. Install the valve spring seat shim on top of the valve spring seat surface of the spring seat/seal unit.
- Recheck the valve spring installed height, replace the cylinder head if the valve spring installed height cannot be obtained.
Important:
• If the valves have been refaced and/or the valve seats ground,
or insufficient valve spring force is believed to be the cause of poor engine
performance, it may be necessary to check the valve spring installed heights
prior to final assembly. • Ensure the valve, keys, and spring cap are correctly seated with
one another and the valve stem.
Specification
| • | If the measured installed height is less than 41.61 mm (1.64 in) no shims are required. |
| • | If the measured installed height is between 41.61-42.37 mm (1.64-1.67 in), install a maximum of one 0.76 mm (0.030 in) thick valve spring shim. |
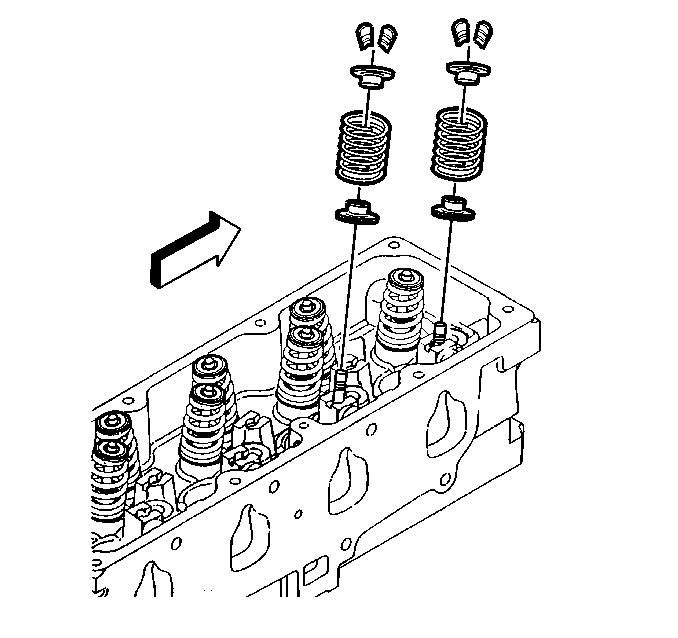
Valve Installation
- Clean the cylinder head valve spring seat area.
- Lubricate the valve stems with engine oil and install the valves fully seated into their proper ports. Refer to Separating Parts .
- Lubricate the outside diameter of the valve guide with engine oil.
- Using the J 38820 , install the valve spring seat and seal unit.
- Install the valve spring.
- Install the valve spring retainer.
- Compress the valve spring using the J 8062 .
- Install the valve stem keys.
Important: If the valves have been refaced and/or the valve seats ground, or insufficient valve spring force is believed to be the cause of poor engine performance, it may be necessary to check the valve spring installed heights prior to final assembly.
Important: When reusing the valves and related components, install the parts in their original location.
Important: The 2.2 L OHV engine uses a unique valve spring seat and seal combination unit. Under no circumstances should this seal and seat unit be replaced with a different type of seal. Use care to ensure that the valve stem seal and spring seat are not damaged during installation.
Push and twist the valve seal into position on the valve guide until the spring seat flange is flush with the cylinder head surface. Do not use excessive force or a hammer to install the seal on the guide. The seal will go on if it is straight and properly lubricated, using hand pressure only.
Important: The valve spring loads should be checked prior to final assembly.
| 8.1. | Use grease to hold the keys in place and remove the J 8062 . |
| 8.2. | Make sure the keys seat properly in the groove of the valve stem and in the tapered seat of the spring retainer. |
| 8.3. | Tap the end to the valve stem with a plastic faced hammer to seat the keys (if necessary). |
