Removal Procedure
- Drain the engine coolant. Refer to Cooling System Draining and Filling in Engine Cooing.
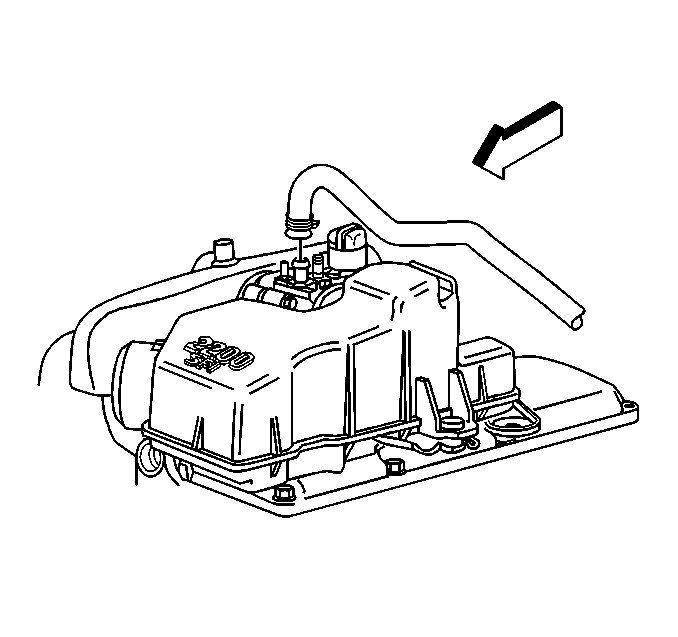
- Disconnect the power brake booster vacuum hose.
- Remove the air cleaner outlet resonator. Refer to Air Cleaner Outlet Resonator Replacement in Engine Controls.
- Remove the throttle body. Refer to Throttle Body Assembly Replacement in Engine Controls.
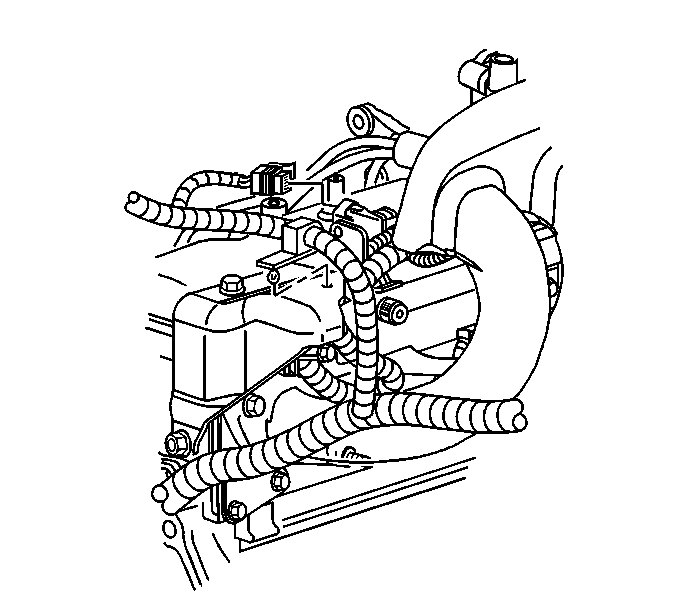
- Remove the spark plug wire harness retainer from the thermostat assembly.
- Remove the spark plug wires from the spark plugs. Refer to Spark Plug Wire Harness Replacement in Engine Electrical.
- Remove the thermostat assembly. Refer to Engine Coolant Thermostat Replacement in Engine Cooling.
- Disconnect the fuel injector harness electrical connector.
- Remove the fuel injector harness electrical connector from the bracket on the valve rocker arm cover.
- Remove the engine wiring harness from the bracket.
- Move and secure the engine wiring harness out of the way.
- Remove the engine wiring harness bracket at the rear of the engine using the following procedure:
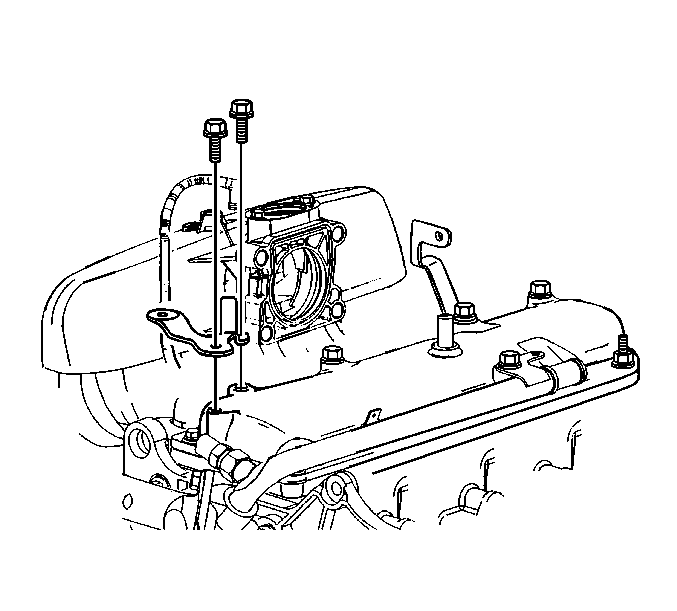
- Remove the air cleaner outlet resonator bracket.
- Remove the valve rocker arm cover. Refer to Valve Rocker Arm Cover Removal .
- Clean all sealing surfaces and the valve rocker arm cover. Refer to Valve Rocker Arm Cover Removal .

Important: Do not bend the thermostat assembly pipe out of the way in order to remove the valve rocker arm cover.
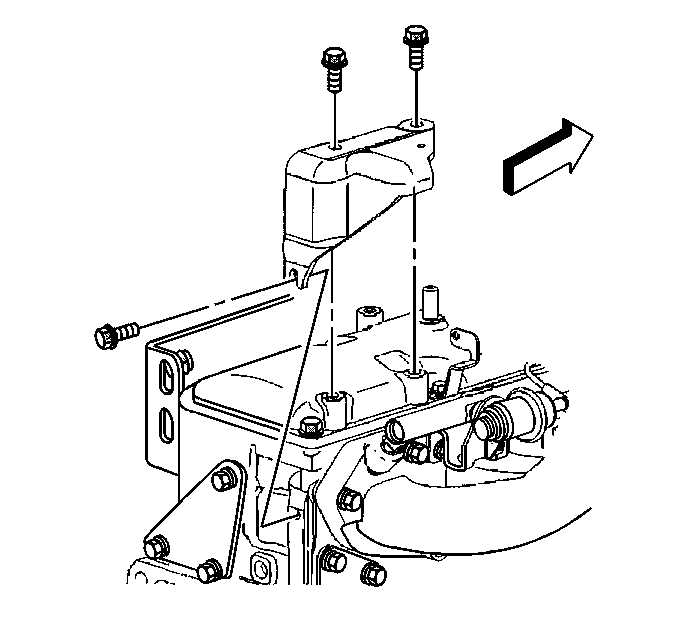
| 12.1. | Loosen the bolt at the rear of the cylinder head. |
| 12.2. | Remove the two bolts that secure the bracket to the valve rocker arm cover. |
| 12.3. | Slide the bracket off of the bolt at the rear of the cylinder head. |
Important: The valve rocker arm cover gasket is reusable. Only replace the valve rocker arm cover gasket if it is damaged.
Installation Procedure
- Install a new rocker arm cover gasket in the groove around the rocker arm cover, if the old gasket was removed.
- Install the valve rocker arm cover. Refer to Valve Rocker Arm Cover Installation .
- Install the air cleaner outlet resonator bracket and bolts.
- Install the wiring harness bracket to the rear of the engine by using the following procedure:
- Tighten the bolts in the following order:
- Tighten the two bolts to the valve rocker arm cover to 10 N·m (89 lb in).
- Tighten the bolt at the rear of the cylinder head to 25 N·m (18 lb ft).
- Position the engine wiring harness.
- Install the engine wiring harness to the bracket.
- Install the fuel injector harness electrical connector to the bracket on the valve rocker arm cover.
- Connect the fuel injector harness electrical connector.
- Install the thermostat assembly. Refer to Engine Coolant Thermostat Replacement in Engine Cooling.
- Install the throttle body. Refer to Throttle Body Assembly Replacement in Engine Controls.
- Install the spark plug wires to the spark plugs. Refer to Spark Plug Wire Harness Replacement in Engine Electrical.
- Install the spark plug wire harness retainer to the thermostat assembly.
- Install the air cleaner outlet resonator. Refer to Air Cleaner Outlet Resonator Replacement in Engine Controls.
- Connect the power brake booster vacuum hose.
- Fill the engine cooling system. Refer to Fan Clutch Replacement in Engine Cooling.
Notice: Use the correct fastener in the correct location. Replacement fasteners must be the correct part number for that application. Fasteners requiring replacement or fasteners requiring the use of thread locking compound or sealant are identified in the service procedure. Do not use paints, lubricants, or corrosion inhibitors on fasteners or fastener joint surfaces unless specified. These coatings affect fastener torque and joint clamping force and may damage the fastener. Use the correct tightening sequence and specifications when installing fasteners in order to avoid damage to parts and systems.
Tighten
Tighten the air cleaner outlet resonator bracket bolts to 10 N·m
(89 lb in).
| 4.1. | Slide the bracket over the bolt at the rear of the cylinder head. |
| 4.2. | Install the two bolts that secure the bracket to the valve rocker arm cover. |
Tighten
