For 1990-2009 cars only
Removal Procedure
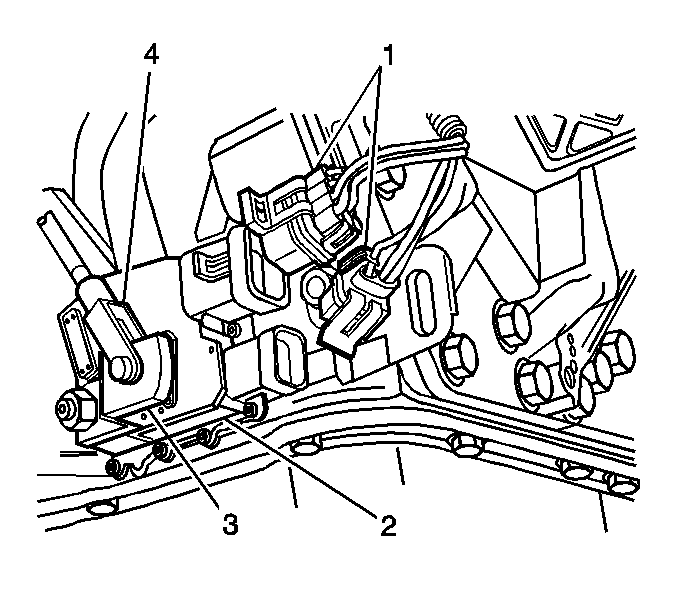
- Disconnect the park/neutral position (PNP) switch electrical connectors (1).
- Remove the shift linkage/cable (4) from the shift lever (3).
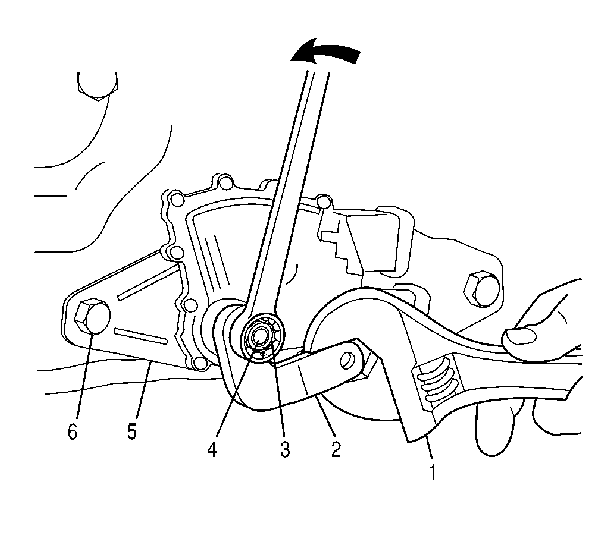
- Use a wrench (1) to prevent the shift lever (2) from rotating. Remove the nut (3) and the shift lever (2) from the selector shaft (4).
- Remove the 2 PNP switch bolts (6).
- Remove the PNP switch (5) by sliding it outward over the selector shaft.
Installation Procedure
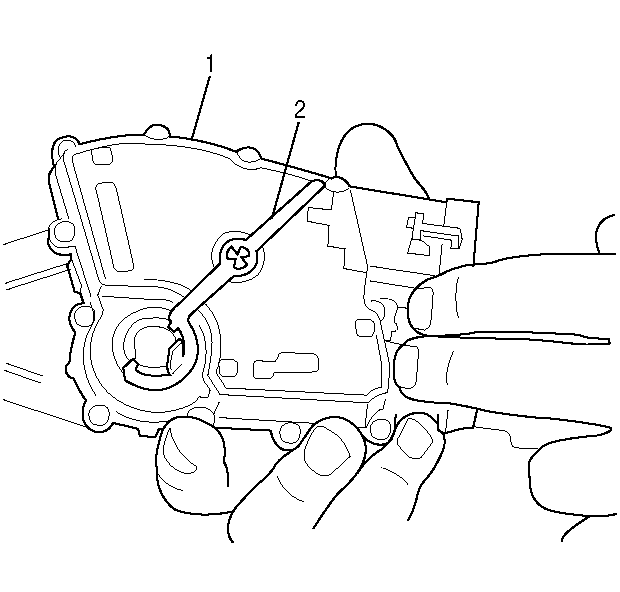
- Be sure that the neutral assurance bracket (2) is in the proper position on PNP switch (1).
- Align the PNP switch (5) with the main housing so that the neutral assurance bracket is facing outward.
- While maintaining the correct PNP switch-to-selector-shaft alignment, slide the new PNP switch over the selector shaft (4).
- While holding the neutral assurance bracket in engagement with the PNP switch (5), install the 2 bolts (6) so that the PNP switch may be rotated with some effort.
- Remove and discard the neutral assurance bracket.
- Install the shift lever (2).
- Install the nut (3), to the end of selector shaft. Use a wrench (1) to keep the shift lever from rotating.
- Install the shift selector linkage/cable (4) to the shift lever (3).
- Connect the PNP switch electrical connectors (1).
- Inspect for proper operation.
Notice: Refer to Fastener Notice in the Preface section.
Tighten
Tighten the bolts to 27 N·m (20 lb ft).
Notice:
• DO NOT drive the selector lever onto the selector shaft. • DO NOT use an impact wrench in order to tighten the selector lever
nut. Hold the lever with a wrench while tightening the nut. • Failure to follow these instructions may result in transmission
damage.
Tighten
Tighten the nut to 24 N·m (18 lb ft).
