Tools Required
J 39400-A
Halogen Leak Detector
Removal Procedure
- Recover the refrigerant from the A/C system. Refer to
Refrigerant Recovery and Recharging
.
- Remove the right wheelhouse panel. Refer to
Wheelhouse Panel Replacement
.
- Remove the air cleaner. Refer to the appropriate procedure:
| • | Caterpillar® 3126 Unit Repair Manual for the 7.2L (Caterpillar) engine |
- Disconnect the low pressure sensor electrical connector.
- Disconnect the blower motor assembly electrical connector.
- Disconnect the blower motor resistor assembly electrical connector.
- Remove the accumulator. Refer to
Air Conditioning Accumulator Replacement
.
- Remove the multi-use module bracket. Refer to the appropriate procedure:
| • | Caterpillar® 3126 Unit Repair Manual |
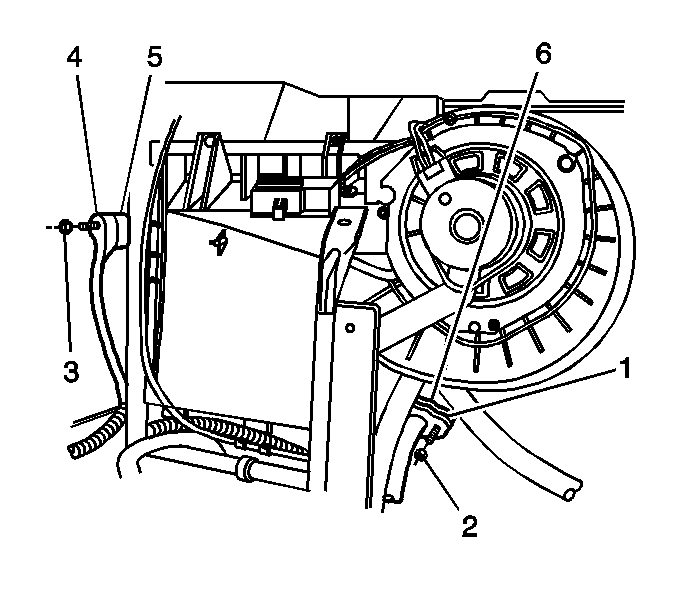
- Remove the retaining nut (3) from the evaporator inlet tube (5).
- Remove the evaporator inlet tube from the evaporator.
- Remove the sealing washer.
- Remove the retaining nut (4) from the evaporator outlet tube (3).
- Remove the evaporator outlet tube from the evaporator.
- Remove the sealing washer.
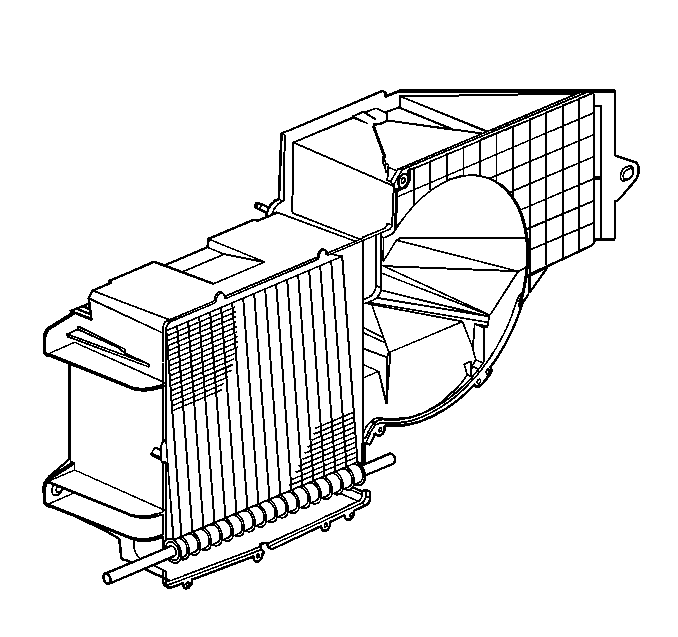
- Remove the front cover retaining screws from the evaporator and blower module assembly.
- Remove the front cover.
- Remove the evaporator core from the evaporator and blower module assembly.
Installation Procedure
- Add polyalkylene glycol (PAG) oil to the evaporative emission (EVAP) core. Refer to
Refrigerant System Capacities
.
- Install the evaporator core to the evaporator and blower module assembly.
- Install the front cover.
Notice: Refer to Fastener Notice in the Preface section.
- Install the front cover retaining screws to the evaporator and blower module assembly.
Tighten
Tighten the screws to 6 N·m (53 lb in).
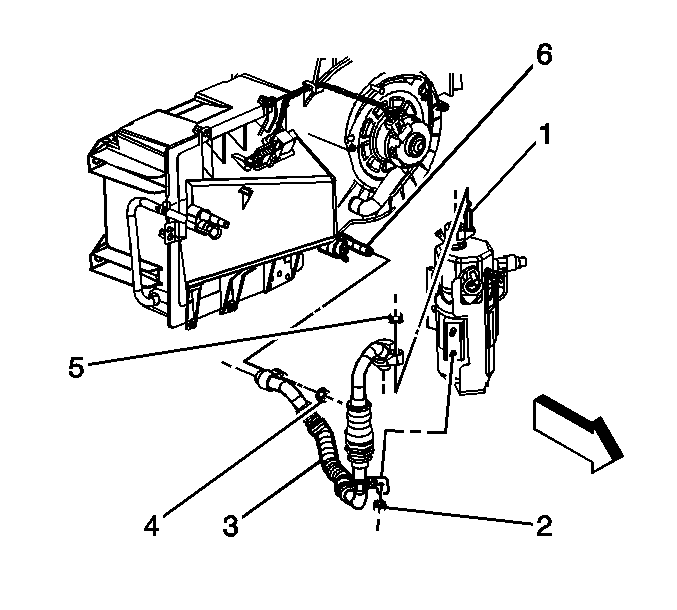
- Install new O-ring seals to the evaporator inlet and outlet tubes. Refer to
O-Ring Replacement
.
- Install the evaporator inlet tube to the evaporator.
- Install the evaporator inlet tube retaining nut (3).
Tighten
Tighten the nut to 16 N·m (12 lb ft).
- Install the evaporator outlet tube to the evaporator.
- Install the evaporator outlet tube retaining nut.
Tighten
Tighten the nut to 16 N·m (12 lb ft).
- Install the multi-use module bracket. Refer to the appropriate procedure:
| • | Caterpillar® 3126 Unit Repair Manual |
- Install the accumulator. Refer to
Air Conditioning Accumulator Replacement
.
- Connect the low pressure sensor electrical connector.
- Connect the blower motor assembly electrical connector.
- Connect the blower motor resistor assembly electrical connector.
- Install the air cleaner. Refer to the appropriate procedure:
| • | Caterpillar® 3126 Unit Repair Manual for the 7.2L (Caterpillar) engine |
- Install the right wheelhouse panel. Refer to
Wheelhouse Panel Replacement
.
- Evacuate and recharge the A/C system. Refer to
Refrigerant Recovery and Recharging
.
- Leak test the fittings of the components using the
J 39400-A
.
