For 1990-2009 cars only
Removal Procedure
- Disable the SIR System. Refer to SIR Disabling and Enabling .
- Remove the instrument panel (I/P) accessory trim panel. Refer to Instrument Panel Accessory Trim Plate Replacement .
- Remove the radio. Refer to Radio Replacement .
- Remove the right access cover from the I/P end cap.
- Remove the right air outlet. Refer to Instrument Panel Outer Air Outlet Replacement - Right Side .
- Remove the I/P compartment door. Refer to Instrument Panel Compartment Door Replacement .
- Remove the digital radio receiver, if equipped. Refer to Digital Radio Receiver Replacement .
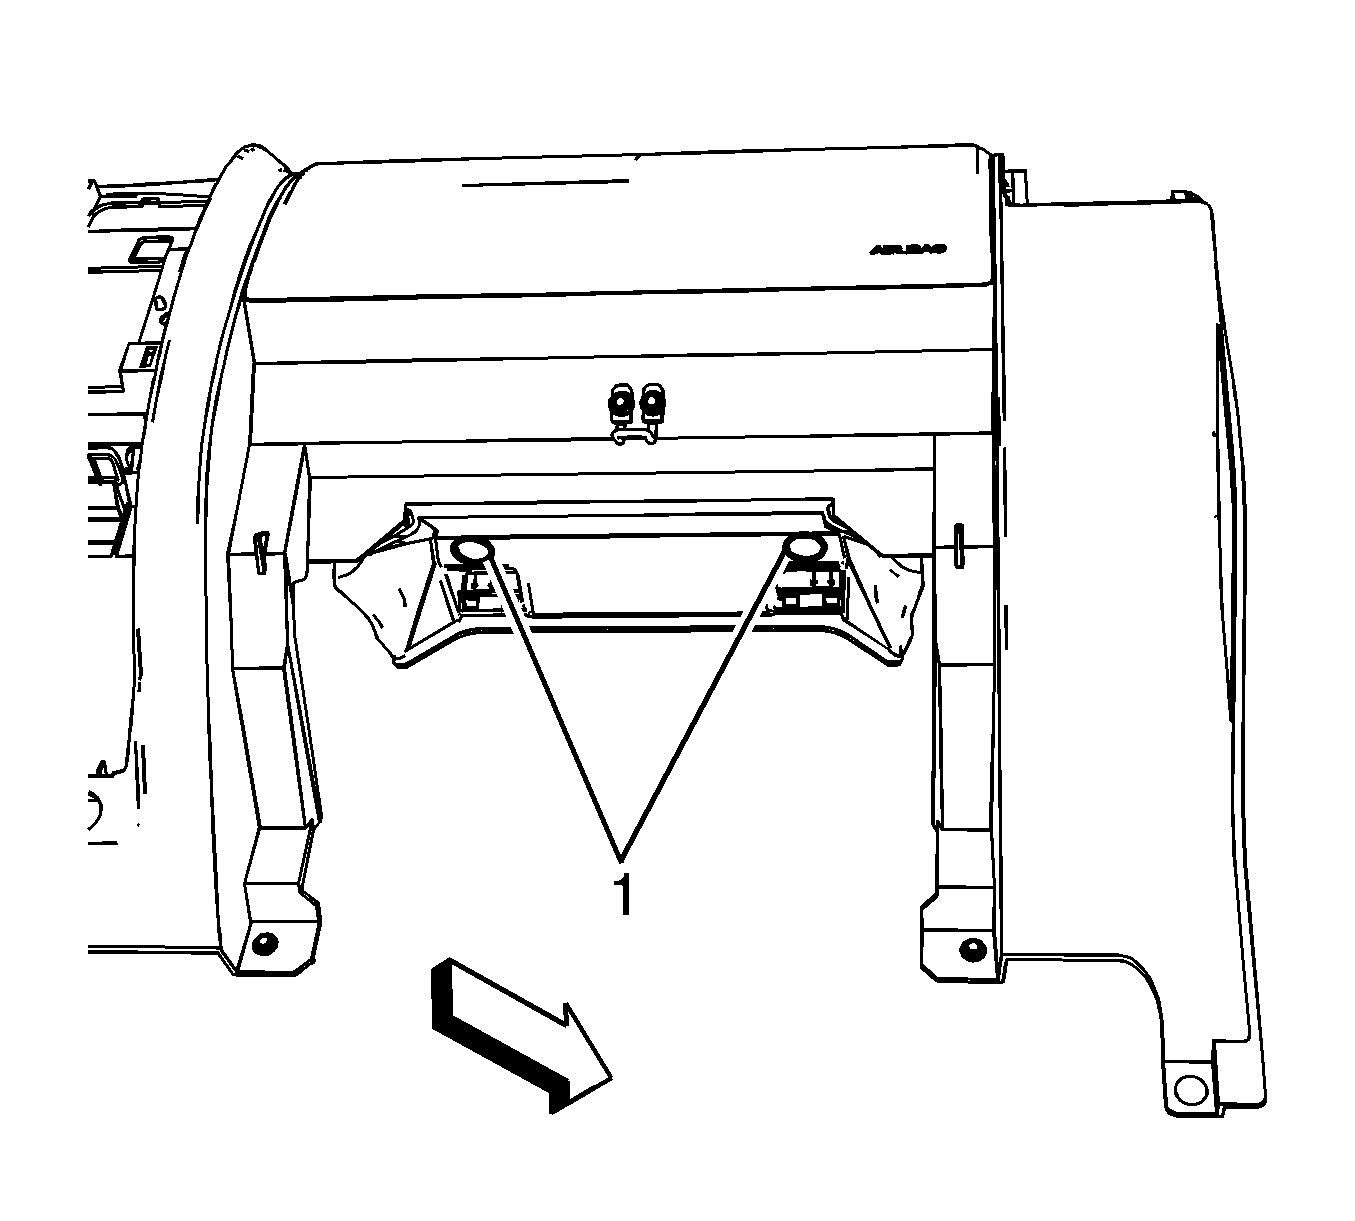
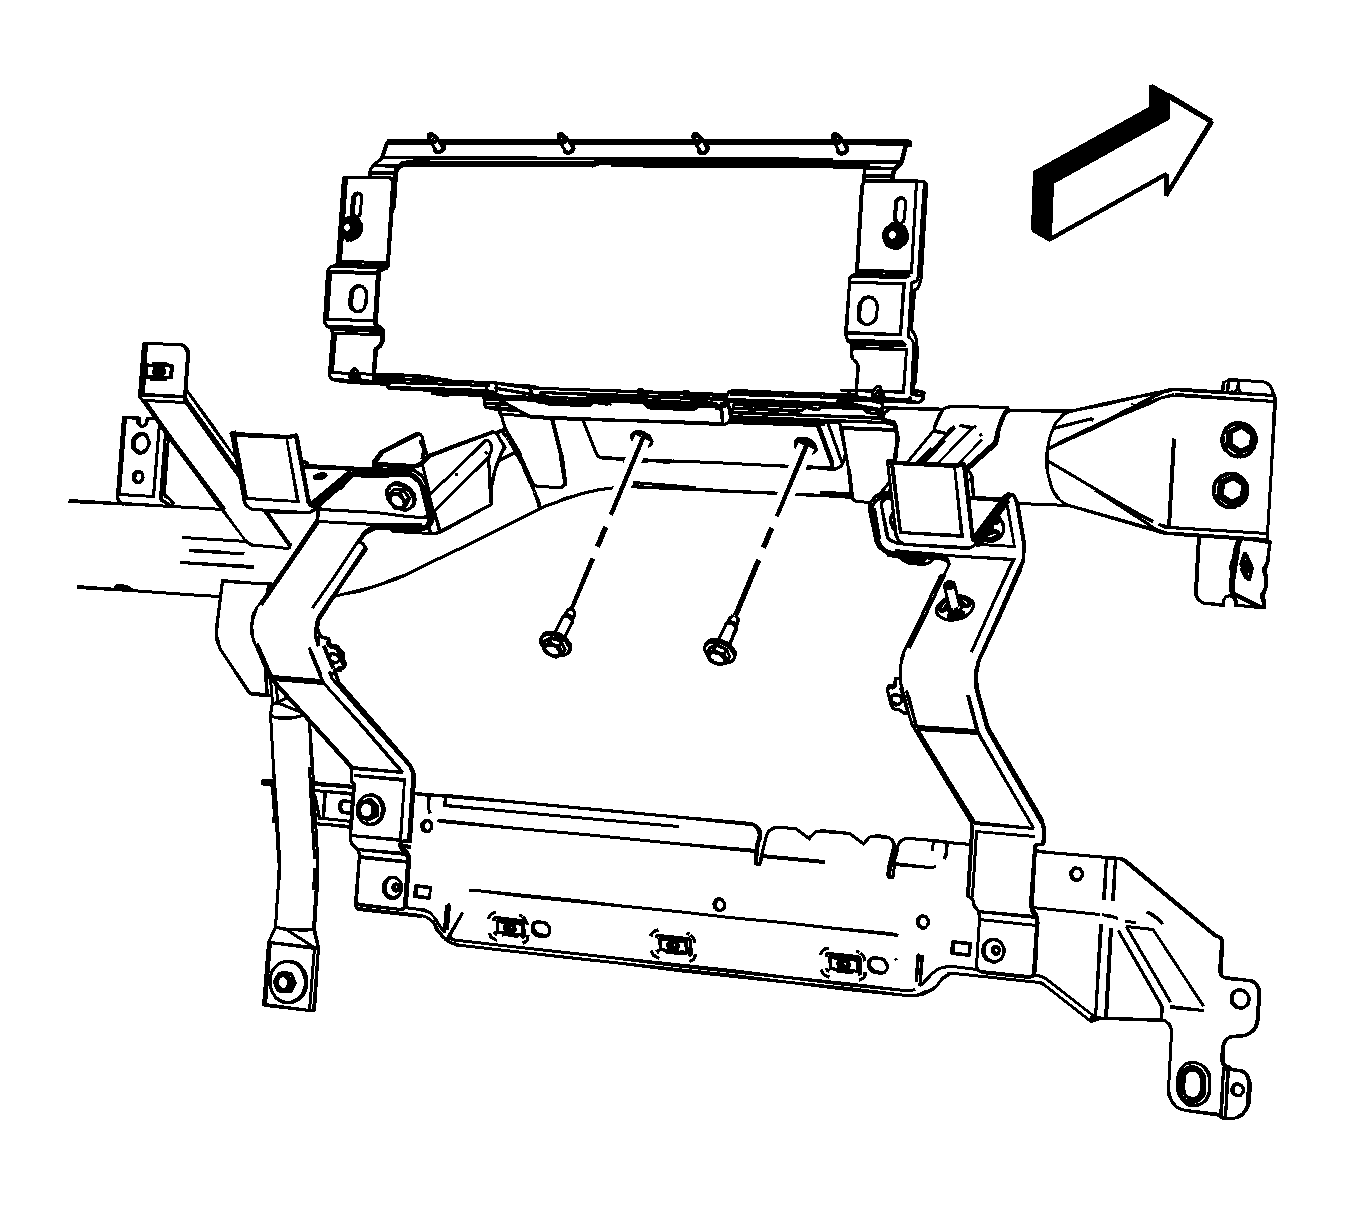
- Access the 2 fasteners located above the service holes (1) inside the I/P compartment door opening.
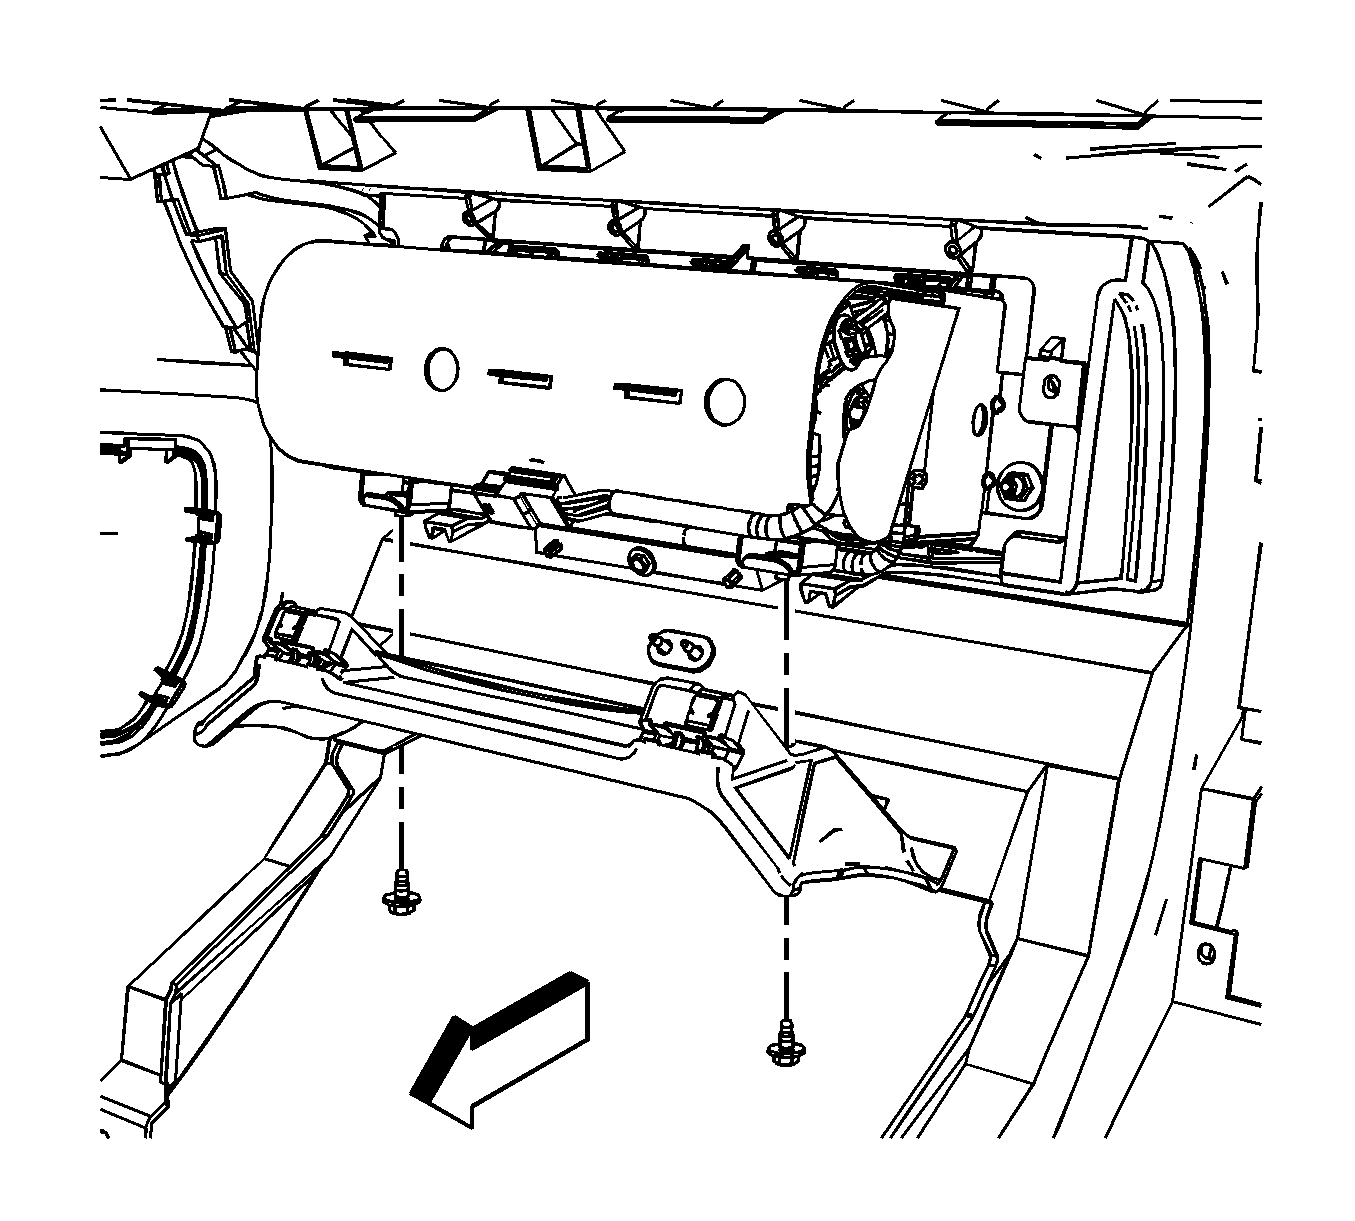
- Remove the fasteners from the passenger supplemental inflatable restraint (PSIR) inflator module.
- Remove the 2 side retaining nuts (1) from the PSIR module.
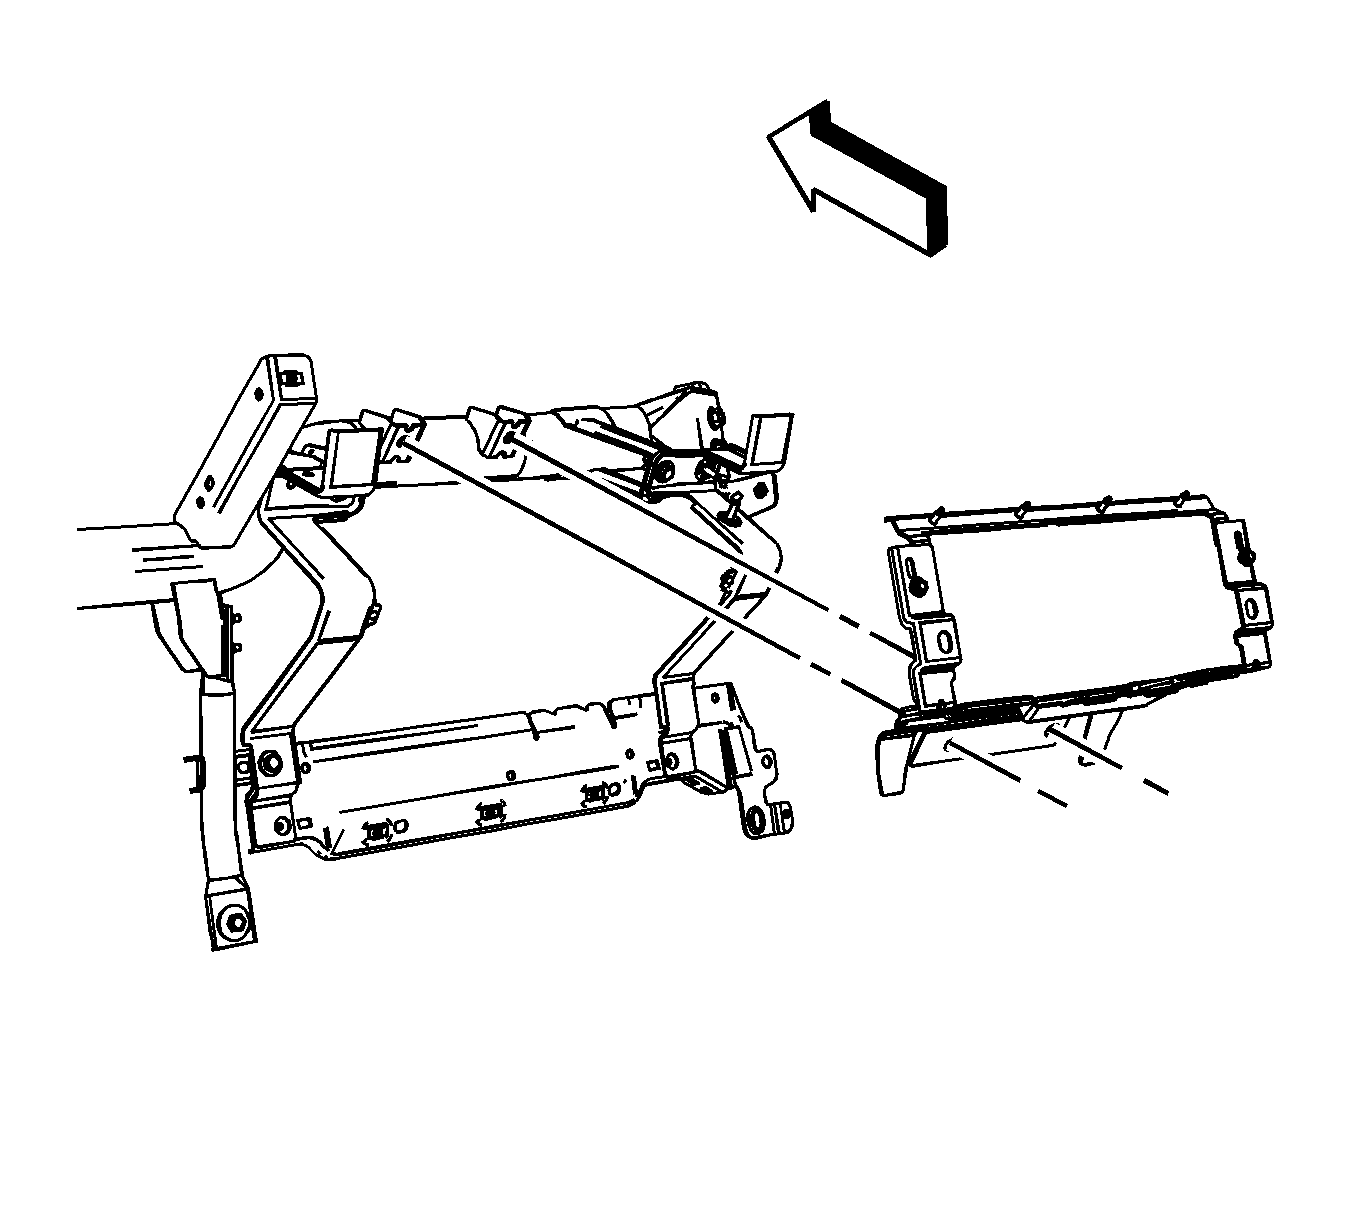
- Partially remove the PSIR inflator module from the I/P.
- Disconnect the connector position assurance (CPA).
- Disconnect the electrical connector from the PSIR module.
- Remove the PSIR inflator module from the vehicle.
- Fully deploy the module before disposal. If the module is being replaced under warranty, fully deploy and dispose of the module after the required retention period. Refer to Inflator Module Handling and Scrapping .
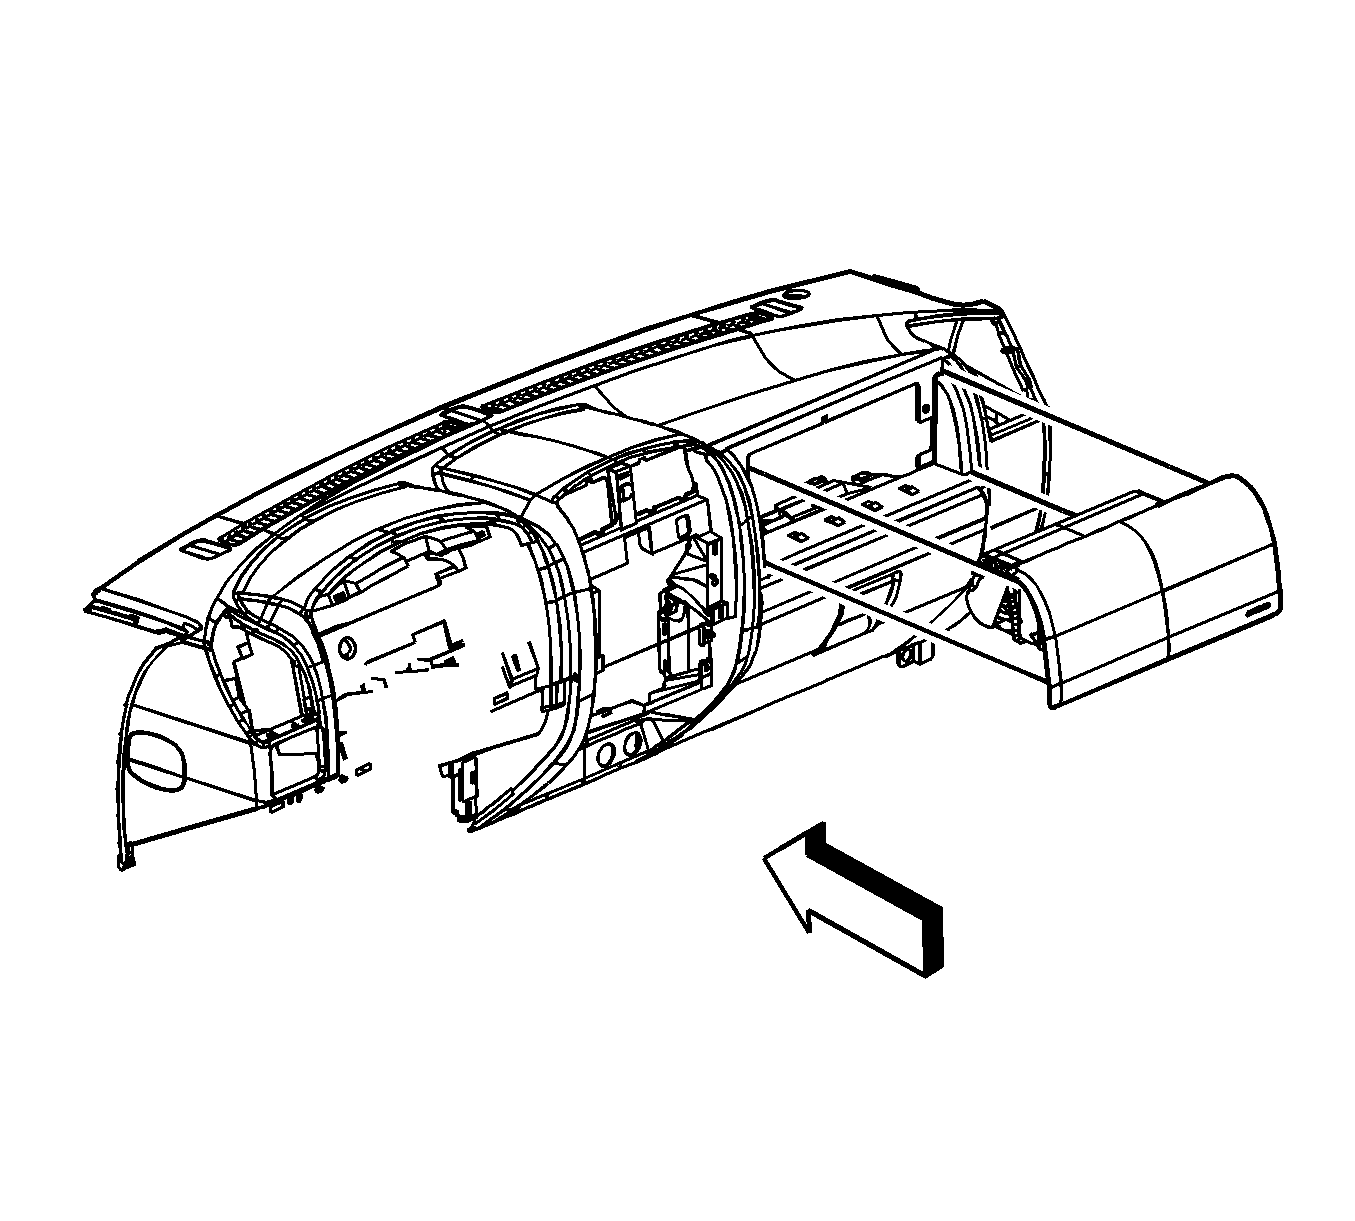
- If replacing the PSIR bracket, remove the I/P assembly. Refer to Instrument Panel Assembly Replacement.
- Remove the 2 fasteners retaining the PSIR bracket to the I/P structure.
- Remove the PSIR bracket from the vehicle.
Caution: Refer to SIR Caution in the Preface section.
Caution: Refer to SIR Inflator Module Handling and Storage Caution in the Preface section.
Important: If the PSIR module has deployed while attached to the I/P, the PSIR bracket MUST be replaced.
Installation Procedure
- If replacing the PSIR bracket, install the PSIR bracket to the I/P structure.
- Install the 2 fasteners retaining the PSIR bracket to the I/P structure.
- Install the I/P assembly. Refer to Instrument Panel Assembly Replacement .
- Position the PSIR inflator module to the front of the I/P and connect the electrical connector.
- Connect the CPA.
- Install the PSIR inflator module to the I/P.
- Partially Install the 2 lower fasteners retaining the PSIR module to the I/P structure.
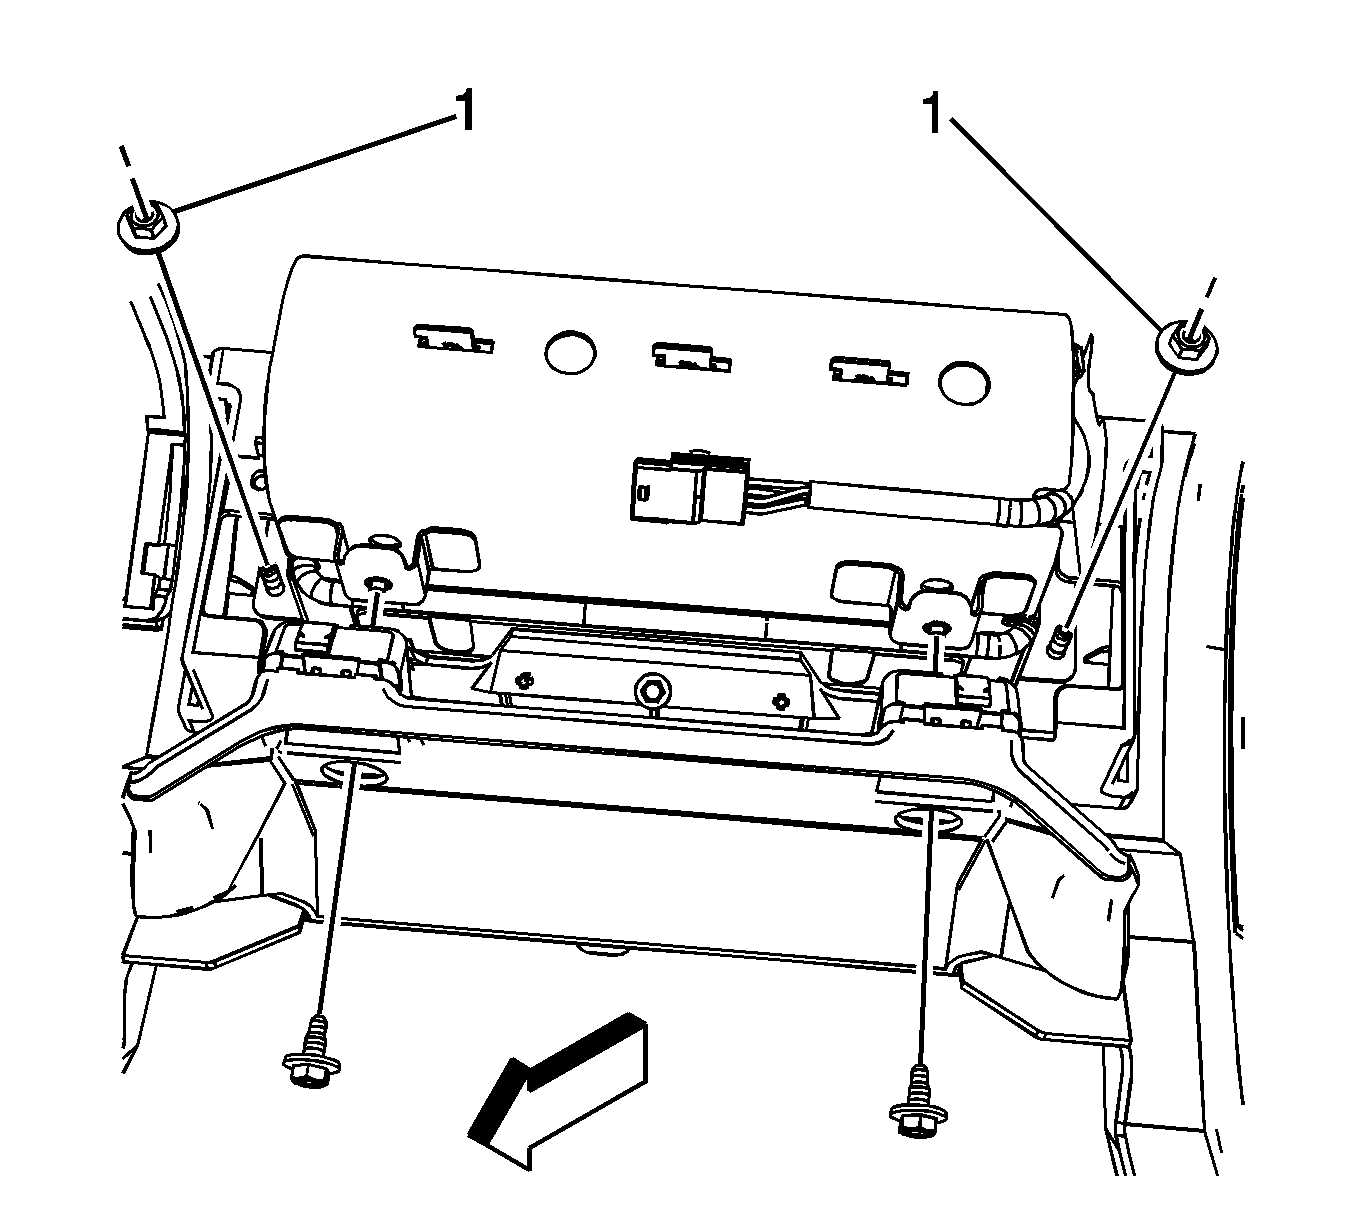
- Install the 2 side retaining nuts (1) to the PSIR inflator module.
- Install the digital radio receiver, if equipped. Refer to Digital Radio Receiver Replacement .
- Install the radio. Refer to Radio Replacement.
- Install the I/P accessory trim panel. Refer to Instrument Panel Accessory Trim Plate Replacement.
- Install the right air outlet. Refer to Instrument Panel Outer Air Outlet Replacement - Right Side.
- Install the right access cover to the I/P end cap.
- Enable the SIR System. Refer to SIR Disabling and Enabling .
- Install the I/P compartment door. Refer to Instrument Panel Compartment Door Replacement .
Notice: Refer to Fastener Notice in the Preface section.
Tighten
Tighten the fasteners to 9 N·m (80 lb in).
Tighten
Tighten the 4 PSIR fasteners until fully
driven, seated and not stripped.
