For 1990-2009 cars only
Removal Procedure
- Remove the center floor console. Refer to Console Replacement.
- Remove the instrument panel (I/P). Refer to Instrument Panel Assembly Replacement.
- Remove the steering column with the steering wheel attached. Refer to Steering Column Replacement.
- Remove the floor console bracket. Refer to Floor Console Bracket Replacement.
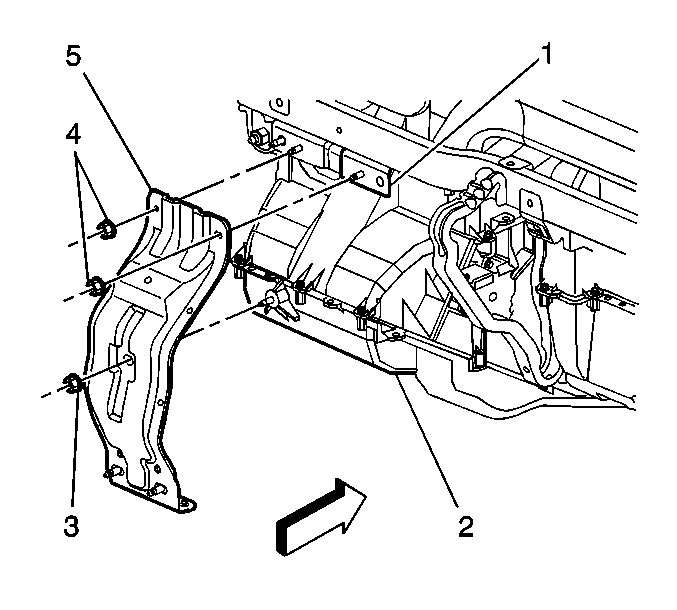
- Remove the splice pack from the floor panel located on the right side of the HVAC center support bracket (5).
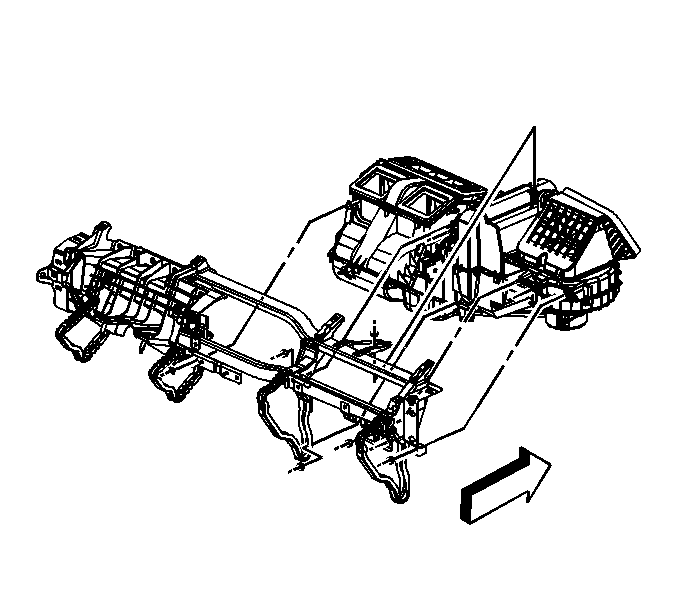
- Remove the HVAC center support bracket (5) from the HVAC module (2).
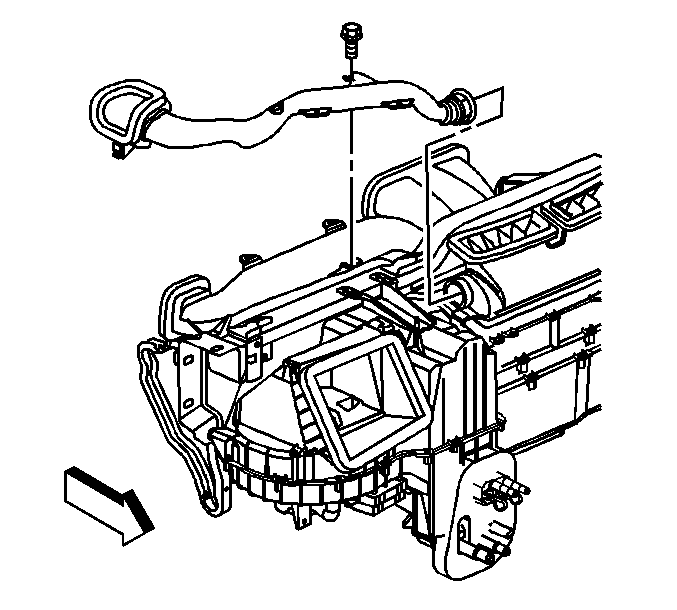
- Remove the side window defogger duct.
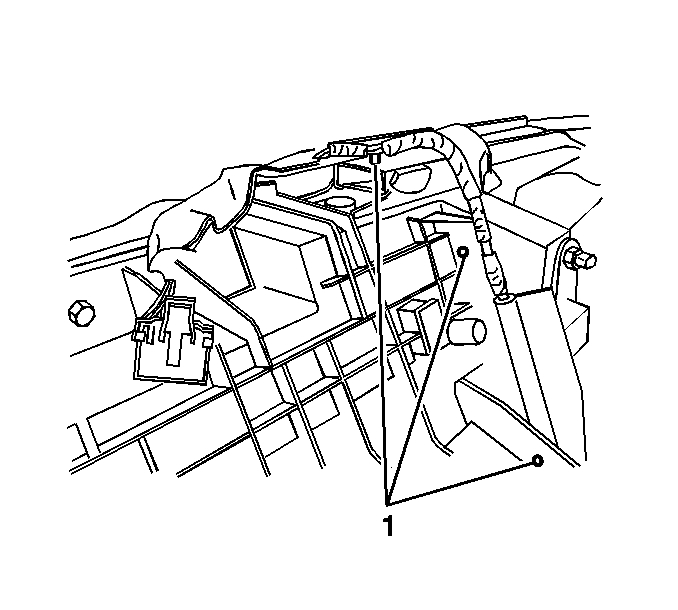
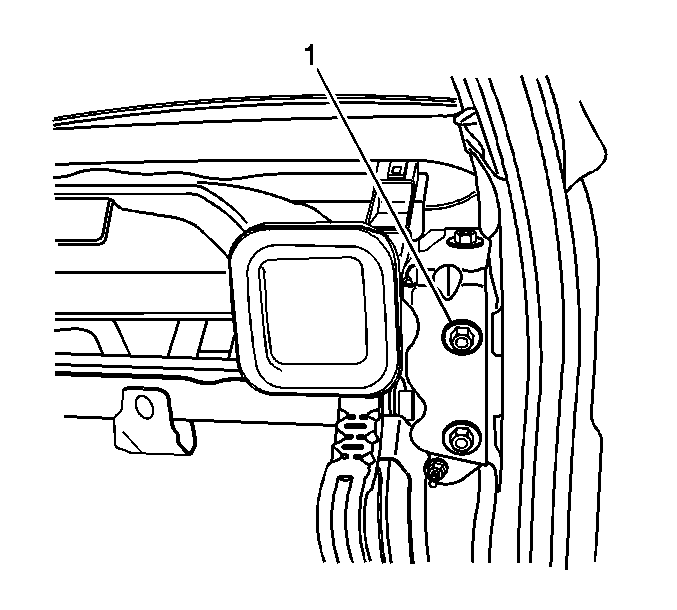
- Remove the instrument panel cluster (IPC) wire harness attachments (1) from the steering column support bracket and I/P carrier.
- Remove the speaker wire harness attachments from the steering column support bracket and I/P carrier.
- Remove the I/P wiring harness retaining screws (1) from the I/P support brackets, located near the steering column support bracket.
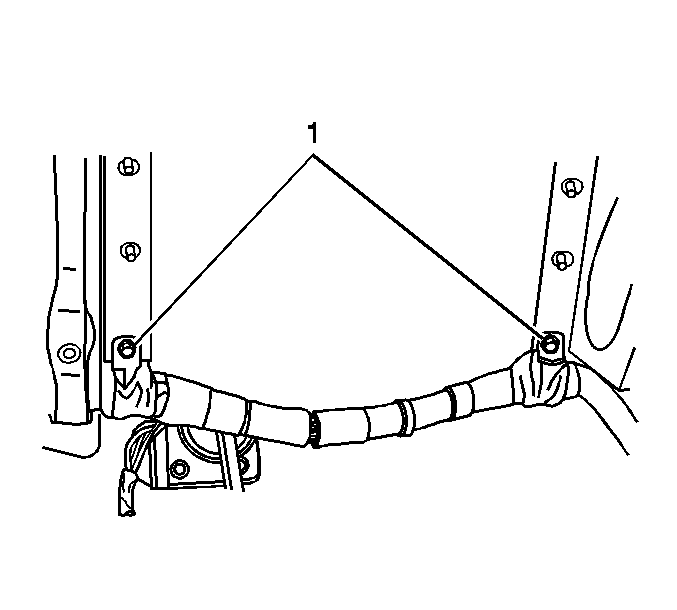
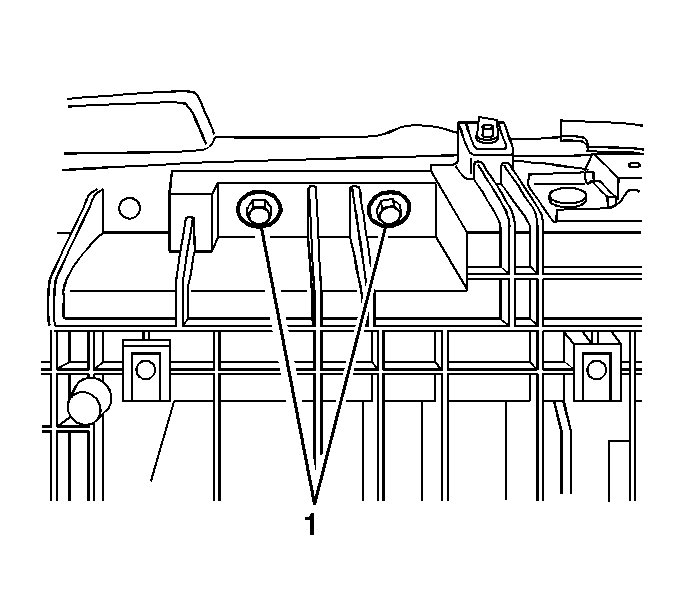
- Remove the 2 bolts (1) located at the top of the steering column support bracket.
- Remove the 2 bolts (1) located underneath the steering column support bracket.
- Detach and remove the SIR harness from the I/P carrier.
- Disconnect the radio antenna cable located near the blower motor.
- Detach and remove the I/P wire harness from the right side of the I/P carrier.
- Remove the radio harness form the I/P carrier.
- Remove the temperature sensors from the ventilation ducts.
- Remove the transfer case control module from the steering column support bracket.
- Remove the upper and lower bolts retaining the I/P carrier to the right cowl side carrier bracket.
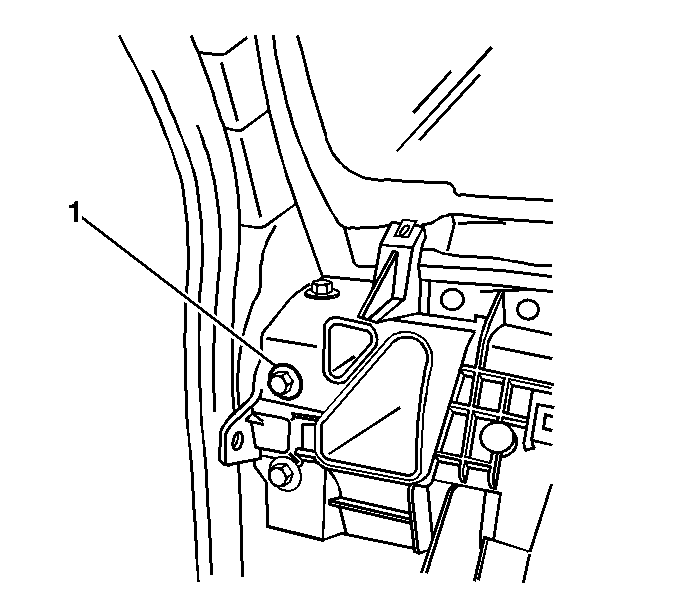
- Remove the center bolt (1) that retains the I/P carrier to the right cowl side carrier bracket.
- Remove the upper and lower bolts retaining the steering column support bracket to the left cowl side carrier bracket.
- Remove the center bolt (1) that retains the steering column support bracket to the left cowl side carrier bracket.
- Remove the 6 nuts that retain the HVAC module to the I/P carrier.
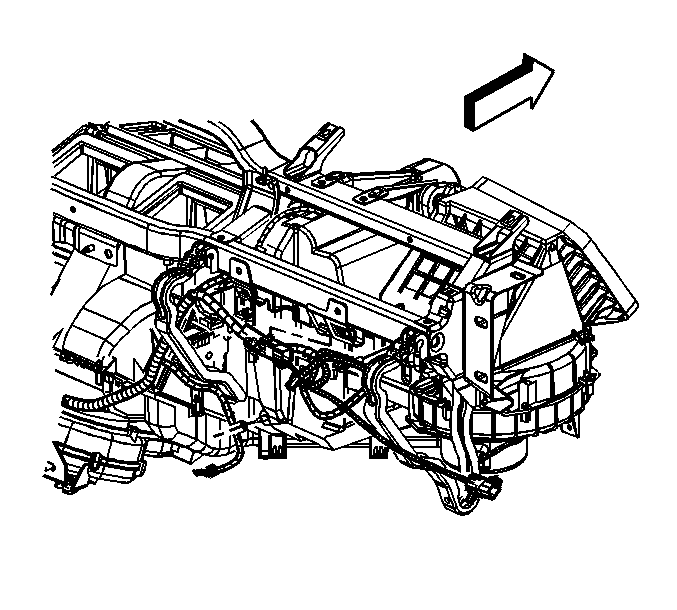
- Remove the I/P carrier and steering column support bracket assembly from the vehicle and place on a clean prepared surface.

Installation Procedure
- Install the I/P carrier and steering column support bracket assembly to the vehicle.
- Install the 6 nuts that retain the HVAC module to the I/P carrier.
- Install the center bolt (1) retaining the steering column support bracket to the left cowl side carrier bracket.
- Install the upper and lower bolts retaining the steering column support bracket to the left cowl side carrier bracket.
- Install the center bolt (1) retaining the I/P carrier to the right cowl side carrier bracket.
- Install the upper and lower bolts retaining the I/P carrier to the right cowl side carrier bracket.
- Install and attach the I/P wire harness to the I/P carrier.
- Connect the radio antenna cable located near the blower motor.
- Install the SIR harness to the I/P carrier.
- Install the radio harness to the I/P carrier.
- Install the temperature sensors to the ventilation ducts.
- Install the transfer case control module to the steering column support bracket.
- Install the 2 bolts (1) located at the top of the steering column support bracket.
- Install the 2 bolts (1) located underneath the steering column support bracket.
- Install the I/P wire harness retaining screws (1) to the I/P support bracket located near the steering column support bracket.
- Install the IPC wire harness attachments (1) to the steering column support bracket and I/P carrier.
- Install the speaker wire harness attachments to the steering column support bracket and I/P carrier.
- Install the side window defogger duct.
- Install the screw retaining the defogger duct to the I/P carrier.
- Install the HVAC center support bracket (5) to the HVAC module.
- Install the nuts retaining the HVAC center support bracket to the HVAC module (2).
- Install the splice pack to the floor panel.
- Install the steering column. Refer to Steering Column Replacement.
- Install the I/P. Instrument Panel Assembly Replacement.
- Install the center floor console. Refer to Console Replacement.
Caution: Refer to Fastener Caution in the Preface section.
Tighten
Tighten the HVAC module to the I/P carrier nuts to 10 N·m (88 lb in).
Tighten
Starting with the center bolts (1), tighten the 6 cowl side carrier bracket bolts to 50 N·m (36 lb ft).
Tighten
Tighten the upper steering column support bracket bolts to 50 N·m (36 lb ft).
Tighten
Tighten the lower steering column support bracket bolts to 50 N·m (36 lb ft).
Tighten
Tighten the I/P wire harness screws to 2.5 N·m (22 lb in).
Tighten
Tighten the defogger duct screw to 2.5 N·m (22 lb in).
Tighten
Tighten the center support bracket nuts to 10 N·m (88 lb in).
Tighten
Tighten the splice pack retaining bolt to 10 N·m (88 lb in).
