For 1990-2009 cars only
Removal Procedure (Type A)
- Remove the I/P upper trim panel. Refer to Instrument Panel Upper Trim Panel Replacement .
- Remove the secondary information centre. Refer to Secondary Driver Information Display Replacement .
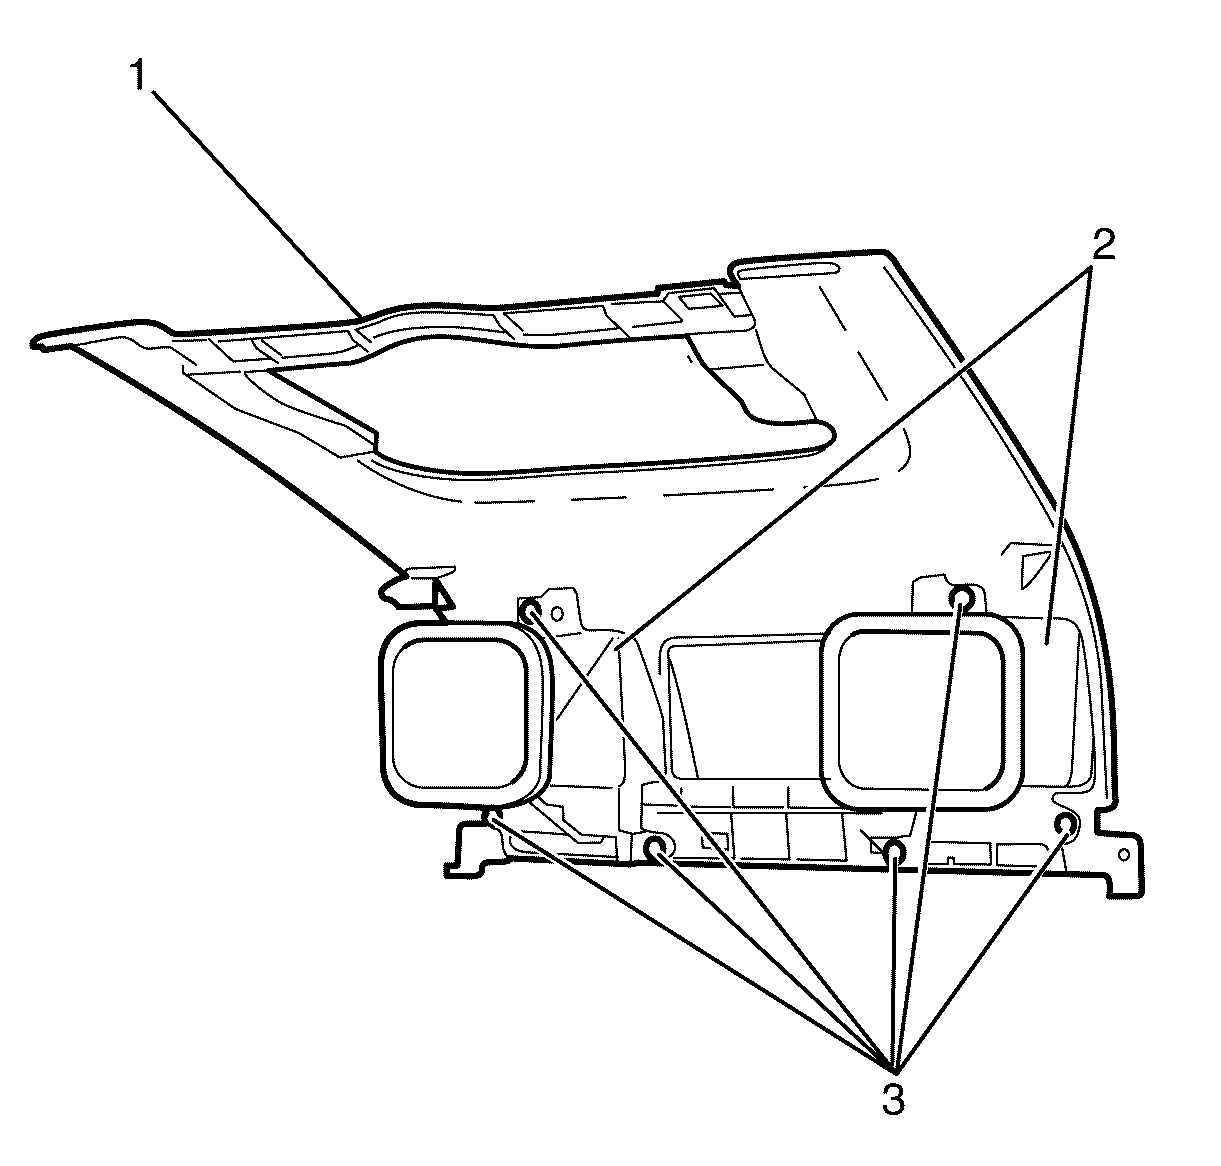
- Remove the I/P center air outlet deflector to I/P upper trim panel retaining screws (3).
- Remove the I/P center air outlet deflector (2) from the I/P upper trim panel (1).

Installation Procedure (Type A)
- Install the I/P center air outlet deflector (2) to the I/P upper trim panel (1).
- Install the I/P center air outlet deflector to I/P upper trim panel retaining screws (3).
- Install the secondary information centre. Refer to Secondary Driver Information Display Replacement .
- Install the I/P upper trim panel. Refer to Instrument Panel Upper Trim Panel Replacement .

Tighten
Tighten the screws to 2 N·m (18 lb
in.)
Removal Procedure (Type B)
- Remove the I/P upper trim panel. Refer to Instrument Panel Upper Trim Panel Replacement .
- Remove the secondary information centre. Refer to Secondary Driver Information Display Replacement .
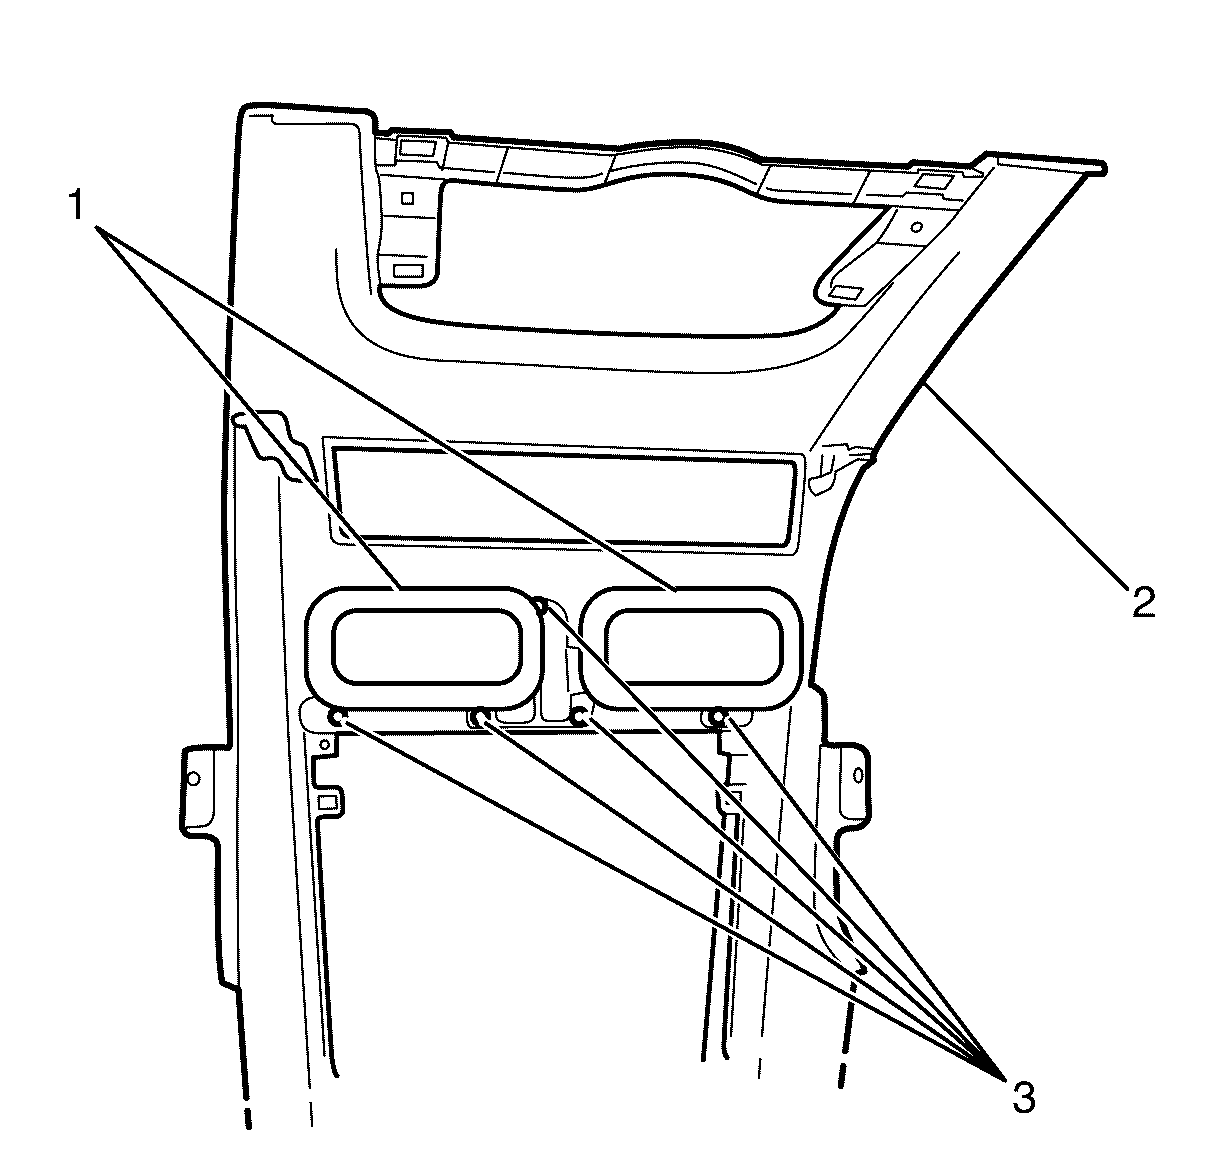
- Remove the I/P center air outlet deflector to I/P upper trim panel retaining screws (3).
- Remove the I/P center air outlet deflector (1) from the I/P upper trim panel (2).

Installation Procedure (Type B)
- Install the I/P center air outlet deflector (1) to the I/P upper trim panel (2).
- Install the I/P center air outlet deflector to I/P upper trim panel retaining screws (3).
- Install the secondary information centre. Refer to Secondary Driver Information Display Replacement .
- Install the I/P upper trim panel. Refer to Instrument Panel Upper Trim Panel Replacement .

Tighten
Tighten the screws to 2 N·m (18 lb
in.)
Removal Procedure (Type C)
- Remove the I/P upper trim panel. Refer to Instrument Panel Upper Trim Panel Replacement .
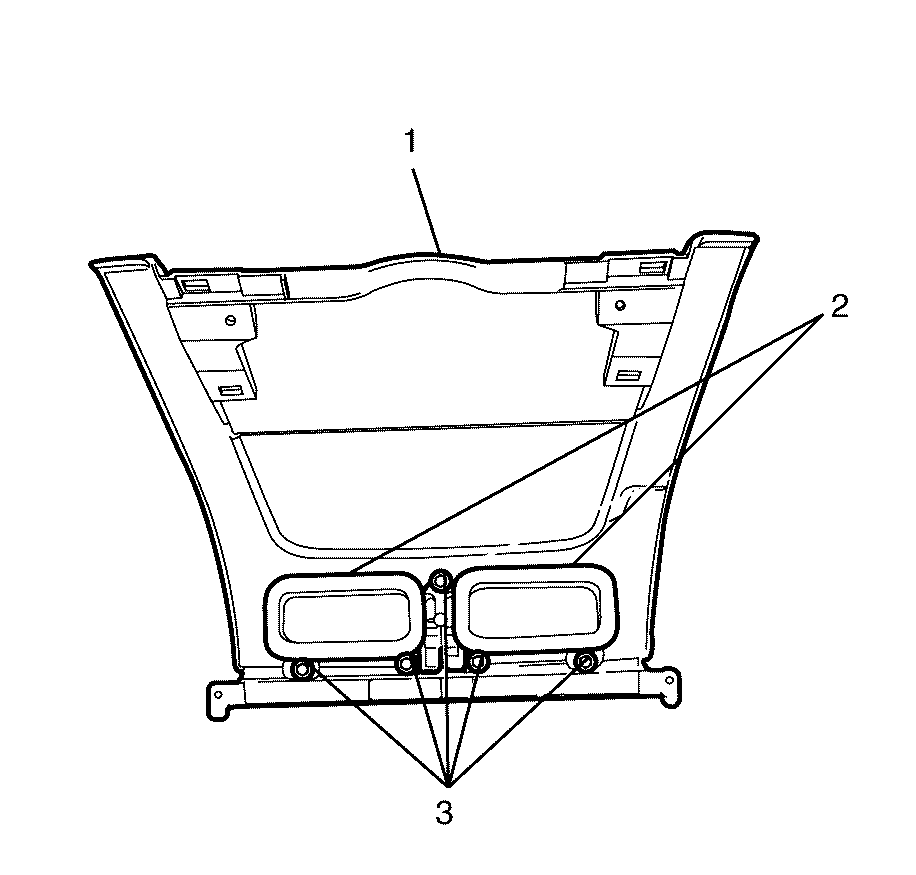
- Remove the I/P center air outlet deflector to I/P upper trim panel retaining screws (3).
- Remove the I/P center air outlet deflector (2) from the I/P upper trim panel (1).

Installation Procedure (Type C)
- Install the I/P center air outlet deflector (2) to the I/P upper trim panel (1).
- Install the I/P center air outlet deflector to I/P upper trim panel retaining screws (3).
- Install the I/P upper trim panel. Refer to Instrument Panel Upper Trim Panel Replacement .

Tighten
Tighten the screws to 2 N·m (18 lb
in.)
Removal Procedure (Type D)
- Remove the console centre trim plate. Refer to Console Trim Plate Replacement .
- Remove the instrument panel centre trim plate. Refer to Instrument Panel Center Trim Panel Replacement .
- Remove the infotainment unit. Refer to Radio Replacement .
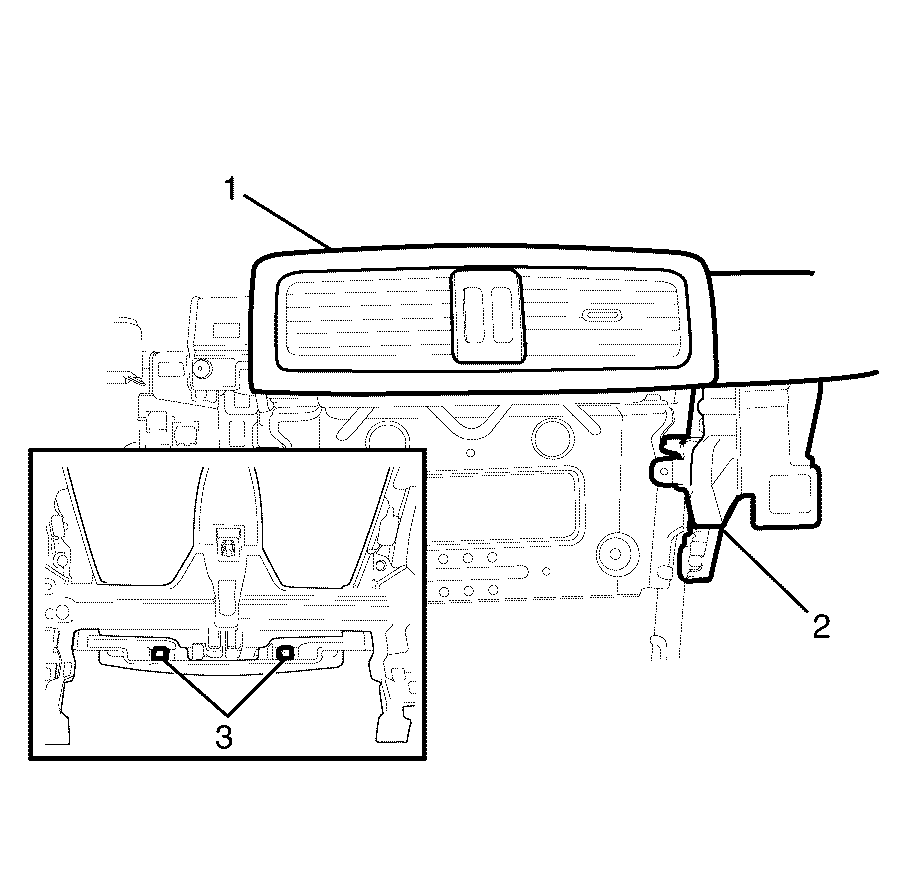
- Disengage the I/P center air outlet deflector to I/P upper trim pad retaining clips (3).
- Remove the I/P center air outlet deflector (1) from the I/P upper trim pad (2).

Important: Depress the I/P center air outlet deflector to I/P upper trim pad retaining clips (3) to disengage the I/P center air outlet deflector (1) from the I/P upper trim pad (2).
Installation Procedure (Type D)
- Install the I/P center air outlet deflector (1) to the I/P upper trim pad (2).
- Install the infotainment unit. Refer to Radio Replacement .
- Install the instrument panel centre trim plate. Refer to Instrument Panel Center Trim Panel Replacement .
- Install the console centre trim plate. Refer to Console Trim Plate Replacement .

Important: Make sure the I/P center air outlet deflector to I/P upper trim pad retaining clips (3) are engaged to avoid an induced rattle condition.
