Sound Barrier Replacement - Rear Seat Cushion to Floorpan LWB
Removal Procedure
- Remove the rear seat back. Refer to Rear Seat Back Replacement .
- Remove the rear seat cushion. Refer to Rear Seat Cushion Replacement .
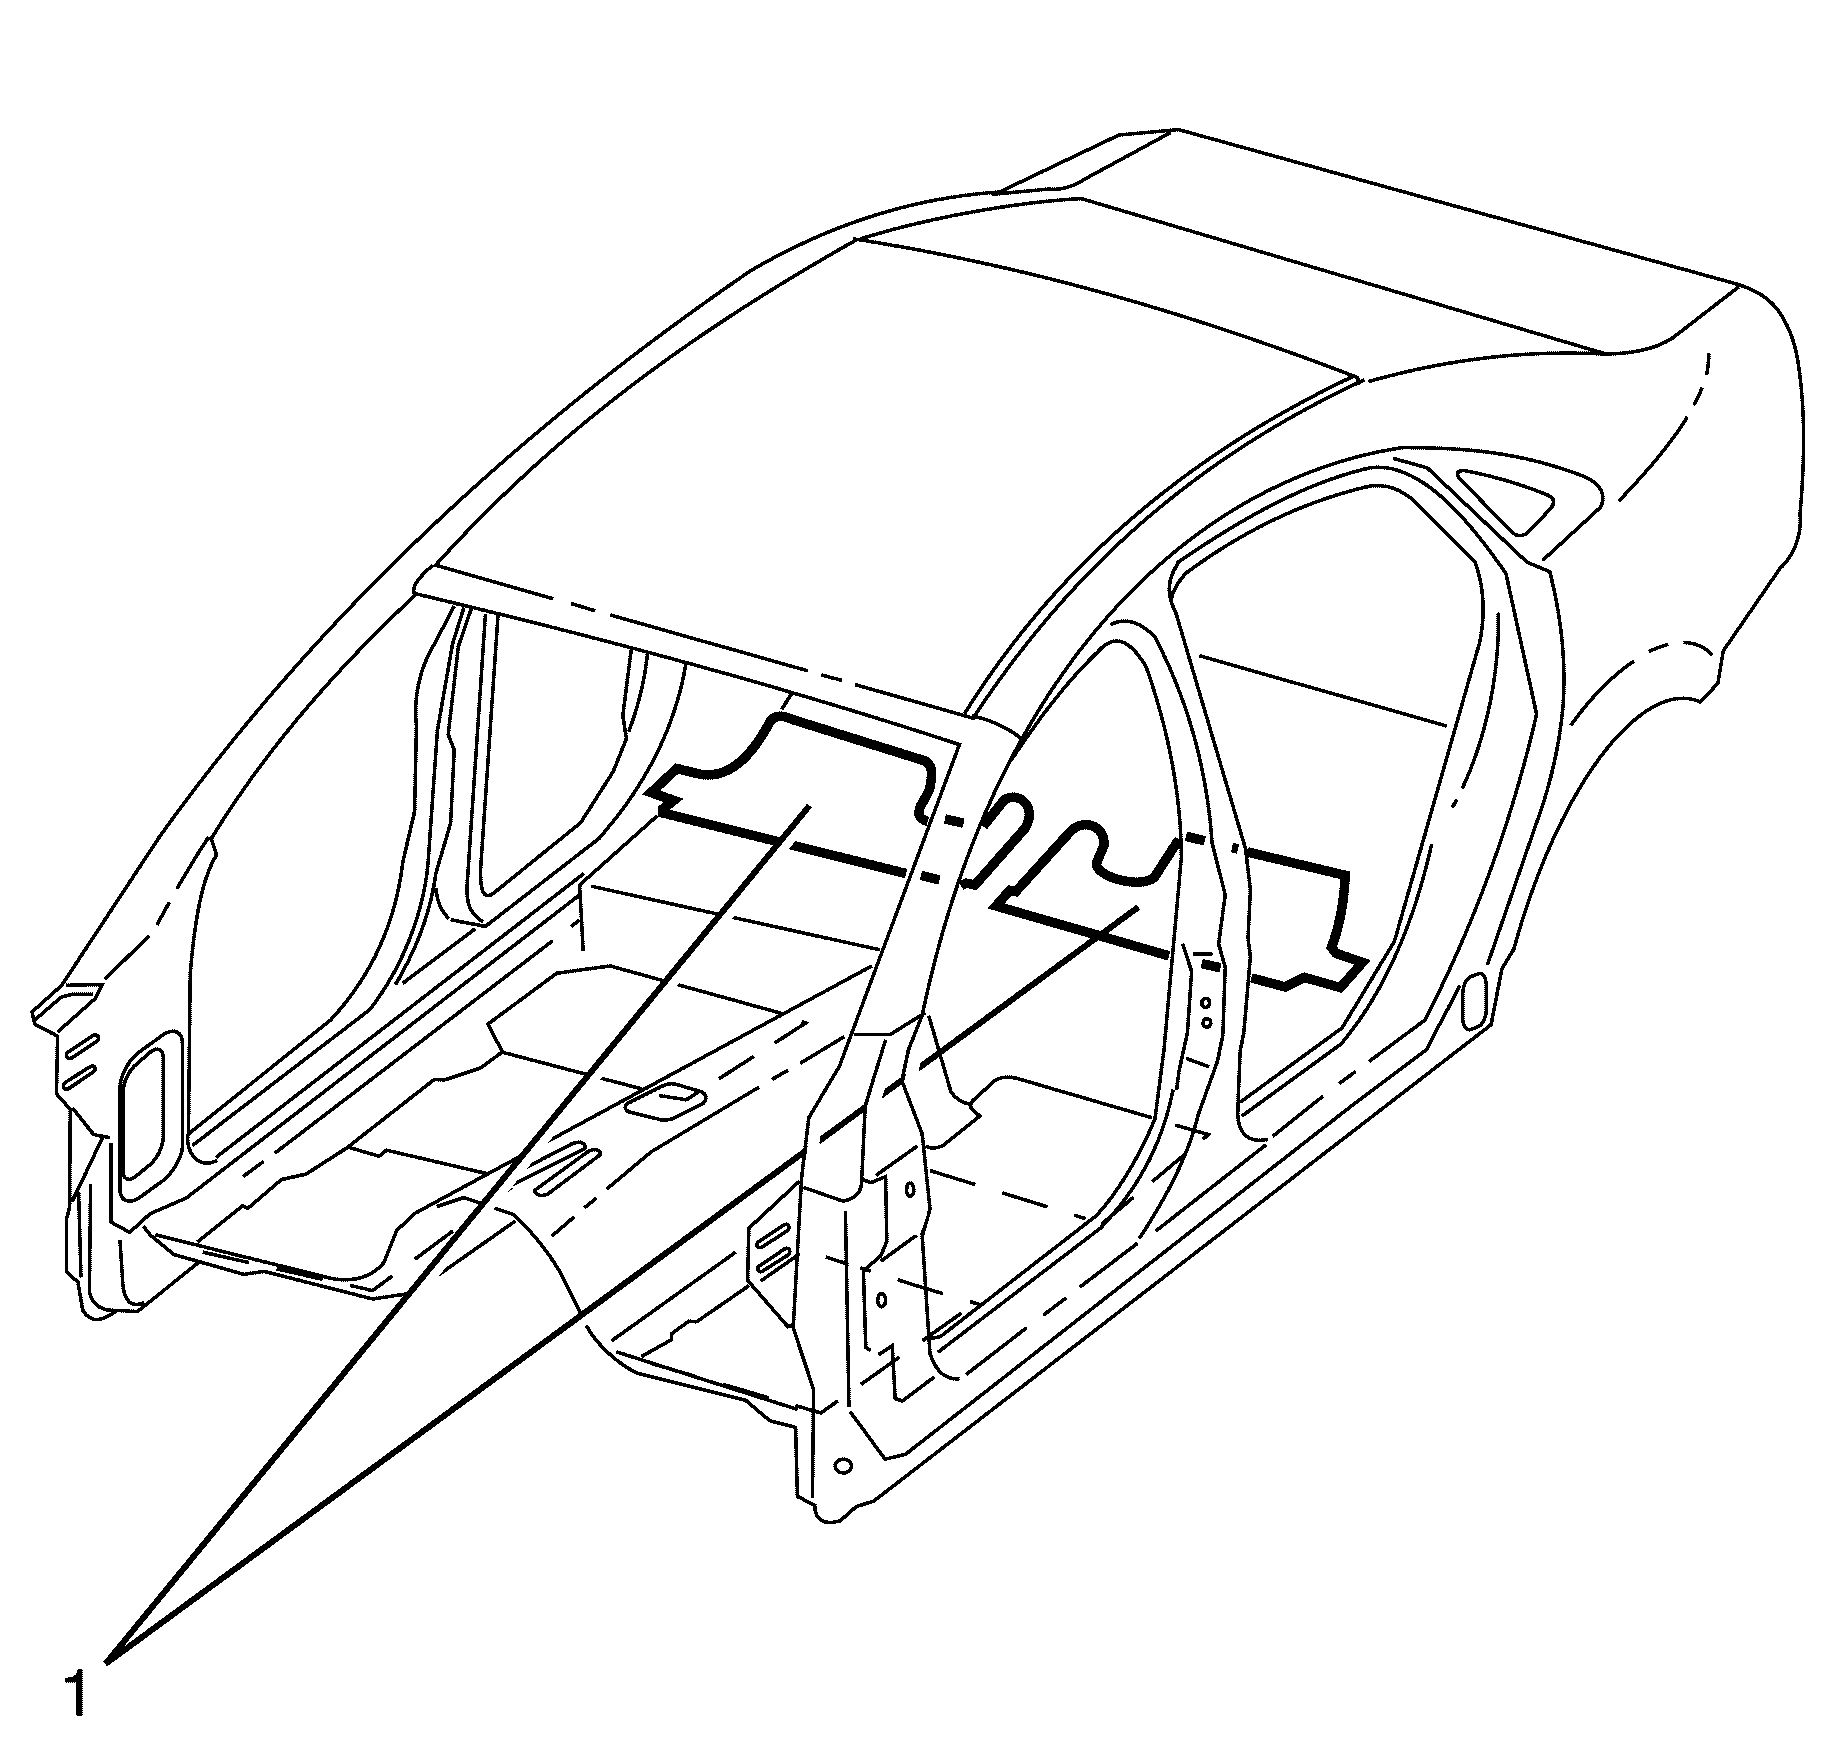
- Lift the rear floor pan sound barriers (1) upward and pull outward in order to remove.

Installation Procedure
- Ensure the attachment areas are clear.
- Remove the backing of the sound barriers.
- Route the sound barriers around the electrical harness.
- Press firmly in all areas in order to secure the sound barriers (1) to the floor pan.
- Install the rear seat cushion. Refer to Rear Seat Cushion Replacement .
- Install the rear seat back. Refer to Rear Seat Back Replacement .
Caution: All floor pan insulator material must meet Federal Vehicle Safety Standards for flammability. Failure to do so could result in personal injury and/or vehicle damage.
Important: Align the sound barriers in order to keep the seat belt and seat attachment areas are clear.
Important: When installing the barriers, ensure they are aligned with the respective holes in the sheet metal.

Sound Barrier Replacement - Rear Seat Cushion to Floorpan SWB
Removal Procedure - Up to 24 Oct 06
- Remove the rear seat back. Refer to Rear Seat Back Replacement .
- Remove the rear seat cushion. Refer to Rear Seat Cushion Replacement .
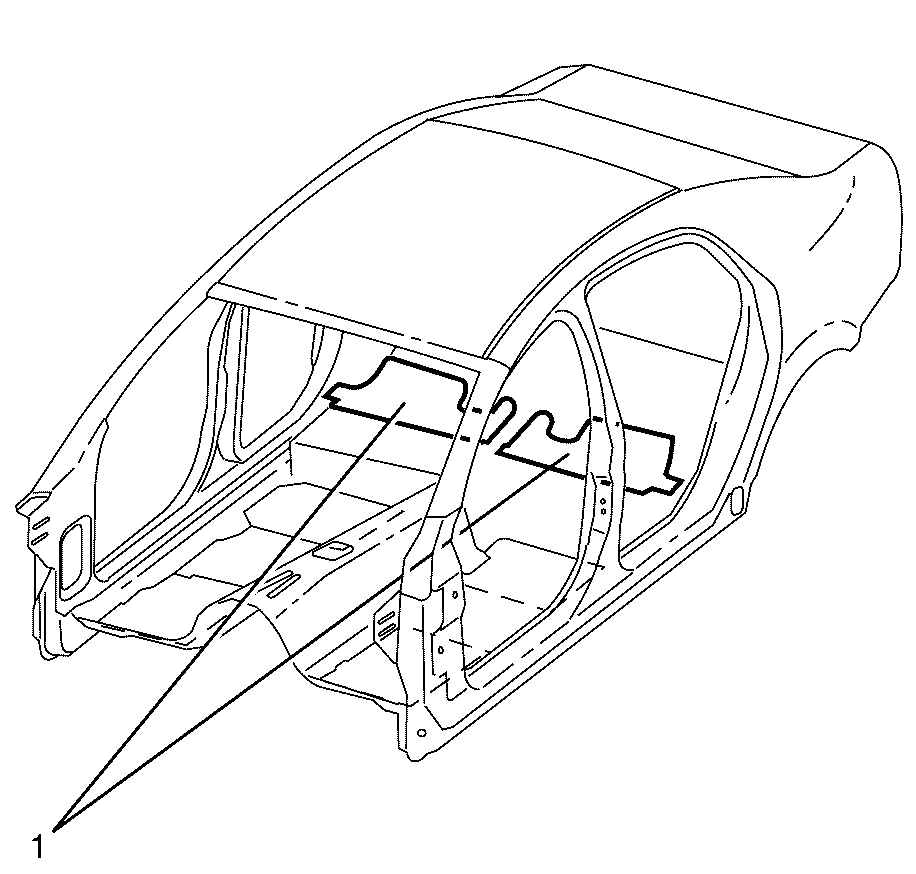
- Lift the rear floor pan sound barriers (1) upward and pull outward in order to remove.

Installation Procedure - Up to 24 Oct 06
- Ensure the attachment areas are clear.
- Remove the backing of the sound barriers.
- Route the sound barriers around the electrical harness.
- Press firmly in all areas in order to secure the sound barriers (1) to the floor pan.
- Install the rear seat cushion. Refer to Rear Seat Cushion Replacement .
- Install the rear seat back. Refer to Rear Seat Back Replacement .
Caution: All floor pan insulator material must meet Federal Vehicle Safety Standards for flammability. Failure to do so could result in personal injury and/or vehicle damage.
Important: Align the sound barriers in order to keep the seat belt and seat attachment areas are clear.
Important: When installing the barriers, ensure they are aligned with the respective holes in the sheet metal.

Sound Barrier Replacement - Rear Seat Cushion to Floorpan Sportwagon
Removal Procedure
- Remove the rear seat cushion. Refer to Rear Seat Cushion Replacement.
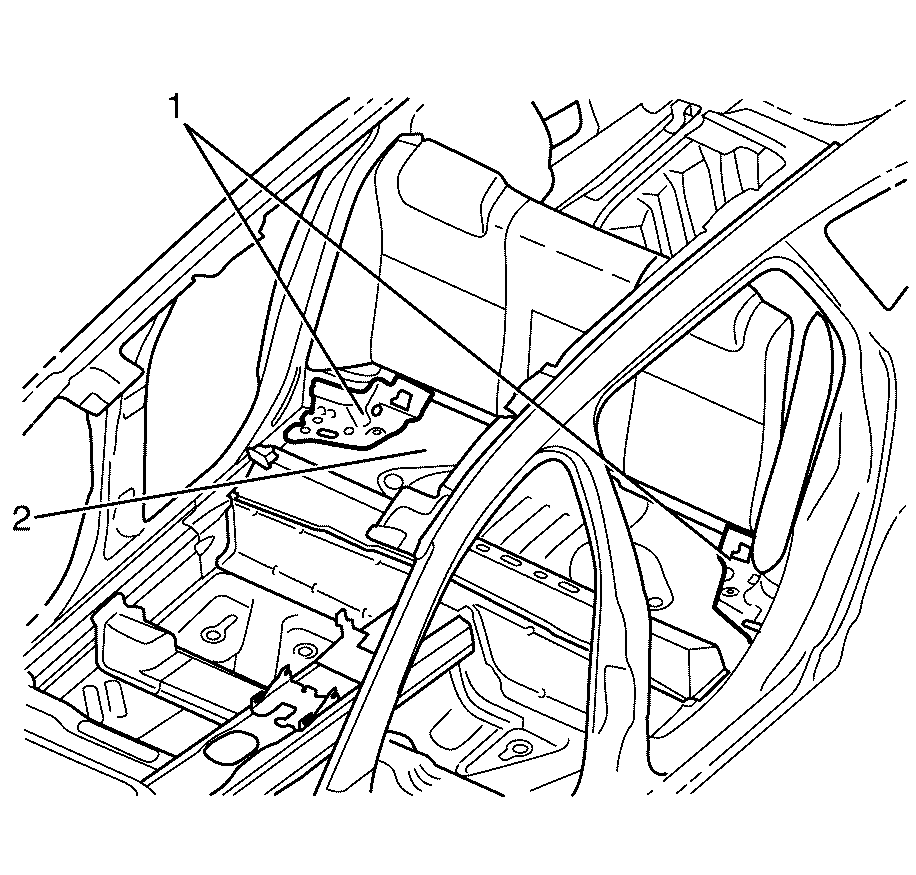
- Remove the rear floorpan sound barriers (1) from the floorpan (2).

Installation Procedure
- Clean the contact surface area with a suitable cleaning solution and a lint free cloth to remove any adhesive or grease.
- Peel the backing from the floorpan sound barriers (1).
- Install the floorpan sound barriers (1) to the floorpan (2).
- Press the floorpan sound barriers (1) firmly in all areas in order to secure the sound barriers to the floorpan (2).
- Install the rear seat cushion. Refer to Rear Seat Cushion Replacement.

Caution: All floor pan insulator material must meet Federal Vehicle Safety Standards for flammability. Failure to do so could result in personal injury and/or vehicle damage.
Important: When installing the floorpan sound barriers, aligned with the floorpan sound barriers with the respective contours on the floorpan (2).
Important: Make sure that the floorpan sound barriers (1) bonds to the floorpan (2) adequately.
