For 1990-2009 cars only
Special Tools
For equivalent regional tools, refer to Special Tools.
Removal Procedure
Follow the steps below in order to remove terminals from the connector.
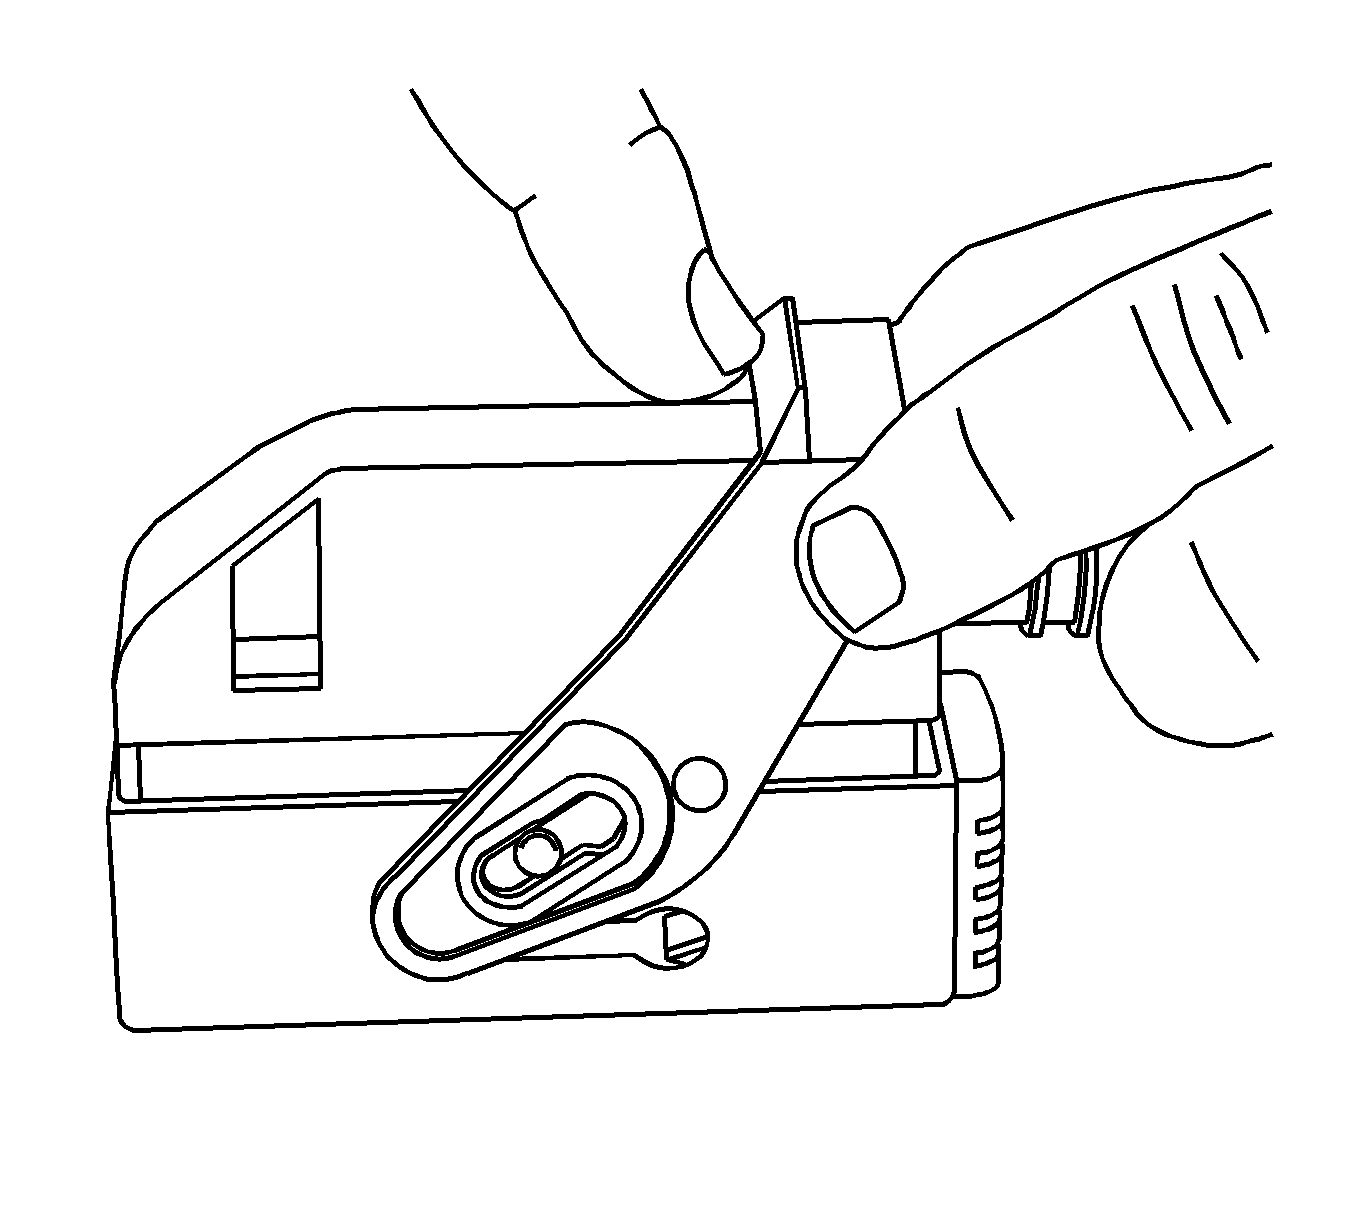
- Slide the lever lock forward while pressing down on the lever lock release tab.
- The release tab is located on the top of the wiredress cover.
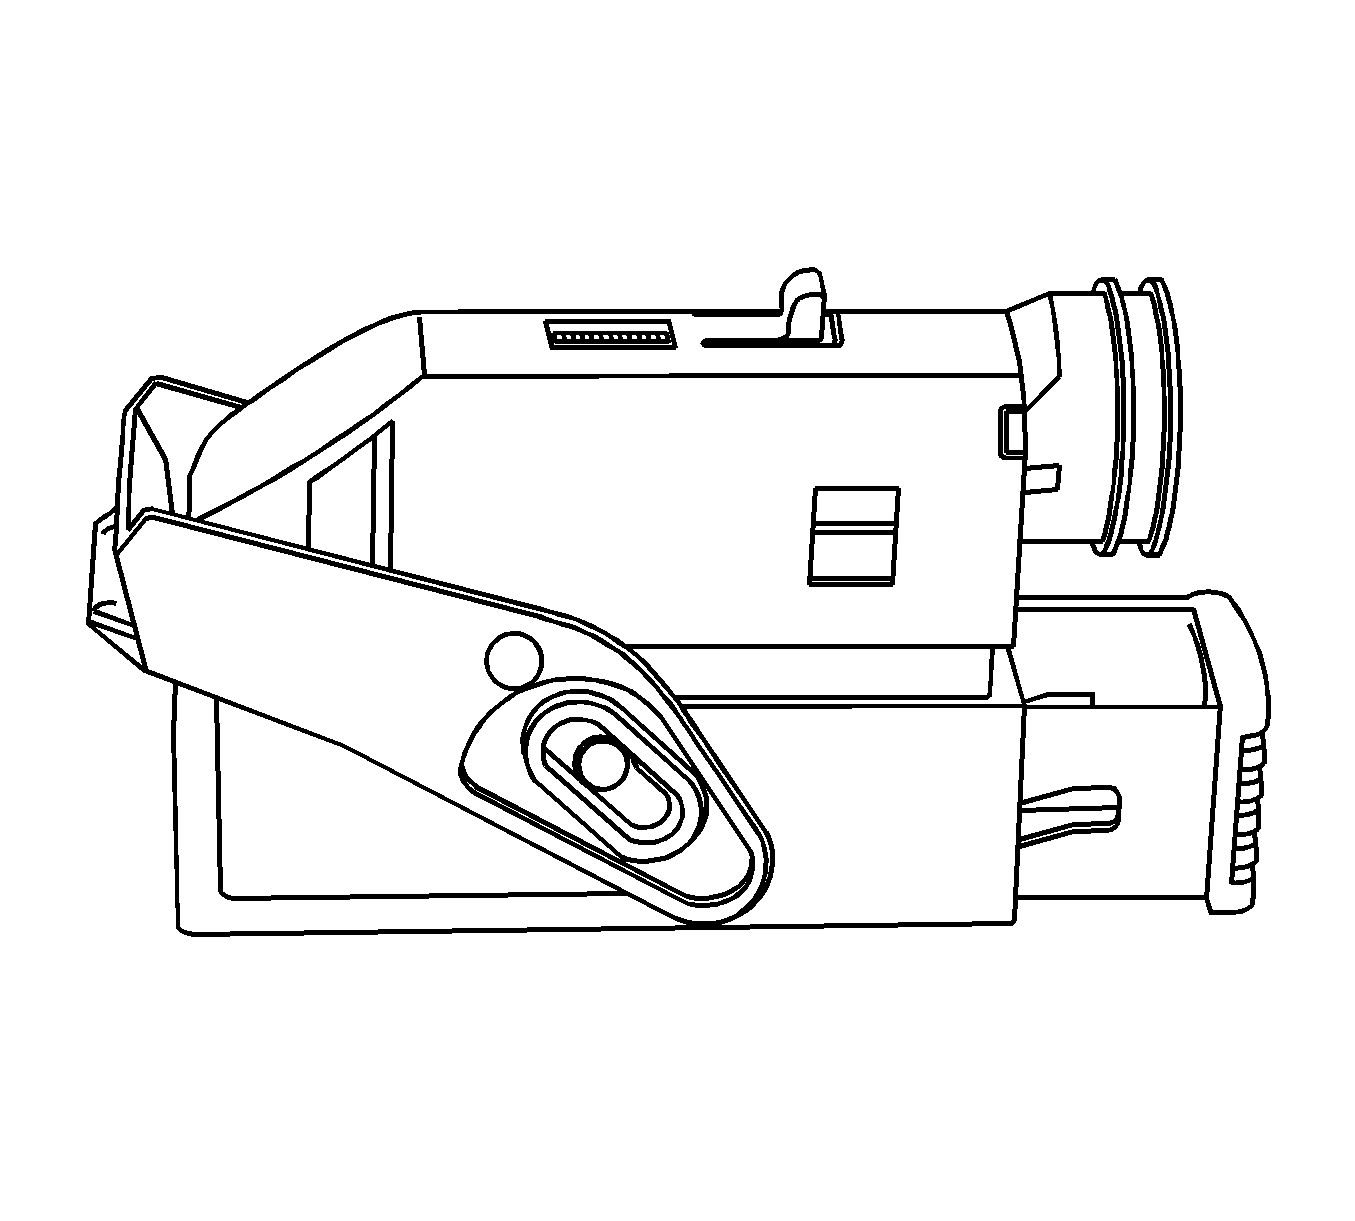
- View of connector in released position.
- Disconnect the connector from the component.
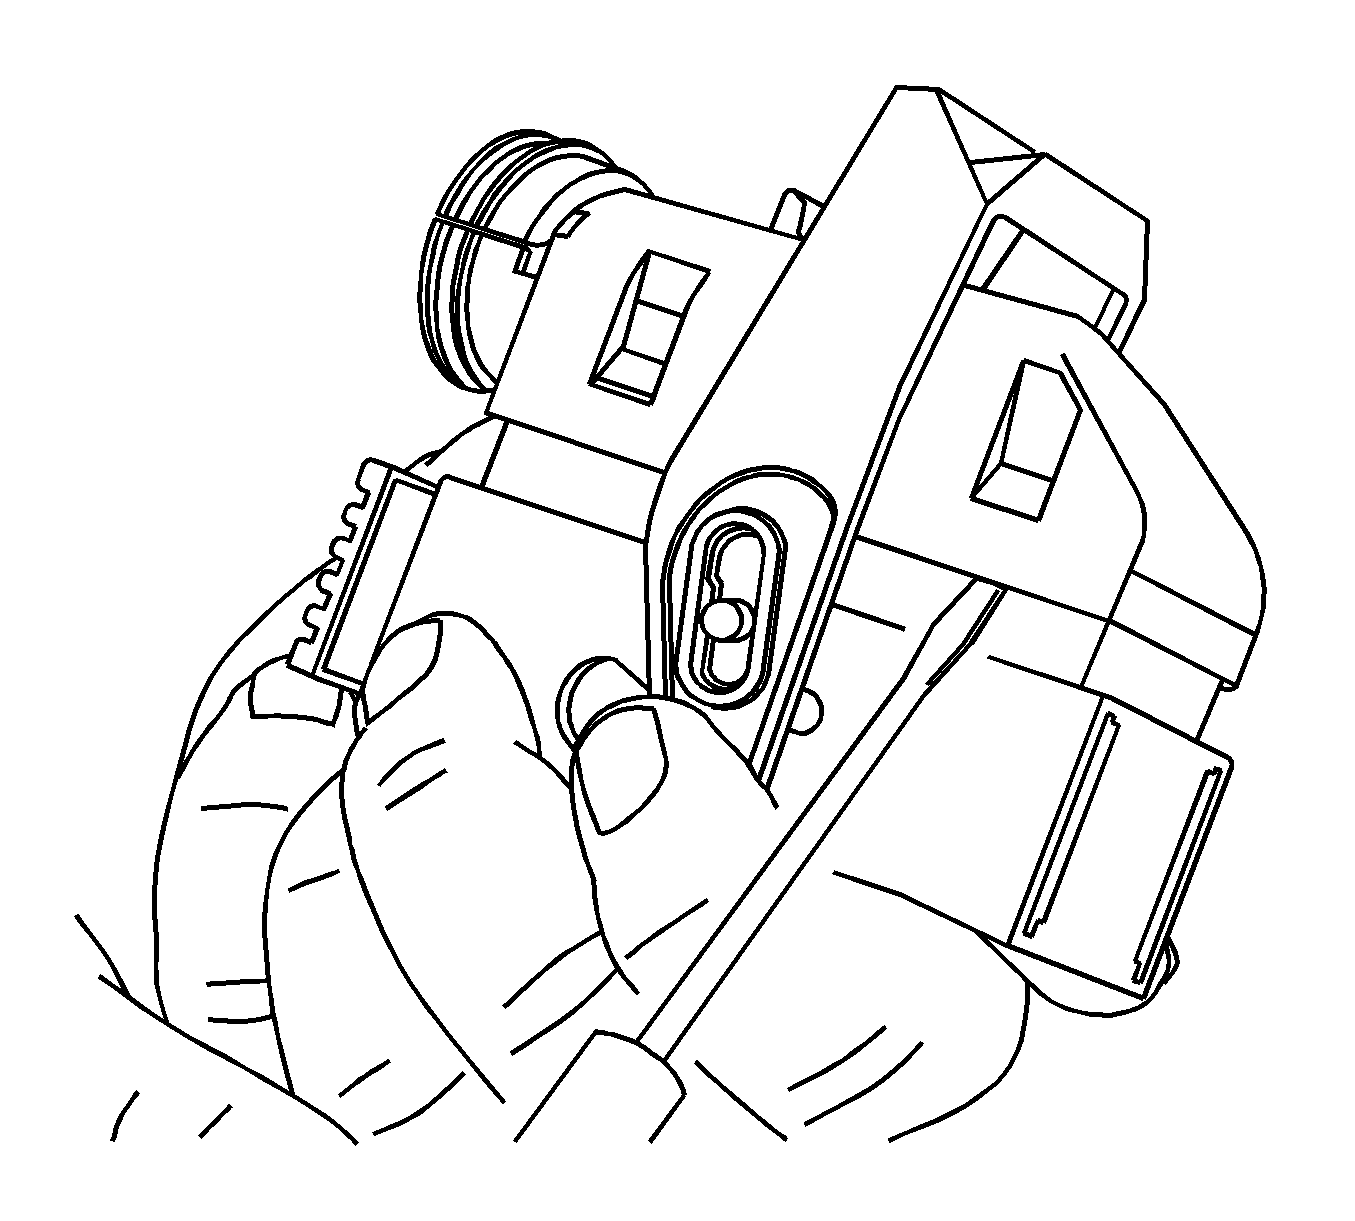
- Locate the dress cover locking tabs at the corners of the dress cover. Use a small flat-blade tool to release the locking tabs and remove the dress cover.
- Use a small flat-blade tool to slide the terminal position assurance (TPA) up one notch on both ends of the connector. The TPA is located underneath the wire dress cover.
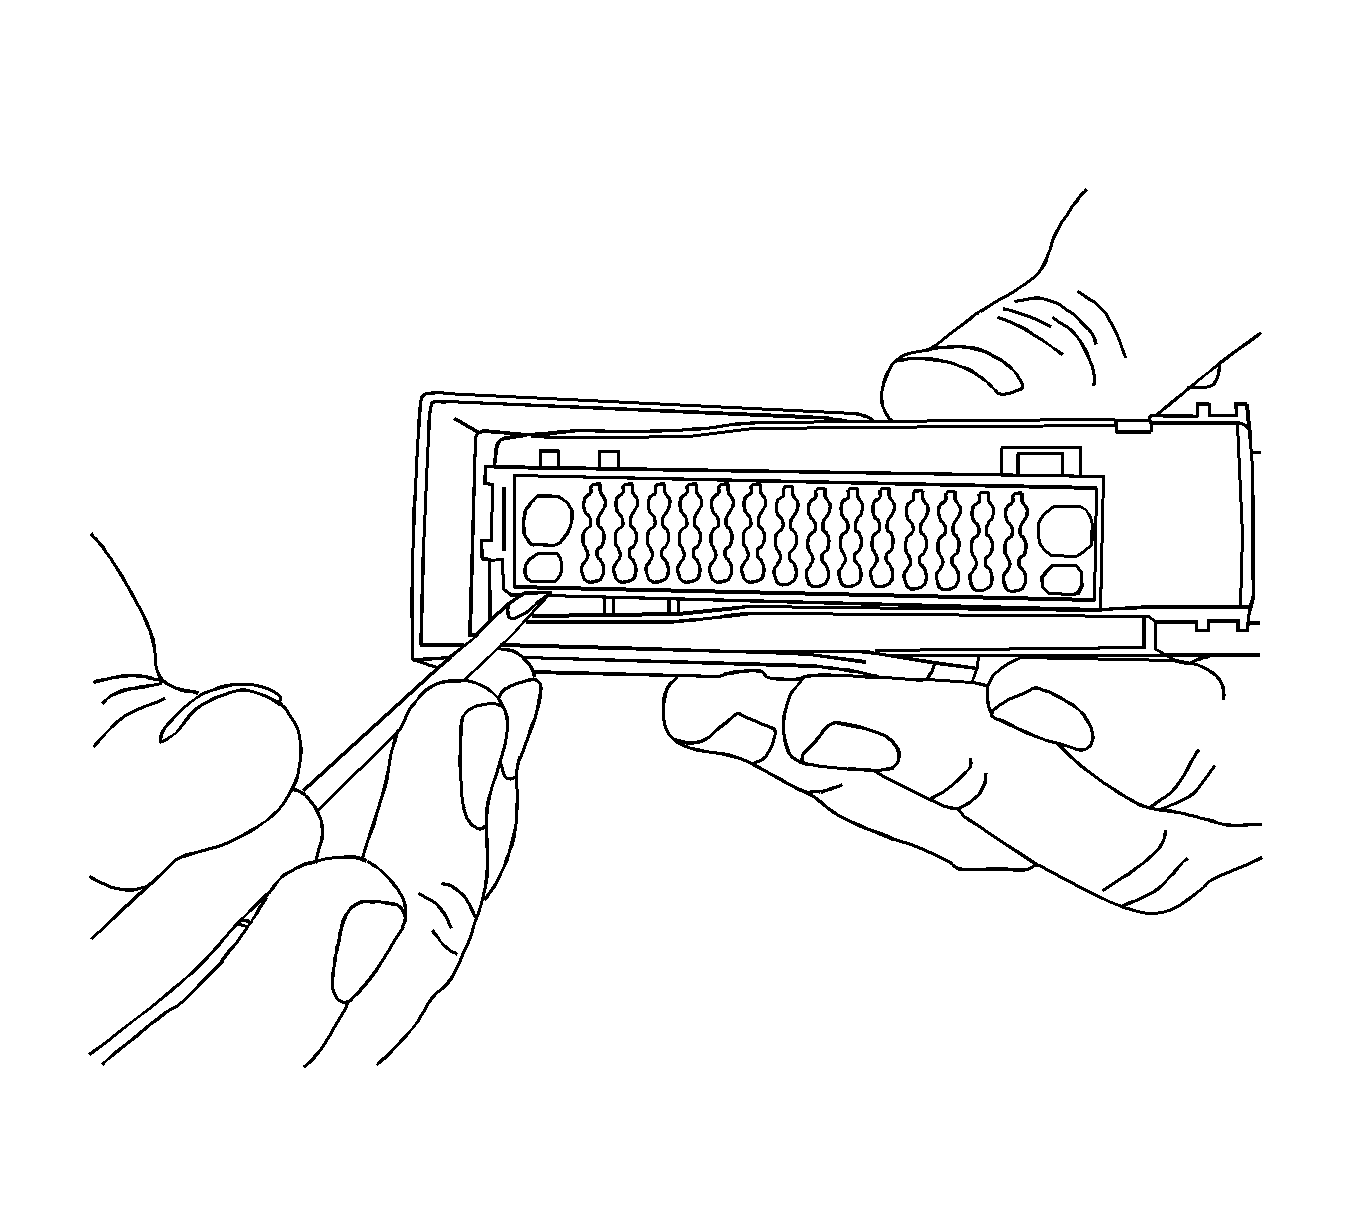
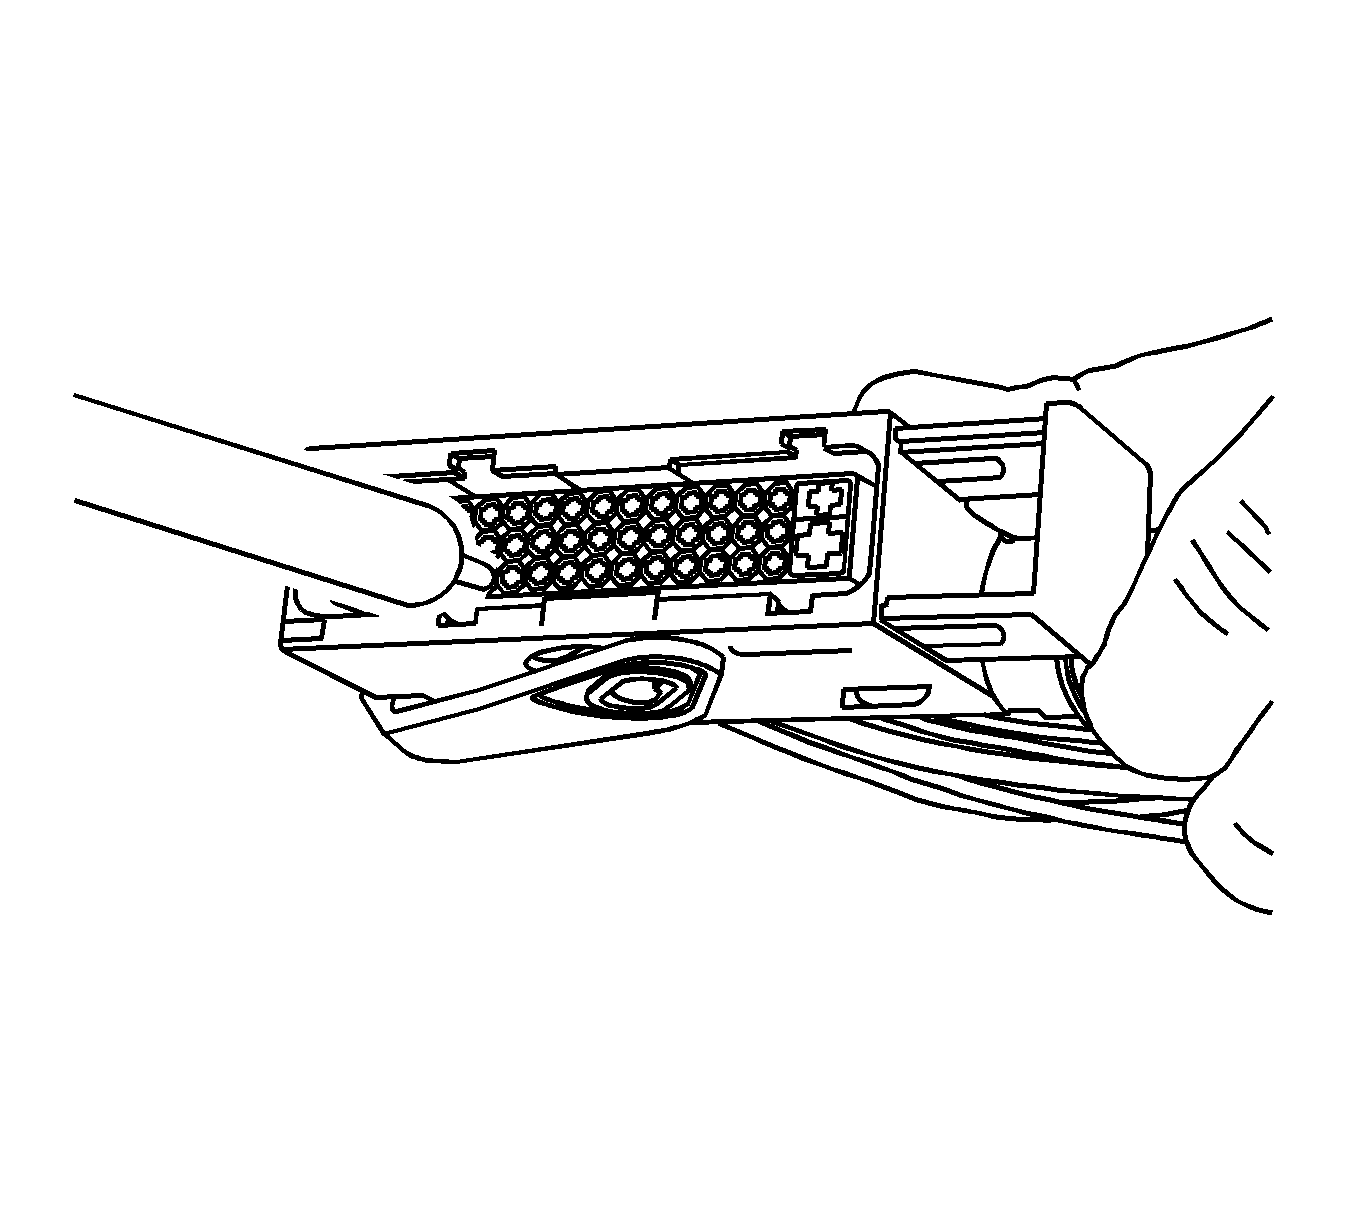
- For the larger terminals insert the EL-38125-556 tool to release the terminals by inserting the tool into the terminal release cavity. For the smaller terminals insert the EL-38125-560 tool to release the terminals by inserting the tool into the terminal release cavity.
- While holding the removal tool in place, gently pull the wire out of the back of the connector. Always remember never use force when pulling a terminal out of a connector.
Terminated Lead Repair
- Remove the terminal.
- Find the appropriate terminated lead.
- Use the appropriate splice sleeves depending on the gage size.
- Refer to Splicing Copper Wire Using Splice Sleeves.
