Delphi Connectors Weather Pack
Special Tools
For equivalent regional tools, refer to Special Tools.
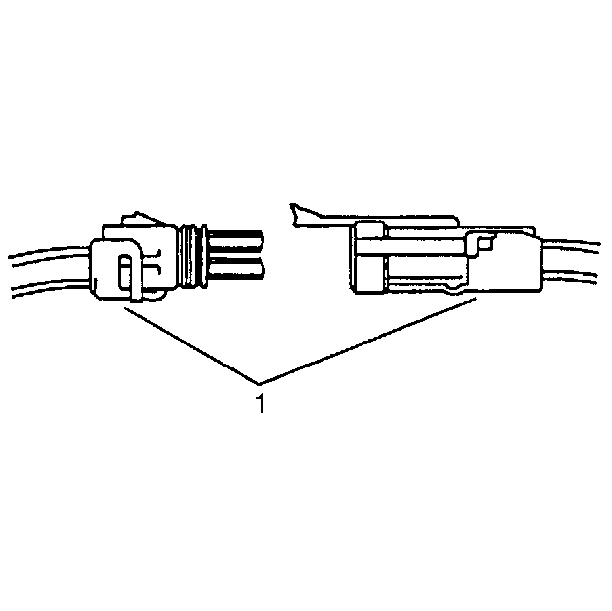
The following is the proper procedure for the repair of Weather Pack® Connectors.
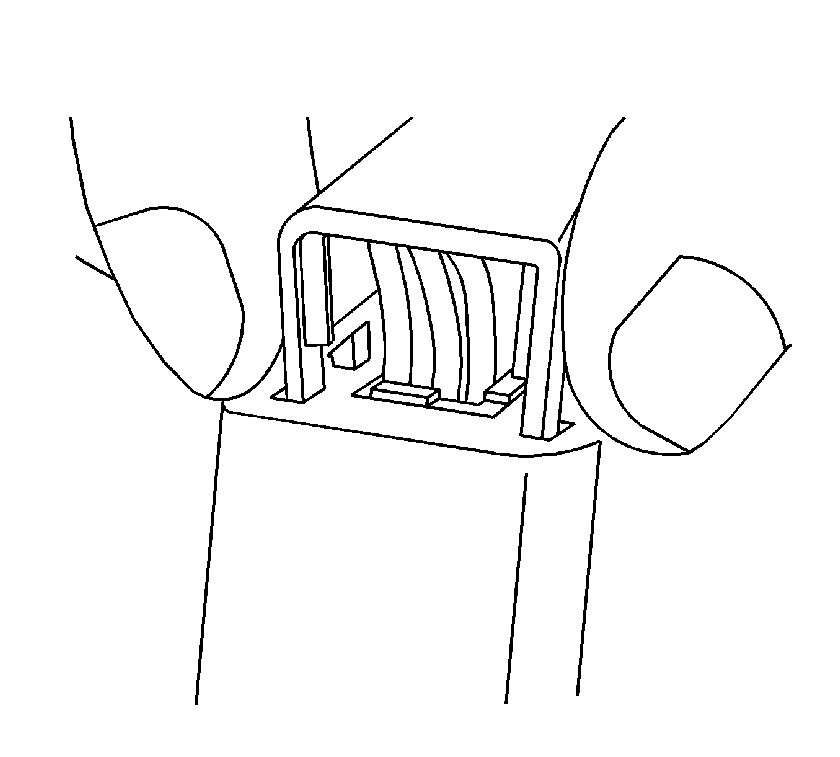
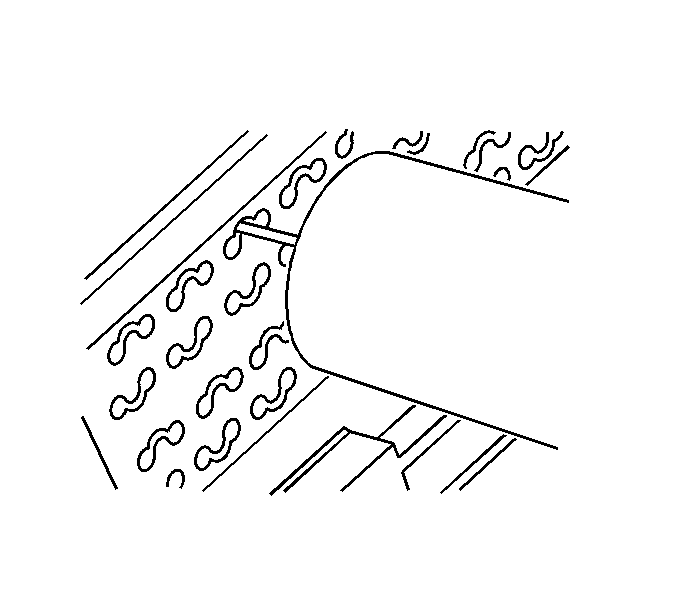
- Separate the connector halves (1).
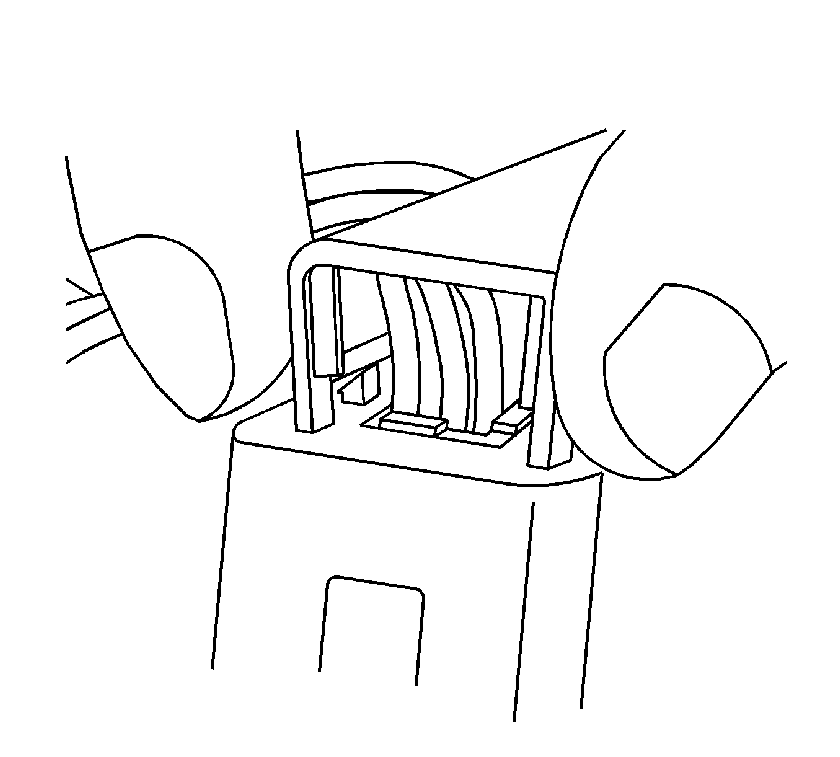
- Open the secondary lock. A secondary lock aids in terminal retention and is usually molded to the connector (1).
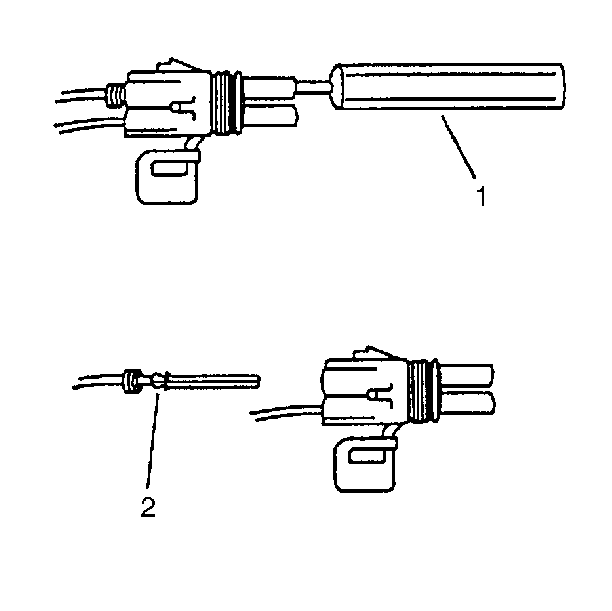
- Grasp the wire and push the terminal to the forward most position. Hold the wire in this position.
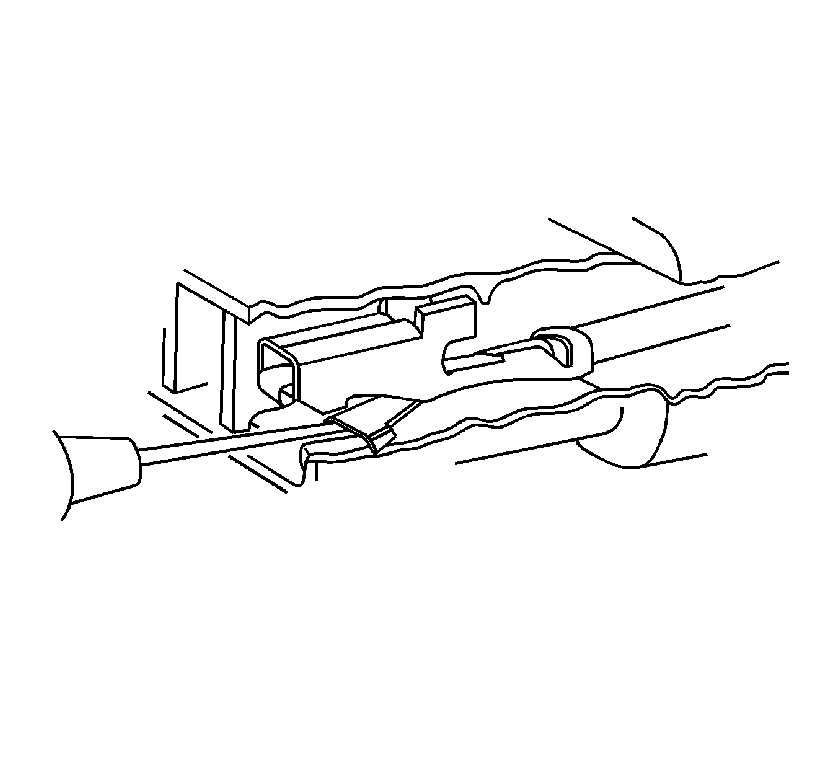
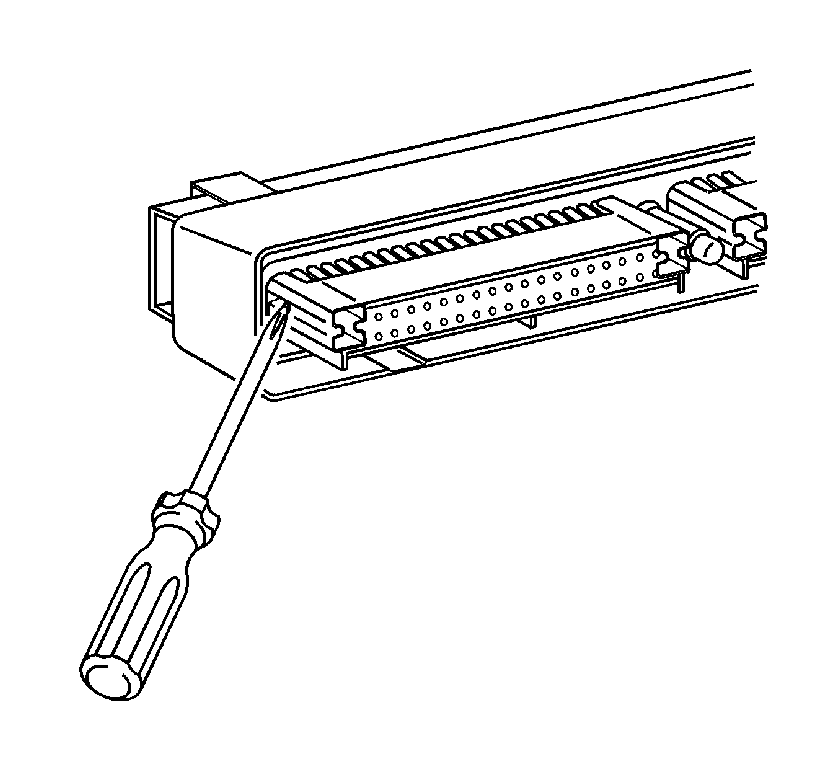
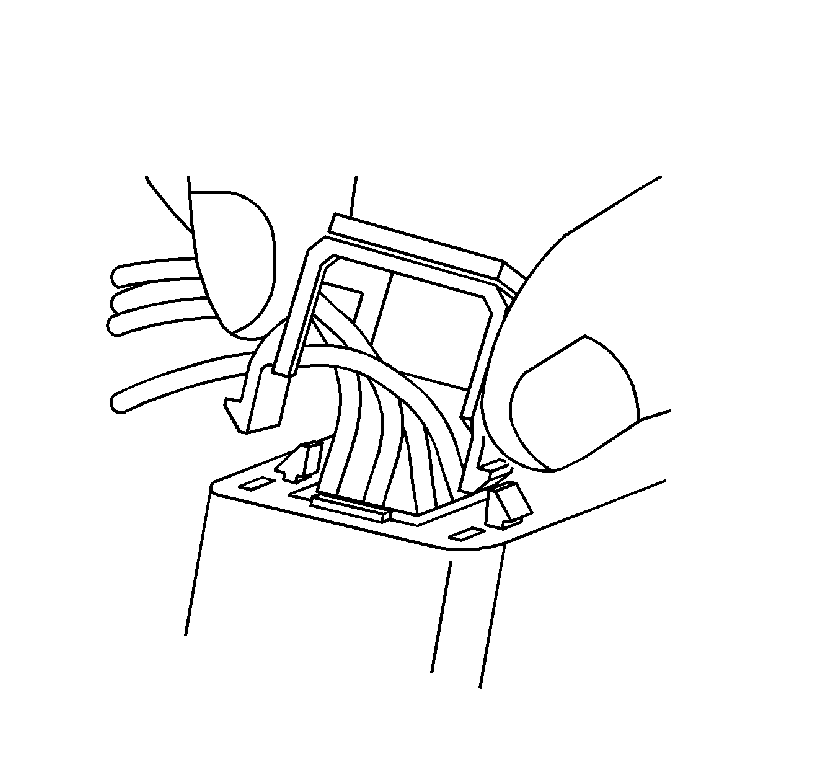
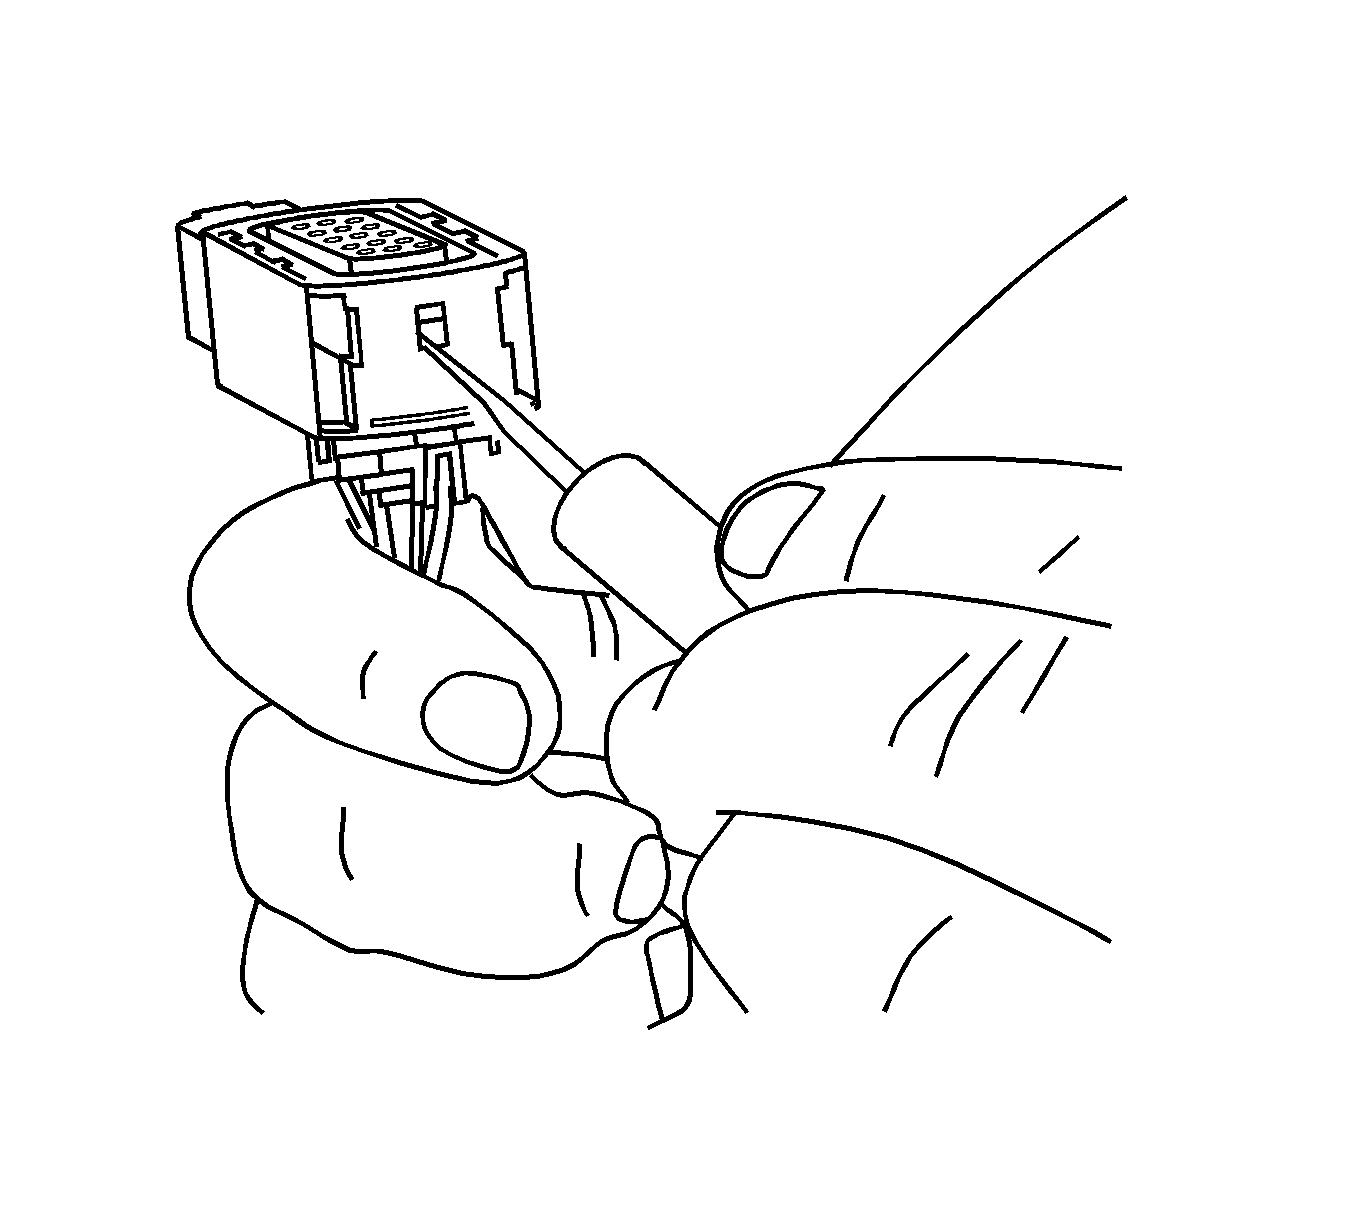
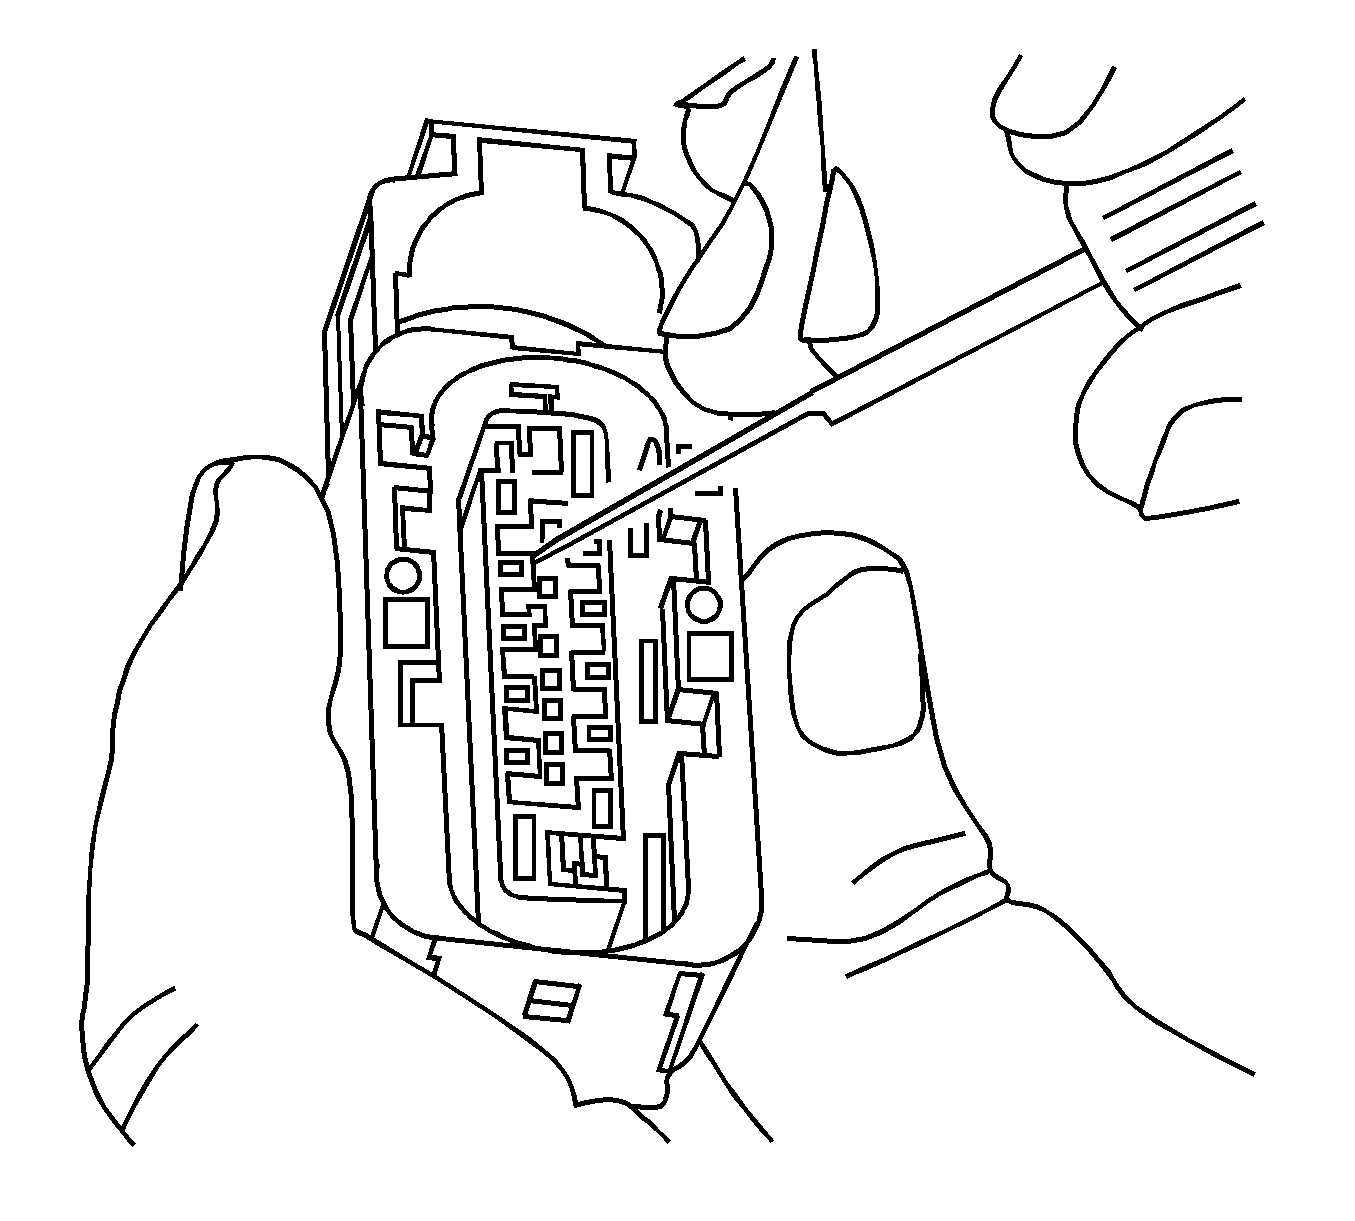
- Insert the Weather Pack® terminal removal tool EL-38125-10A into the front (mating end) of the connector cavity until it rests on the cavity shoulder (1).
- Gently pull on the wire to remove the terminal through the back of the connector (2).
- Inspect the terminal and connector for damage. Repair as necessary. Refer to Repairing Connector Terminals.
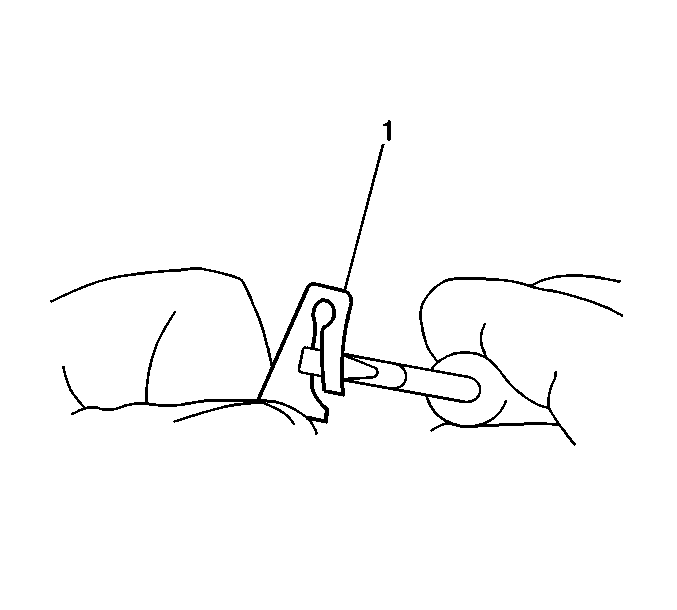
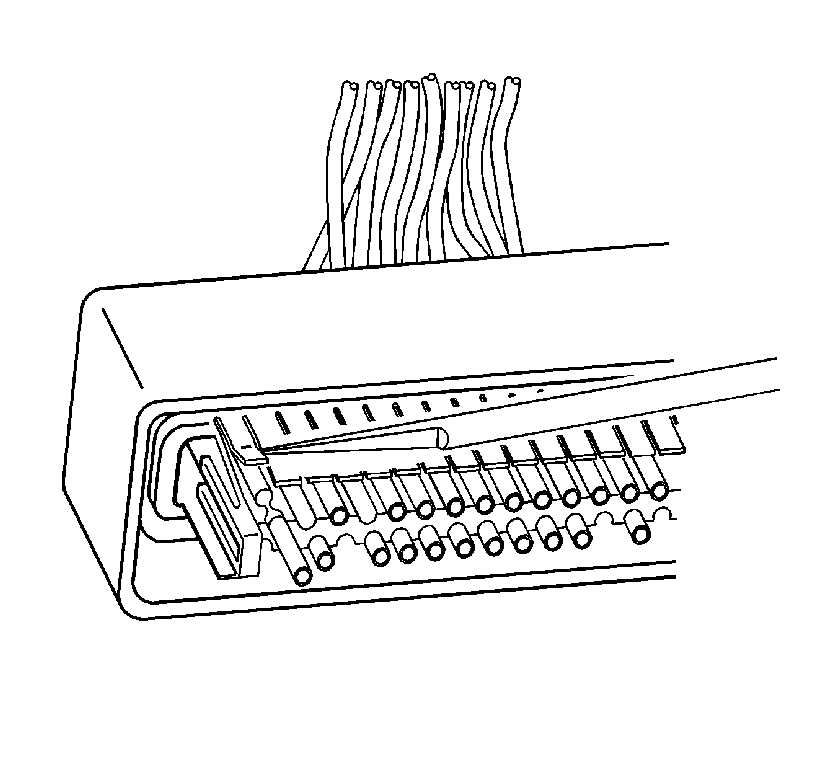
- Reform the lock tang (2) and reset terminal in connector body.
- Close secondary locks and join connector halves.
- Verify that circuit is complete and working satisfactorily.
- Perform system check.
Note: Never use force to remove a terminal from a connector.
Terminated Lead Repair
- Remove the terminal.
- Find the appropriate terminated lead.
- Use the appropriate splice sleeves depending on the gage size.
- Refer to Splicing Copper Wire Using Splice Sleeves.
Delphi Connectors Push To Seat
Special Tools
For equivalent regional tools, refer to Special Tools.
Terminal Removal
Follow the steps below in order to repair push to seat connectors.
- Remove the terminal position assurance (TPA) device, the connector position assurance (CPA) device, and/or the secondary lock.
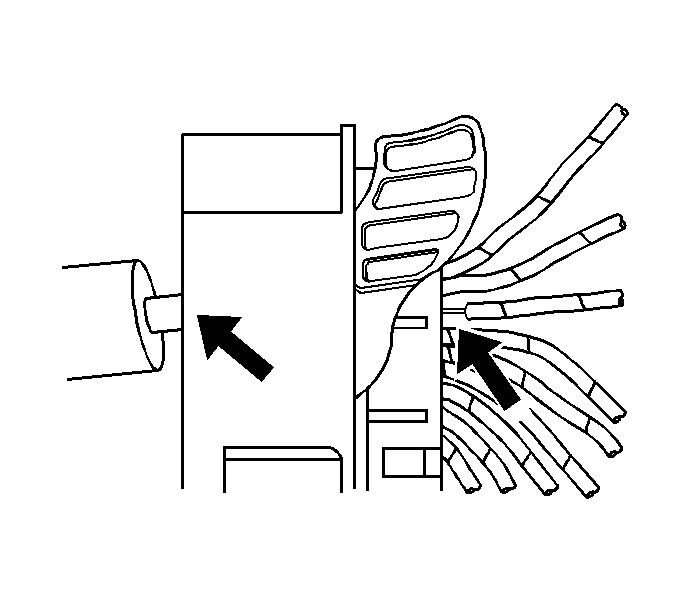
- Separate the connector halves (1).
- Use the proper pick or removal tool (1) in order to release the terminal.
- Gently pull the cable and the terminal (2) out of the back of the connector.
- Re-form the locking device if you are going to reuse the terminal (1).
- To repair the terminal, refer to Terminal Repair.
Reinstalling Terminal
- In order to reuse a terminal or lead assembly, refer to Wiring Repairs.
- Ensure that the cable seal is kept on the terminal side of the splice.
- Insert the lead from the back until it catches.
- Install the TPA, CPA, and/or the secondary locks.
Terminated Lead Repair
- Remove the terminal.
- Find the appropriate terminated lead.
- Use the appropriate splice sleeves depending on the gage size.
- Refer to Splicing Copper Wire Using Splice Sleeves.
Delphi Connectors Pull To Seat
Special Tools
For equivalent regional tools, refer to Special Tools.
Terminal Removal
If the terminal is visibly damaged or is suspected of having a faulty connection, the terminal should be replaced.
Follow the steps below in order to repair pull-to-seat connectors:
- Remove the connector position assurance (CPA) device and/or the secondary lock.
- Disconnect the connector from the component or separate the connectors for in-line connectors.
- Remove the terminal position assurance (TPA) device.
- Insert the proper pick or removal tool into the front of the connector body.
- Grasp the wire at the back of the connector body and gently push the terminal out the front of the connector body.
Note: On connectors with more than one terminal the service loop may not be large enough to remove the terminal and crimp on a new one. If the terminal wire does not have a large enough service loop for removal, cut the wire 5 cm (2 in) behind the connector before removal.
Terminal Repair
- If the wire needed to be cut in order to remove the terminal, gently push a small length of the same size wire through the back of the connector cavity until there is enough wire exposed in order to crimp on a new terminal. If the wire was not cut, cut the existing wire as close to the old terminal as possible.
- Strip 5 mm (3/16 in) of insulation from the wire.
- Crimp a new terminal to the wire.
- Solder the crimp with rosin core solder.
Terminal Installation
- Align the terminal and pull the wire from the back of the connector in order to seat the terminal.
- If necessary, cut the new wire to proper length and splice with existing circuit. Refer to Splicing Copper Wire Using Splice Sleeves.
- If the connector is outside of the passenger compartment, apply dielectric grease to the connector.
- Install the TPA, CPA, and/or the secondary locks.
Terminated Lead Repair
- Remove the terminal.
- Find the appropriate terminated lead.
- Use the appropriate splice sleeves depending on the gage size.
- Refer to Splicing Copper Wire Using Splice Sleeves.
Delphi Connectors Micro-Pack 100W
Special Tools
For equivalent regional tools, refer to Special Tools.
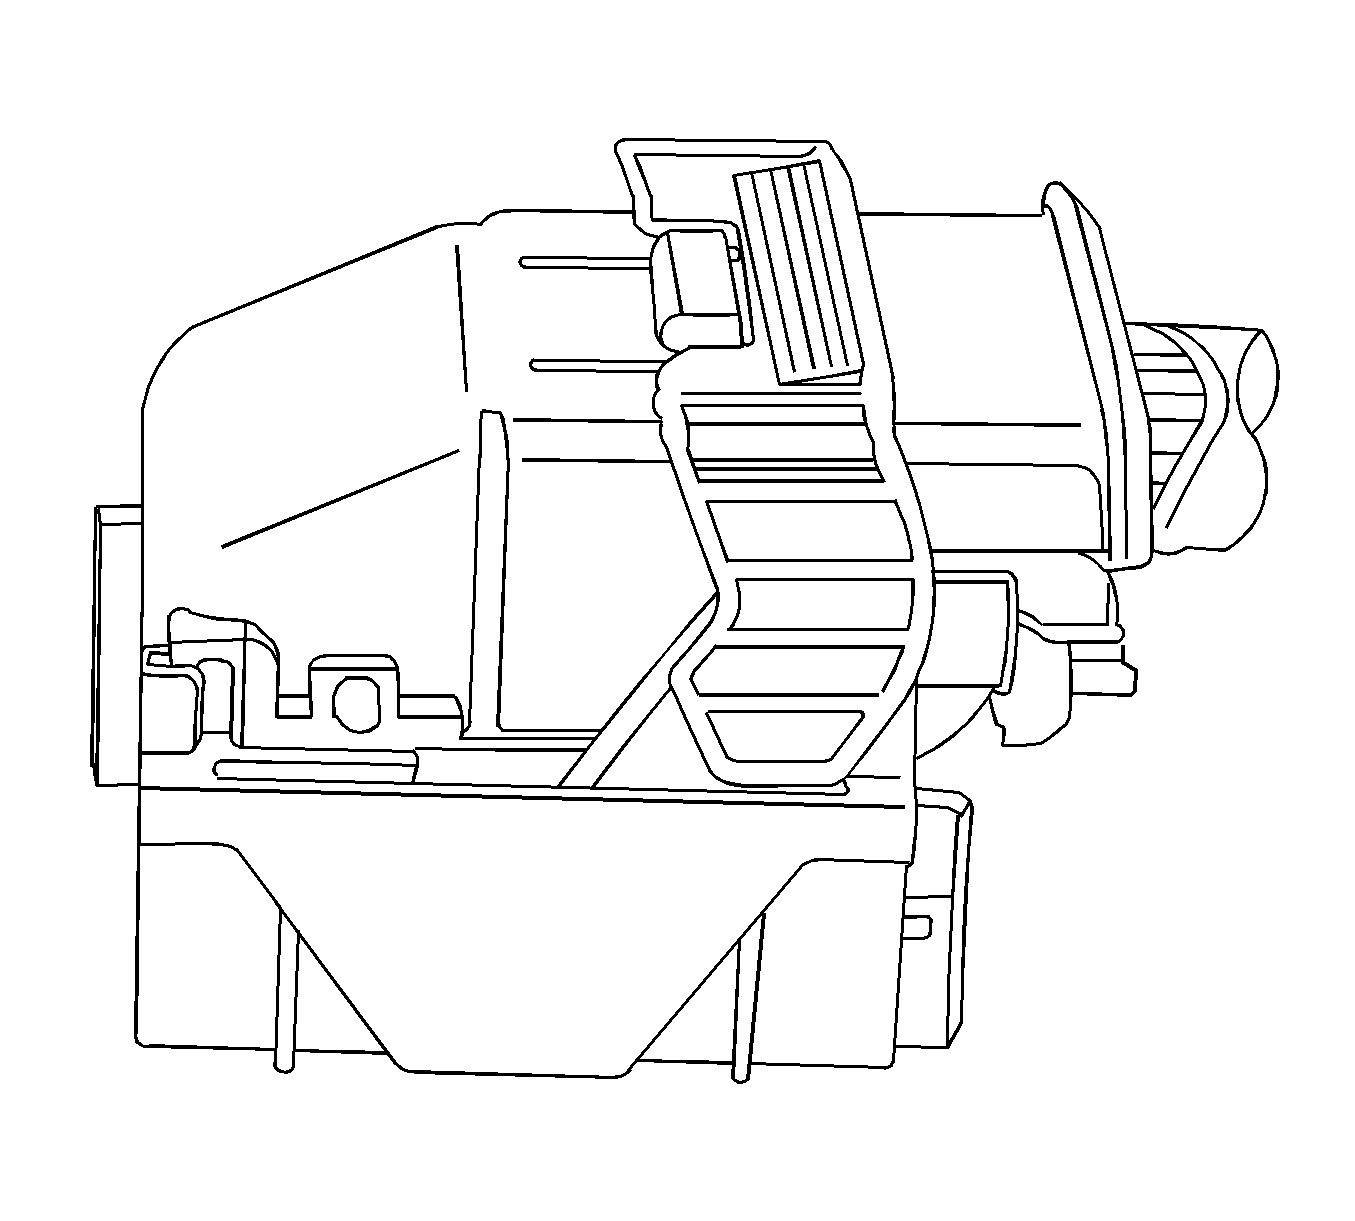
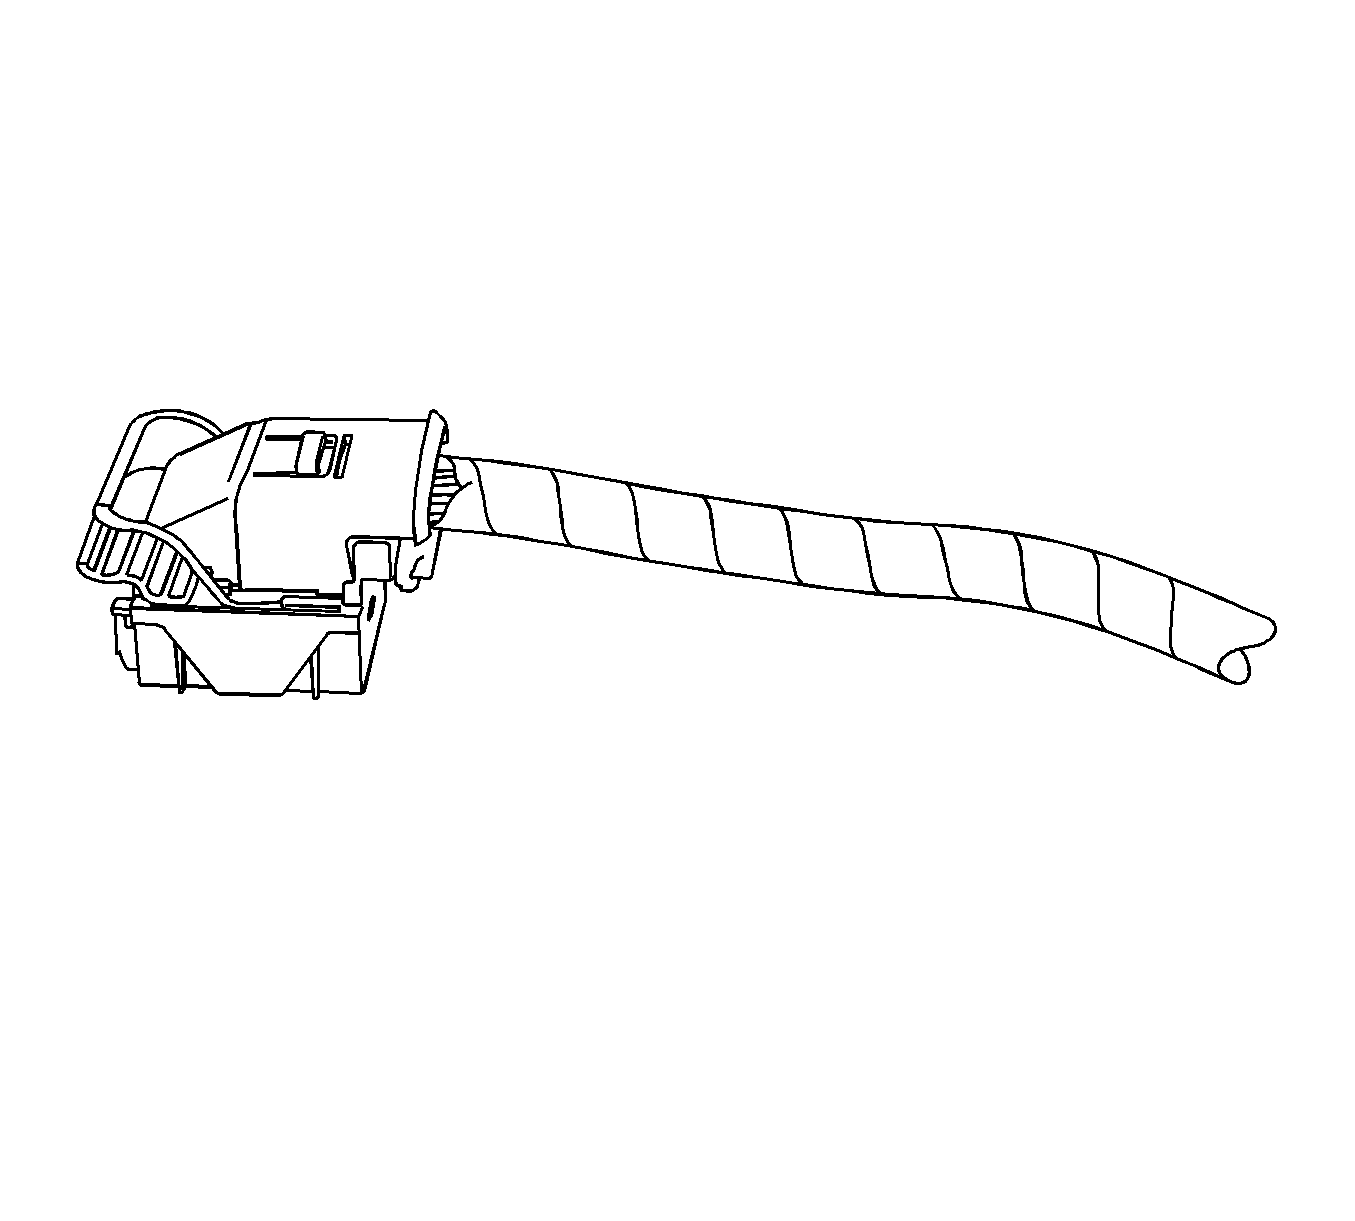
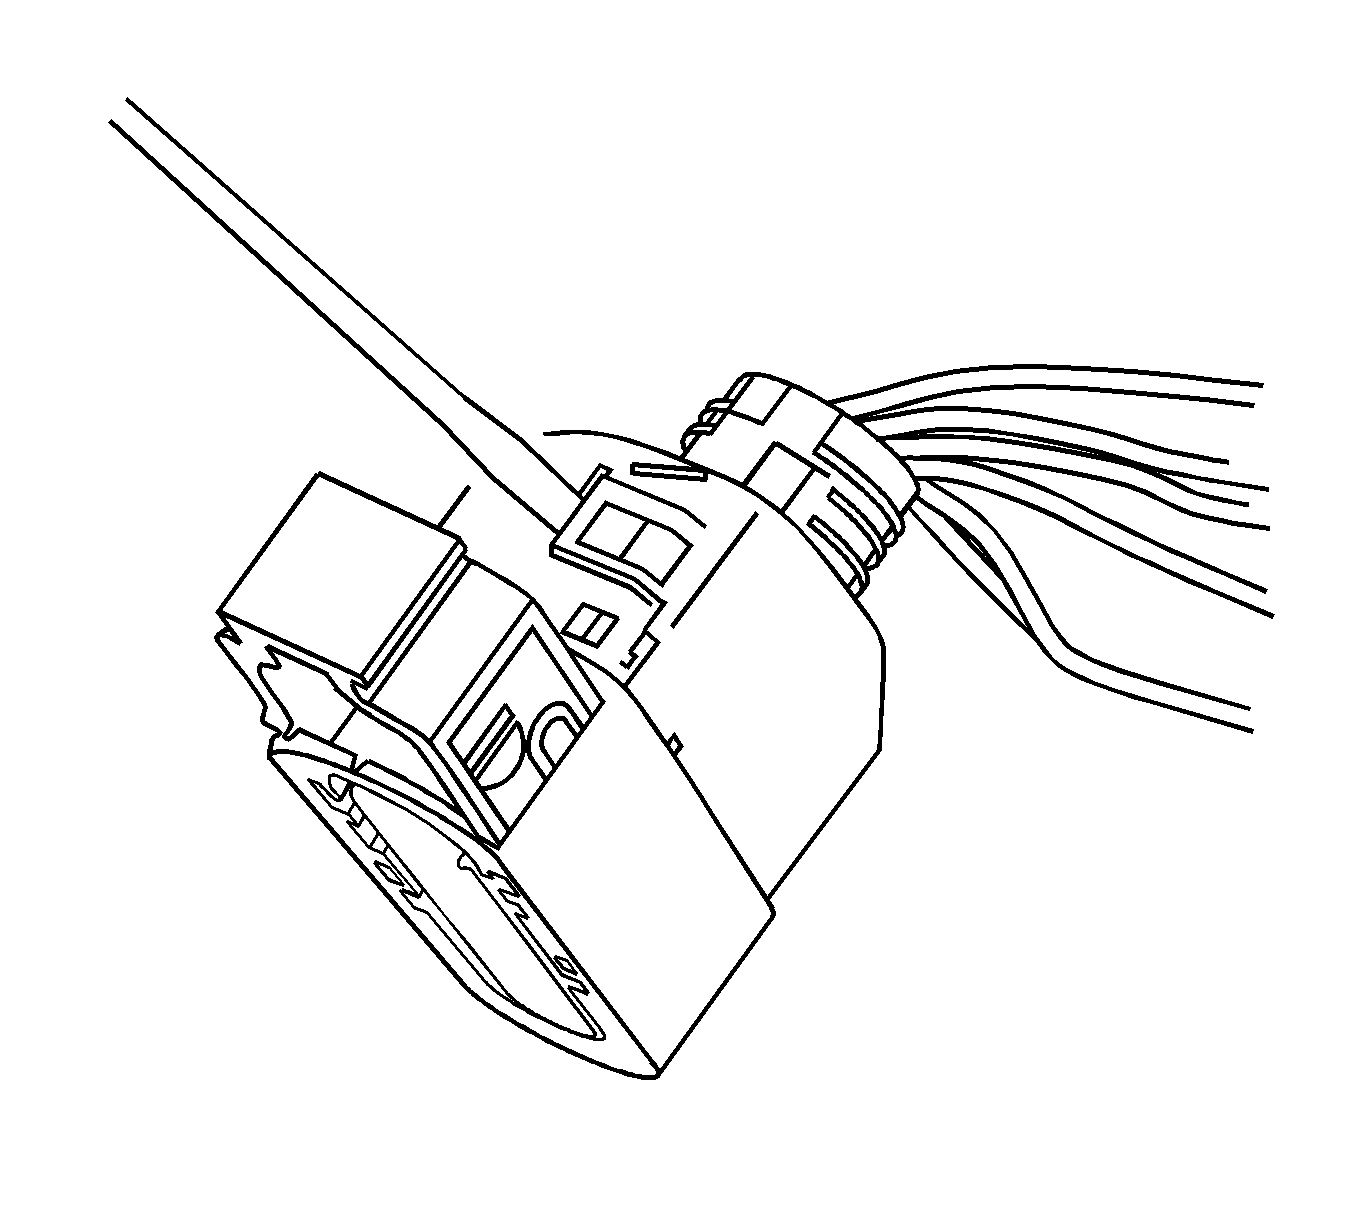
Terminal Removal Procedure
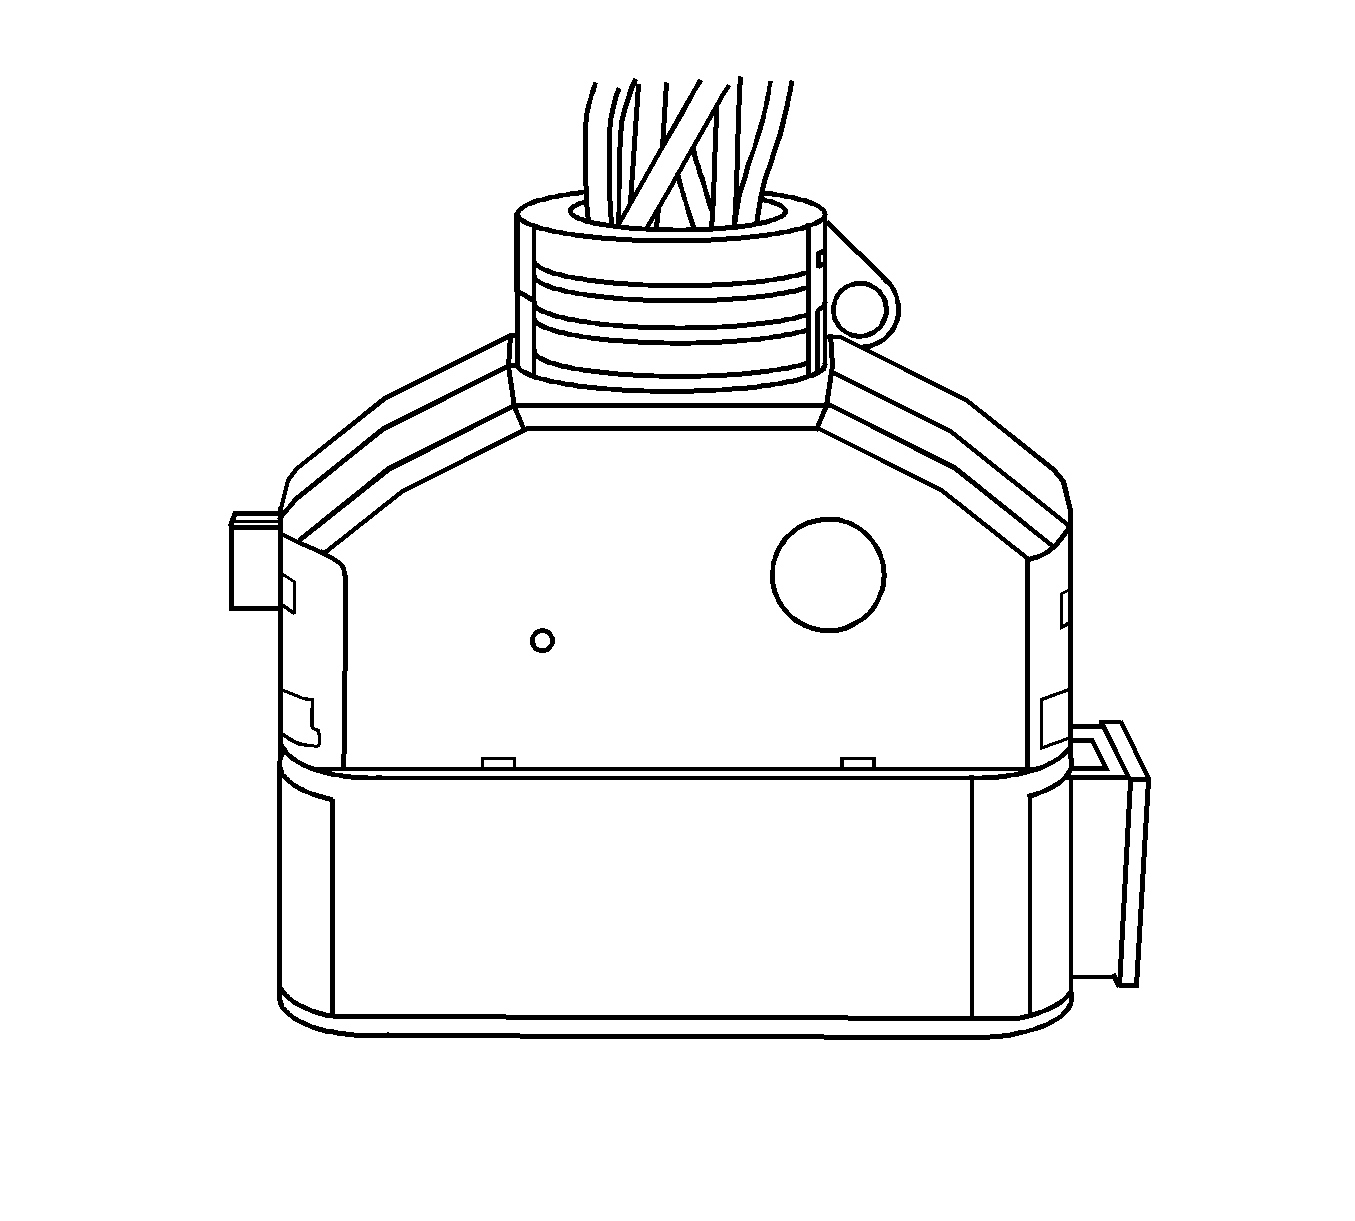
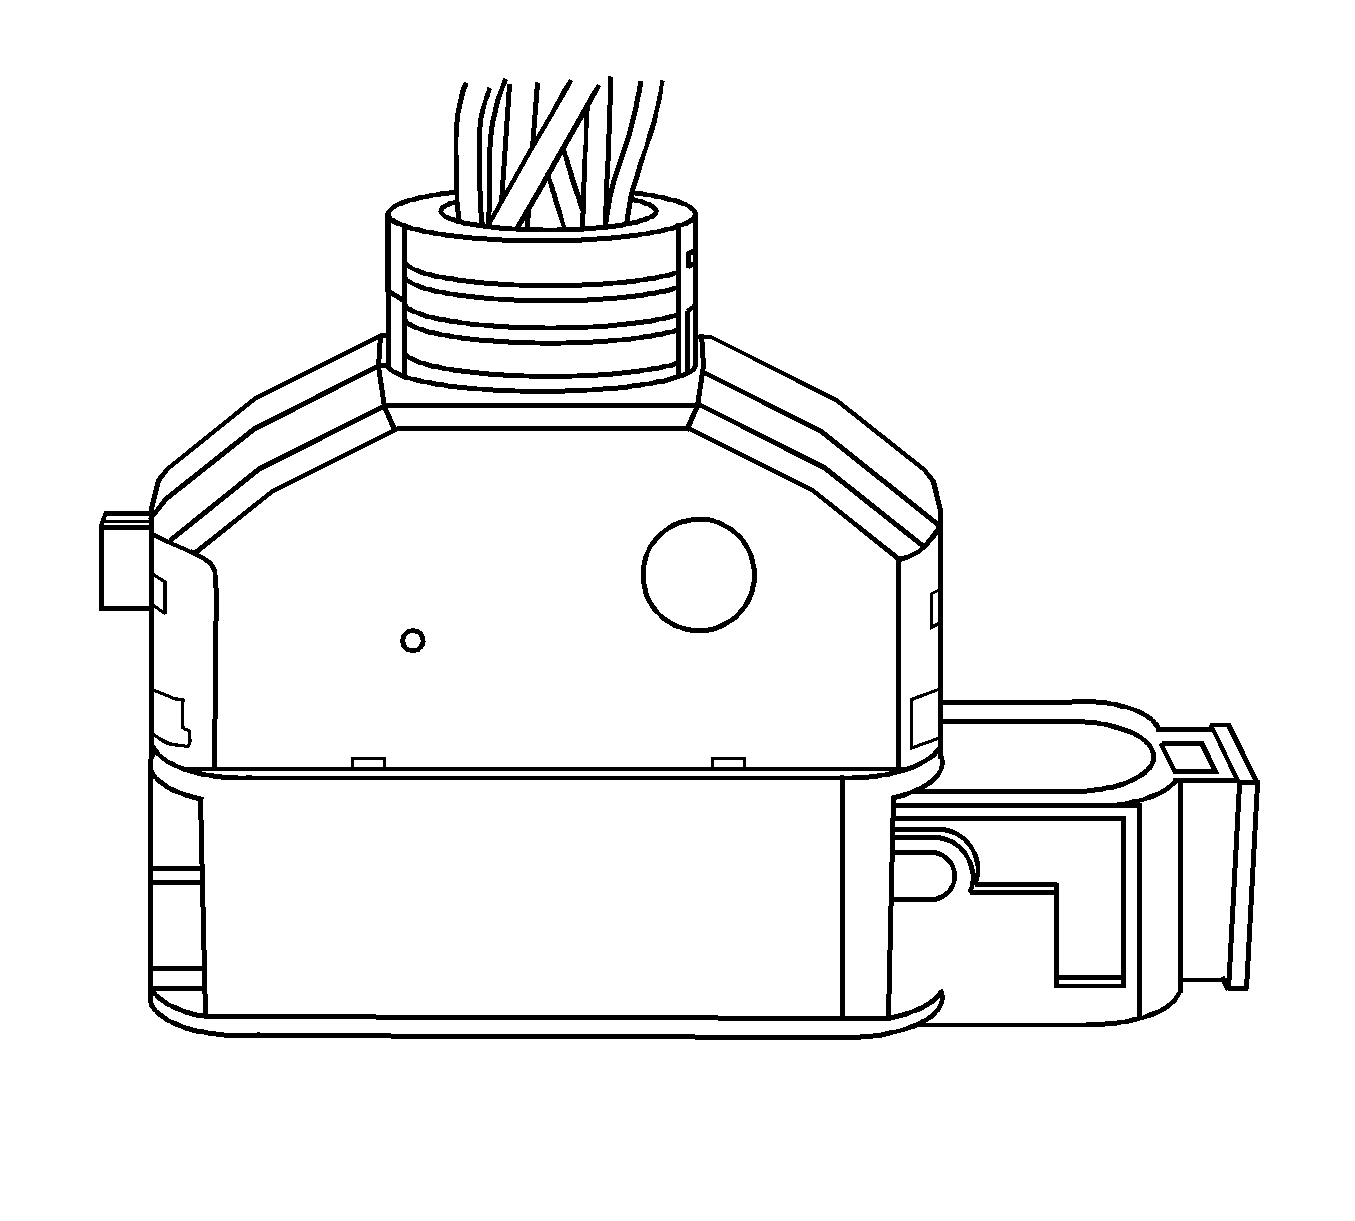
There are 2 styles of Micro-Pack 100W connectors. These connectors are very similar but use different terminals and have some minor physical differences also.
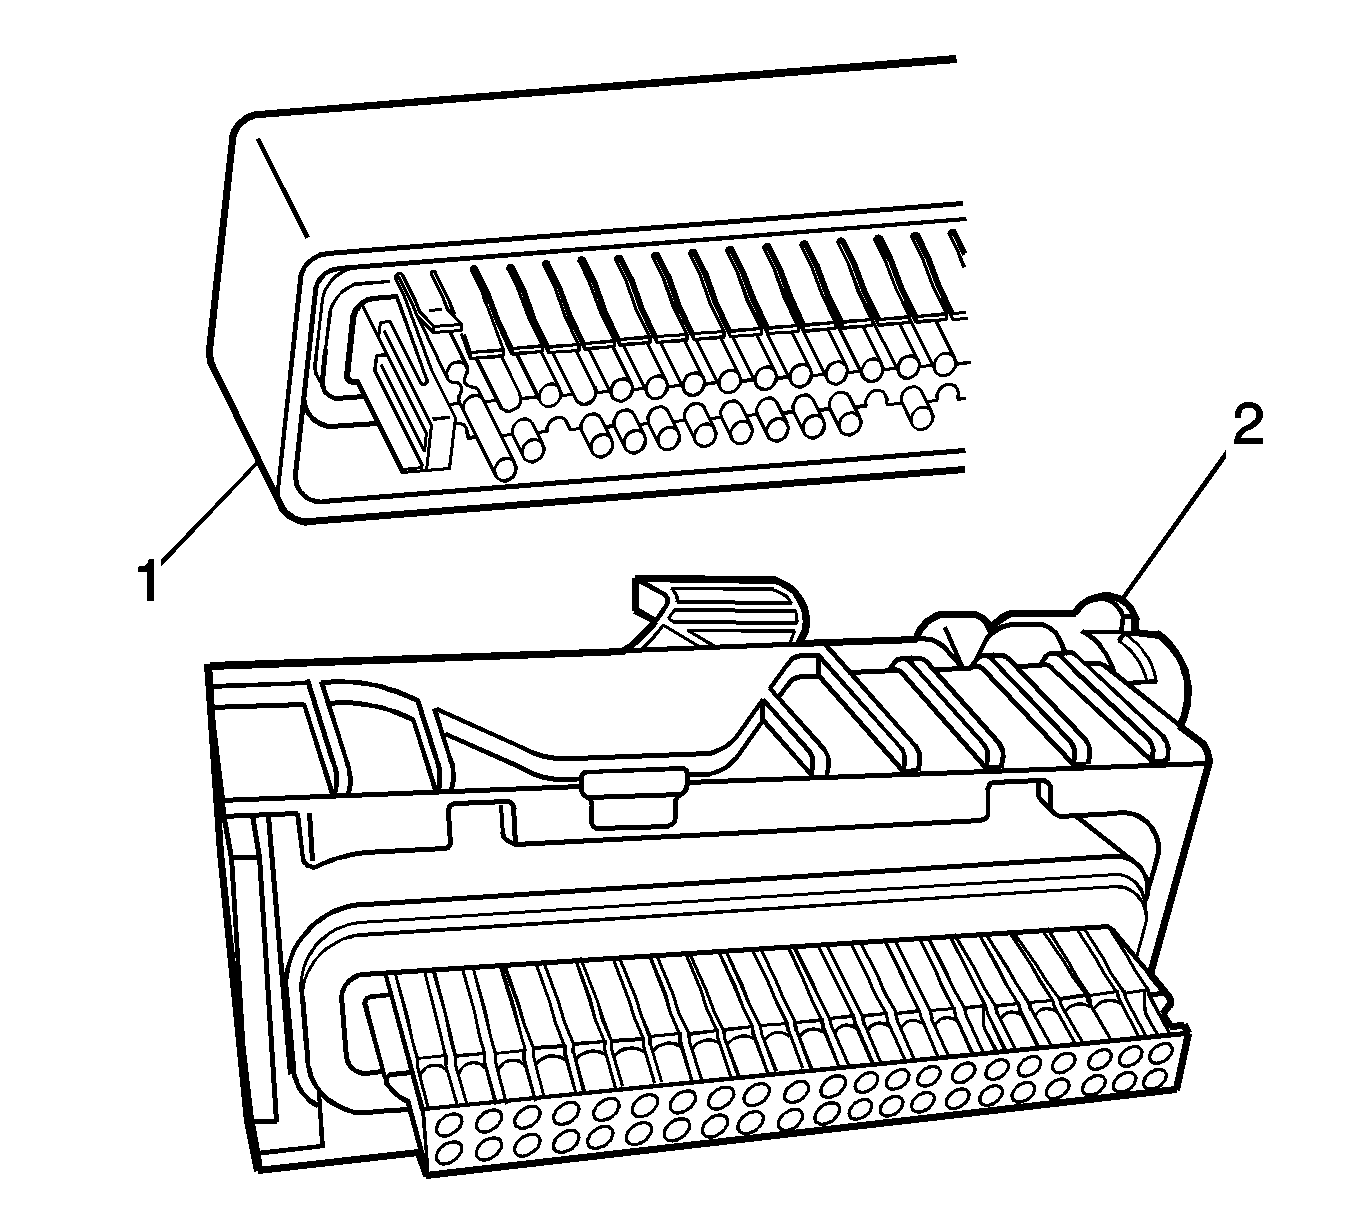
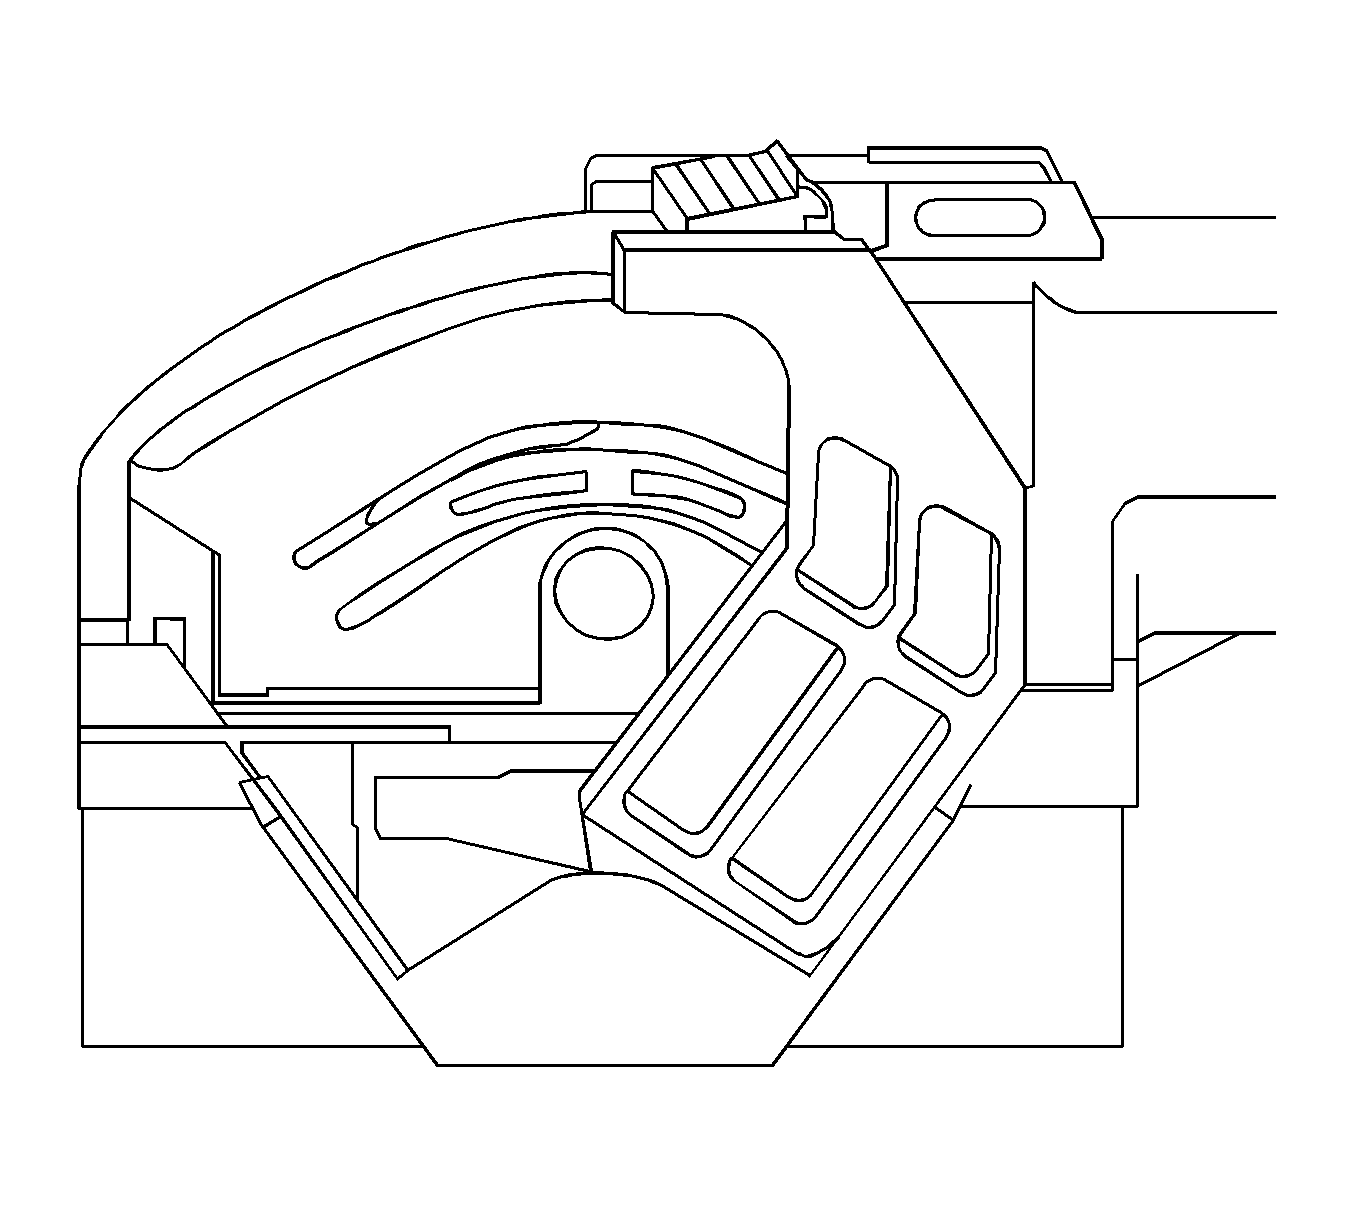
The first connector design of the Micro-Pack 100W (1) has a white connector interface that holds the terminals. The second design of the Micro-Pack 100W (2) has a gray interface to hold the terminals. Also, the first design has terminal cavities that are further apart (3 mm centerline) and offset from the other row of terminal cavities in the connector. The second design has terminals cavities that are closer together (2.54 mm centerline) and aligned vertically. One other way to identify the second design is the thin strip of material that runs along the outside of the cavities.
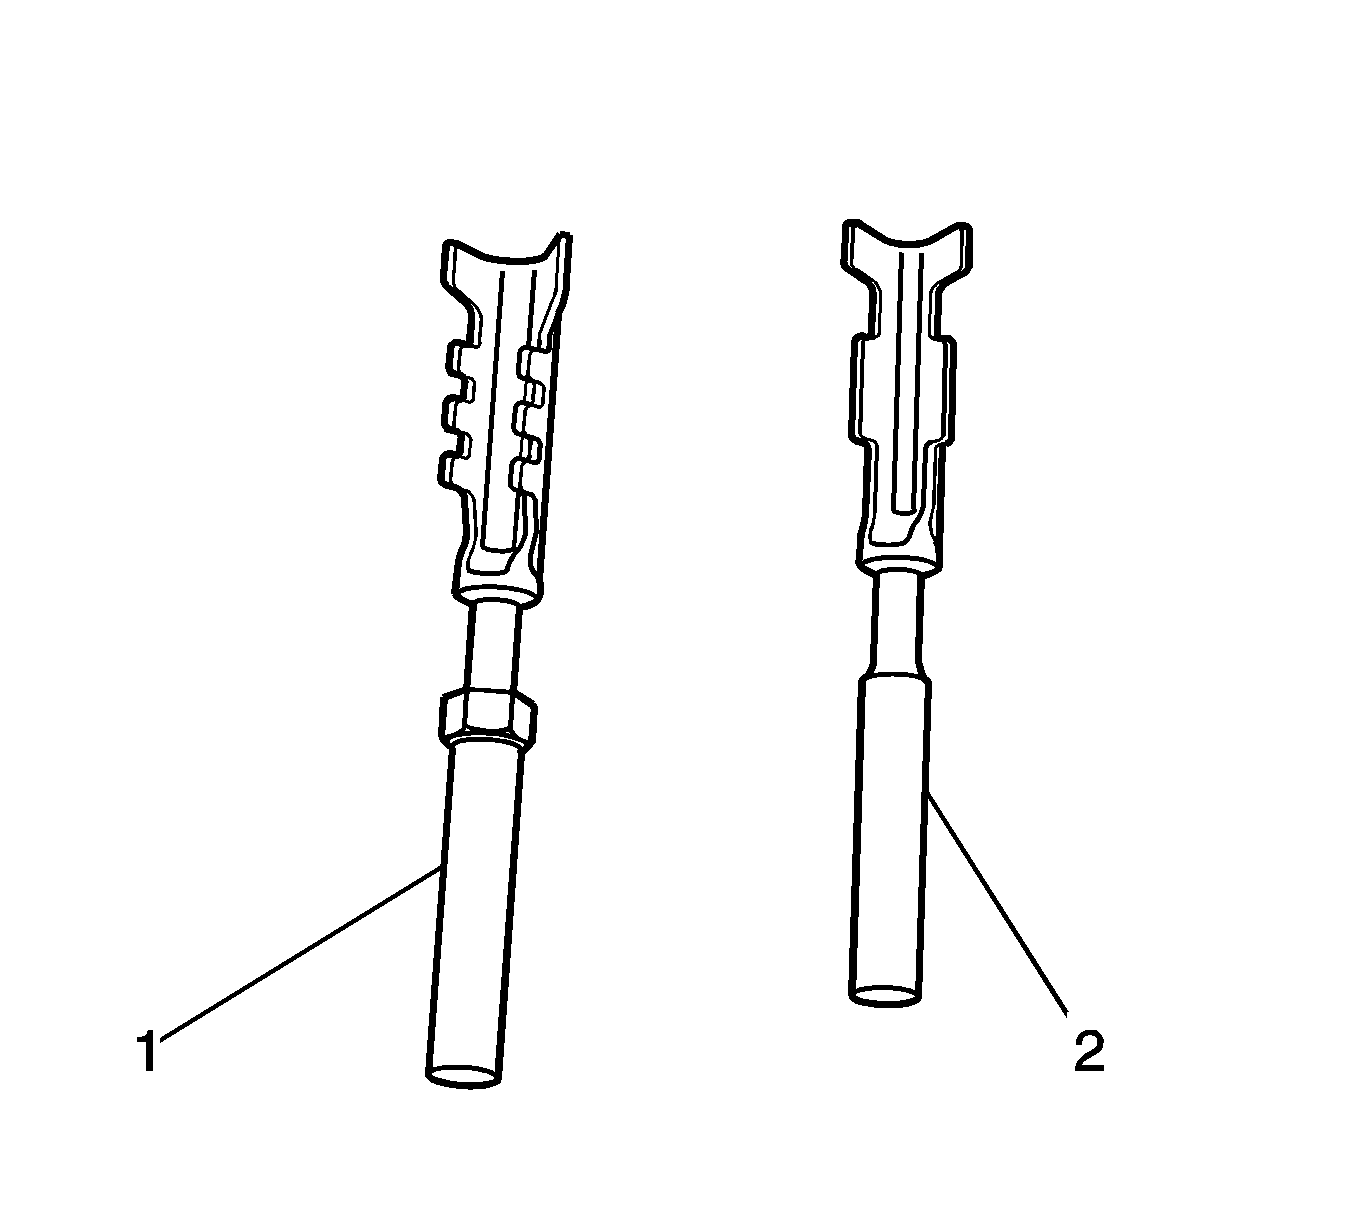
Note: There are 2 styles of Micro-Pack 100W terminals which are very similar. Ensure that you have the correct terminal before crimping the new terminal to the wire. The first design connector uses the longer terminal (1) that has a raised area in front of the recess in the terminal. The second design connector uses the shorter terminal without the raised area.
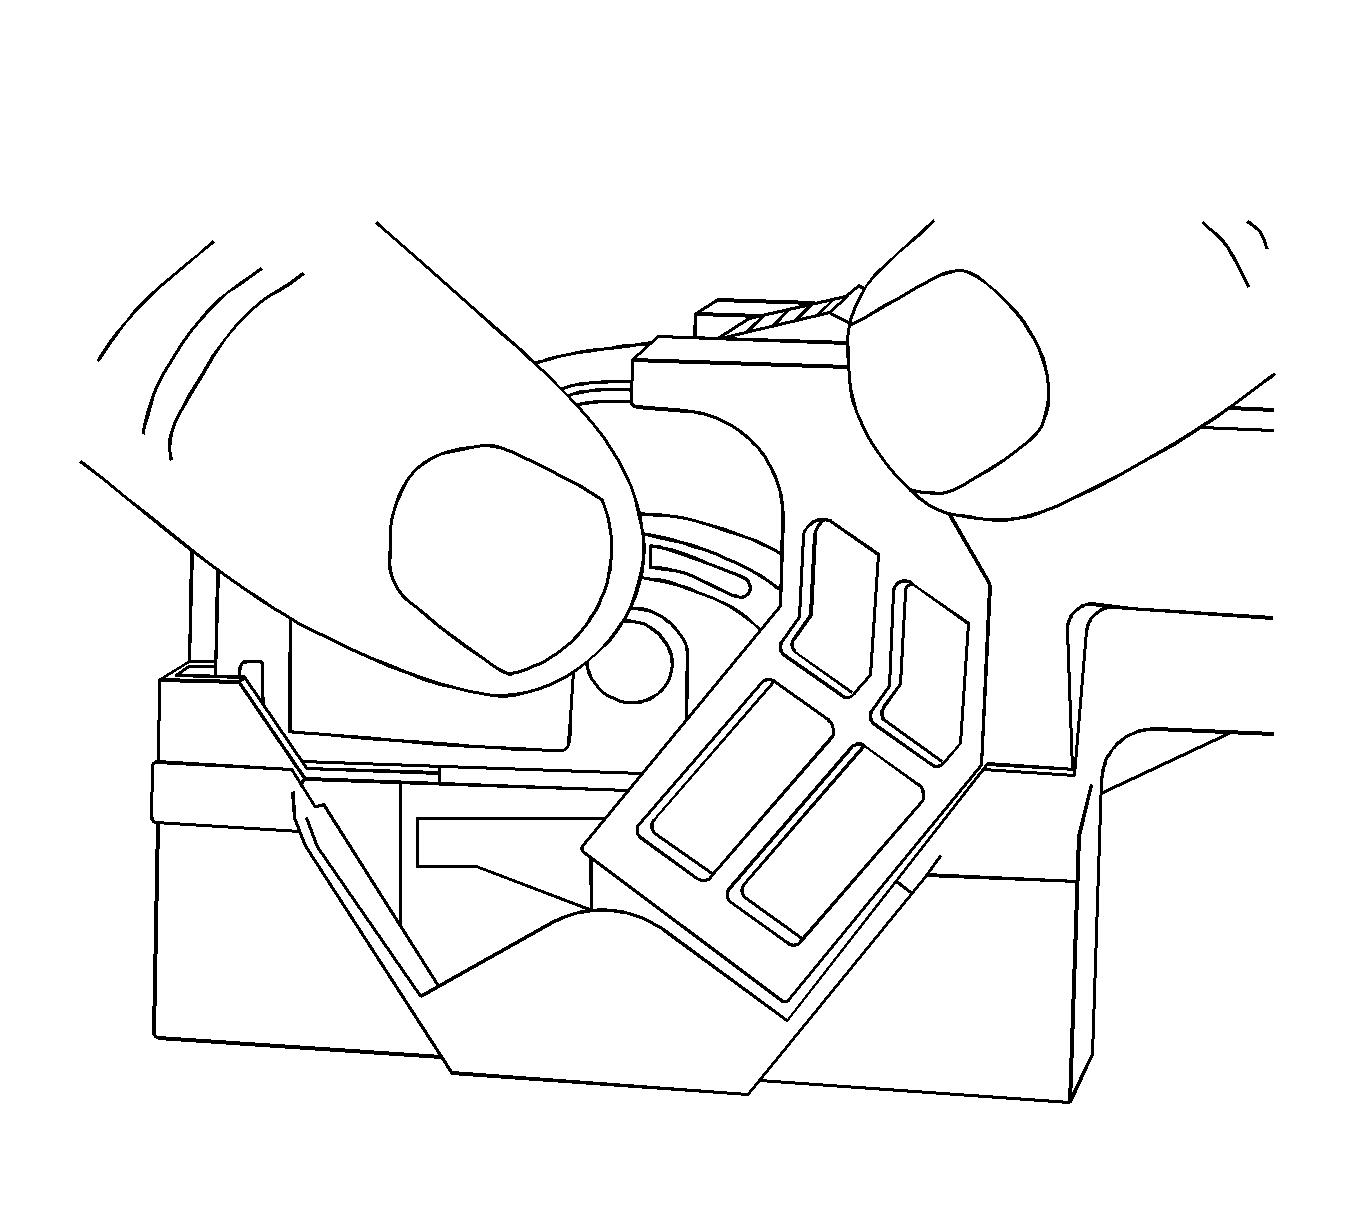
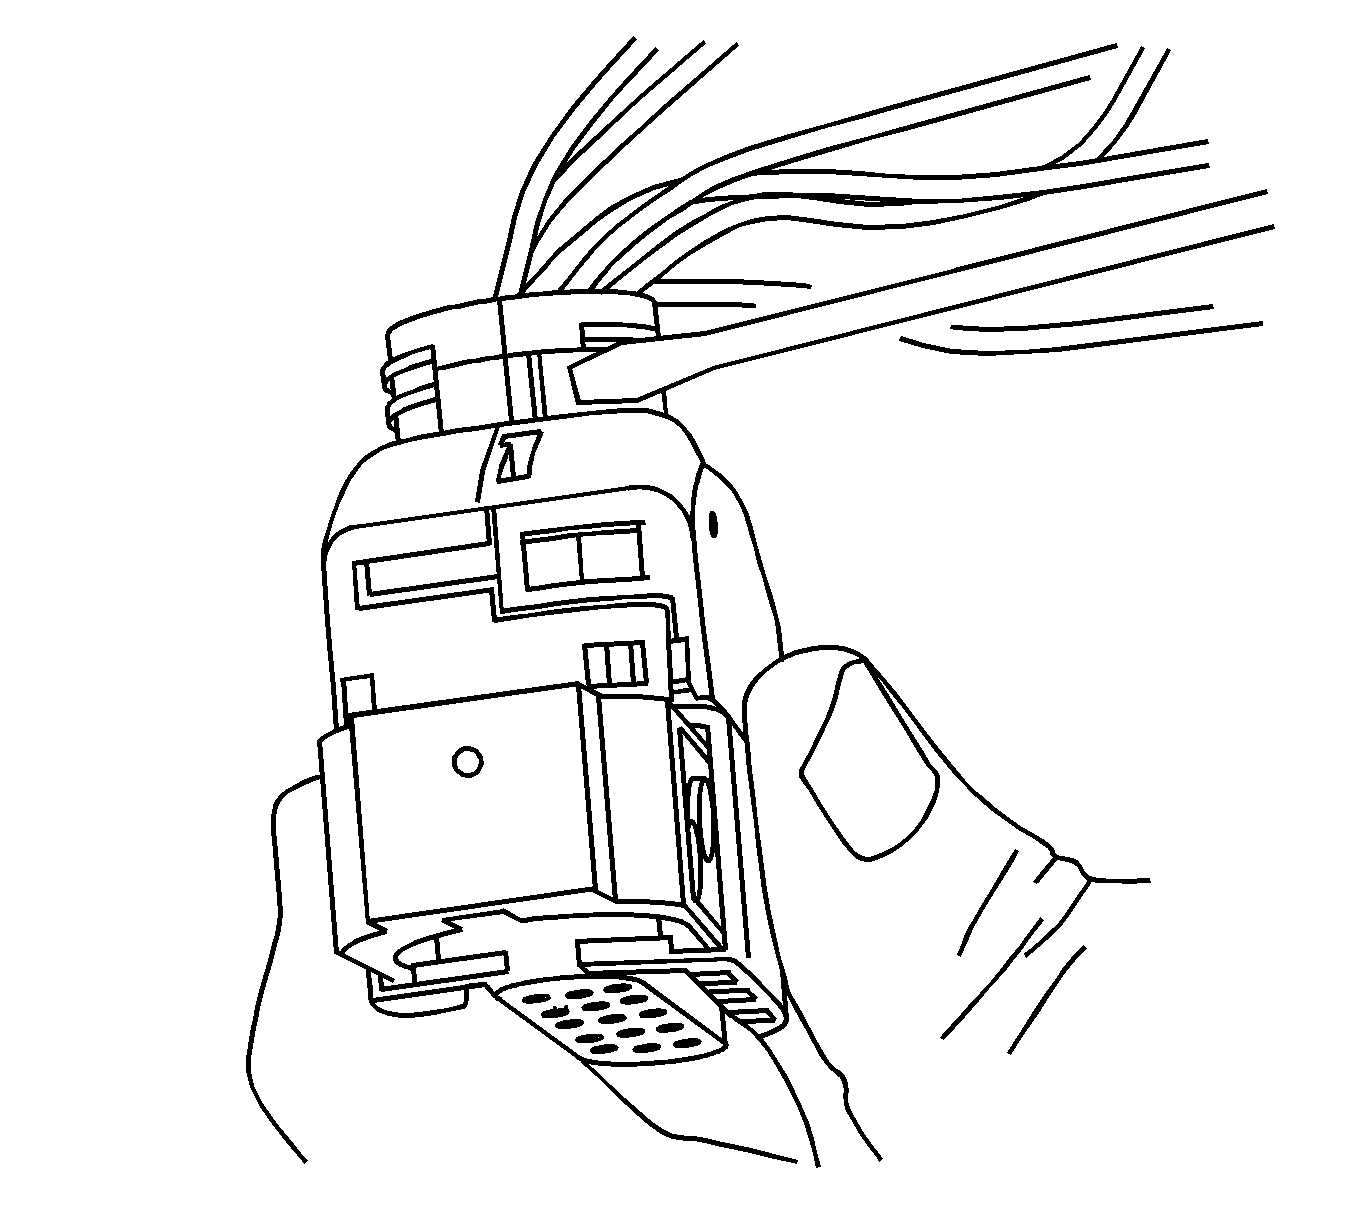
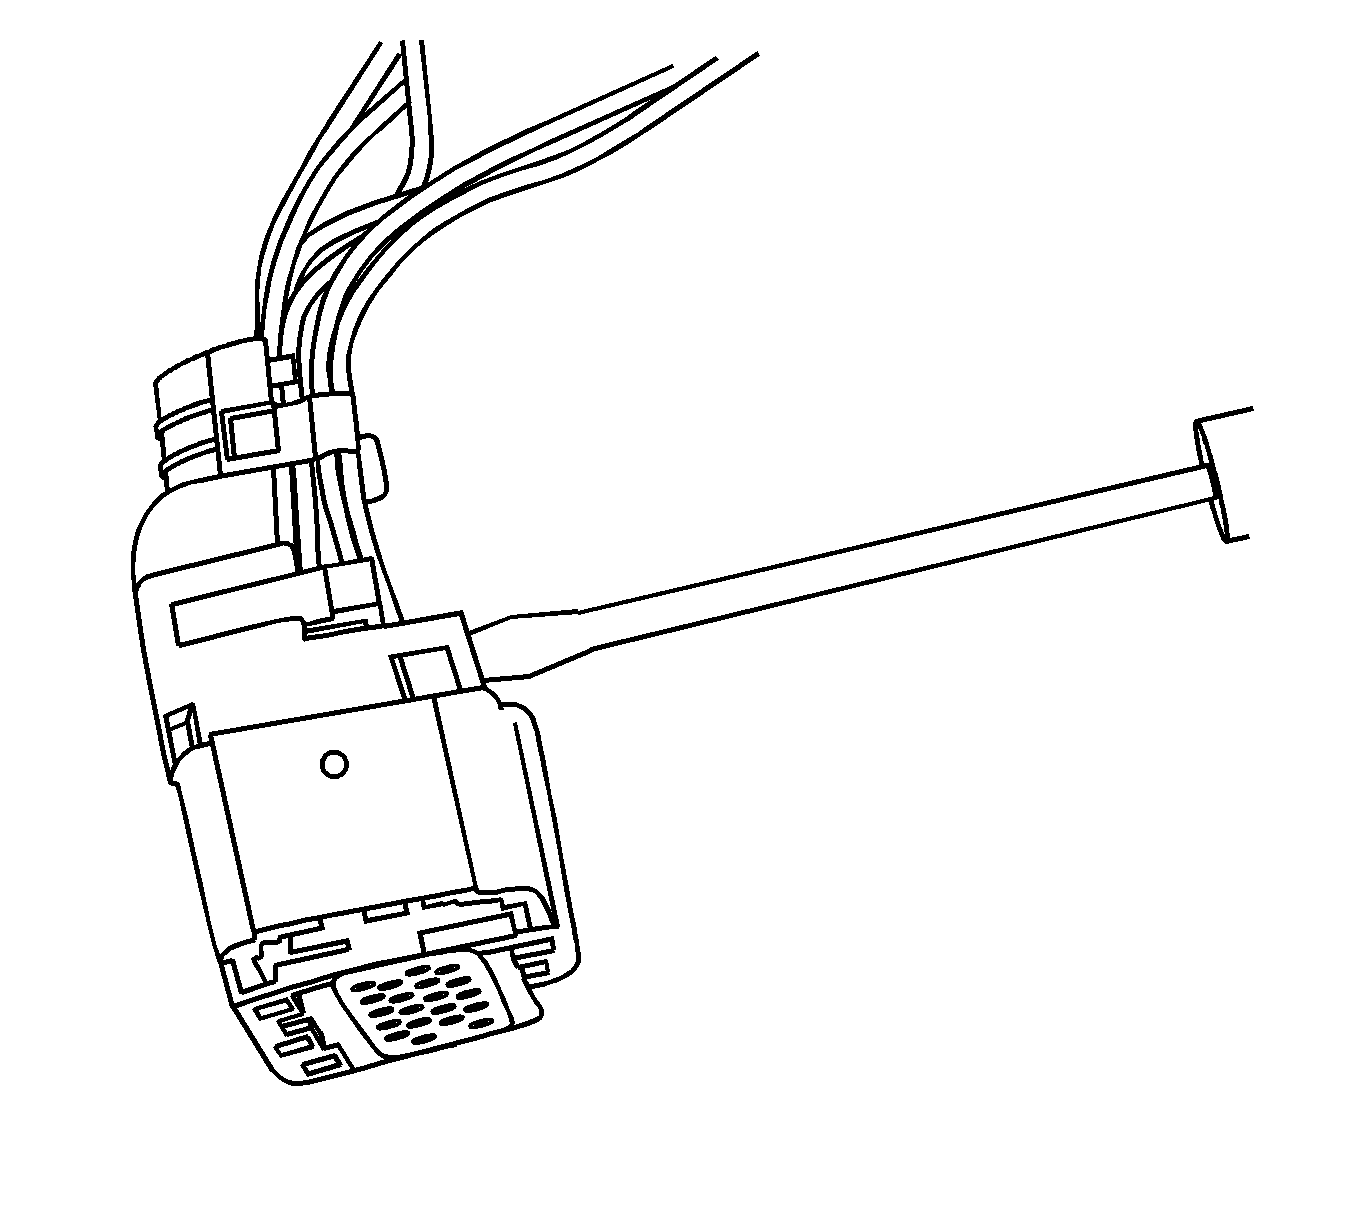
Follow the steps below in order to remove terminals from Micro-Pack 100W connectors. Some Micro-Pack 100W connector disassembly procedures will vary. Use this procedure as a guide.
- Disconnect the connector from the component.
- Locate the nose piece locking tabs that are positioned on the side of the connector nose piece. The connector nose piece acts as a terminal positive assurance (TPA) and may be referred to as such.
- Use a small flat-blade tool to push in one of the locking tabs while gently pulling on the same side of the nose piece.
- Repeat the procedure for the other locking tab and remove the nose piece.
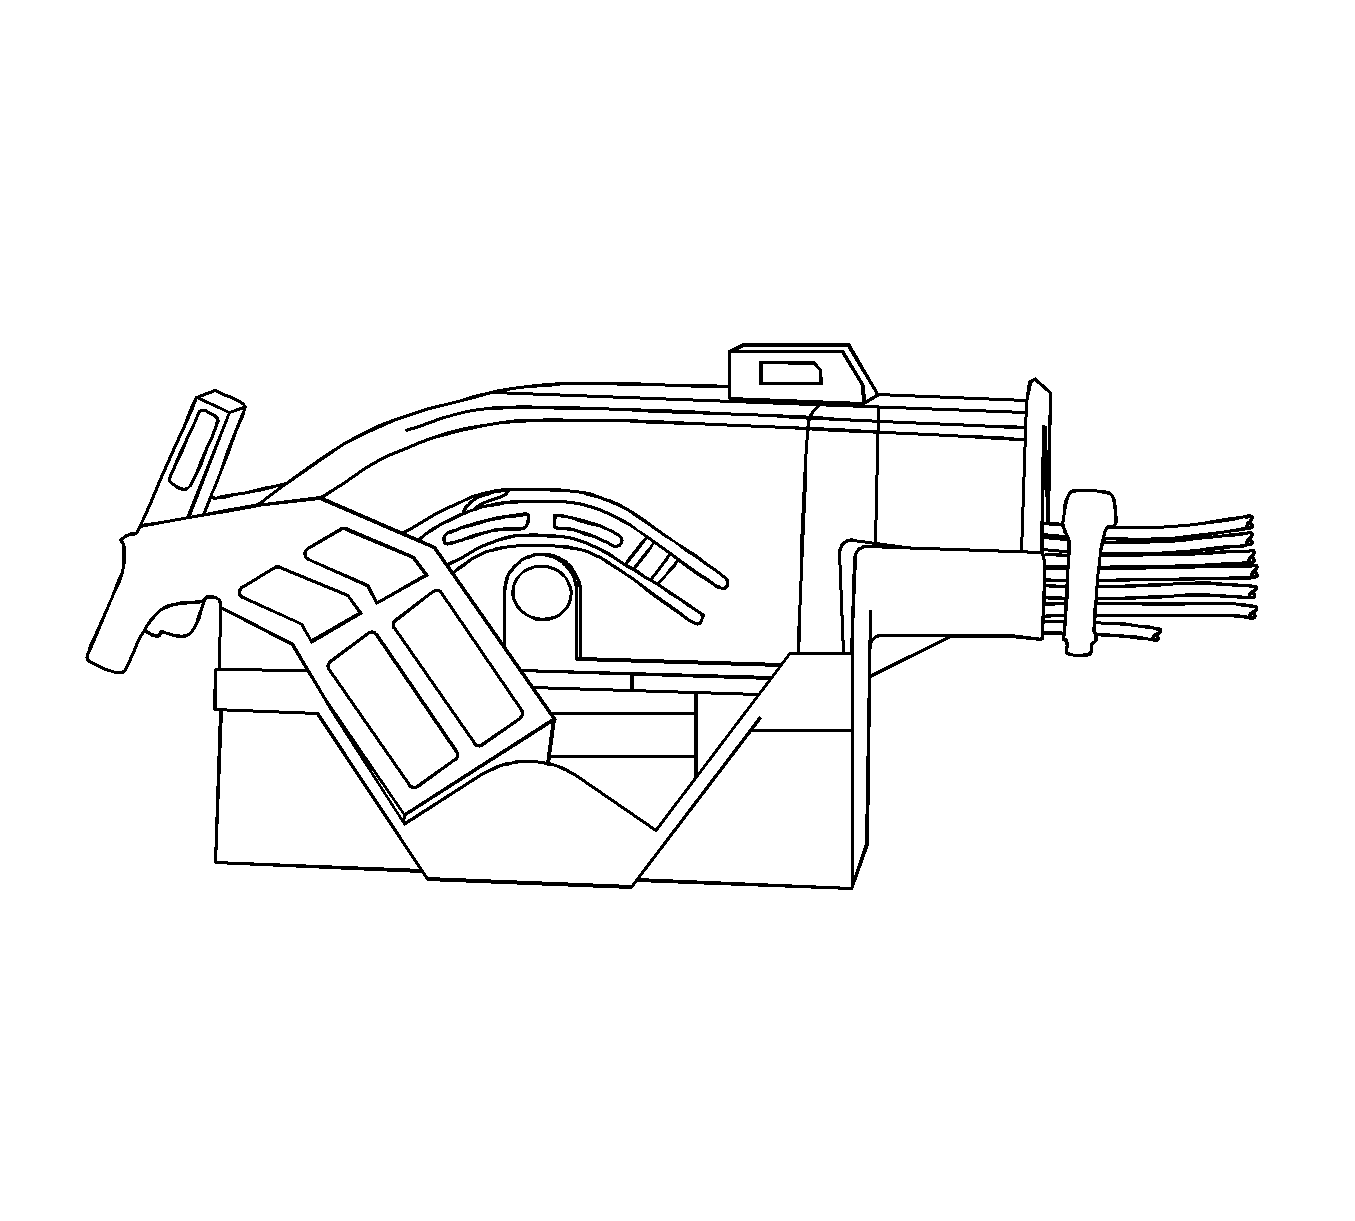
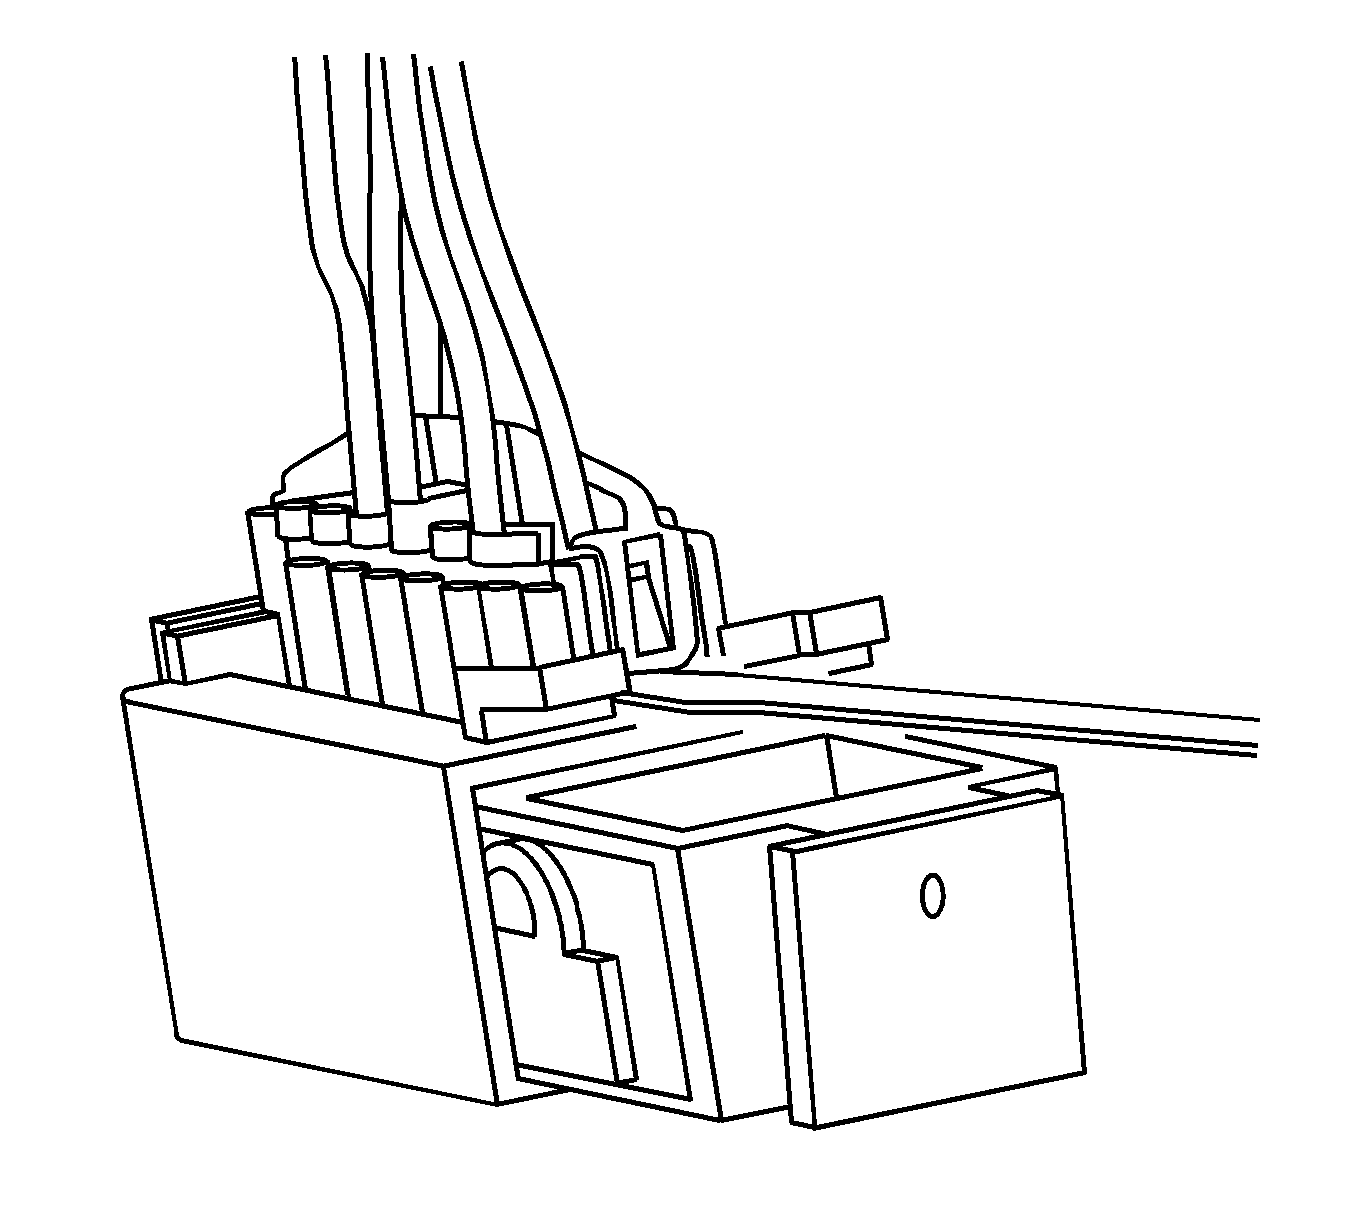
- Remove the wire dress cover. The following is a general procedure for wire dress cover removal. Use this procedure as a guide, some dress cover removal procedures may vary.
- Use fingers to squeeze the 2 locking legs of the cover.
- Apply pressure and gently rock the cover until one locking leg is unseated.
- Continue to apply pressure and rock the cover until the second locking leg is unseated. Repeat procedure for the other side of the dress cover and remove the cover.
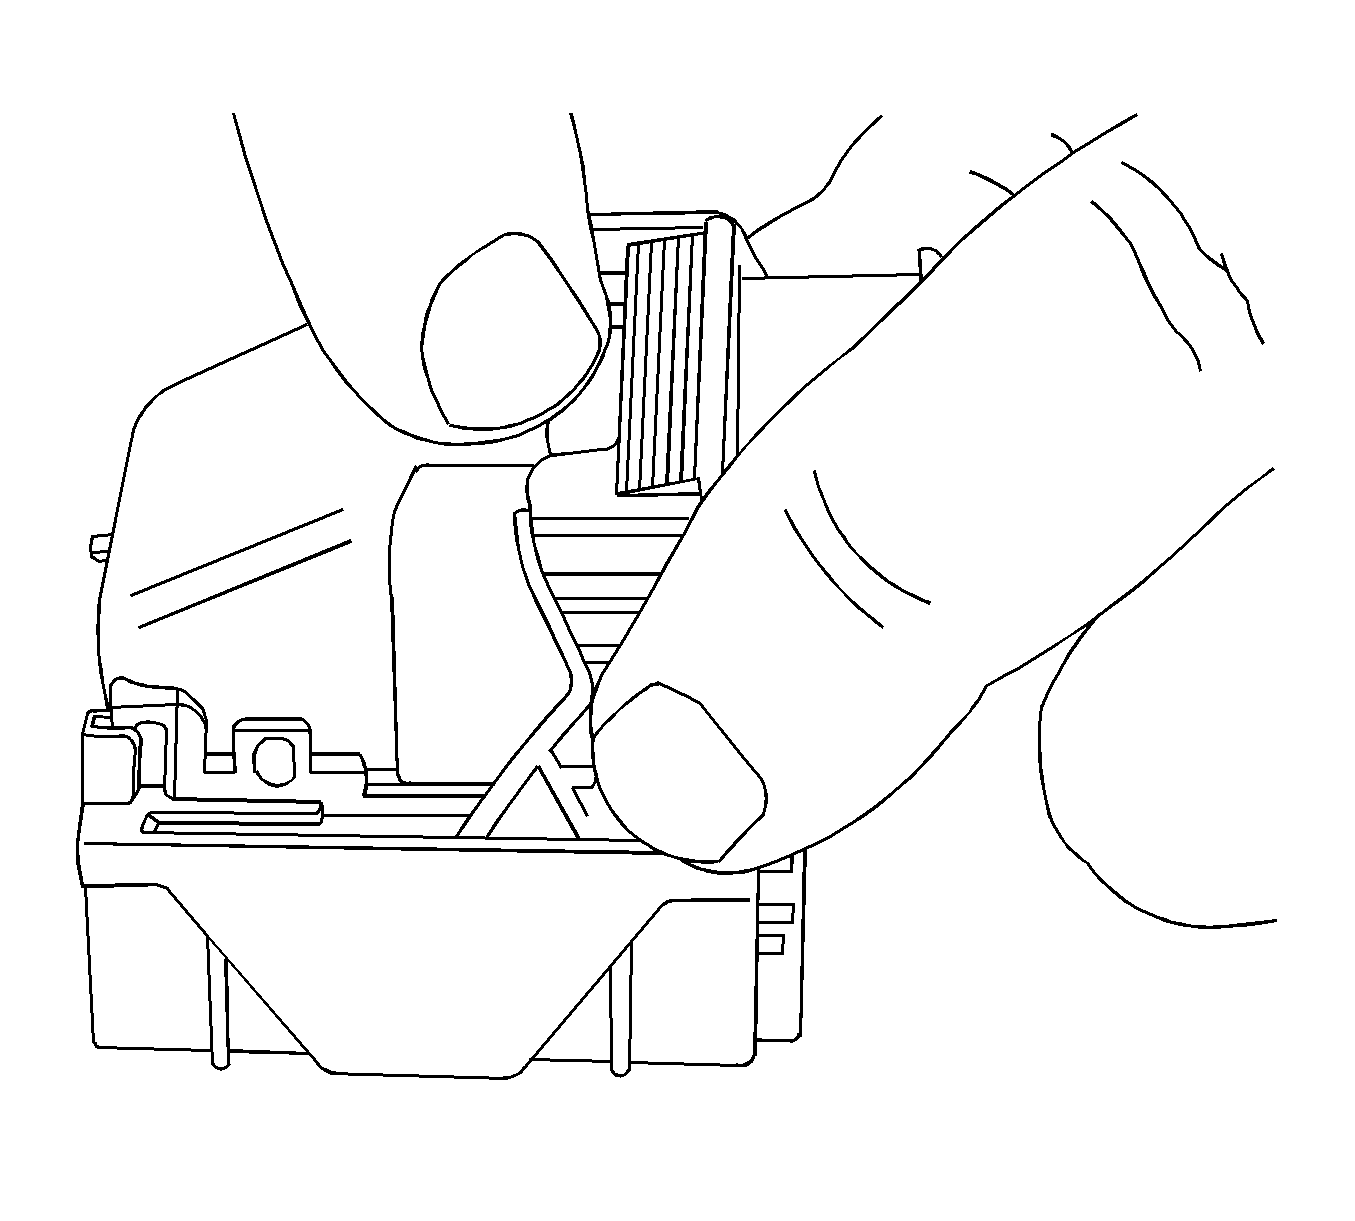
- Use EL-38125-12A to gently lift the terminal retaining tab while gently pulling the wire out of the back of the connector. Always remember never use force when pulling a terminal out of a connector.
- If the terminal is severely bent or damaged, it may be possible on some connectors to push the wire out of the front of the connector instead of pulling it through. This will prevent damage to the internal seals of the connector. Once the terminal is pushed out of the connector, cut the wire as close to the terminal as possible and pull the wire through the connector.

Terminated Lead Repair
- Remove the terminal.
- Find the appropriate terminated lead.
- Use the appropriate splice sleeves depending on the gage size.
- Refer to Splicing Copper Wire Using Splice Sleeves.
Terminal Replacement Procedure
After the terminal is crimped to the wire perform the following procedure in order to replace Micro-Pack 100 terminals.
- Slide the new terminal into the correct cavity at the back of the connector.
- Push the terminal into the connector until it locks into place. The new terminal should be even with the other terminals. Ensure that the terminal is locked in place by gently pulling on the wire.
- To assemble the connector, reverse the Terminal Removal Procedure.
Delphi Connectors Micro .64
Special Tools
For equivalent regional tools, refer to Special Tools.
Removal Procedure
Follow the steps below in order to remove terminals from Micro .64 connectors.
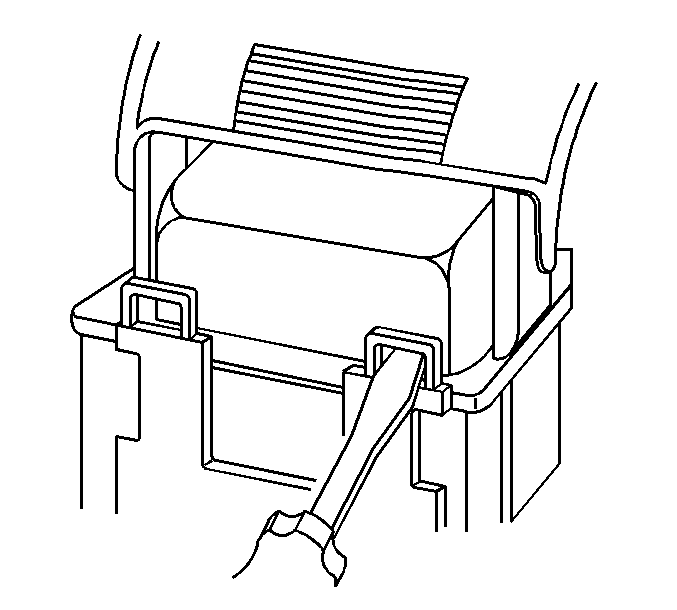
- Locate the lever lock on the wire dress cover. While depressing the lock, pull the lever over and past the lock. The lever lock may be located on the top or sides of the wire dress cover.
- View of a typical Micro 64 connector.
- Depress the lock and pull the lever over and past the lock.
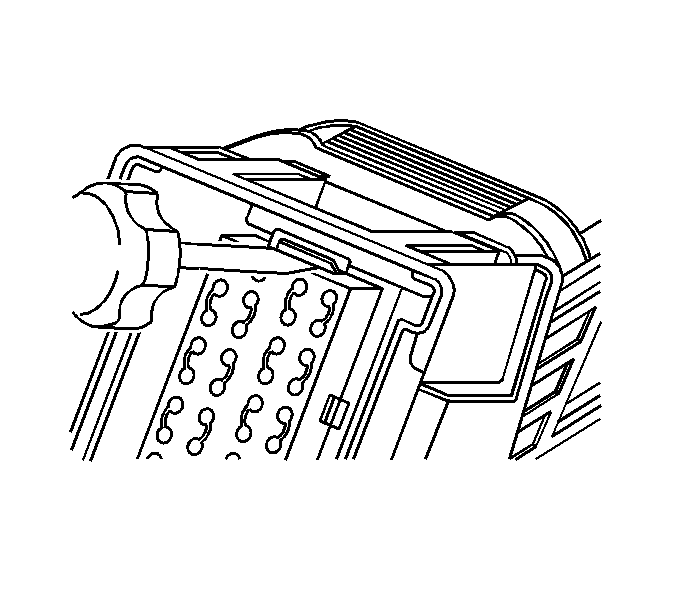
- View of the connector when released from the component.
- View of another type of Micro 64 connector.
- Depress the locks that are located on both sides of the wire dress cover and pull the lever over and past the locks.
- View of the connector when released from the component.
- Disconnect the connector from the component.
- Locate the dress cover locking tabs at the front of the connector. Using a small flat-blade tool push down on one of the locking tabs and pull the cover up until the dress cover releases. Repeat this procedure for the other locking tab.
- Once the front 2 locks are unlocked, lift the front of the dress cover and pull it forward.
- Remove the TPA by inserting a small flat-blade tool into the small slot on the TPA and pushing down until the TPA releases. Gently pry the TPA out of the connector.
- Insert the EL-38125-21 tool into the round canal between the terminals cavities at the front of the connector.
- While holding the removal tool in place, gently pull the wire out of the back of the connector. Always remember never use force when pulling a terminal out of a connector.
Note: Always use care when removing a terminal position assurance (TPA) in order to avoid damaging it.
Note: Be careful not to angle or rock the EL-38125-21 tool when inserting it into the connector or the tool may break.
Terminated Lead Repair
- Remove the terminal.
- Find the appropriate terminated lead.
- Use the appropriate splice sleeves depending on the gage size.
- Refer to Splicing Copper Wire Using Splice Sleeves.
Delphi Connectors 12-Way
Special Tools
For equivalent regional tools, refer to Special Tools.
Removal Procedure
Follow the steps below in order to remove terminals from the connector.
- Locate the lever lock on the wire dress cover. Remove the connector position assurance (CPA) and slide the lever lock away from the connector body.
- Disconnect the connector from the component.
- Locate the dress cover locking tabs on the dress cover of the connector. Using a small flat-blade tool release all of the locking tabs.
- Release the lower wire dress cover locking tab.
- Release the upper wire dress cover locking tab.
- Once the locks are unlocked, lift the dress cover off.
- Remove the TPA by inserting a small flat-blade tool into the locking tabs on both sides of the TPA. Gently pry the TPA out of the connector.
- Remove the nose piece by inserting a small flat-blade tool into the locking tabs on both sides of the nose piece. Gently pry the nose piece out of the connector.
- Insert the EL-38125-12A tool to release the terminals by inserting the tool into the terminal release cavity.
- While holding the removal tool in place, gently pull the wire out of the back of the connector. Always remember never use force when pulling a terminal out of a connector.
Note: Always use care when removing a terminal position assurance (TPA) in order to avoid damaging it.
Terminated Lead Repair
- Remove the terminal.
- Find the appropriate terminated lead.
- Use the appropriate splice sleeves depending on the gage size.
- Refer to Splicing Copper Wire Using Splice Sleeves.
