Special Tools
| • | EN-46843 |
| • | 7370 |
| • | 7371 |
| • | EN-48536 |
Removal Procedure
- Ignition OFF.
- Disconnect the battery negative cable. Refer to Battery Negative Cable Disconnection and Connection.
- Drain the fuel tank into a suitable container. Refer to Fuel Tank Draining.
- Raise and support the vehicle. Refer to Lifting and Jacking the Vehicle.
- Remove the right rear wheel. Refer to Tire and Wheel Removal and Installation.
- Remove the exhaust system for access. Refer to Exhaust System Replacement.
- Remove the propeller shaft. Refer to Propeller Shaft Replacement.
- Remove the park brake cables. Refer to Parking Brake Rear Cable Replacement.
- Disconnect the filler vent tube connector (1) from the fuel tank assembly.
- Remove the retaining hose clamp (1) from the fuel filler hose (2).
- Remove the retaining hose clamp (3) from the fuel filler hose (2).
- Remove the fuel filler hose (2) from the vehicle.
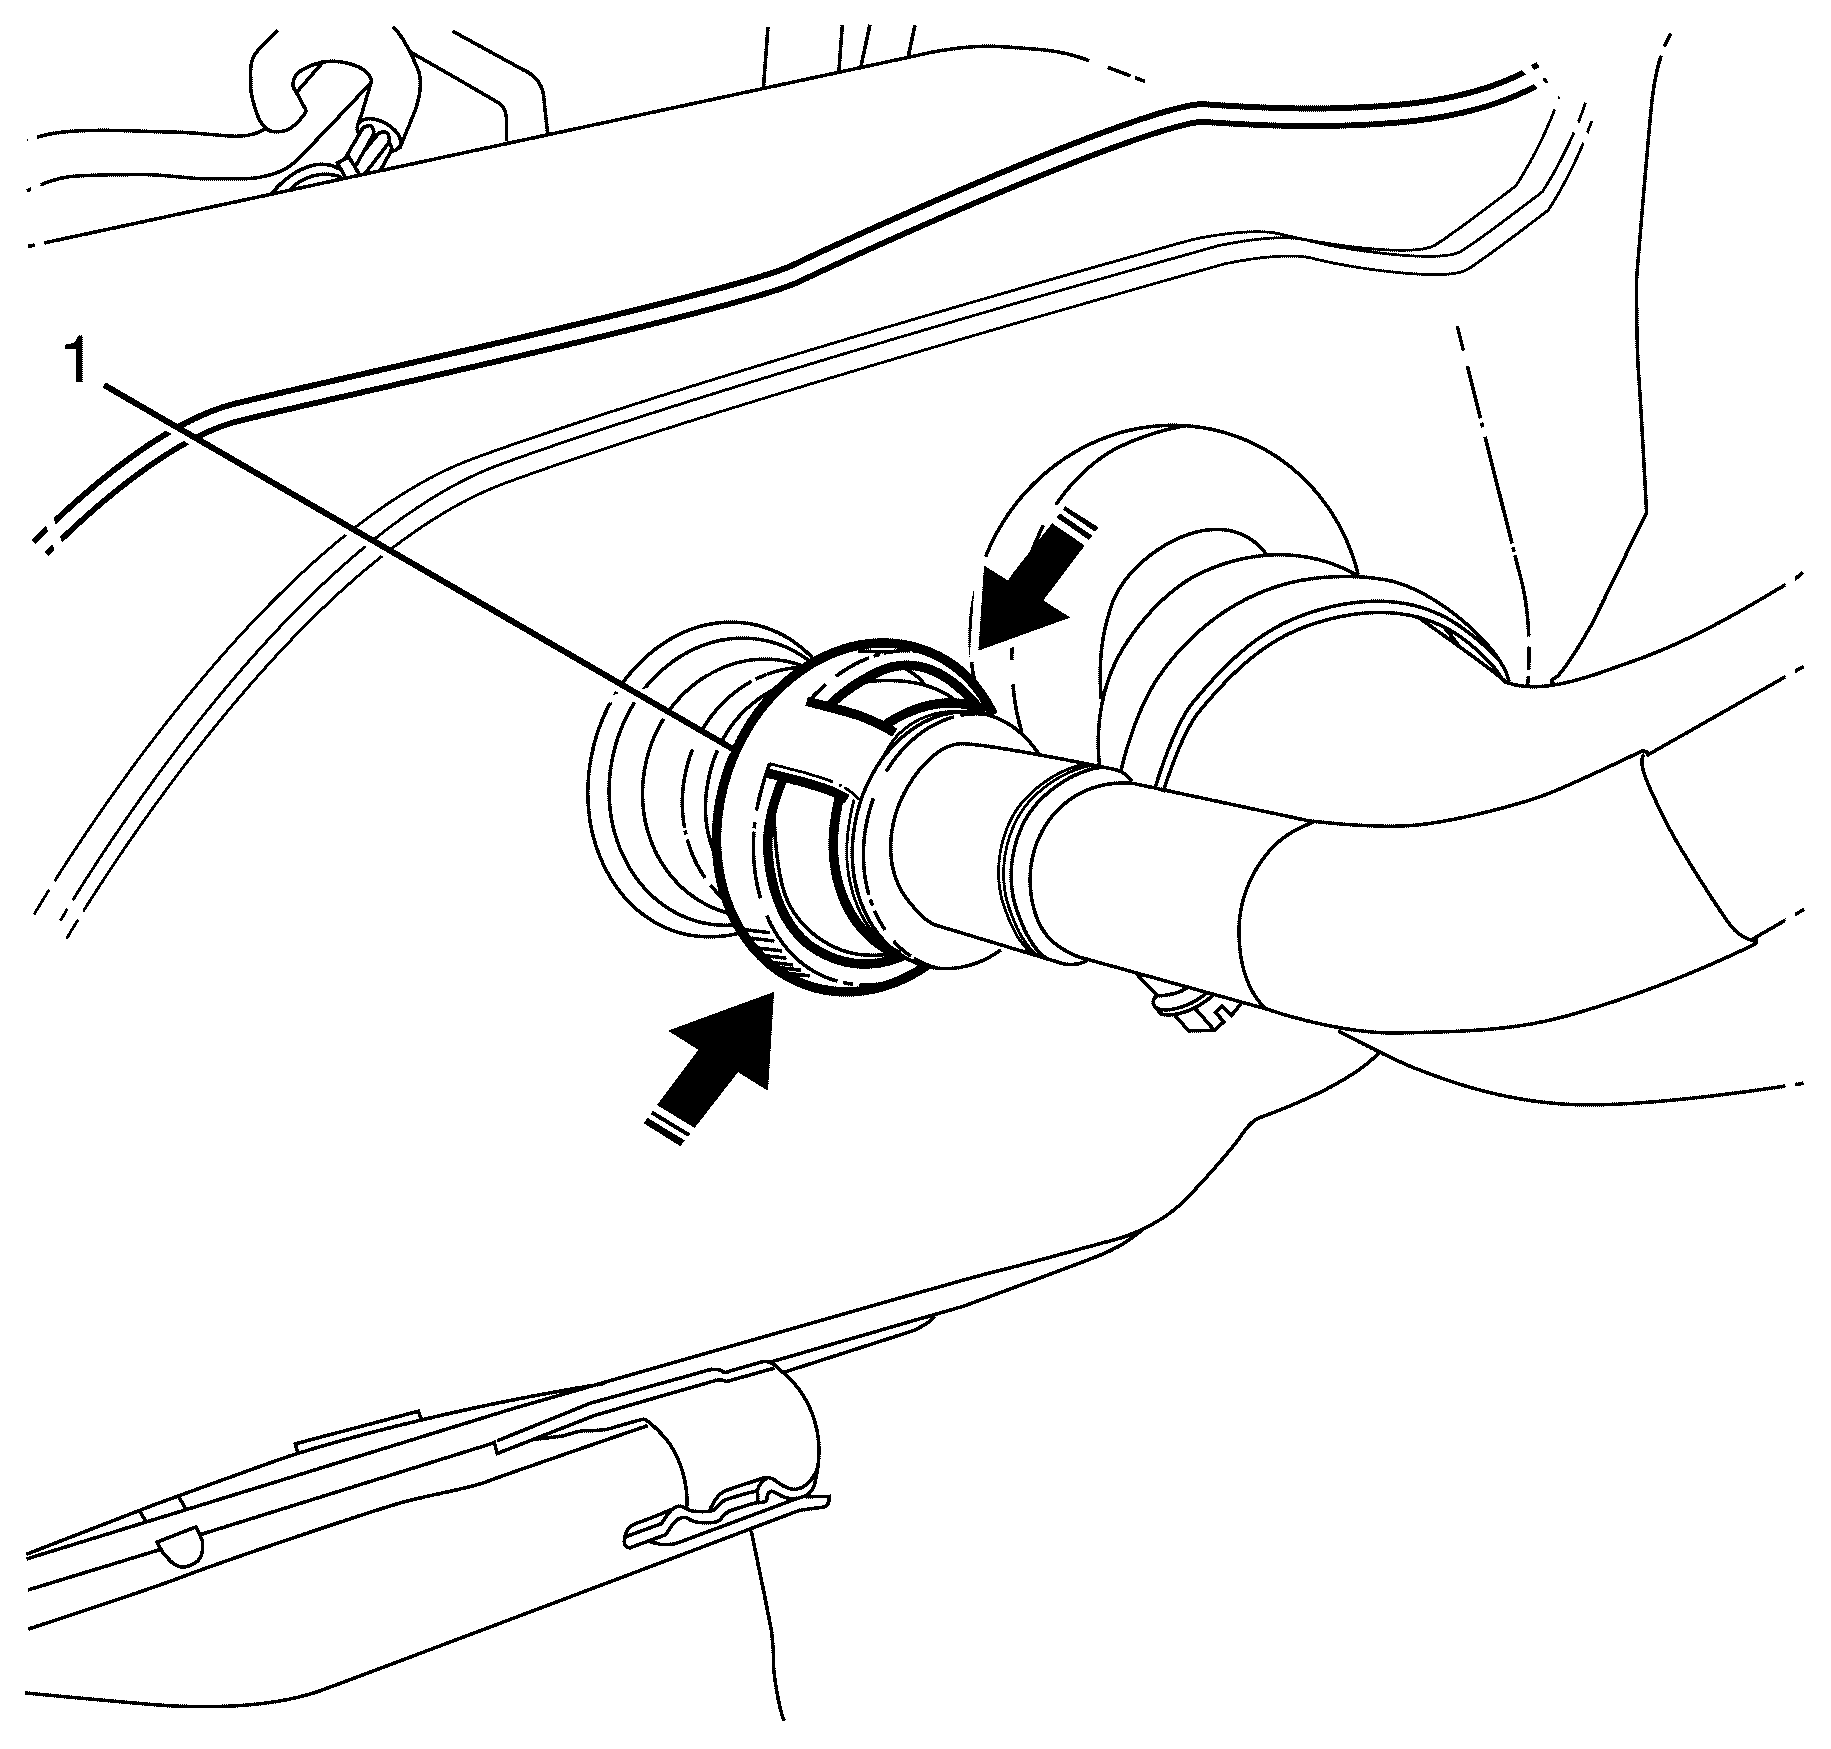
- Disconnect the fuel feed line connector (1) using 7371 .
- Disconnect the EVAP line (2). Refer to Plastic Collar Quick Connect Fitting Service.
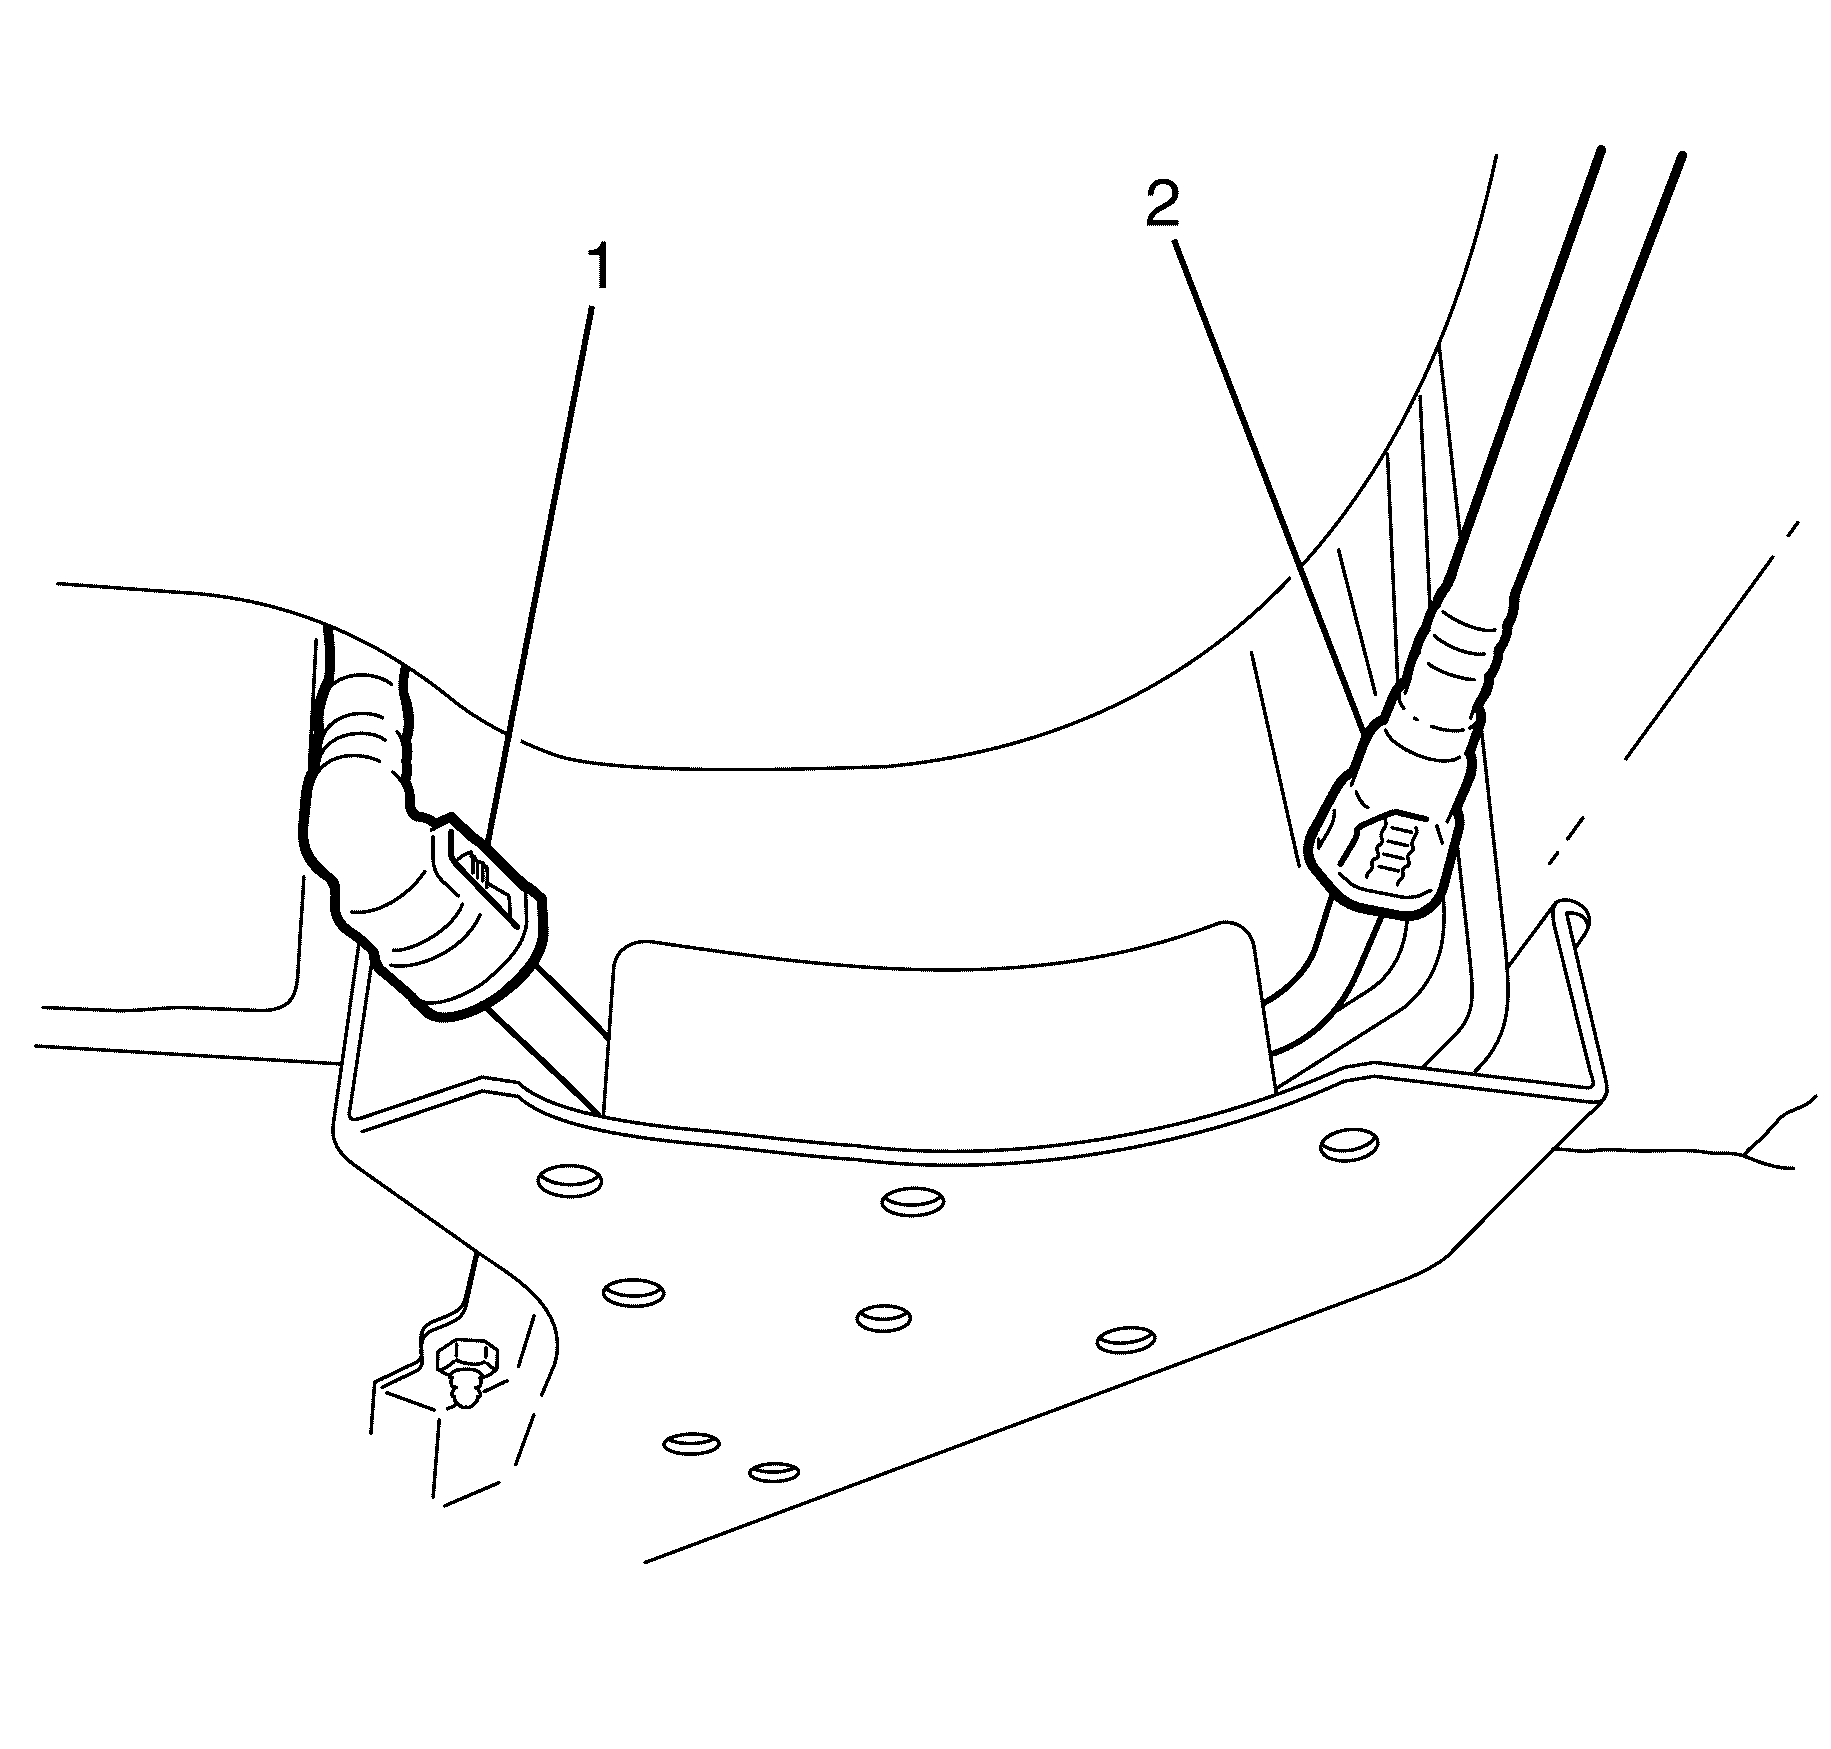
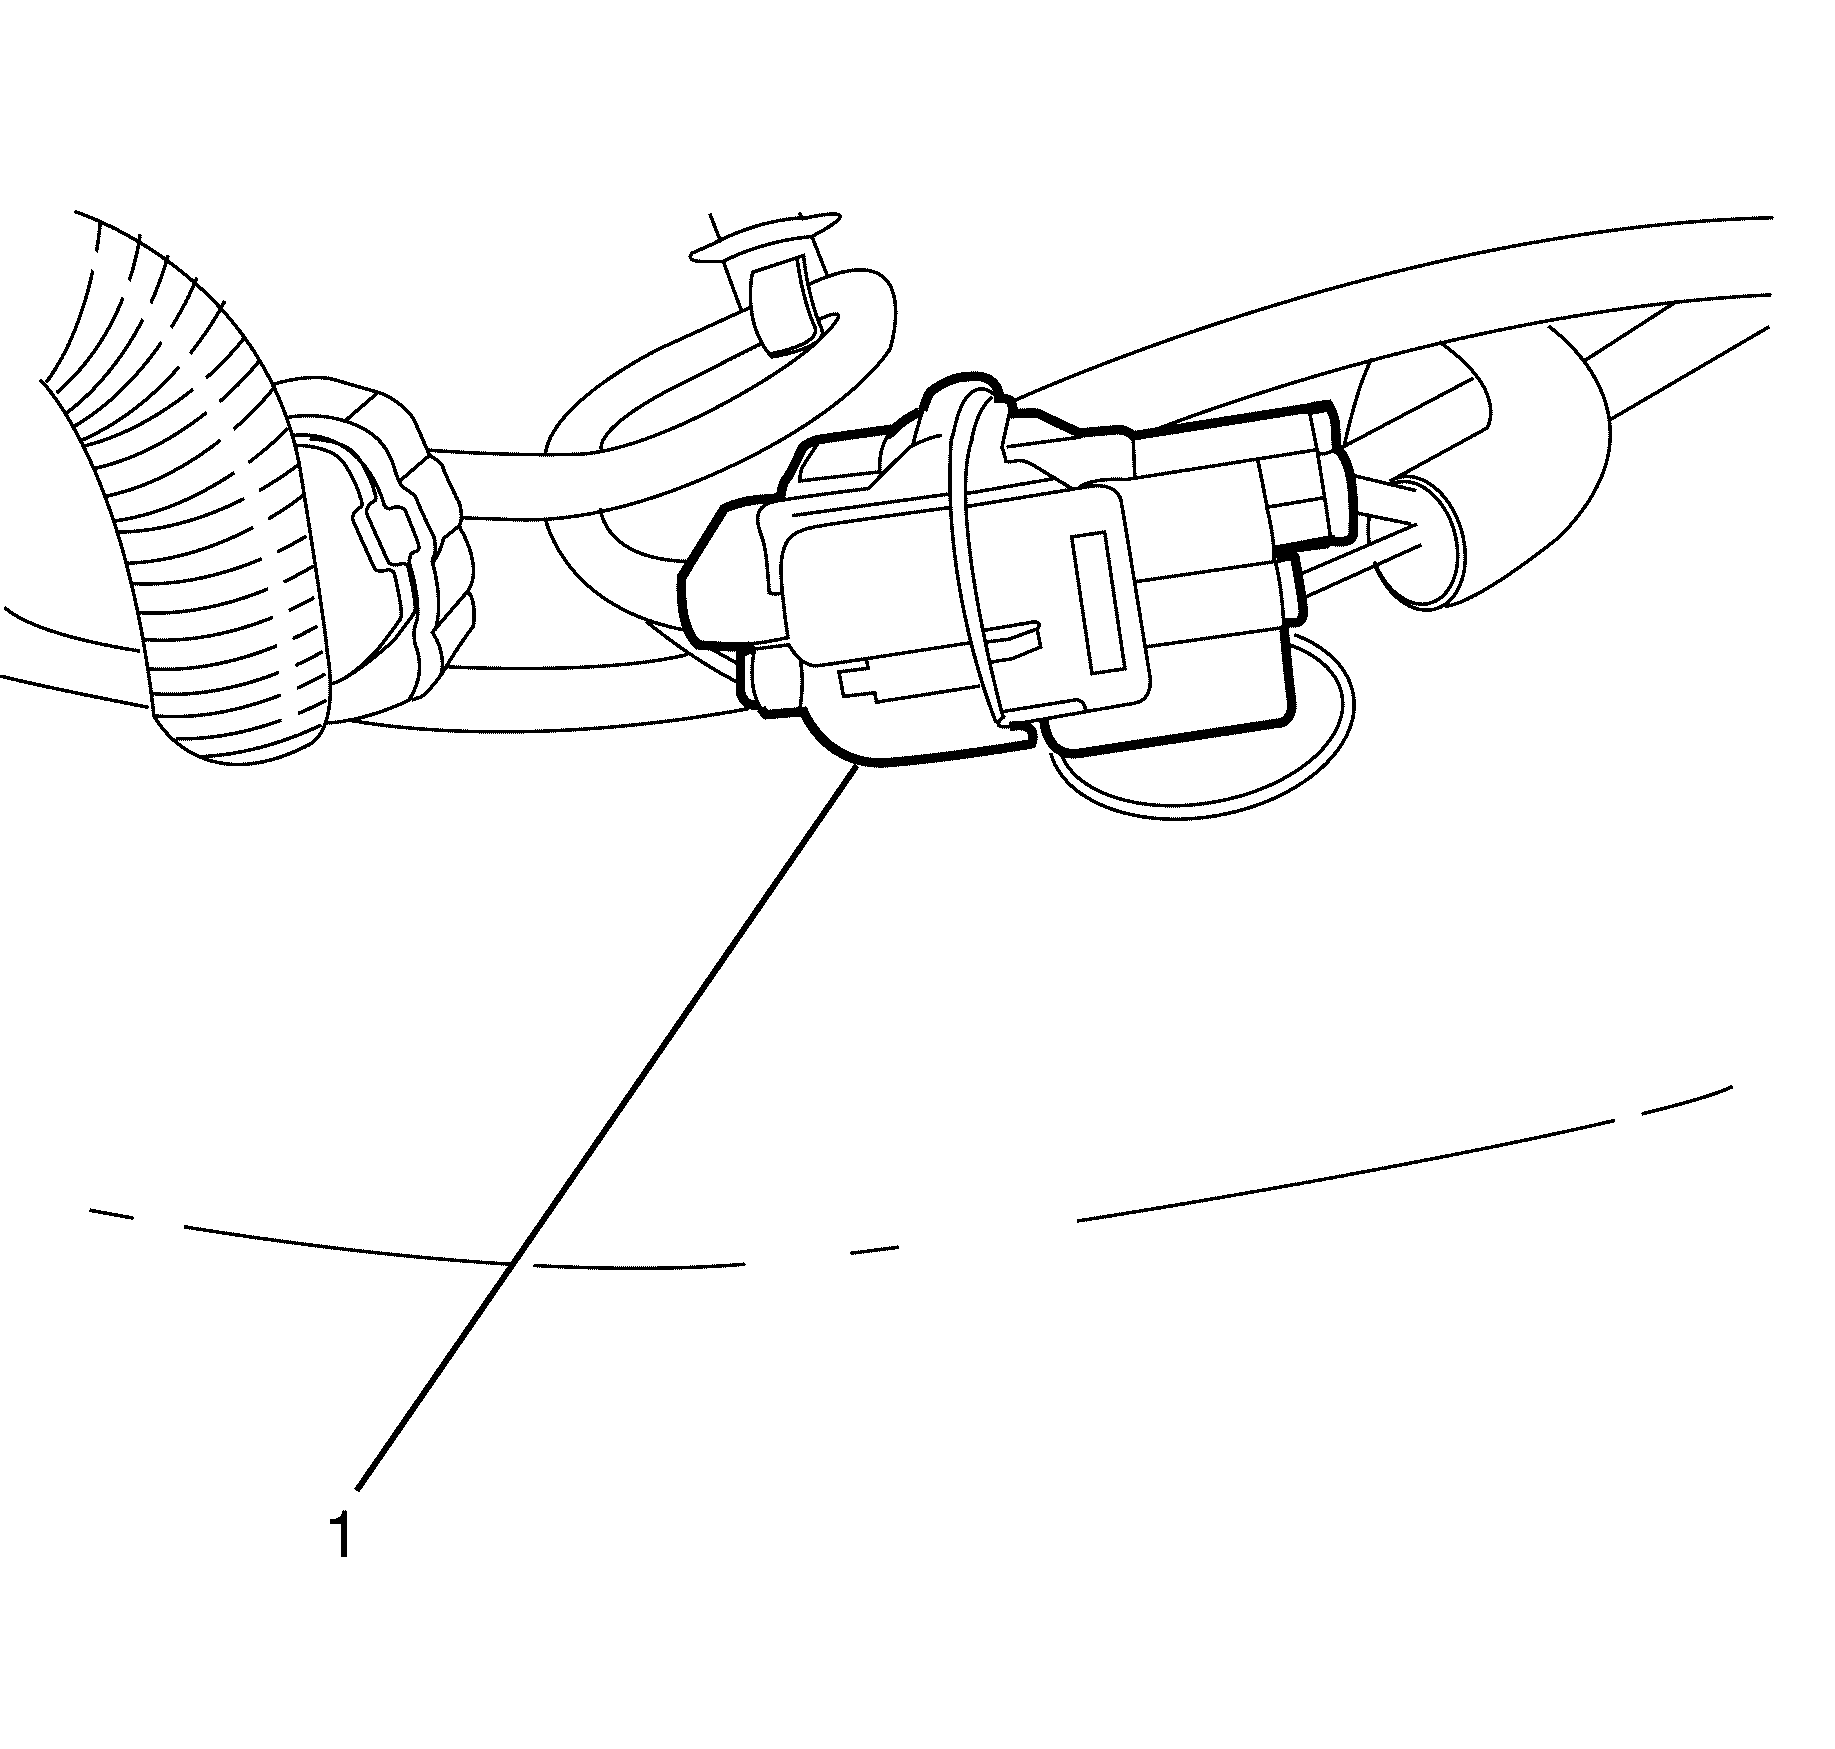
- Disconnect the fuel tank electrical connector (1) from the chassis electrical harness.
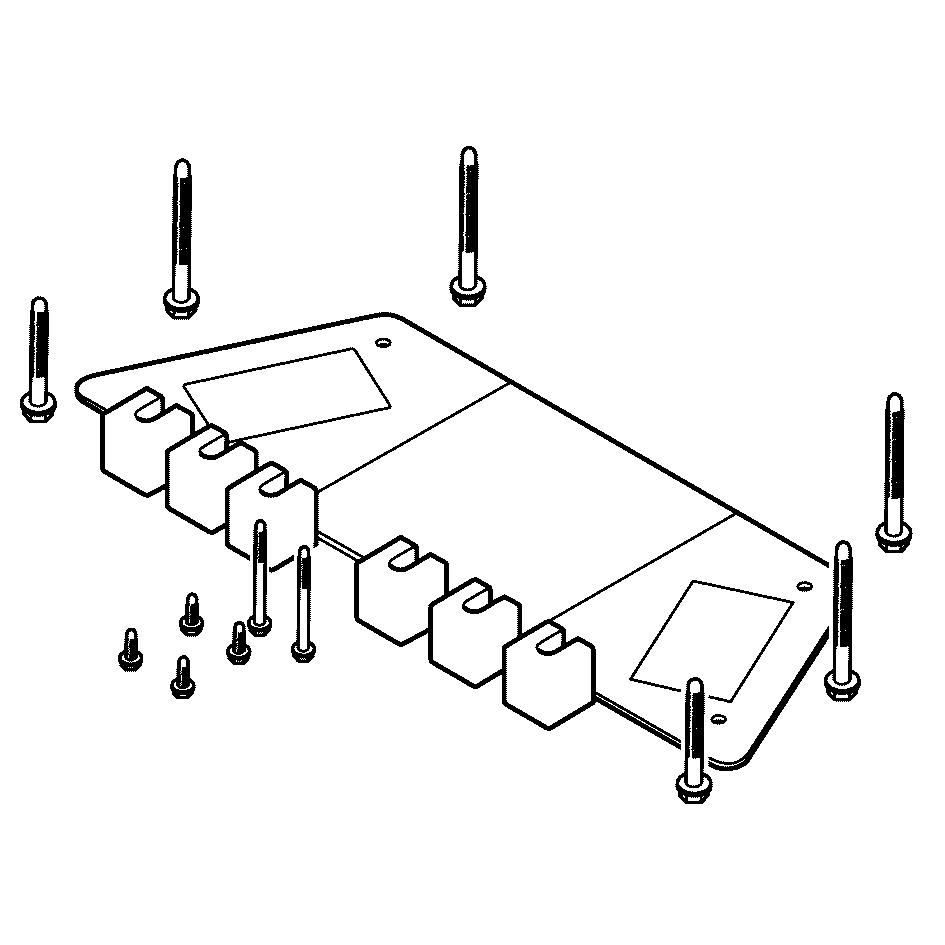
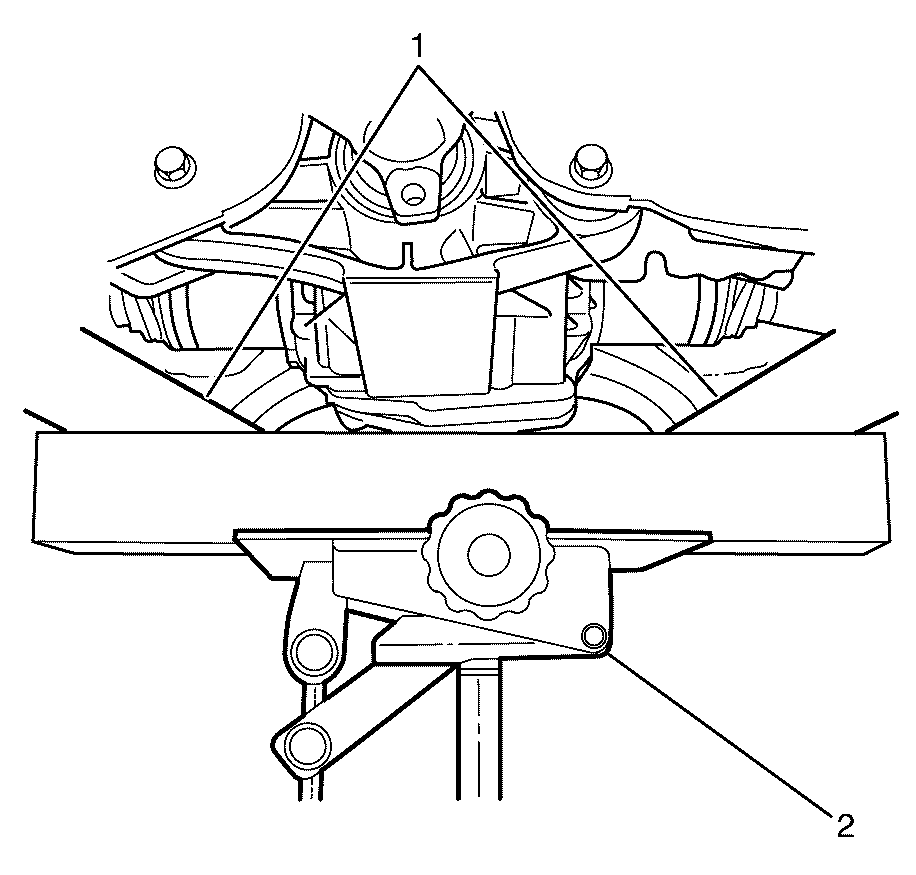
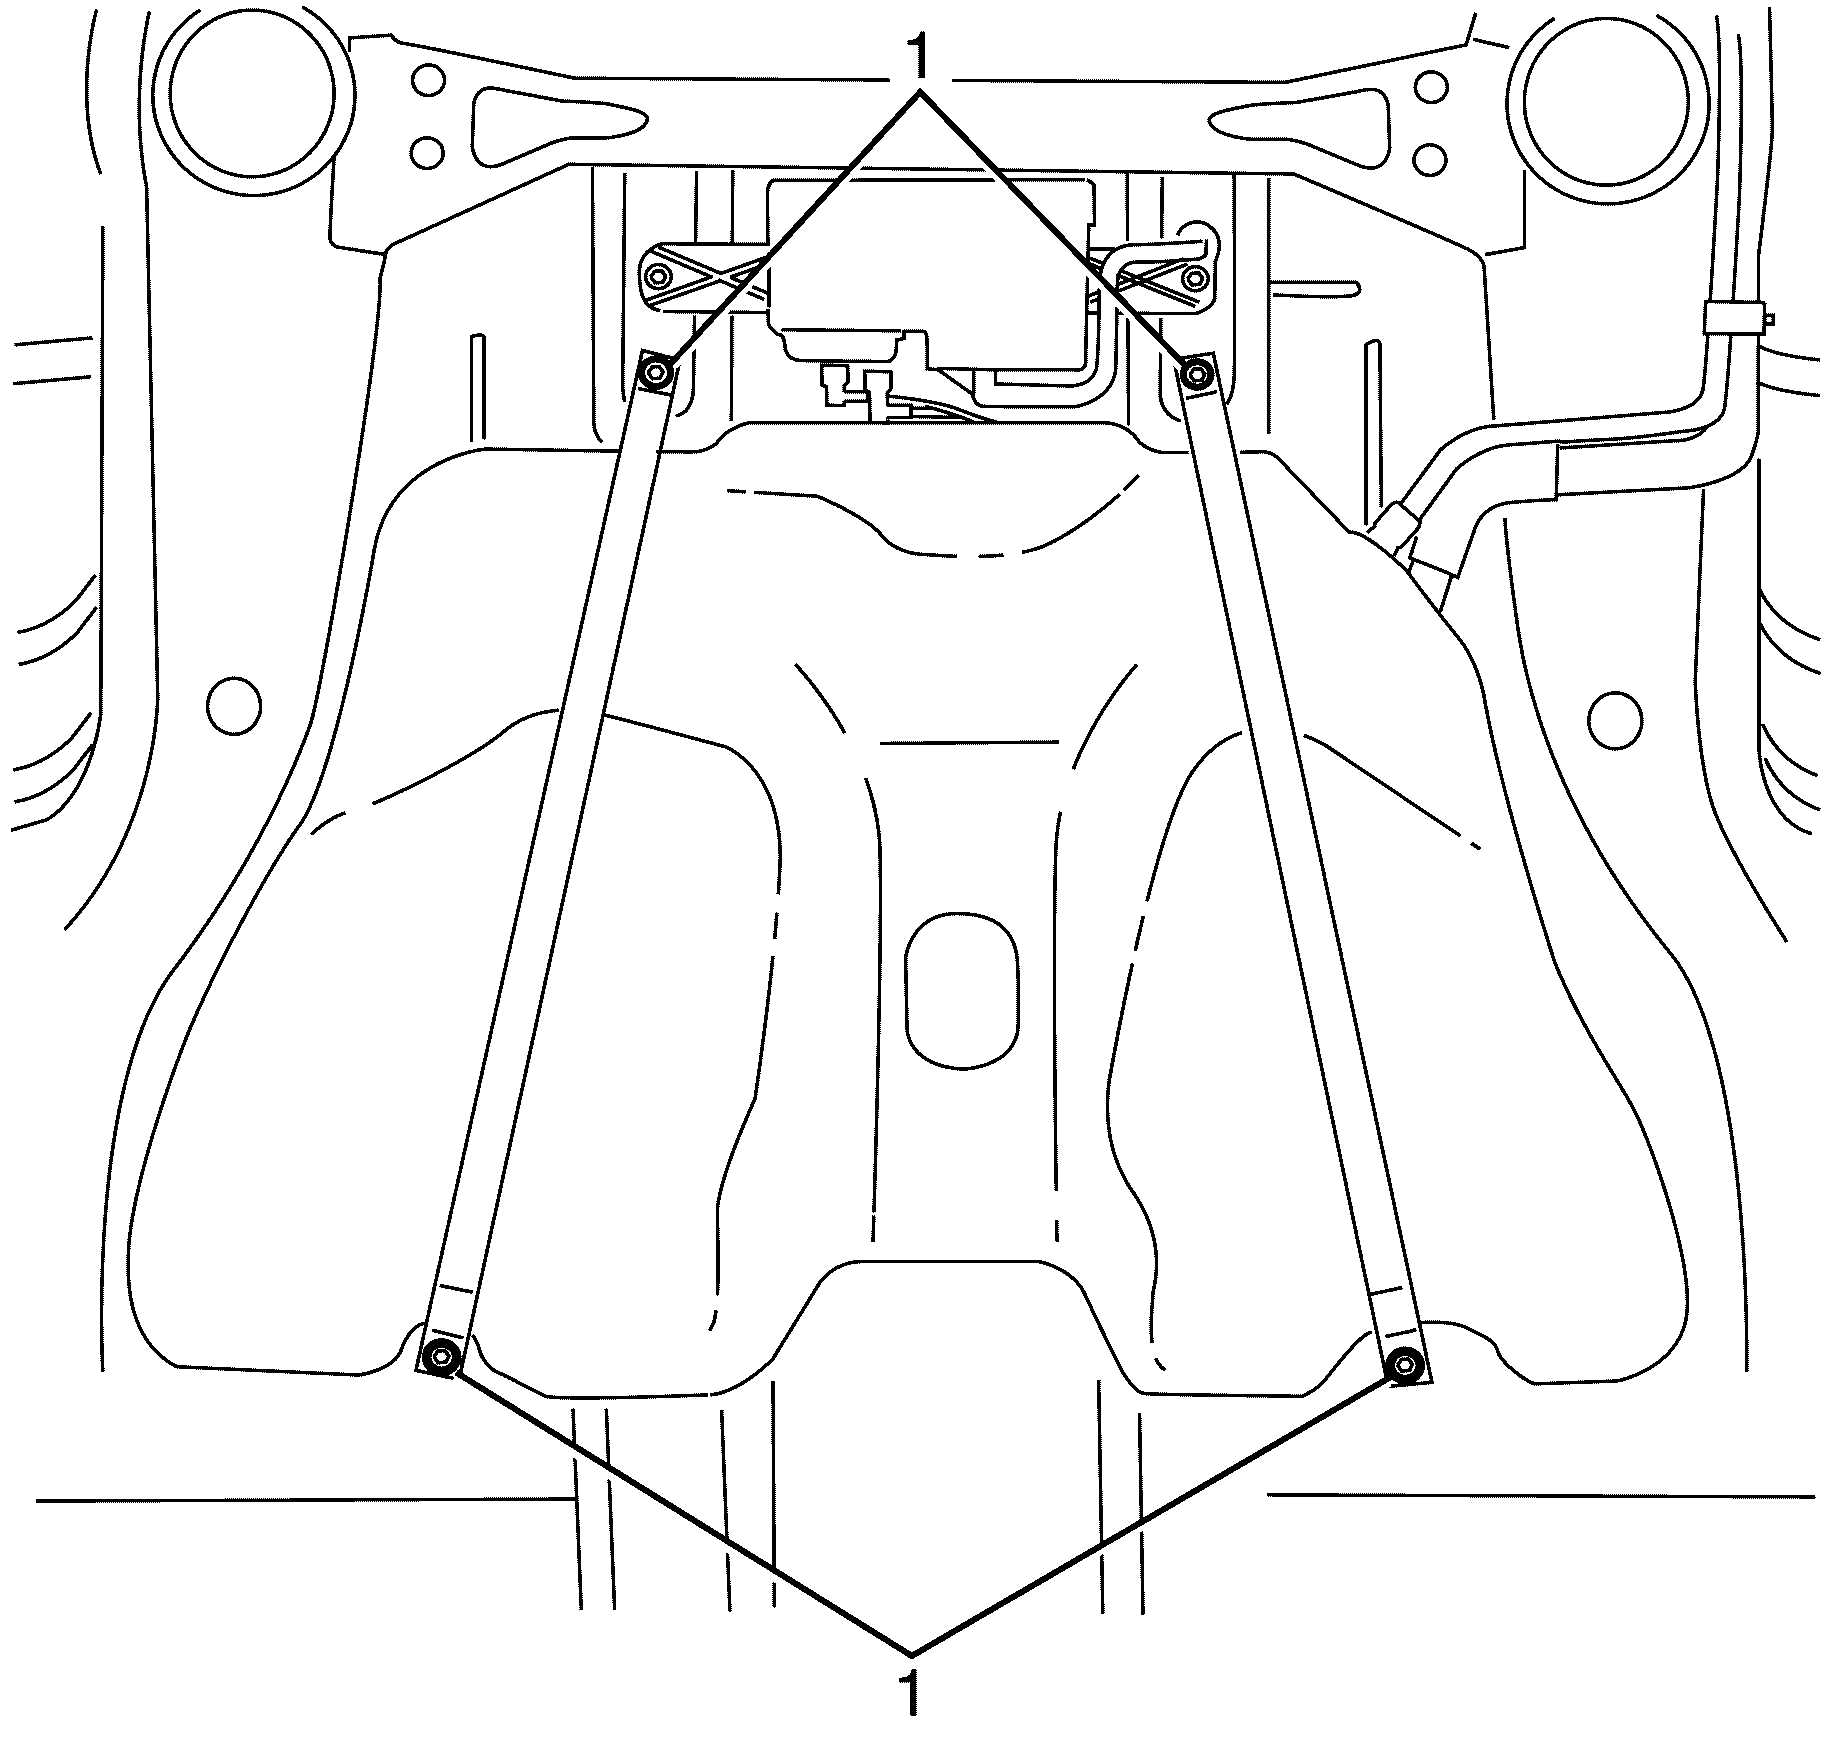
- Support the rear frame assembly (1) using a suitable tool (2).
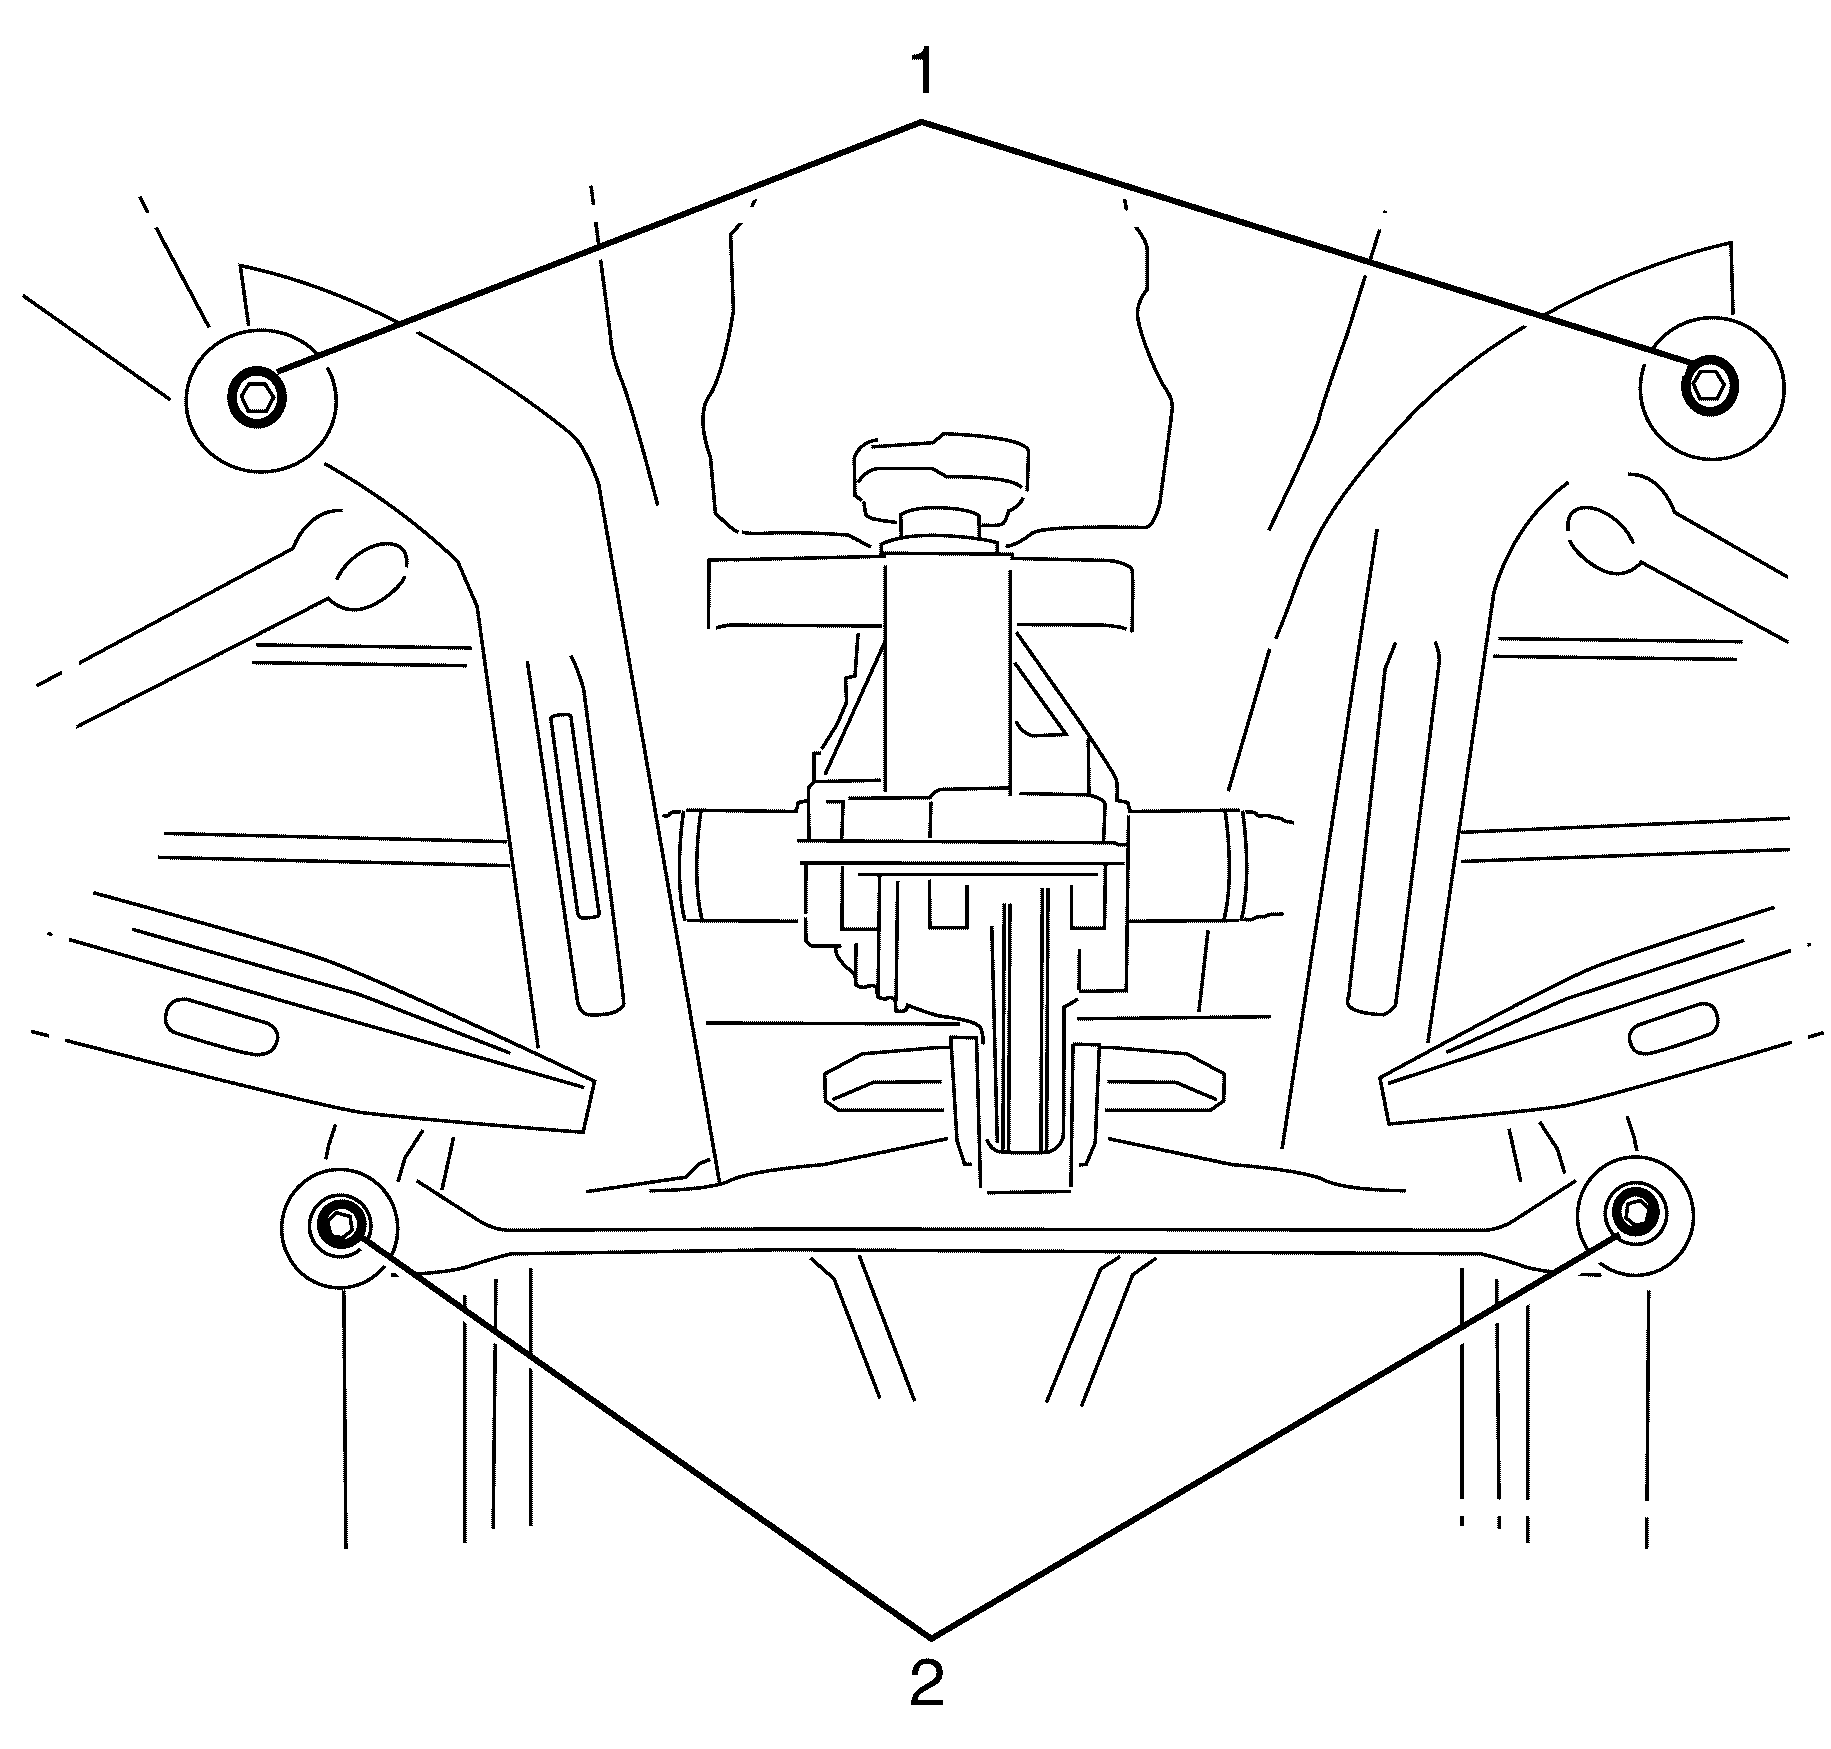
- Remove the rear frame to chassis retaining bolts (1) and discard.
- Remove the rear frame to chassis retaining bolts (2) and discard.
- Install the bolts (2) of EN-48536 to the rear frame mounts (1).
- Lower the rear frame onto the bolts (2) of EN-48536 .
- Detach the EVAP canister hose connector (1) from the EVAP canister (3).
- Detach the EVAP canister hose connector (2) from the EVAP canister (3). Refer to Plastic Collar Quick Connect Fitting Service.
- Disconnect the electrical connector (5) from the EVAP canister vent solenoid (4).
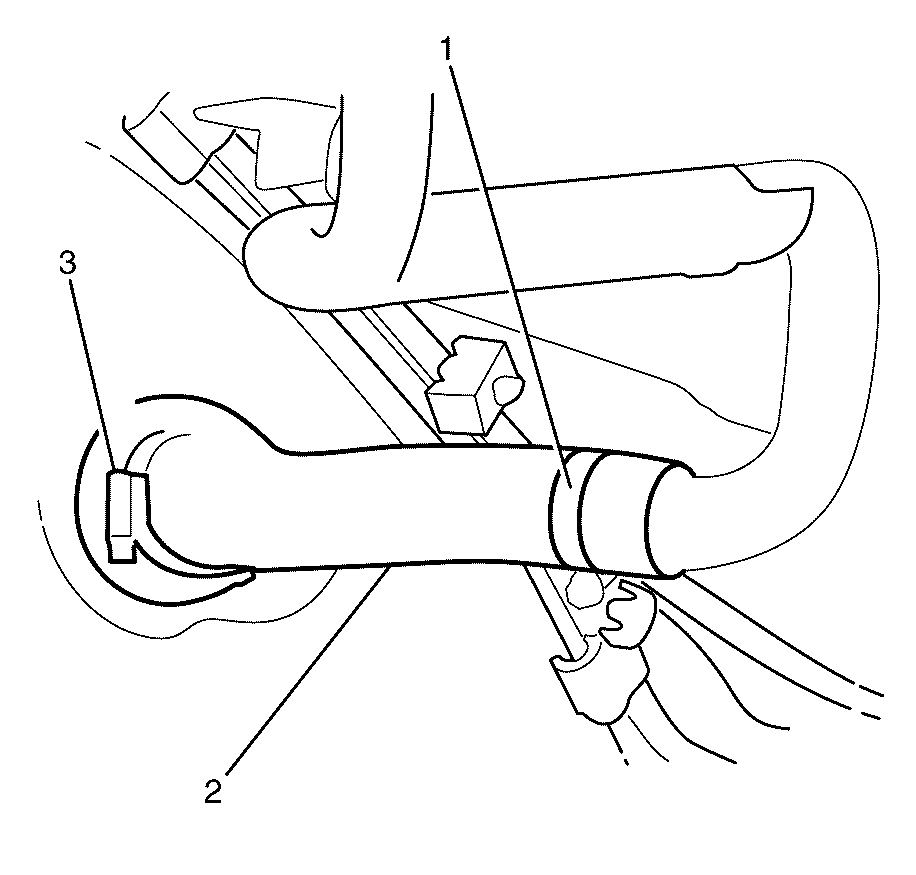
- Remove the fuel tank strap to chassis retaining bolts (1).
- With the aid of an assistant, carefully manoeuvre the fuel tank assembly from the vehicle.
- Remove the following components if replacing the fuel tank:
Caution: Refer to Battery Disconnect Caution in the Preface section.
Caution: Refer to Gasoline/Gasoline Vapors Caution in the Preface section.
Caution: Refer to Vehicle Lifting Caution in the Preface section.
Caution: Refer to Safety Glasses Caution in the Preface section.
Important: Squeezes the collar of the EVAP canister hose connector (1) to release the connector.
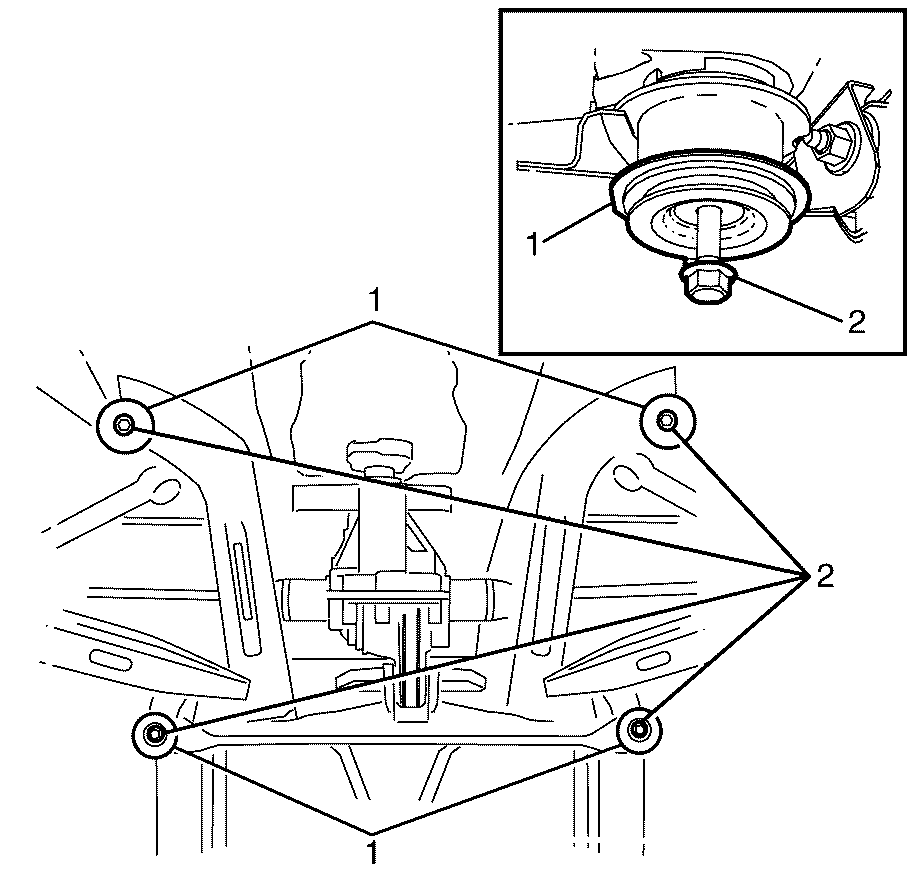
Important: Make sure that the bolts (2) extends 50mm (2 in) from the rear frame.
Important: When lowering the rear frame do not to damage the rear brake hoses.
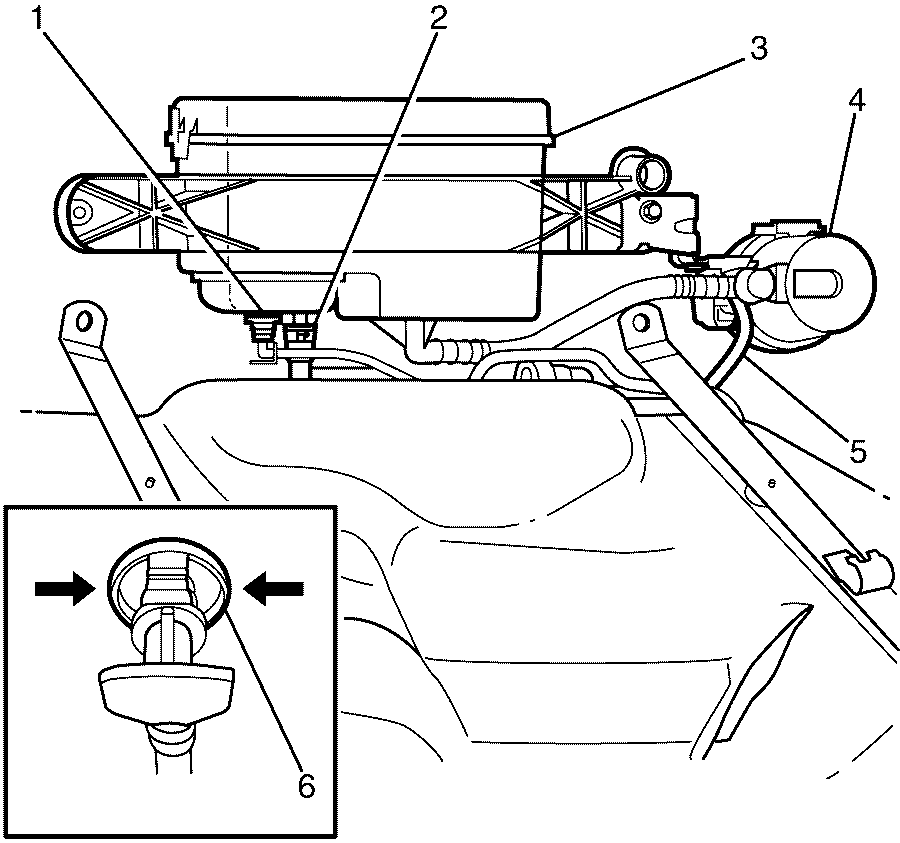
Important: Squeezes the collar (6) of the EVAP canister hose connector to release the connector (1).
Important: Take care not to damage the following components
when lowering the fuel tank assembly.
• The fuel tank assembly wiring harness. • The fuel feed pipe. • The EVAP pipes.
Important: Support the fuel tank assembly with a suitable tool before removing the fuel tank assembly straps to chassis retaining bolts (1)
| • | The primary fuel tank module--Refer to Primary Fuel Tank Module Replacement. |
| • | The secondary fuel tank module--Refer to Secondary Fuel Tank Module Replacement. |
| • | The fuel tank pressure sensor. Refer to Fuel Tank Pressure Sensor Replacement. |
| • | The fuel tank assembly electrical harness. |
| • | The fuel tank EVAP pipes. |
Installation Procedure
- If the fuel tank was replaced, install the following components:
- With the aid of an assistant, carefully manoeuvre and install the fuel tank assembly to the vehicle.
- Install the fuel tank assembly strap to chassis retaining bolts (1).
- Attach the EVAP canister hose connector (1) to the EVAP canister (3).
- Attach the EVAP canister hose connector (2) to the EVAP canister (3). Refer to Plastic Collar Quick Connect Fitting Service.
- Connect the electrical connector (5) to the EVAP canister vent solenoid (4).
- Raise and support the rear frame assembly (1) into its position using a suitable tool (2).
- Remove the bolts (2) of EN-48536 from the rear frame mounts (1).
- Install the NEW rear frame to chassis retaining bolts (2).
- Install the NEW rear frame to chassis retaining bolts (1).
- Tighten the NEW rear frame to chassis retaining bolts (1) and (2) to:
- Connect the fuel tank assembly electrical connector (1) to the chassis electrical harness.
- Connect the EVAP line (2) to the EVAP chassis pipe. Refer to Plastic Collar Quick Connect Fitting Service.
- Connect the fuel feed line (1) to the chassis fuel feed pipe.
- Install the fuel filler hose (2) to the vehicle.
- Install the retaining hose clamp (1) to the fuel filler hose (2).
- Install the retaining hose clamp (3) to the fuel filler hose (2).
- Connect the filler vent tube connector (1) to the fuel tank assembly.
- Install the park brake cables. Refer to Parking Brake Rear Cable Replacement.
- Install the propeller shaft. Refer to Propeller Shaft Replacement.
- Install the exhaust system. Refer to Exhaust System Replacement.
- Install the right rear wheel. Refer to Tire and Wheel Removal and Installation.
- Lower the vehicle to the ground.
- Fill the fuel tank with the drained fuel.
- Connect the battery negative cable. Refer to Battery Negative Cable Disconnection and Connection.
- Inspect for fuel leaks using the following procedure:
| • | The primary fuel tank module--Refer to Primary Fuel Tank Module Replacement. |
| • | The secondary fuel tank module--Refer to Secondary Fuel Tank Module Replacement. |
| • | The fuel tank pressure sensor. Refer to Fuel Tank Pressure Sensor Replacement. |
| • | The fuel tank assembly electrical harness. |
| • | The fuel tank EVAP pipes. |
Important: Take care not to damage the following components
when installing the fuel tank assembly to the vehicle:
• The fuel tank assembly wiring harness. • The fuel feed pipe. • The EVAP pipes.
Important: Support the fuel tank assembly with a suitable tool while installing the fuel tank assembly straps to chassis retaining bolts (1).
Notice: Refer to Fastener Notice in the Preface section.
Tighten
Tighten the fuel tank strap bolts to 20 N·m (15 lb ft)
Important: Listen for an audible click to confirm correct installation.
Important: Using a suitable tool clean the threaded holes of the rear frame to chassis retaining bolts.
Do not fully tighten at this stage.
Do not fully tighten at this stage.
First Pass
Tighten the bolts to 65 N·m (48 lb ft)
Final Pass
Tighten the bolts a further 125 degrees.
Important: Listen for an audible click to confirm correct installation.
Tighten
Tighten the fuel filler hose to 4 N·m (35 lb in).
Tighten
Tighten the fuel filler hose to 4 N·m (35 lb in).
Important: Listen for an audible click to confirm correct installation.
| • | Turn ON the ignition, with the engine OFF for 2 seconds. |
| • | Turn OFF the ignition, for 10 seconds. |
| • | Turn ON the ignition, with the engine OFF. |
| • | Inspect for leaks. |
