- Raise and support the vehicle. Refer to Lifting and Jacking the Vehicle .
- Remove the tyre and wheel assembly from the vehicle. Refer to Tire and Wheel Removal and Installation .
- Install the wheel on a spin-type wheel balancer.
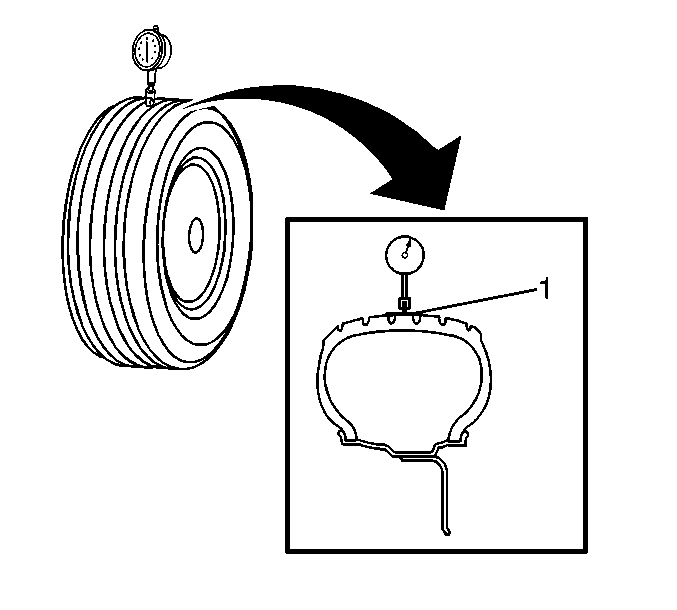
- Wrap the circumference of each tyre with tape (1) in the center of the tread area.
- Position a dial indicator fitted with a roller, on the taped portion of the tyre tread perpendicular to the surface.
- Slowly rotate the tyre and wheel assembly one complete revolution in order to find the wheel high point.
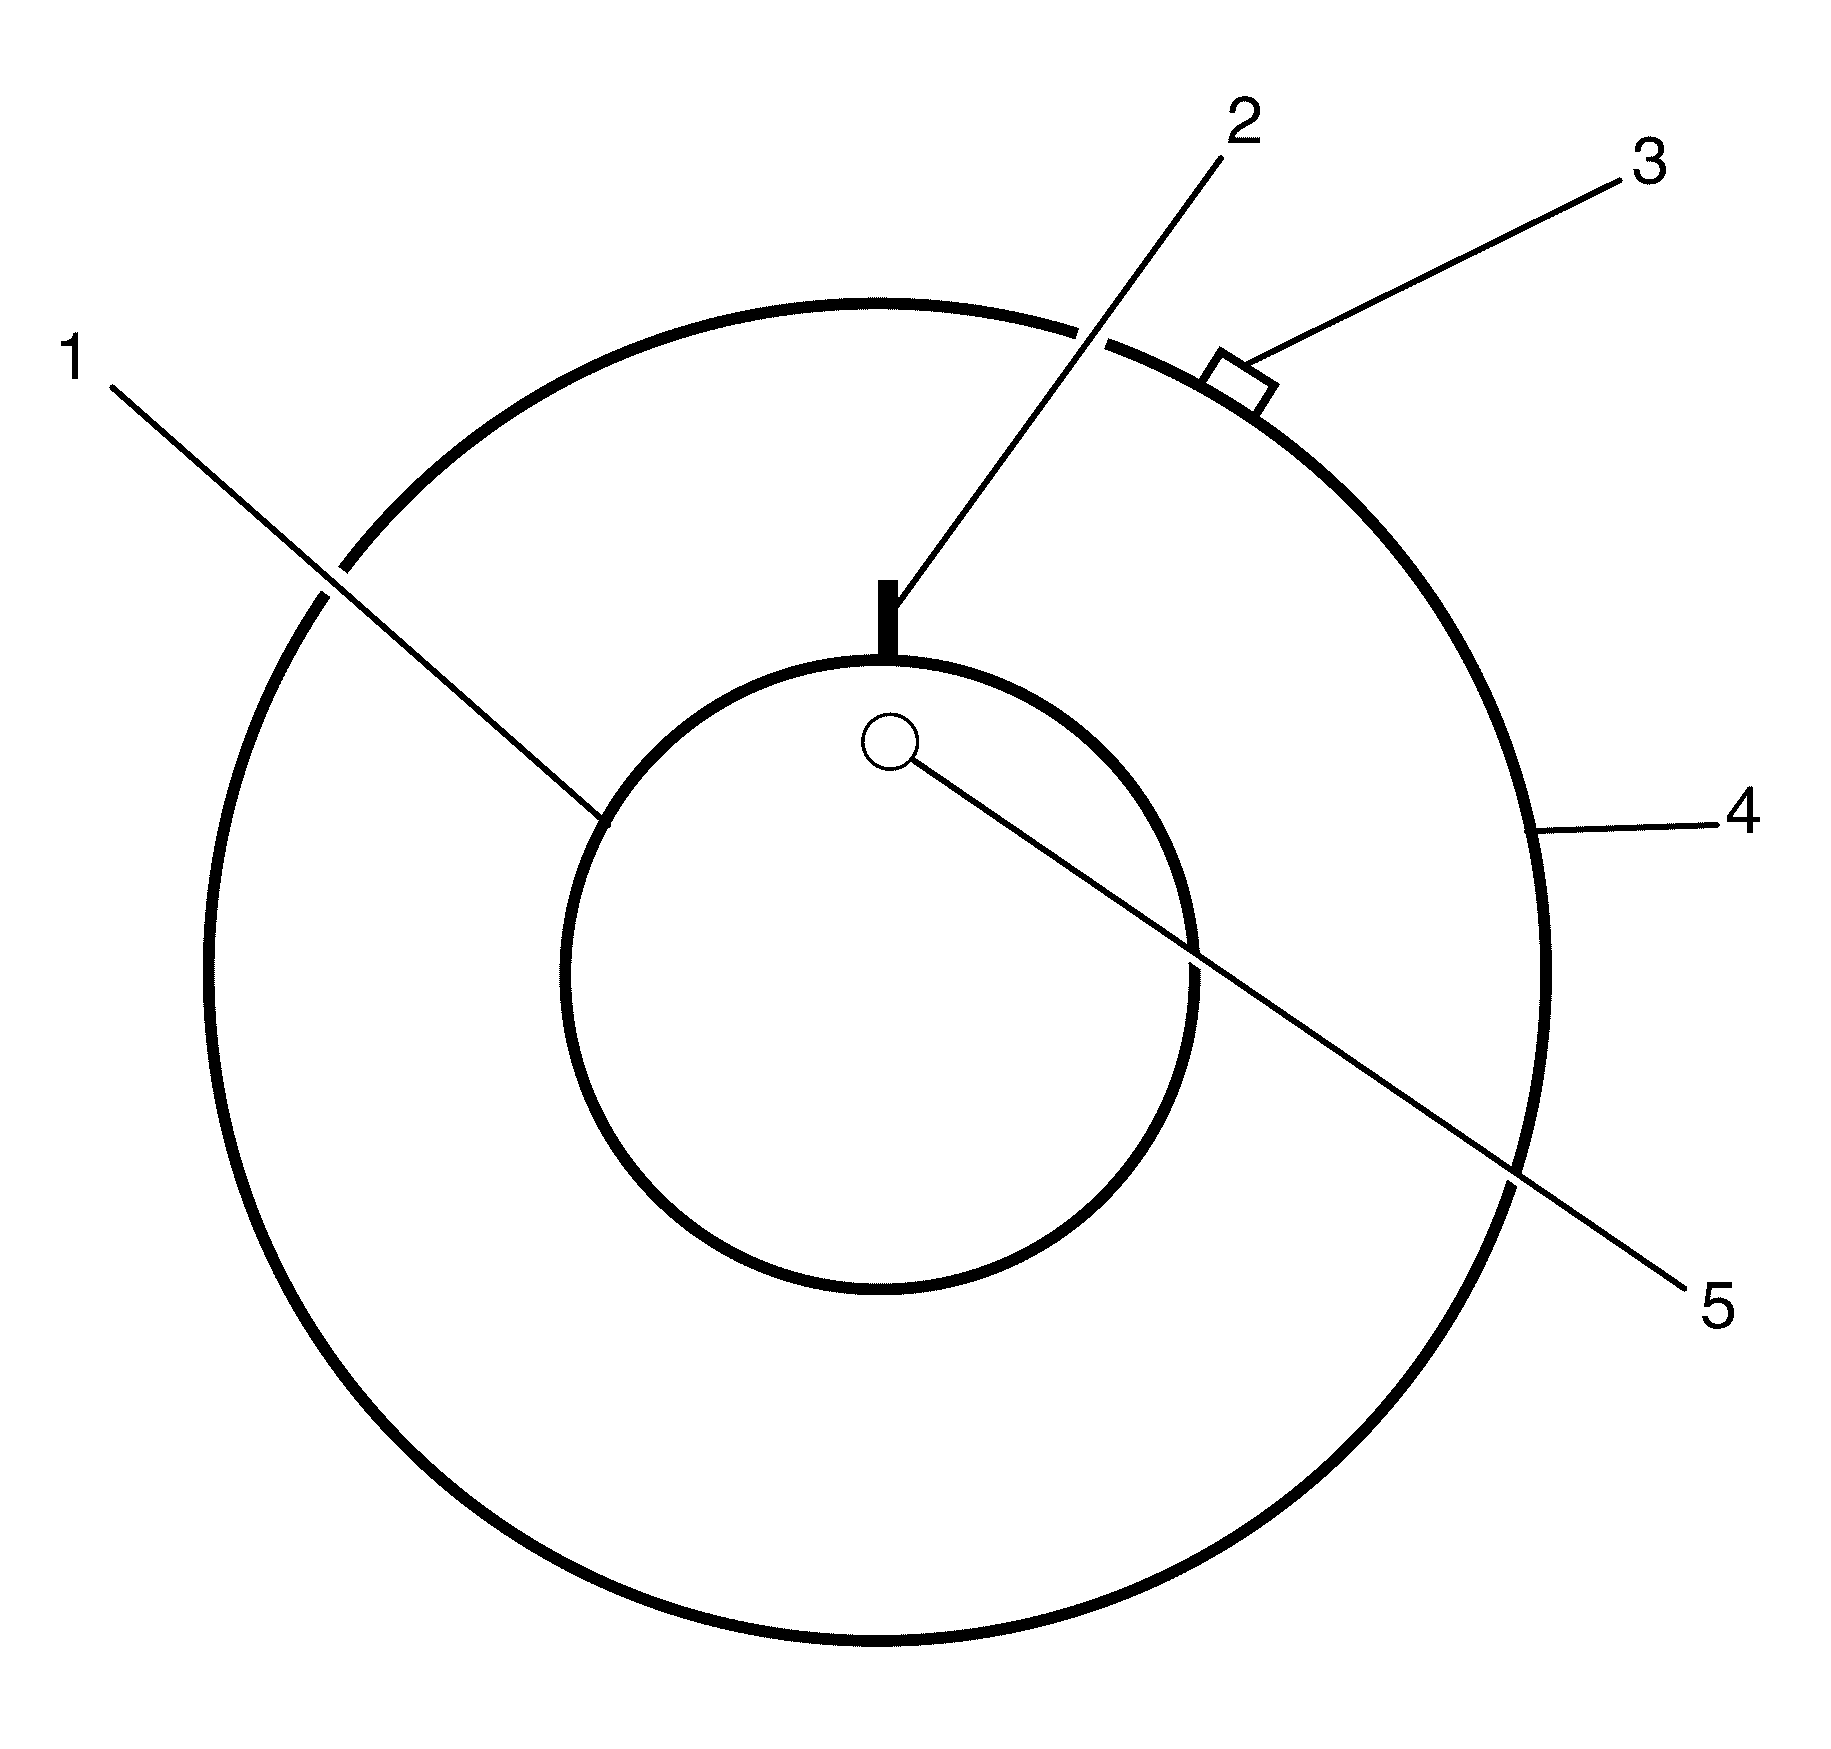
- Mark the location of the high point (3) on the tyre (4).
- Place a reference mark (2) on the tyre sidewall at the location of the valve stem (5).
- Mount the tyre and wheel assembly on a tyre changing machine and break down the bead.
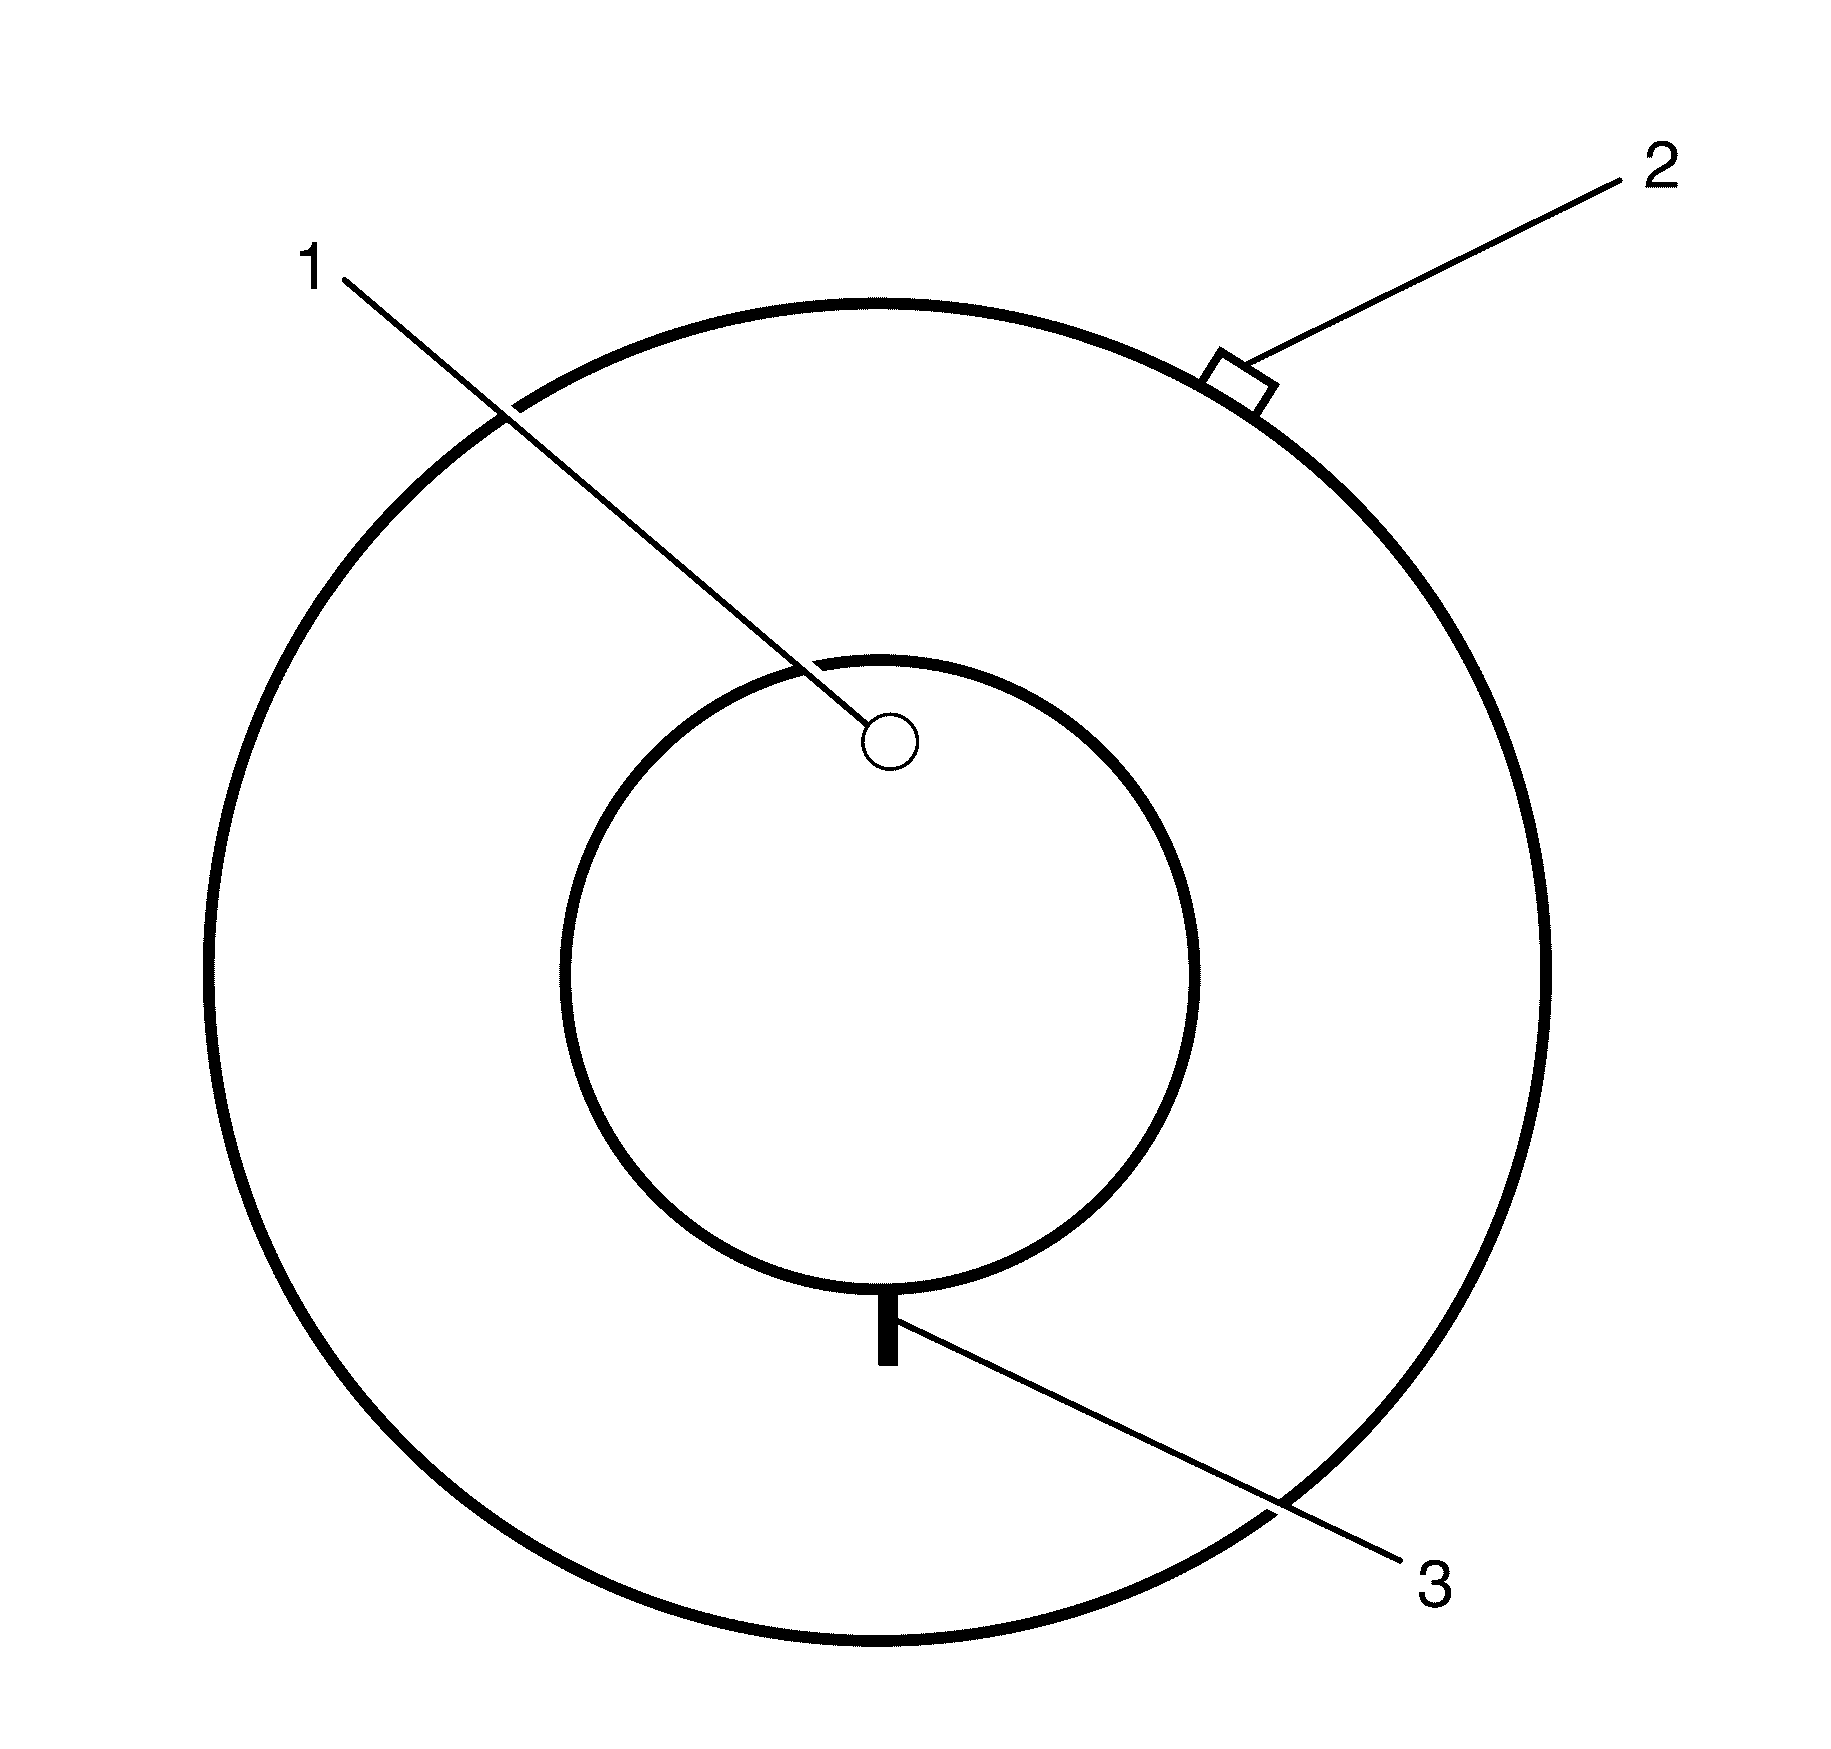
- Rotate the tyre 180 degrees on the rim so that the valve stem reference mark (3) is now at the 6 O'clock position in relation to the valve stem (1).
- Inflate the tyre and seat the bead, closely inspect each tyre for correct and even bead seating.
- Install the wheel on a spin-type wheel balancer.
- Position a dial indicator fitted with a roller, on the taped portion of the tyre tread perpendicular to the surface.
- Slowly rotate the tyre and wheel assembly one complete revolution in order to find the wheel high point.
- Measure the wheel and tyre assembly runout.
- Mark the new location of the assembly runout high point on the tyre.
- If the assembly runout has been reduced and is within tolerance, no further steps are necessary. Balance the tyre and wheel assembly, then install the assembly to the vehicle. Refer to the following:
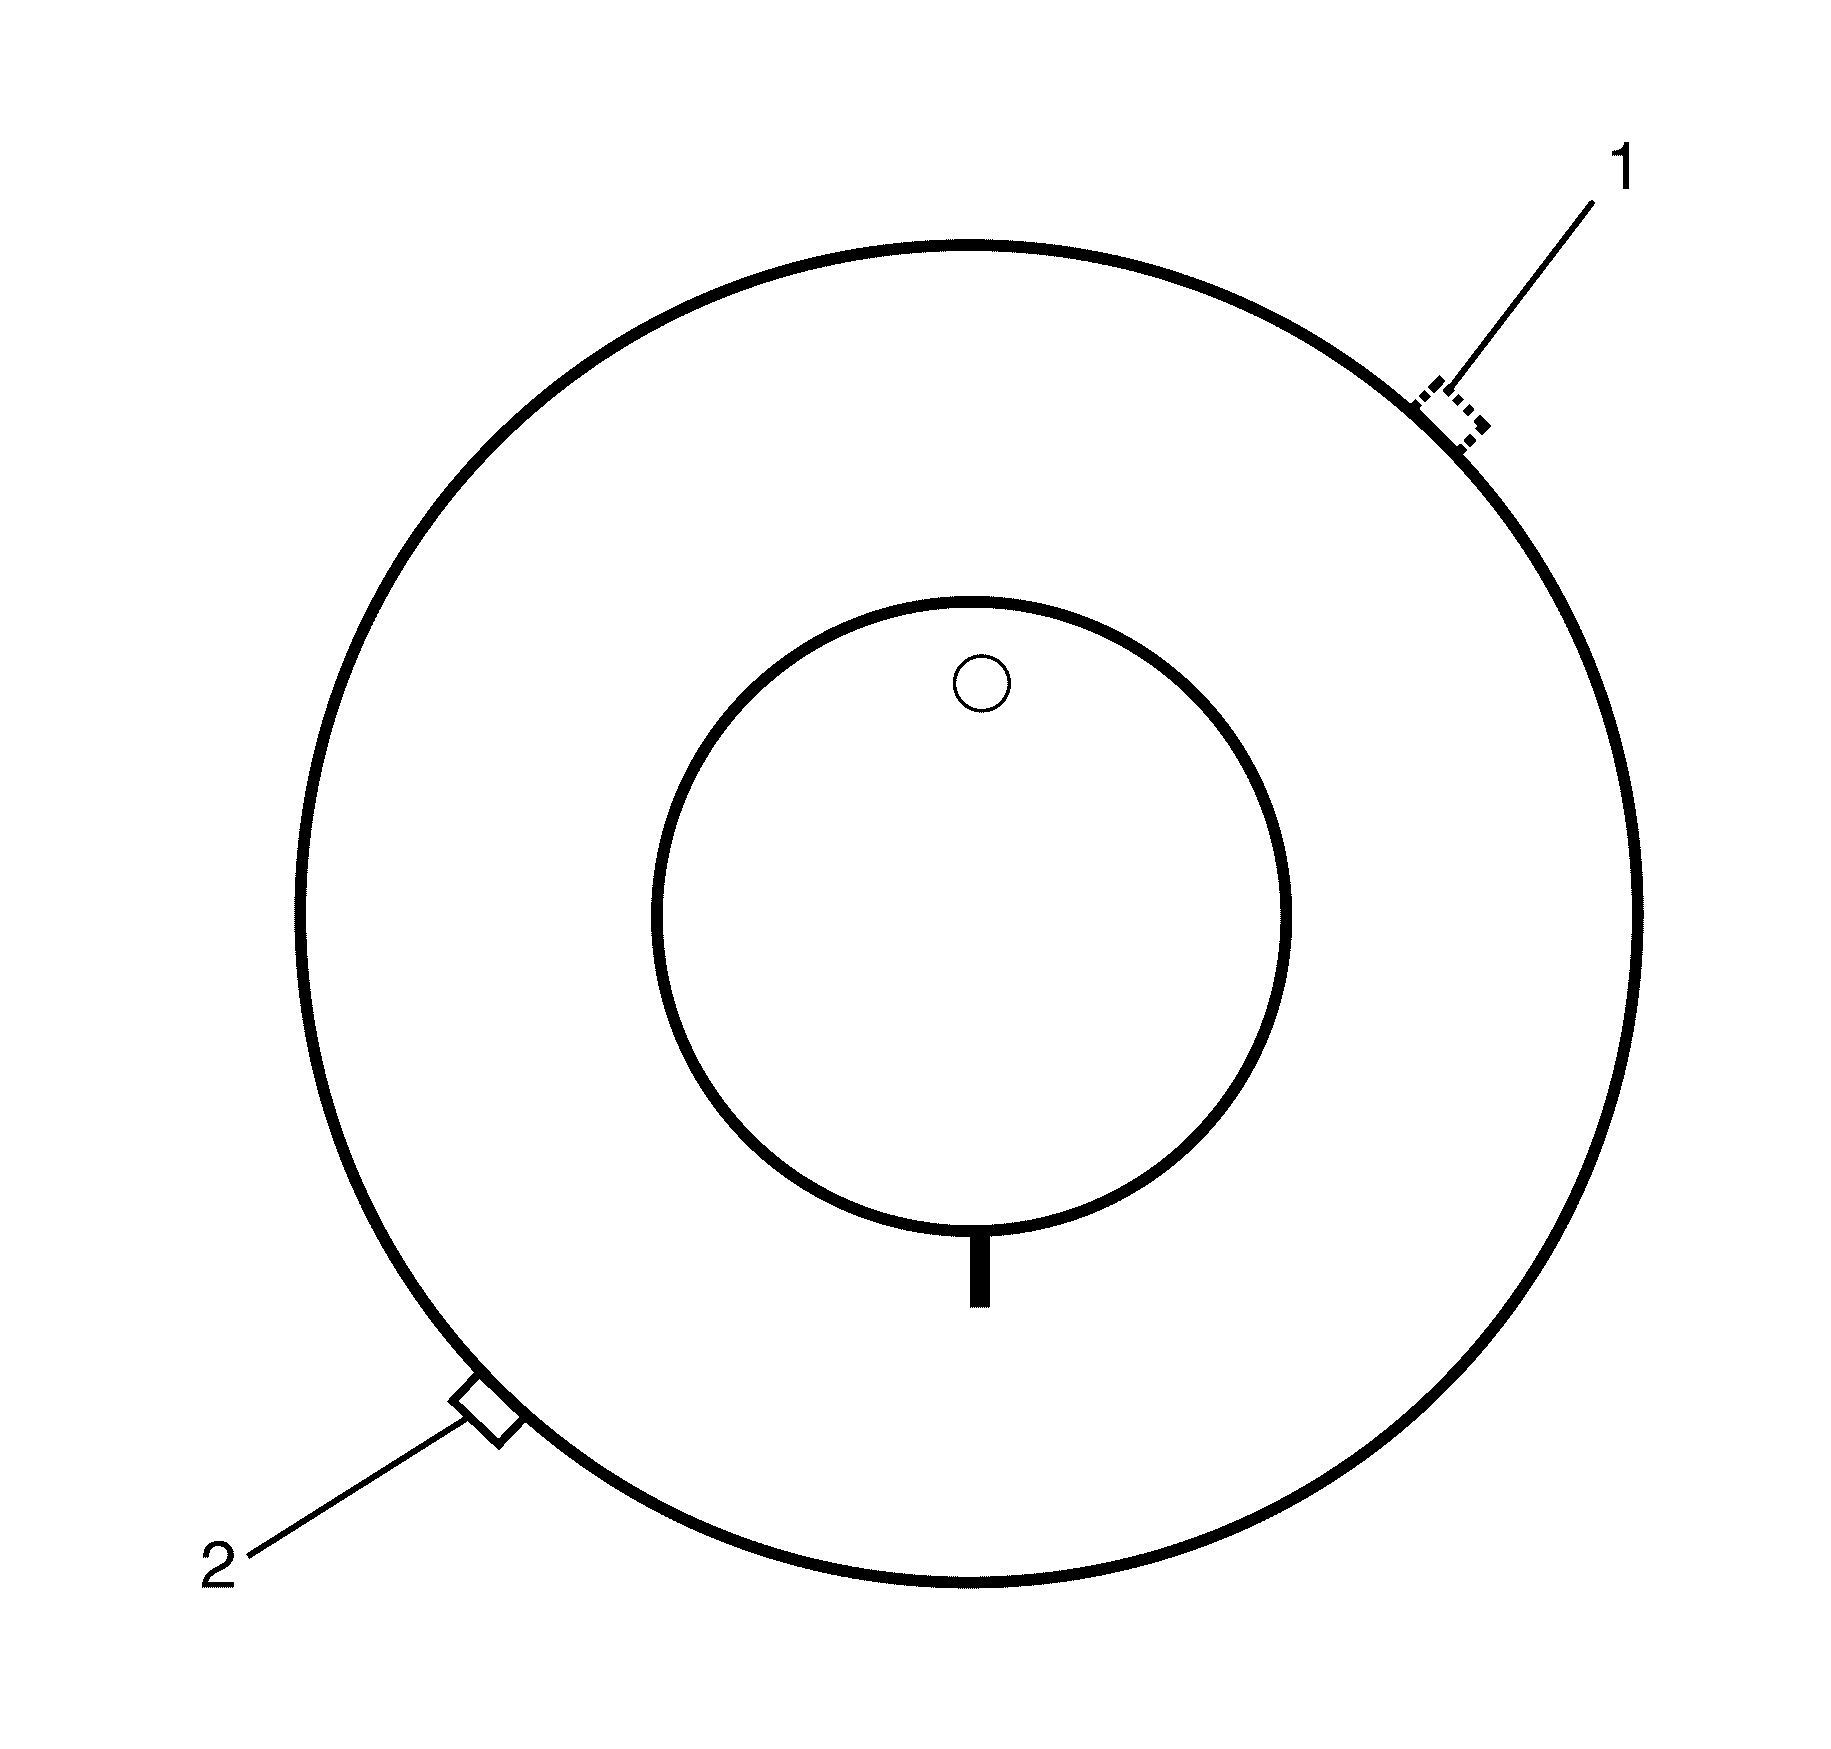
- If the clock location of the high point remained at or near the original clock location of the high point (2) and the assembly runout has not been reduced, the wheel is the major contributor to the assembly runout concern. Replace the wheel. Refer to Tire Dismounting and Mounting and Replacement Wheels Description .
- If the clock location of the high point has moved, however the assembly runout has not been reduced, perform the following steps:
Important: The wheel must be mounted on the spin-type wheel balancer in accordance with manufacturers instructions.

Important: Wrapping the tread with tape allows for a smooth and accurate reading of radial runout to be obtained.

| • | Always refer to the valve stem (5) as the 12 O'clock position. |
| • | Refer to the location of the high point (3) by its clock position on the wheel (1), relative to the valve stem (5). |
Important: Do not dismount the tyre from the wheel.

Important: lubricate the bead area in order to easily rotate the tyre on the wheel.
Important: The wheel must be mounted on the spin-type wheel balancer in accordance with manufacturers instructions.
Important: After remounting a tyre to a wheel or after replacing a tyre and/or a wheel, remeasure the tyre and wheel assembly runout in order to verify that the runout has been reduced and is within tolerance. Ensure that the tyre and wheel assembly is balanced before installing to the vehicle.

| 19.1. | If the clock location of the high point (2) is now at or near a position 180 degrees from the original clock location of the high point (1), the tyre is the major contributor to the assembly runout concern. Replace the tyre. Refer to Tire Dismounting and Mounting . |
| 19.2. | If the clock location of the high point is now between the original high point position and the opposite extreme, then both the tyre and the wheel are contributing to the assembly runout concern. Continue rotating the tyre in relation to the wheel and remeasuring the assembly runout until the lowest amount of runout is achieved. If the lowest amount of runout achieved is not within tolerance measure the off vehicle tyre and wheel runout, refer to Tire and Wheel Assembly Runout Measurement - On-Vehicle in Tires and Wheels, in order to isolate the tyre or wheel as the cause of the runout concern. |
