Removal Procedure
Tools Required
- Raise and support the vehicle. Refer to Lifting and Jacking the Vehicle .
- Drain the fuel tank. Refer to Fuel Tank Draining .
- Relieve the fuel system pressure. Refer to Fuel Pressure Relief .
- Remove the exhaust system. Refer to Exhaust System Replacement .
- Remove the propeller shaft. Refer to Propeller Shaft Replacement .
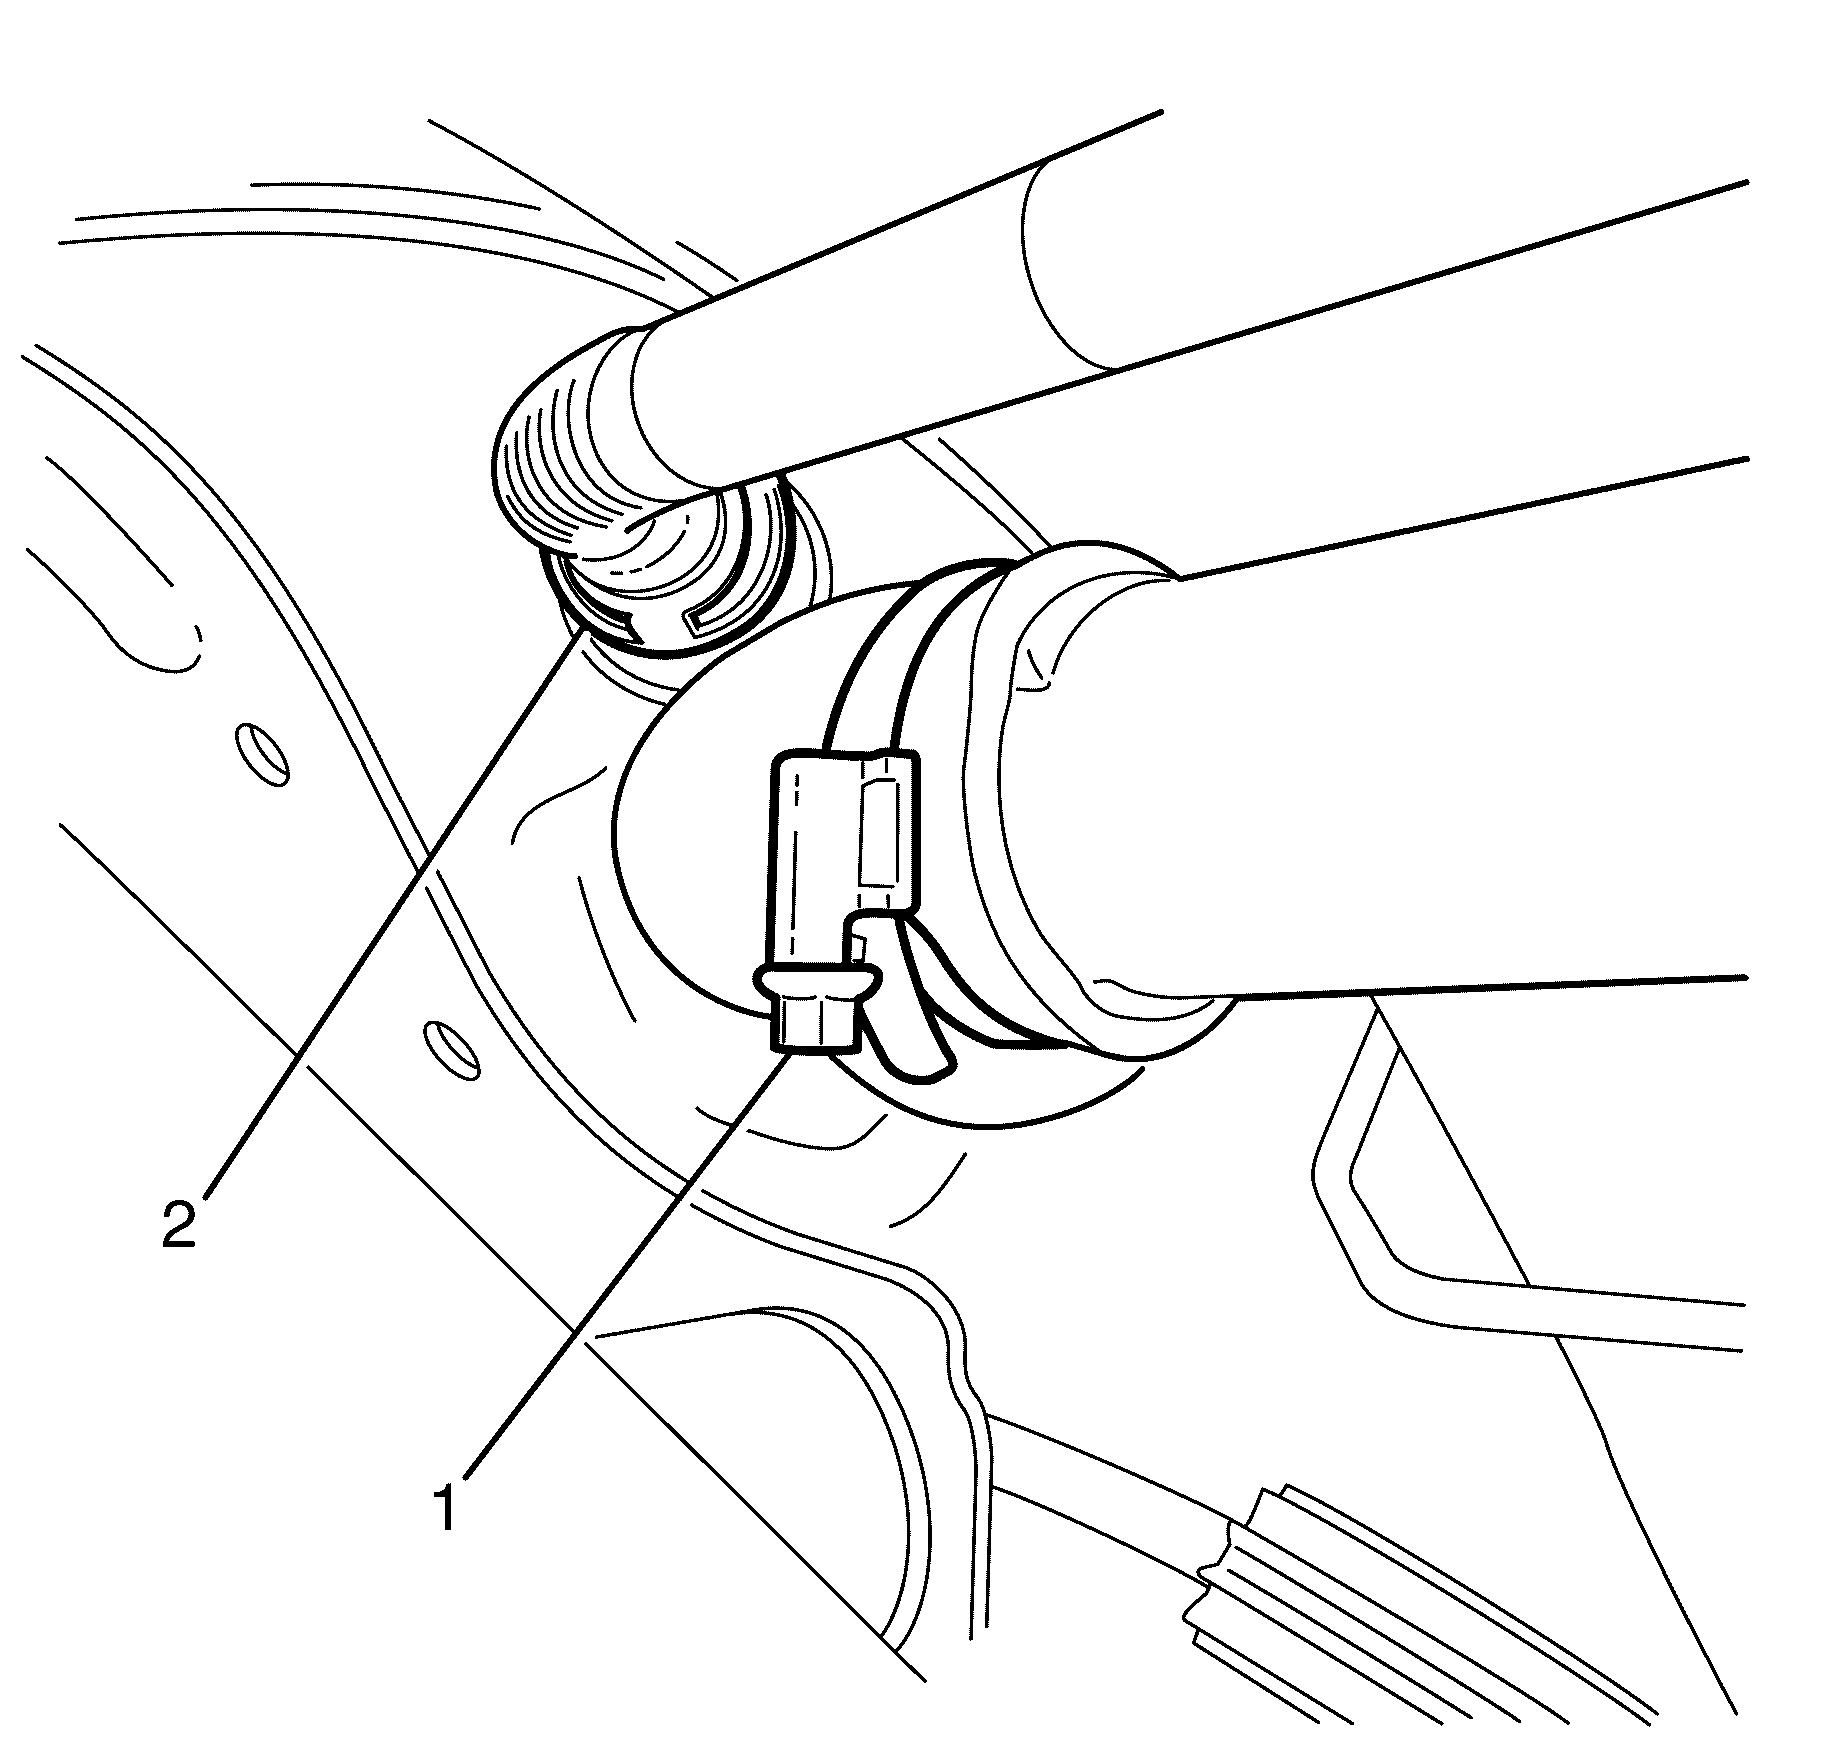
- Disconnect the filler tube (1) from the fuel tank.
- Disconnect the filler vent tube (2) from the tank. Refer to Plastic Collar Quick Connect Fitting Service .
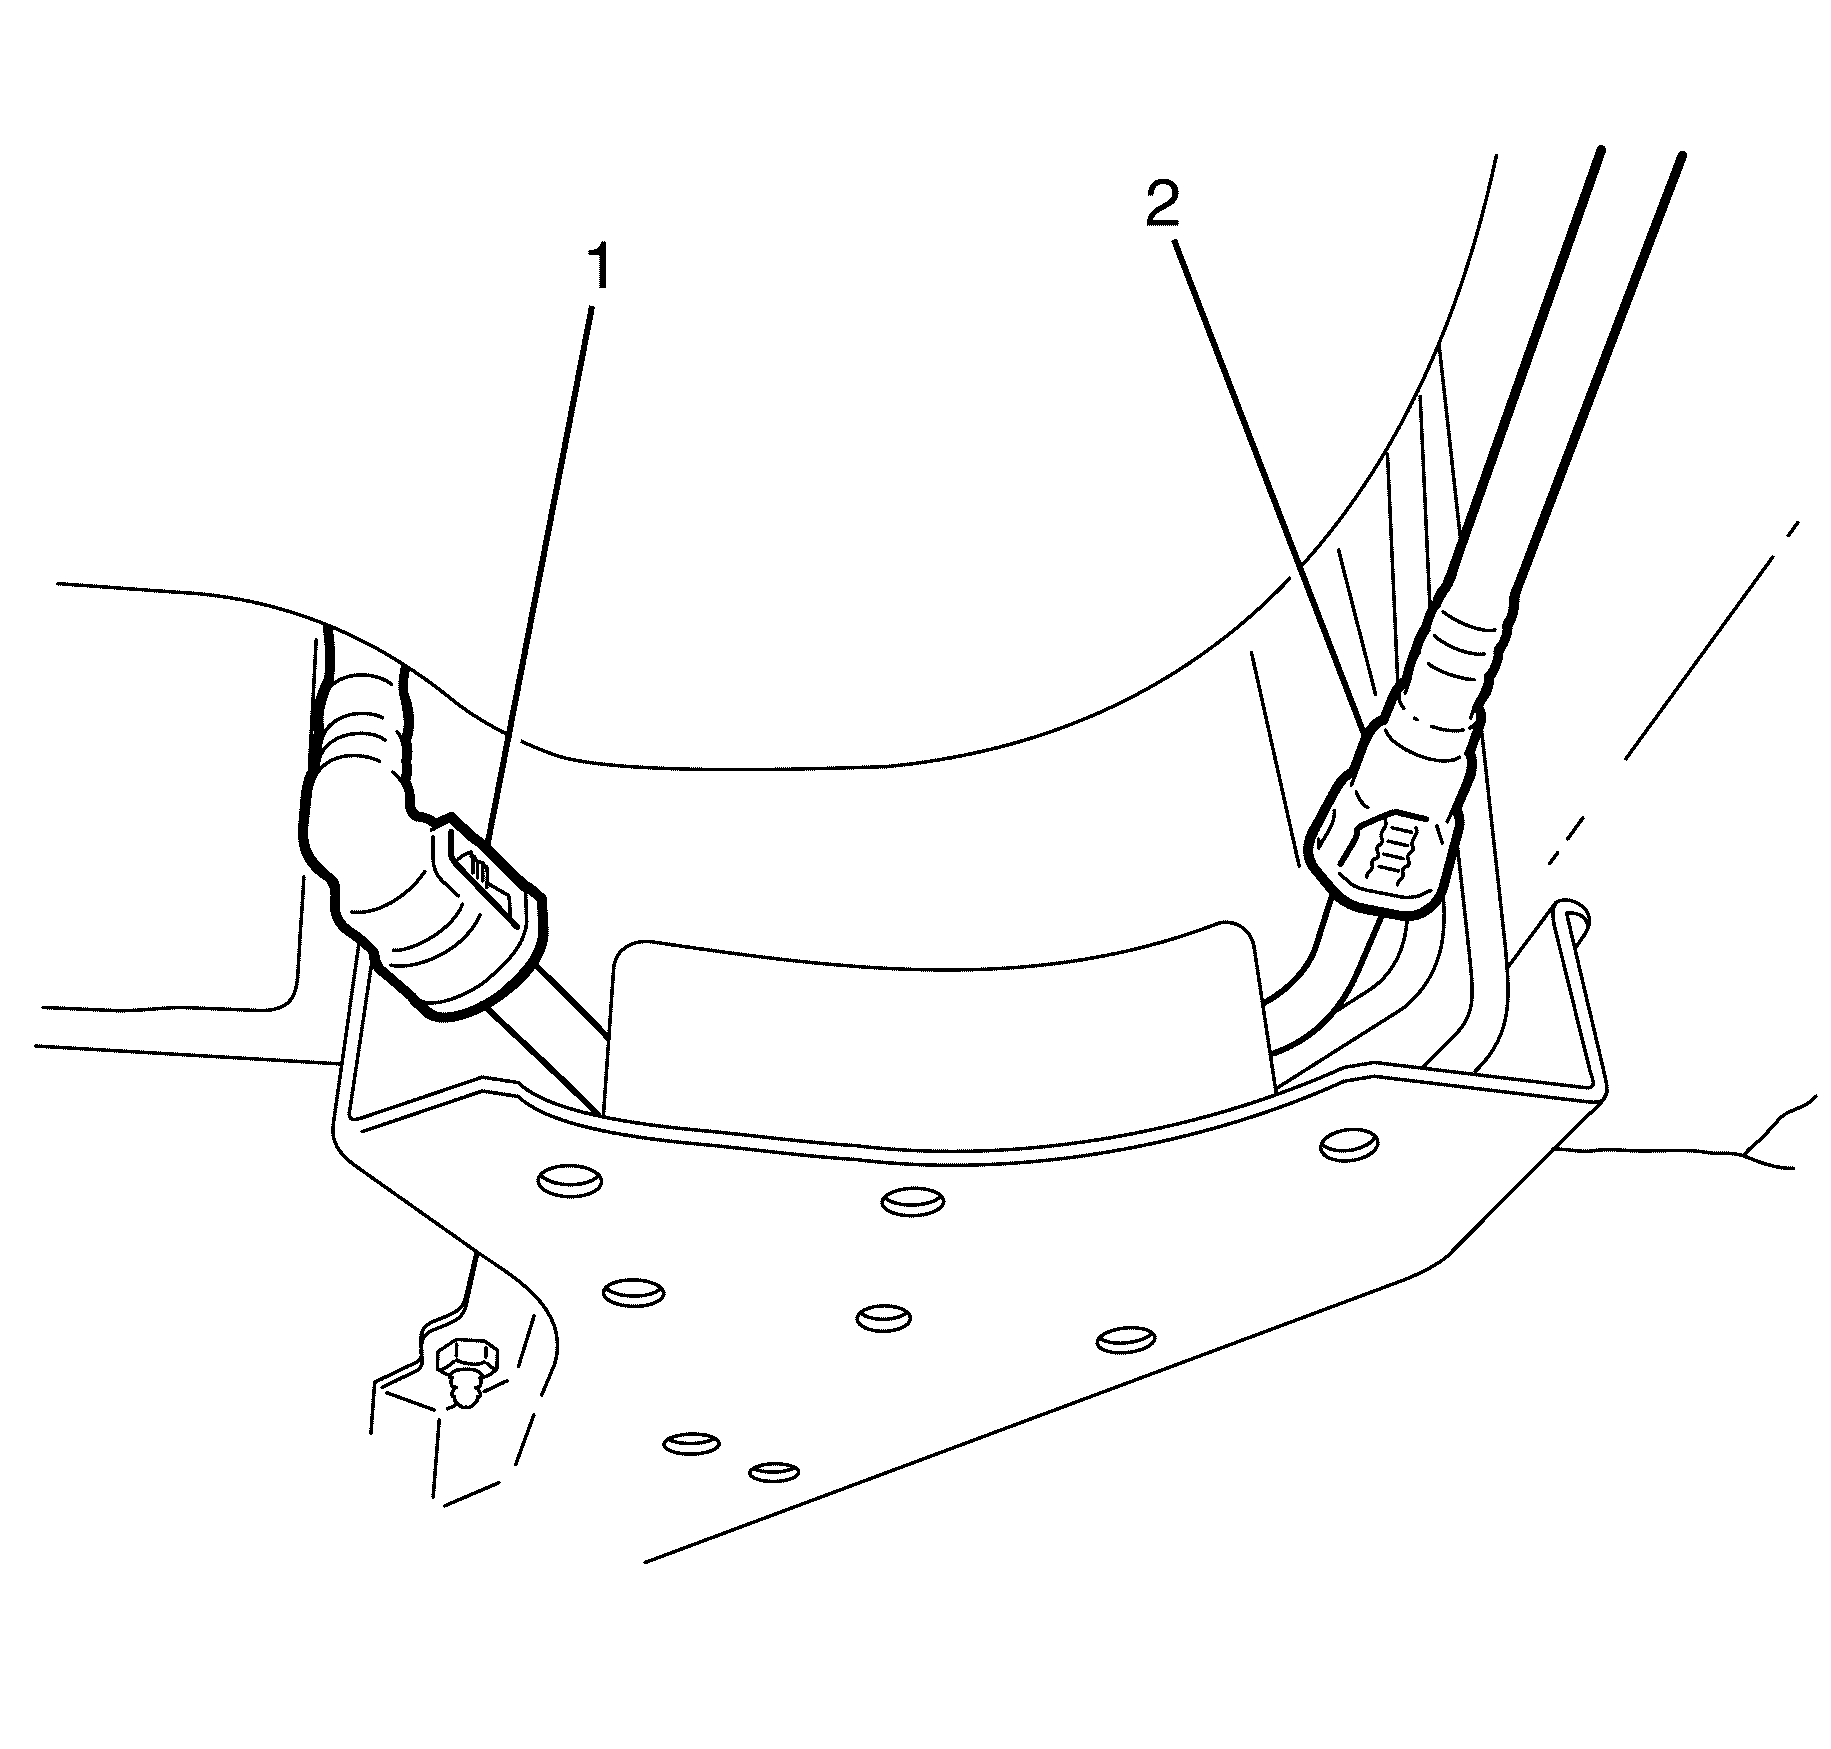
- Disconnect the fuel feed line (1) and evaporative emission (EVAP) line (2). Refer to Plastic Collar Quick Connect Fitting Service .
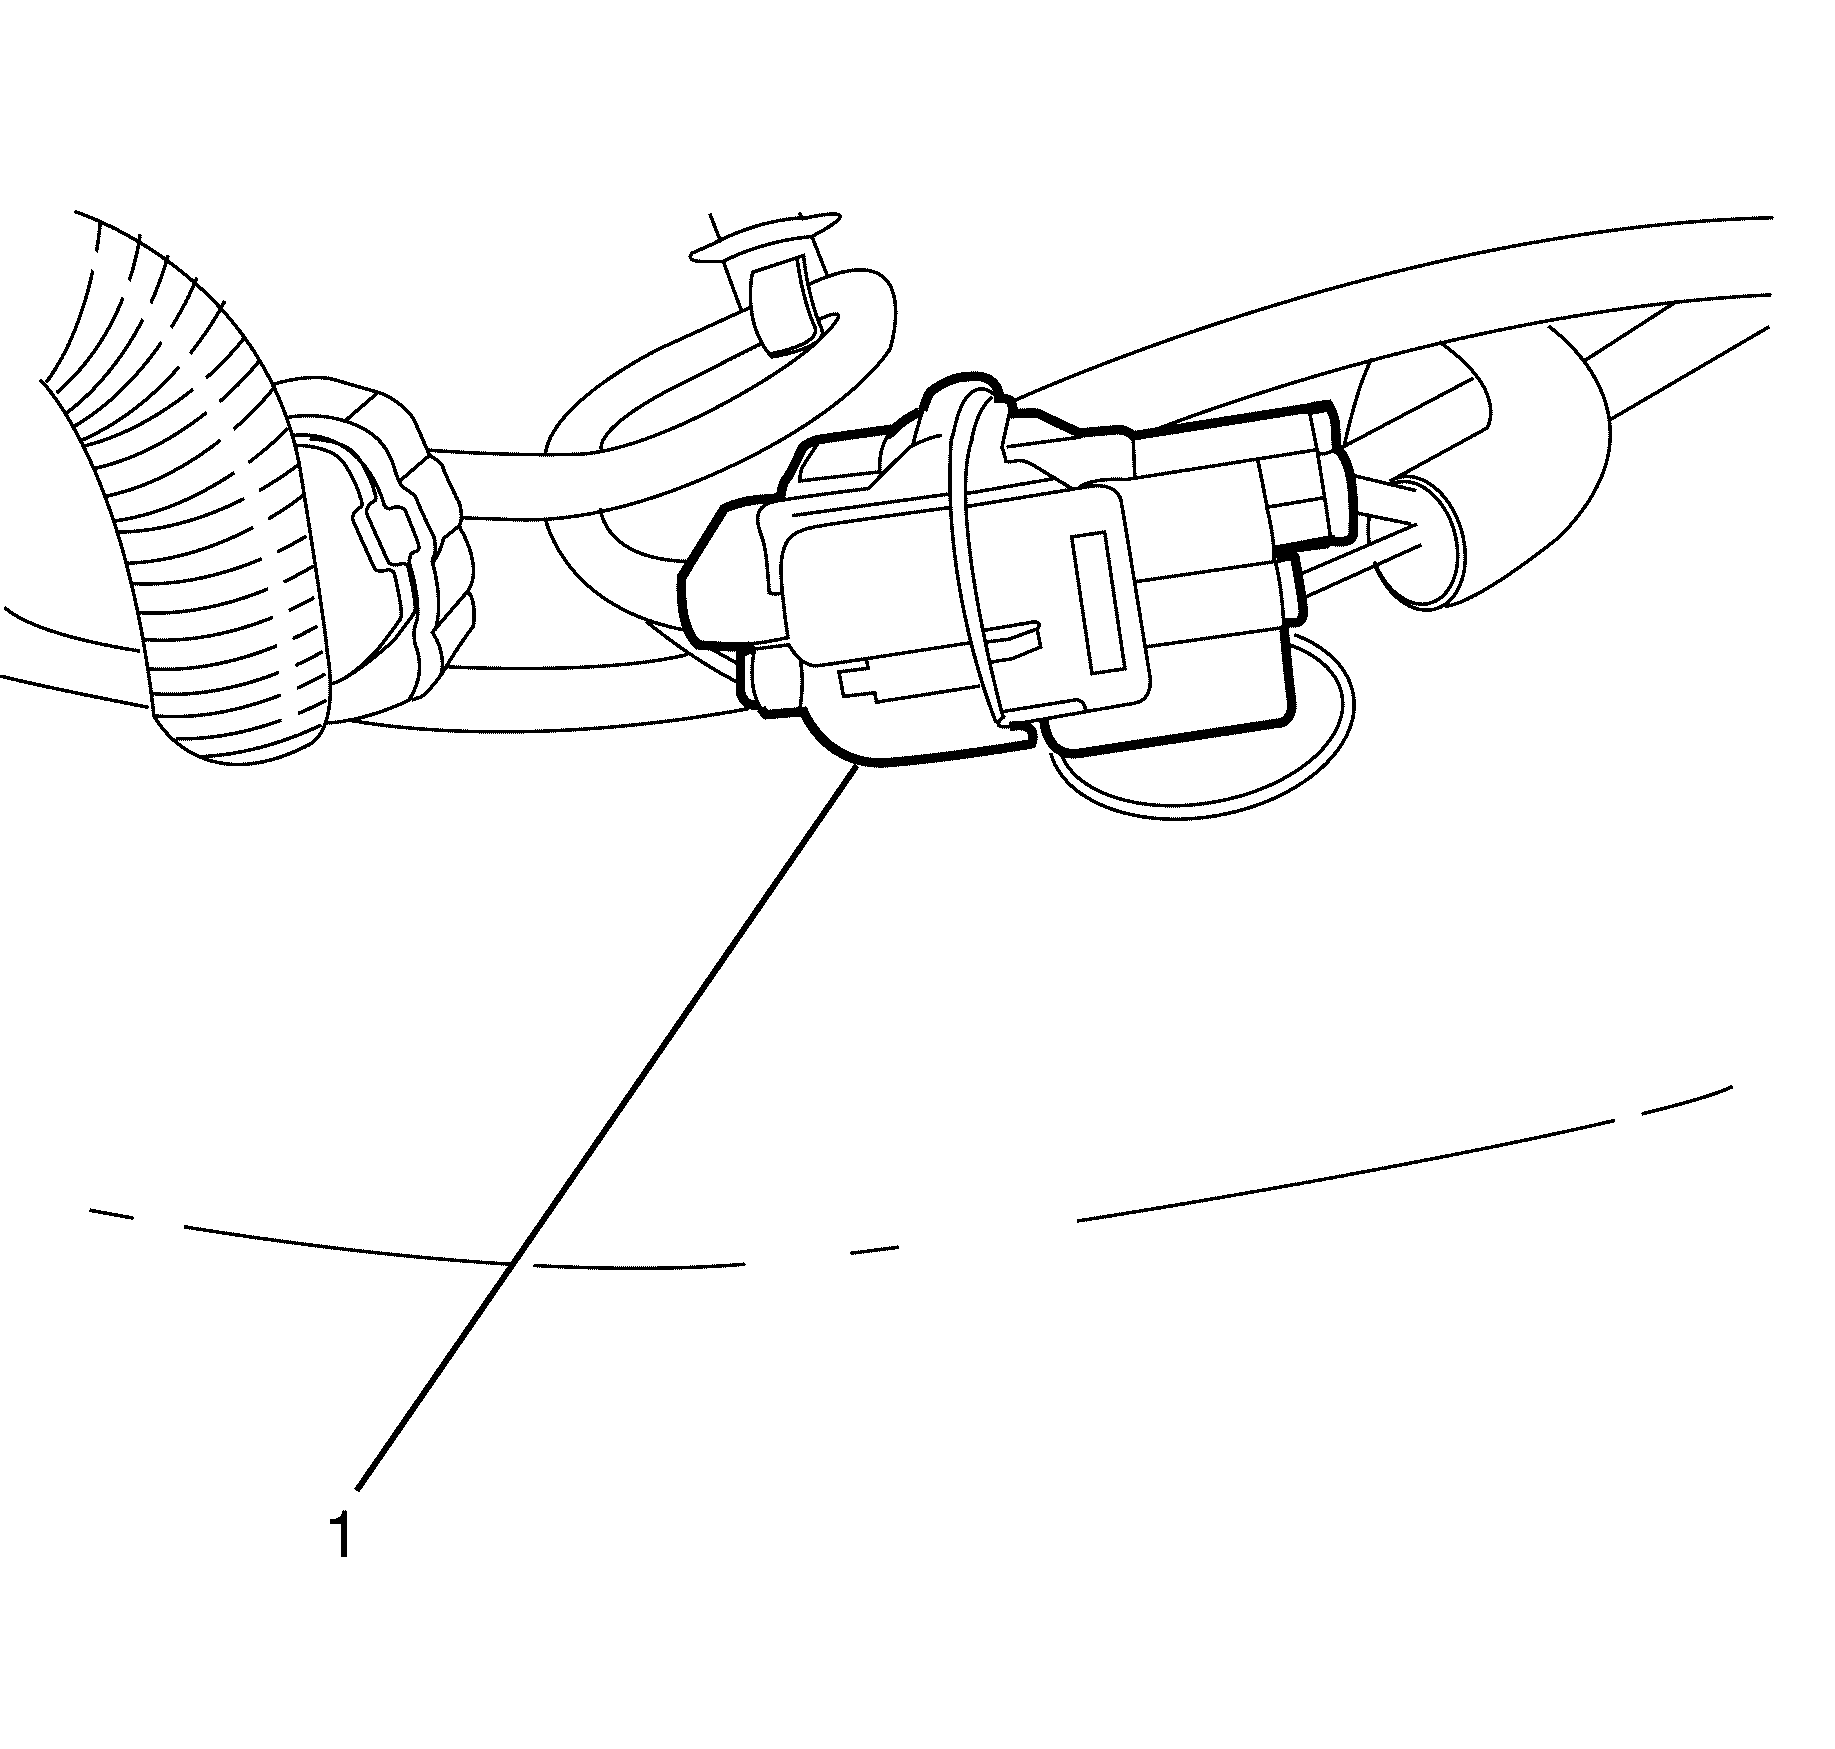
- Disconnect the fuel tank electrical connector (1).
- Support the rear frame assembly using a suitable tool.
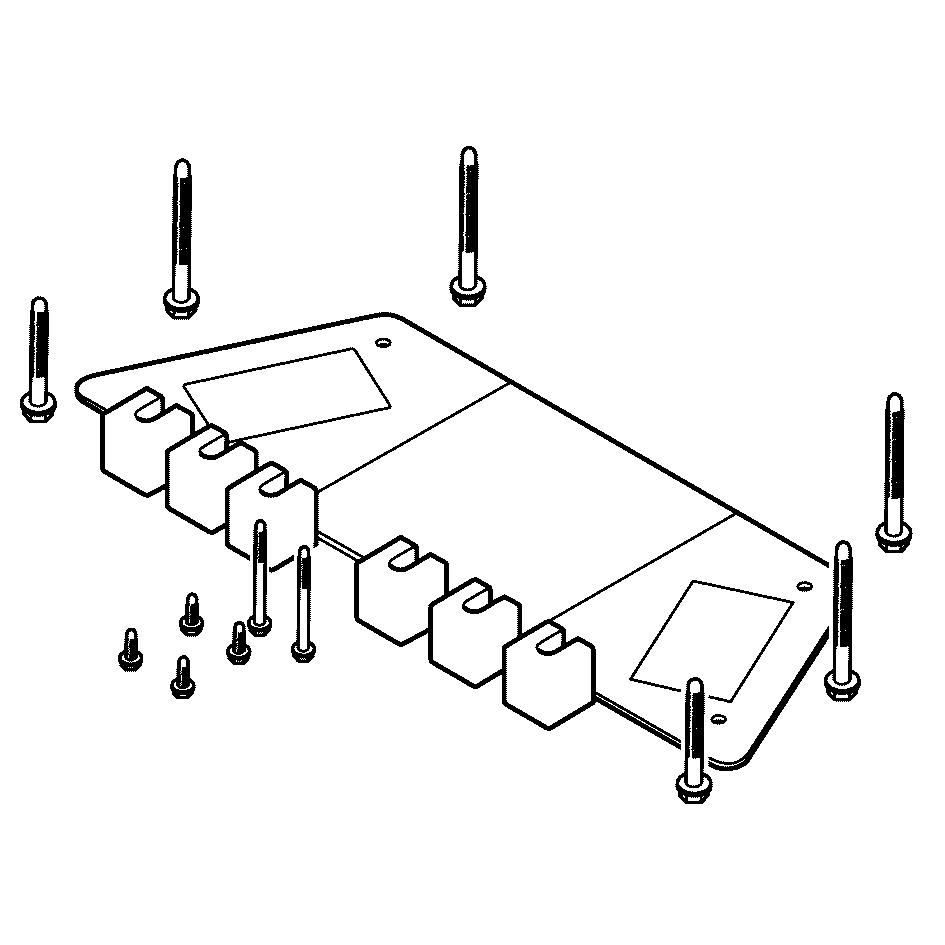
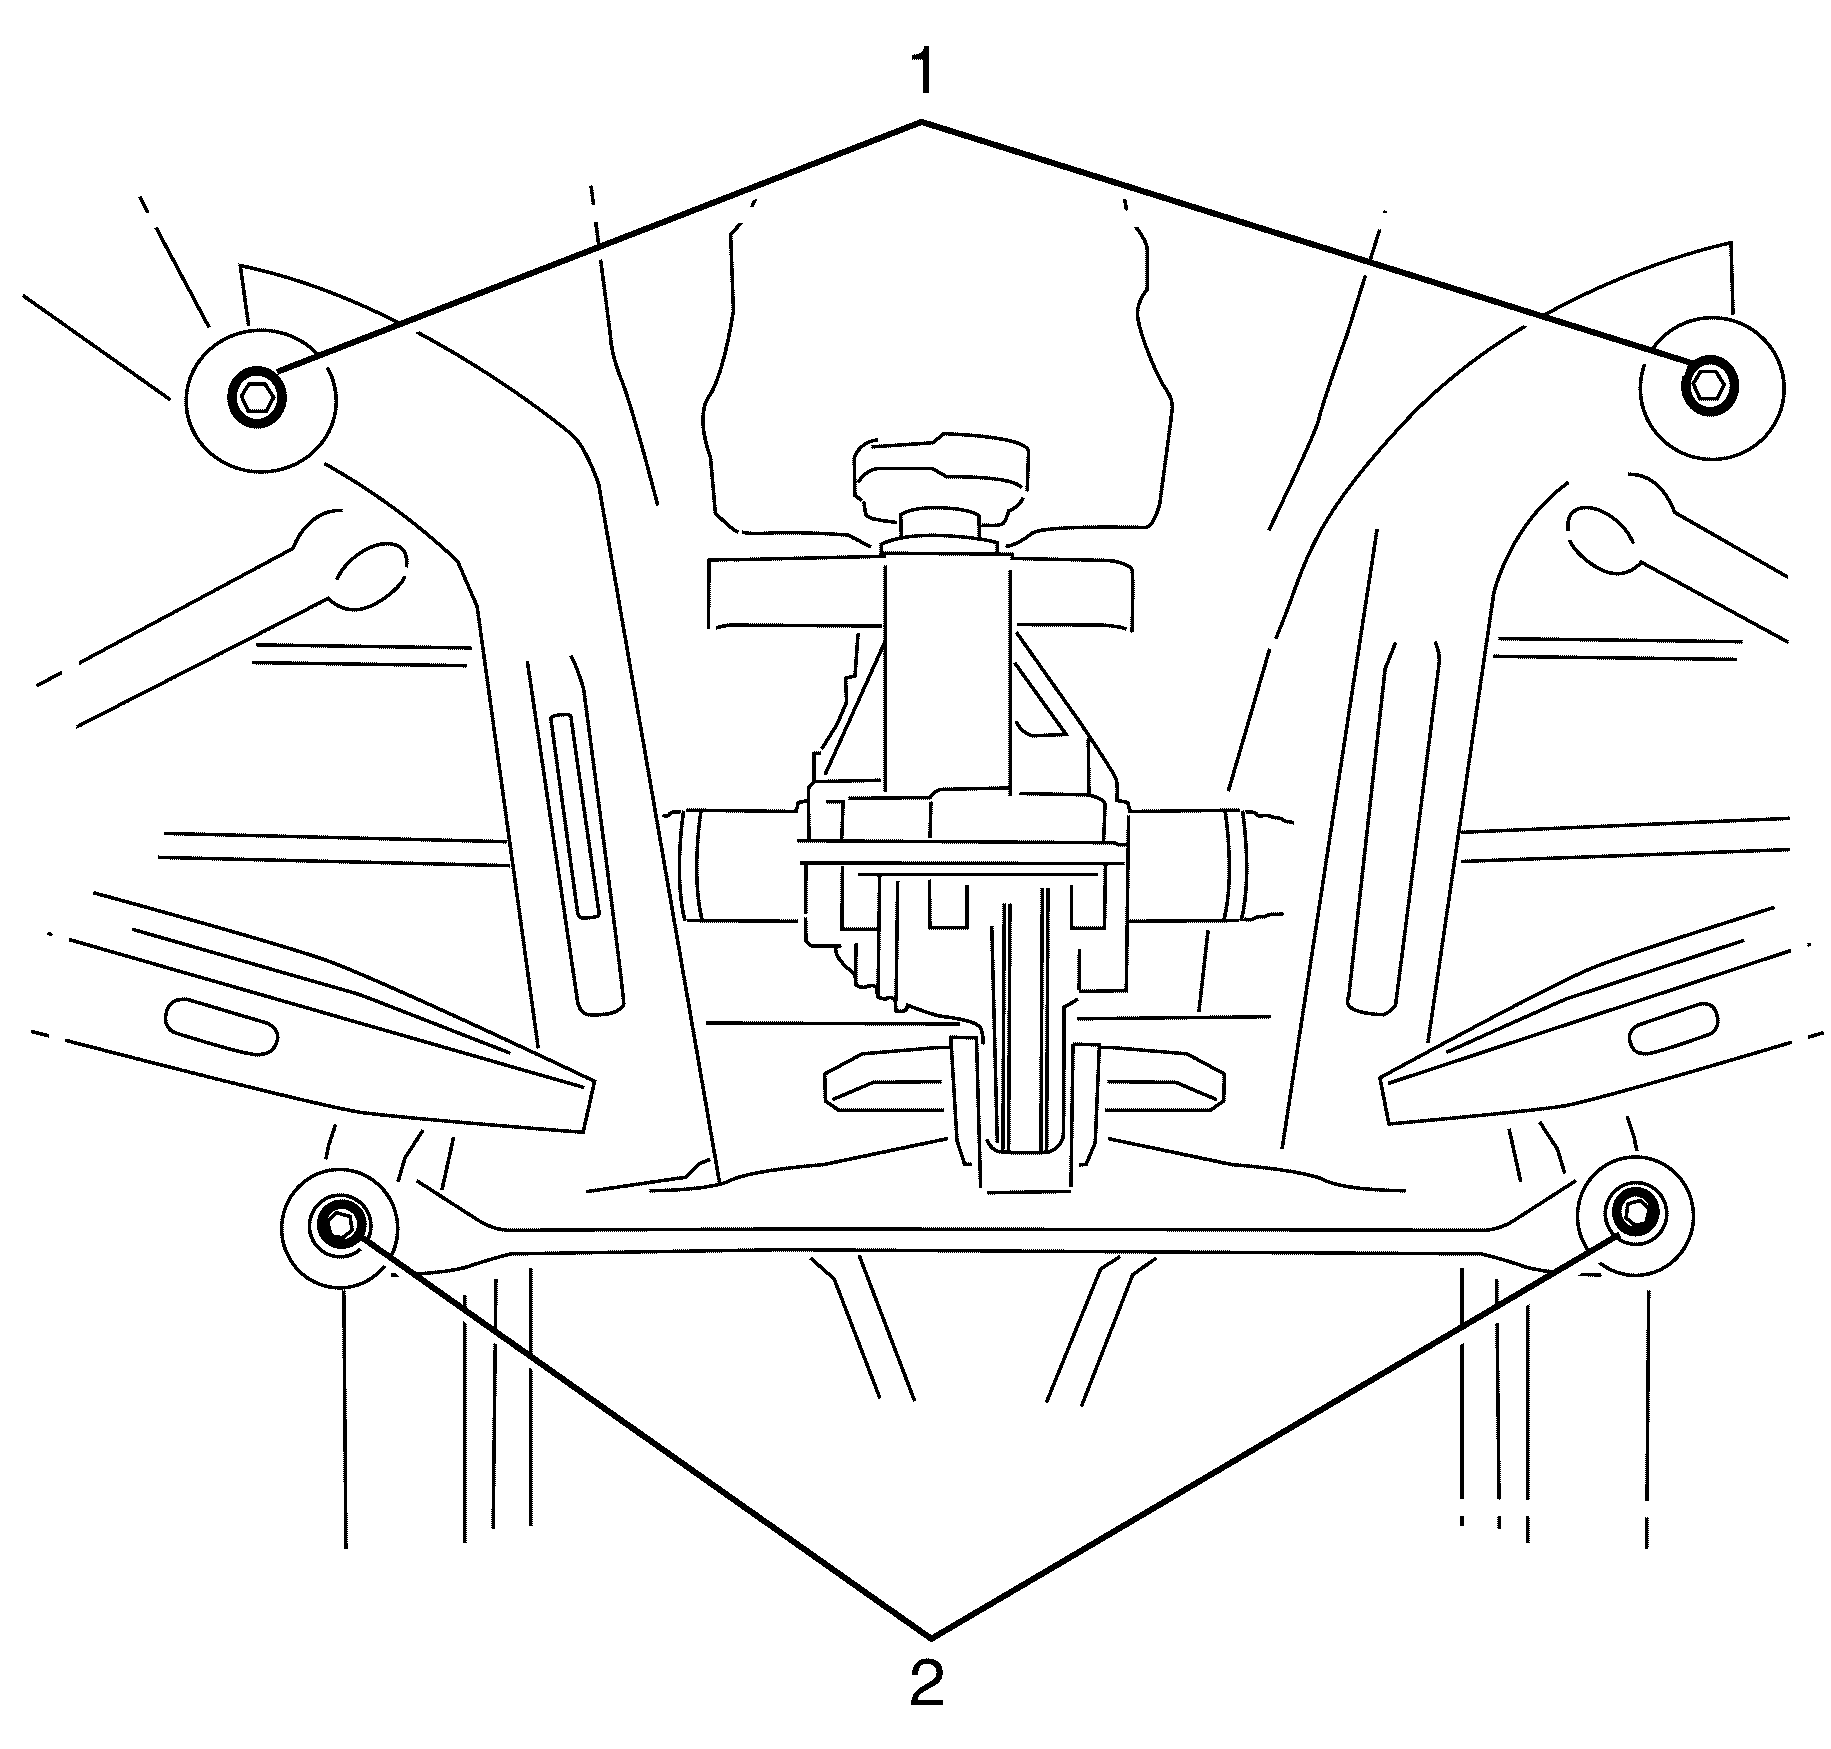
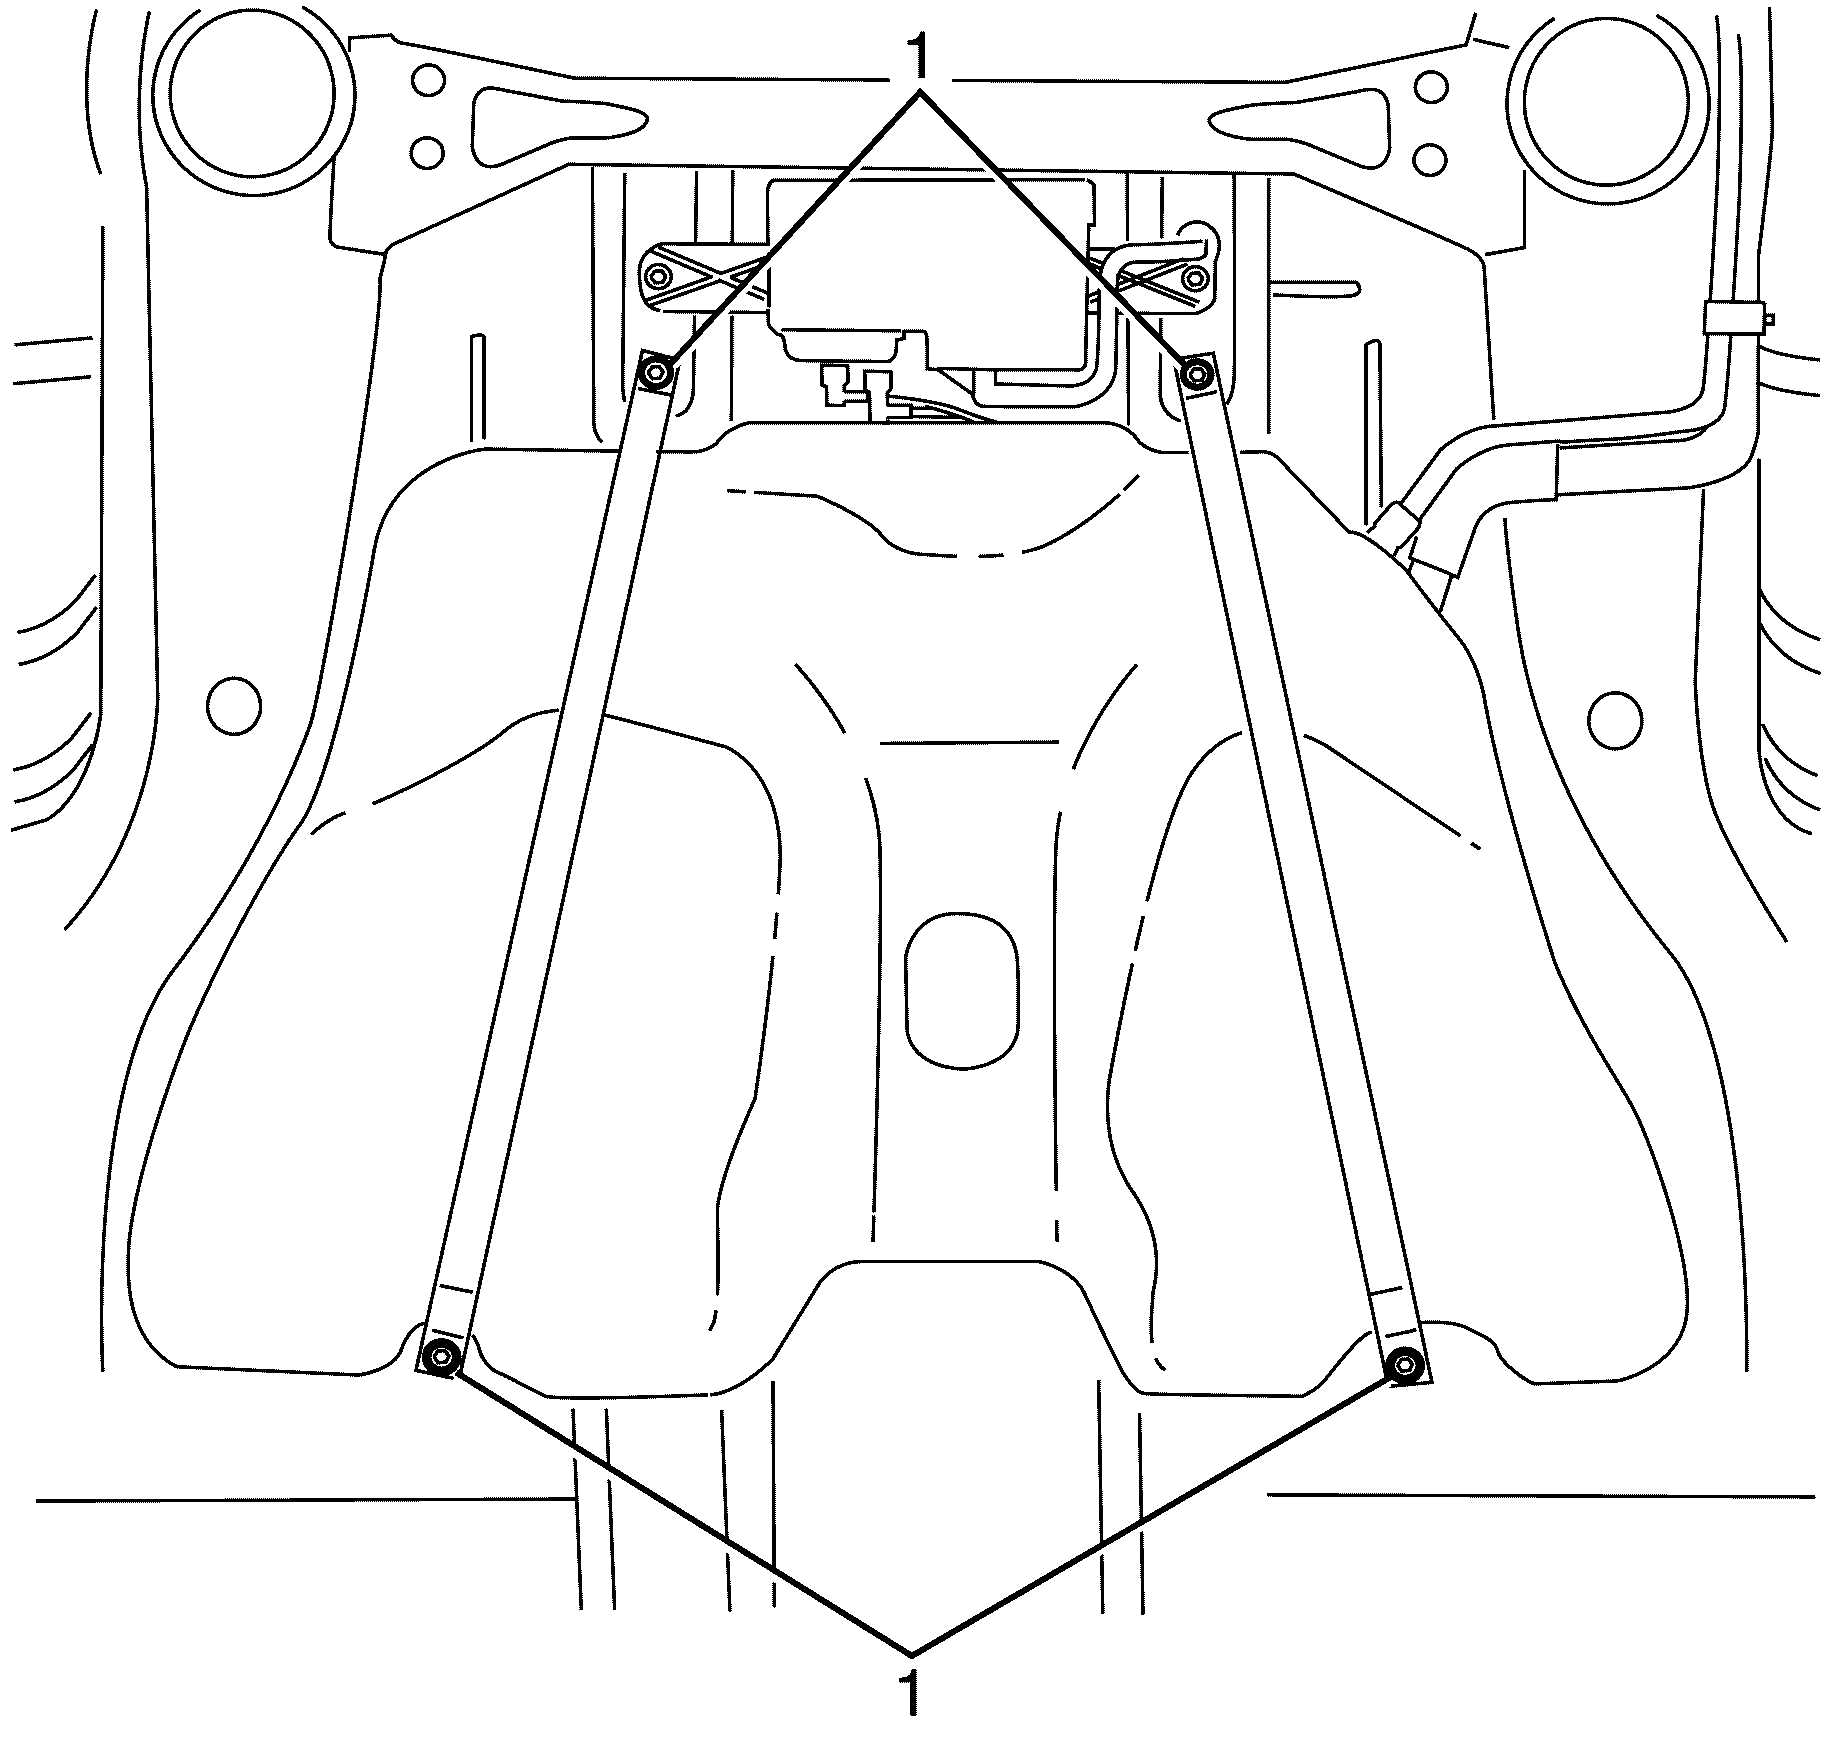
- Remove the rear frame to chassis retaining bolts (1, 2) and discard.
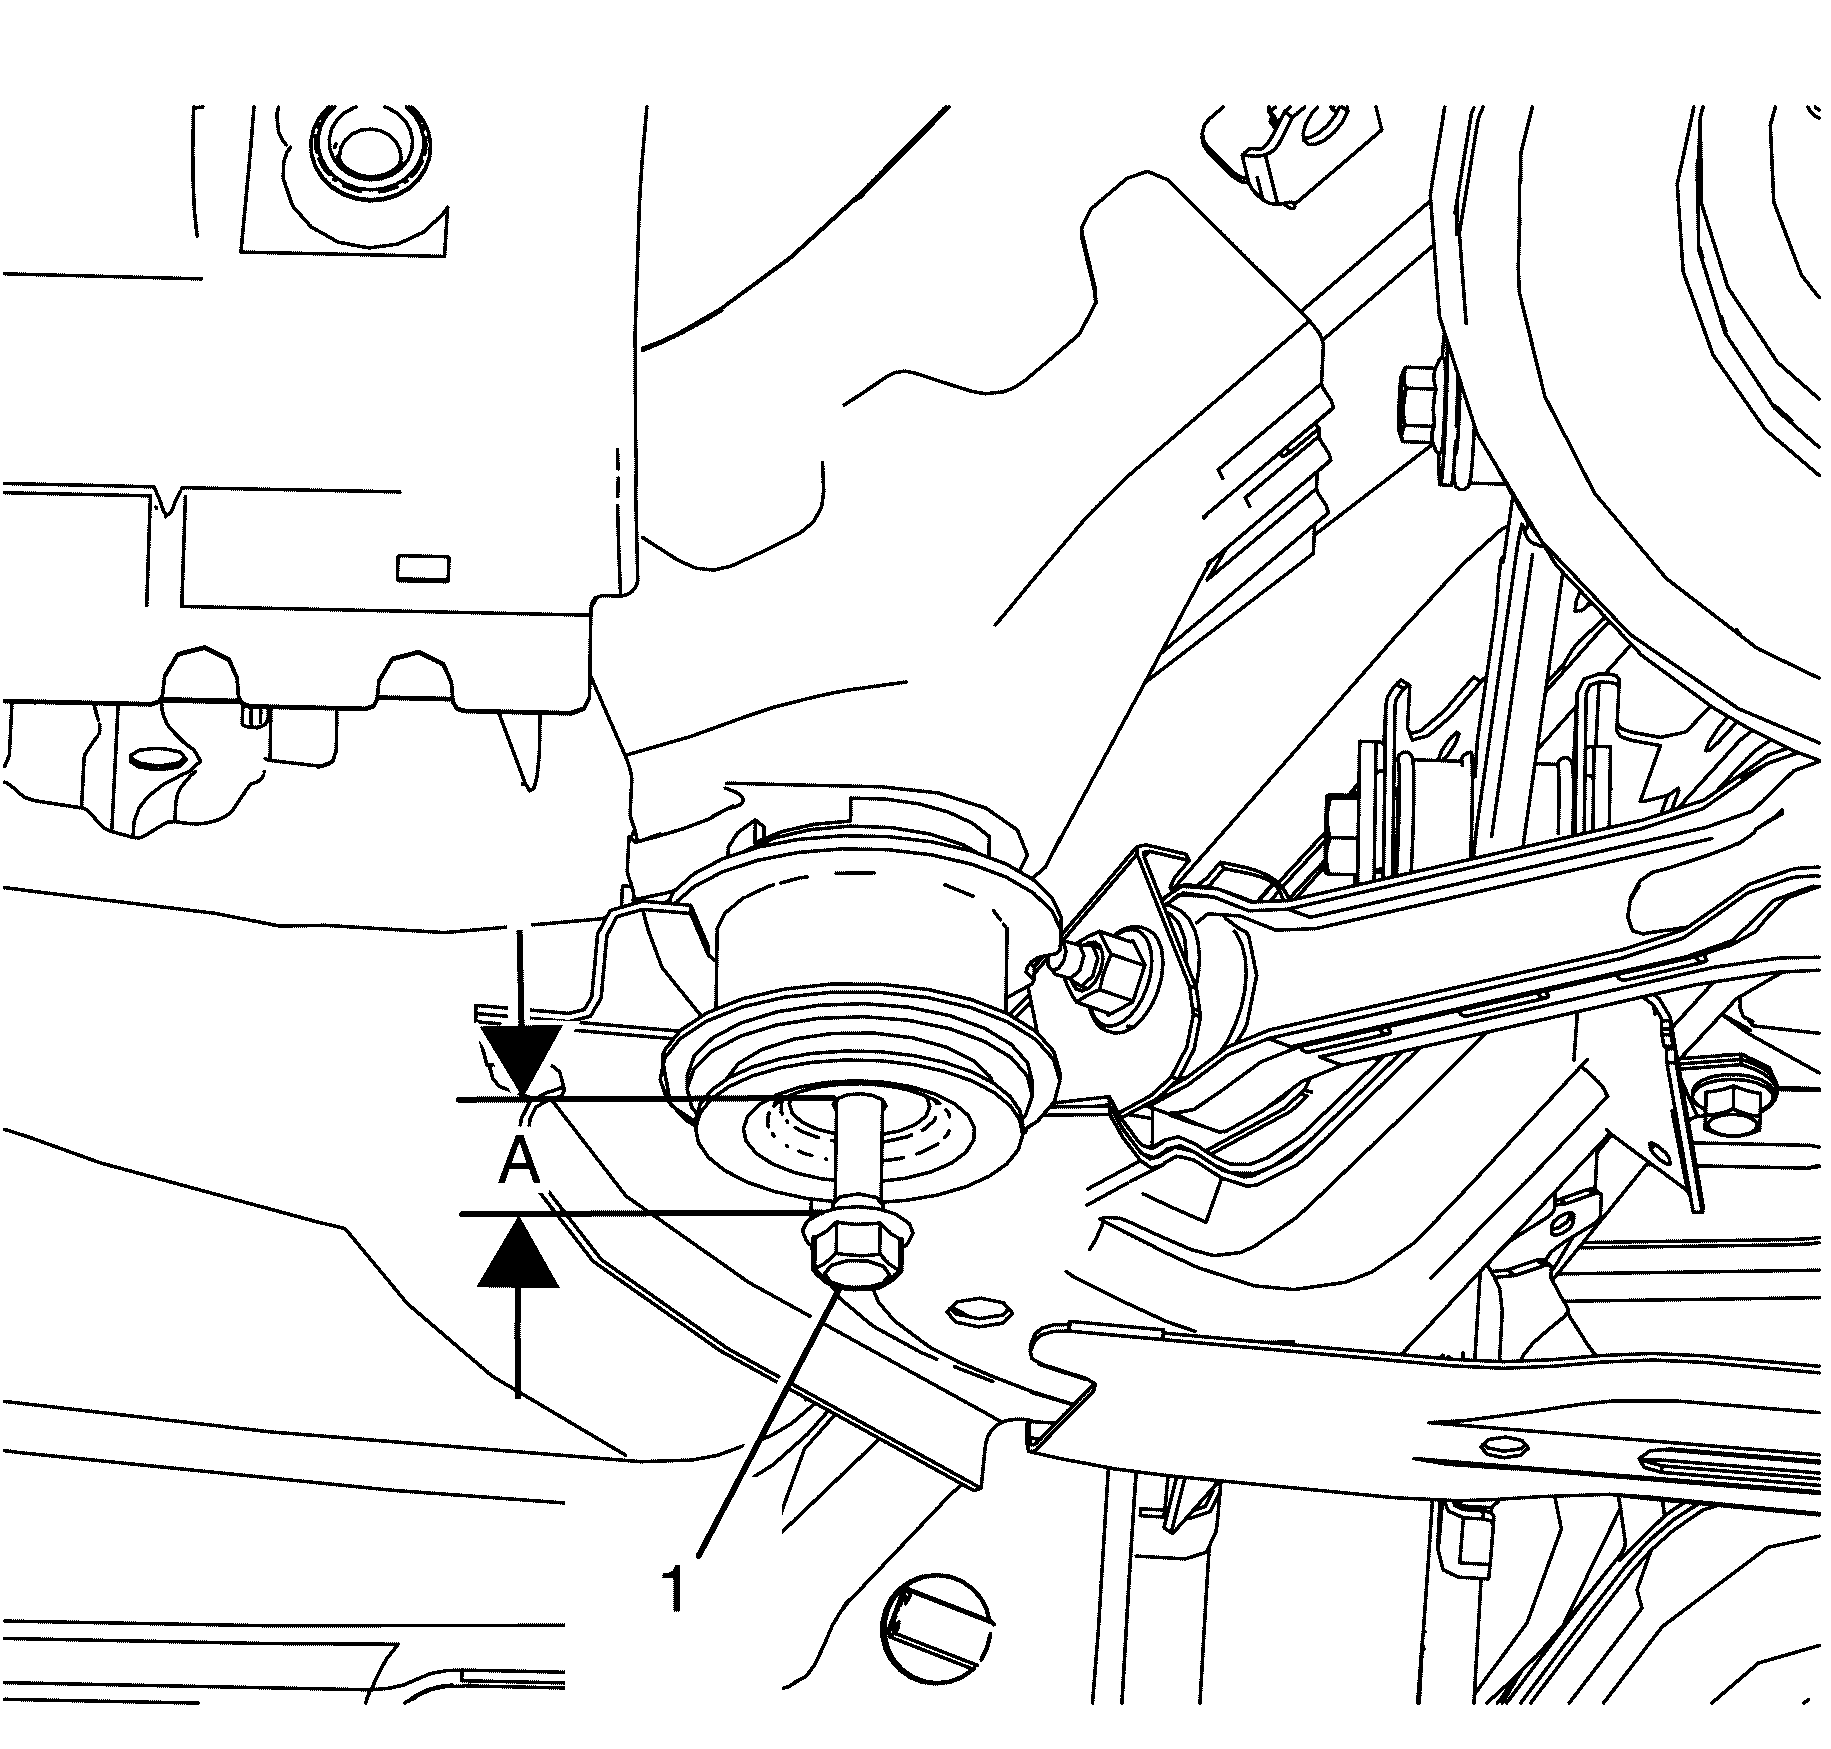
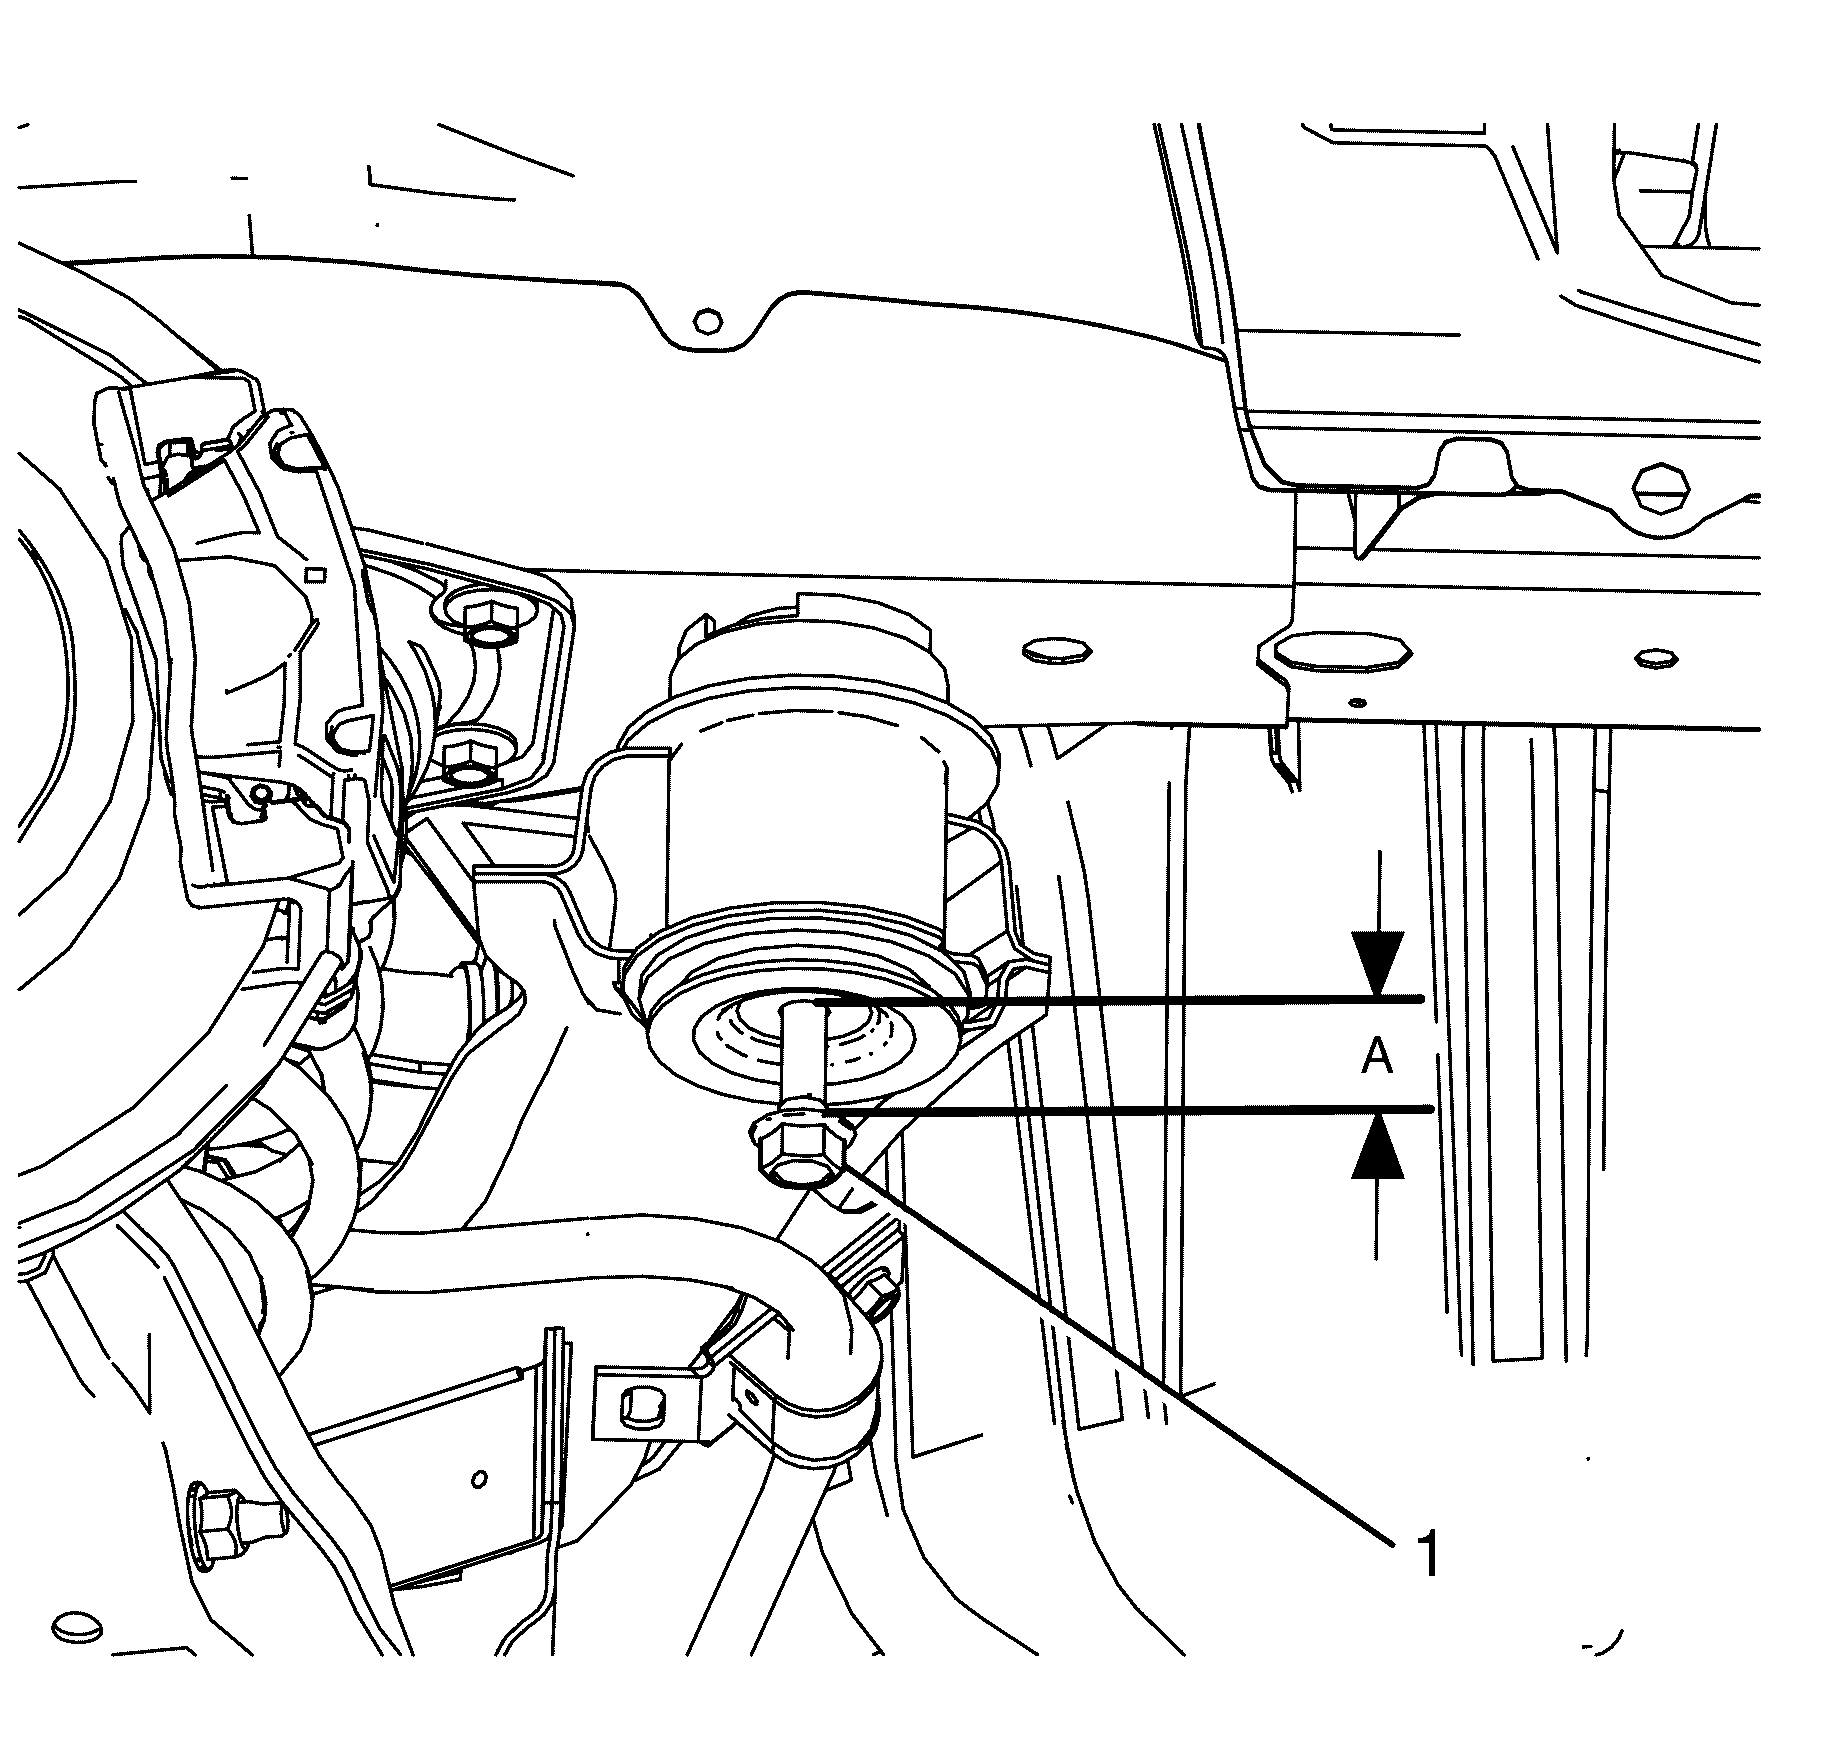
- Support the rear frame using the bolt (1) from the EN-48536 . Repeat for the opposite side.
- Support the rear frame using the bolt (1) from the EN-48536 . Repeat for the opposite side.
- Lower the rear frame approximately 50 millimetres (2 in) (A) at the rear mounting surface between the rear frame and the chassis.
- Remove the fuel tank strap to chassis retaining bolts (1).
- Position the fuel tank straps away from the fuel tank.
- Carefully bend the fuel tank straps enough to allow the fuel tank to be removed.
- With the aid of an assistant, carefully lower the fuel tank from the vehicle.
- Remove the following components if replacing just the fuel tank.
Caution: Refer to Gasoline/Gasoline Vapors Caution in the Preface section.
Caution: Refer to Safety Glasses Caution in the Preface section.
Caution: Refer to Vehicle Lifting Caution in the Preface section.
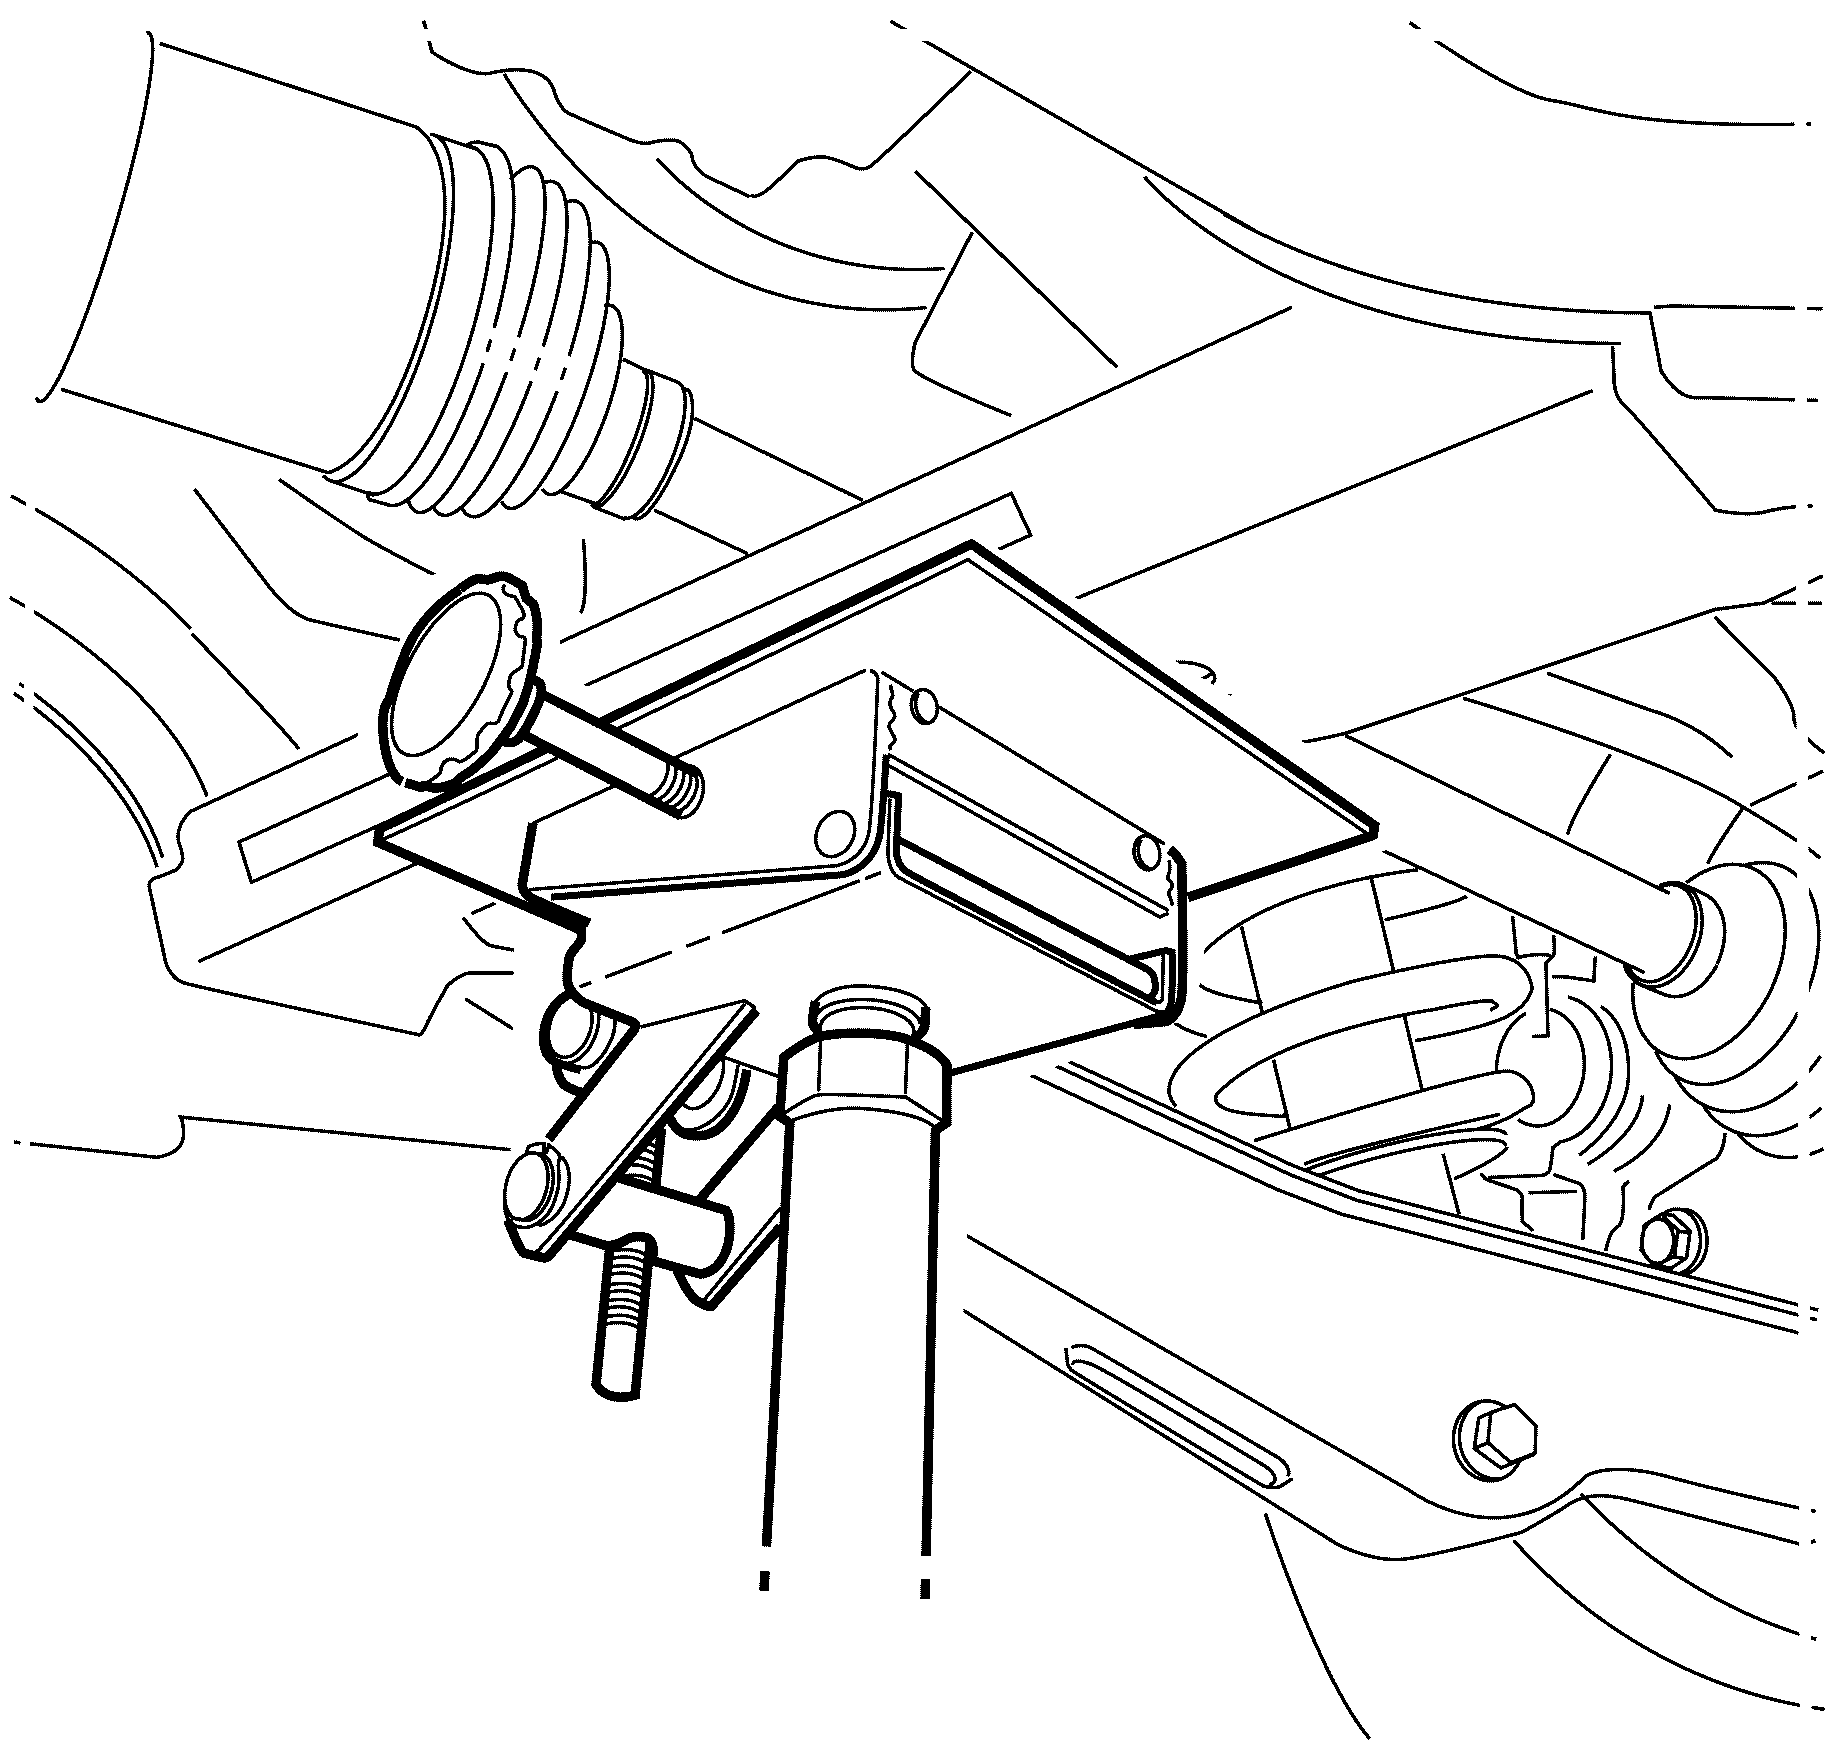
Important: When lowering the rear frame use care not to over extend the rear brake hoses.
This will allow clearance to access the fuel tank strap bolts.
Important: Make sure the following are free from the
surrounding components while lowering the fuel tank:
• The fuel tank wiring harness. • The fuel hoses at the chassis pipes.
| • | The primary fuel tank module - Refer to Primary Fuel Tank Module Replacement . |
| • | The secondary fuel tank module - Refer to Secondary Fuel Tank Module Replacement . |
Installation Procedure
- Install the following components if fuel tank replacement was necessary.
- With the aid of an assistant, carefully raise the fuel tank to the vehicle.
- Carefully install the fuel tank straps back to their original form.
- Position the fuel tank straps around the rear frame and upward into position, aligning the holes in the straps with the threaded holes in the chassis.
- Install the fuel tank strap bolts.
- Connect the filler hose (1) to the fuel tank.
- Connect the filler vent tube (2) to the EVAP hose. Refer to Plastic Collar Quick Connect Fitting Service .
- Connect the fuel tank electrical connector (1).
- Refer to Plastic Collar Quick Connect Fitting Service , in order to connect the following to the chassis bundle:
- Raise the rear frame assembly using suitable tool.
- Remove the EN-48536 bolt (1) from the rear frame. Repeat for the opposite side.
- Remove the EN-48536 bolt (1) from the rear frame. Repeat for the opposite side.
- Using a suitable tool clean the threaded holes in the rear chassis.
- Install the NEW rear frame to chassis retaining bolts (2).
- After retaining bolts (1 and 2) are installed tighten to.
- Remove the support tool.
- Install the propeller shaft. Refer to Propeller Shaft Replacement .
- Install the exhaust system. Refer to Exhaust System Replacement .
- Refill the fuel tank.
- Inspect for fuel leaks.
- If re-programming is required. Refer to Control Module References .
| • | The primary fuel tank module - Refer to Primary Fuel Tank Module Replacement . |
| • | The secondary fuel tank module - Refer to Secondary Fuel Tank Module Replacement . |
Important: Make sure the following are properly routed
while raising the fuel tank:
• The fuel tank wiring harness • The fuel hoses at the chassis pipes.
Important: Make sure the fuel tank straps are not pressed into the fuel tank.
Notice: Refer to Fastener Notice in the Preface section.
Tighten
Tighten the fuel tank strap bolts to 20 N·m
(15 lb ft).
Tighten
Tighten the fuel filler tube hose clamp (3)
to 4 N·m (35 lb in).
| • | The fuel feed line |
| • | The fuel EVAP hose |
Important: Rear frame retaining bolts must not to be fully tightened at this stage.
Do not fully tighten at this stage.
Tighten
| • | First Pass: Tighten the bolts to 65 N·m (48 lb ft) |
| • | Final Pass: Tighten the bolts a further 125 degrees. |
