For 1990-2009 cars only
- Raise and support the vehicle. Refer to Lifting and Jacking the Vehicle.
- Remove the front wheel. Refer to Tire and Wheel Removal and Installation.
- Remove the brake disc. Refer to Front Brake Rotor Replacement.
- Clean the wheel mounting surface of the front wheel hub assembly of any loose debris, rust, and/or corrosion.
- Position a dial indicator (4), on the wheel mounting surface of the front wheel hub assembly (3) perpendicular to the surface.
- Slowly rotate the front wheel hub assembly one complete revolution in order to find the low spot.
- Set the dial indicator to zero at the low spot.
- Slowly rotate the front wheel hub assembly one more complete revolution and measure the total amount of radial runout.
- Position the dial indicator (4) on the centre of the wheel mounting flange (3) of the front wheel hub assembly perpendicular to the surface.
- Push the wheel mounting flange towards the centre of the car, set the dial indicator to zero.
- Pull the wheel mounting flange towards the outside of the car and measure the total amount of axial end float.
- If the measurements are not within the specified range replace the front wheel hub assembly. Refer to Front Wheel Bearing and Hub Replacement.
- Install the brake disc. Refer to Front Brake Rotor Replacement.
- Install the rear wheel. Refer to Tire and Wheel Removal and Installation.
- Remove the safety stands.
- Lower the vehicle to the ground.
Caution: Refer to Safety Glasses Caution in the Preface section.
Caution: Refer to Vehicle Lifting Caution in the Preface section.
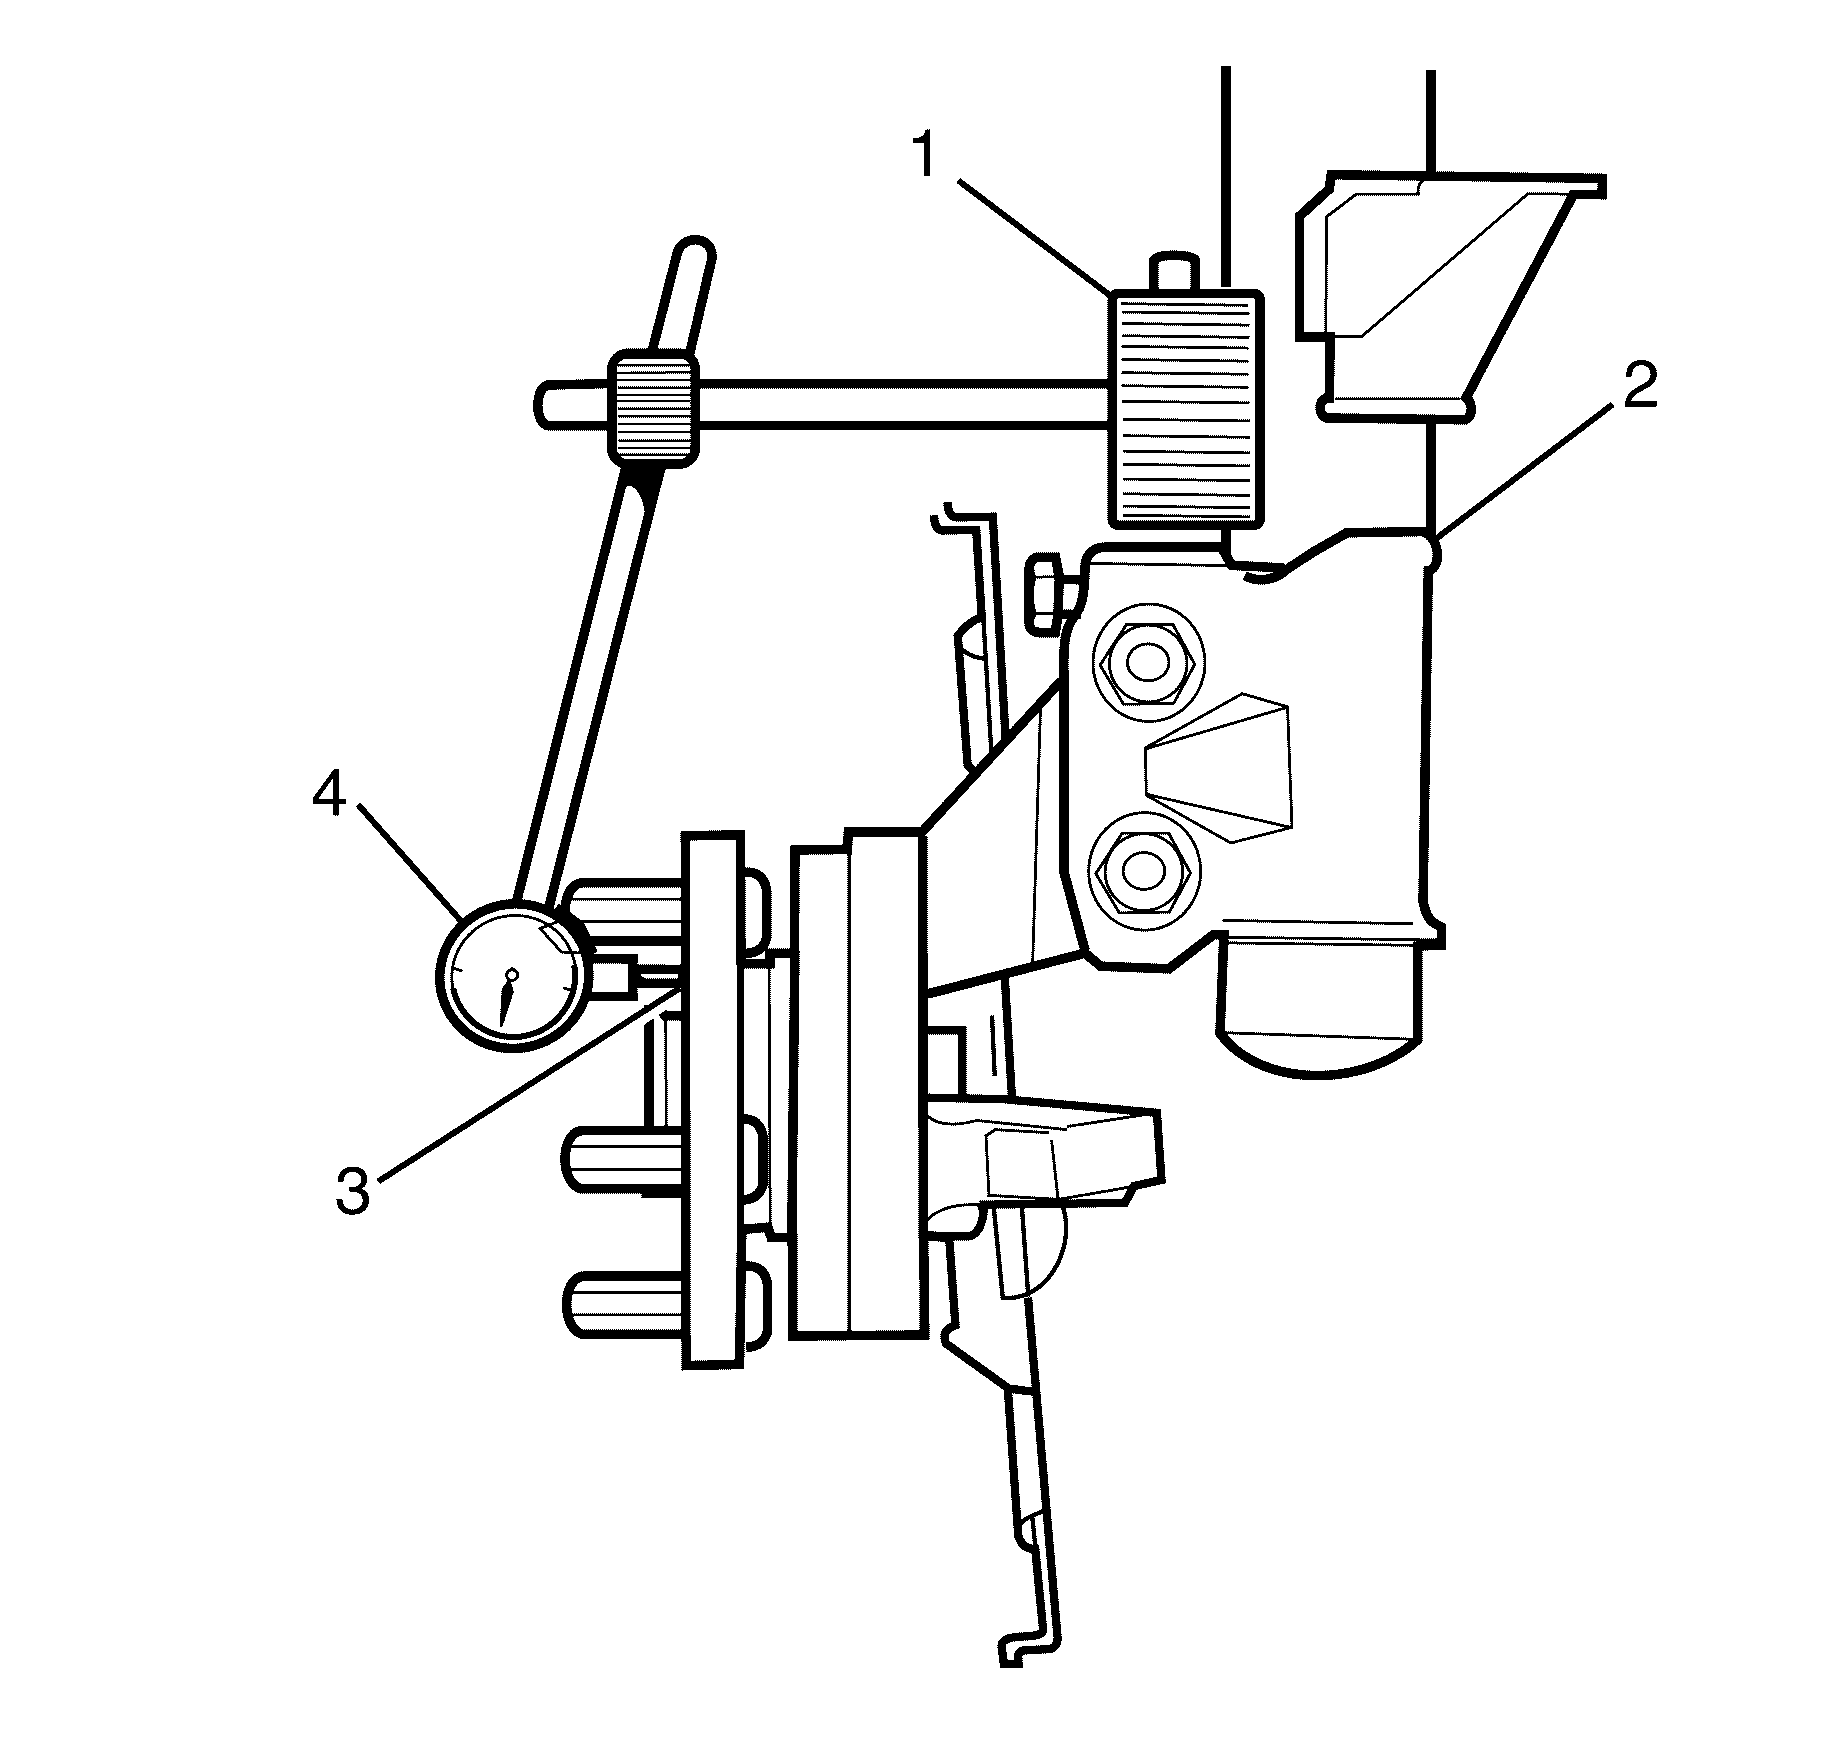
Important: The dial gauge mounting base (1) must be securely mounted to the front strut unit (2).
Specification
Maximum front wheel hub assembly runout 0.025 mm
(0.001 in)

Important: The dial gauge mounting base (1) must be securely mounted to the front strut unit (2).
Specification
The front wheel hub assembly has zero axial
end float (preload).
