Tools Required
| • | C-4150-C Press Tool. |
| • | 7208 Drive Shaft Remover. |
| • | KM-468 Hub Holding Tool. |
Removal Procedure
- Raise and support the vehicle. Refer to Lifting and Jacking the Vehicle.
- Remove the rear wheels. Refer to Tire and Wheel Removal and Installation.
- Remove the rear brake disc. Refer to Rear Brake Rotor Replacement.
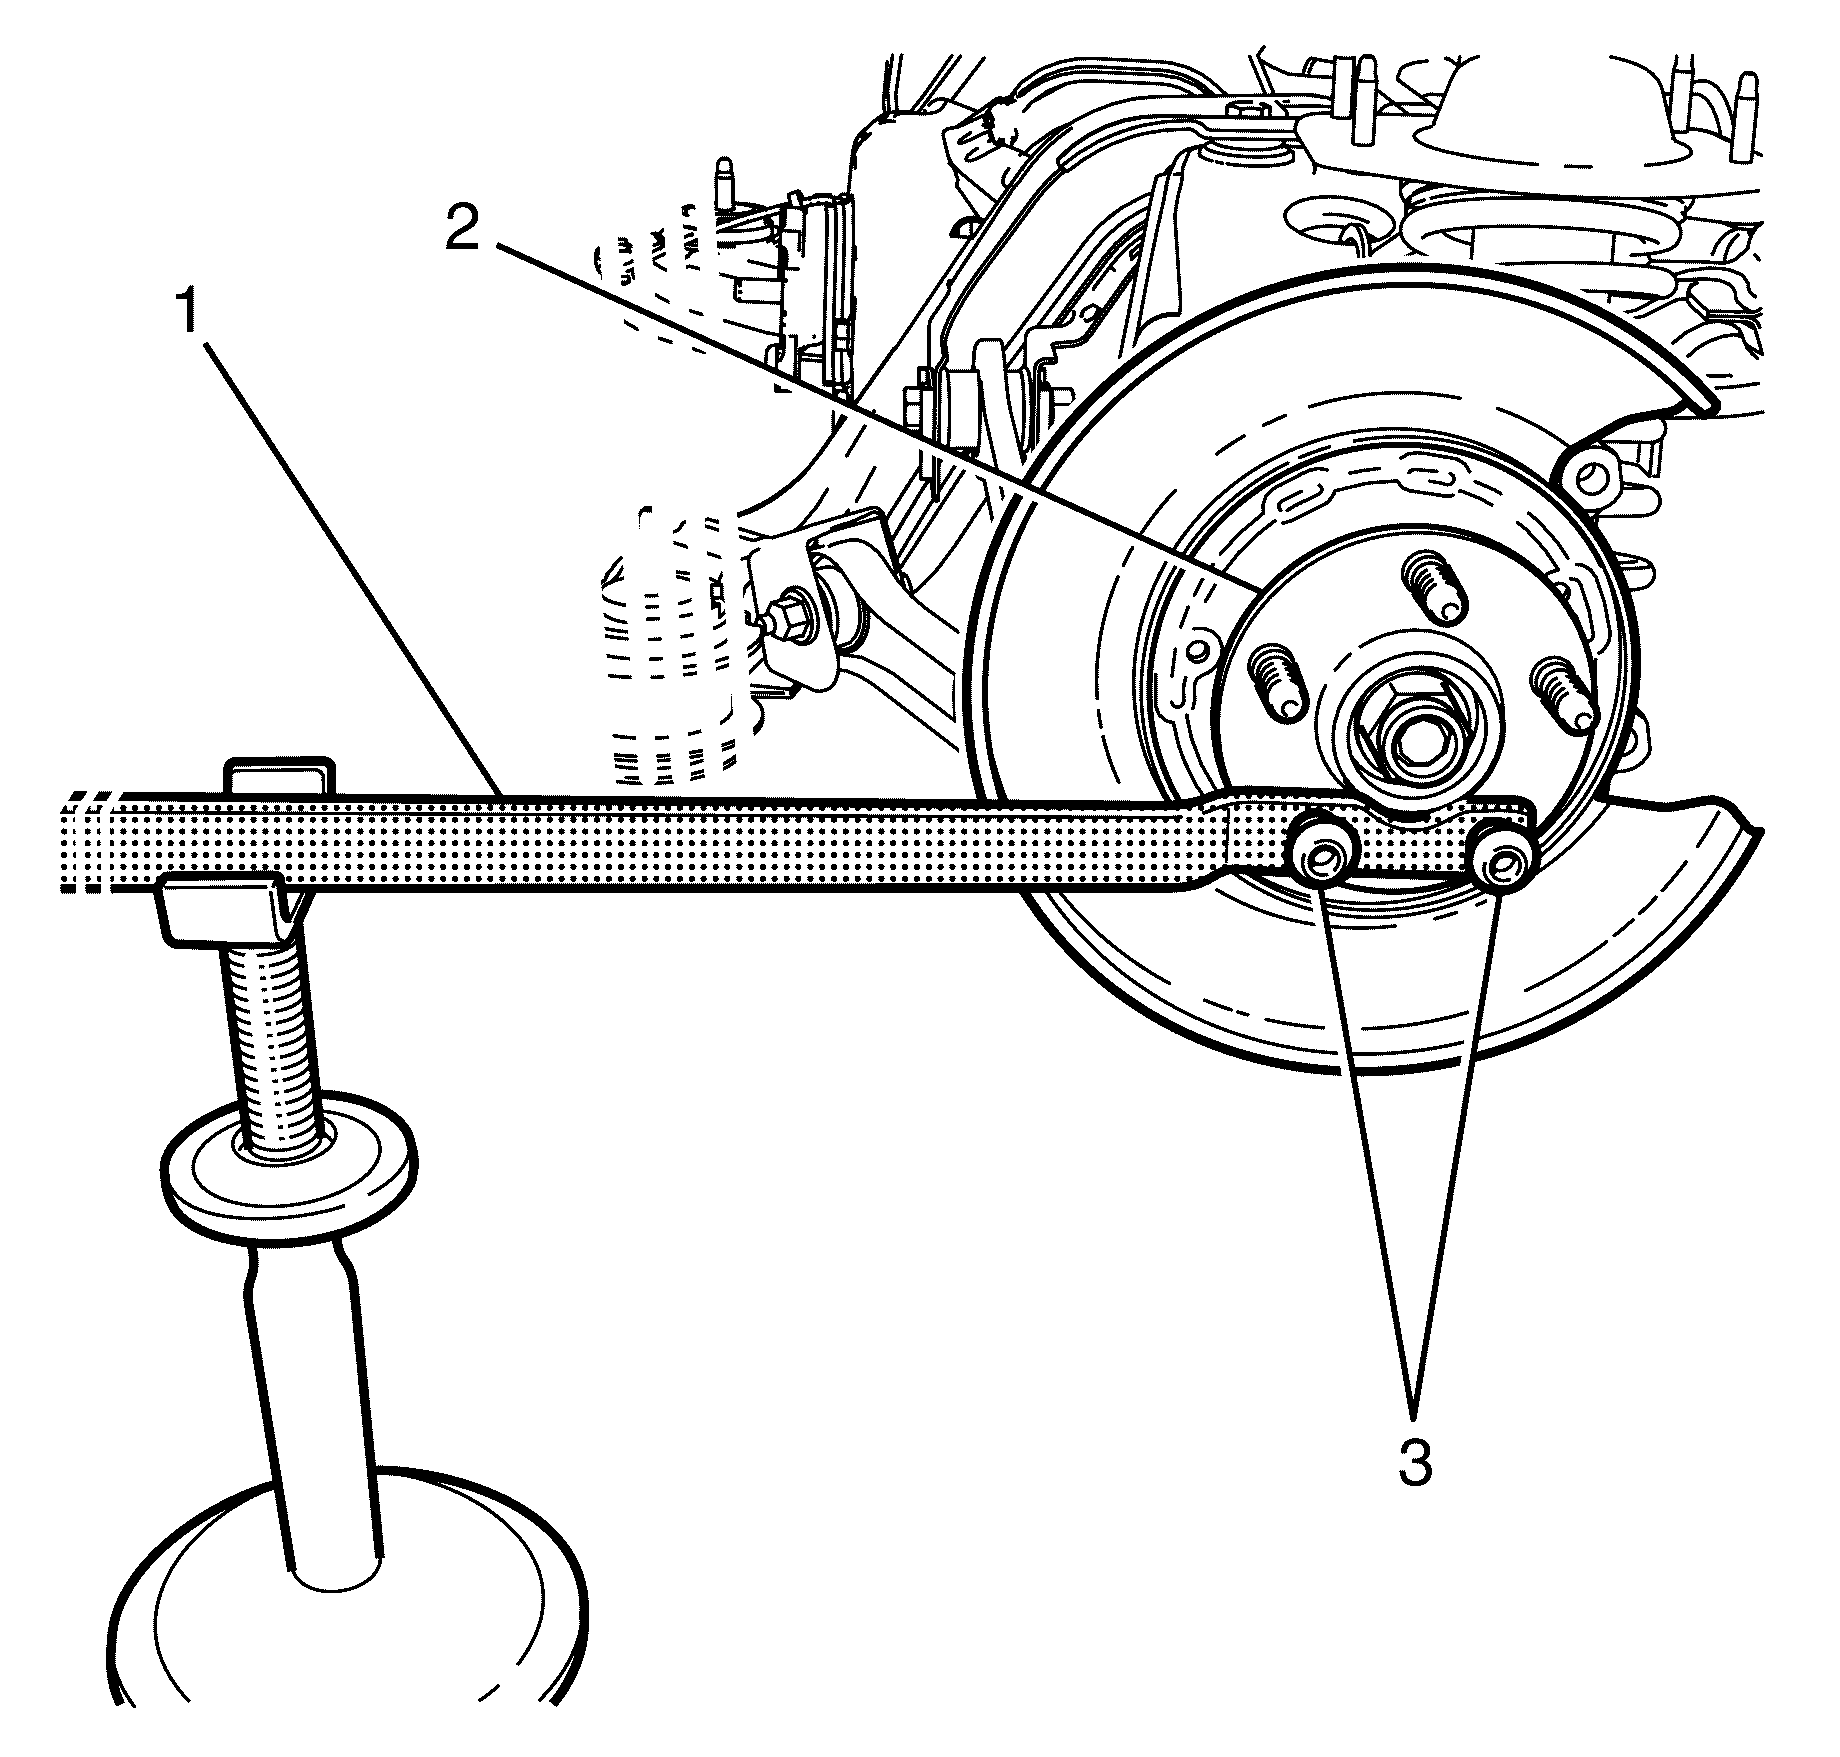
- Install the KM-468 (1) to the wheel hub (2) with two inverted wheel nuts (3).
- Support the KM-468 (1) outer end on a safety stand.
- Remove the rear driveshaft retaining nut (2) and washer (1).
- Secure the rear driveshaft with wire to protect it from damage.
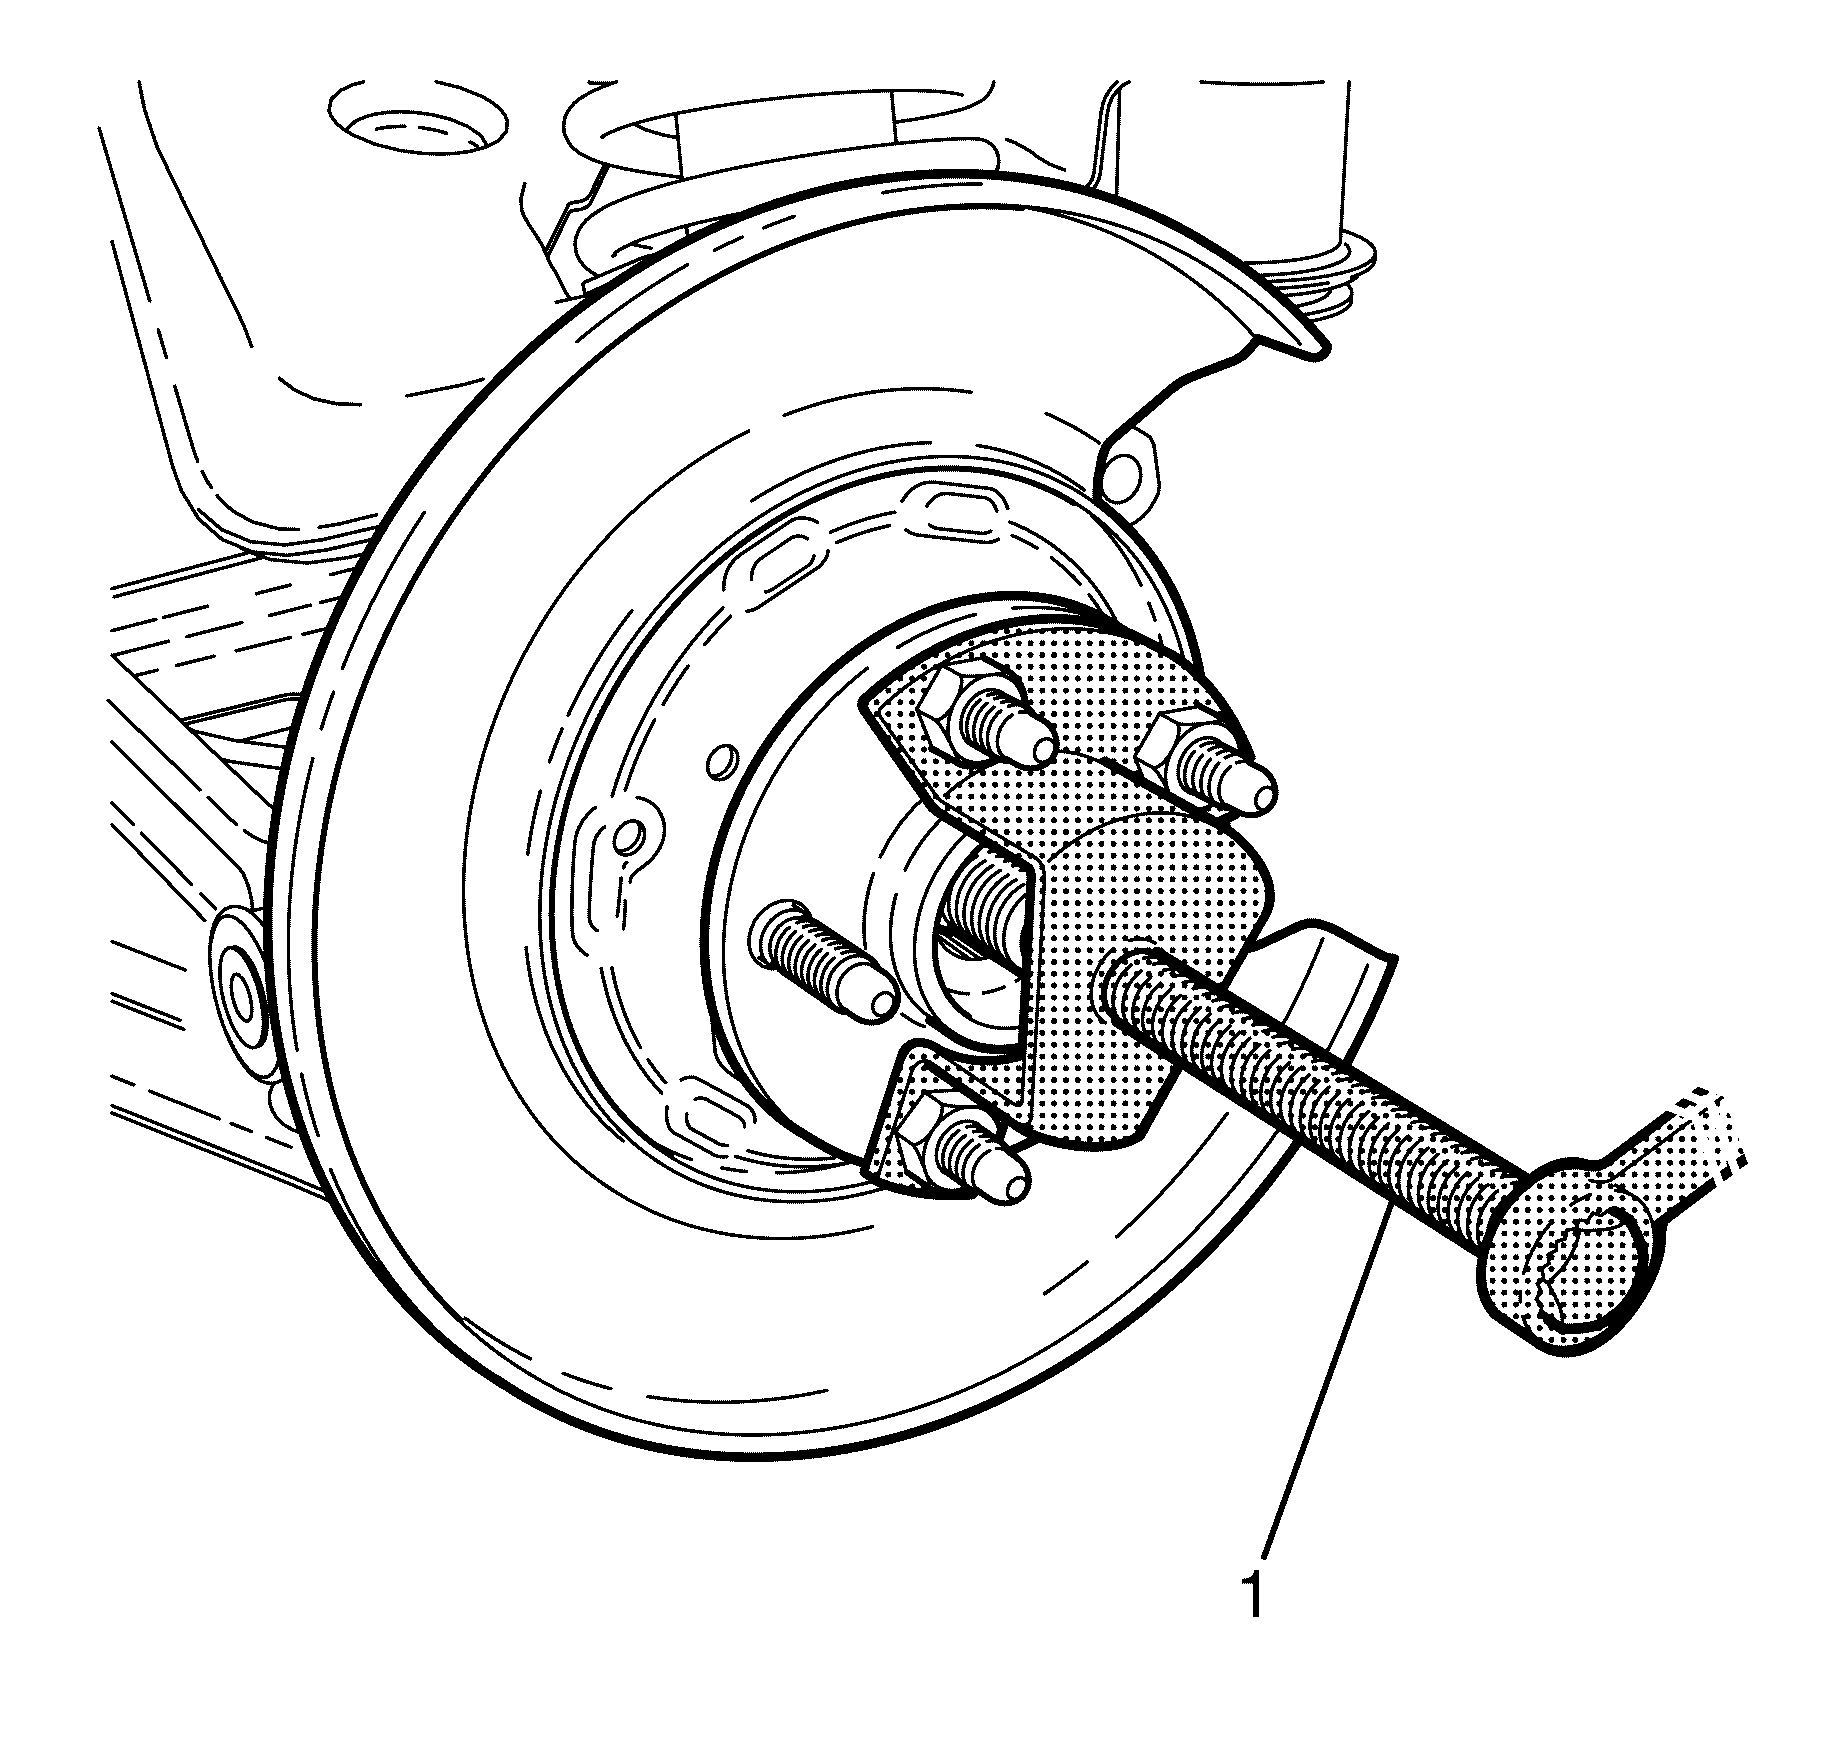
- Install the 7208 (1) to the wheel hub (2).
- Press the rear driveshaft from the wheel hub using the 7208 (1).
- Remove the 7208 (1) from the wheel hub (2).
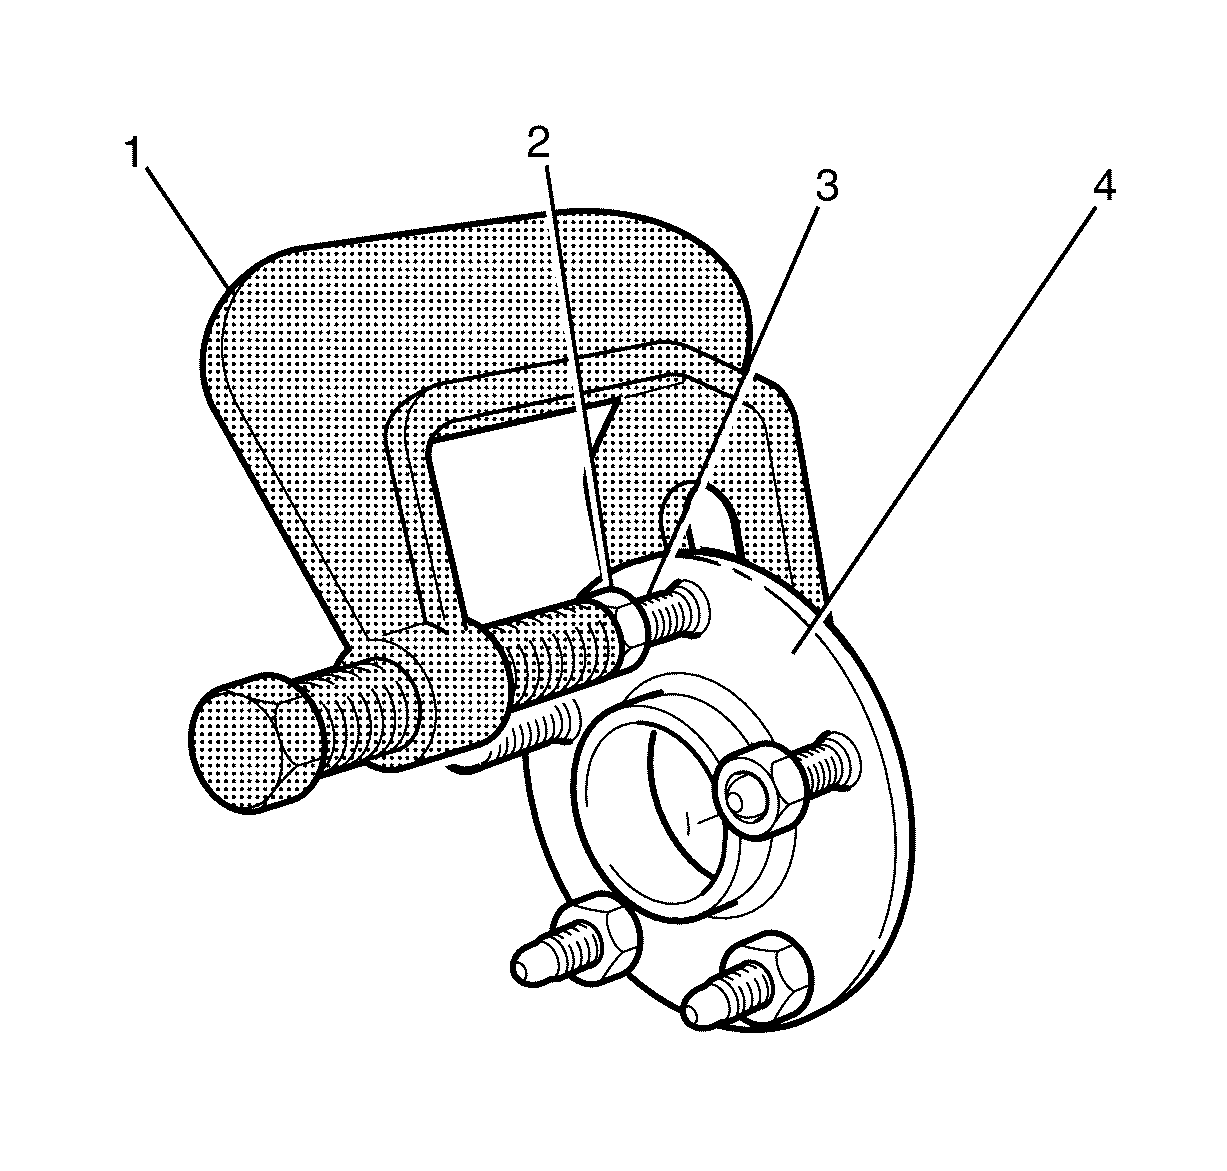
- Install a wheel nut (2) flush with the end of the wheel stud (3).
- Remove the wheel stud (3) from the wheel hub (4) using the C-4150-C (1).
- Repeat steps 11 and 12 for any additional wheel studs that require replacement.
Caution: Refer to Safety Glasses Caution in the Preface section.
Caution: Refer to Vehicle Lifting Caution in the Preface section.
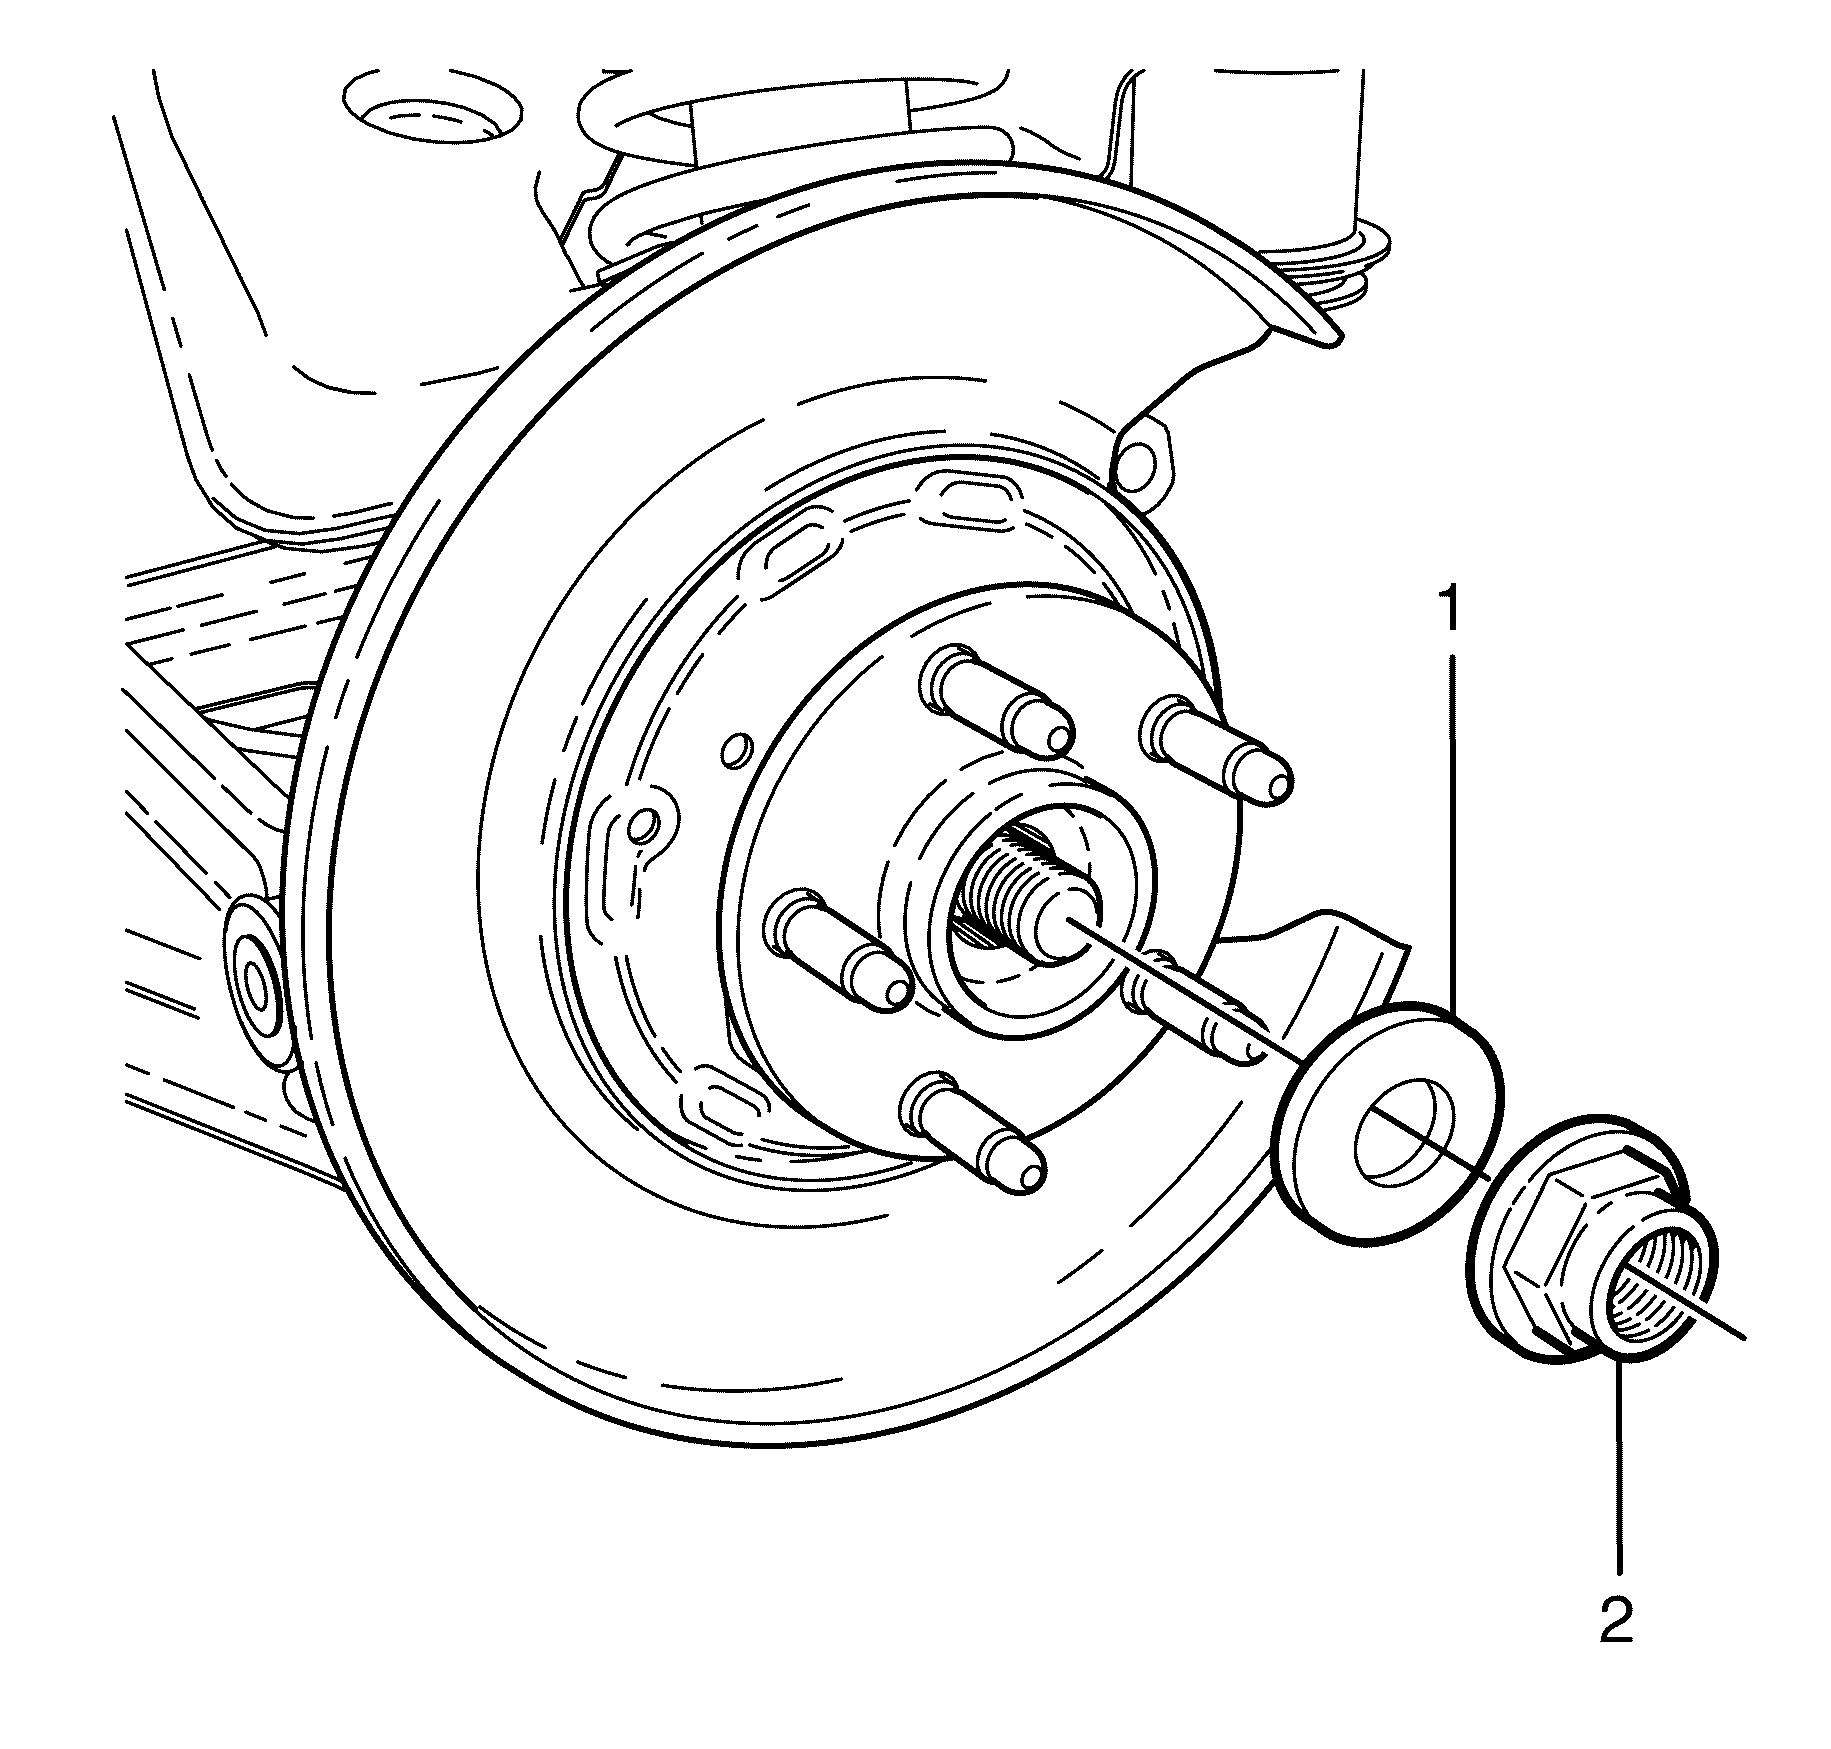
Important: The rear driveshaft retaining nut (2) and washer (1) must be discarded after removal.
| • | Discard the nut. |
| • | Discard the washer. |
Notice: Refer to General Repair Instructions in the Preface section.
Installation Procedure
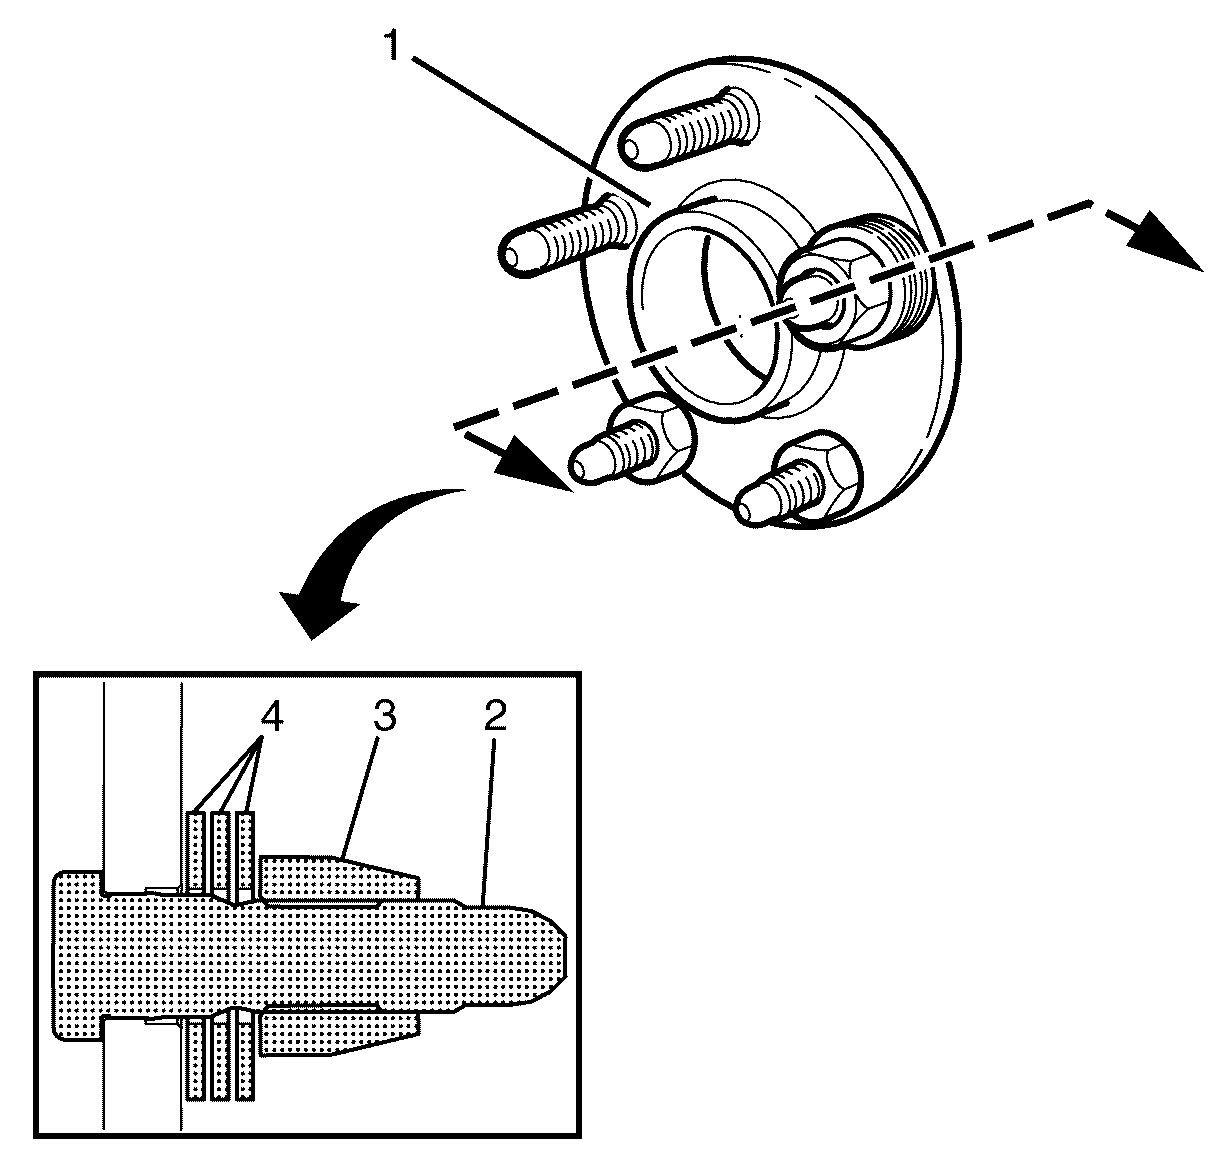
- Install the wheel stud (2) to the wheel hub (1).
- Install spacing washers (4) and an inverted wheel nut (3) onto the replacement wheel stud (2).
- Remove the wheel nut (3) and spacing washers (4).
- Repeat steps 1 to 3 for any additional studs that require replacement.
- Remove the rear driveshaft securing wire, used in the removal process to prevent damage.
- Push the rear driveshaft outer splined end (4) into the splined cavity (5) of the wheel hub (1).
- Install the rear driveshaft NEW retaining nut (2) and NEW washer (1).
- Install the KM-468 (1) to the wheel hub (2) with two inverted wheel nuts (3).
- Preferred Method
- Remove the KM-468 (1).
- Install the rear brake disc. Refer to Rear Brake Rotor Replacement.
- Install the rear wheel. Refer to Tire and Wheel Removal and Installation.
- Remove the safety stands.
- Lower the vehicle to the ground.
Notice: Refer to Fastener Notice in the Preface section.
Important: Suitable sized spacing washers (4) must be used to fully seat the wheel stud (2).
Tighten
Tighten the nut to 170 N·m (125 lb ft).
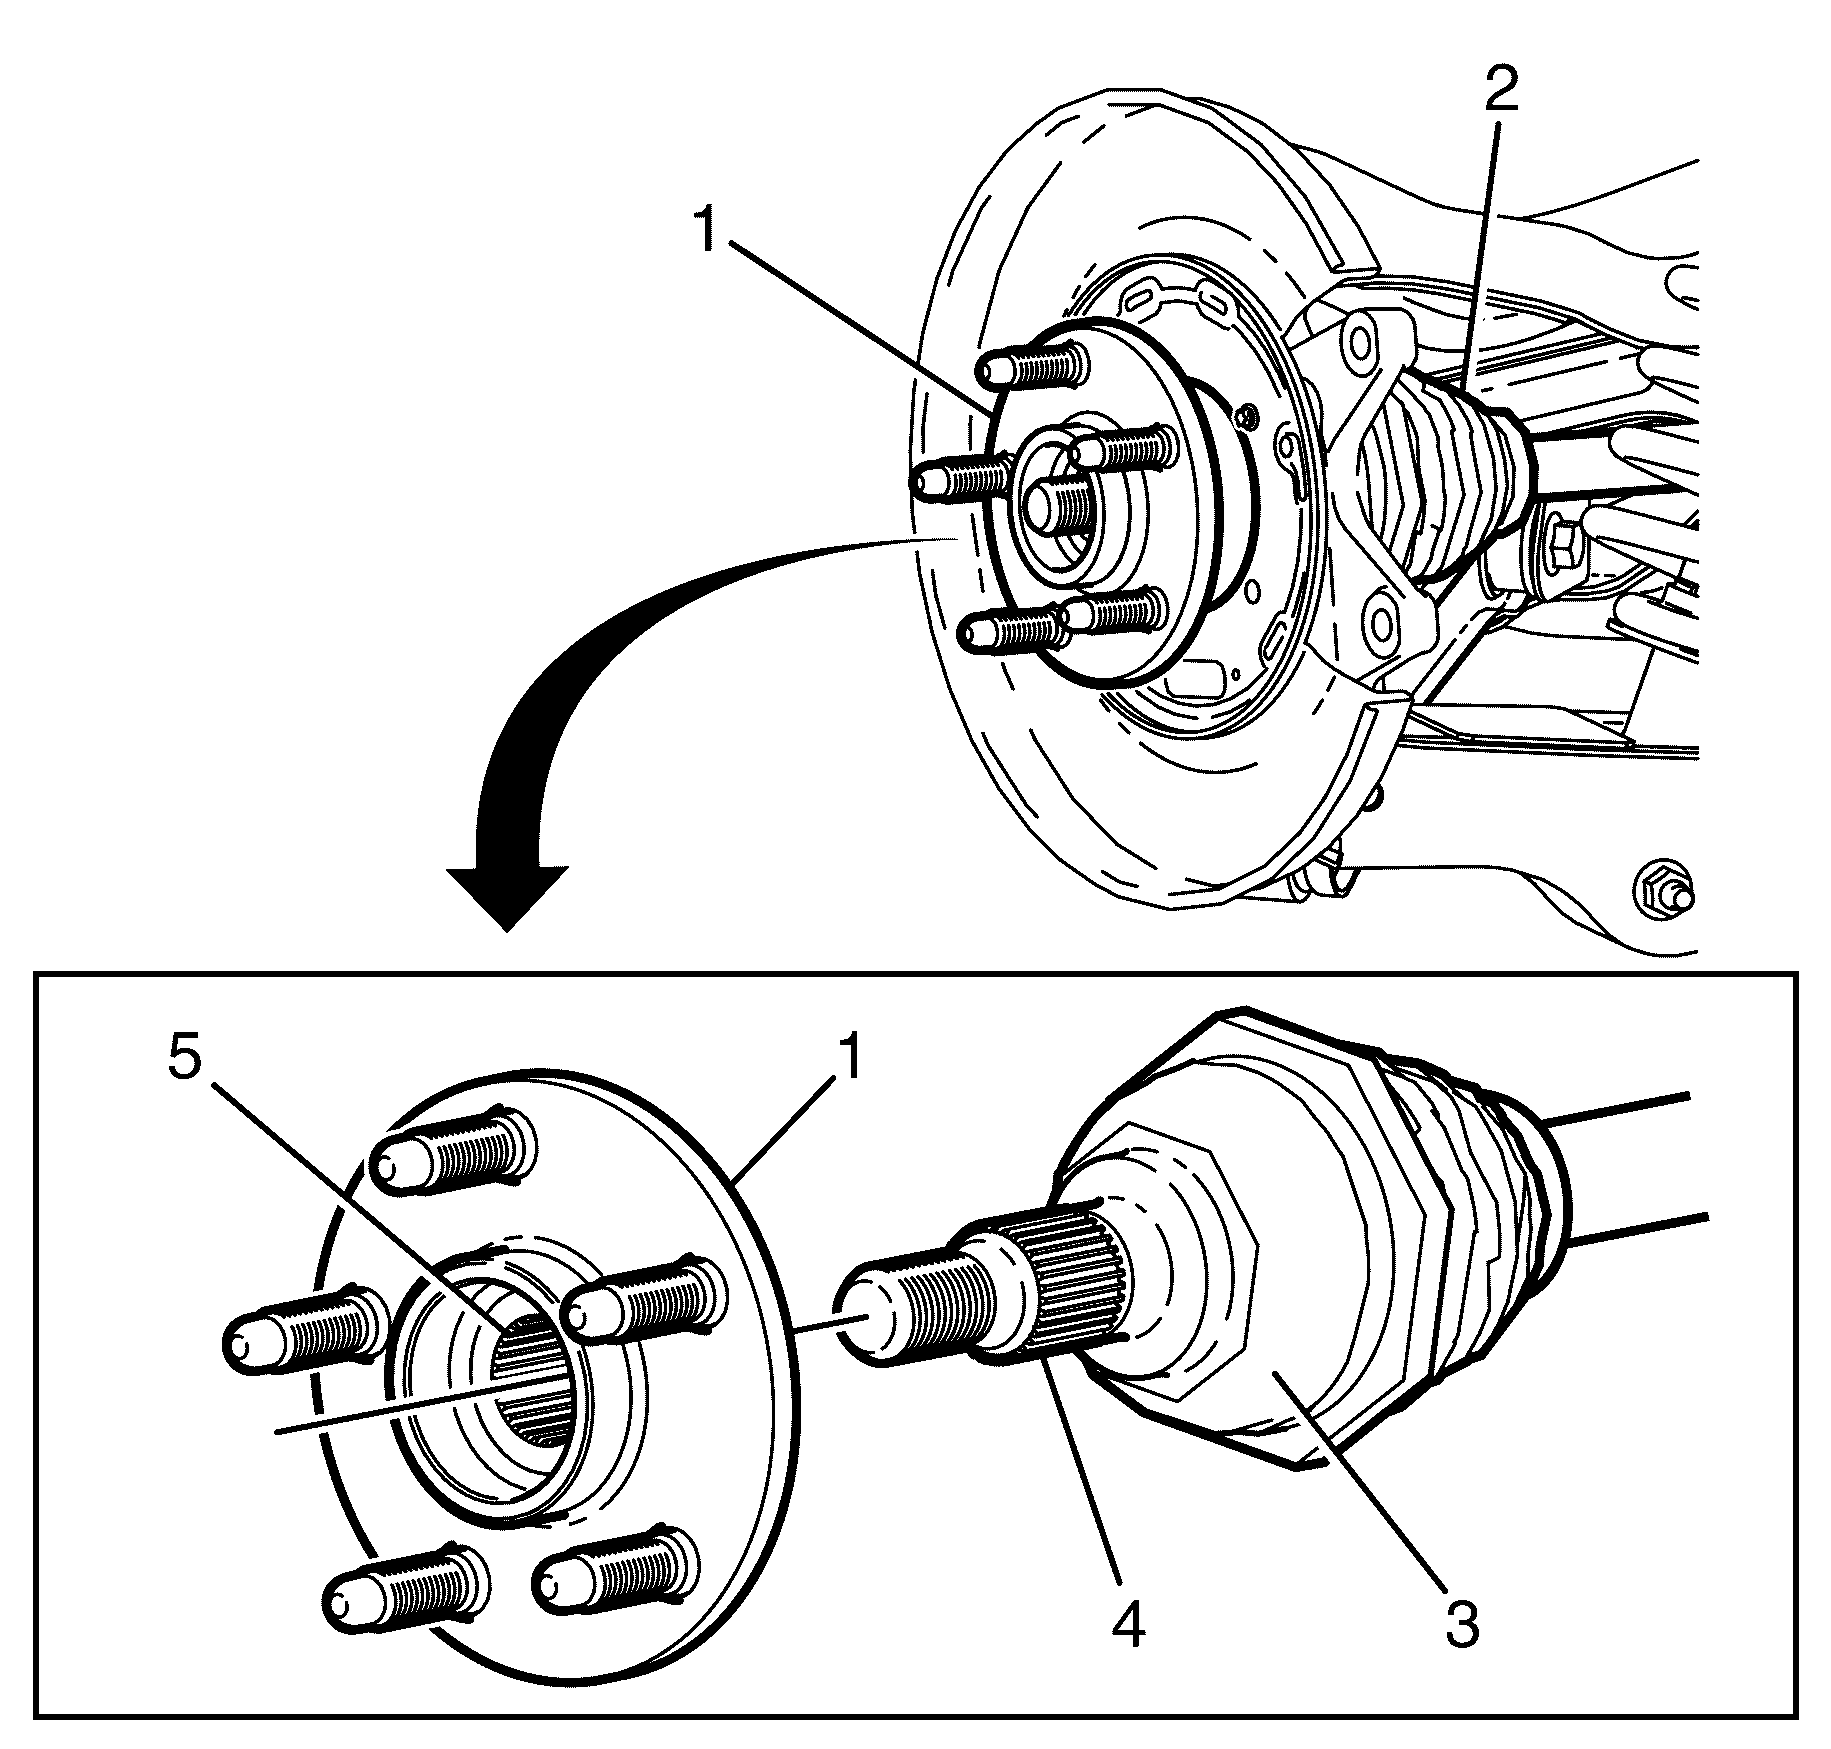
Important: Lightly lubricate the rear driveshaft outer splined end (4) with the recommended differential lubricant.
Important: DO NOT excessively push the rear driveshaft (3) through the wheel hub (1).

Important: A NEW nut and NEW washer must be used when installing the rear drive shaft.

Support the KM-468 (1) outer end on a safety stand.
Notice: Refer to Fastener Notice in the Preface section.
Important: There are two suitable methods of tightening the wheel drive shaft retaining nut. DO NOT EXCEED THE SPECIFIED TIGHTENING VALUES, otherwise premature bearing failure may result.
Tighten
Tighten the nut on first pass to 150 N·m
(111 lb ft).
Loosen
Loosen the nut on second pass by 180 Degrees.
Tighten
Tighten the nut on third pass to 425 N·m
(313 lb ft)
Crimp nut.
Alternate Method
Tighten
Tighten the nut on first pass to 150 N·m
(111 lb ft).
Loosen
Loosen the nut on second pass by 180 Degrees.
Tighten
Tighten the nut on the third pass to 50 N·m
(37 lb ft)
Tighten
Tighten the nut on the forth pass by 45 Degrees
Crimp nut.
