Tools Required
KM-619 Bushing Remover/Installer.
Removal Procedure
- Raise and support the vehicle. Refer to Lifting and Jacking the Vehicle.
- Remove the rear wheel. Refer to Tire and Wheel Removal and Installation.
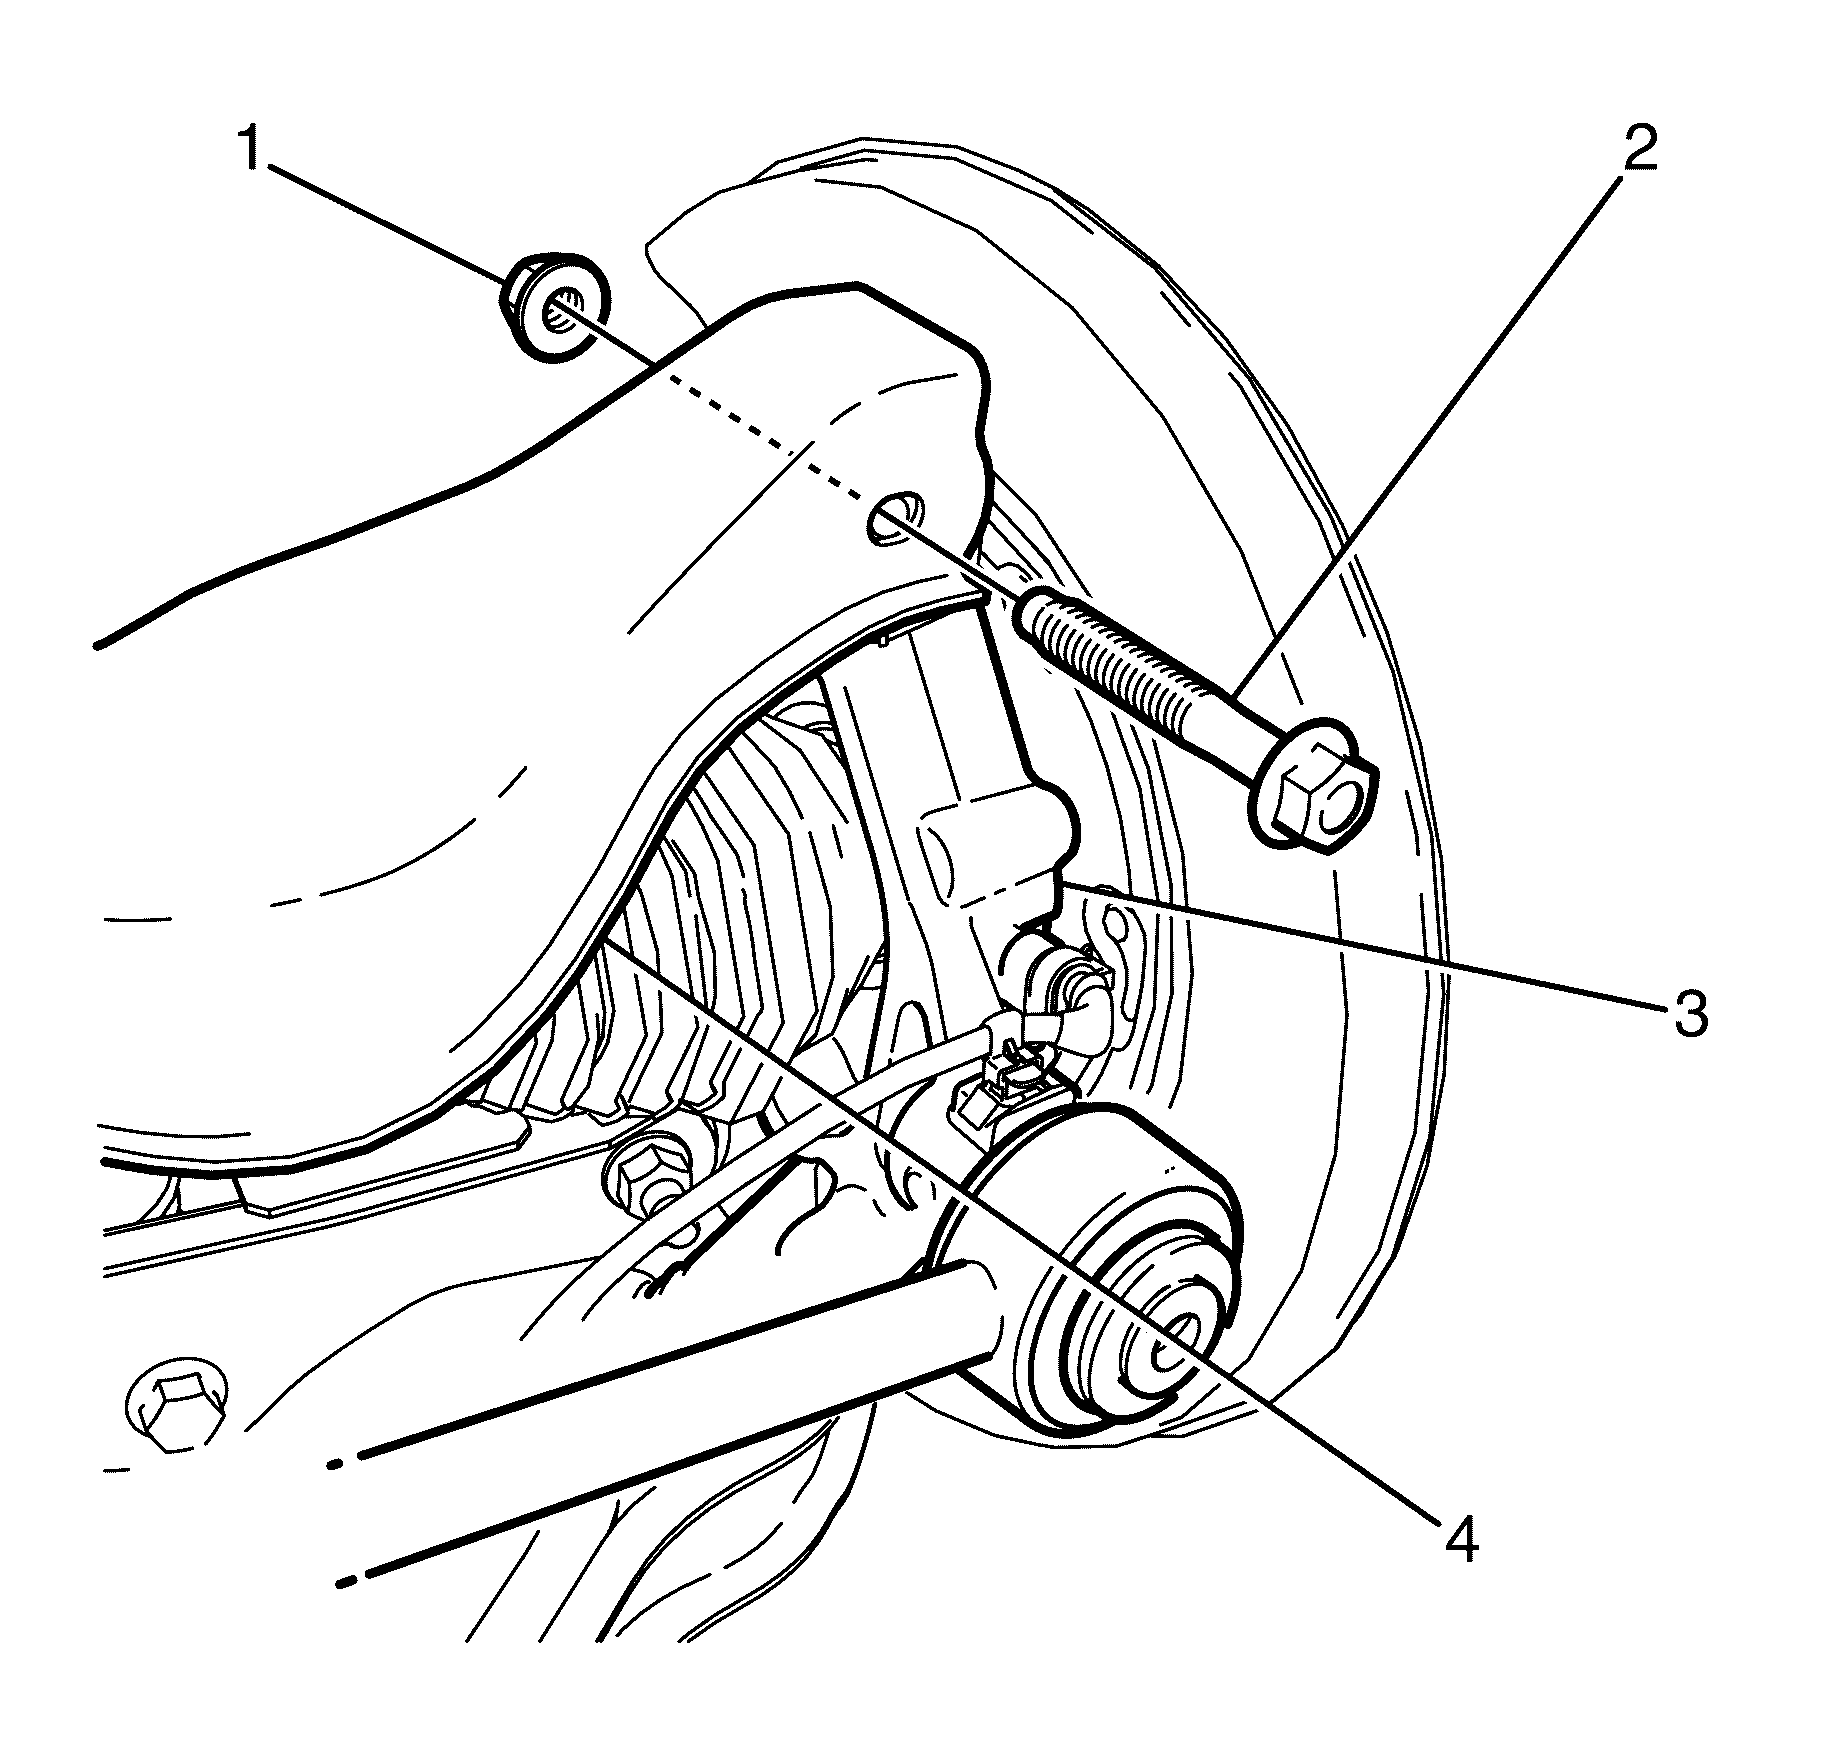
- Remove the upper control arm to knuckle retaining bolt (2) and nut (1).
- Disconnect the upper control arm (4) from the knuckle (3).
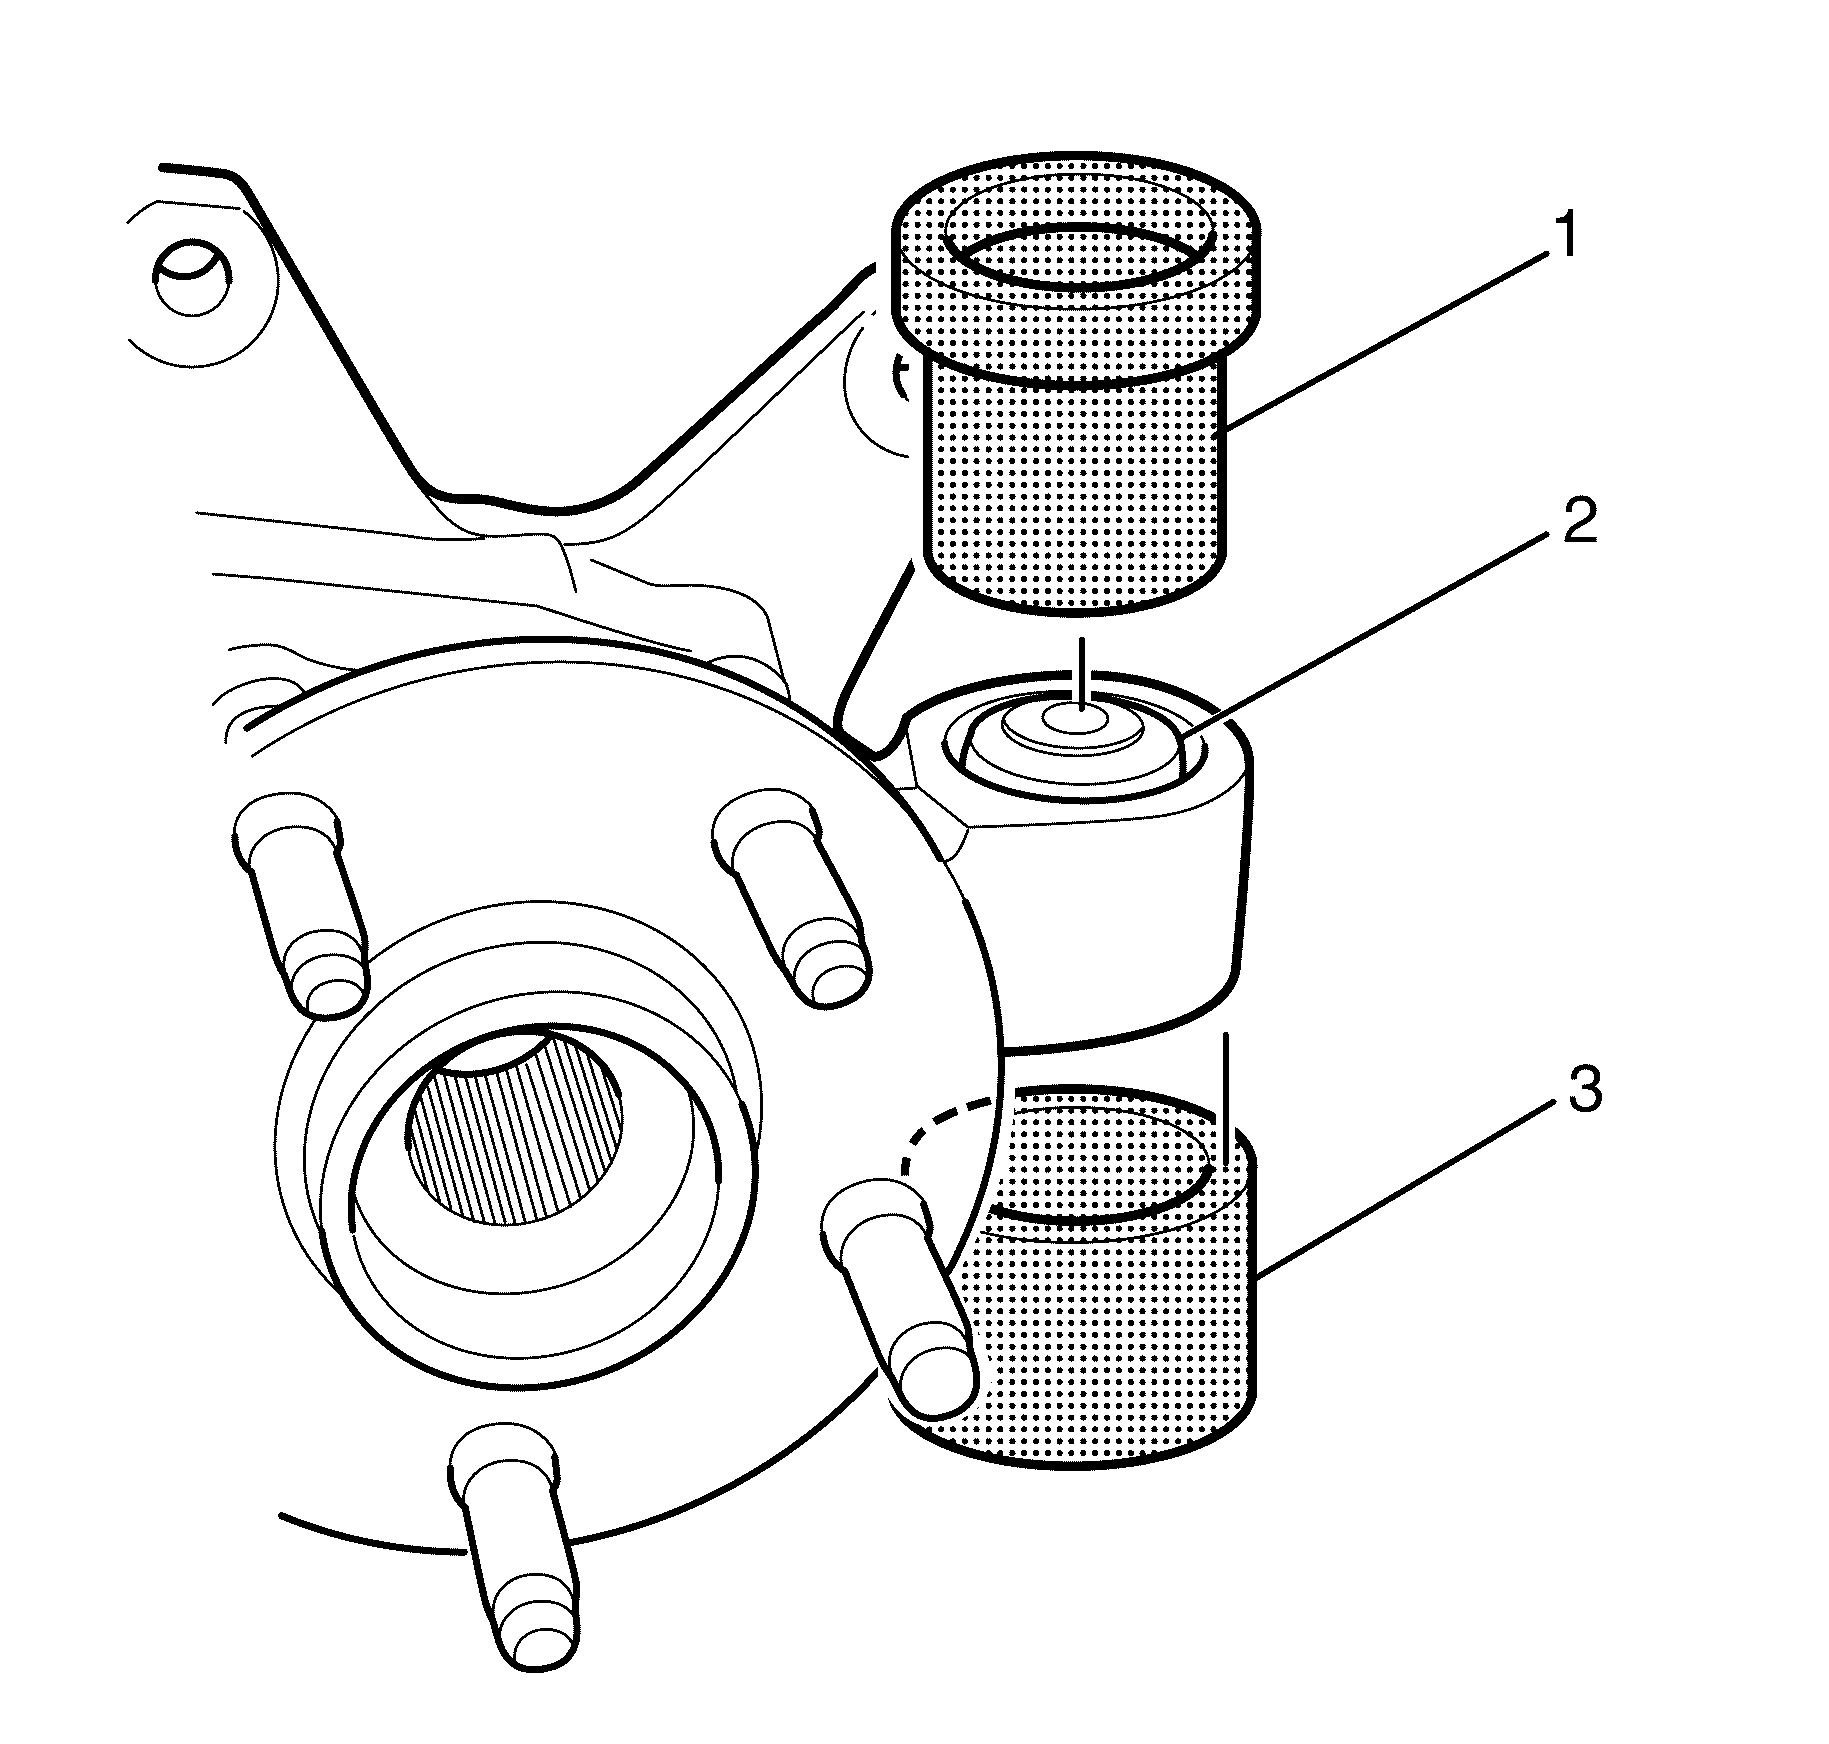
- Remove the upper control arm to knuckle bushing (2) using the KM-619 (1, 3).
- Inspect all parts for wear and damage.
Caution: Refer to Safety Glasses Caution in the Preface section.
Caution: Refer to Vehicle Lifting Caution in the Preface section.

Important: Mark the location of the bolt and nut relative to the upper control arm for correct re-assembly.
Important: Nuts with micro-encapsulated thread sealant must be replaced after removal.
Discard the nut.

Important: It is recommended to observe the orientation and depth of the knuckle to upper control arm bushing (2) with reference to the original position. Adhering to this recommendation will minimize the potential of incorrect knuckle to upper control arm bushing (2) installation.
Installation Procedure
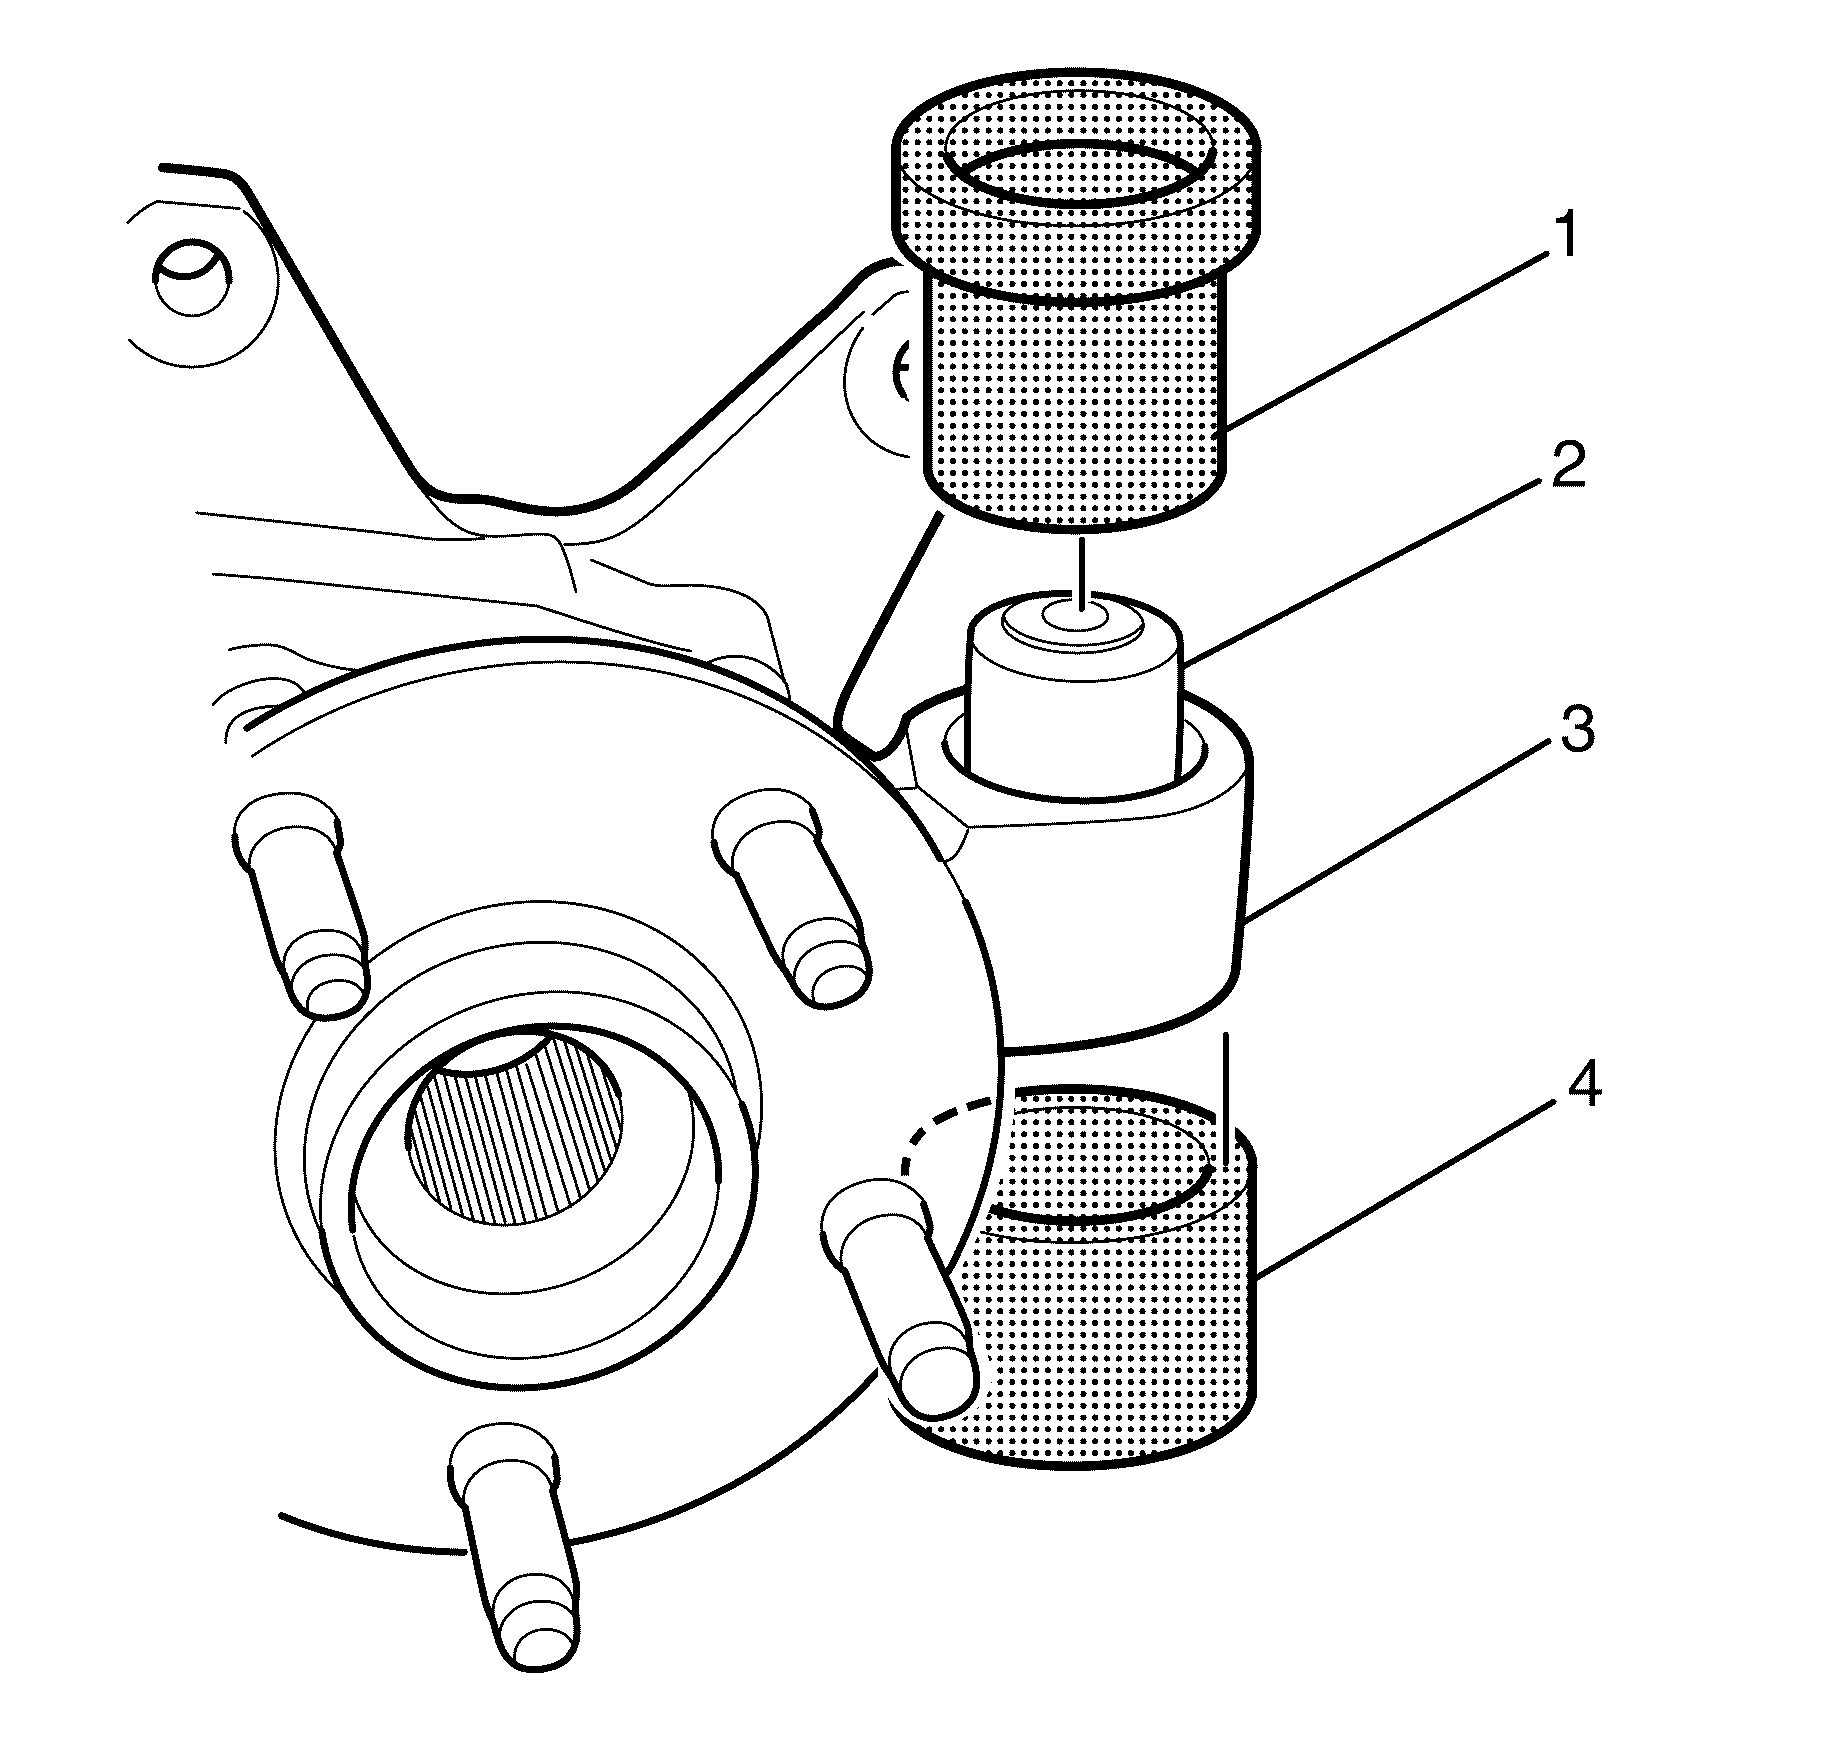
- Install the upper control arm to knuckle bushing (2) to the knuckle (3) using the KM-619 (1, 4).
- Connect the upper control arm (4) to the knuckle (3).
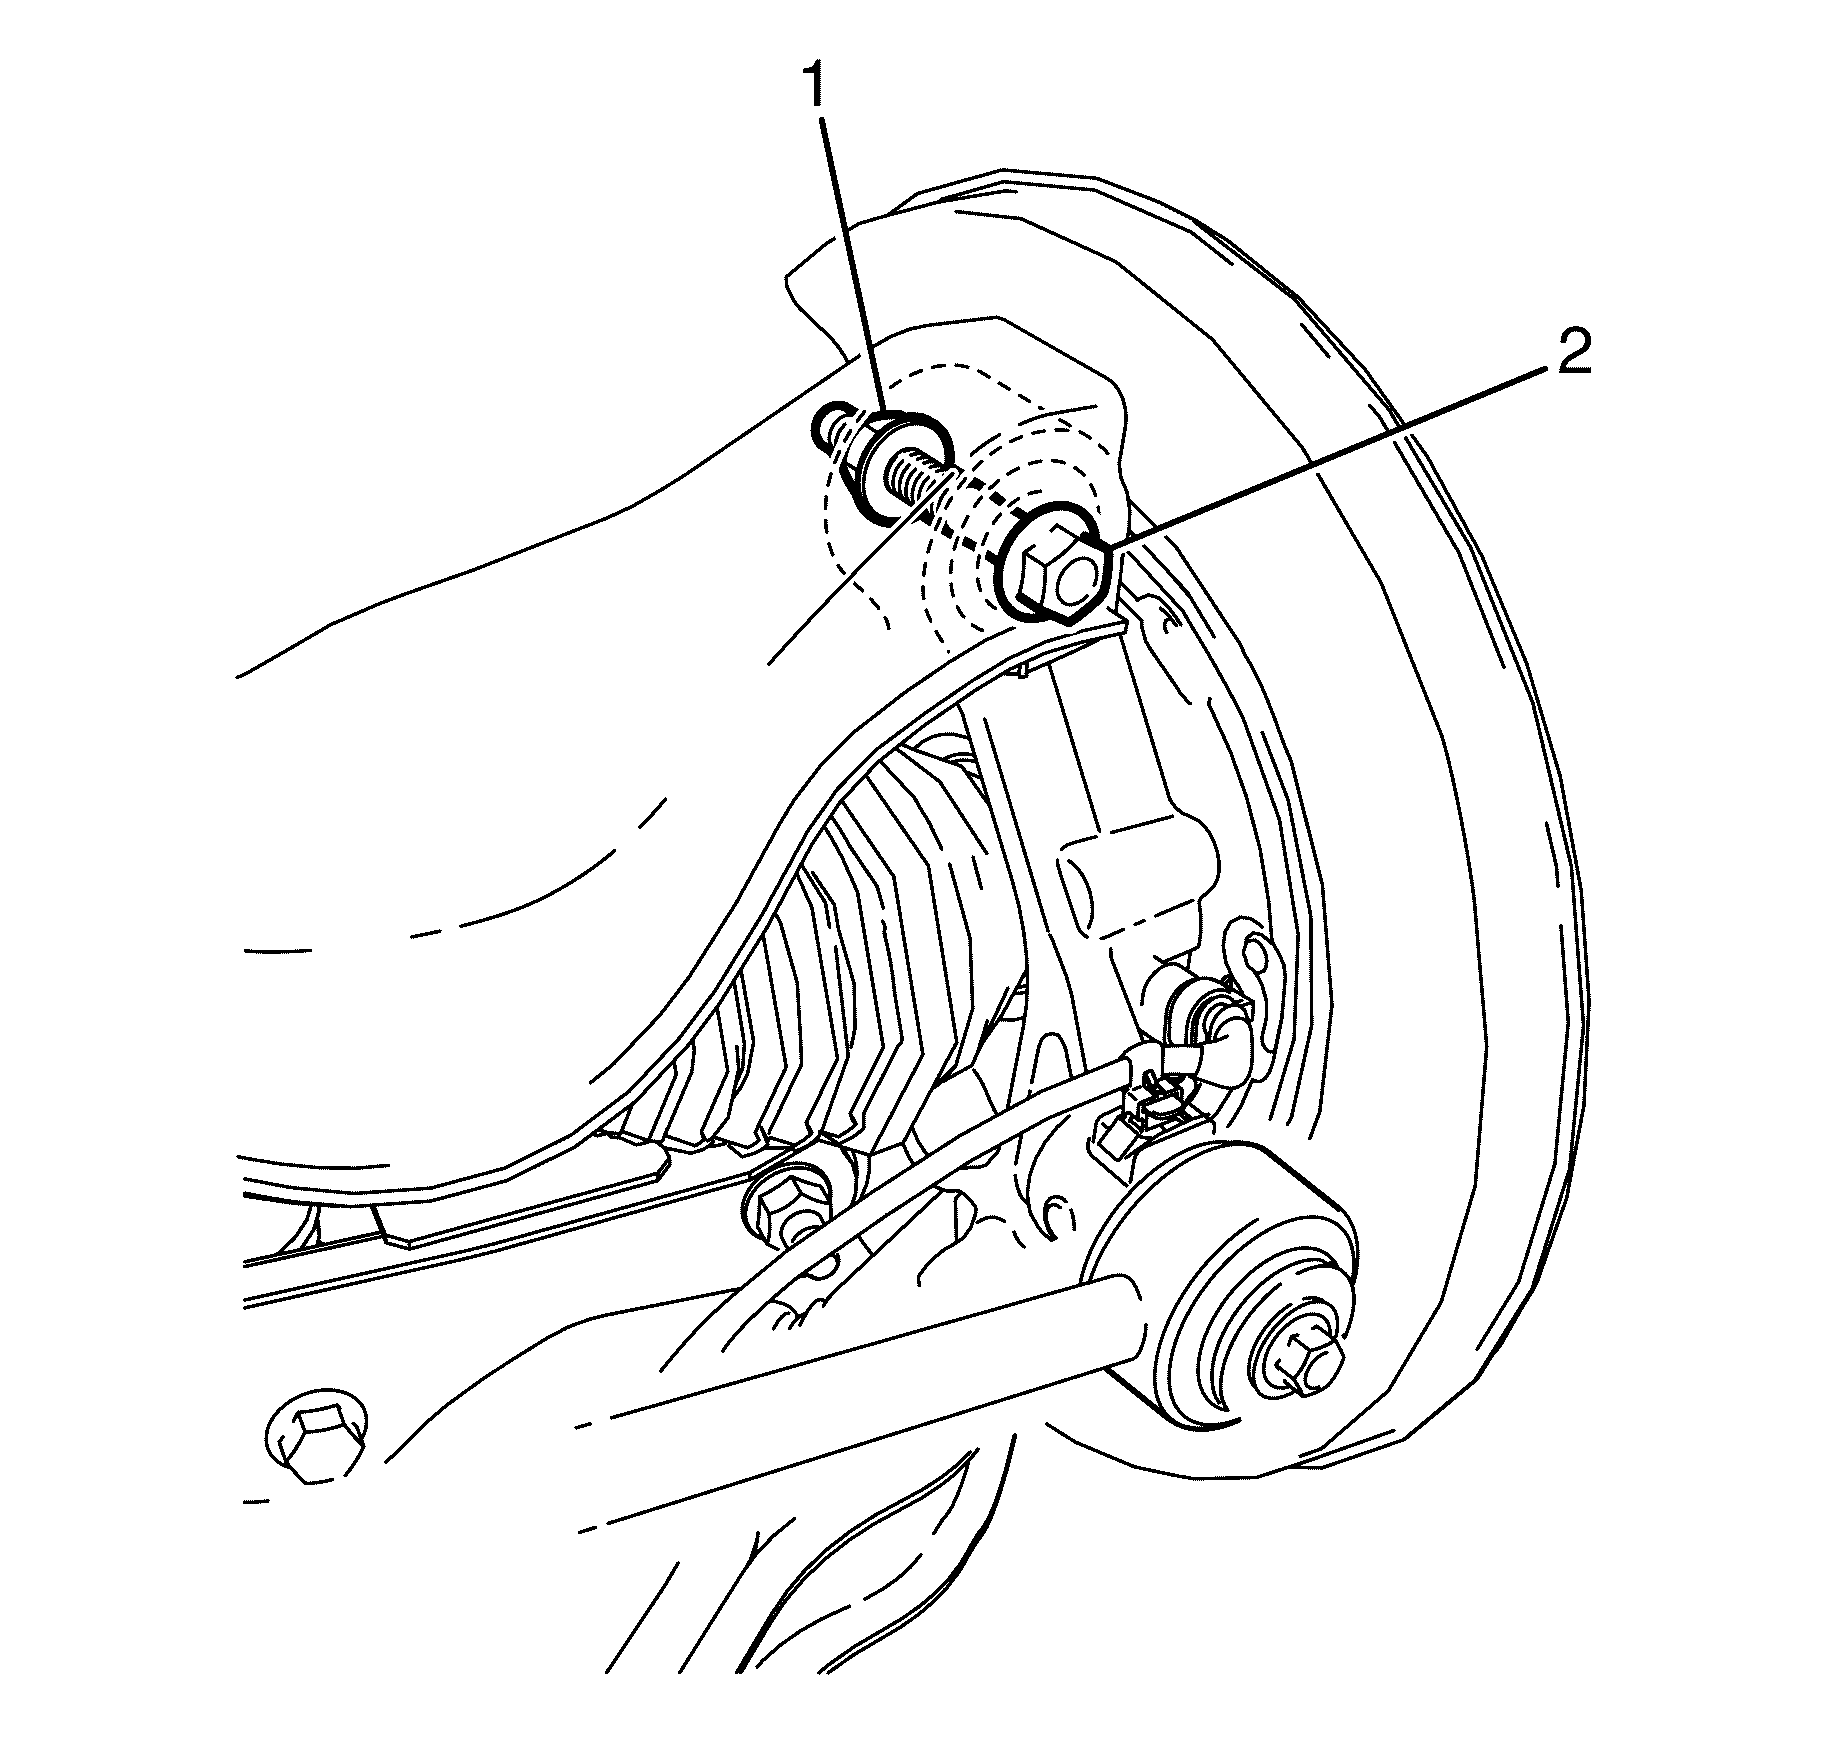
- Install the upper control arm to knuckle retaining bolt (2) and NEW nut (1).
- Remove the safety stands.
- Lower the vehicle to the ground.
- Bounce the vehicle several times to settle the suspension.
- Tighten the upper control arm to knuckle retaining bolt (2) and NEW nut (1).
- Check the vehicle rear wheel alignment and adjust if necessary. Refer to Wheel Alignment Specifications.

Important: Before installing, the upper control arm to knuckle bushing (2) must be correctly aligned and orientated.

Important: The upper control arm to knuckle retaining bolt and nut must not to be fully tightened at this stage.
Do not fully tighten at this stage.
Notice: Refer to Fastener Notice in the Preface section.

Important: Align the mark from bolt to upper control arm made prior to removal.
Important: The weight of the vehicle must be on a level surface and on all four wheels before fully tightening the nuts and bolts.
Tighten
Tighten the bolt and nut to 60 N·m(44 lb ft).
Tighten the bolt and nut to 90 Degrees.
