Removal Procedure
- Raise and support the vehicle. Refer to Lifting and Jacking the Vehicle.
- Remove the front wheel. Refer to Tire and Wheel Removal and Installation.
- Remove the front strut assembly. Refer to Strut Assembly Replacement.
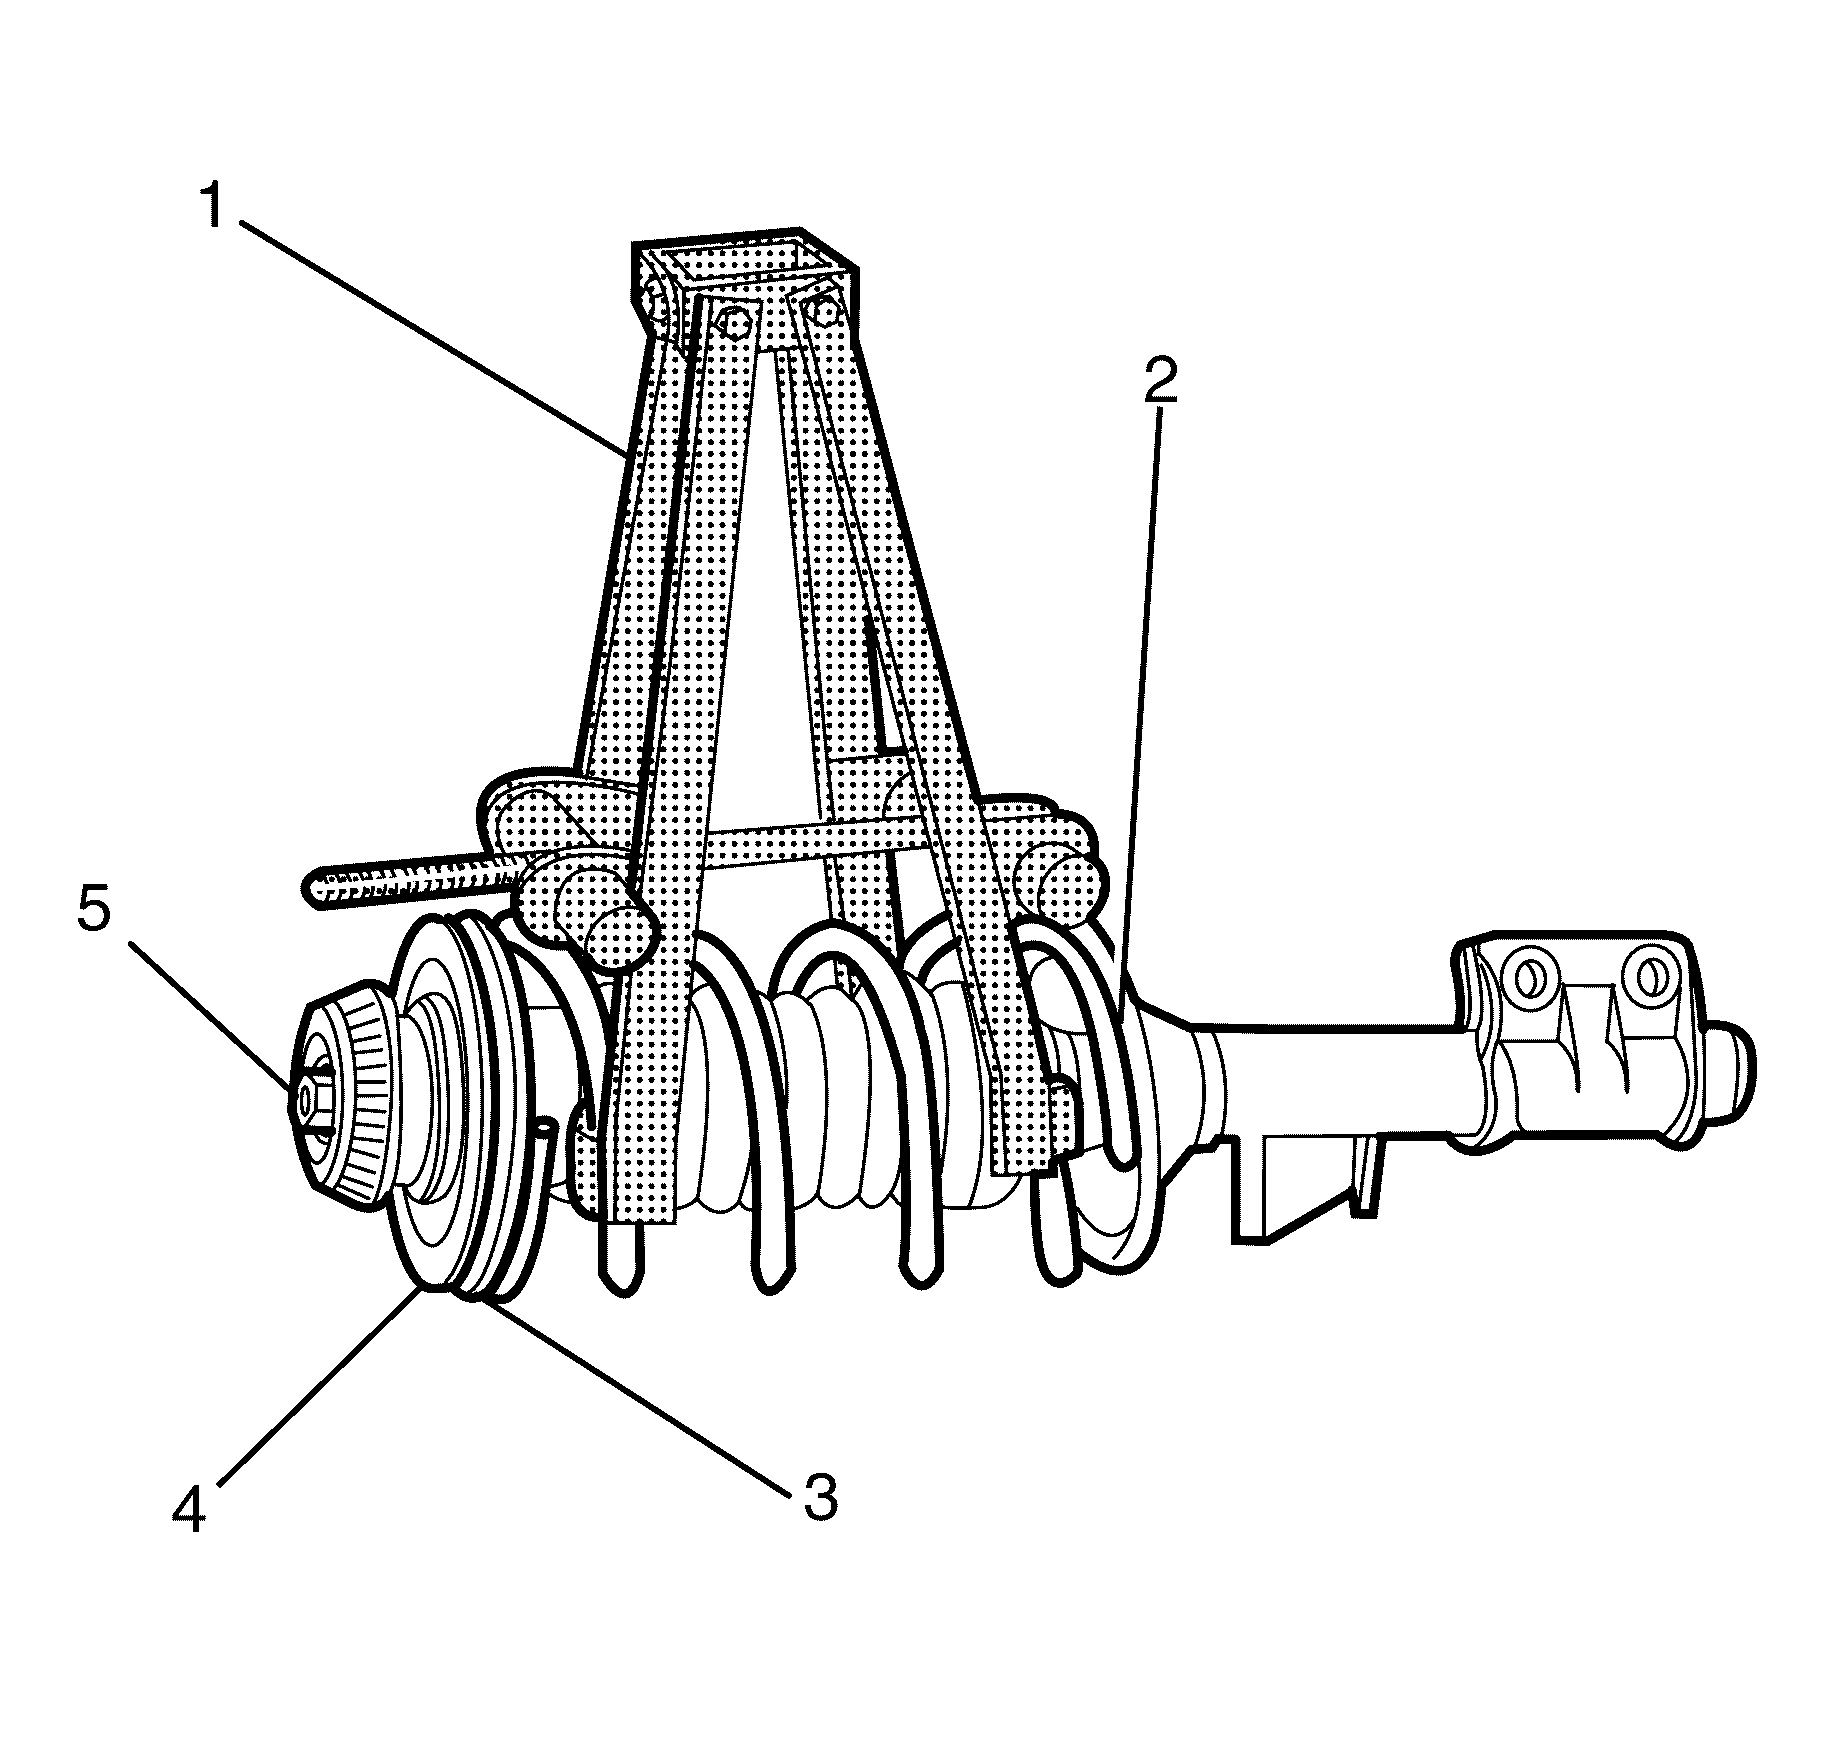
- Install the spring compressor (1) on to the front coil spring (2), make sure the hooks are seated on the coil spring (2) correctly.
- Mark the coil spring seat in relation to the strut unit.
- Compress the coil spring (2) until the coil spring insulator (4) has clearance at the coil spring seat (3).
- Remove the strut assembly retaining nut (1).
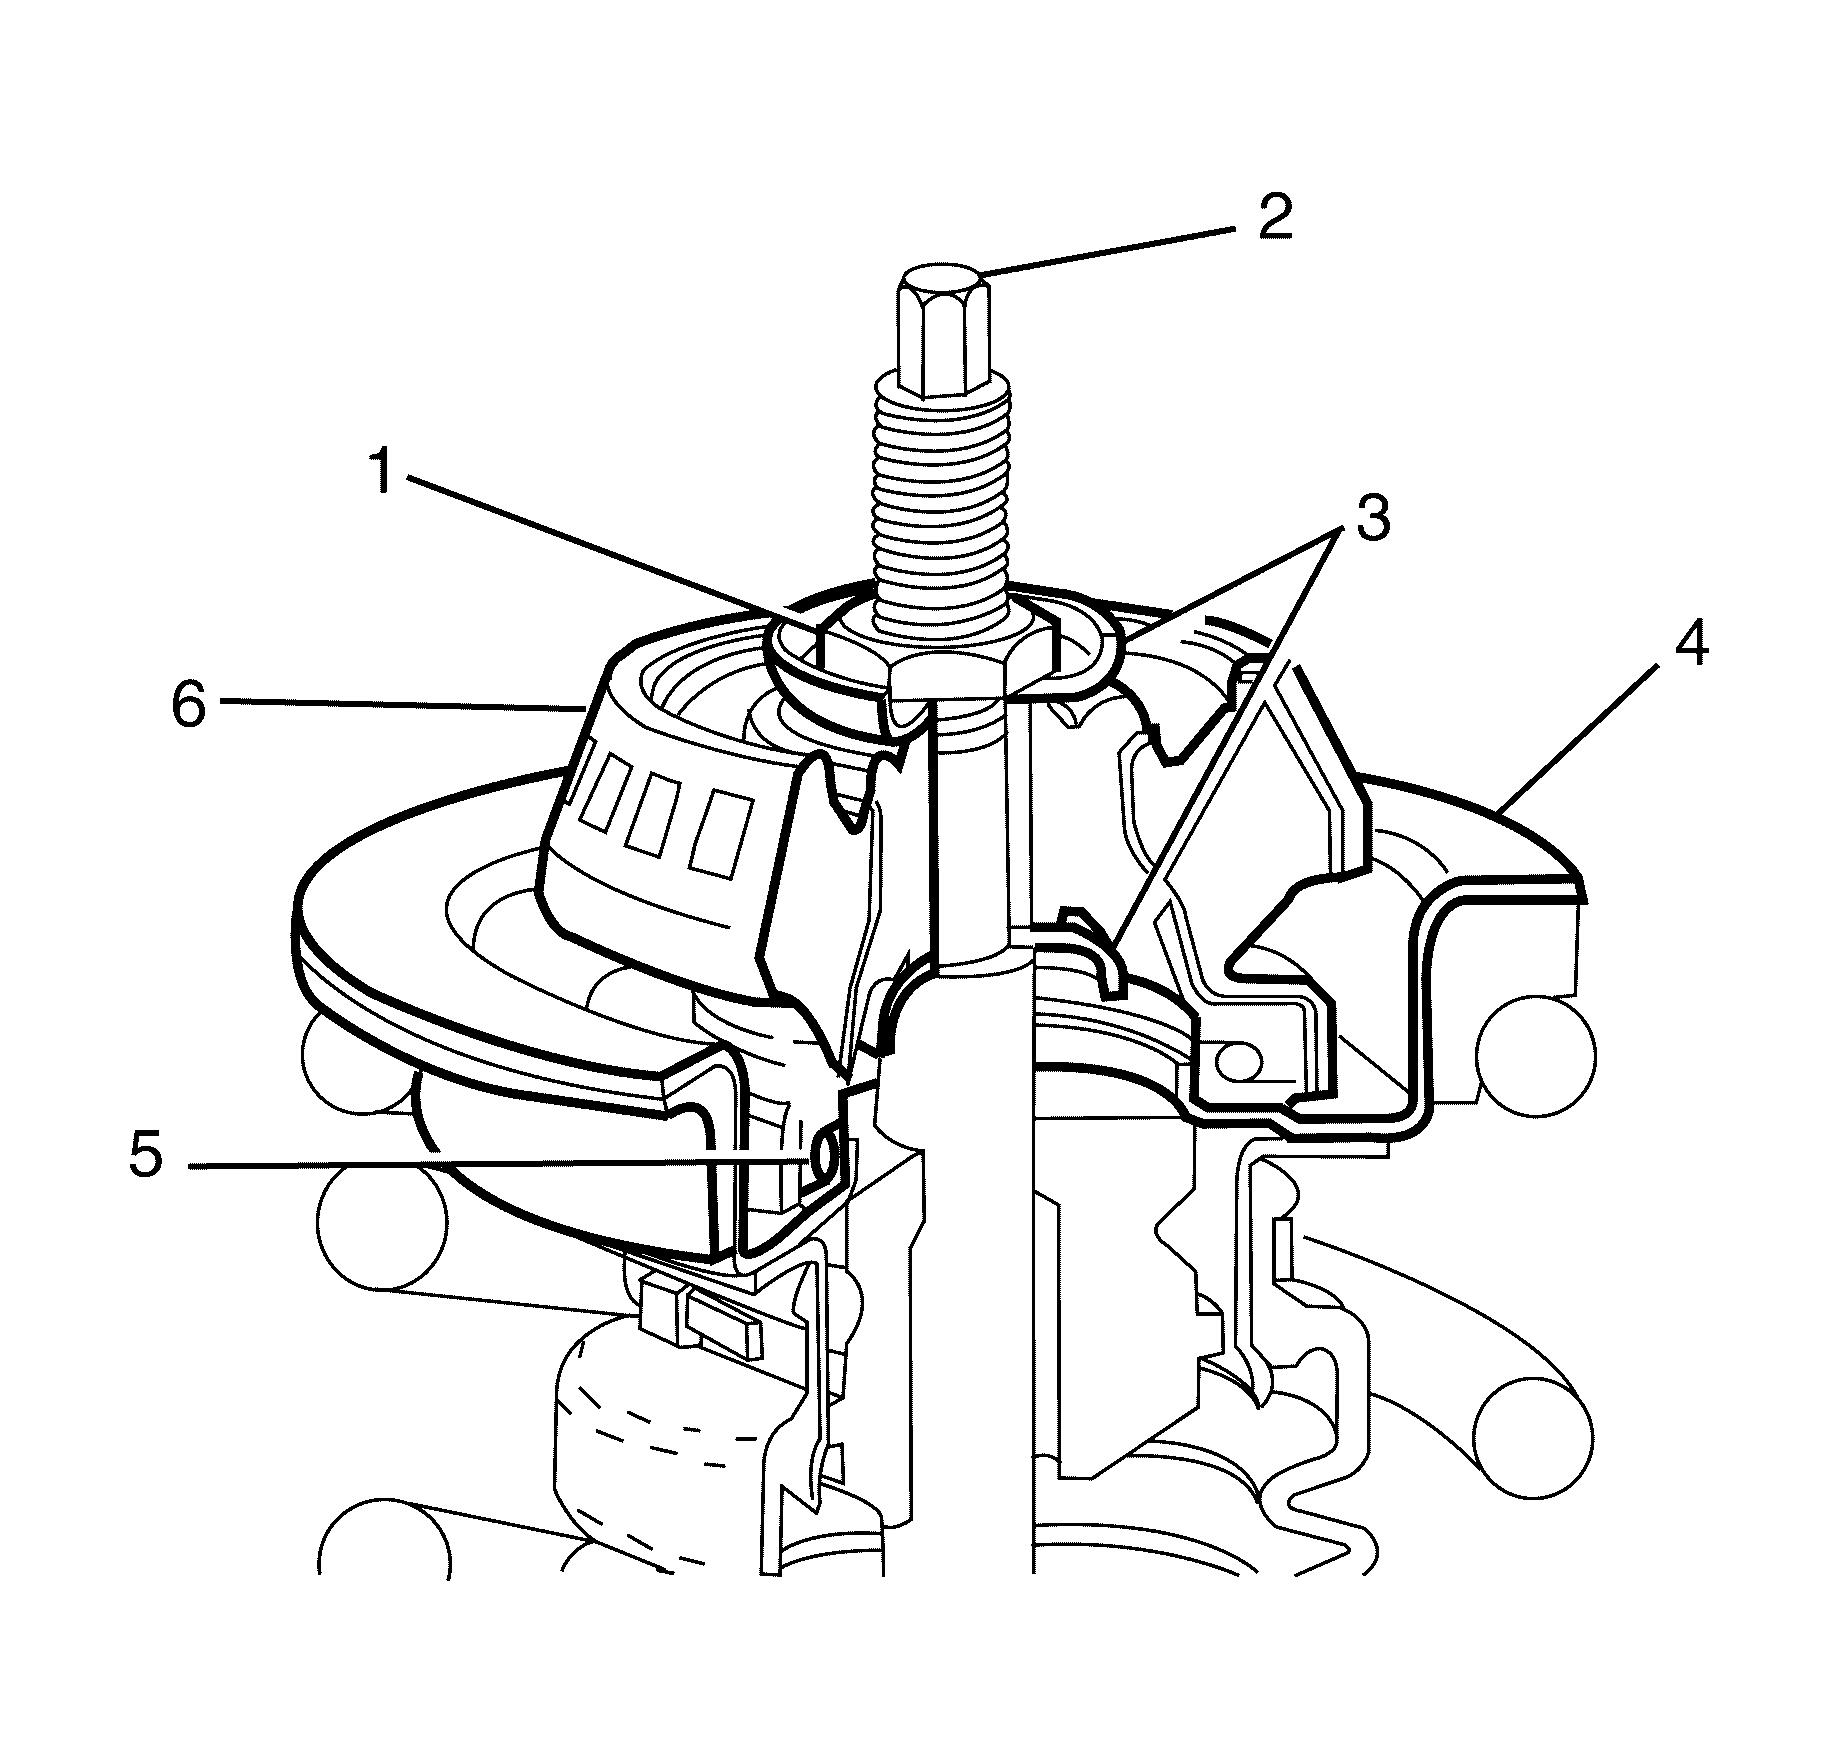
- Remove the strut assembly support mount (6), bearing (5) and the two washers (3) on both sides of the bearing.
- Inspect all parts for wear and damage.
Caution: Refer to Safety Glasses Caution in the Preface section.
Caution: Refer to Vehicle Lifting Caution in the Preface section.
Caution: Refer to General Repair Instructions in the Preface section.


Important: Nuts with micro-encapsulated thread sealant must be discarded after removal.
Important: Use the hex on the strut unit piston shaft to hold the strut unit piston shaft (2) while loosening the strut assembly retaining nut (1).
Important: Special attention must be paid to the orientation of the cup washers (3) in relation to strut assembly support mount (6).
Important: Special attention must be paid to the orientation of the strut assembly support bearing (5) in relation to the coil spring seat (4).
Important: The strut assembly support bearing (5) is sealed for life. If considered to be faulty, the bearing must be replaced as an assembly.
Installation Procedure
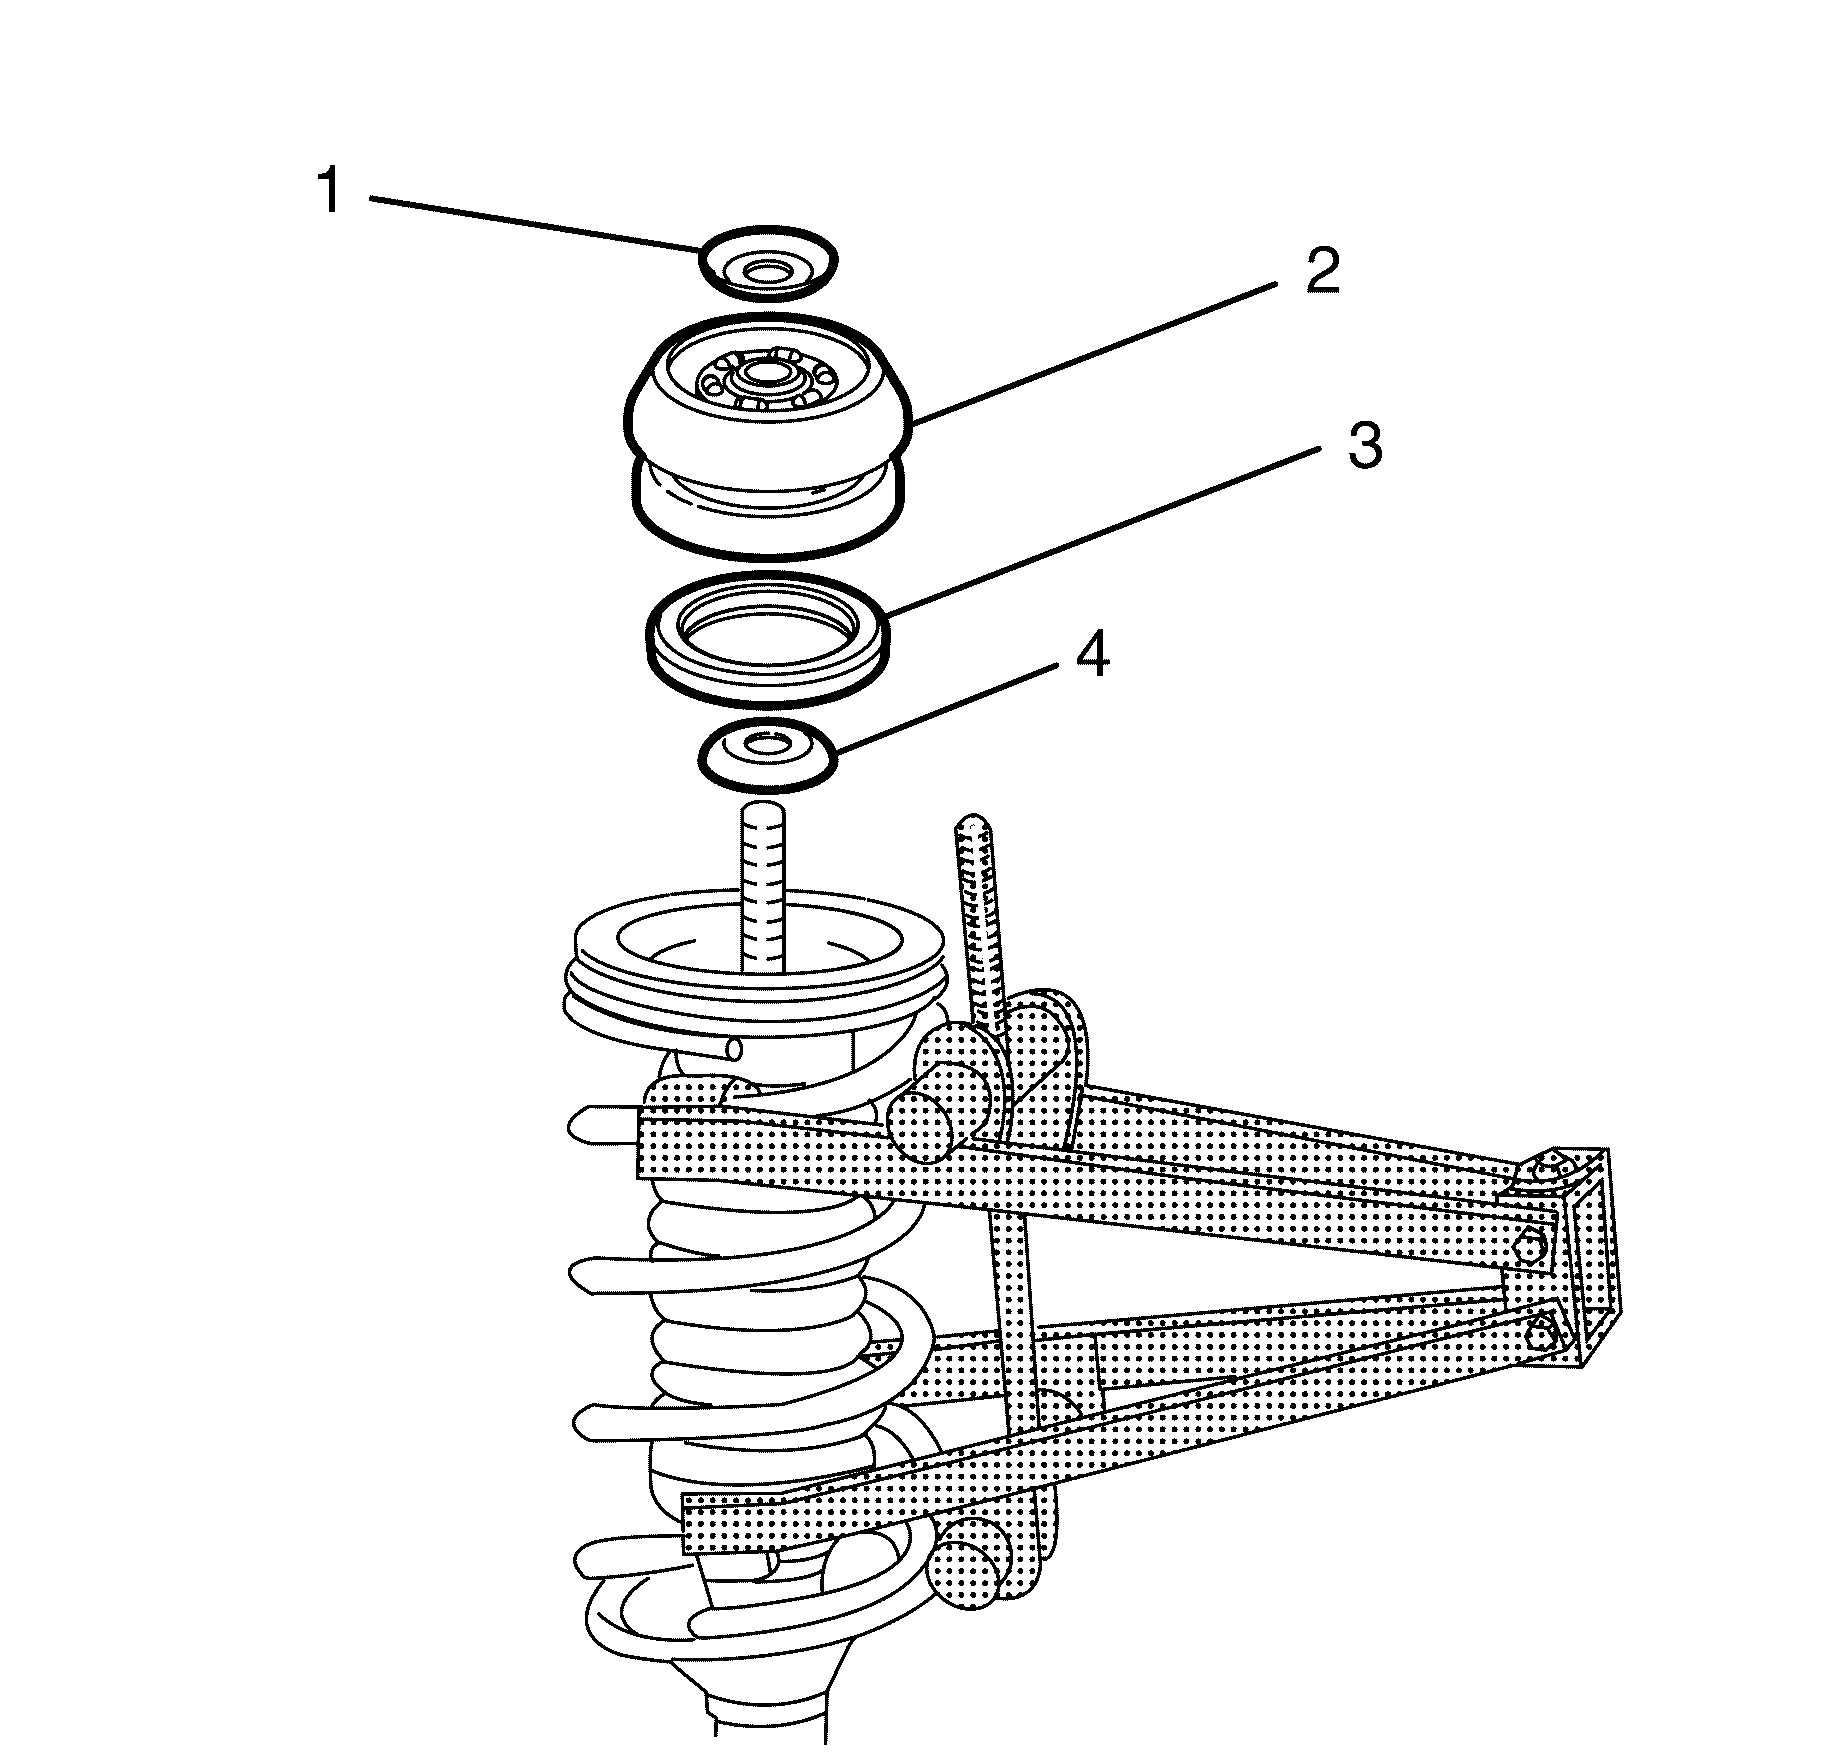
- Install the lower cup washer (4) with the dished side facing downward.
- Install the strut assembly support bearing (3) with the same orientation as noted on removal.
- Install the strut assembly support mount (2).
- Install the upper cup washer (1) with the dished side facing upward.
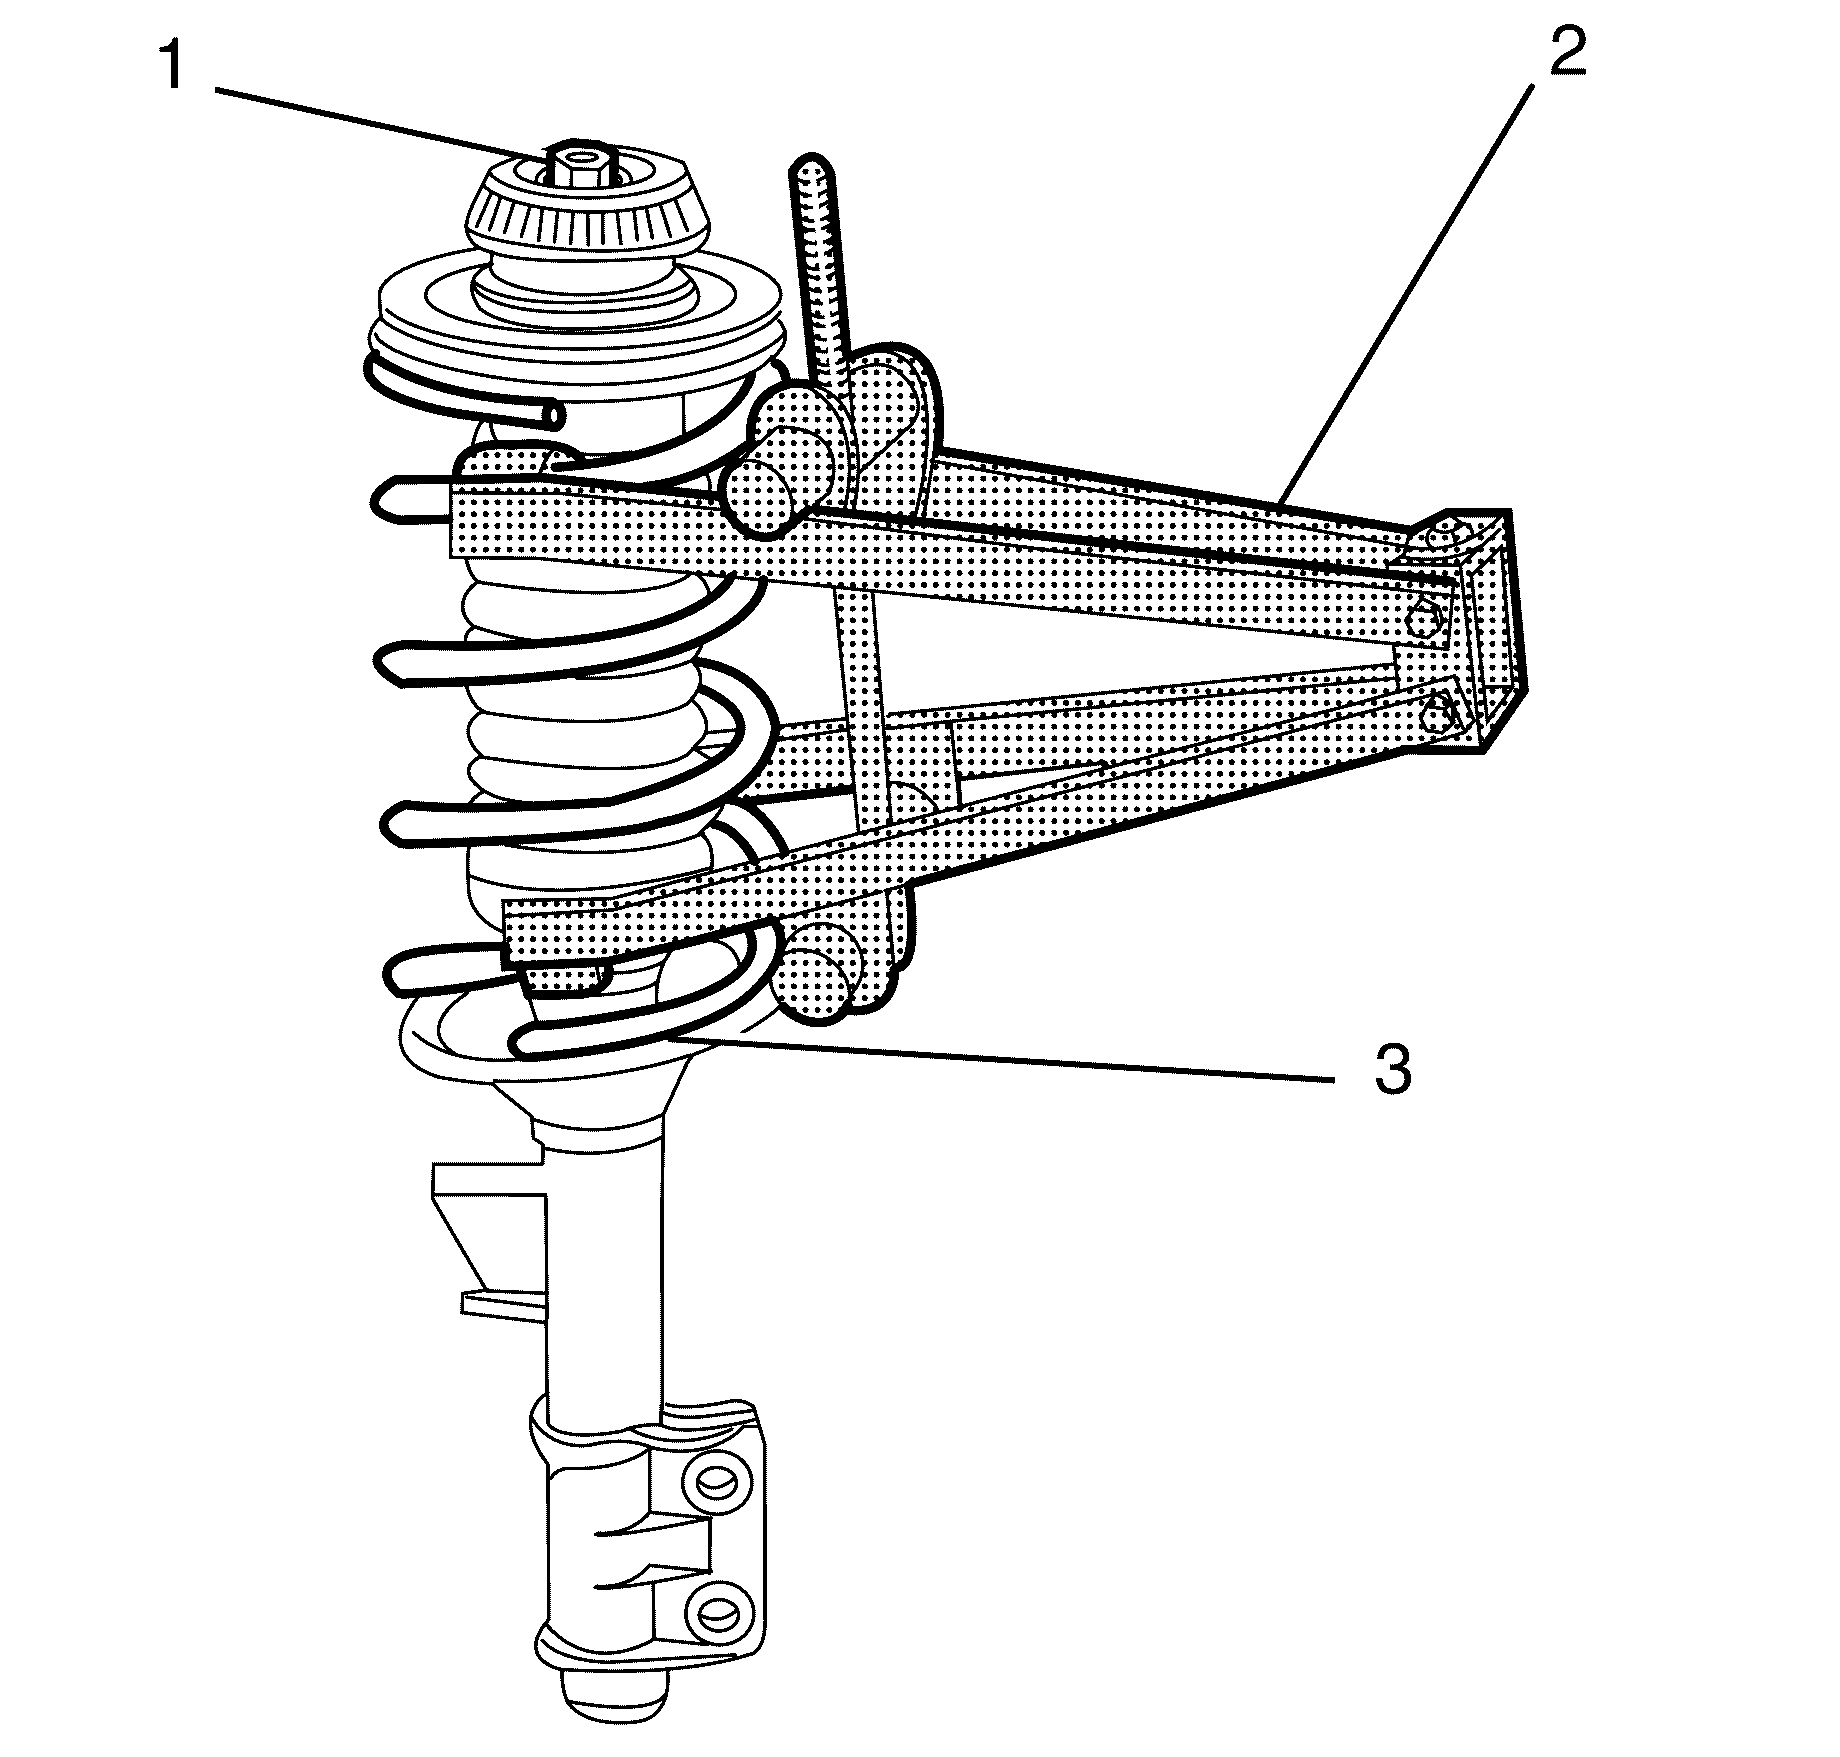
- Install the strut assembly retaining nut (1).
- Remove the spring compressor (2) from the front coil spring (3).
- Install the front strut assembly. Refer to Strut Assembly Replacement.
- Install the front wheel. Refer to Tire and Wheel Removal and Installation.
- Remove the safety stands.
- Lower the vehicle to the ground.

Important: Before installing the bearing, the bearing must be properly aligned and orientated.
Notice: Refer to Fastener Notice in the Preface section.

Important: Align the mark on the coil spring seat with the strut unit before tightening the strut assembly retaining nut (1).
Tighten
Tighten the nut to 75 N·m (55 lb ft).
