Removal Procedure
- Raise and support the vehicle. Refer to Lifting and Jacking the Vehicle .
- Remove the rear wheels. Refer to Tire and Wheel Removal and Installation .
- Remove the rear brake caliper and brake disc. Refer to Rear Brake Rotor Replacement .
- Remove the rear wheel hub and bearing assembly. Refer to Rear Wheel Bearing and Hub Replacement .
- Rotate the park brake adjusting nut until all park brake shoe adjustment has been removed.
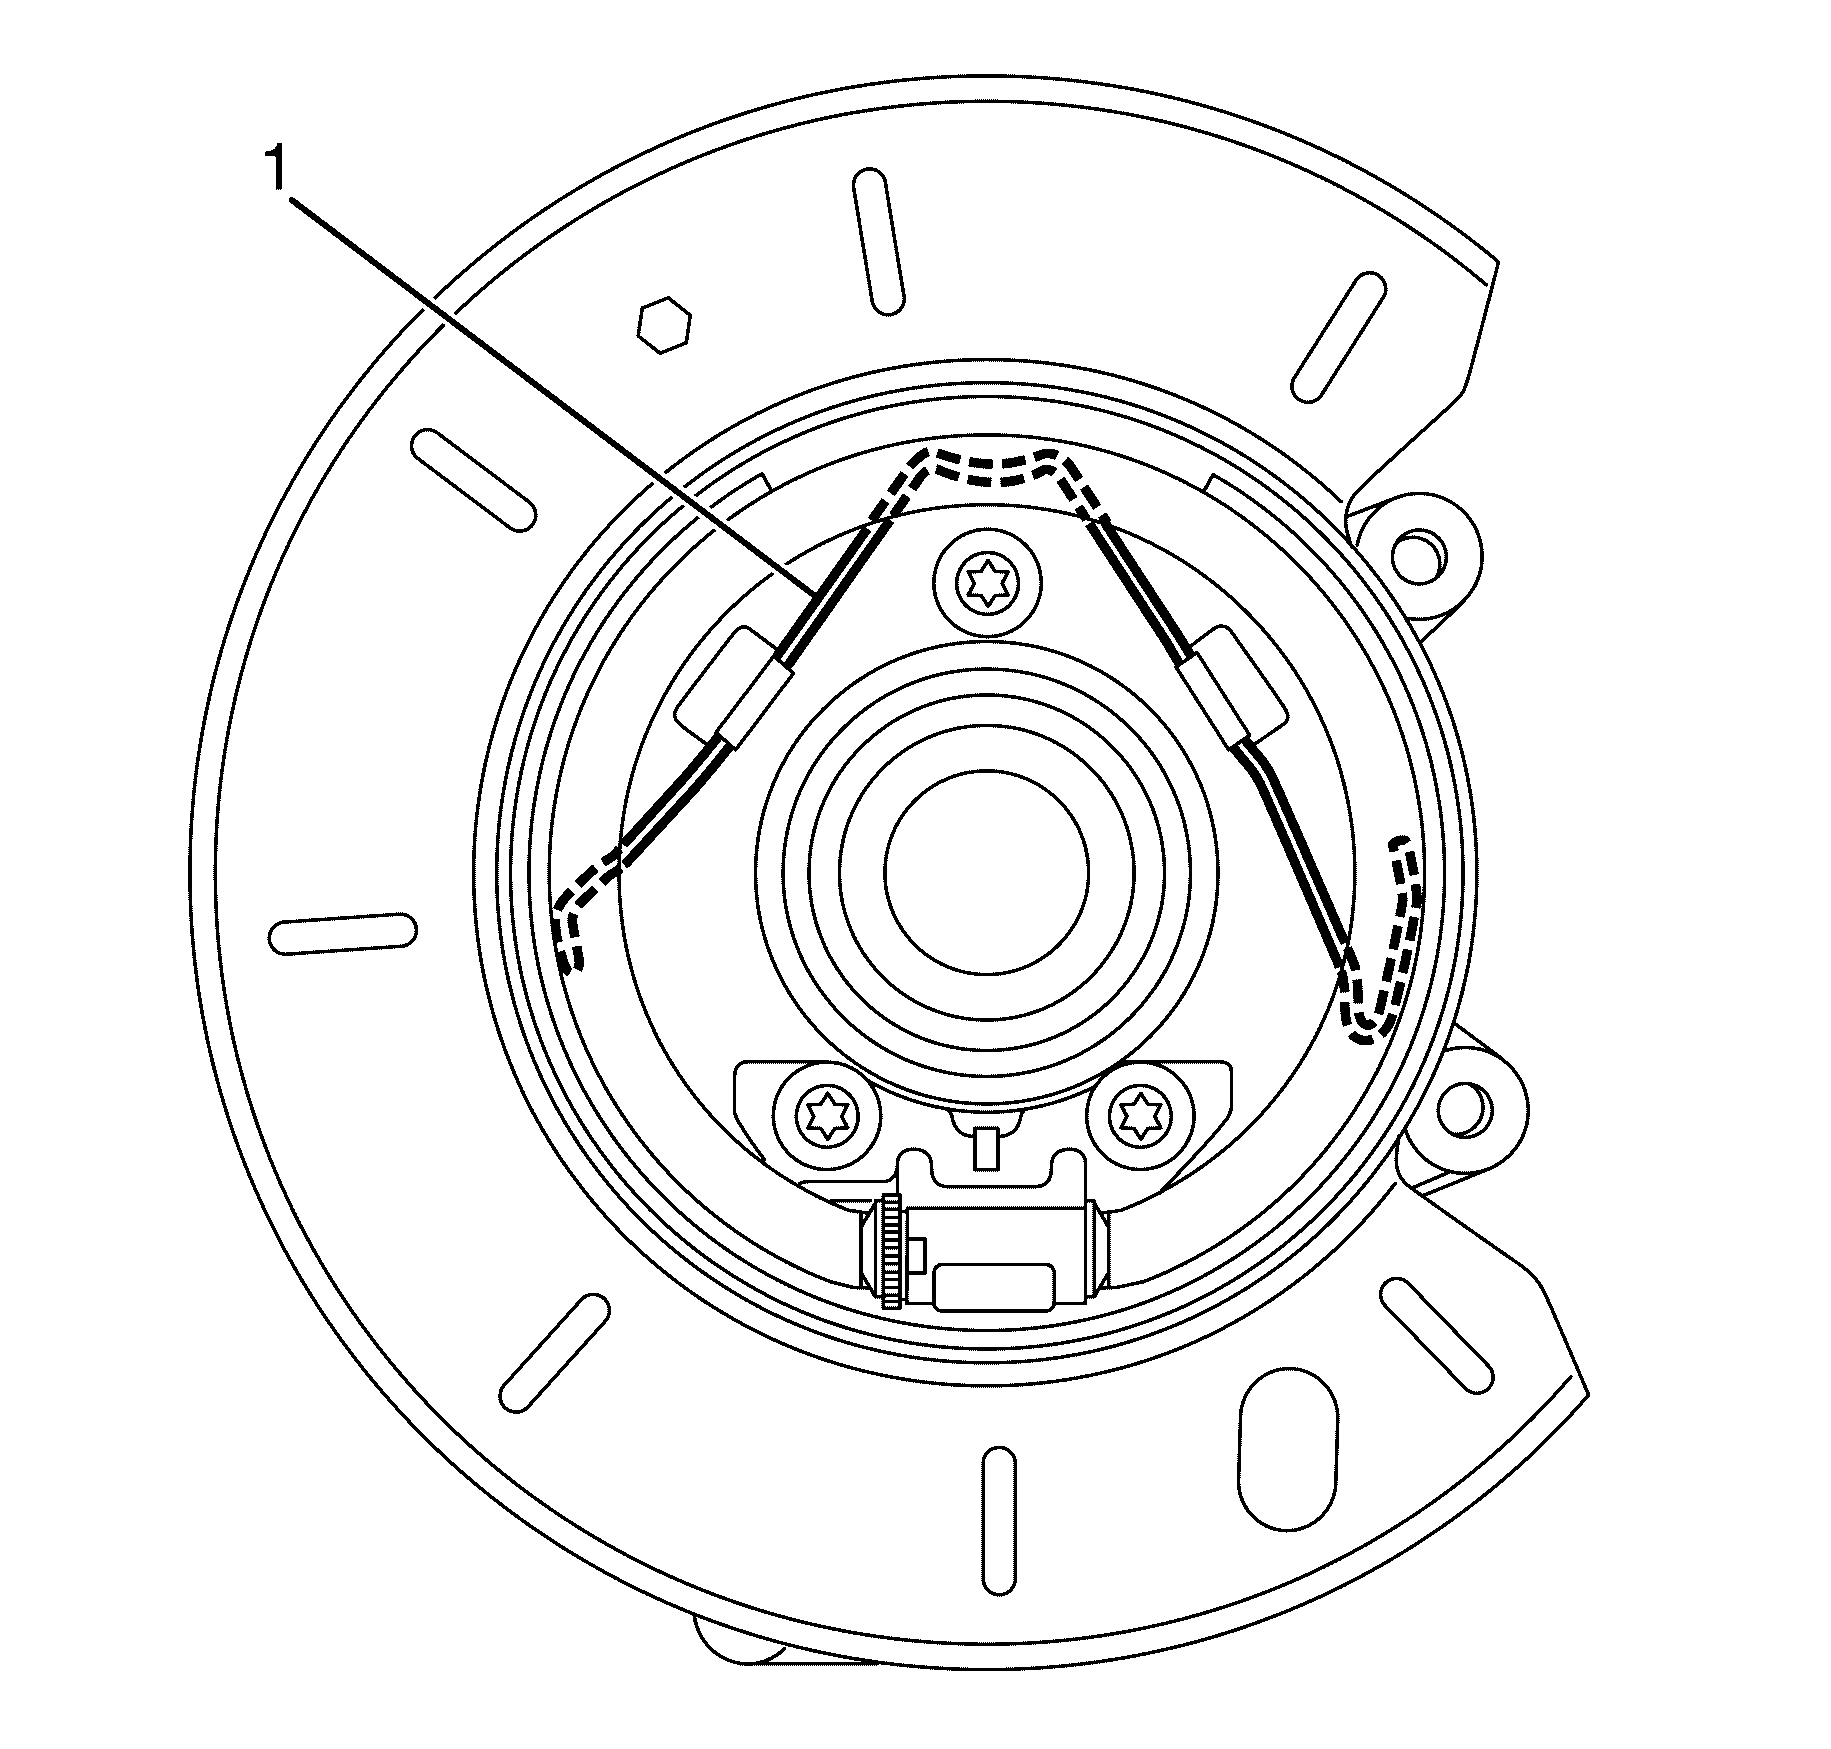
- Remove the park brake shoe retaining spring (1).
- Detach the park brake shoe (1) from the actuator assembly (2).
- Remove the park brake shoe (1).
- Remove the actuator assembly / backing plate to knuckle retaining bolts (1).
- Remove the actuator assembly (3) from the backing plate (2).
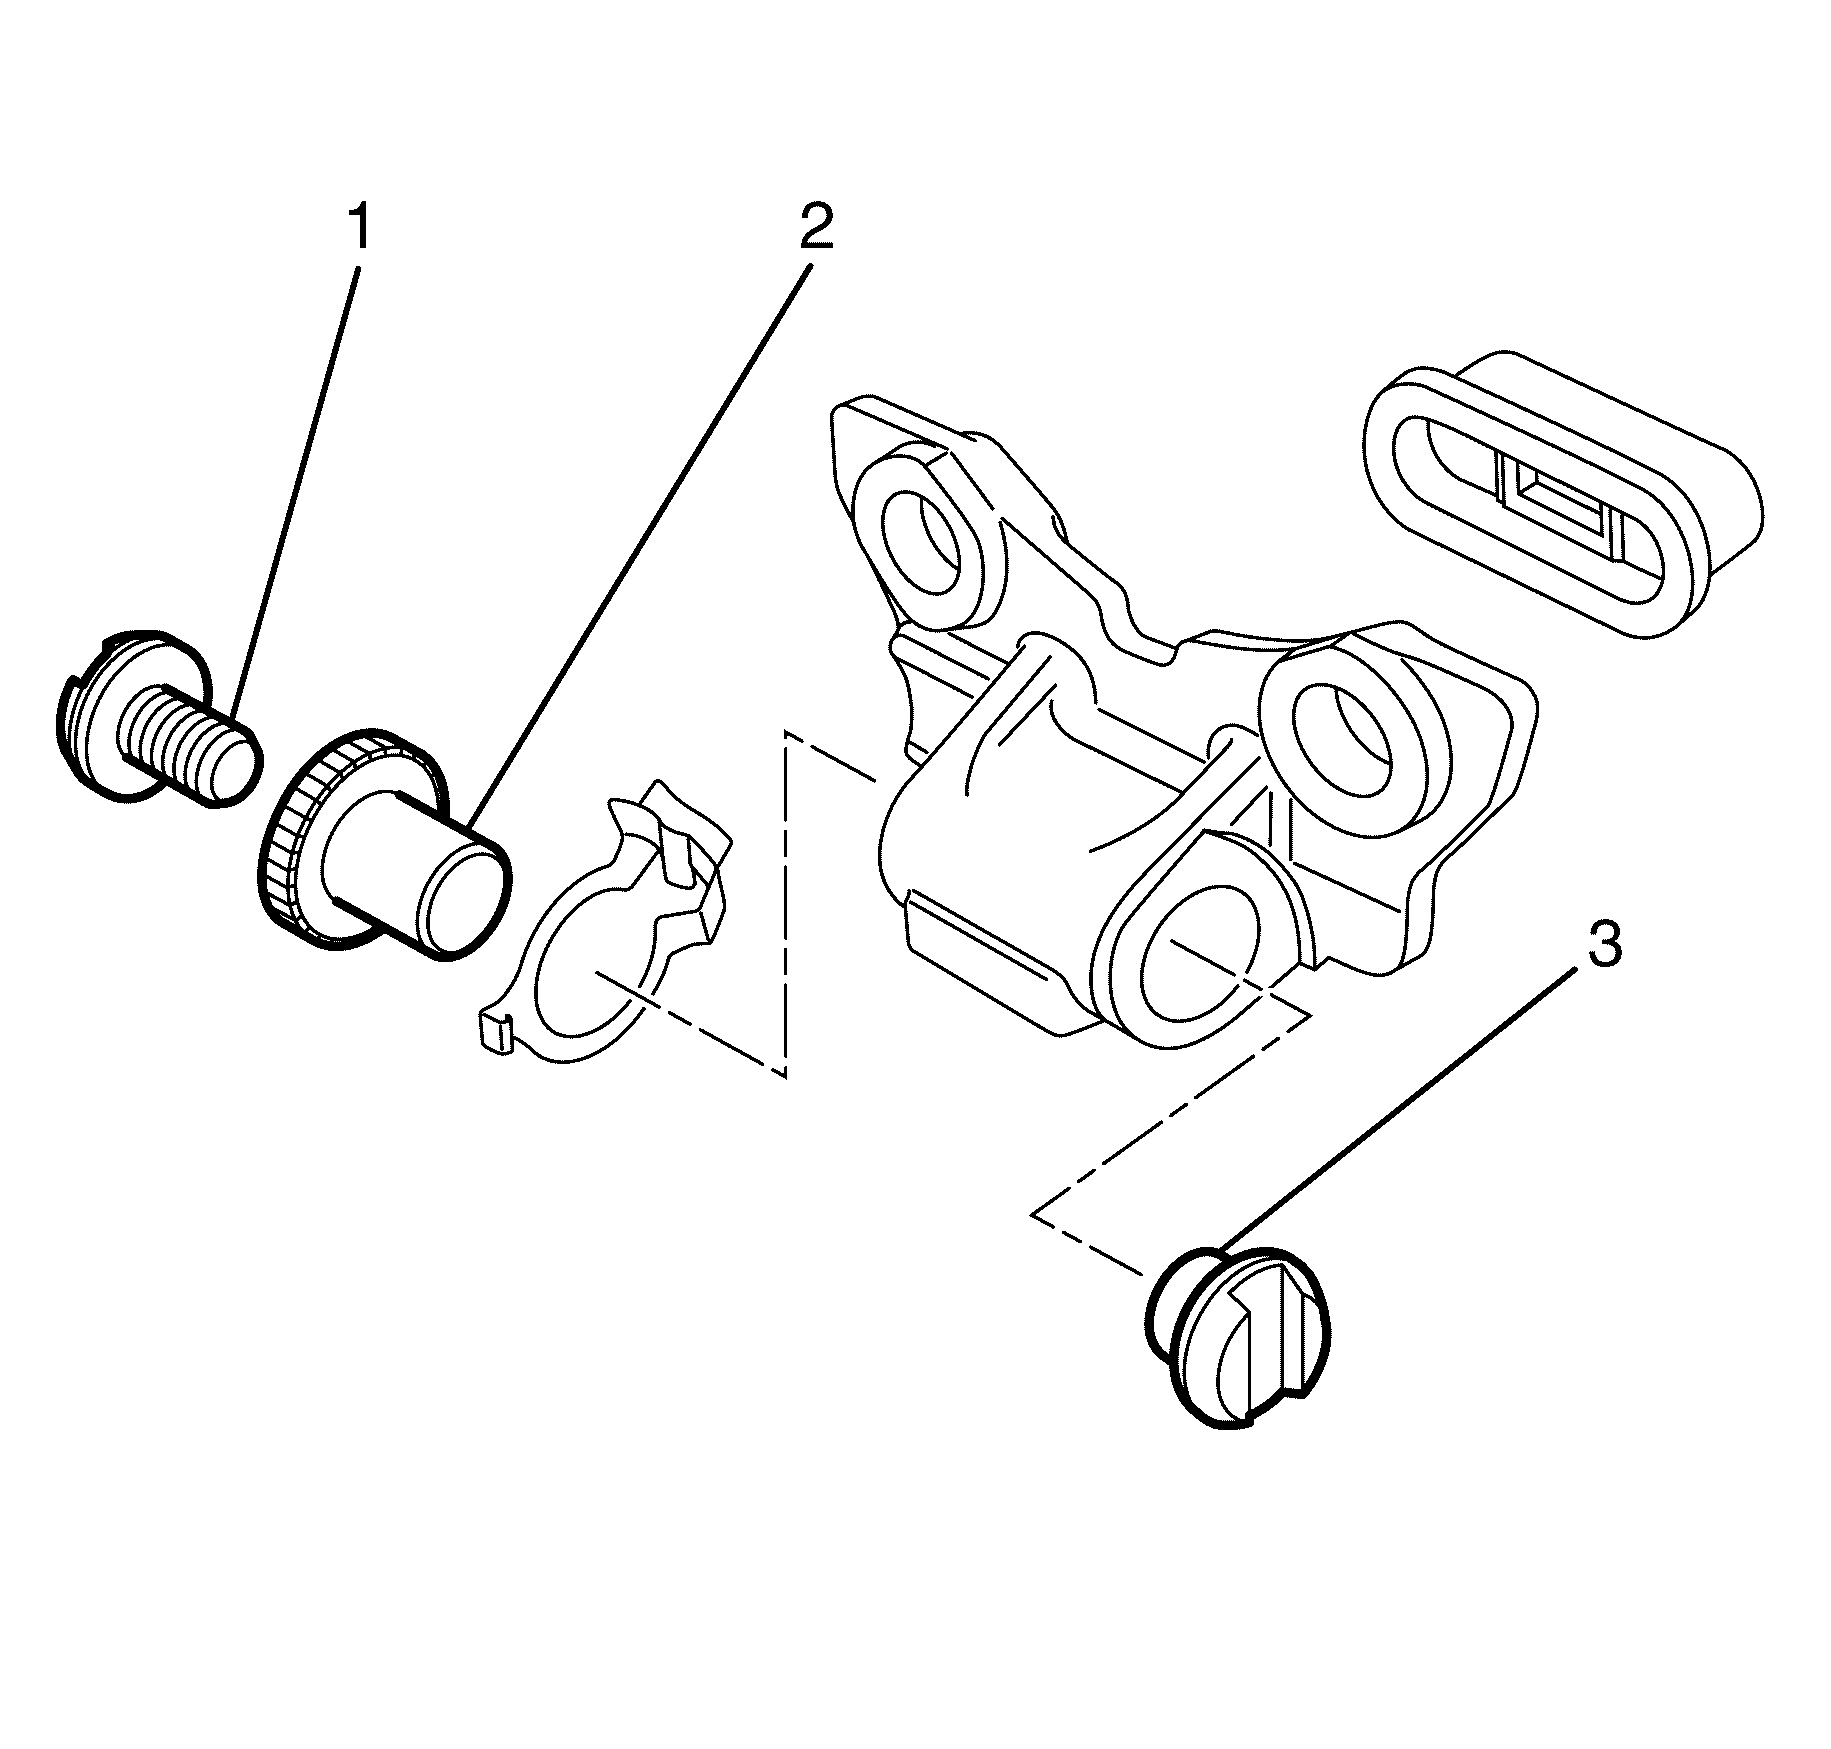
- Remove the adjuster nut (2) from the abutment plate (3).
- Remove the adjustment screw (1) from the adjuster nut (2).
- Remove the tappet (5) from the abutment plate (3).
- Remove the adjustment pawl (6).
- Remove the dust cover (4) from the abutment plate (3).
Caution: Refer to Safety Glasses Caution in the Preface section.
Caution: Refer to Vehicle Lifting Caution in the Preface section.
Caution: Refer to Brake Dust Caution in the Preface section.
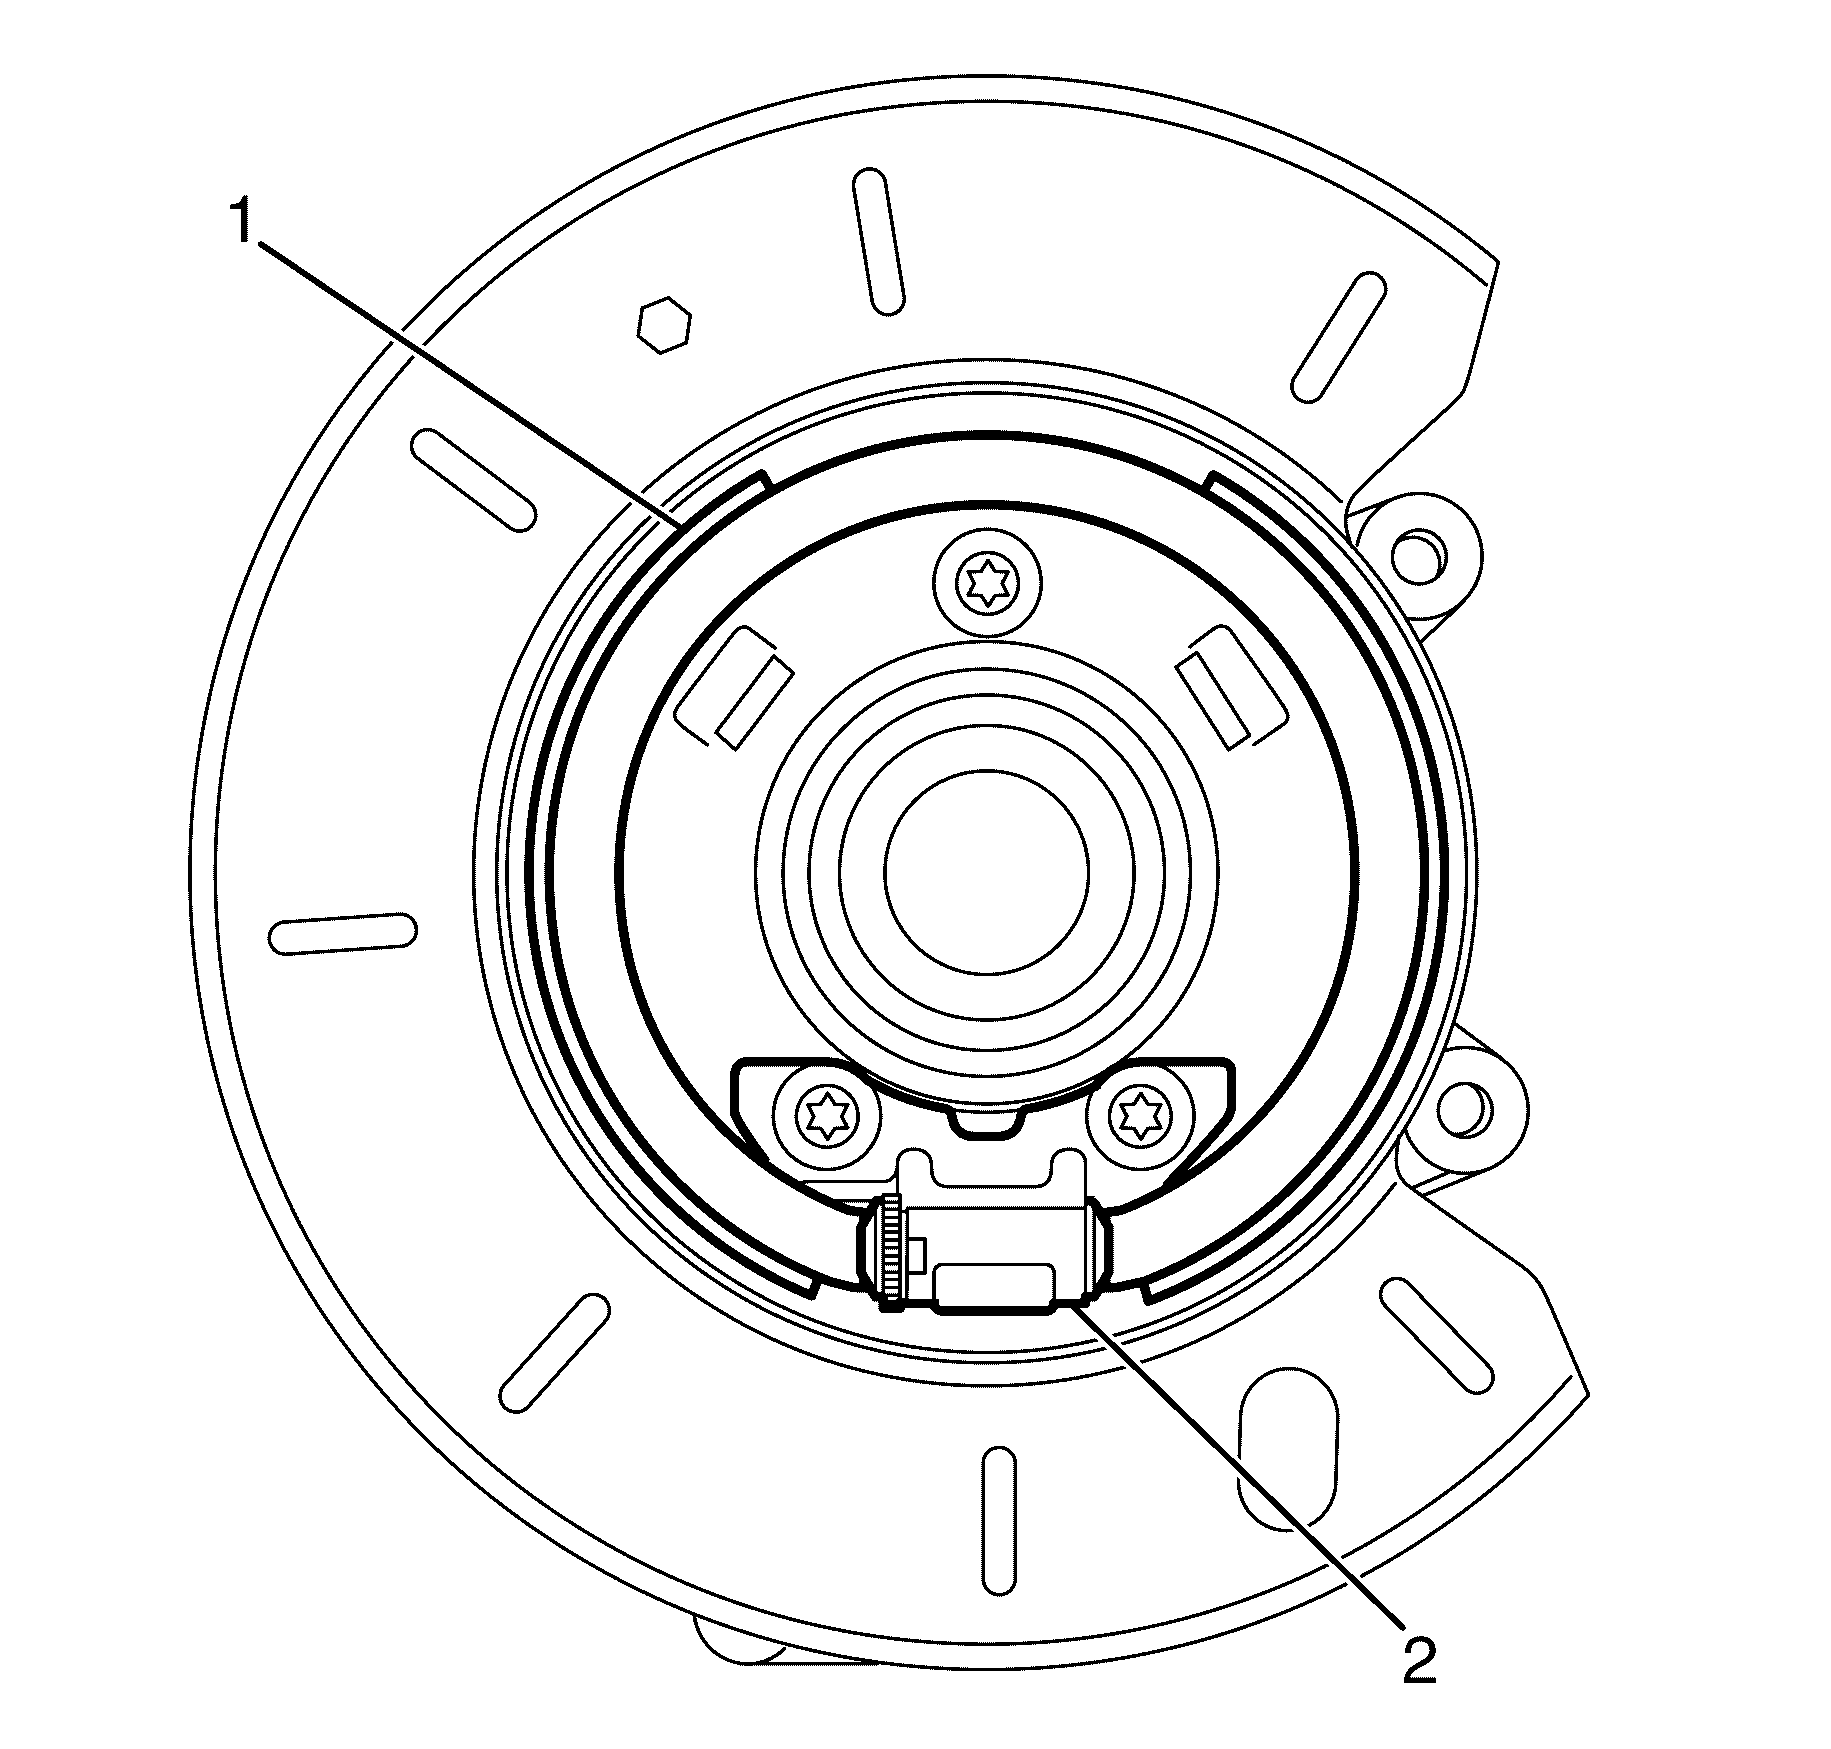
Important: Detach the park brake shoe (1) from the actuator assembly (2) by grasping the shoe and pushing upwards.
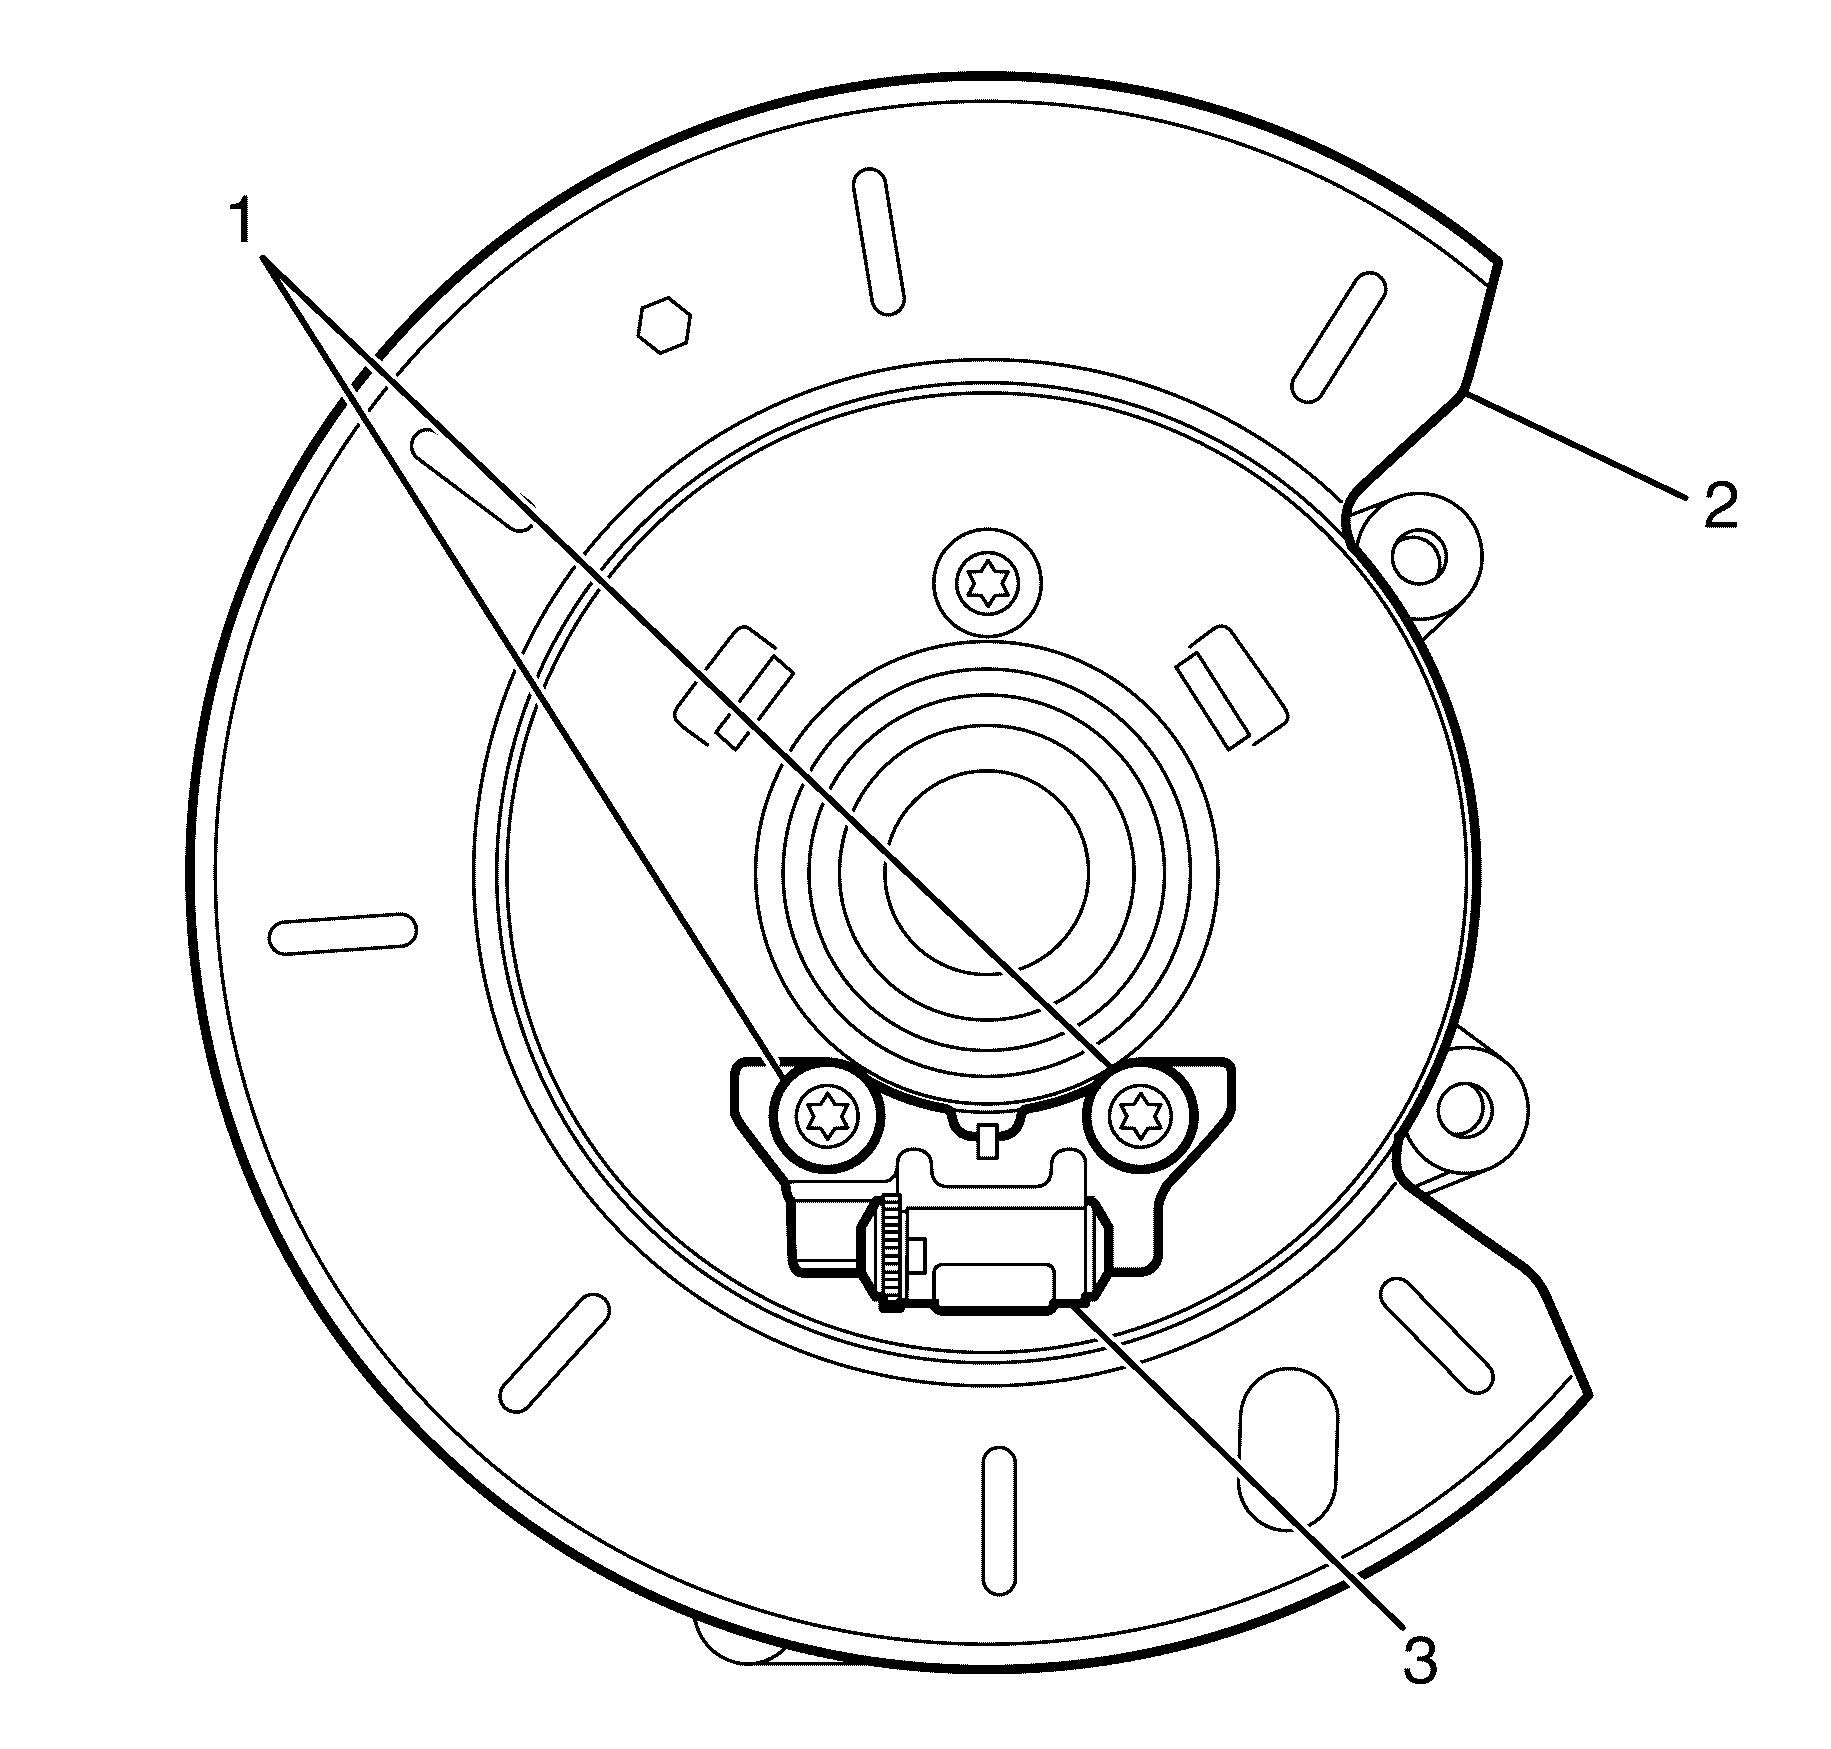
Important: Slide the actuator assembly (3) downwards to detach the actuator assembly (3) from the locating tab on the backing plate (2).
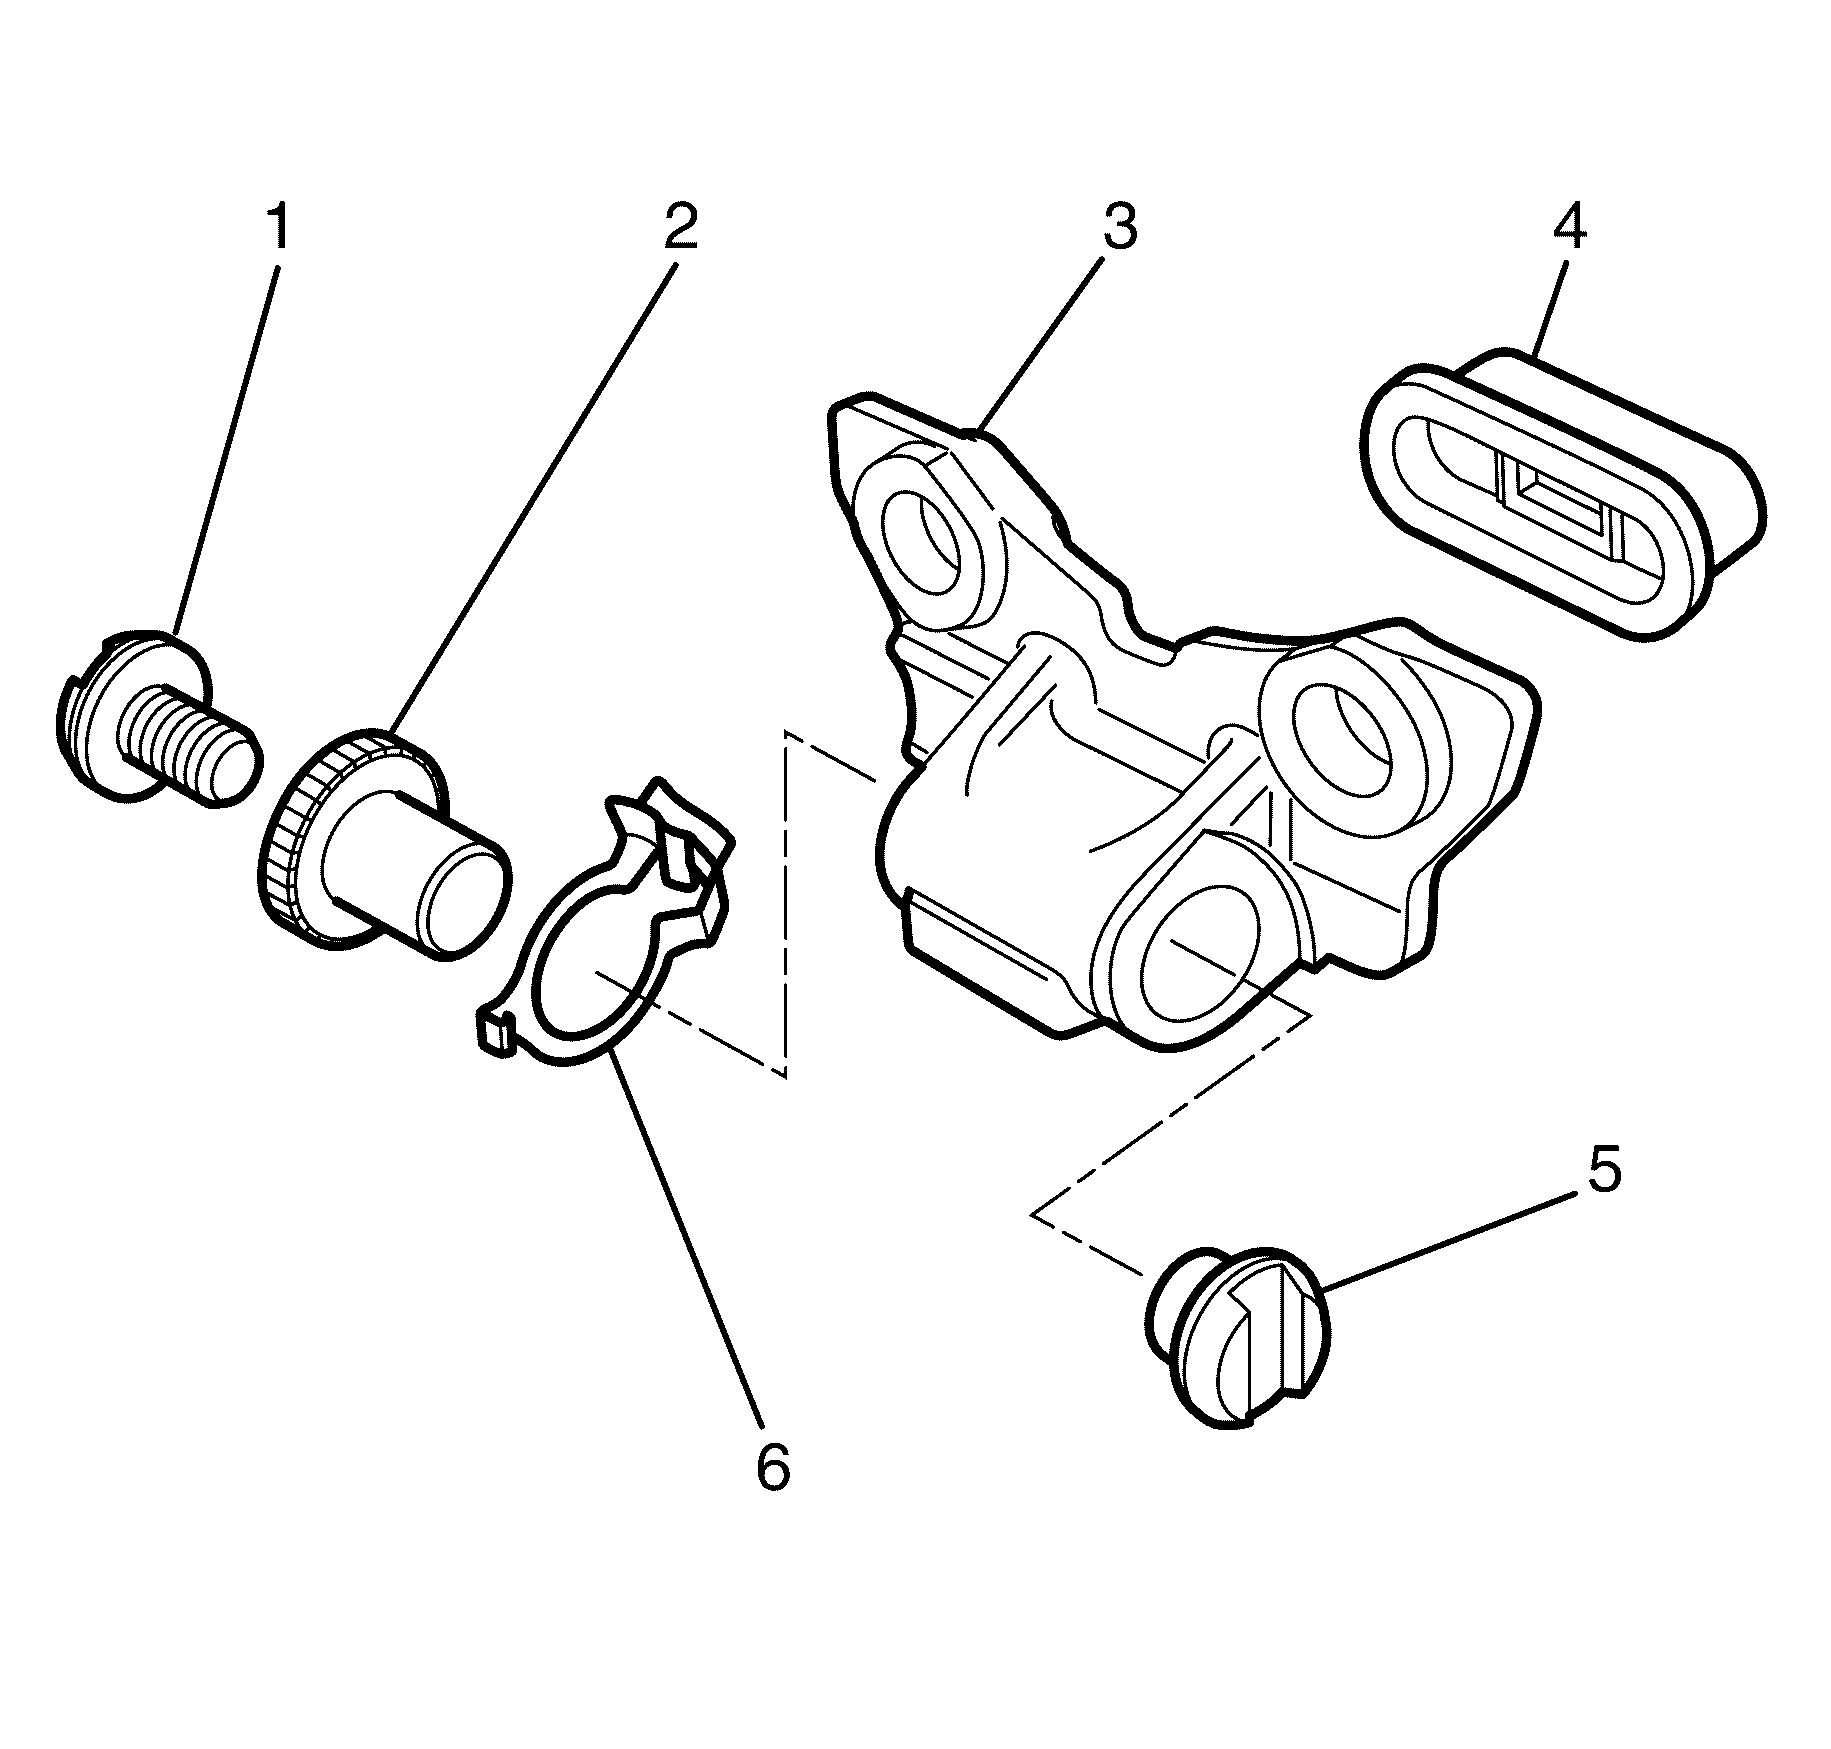
Important: Using a flat blade screwdriver remove the adjuster nut (2) from the abutment plate (3).
Important: Using a flat blade screwdriver remove the tappet (5) from the abutment plate (3).
Installation Procedure
- Apply a small amount of GM approved silicone grease to positions (2, 3). DO NOT apply grease to the bolt threads (1).
- Install the dust cover (4) to the abutment plate (3).
- Install the adjustment pawl (6).
- Install the tappet (5) to the abutment plate (3).
- Install the adjustment screw (1) to the adjuster nut (2).
- Install the adjuster nut (2) to the abutment plate (3).
- Install the actuator assembly (3) to the backing plate (2).
- Install the actuator assembly/backing plate to knuckle retaining bolts (1).
- Install the park brake shoe assembly (1) to the actuator assembly (2).
- Install the park brake shoe retaining spring (1).
- Install the rear wheel hub and bearing assembly. Refer to Rear Wheel Bearing and Hub Replacement .
- Install the rear brake disc and rear brake caliper. Refer to Rear Brake Rotor Replacement .
- Adjust the park brake. Refer to Park Brake Adjustment .
- Install the rear wheels. Refer to Tire and Wheel Removal and Installation .
- Lower the vehicle.
Caution: Refer to Safety Glasses Caution in the Preface section.
Caution: Refer to Vehicle Lifting Caution in the Preface section.
Caution: Refer to Brake Dust Caution in the Preface section.


Important: Slide the actuator assembly (3) upwards to attach the actuator assembly (3) to the locating tab on the backing plate (2).
Notice: Refer to Fastener Notice in the Preface section.
Tighten
Tighten the bolt to 130 Nm (96 lb ft).

Important: Install the park brake shoe assembly (1) by grasping the shoe and spreading slightly while pulling the shoe over the actuator assembly (2).

