Tools Required
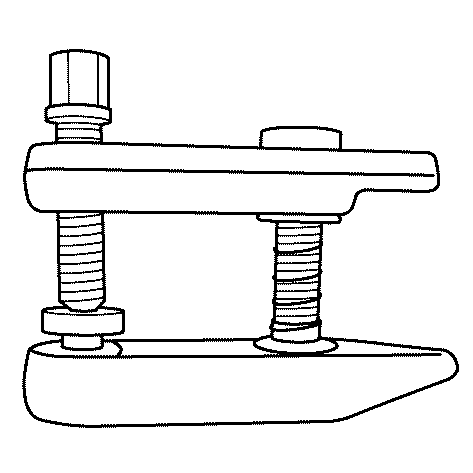
| • | CH-49405 Ball Joint Release Tool. |
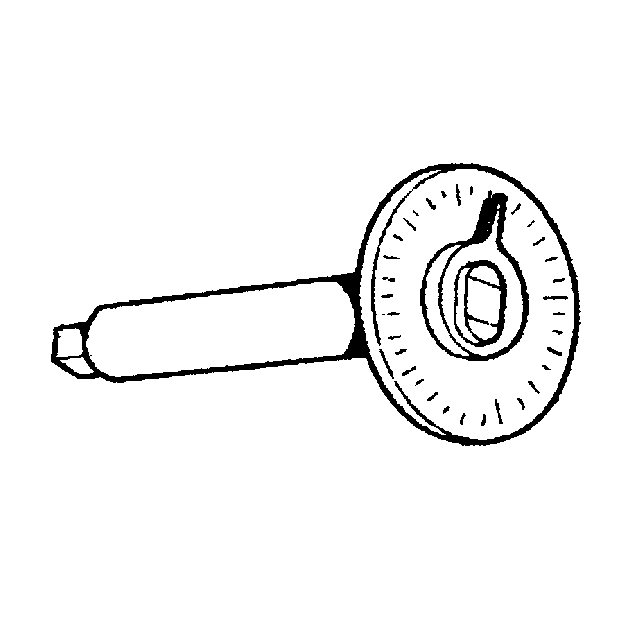
| • | E7115 Angle Wrench. |
Removal Procedure - Up to 12 Jun 2007
- Raise and support the vehicle. Refer to Lifting and Jacking the Vehicle.
- Remove the front wheel. Refer to Tire and Wheel Removal and Installation.
- Remove the front wheel hub assembly. Refer to Front Wheel Bearing and Hub Replacement.
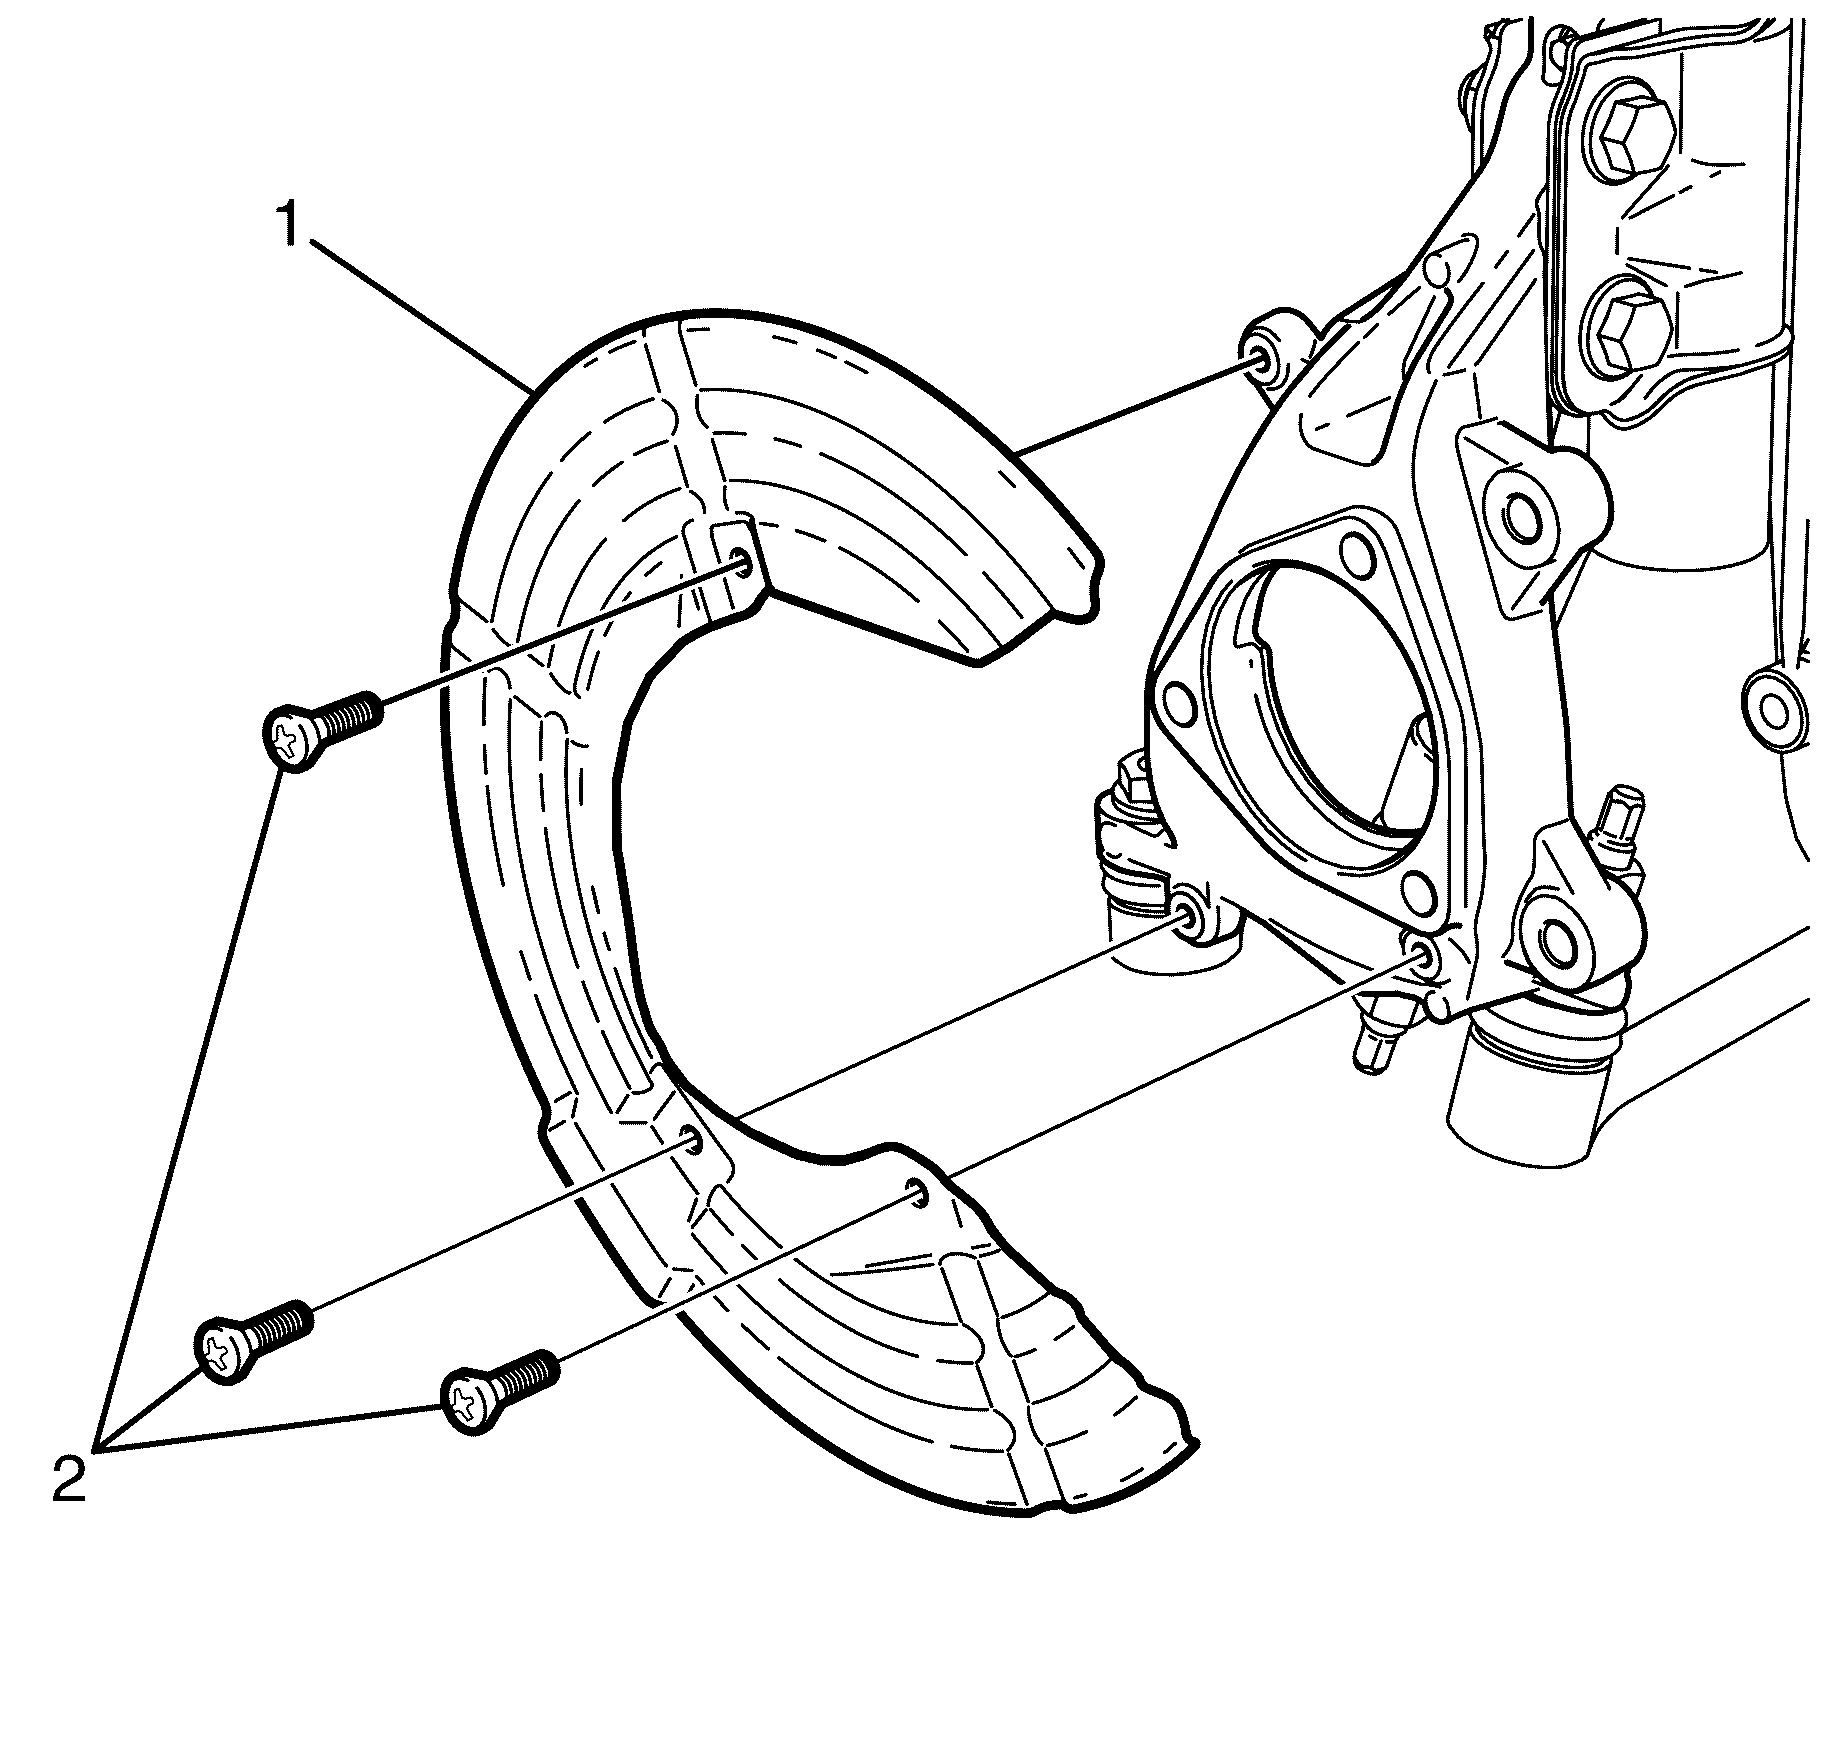
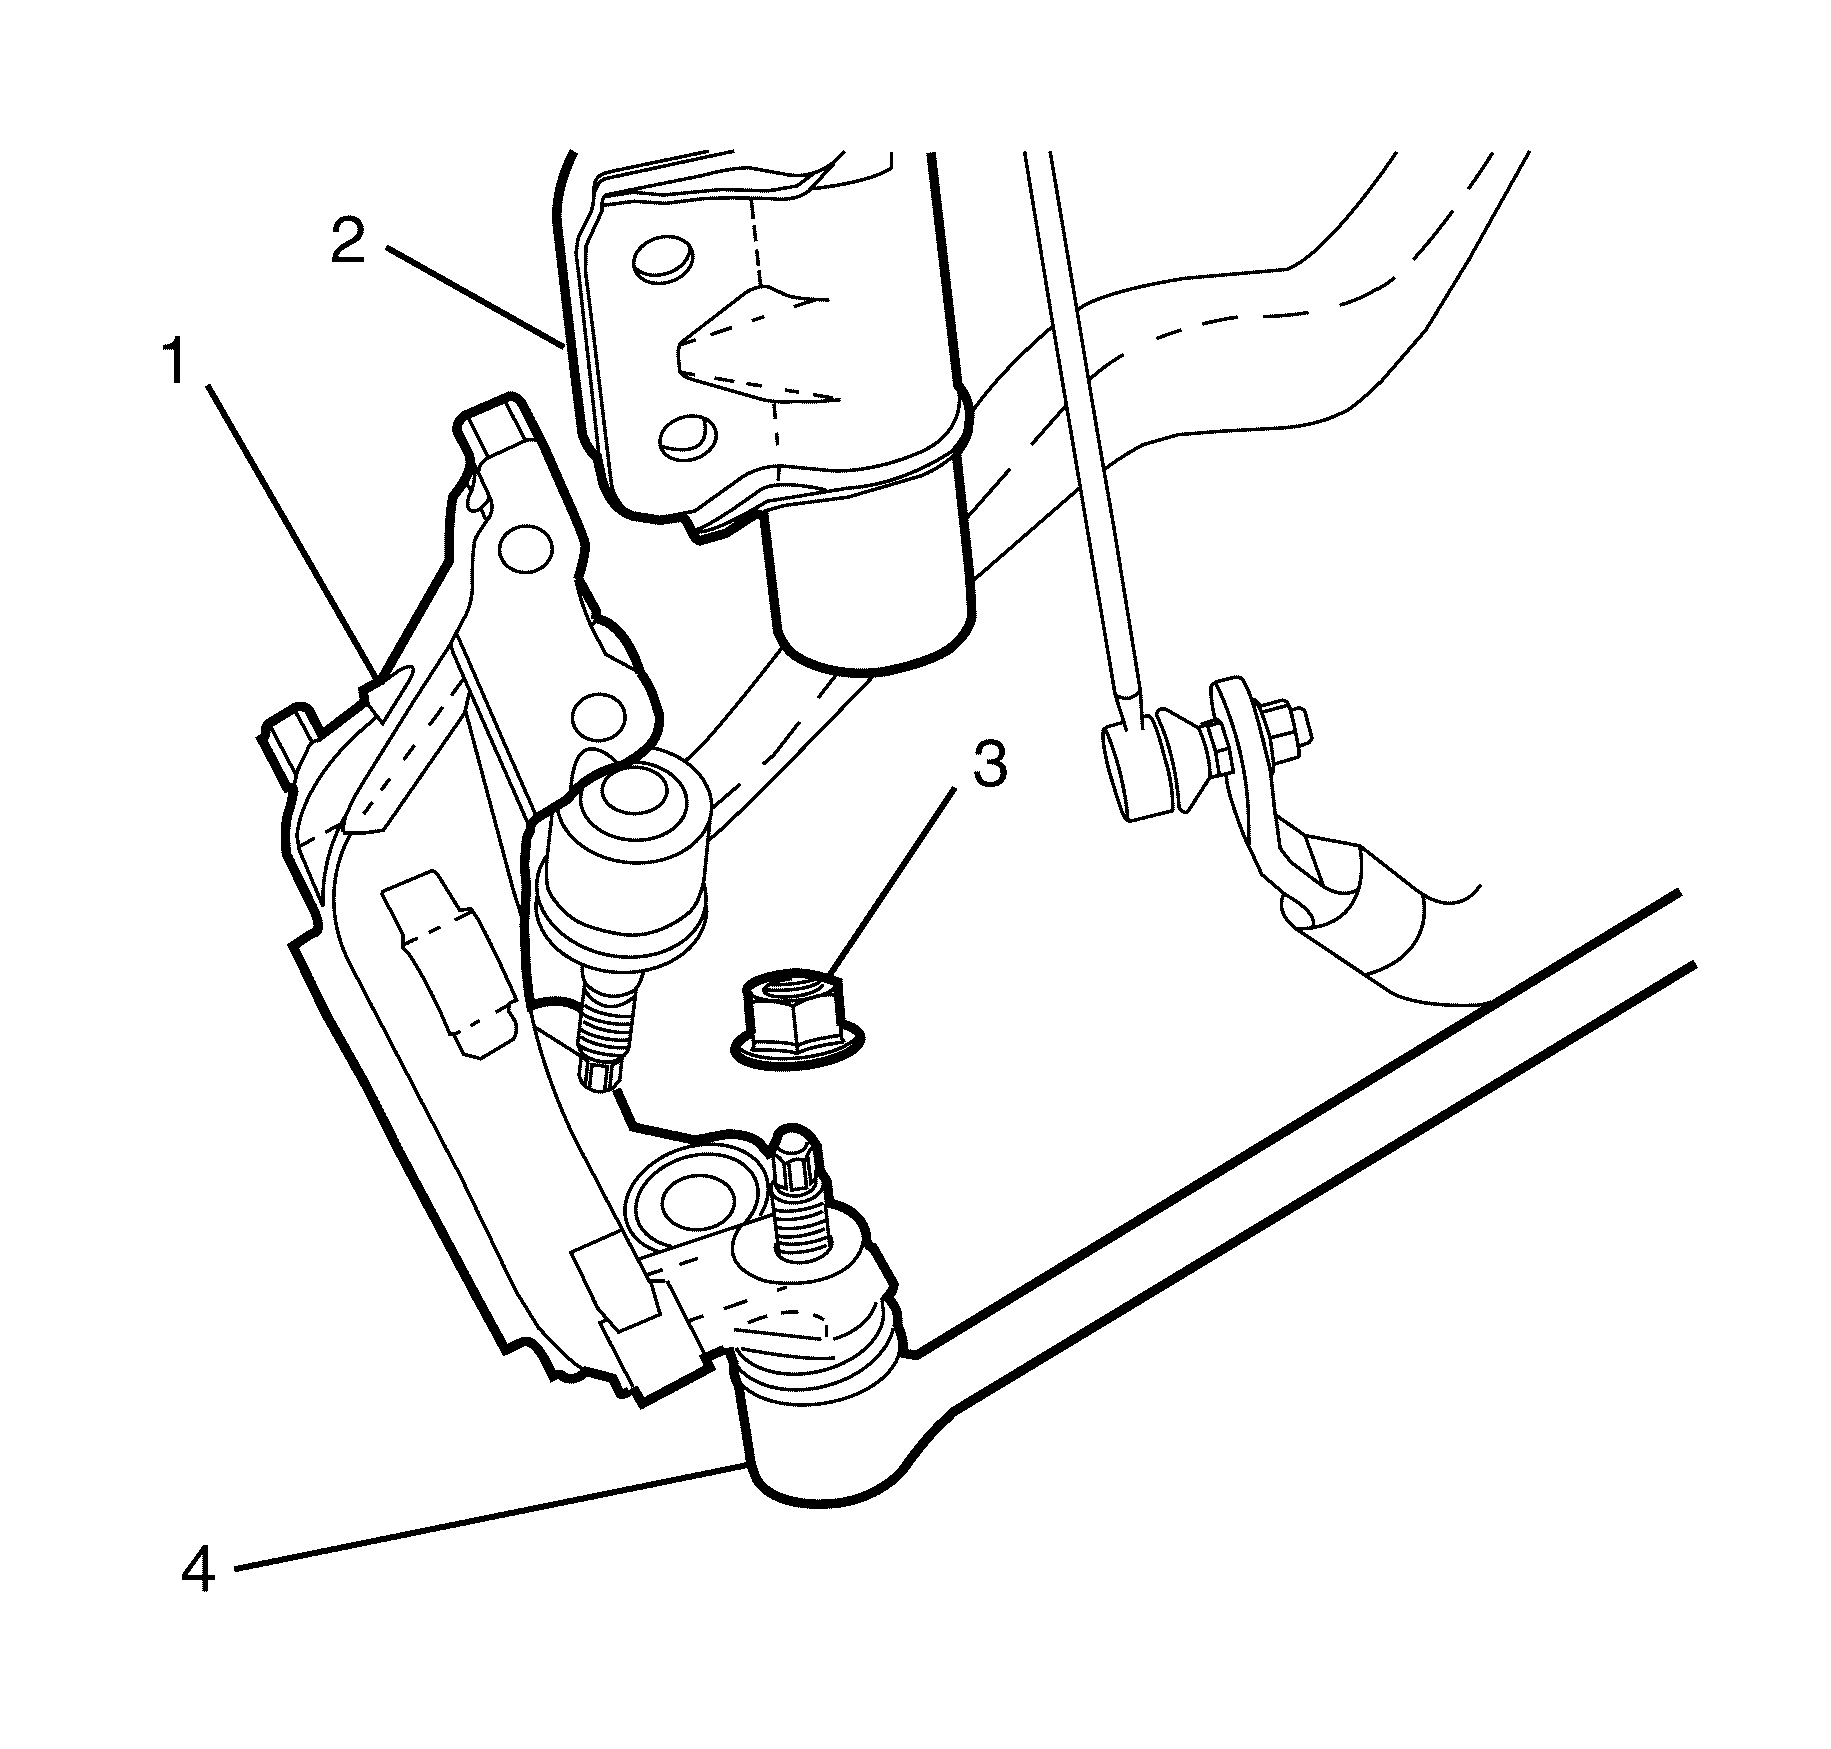
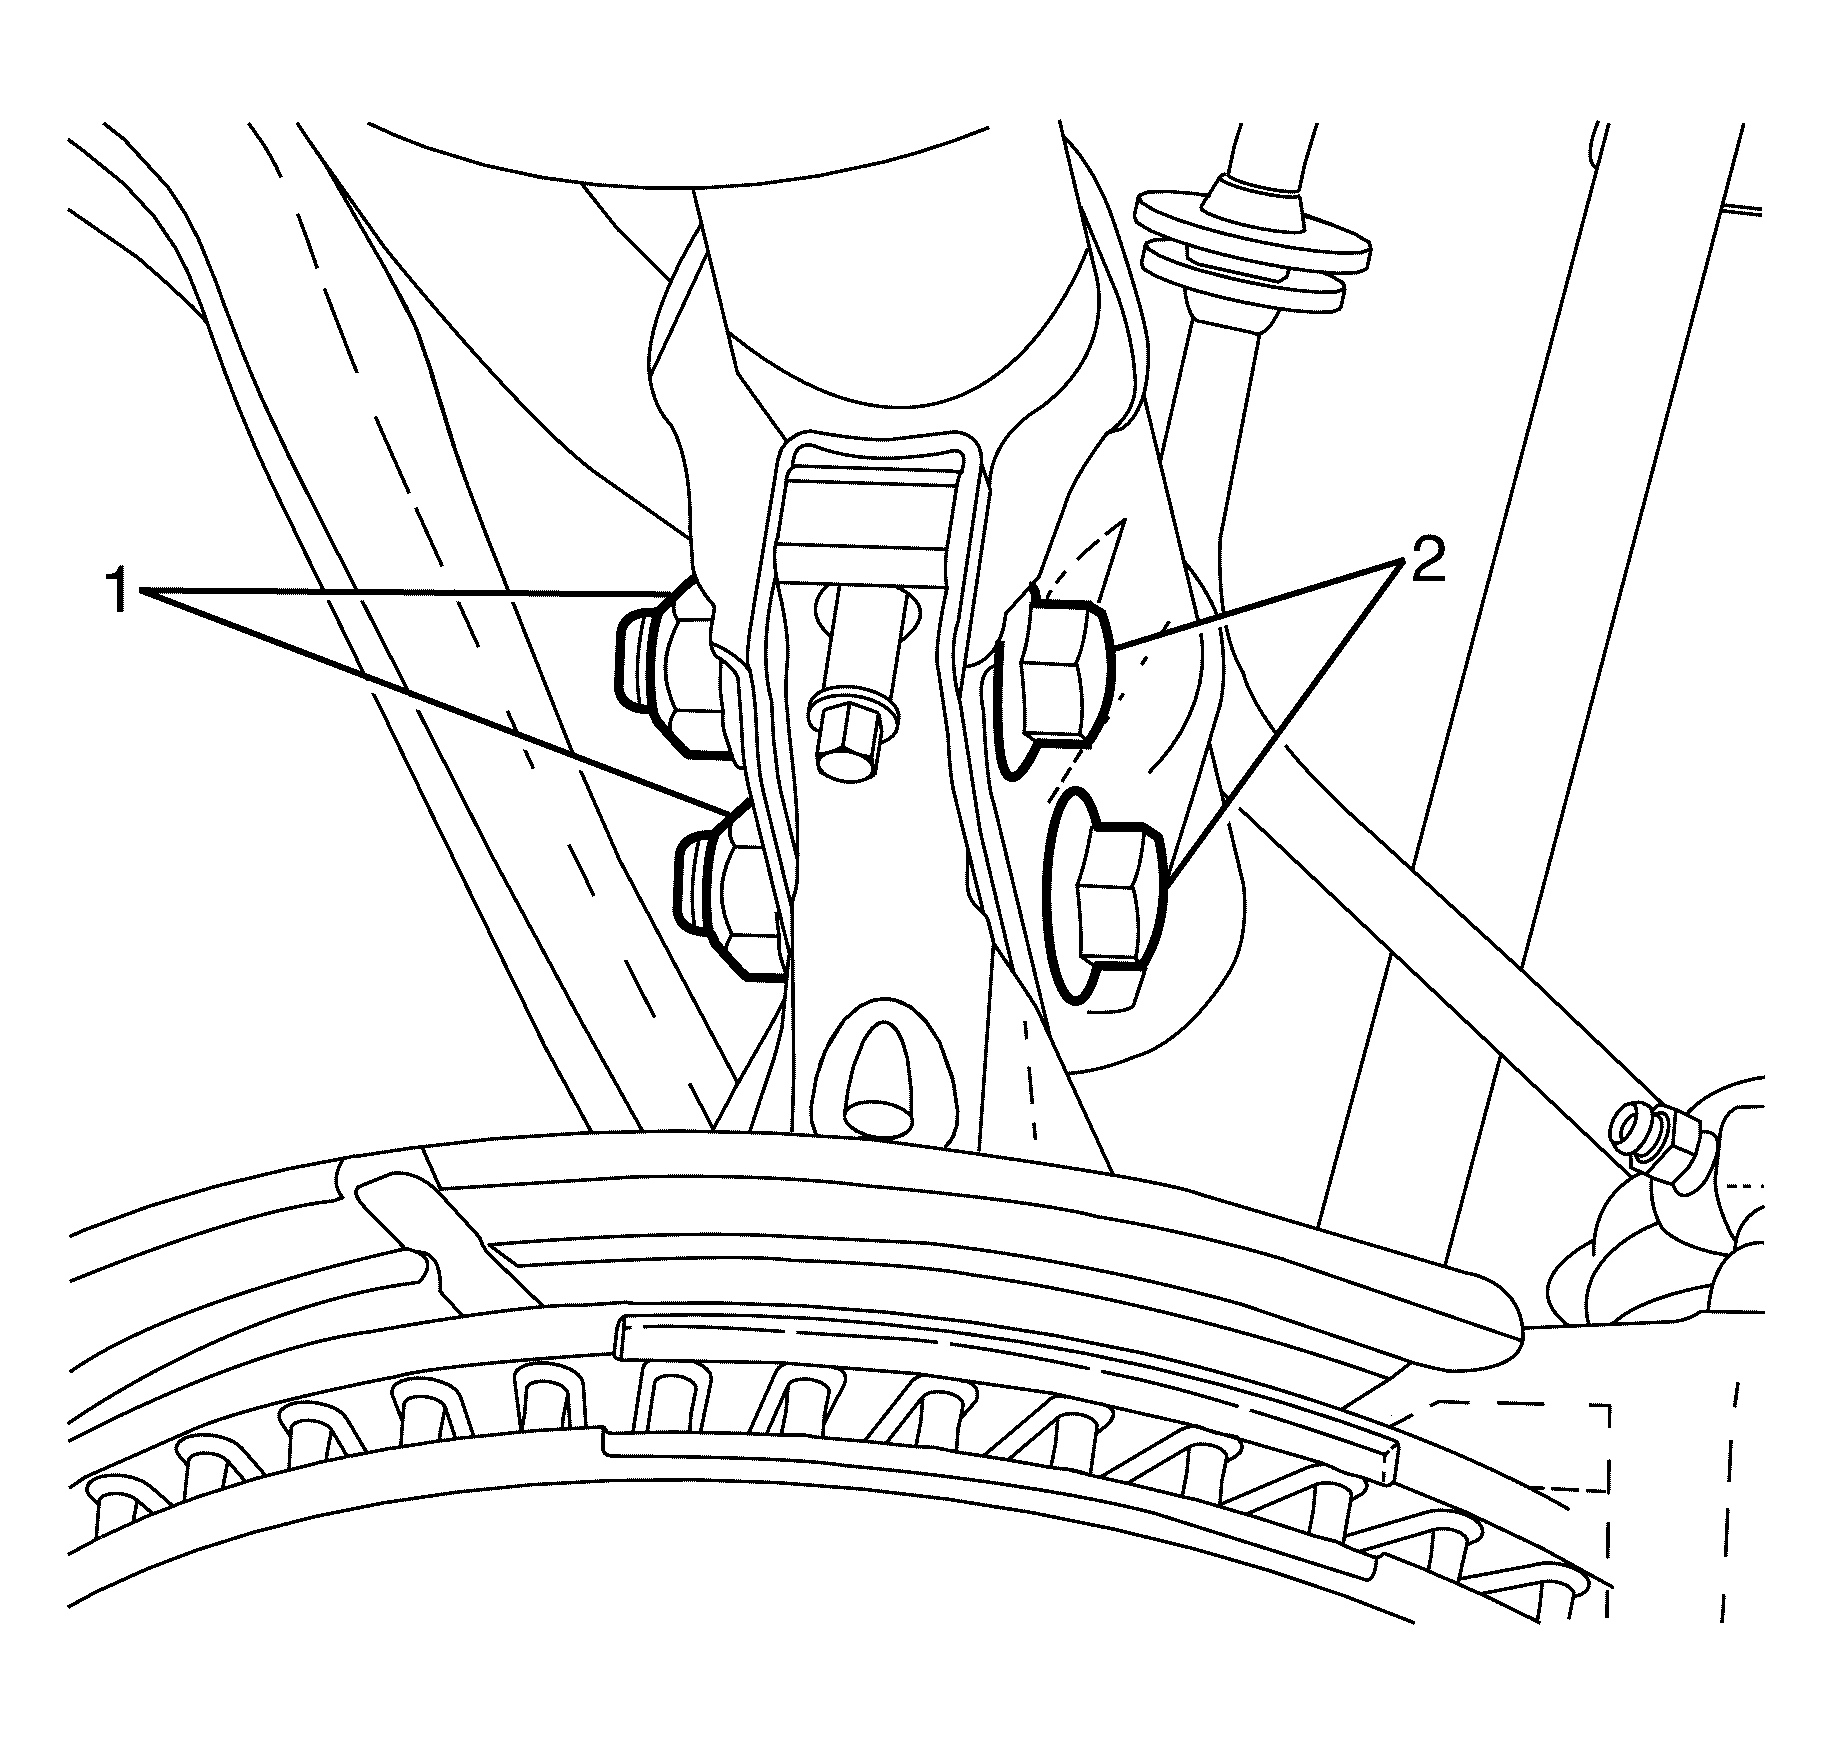
- Remove the brake disc splash shield to steering knuckle retaining bolts (2).
- Remove the brake disc splash shield (1).
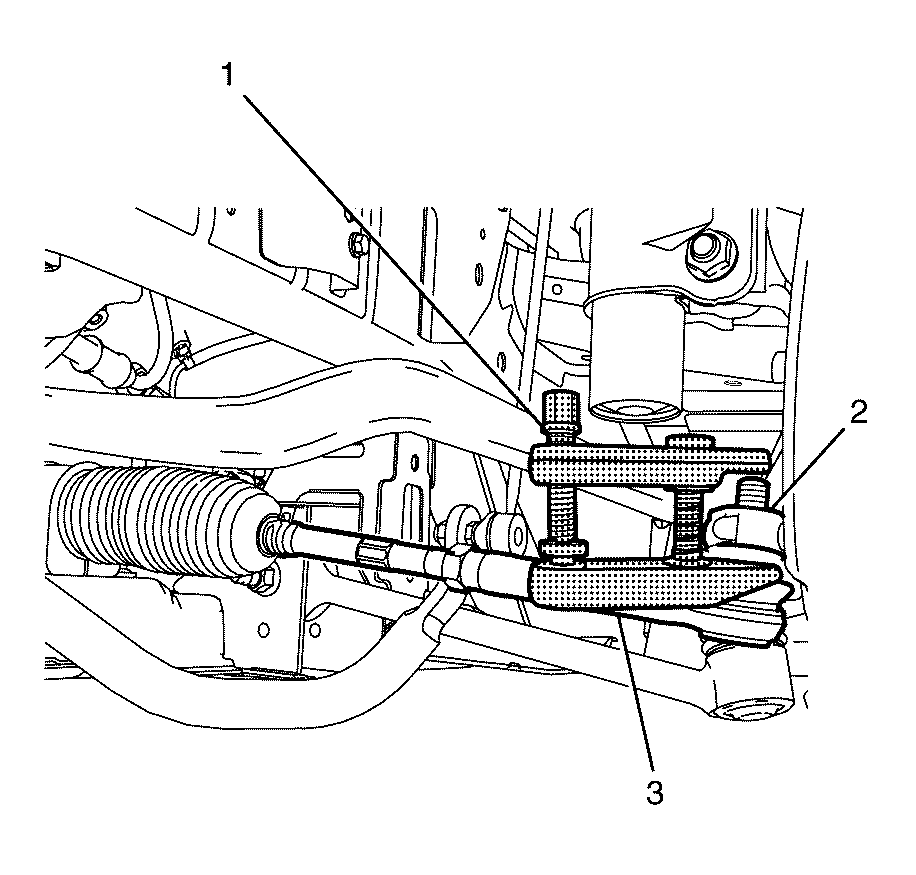
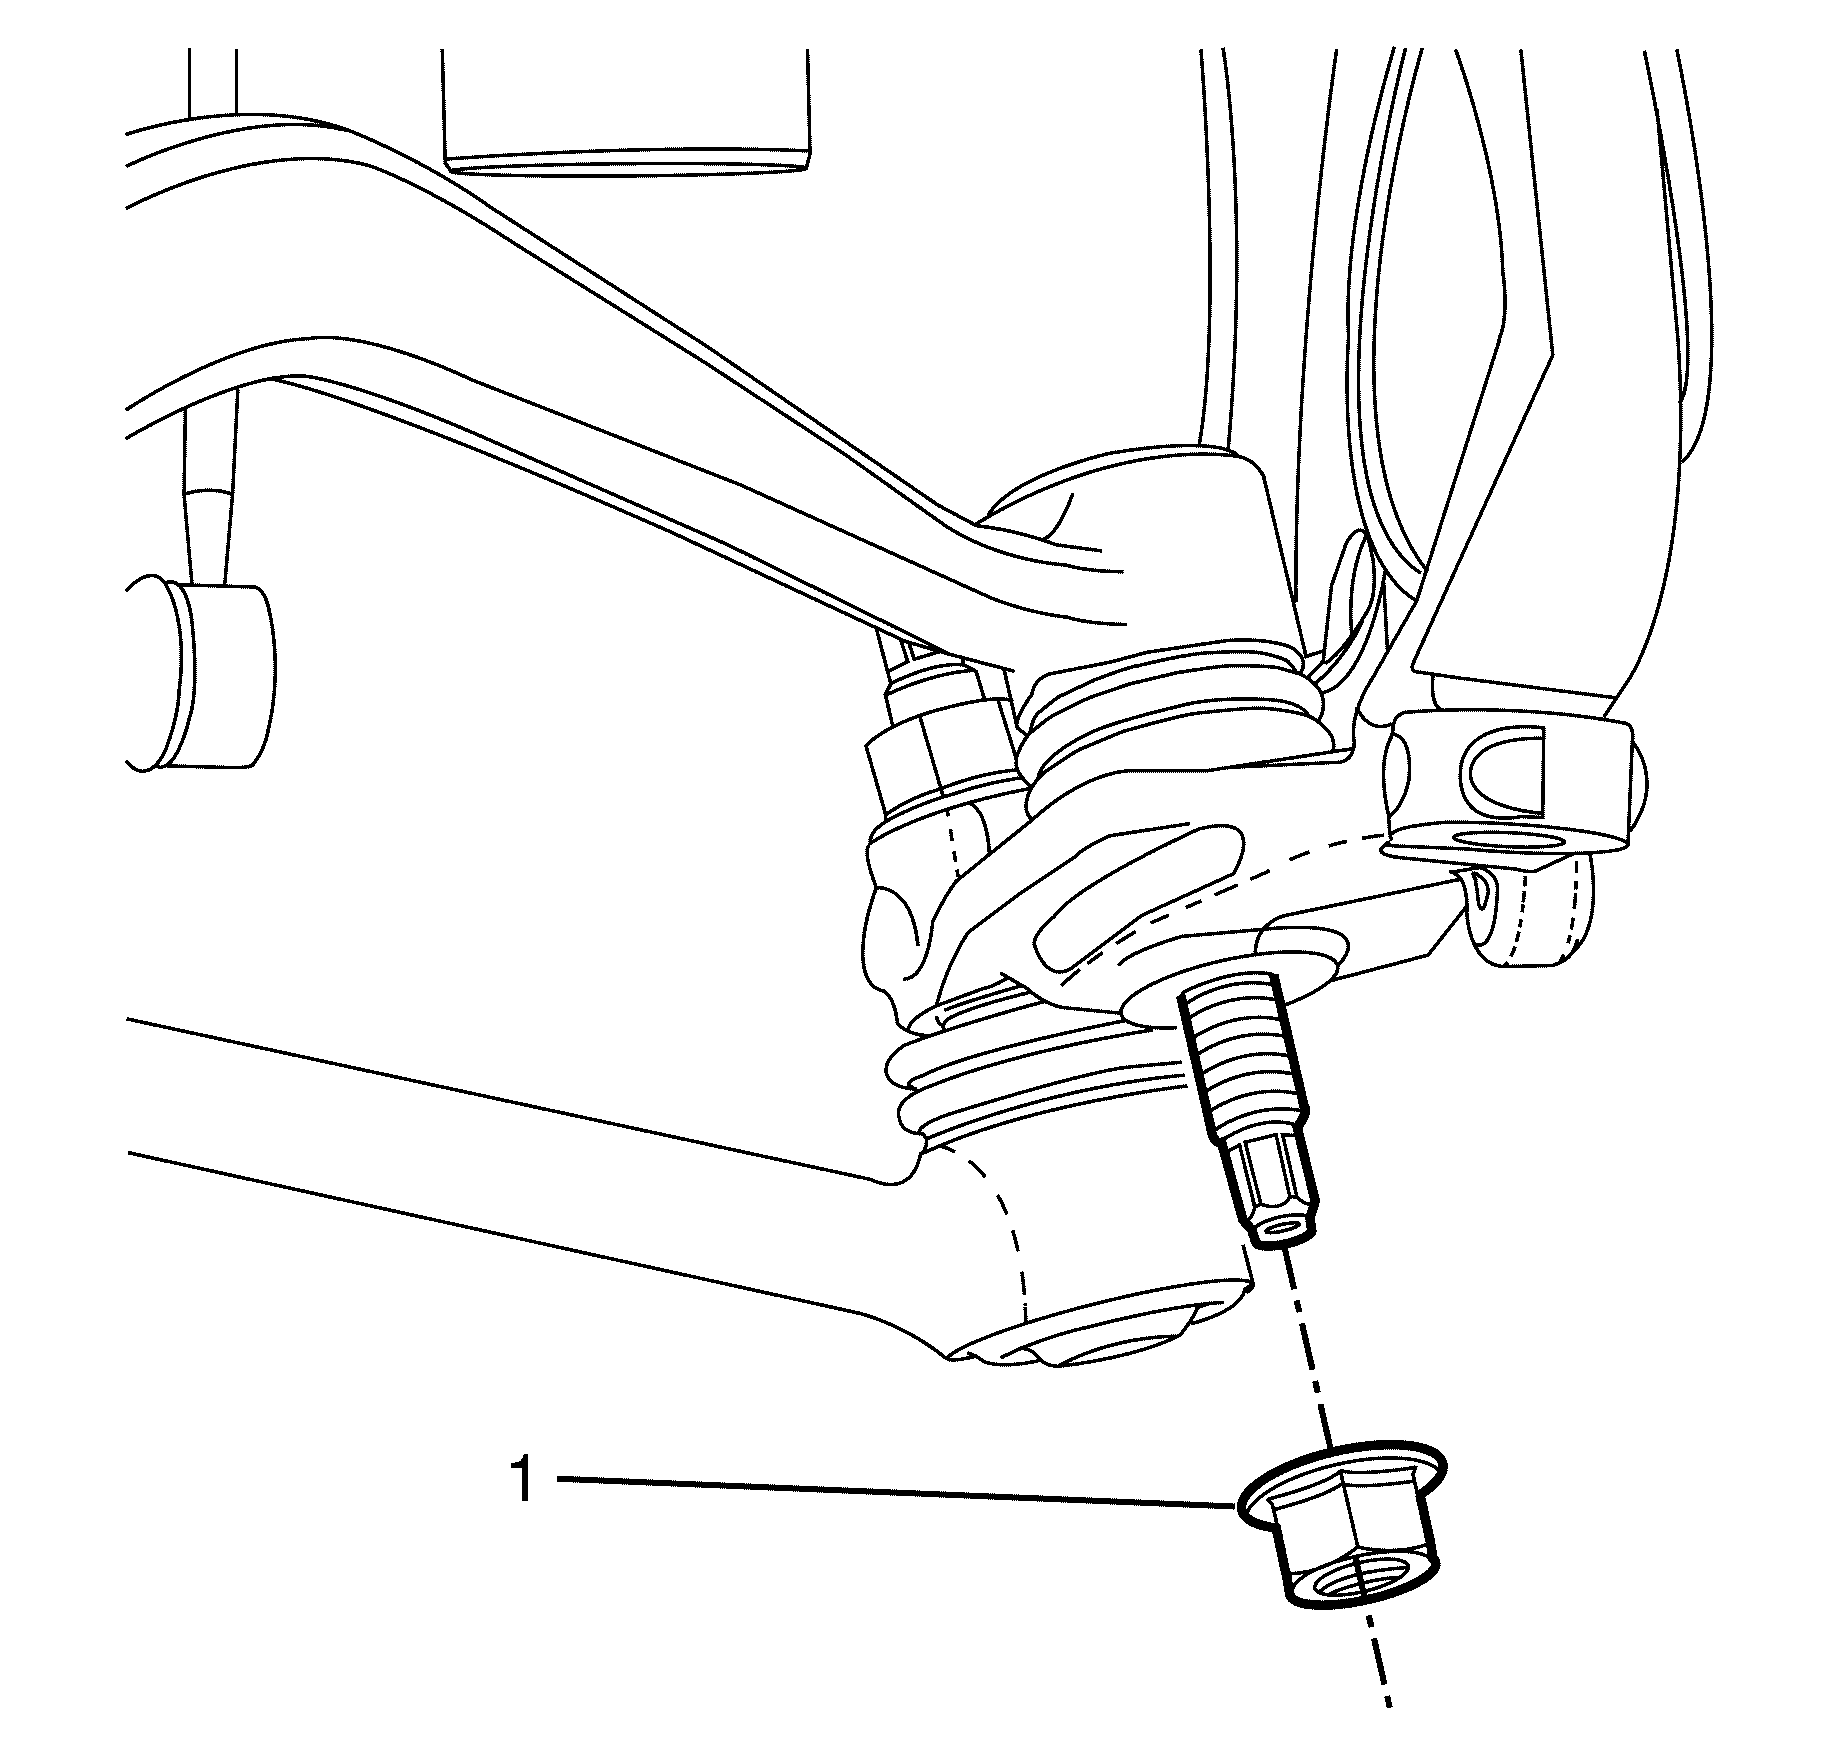
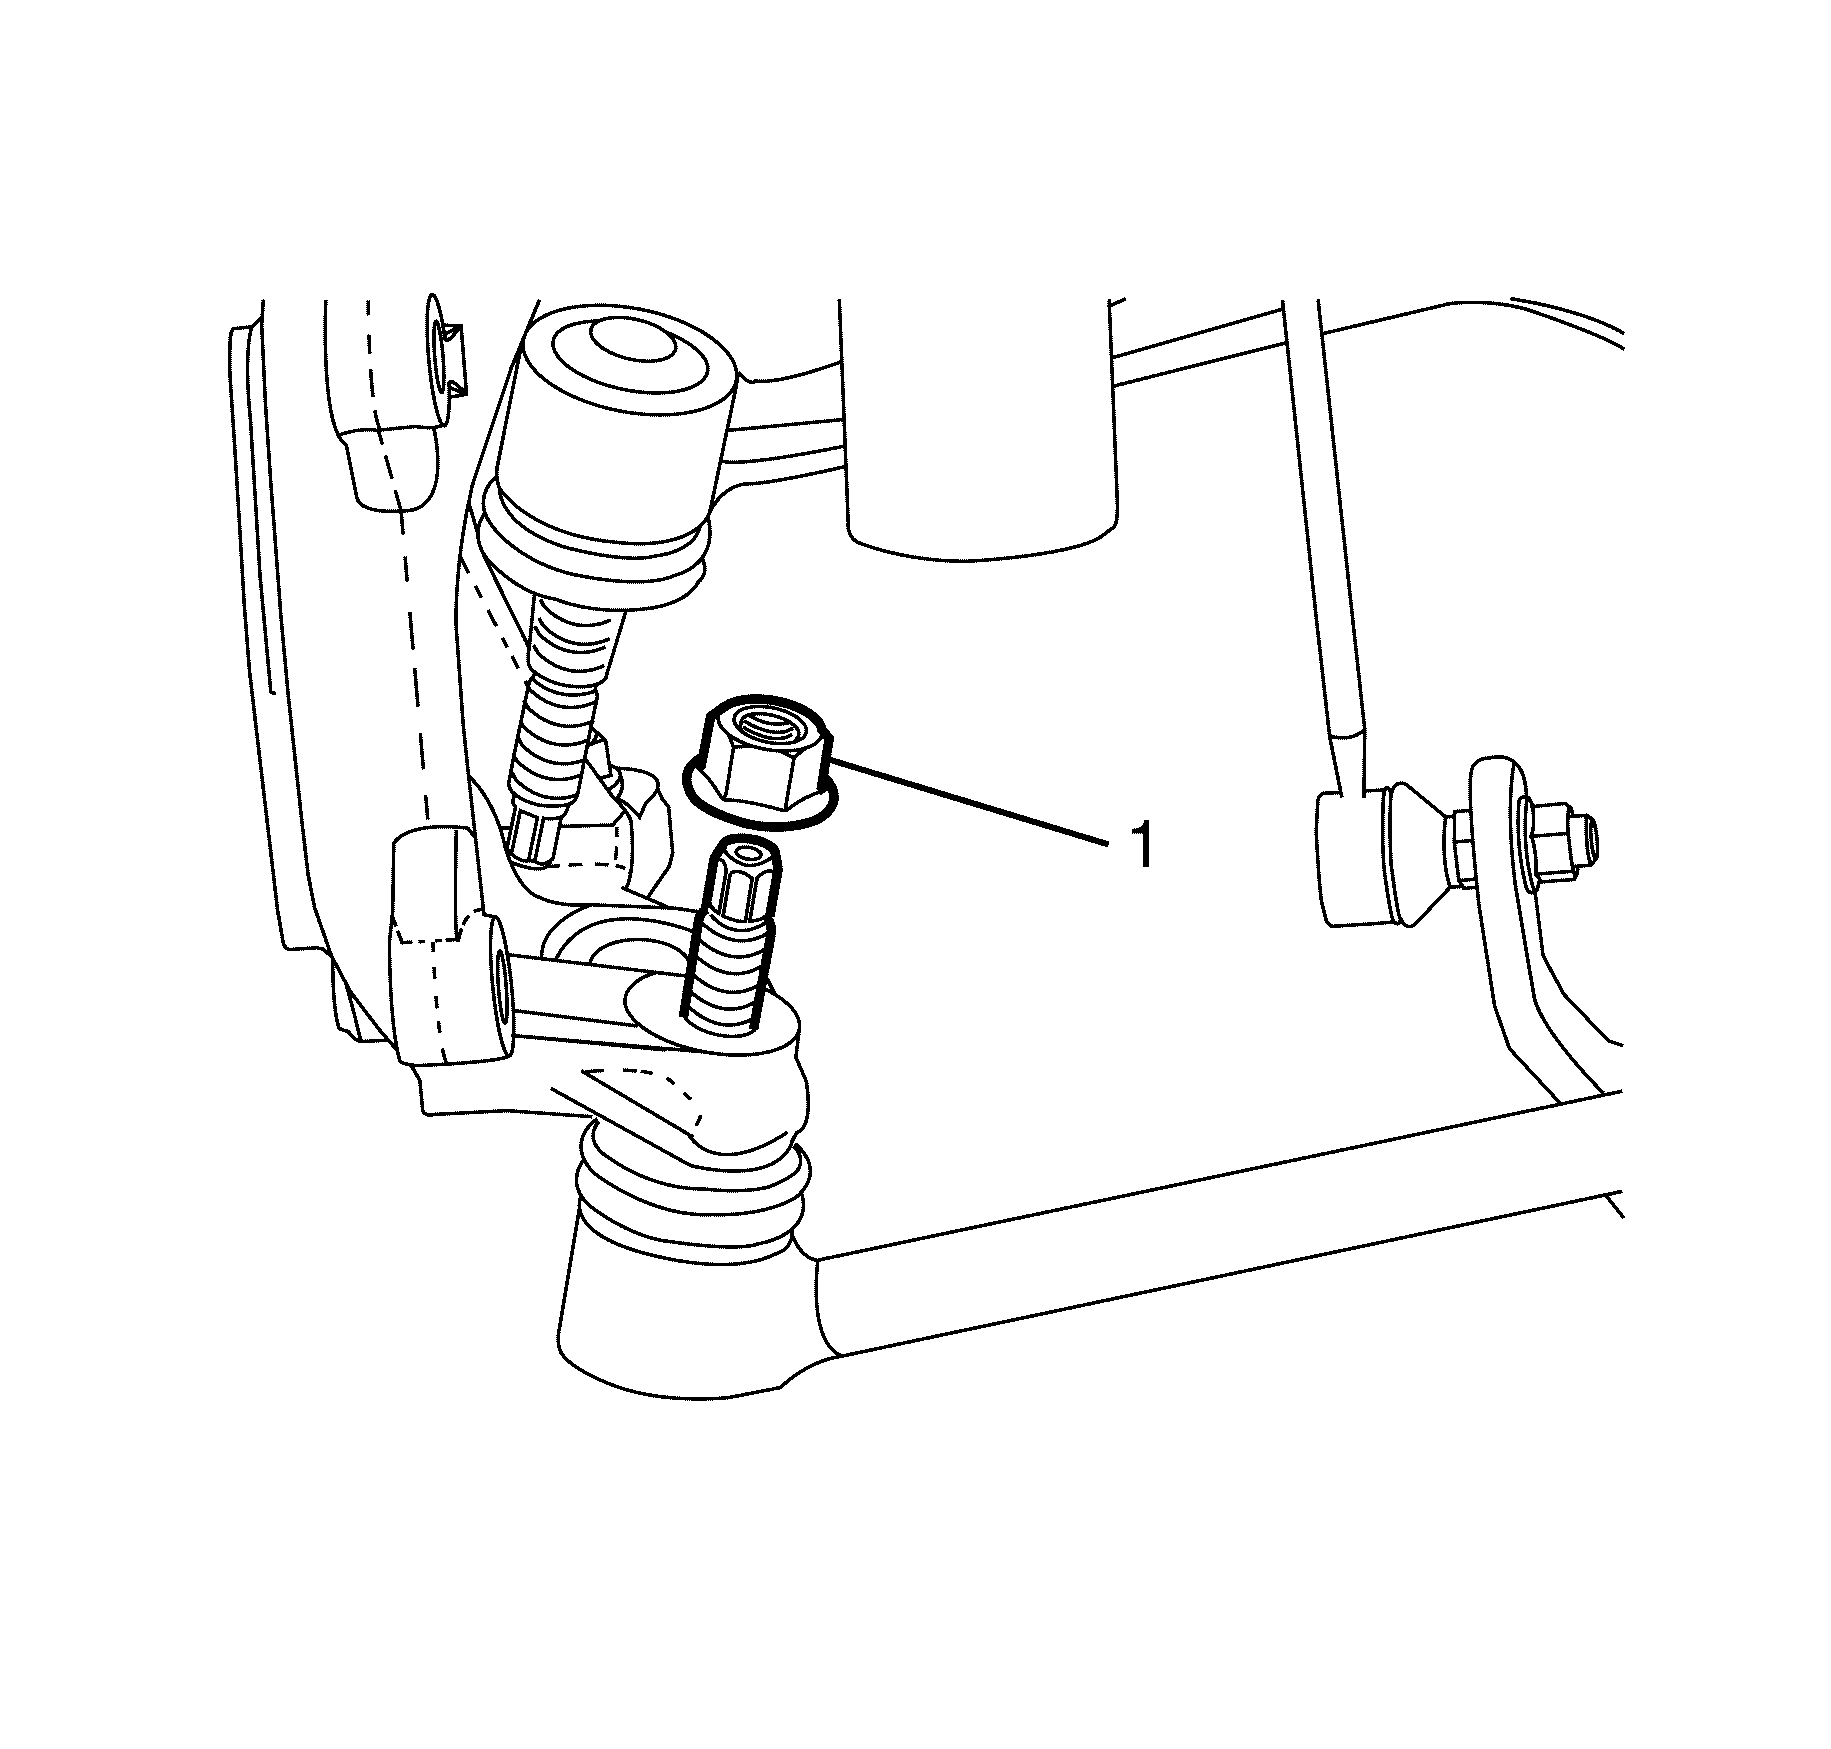
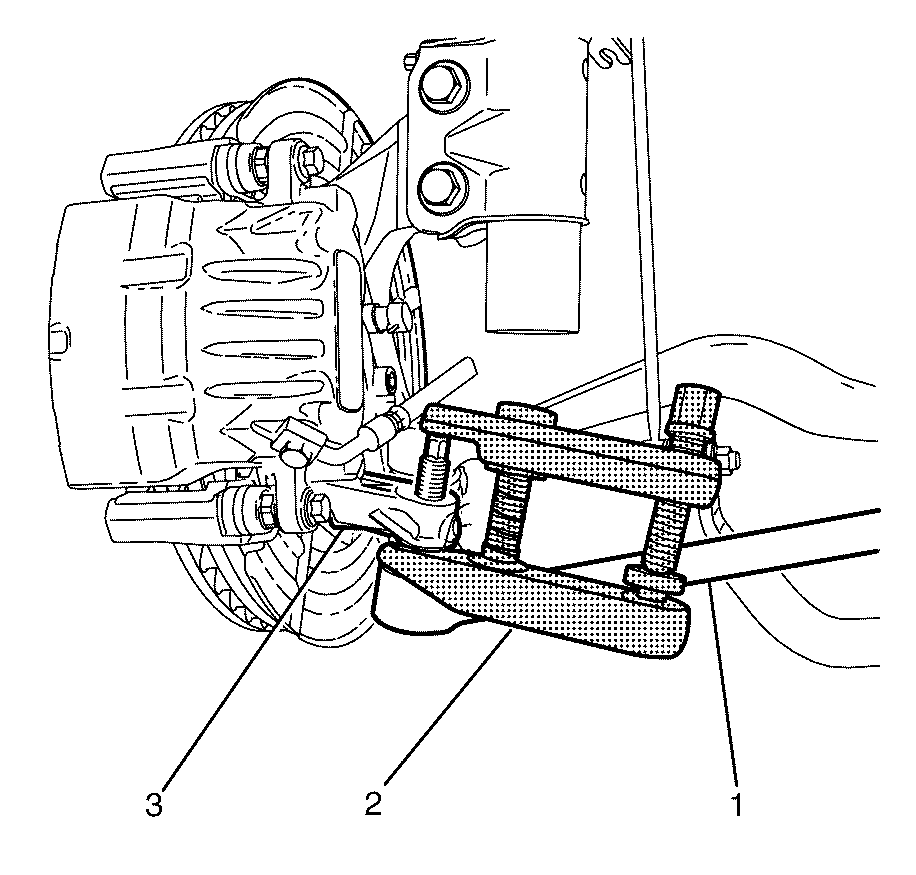
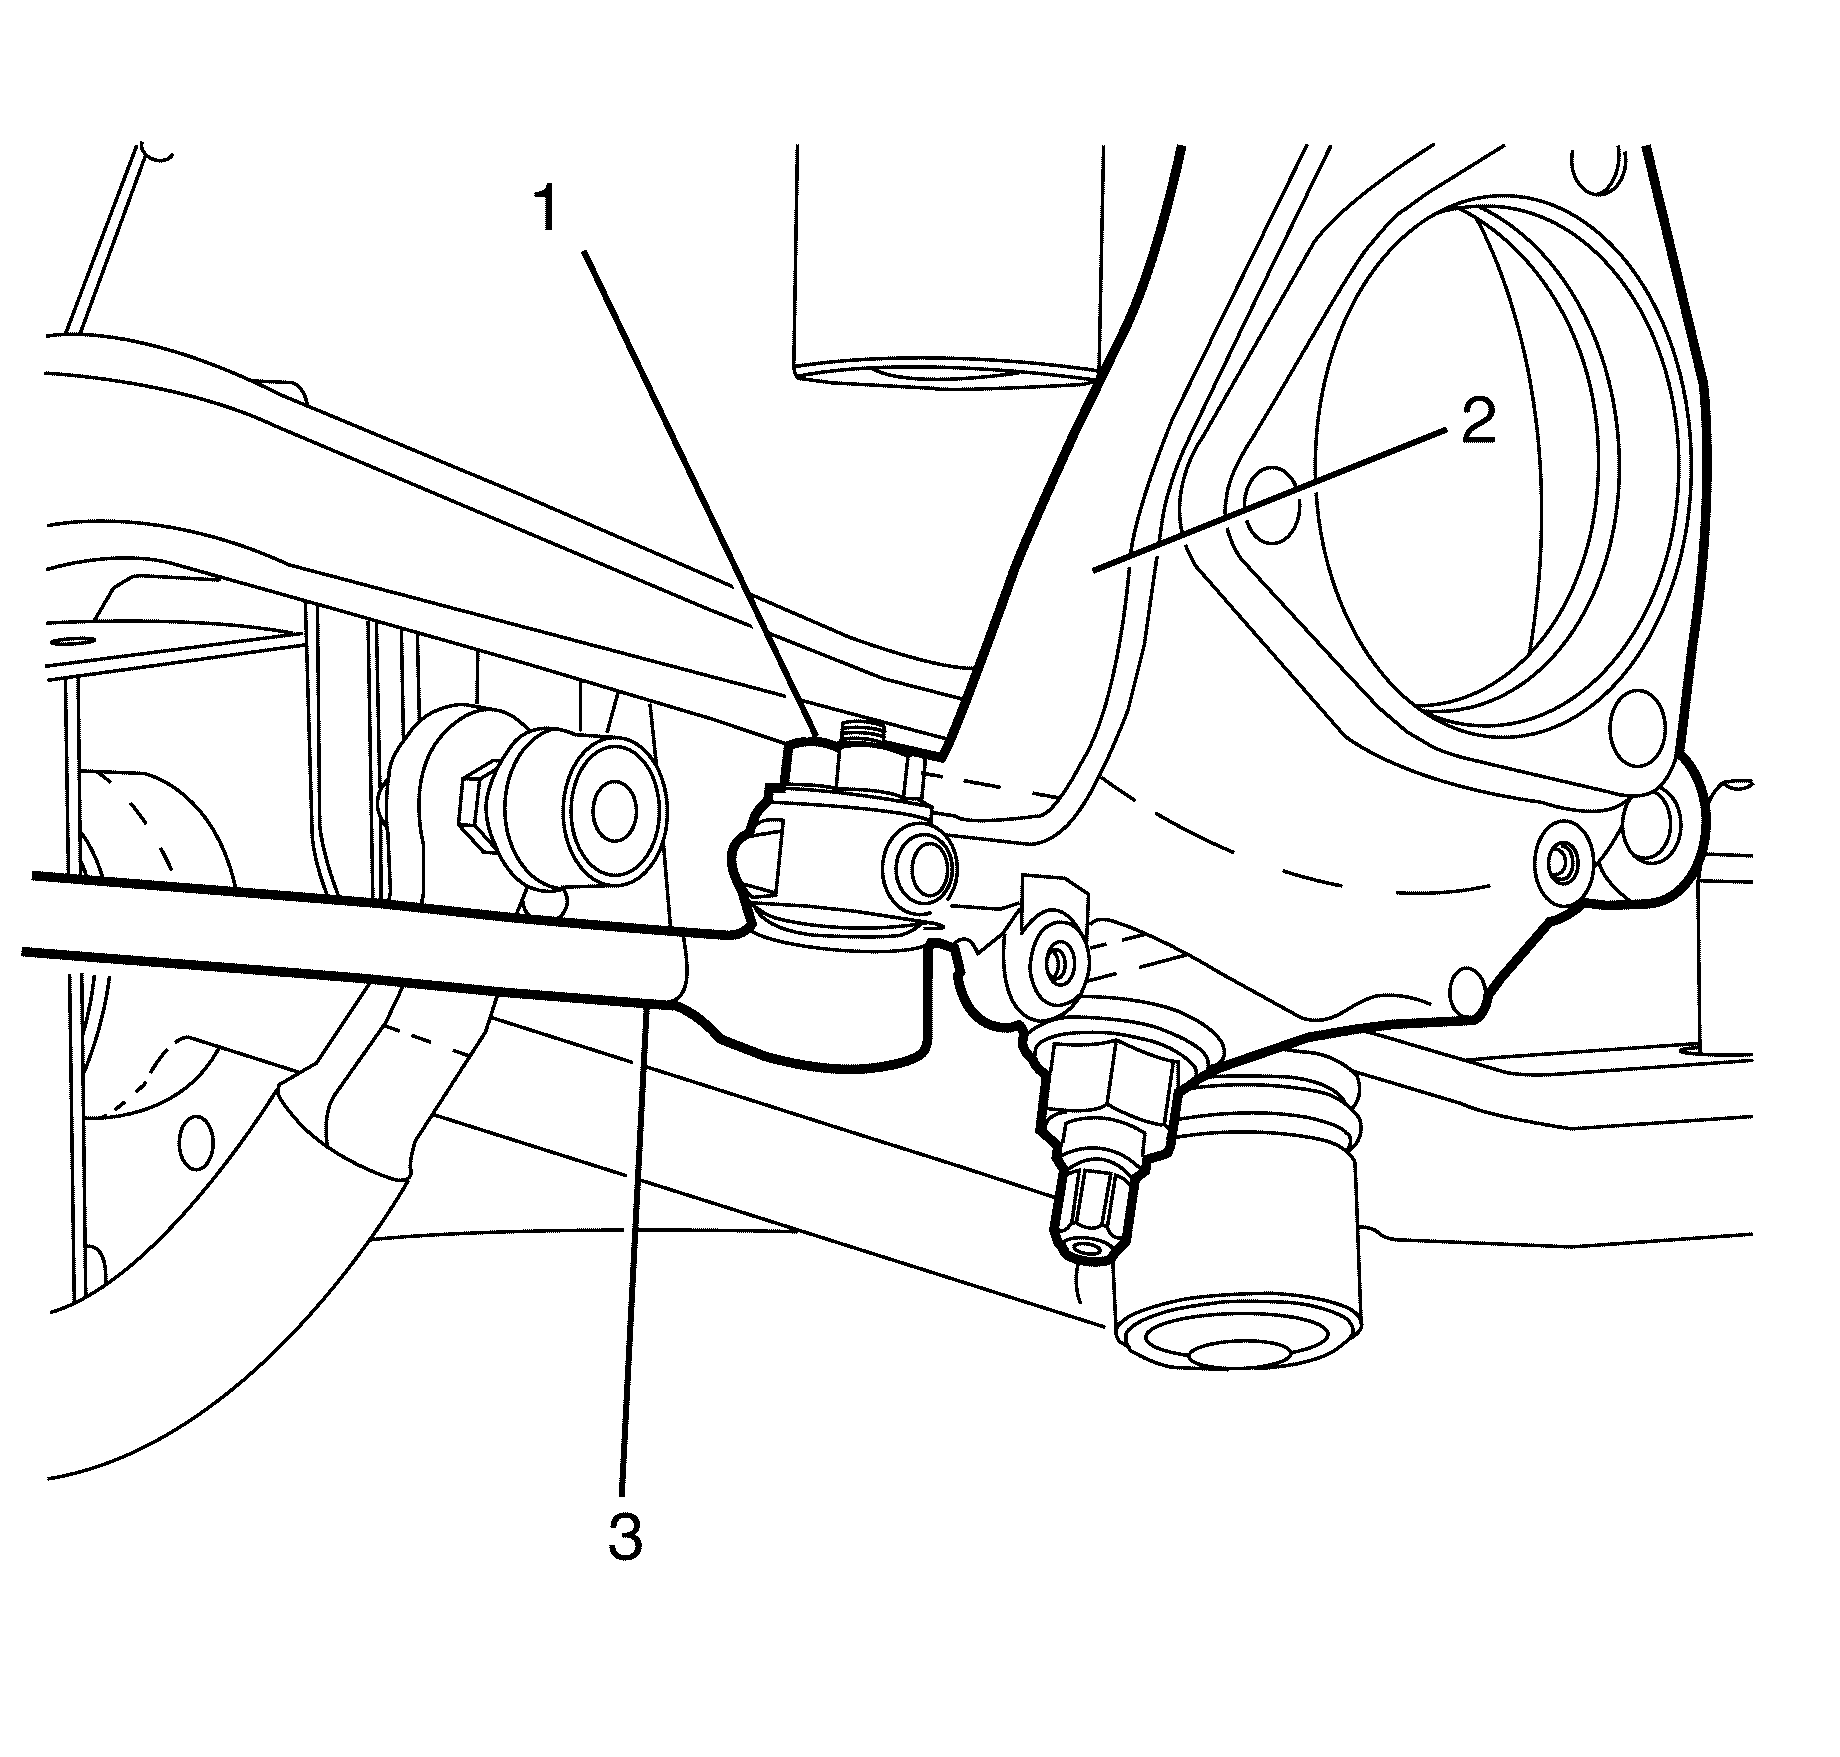
- Remove the tie rod end to steering knuckle retaining nut (1).
- Disconnect the tie rod (3) from the steering knuckle (2) using the CH-49405 (1).
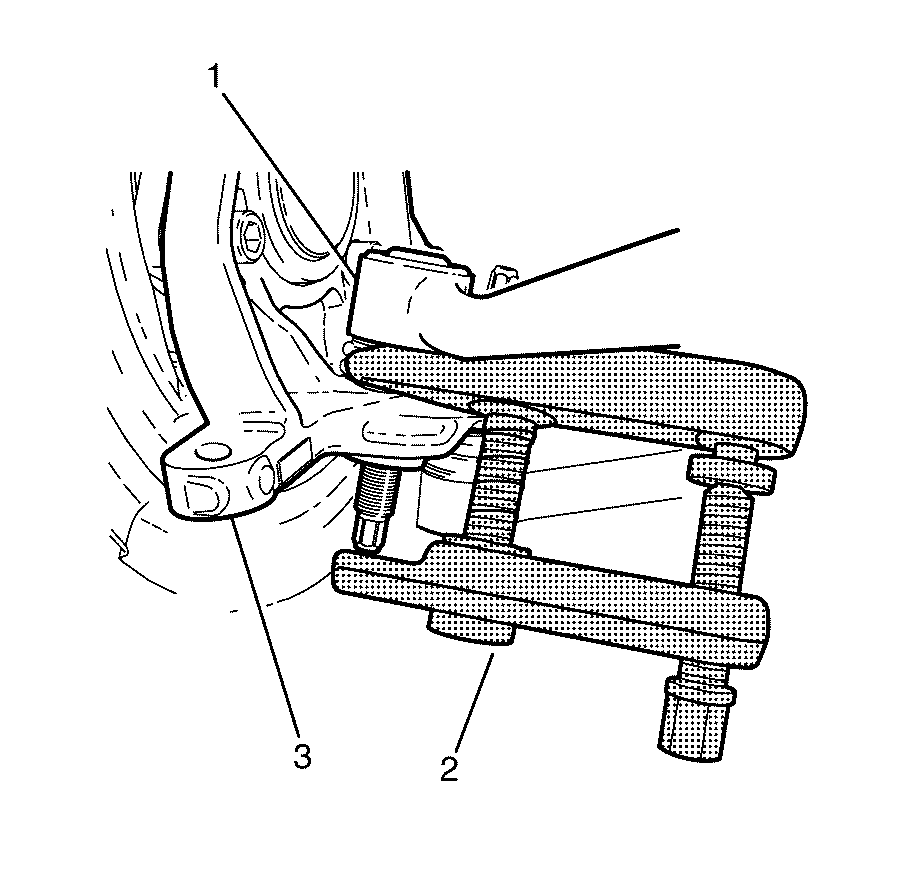
- Remove the caster arm to steering knuckle retaining nut (1).
- Separate the caster arm (1) from the steering knuckle (3) using the CH-49405 (2).
- Remove the CH-49405 (2).
- Disconnect the caster arm (1) from the steering knuckle (3).
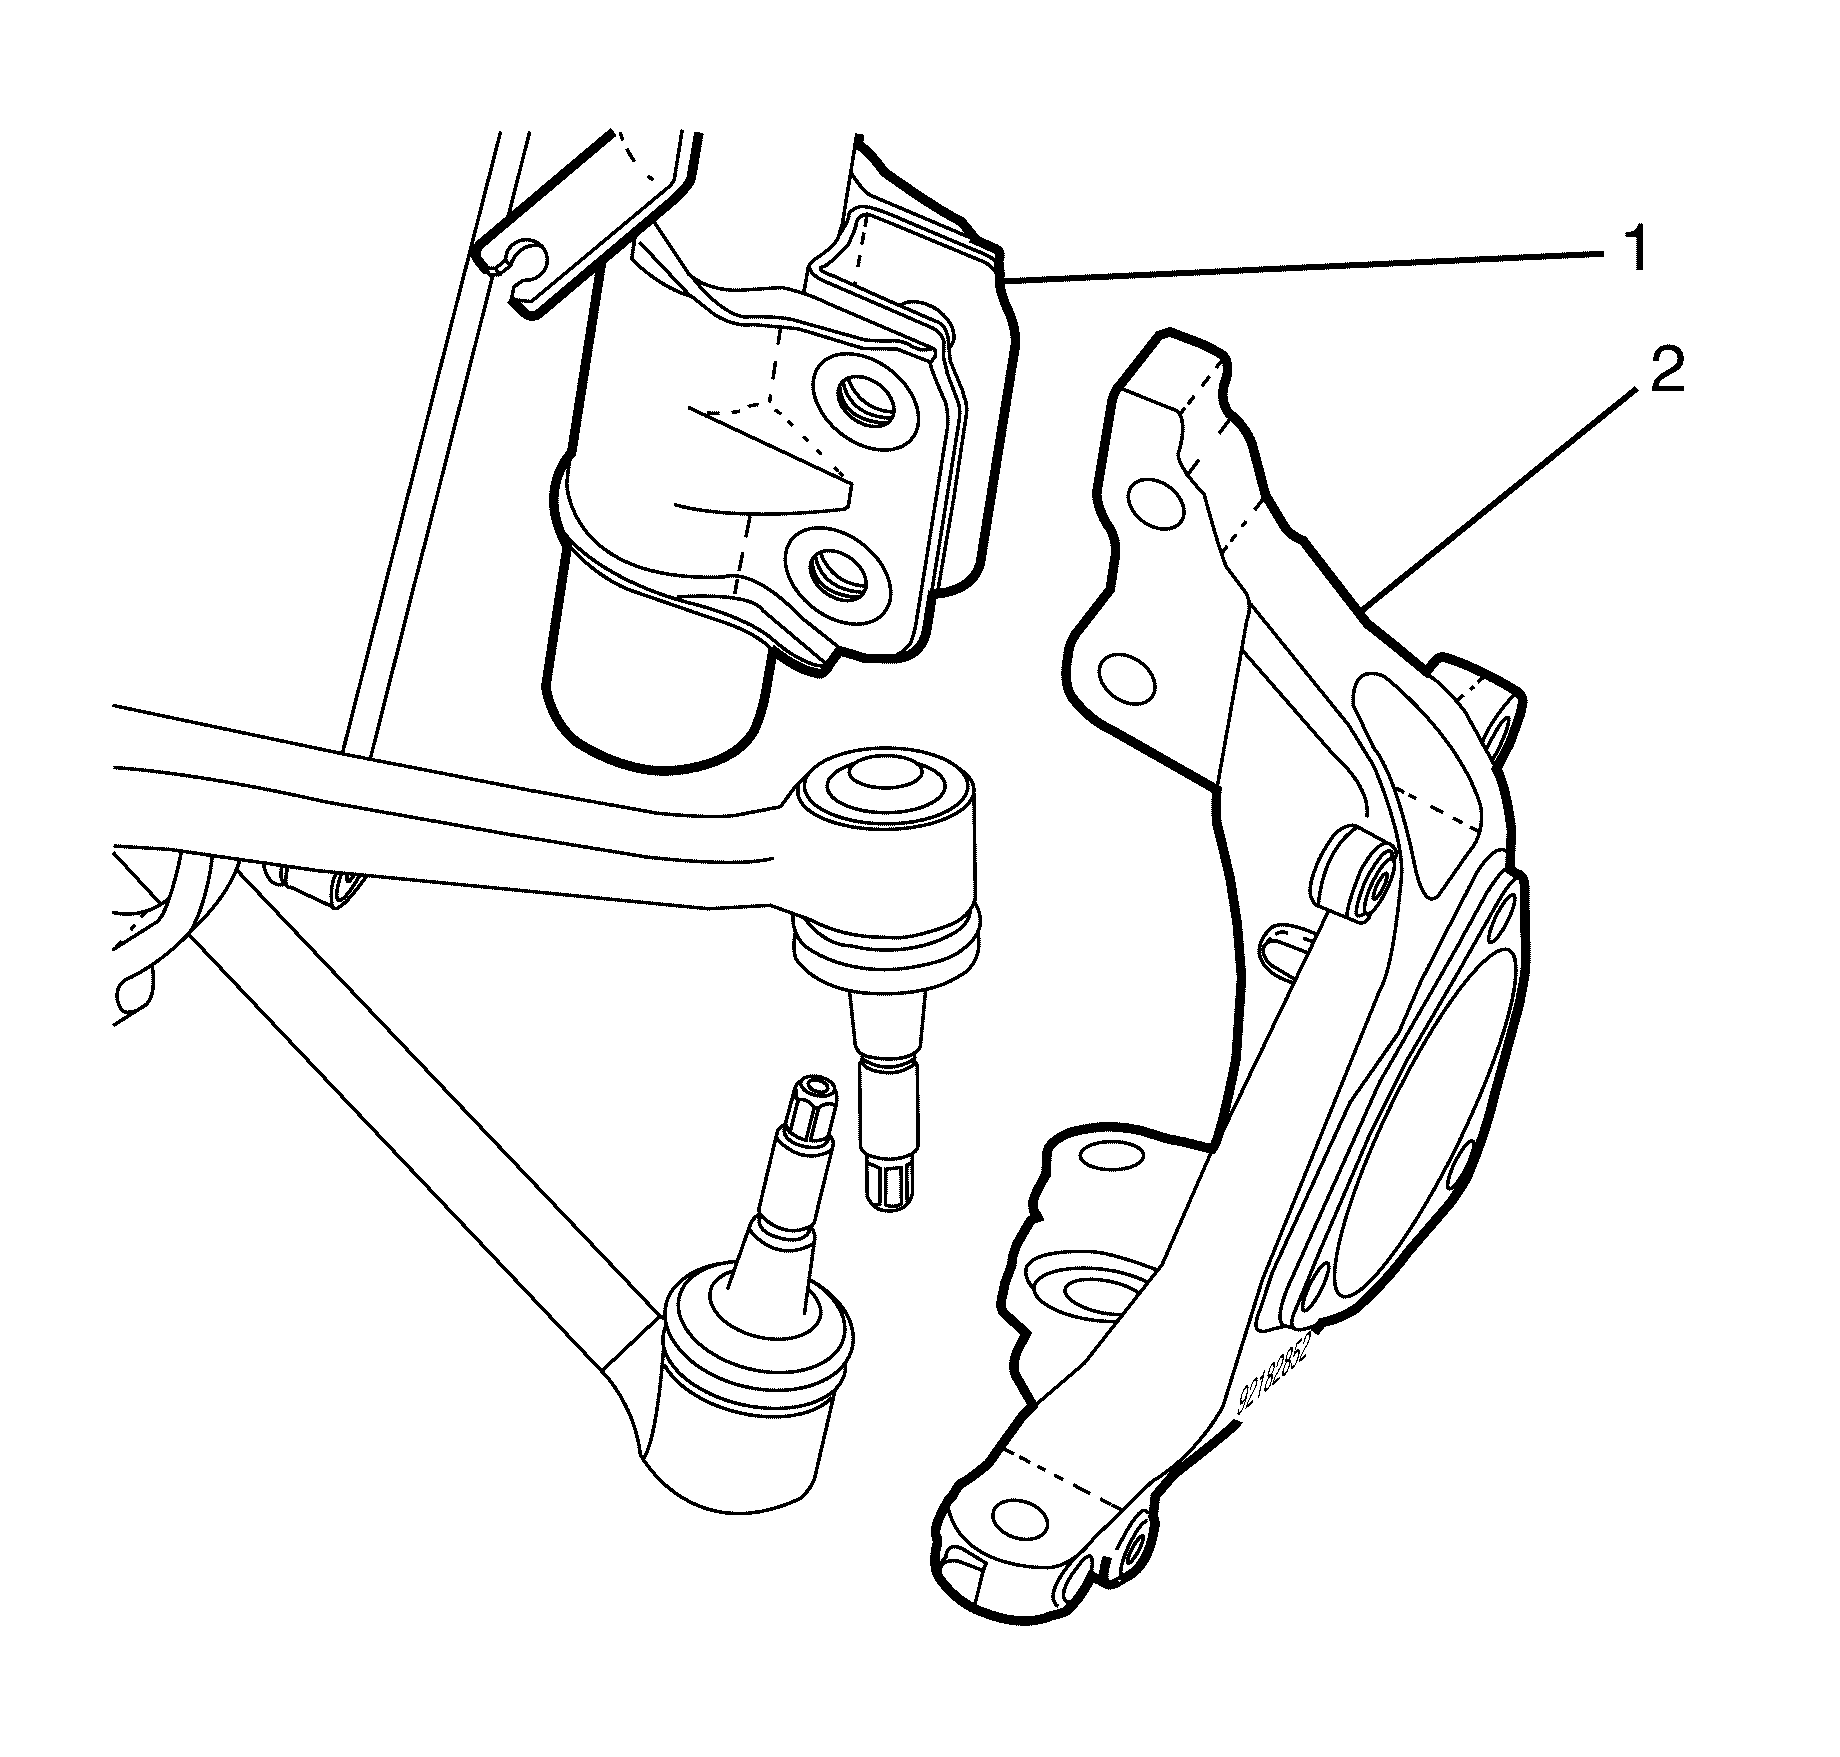
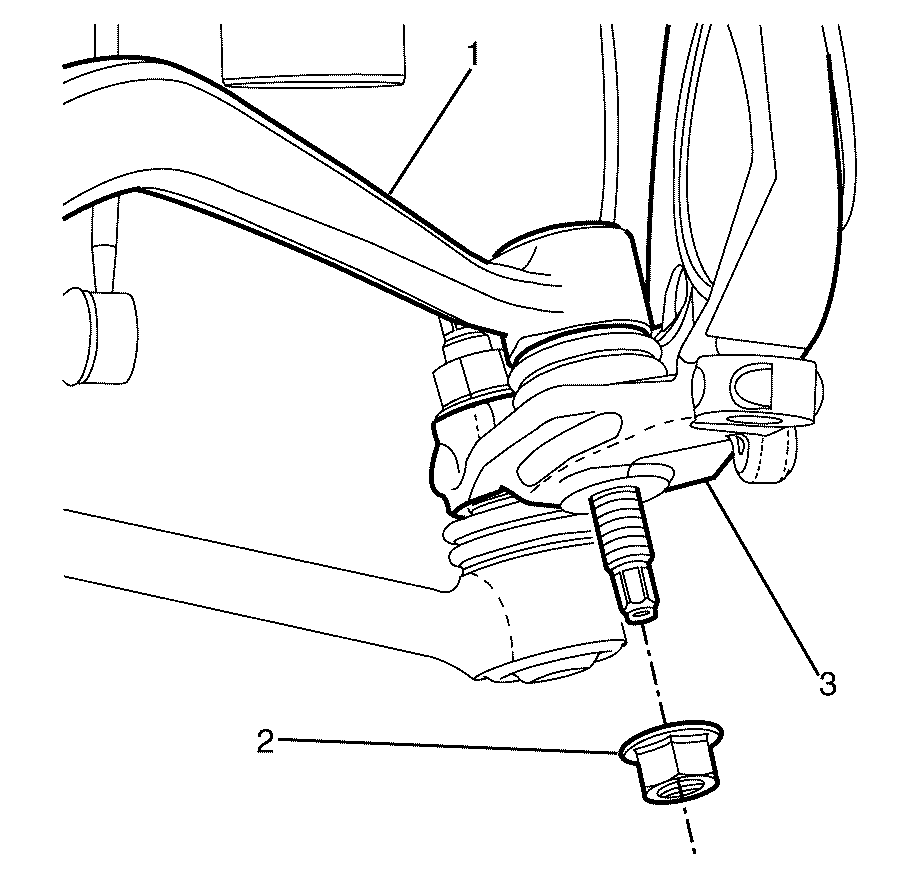
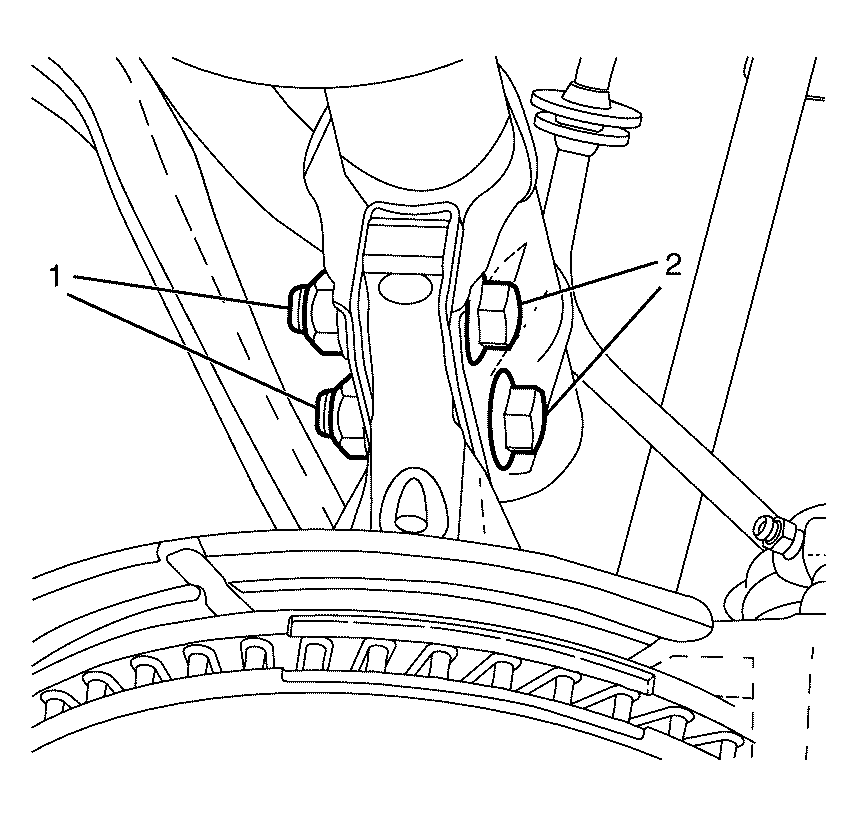
- Remove the control arm to steering knuckle retaining nut (1).
- Separate the control arm (1) from the steering knuckle (3) using the CH-49405 (2).
- Remove the CH-49405 (2).
- Disconnect the control arm (1) from the steering knuckle (3).
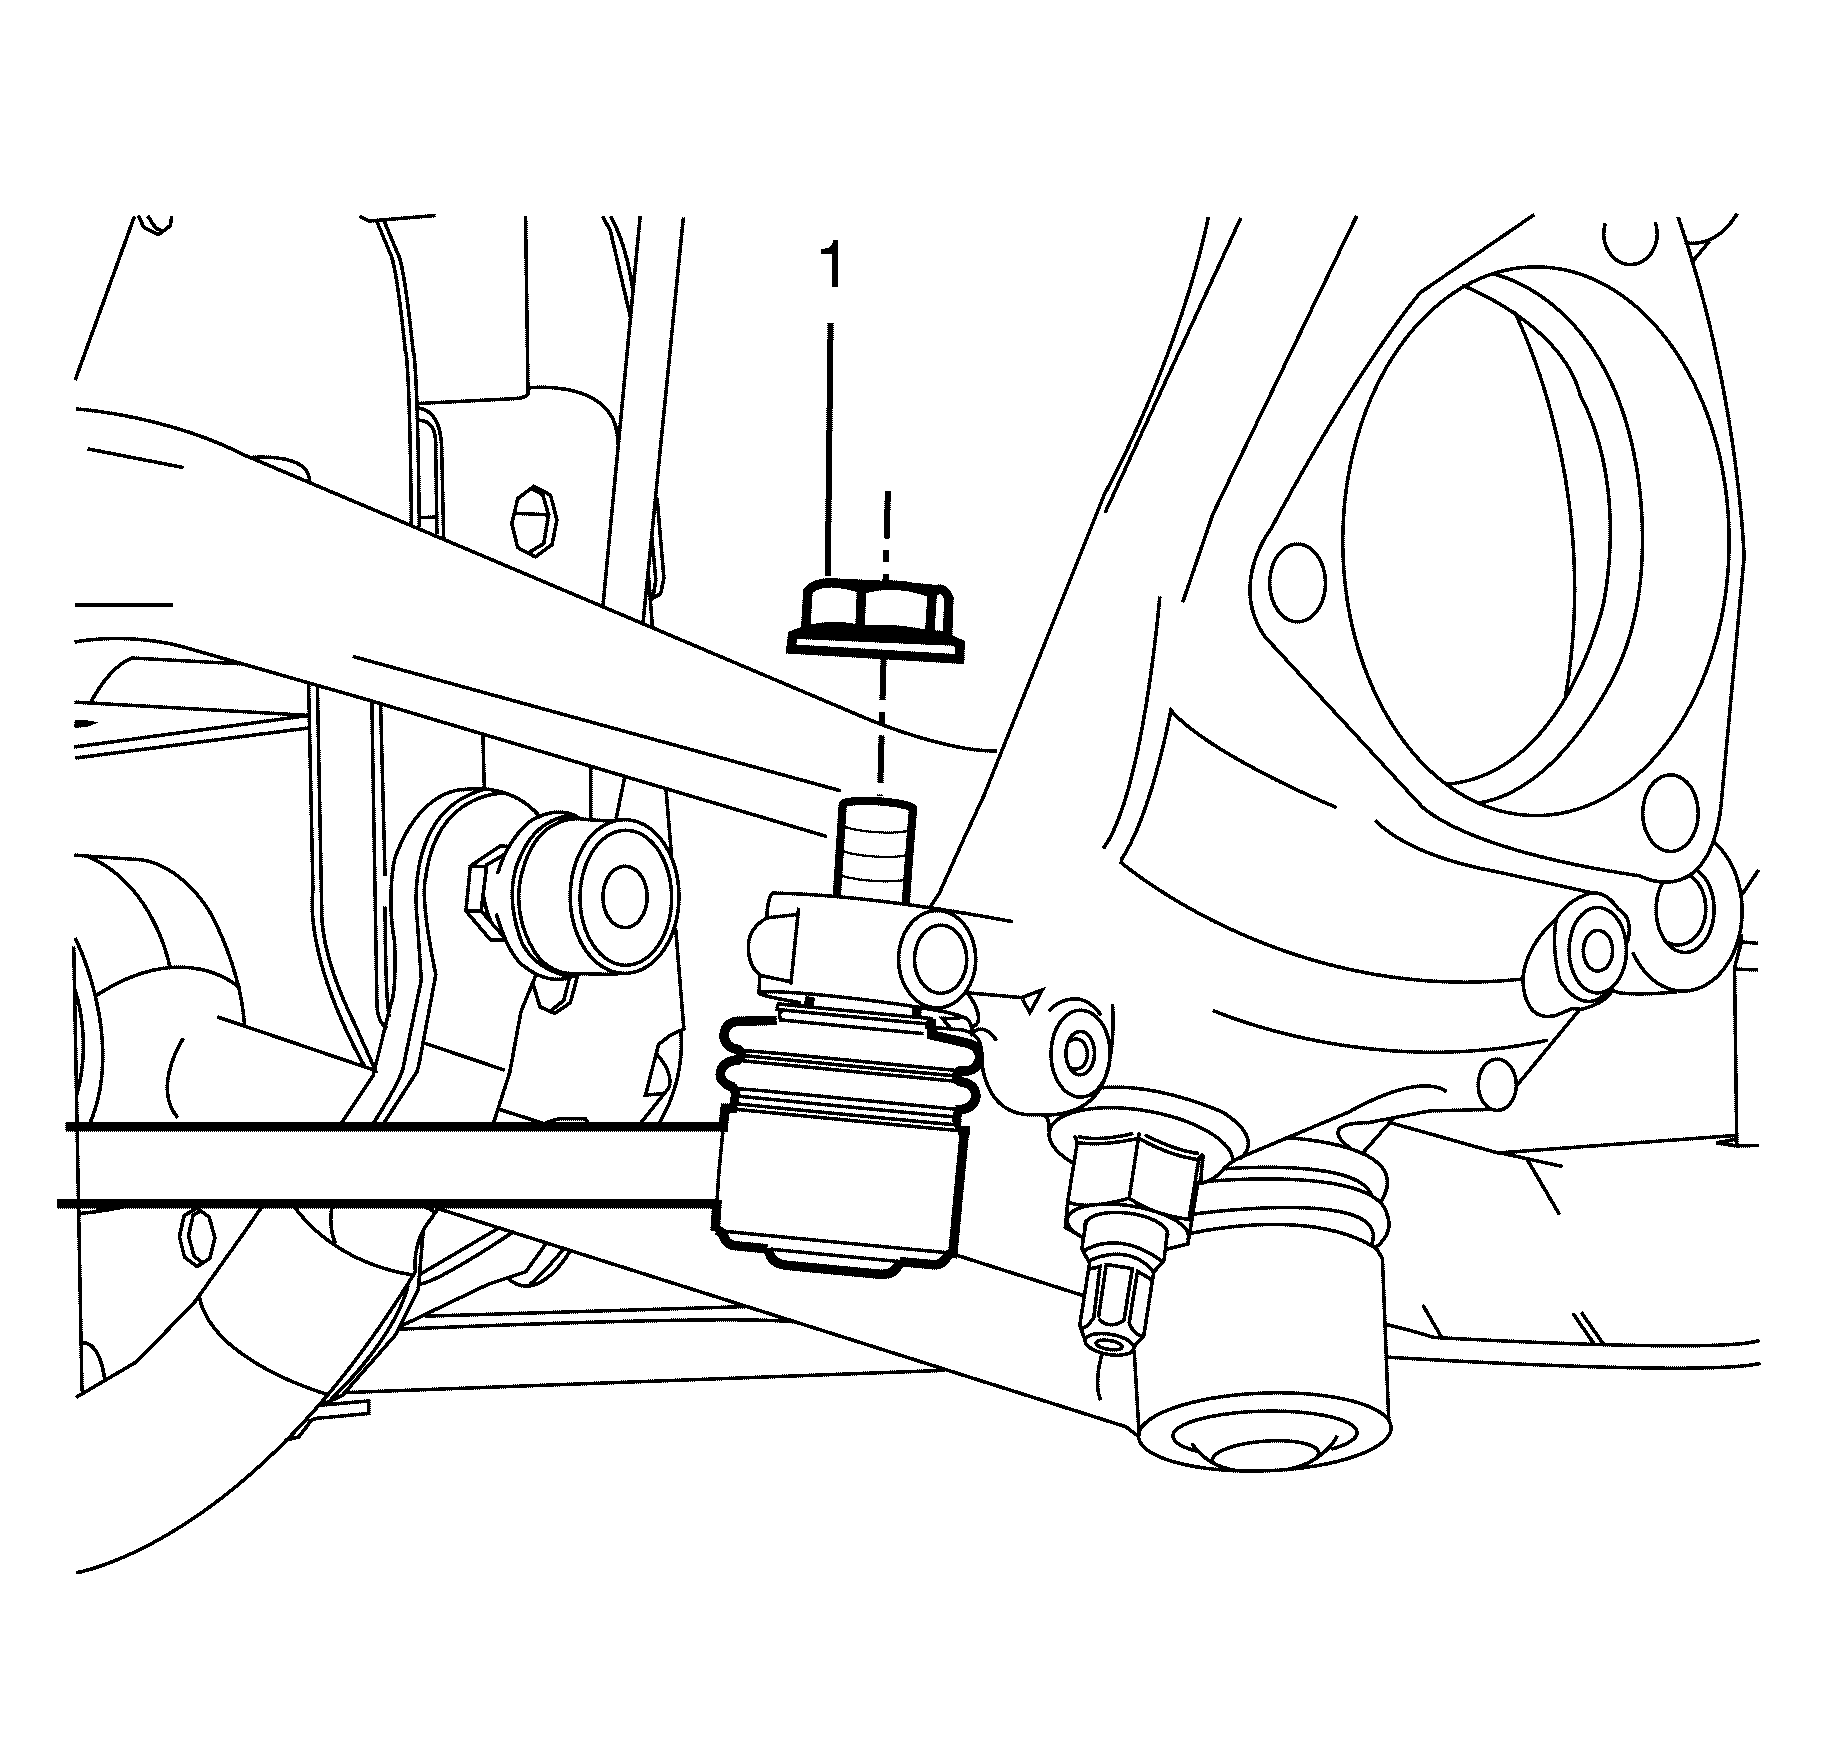
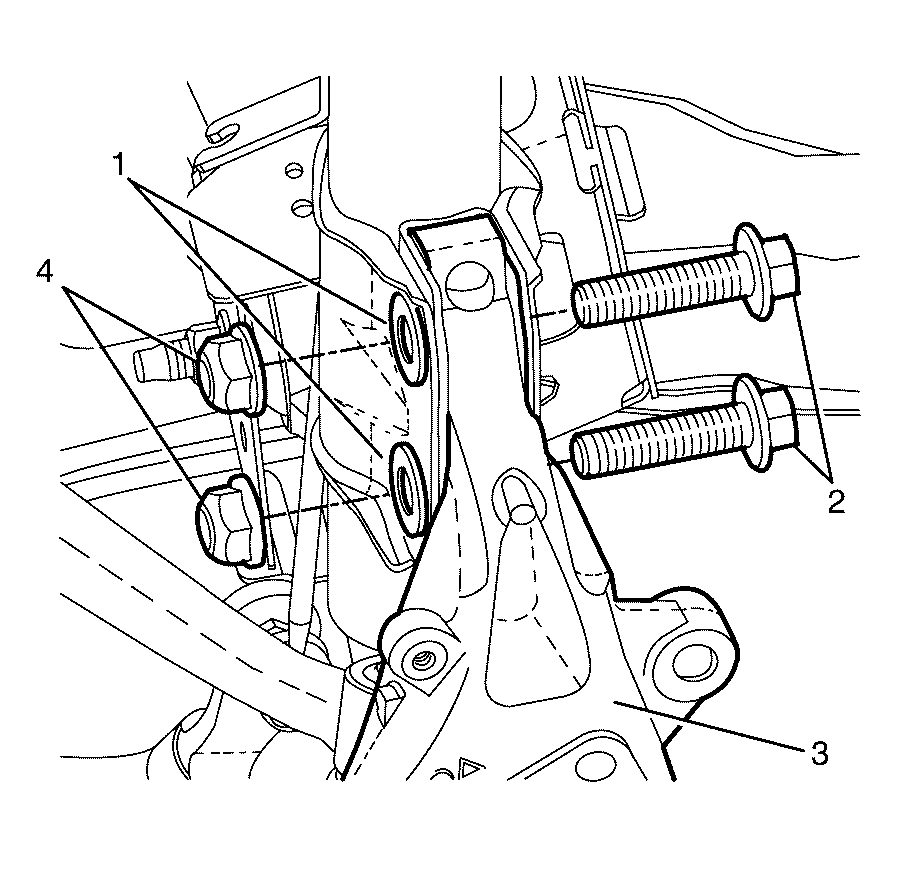
- Remove the camber adjusting bolt (3) from the steering knuckle (4).
- Remove the strut assembly to steering knuckle retaining bolts (2) nuts (5) and washers (1).
- Remove the steering knuckle (2) from the strut assembly (1).
Caution: Refer to Safety Glasses Caution in the Preface section.
Caution: Refer to Vehicle Lifting Caution in the Preface section.
Important: Nuts with micro-encapsulated thread sealant must be discarded after removal.
Discard the nut.
Important: Once a load is applied by the ball joint release tool loading bolt, a quick tap on the nut end of the tool will reduce the separating force required.
Discard the nut.
Important: Once a load is applied by the ball joint release tool loading bolt, a quick tap on the nut end of the tool will reduce the separating force required.
Discard the nut.
Important: Once a load is applied by the ball joint release tool loading bolt, a quick tap on the nut end of the tool will reduce the separating force required.
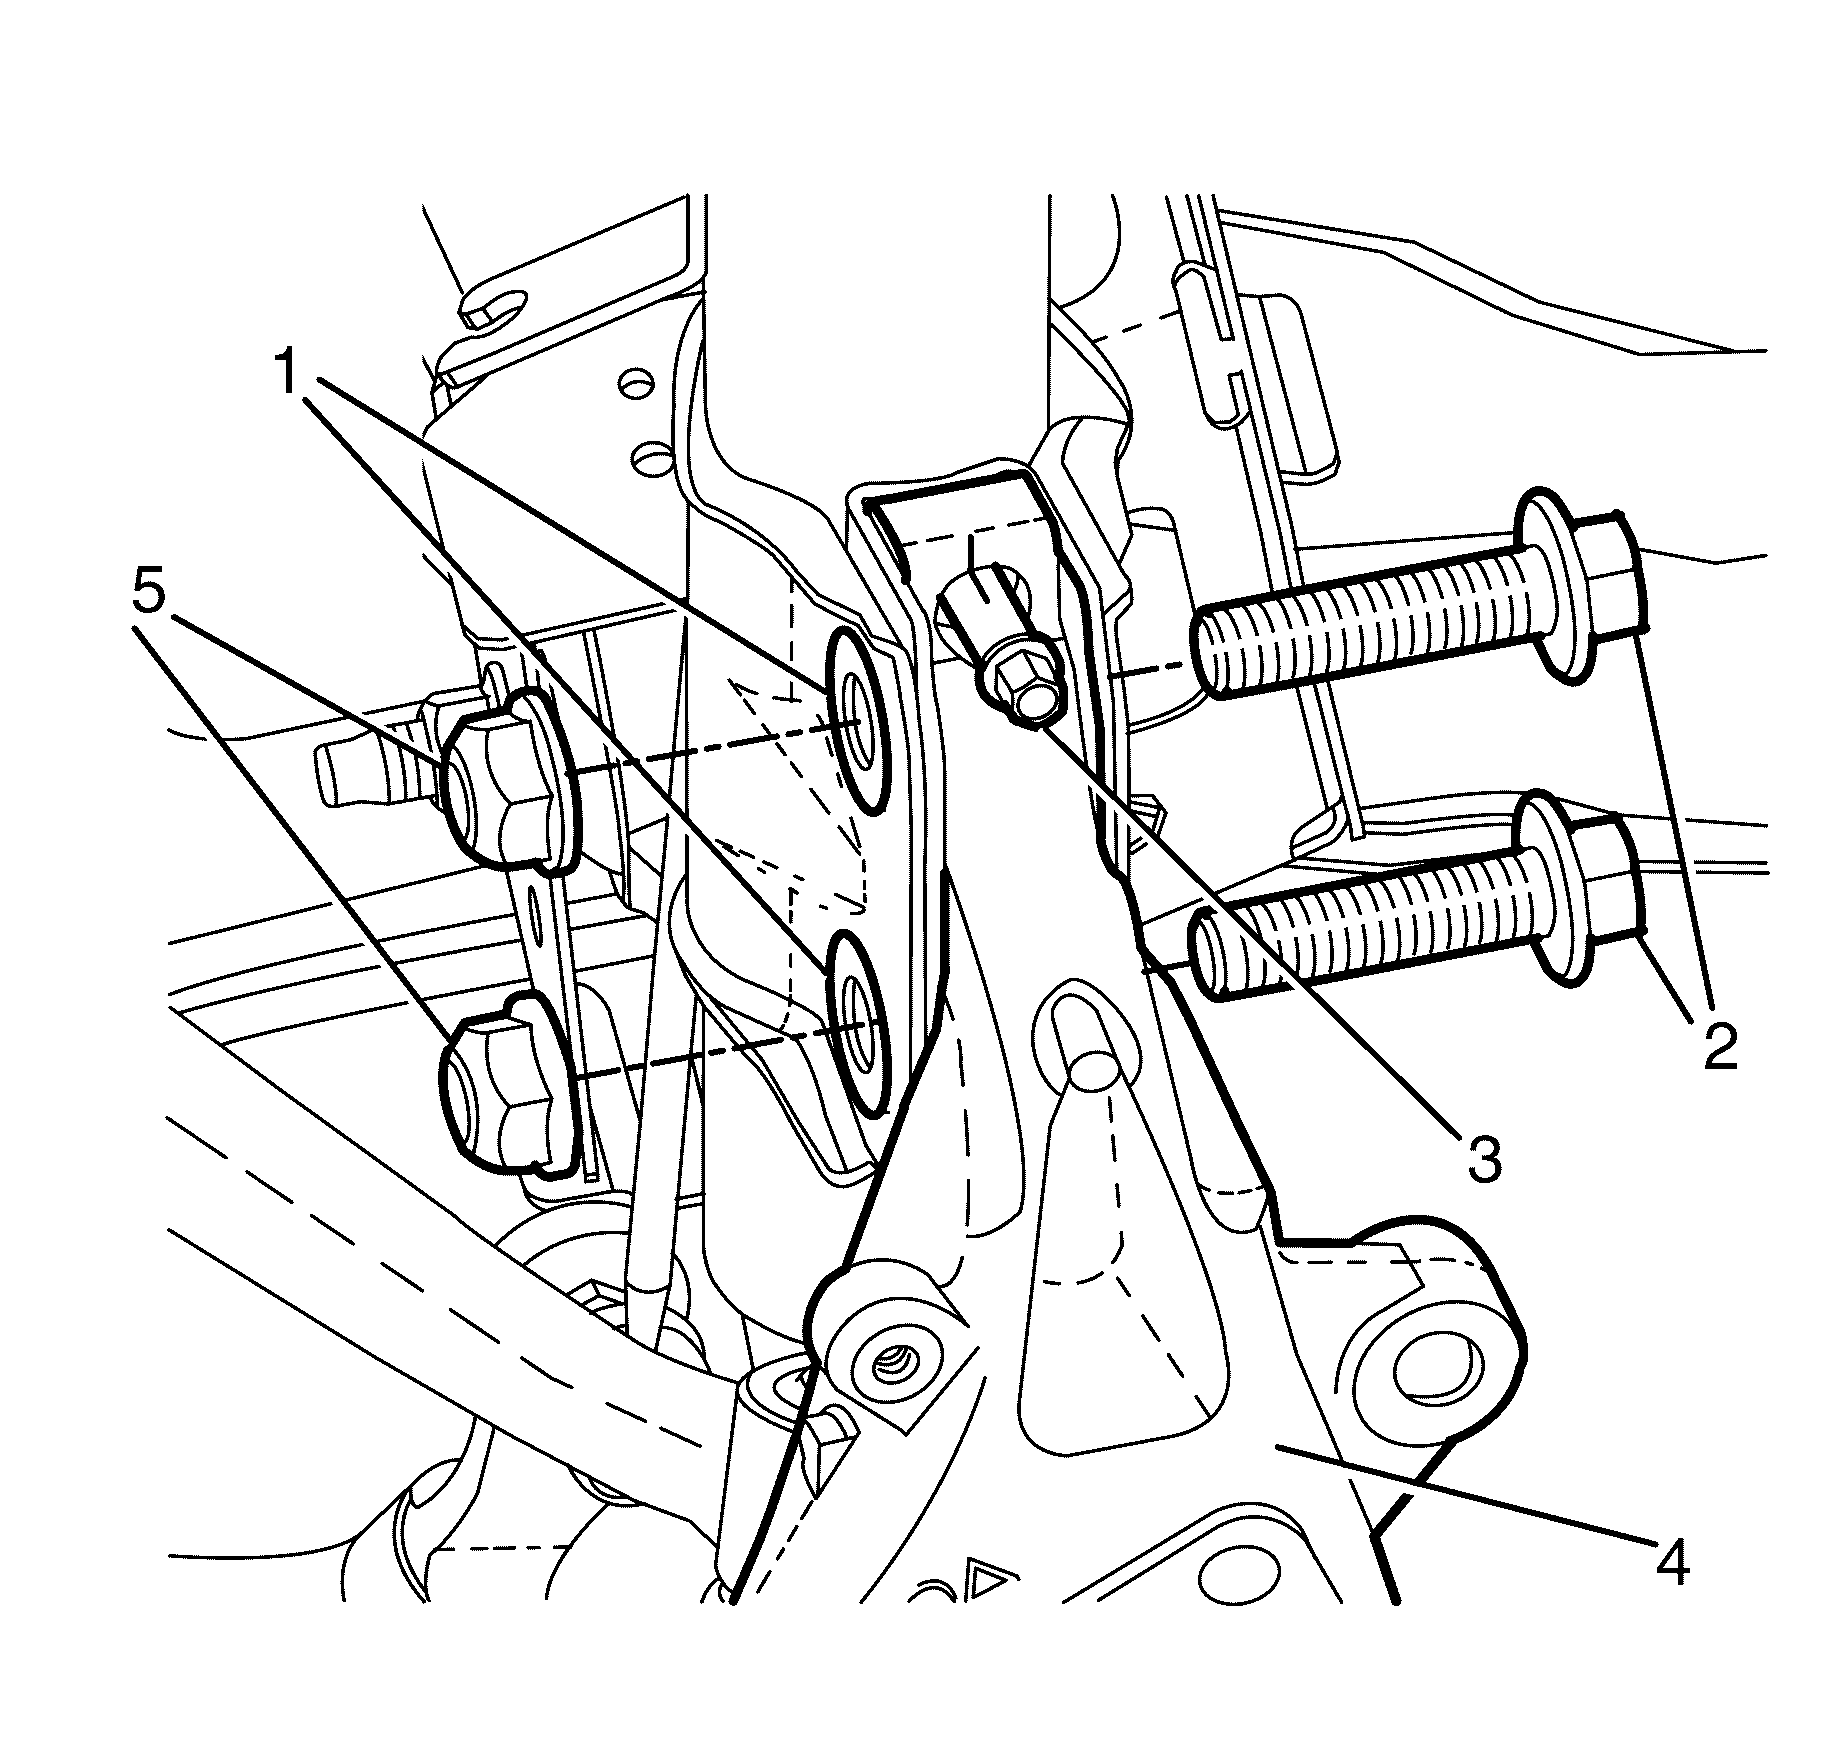
Important: Mark the camber adjusting bolt in relation to the steering knuckle and note the number of turns required to remove.
Important: The strut assembly to steering knuckle retaining bolts (2) nuts (5) and washers (1) are single use parts. They must be discarded after removal.
Important: Suitably support the steering knuckle before removing strut assembly to steering knuckle retaining bolts (2)
Discard the bolts, nuts and washers.
Installation Procedure - Up to 12 Jun 2007
- Install the steering knuckle (1) to the control arm (4).
- Install the NEW control arm to steering knuckle retaining nut (3).
- Install the steering knuckle (1) to the strut assembly (2).
- Install the NEW steering knuckle to strut assembly retaining bolts (2), nuts (5) and washers (1).
- Install the camber adjusting bolt (3) to the steering knuckle (4).
- Install the caster arm to the steering knuckle.
- Install the NEW caster arm to steering knuckle retaining nut (1).
- Install the tie rod (3) to the steering knuckle (2).
- Install the NEW tie rod to steering knuckle retaining nut (1).
- Install the brake disc splash shield (1).
- Install the brake disc splash shield to steering knuckle retaining bolts (2).
- Install the front wheel hub assembly. Refer to Front Wheel Bearing and Hub Replacement.
- Install the front wheel. Refer to Tire and Wheel Removal and Installation.
- Remove the safety stands.
- Lower the vehicle to the ground.
- Bounce the vehicle several times to settle the suspension.
- Check and adjust the wheel alignment. Refer to Wheel Alignment Measurement.
- Tighten the strut assembly to steering knuckle retaining bolts (2) and nuts (1).
Notice: Refer to Fastener Notice in the Preface section.
Tighten
Tighten the nuts a first pass to 40 N·m
(30 lb ft).
Tighten
Tighten the nuts an additional 60 degrees.
Important: The steering knuckle (3) to strut assembly retaining bolts (2), nuts (5) and washers (1) are not to be fully tightened at this stage.
Do not fully tighten at this stage.
Important: The camber adjusting bolt (3) must be installed rotating the same number of turns as recorded during removal and aligned with the marks previously made.
Tighten
Tighten the nuts a first pass to 40 N·m
(30 lb ft).
Tighten
Tighten the nuts an additional 60 degrees.
Tighten
Tighten the nut to 25 N·m+ 120 degrees
(18 lb ft + 120 degrees).
Tighten
Tighten the bolts to 9 N·m (7 lb ft).
Important: If the steering knuckle has been replaced, the end-float measurement must be checked. Refer to Front Wheel Hub Assembly Inspection
Tighten
Tighten the bolts a first pass to 85 N·m
(63 lb ft).
Tighten
Tighten the bolts a second pass to 100 N·m
(74 lb ft).
Tighten
Tighten the bolts an additional 90 degrees.
Removal Procedure - From 12 Jun 2007
- Raise and support the vehicle. Refer to Lifting and Jacking the Vehicle.
- Remove the front wheel. Refer to Tire and Wheel Removal and Installation.
- Remove the front wheel hub assembly. Refer to Front Wheel Bearing and Hub Replacement.
- Remove the brake disc splash shield to steering knuckle retaining bolts (2).
- Remove the brake disc splash shield (1) from the steering knuckle.
- Remove the tie rod end to steering knuckle retaining nut (1).
- Disconnect the tie rod (3) from the steering knuckle (2) using the CH-49405 (1).
- Remove the caster arm to steering knuckle retaining nut (1).
- Separate the caster arm (1) from the steering knuckle (3) using the CH-49405 (2).
- Remove the CH-49405 (2).
- Disconnect the caster arm (1) from the steering knuckle (3).
- Remove the control arm to steering knuckle retaining nut (1).
- Separate the control arm (1) from the steering knuckle (3) using the CH-49405 (2).
- Remove the CH-49405 (2).
- Disconnect the control arm (1) from the steering knuckle (3).
- Remove the strut assembly to steering knuckle retaining bolts (2) nuts (4) and washers (1).
- Remove the steering knuckle (2) from the strut assembly (1).
Caution: Refer to Safety Glasses Caution in the Preface section.
Caution: Refer to Vehicle Lifting Caution in the Preface section.
Important: Nuts with micro-encapsulated thread sealant must be discarded after removal.
Discard the nut.
Important: Once a load is applied by the ball joint release tool loading bolt, a quick tap on the nut end of the tool will reduce the separating force required.
Discard the nut.
Important: Once a load is applied by the ball joint release tool loading bolt, a quick tap on the nut end of the tool will reduce the separating force required.
Discard the nut.
Important: Once a load is applied by the ball joint release tool loading bolt, a quick tap on the nut end of the tool will reduce the separating force required.
Important: The strut assembly to steering knuckle retaining bolts (2) nuts (4) and washers (1) are single use parts. They must be discarded after removal.
Important: Suitably support the steering knuckle (3) before removing strut assembly to steering knuckle retaining bolts (2)
Discard the bolts, nuts and washers.
Installation Procedure - From 12 Jun 2007
- Install the steering knuckle (1) to the control arm (4).
- Install the NEW control arm to steering knuckle retaining nut (3).
- Install the steering knuckle (1) to the strut assembly (2).
- Install the NEW steering knuckle to strut assembly retaining bolts (2), nuts (4) and washers (1).
- Install the caster arm to the steering knuckle.
- Install the NEW caster arm (1) to steering knuckle (3) retaining nut (2).
- Install the tie rod (3) to the steering knuckle (2).
- Install the NEW tie rod to steering knuckle retaining nut (1).
- Install the brake disc splash shield (1).
- Install the brake disc splash shield to steering knuckle retaining bolts (2).
- Install the front wheel hub assembly. Refer to Front Wheel Bearing and Hub Replacement.
- Install the front wheel. Refer to Tire and Wheel Removal and Installation.
- Remove the safety stands.
- Lower the vehicle to the ground.
- Bounce the vehicle several times to settle the suspension.
- Check and adjust the wheel alignment. Refer to Wheel Alignment Measurement.
- Tighten the strut assembly to steering knuckle retaining bolts (2) and nuts (1).
Notice: Refer to Fastener Notice in the Preface section.
Tighten
Tighten the nuts a first pass to 40 N·m
(30 lb ft).
Tighten
Tighten the nuts an additional 60 degrees.
Important: The steering knuckle (3) to strut assembly retaining bolts (2), nuts (4) and washers (1) are not to be fully tightened at this stage.
Do not fully tighten at this stage.
Tighten
Tighten the nuts a first pass to 40 N·m
(30 lb ft).
Tighten
Tighten the nuts an additional 60 degrees.
Tighten
Tighten the nut to 25 N·m+ 120 degrees
(18 lb ft + 120 degrees).
Tighten
Tighten the bolts to 9 N·m (7 lb ft).
Important: If the steering knuckle has been replaced, the end-float measurement must be checked. Refer to Front Wheel Hub Assembly Inspection.
Tighten
Tighten the bolts a first pass to 85 N·m
(63 lb ft).
Tighten
Tighten the bolts a second pass to 100 N·m
(74 lb ft).
Tighten
Tighten the bolts an additional 90 degrees.
