For 1990-2009 cars only
Cleaning Procedure
- Clean all the following components with solvent:
- Clean each camshaft position actuator's exterior with solvent.
- Dry the timing components with compressed air.
| • | Crankshaft sprocket. |
| • | Primary timing drive chain. |
| • | Primary timing drive chain shoe. |
| • | Primary timing drive chain guides. |
| • | Primary timing drive chain tensioner. |
| • | Secondary timing drive chains. |
| • | Secondary timing drive chain shoes. |
| • | Secondary timing drive chain guides. |
| • | Secondary timing drive chain tensioners. |
| • | Timing component fastening bolts. |
Caution: Refer to Safety Glasses Caution in the Preface section.
Visual Inspection
Camshaft Position Actuators (LY7 Engine)
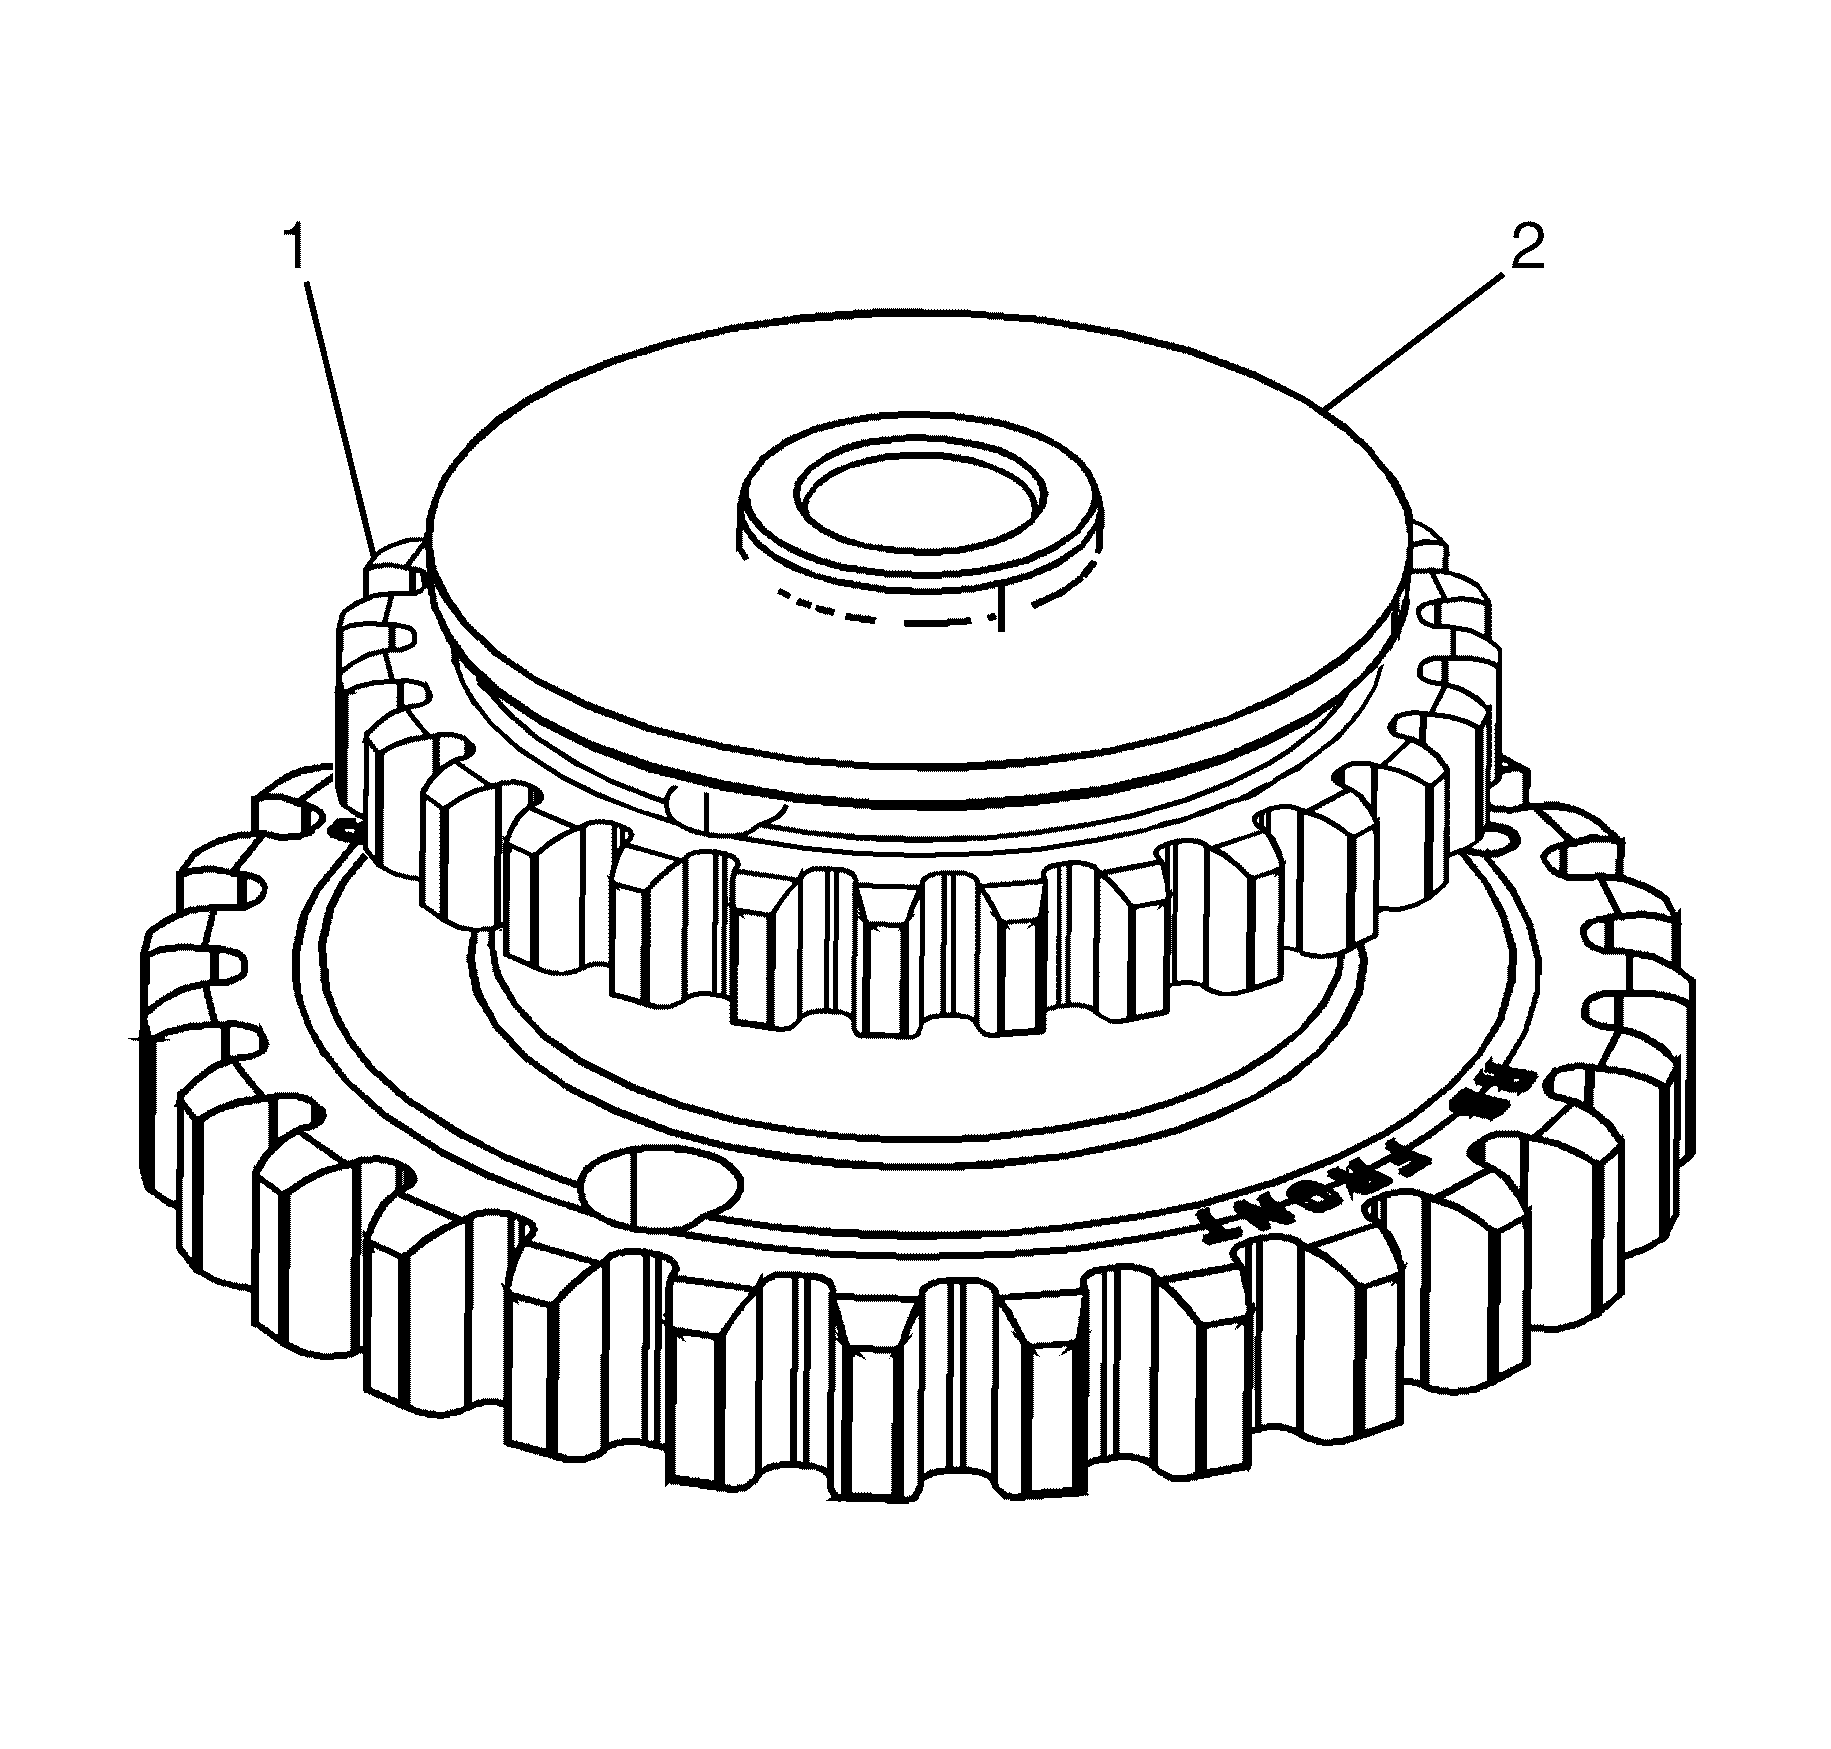
- Inspect the front of the exhaust camshaft position actuators for the following:
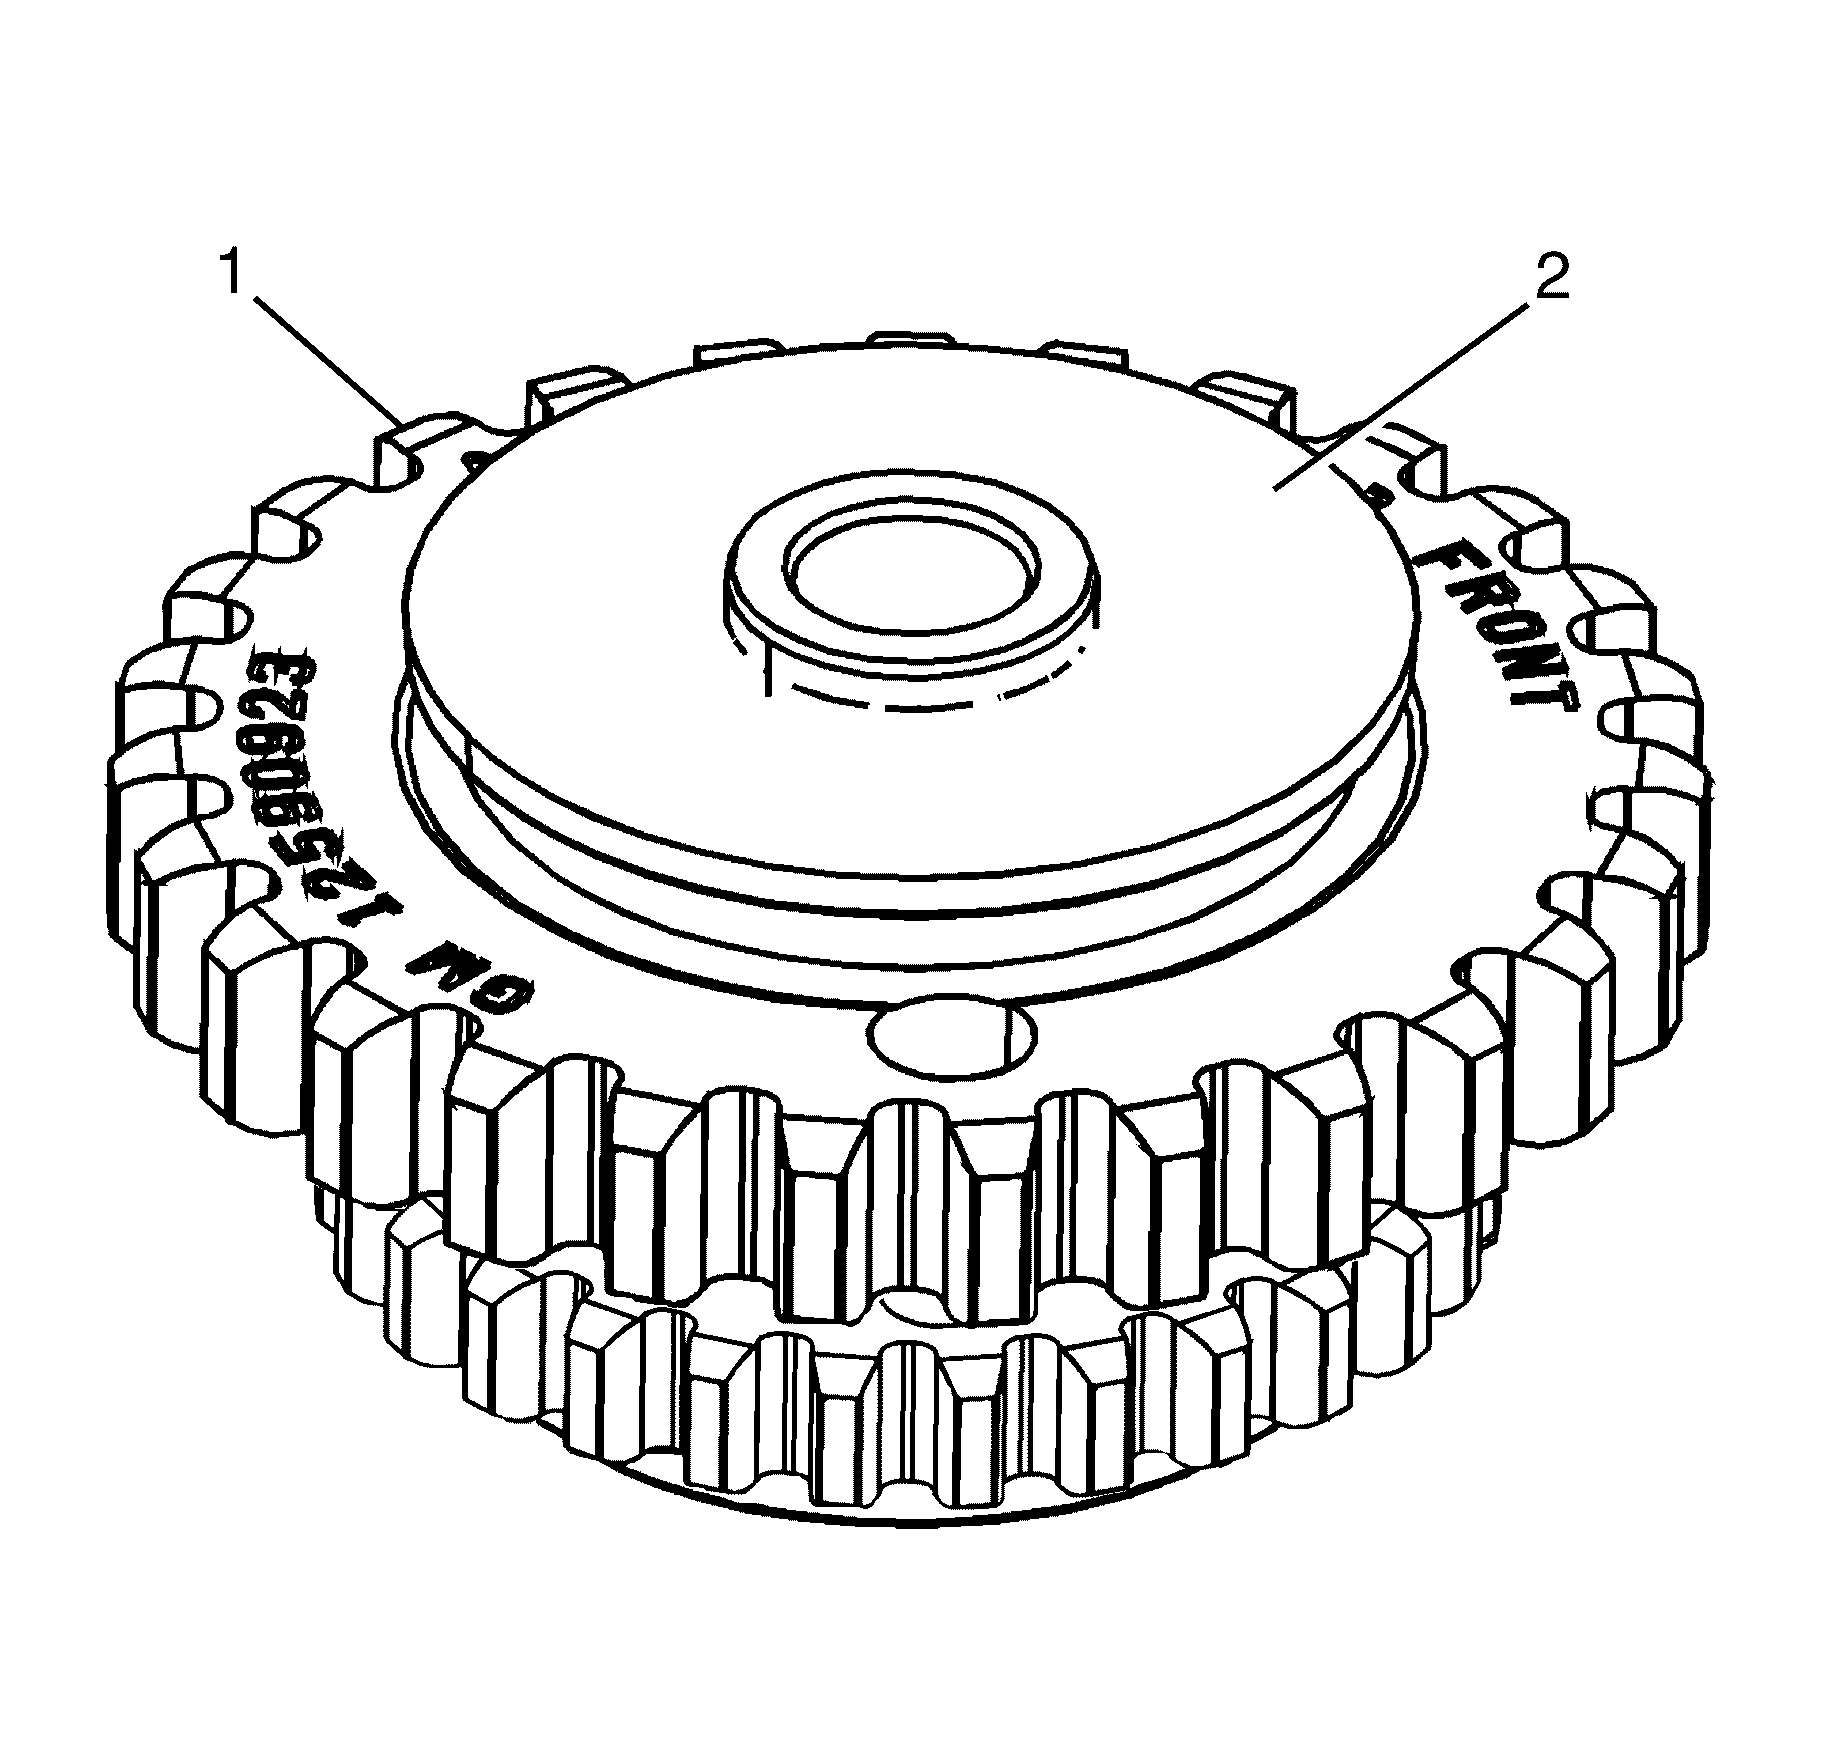
- Inspect the back of the exhaust camshaft position actuators for the following:
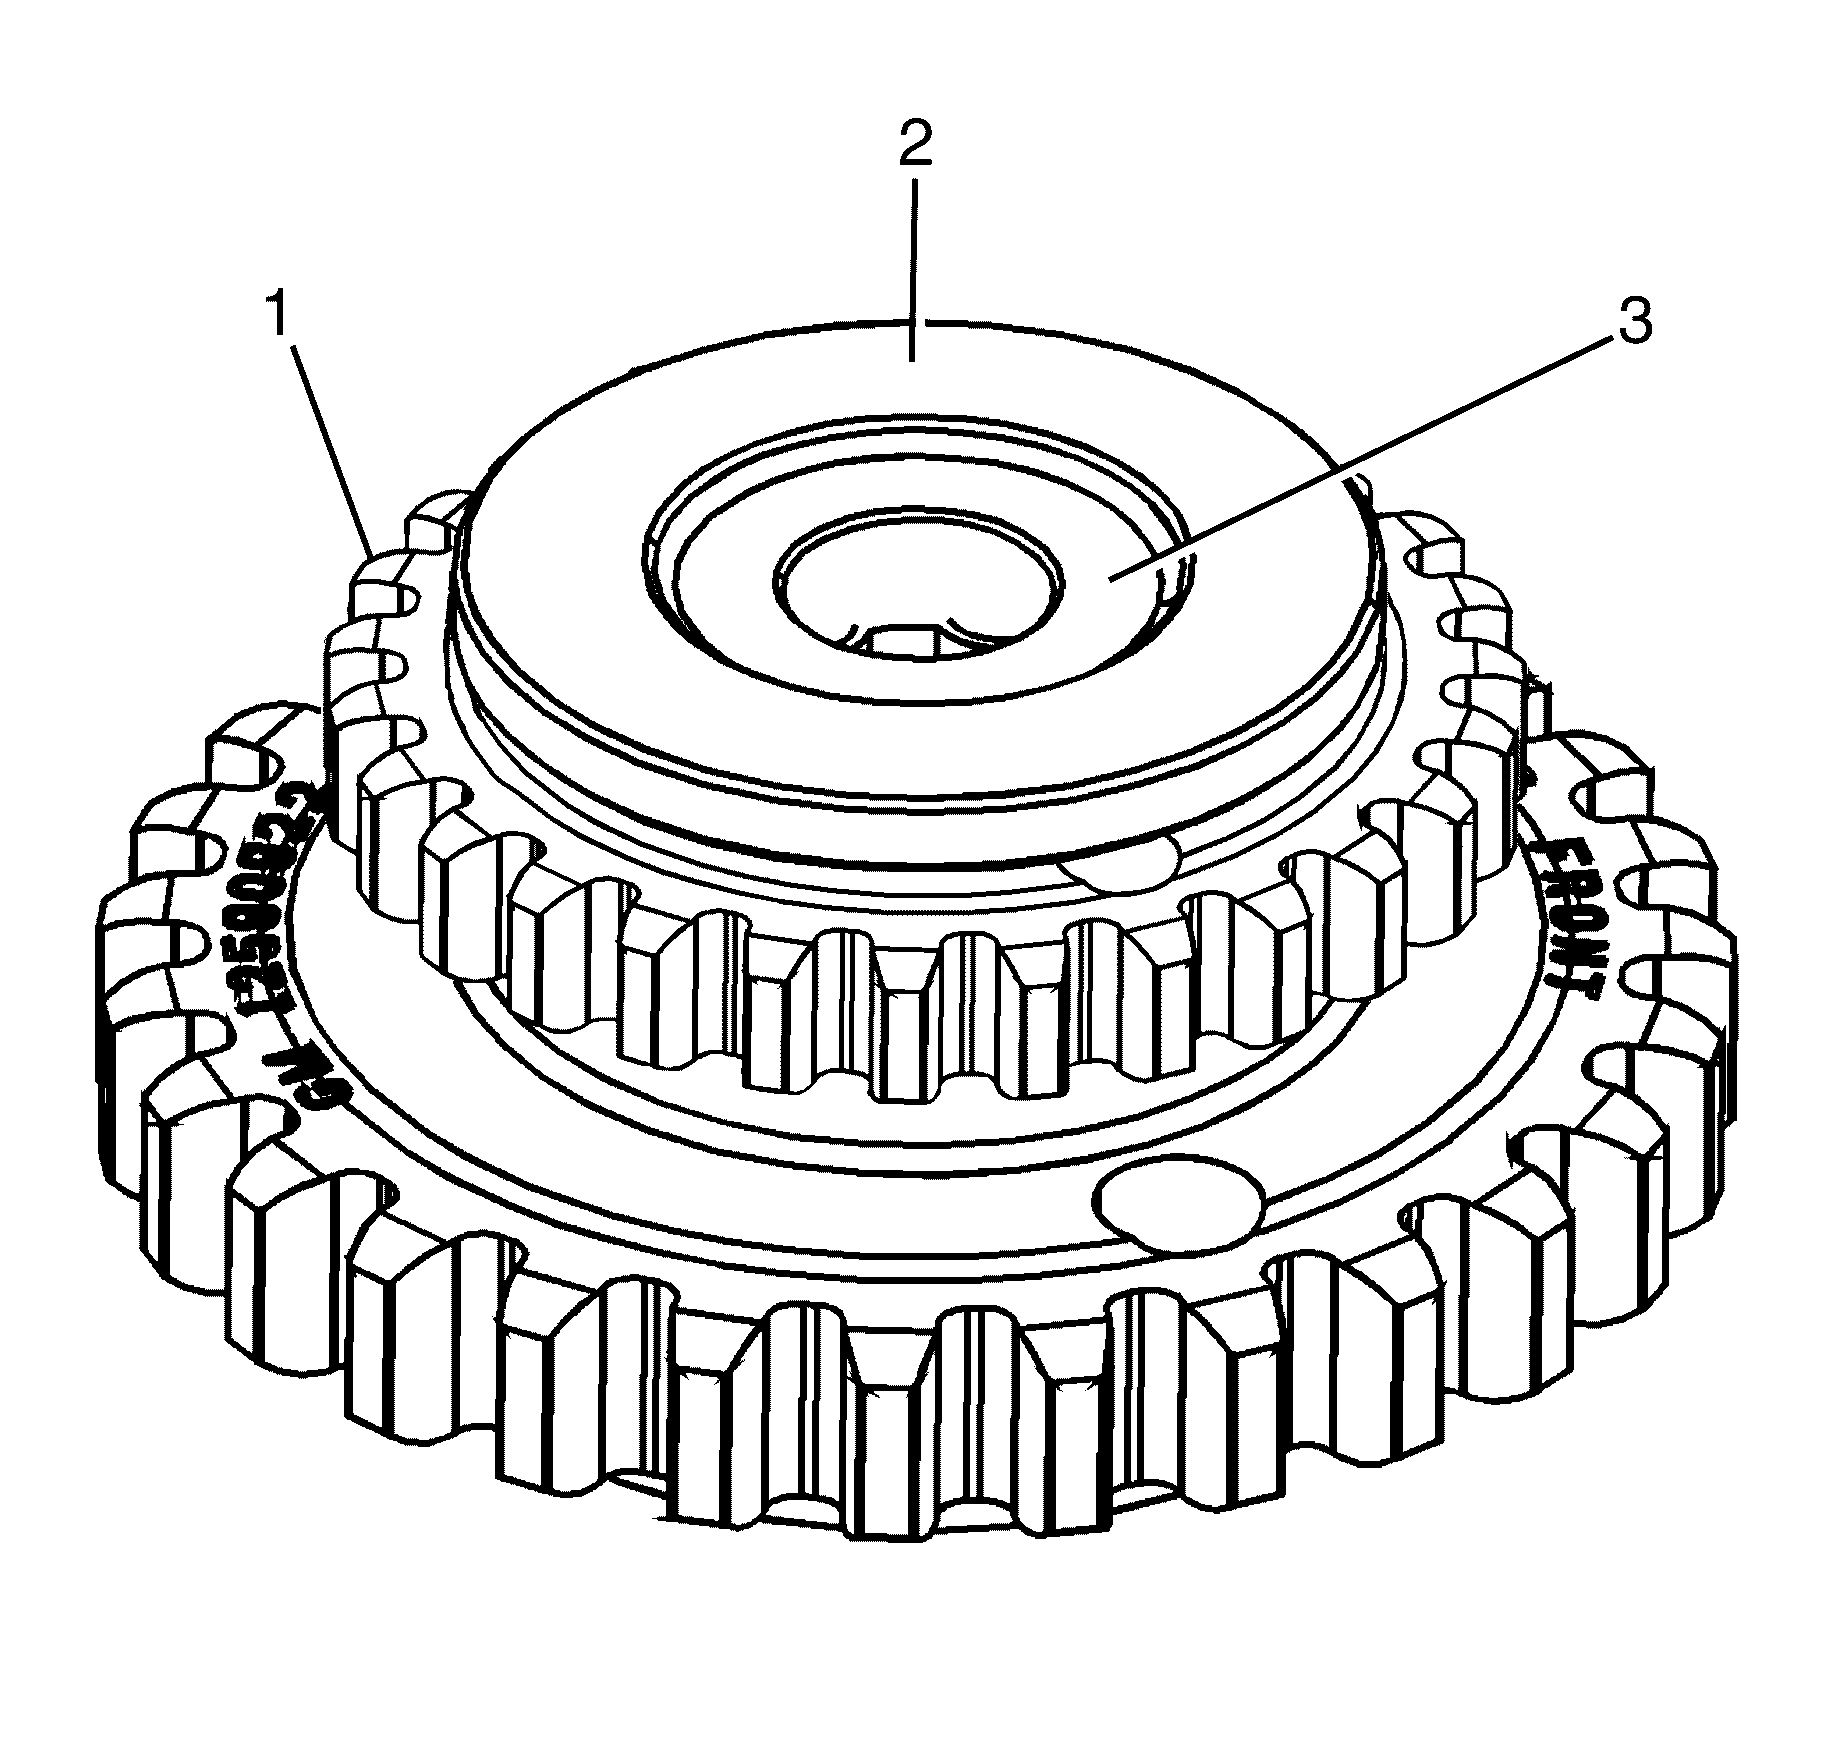
- Inspect the front of the intake camshaft position actuators for the following:
- Inspect the back of the intake camshaft position actuators for the following:
- Replace a damaged camshaft position actuator.
| • | Sprocket damage (1). |
| • | Reluctor/sensor wheel damage (2). |
| • | Camshaft position actuator to camshaft retaining bolt seating/sealing inner hub flange damage (3). |
| • | Sprocket damage (1). |
| • | Camshaft locating pin damage (2). |
| • | Camshaft seating/sealing inner hub flange damage (3). |
| • | Blockage to the oil passages (4). |
| • | Loose or missing housing bolts (5). |
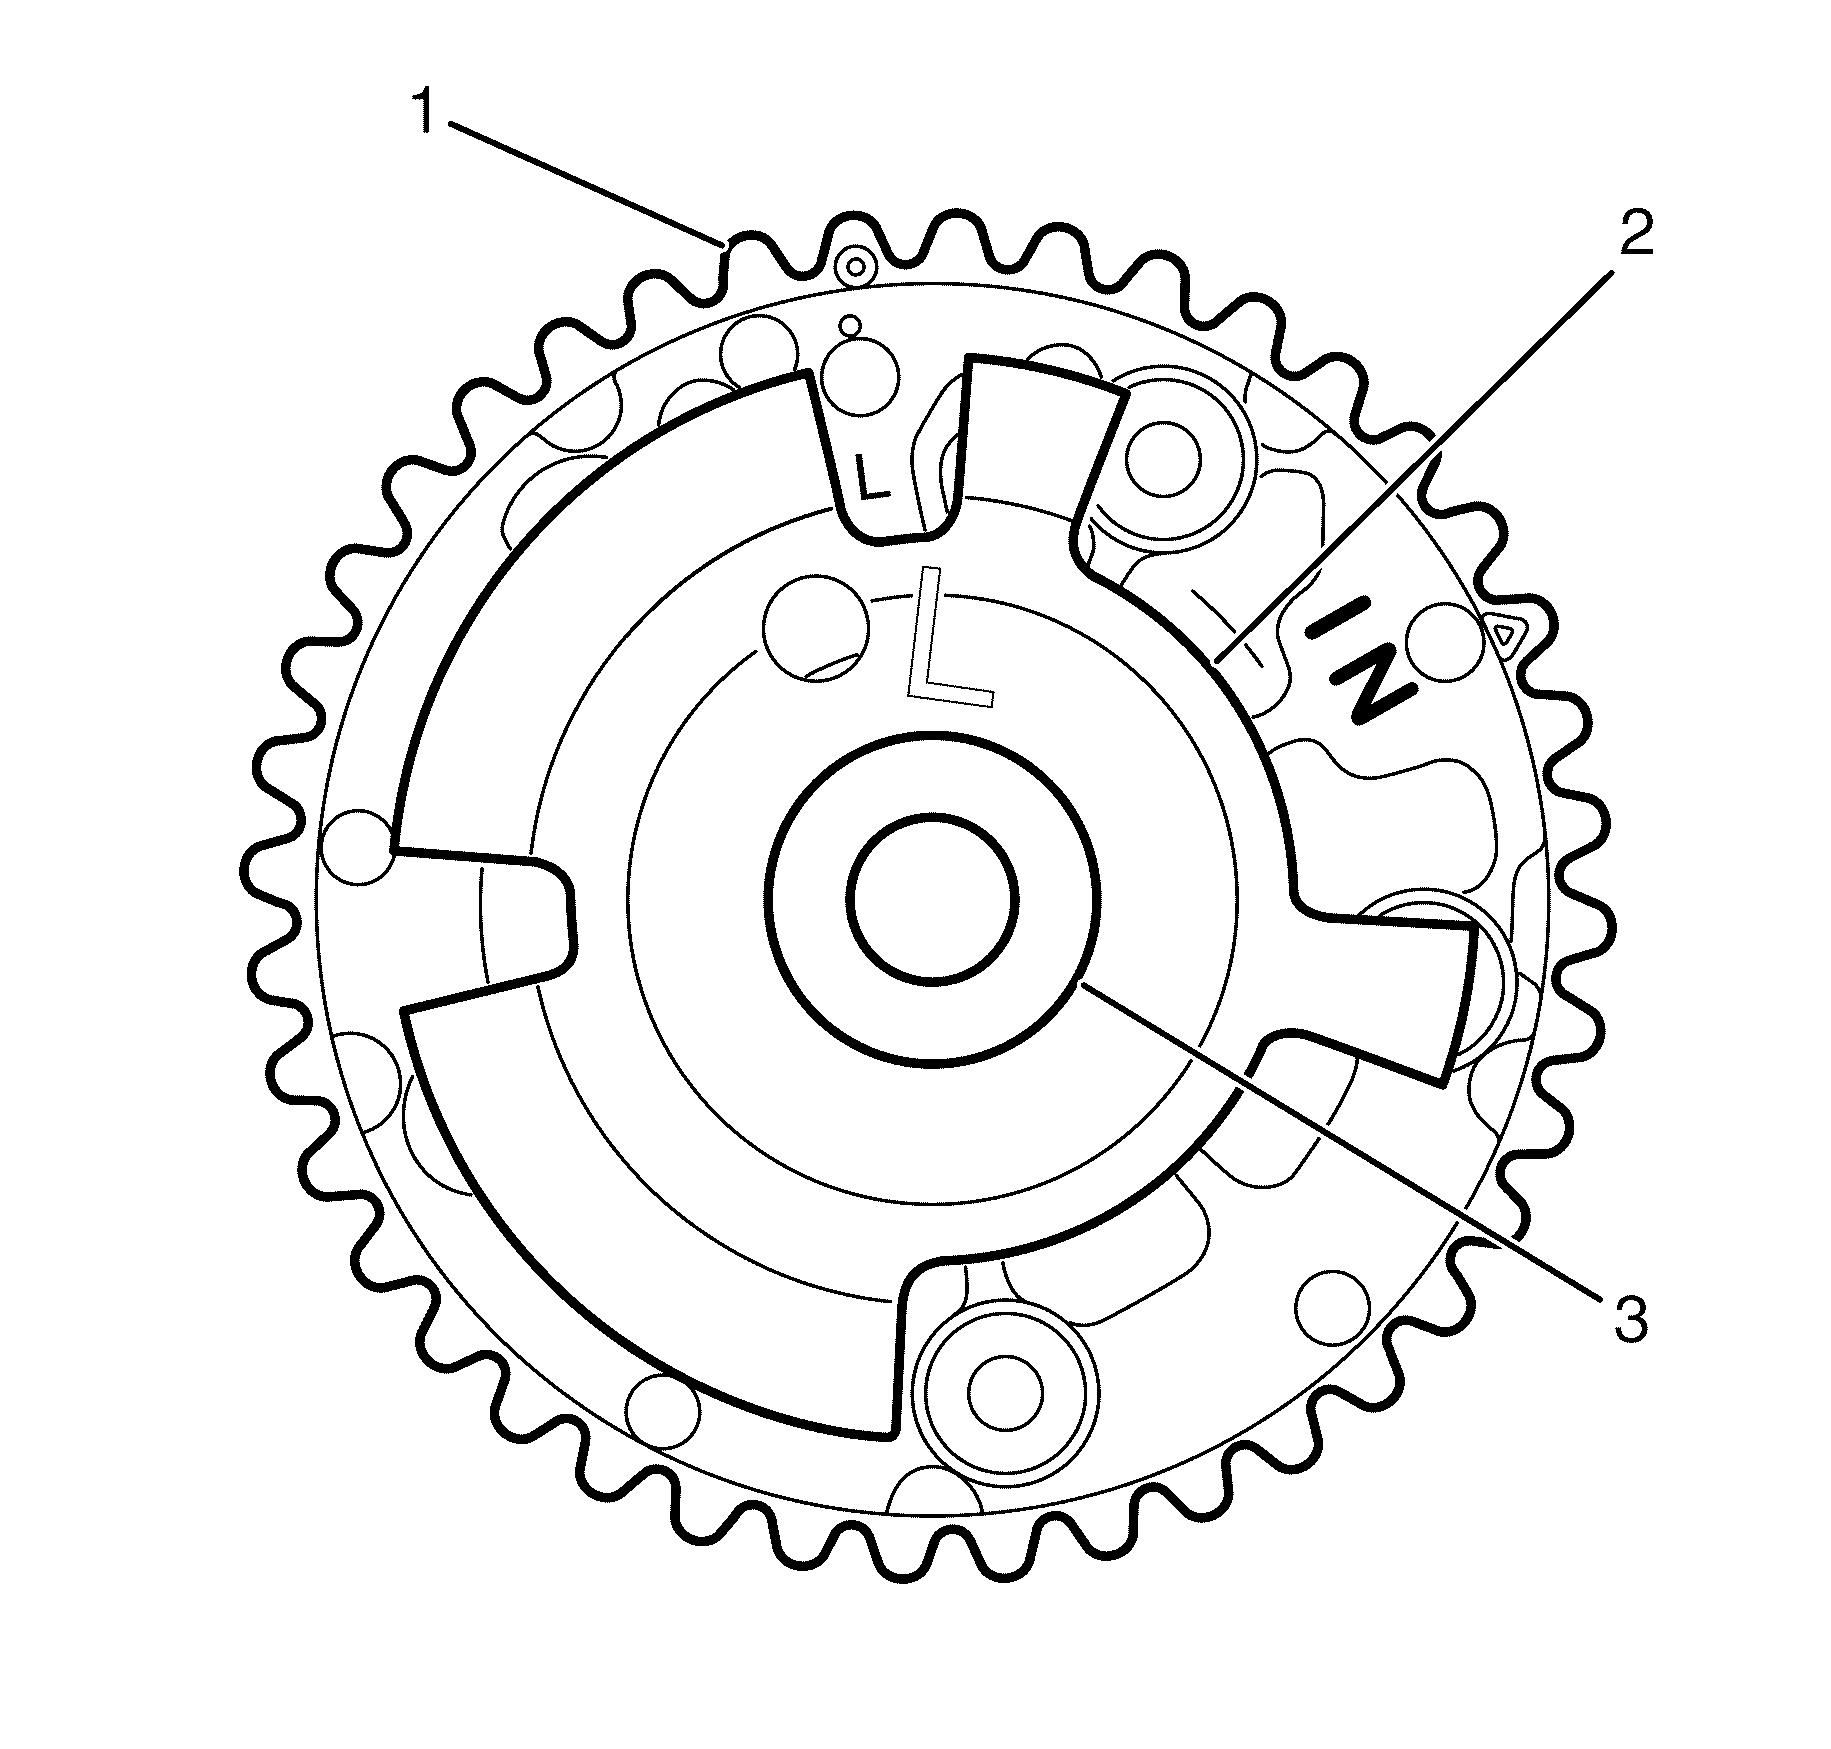
| • | Sprocket damage (1). |
| • | Reluctor/sensor wheel damage (2). |
| • | Camshaft position actuator oil control valve bolt seating/sealing inner hub flange damage (3). |
| • | Sprocket damage (1). |
| • | Camshaft locating pin damage (2). |
| • | Camshaft seating/sealing inner hub flange damage (3). |
| • | Blockage to the oil passages (4). |
| • | Loose or missing housing bolts (5). |
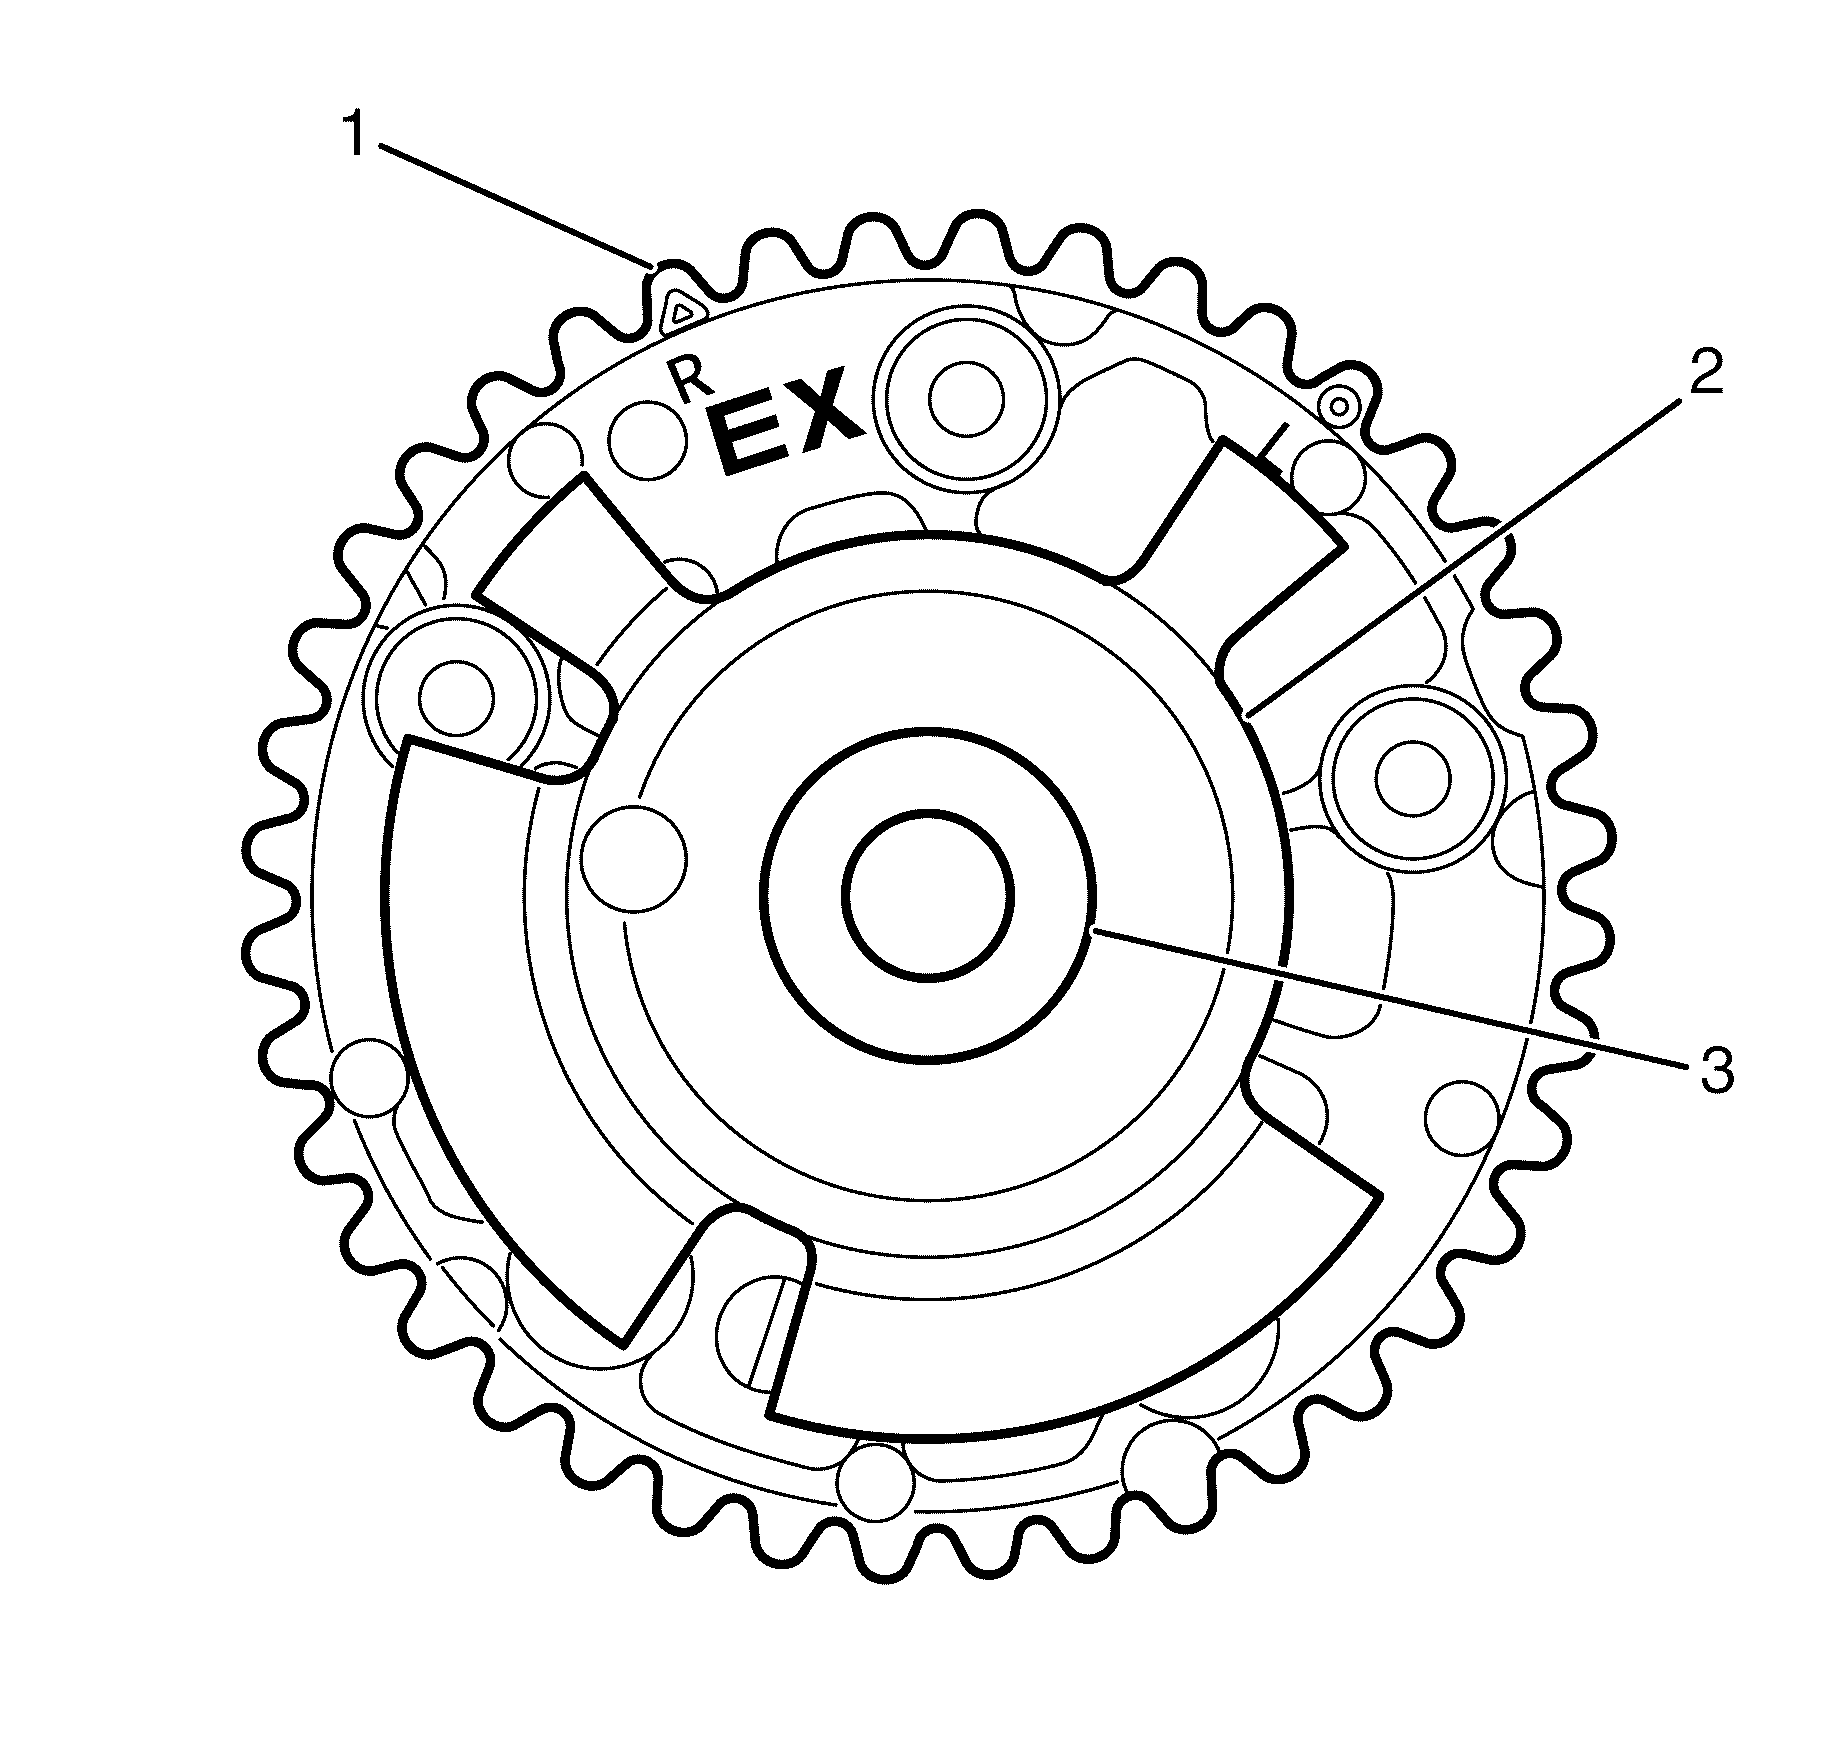
Camshaft Position Actuators and Sprockets (LE0 & LW2 Engines)
- Inspect the front of the exhaust camshaft sprockets for the following:
- Inspect the back of the exhaust camshaft sprockets for the following:
- Inspect the front of the intake camshaft position actuators for the following:
- Inspect the back of the intake camshaft position actuators for the following:
- Replace a damaged camshaft position actuator.
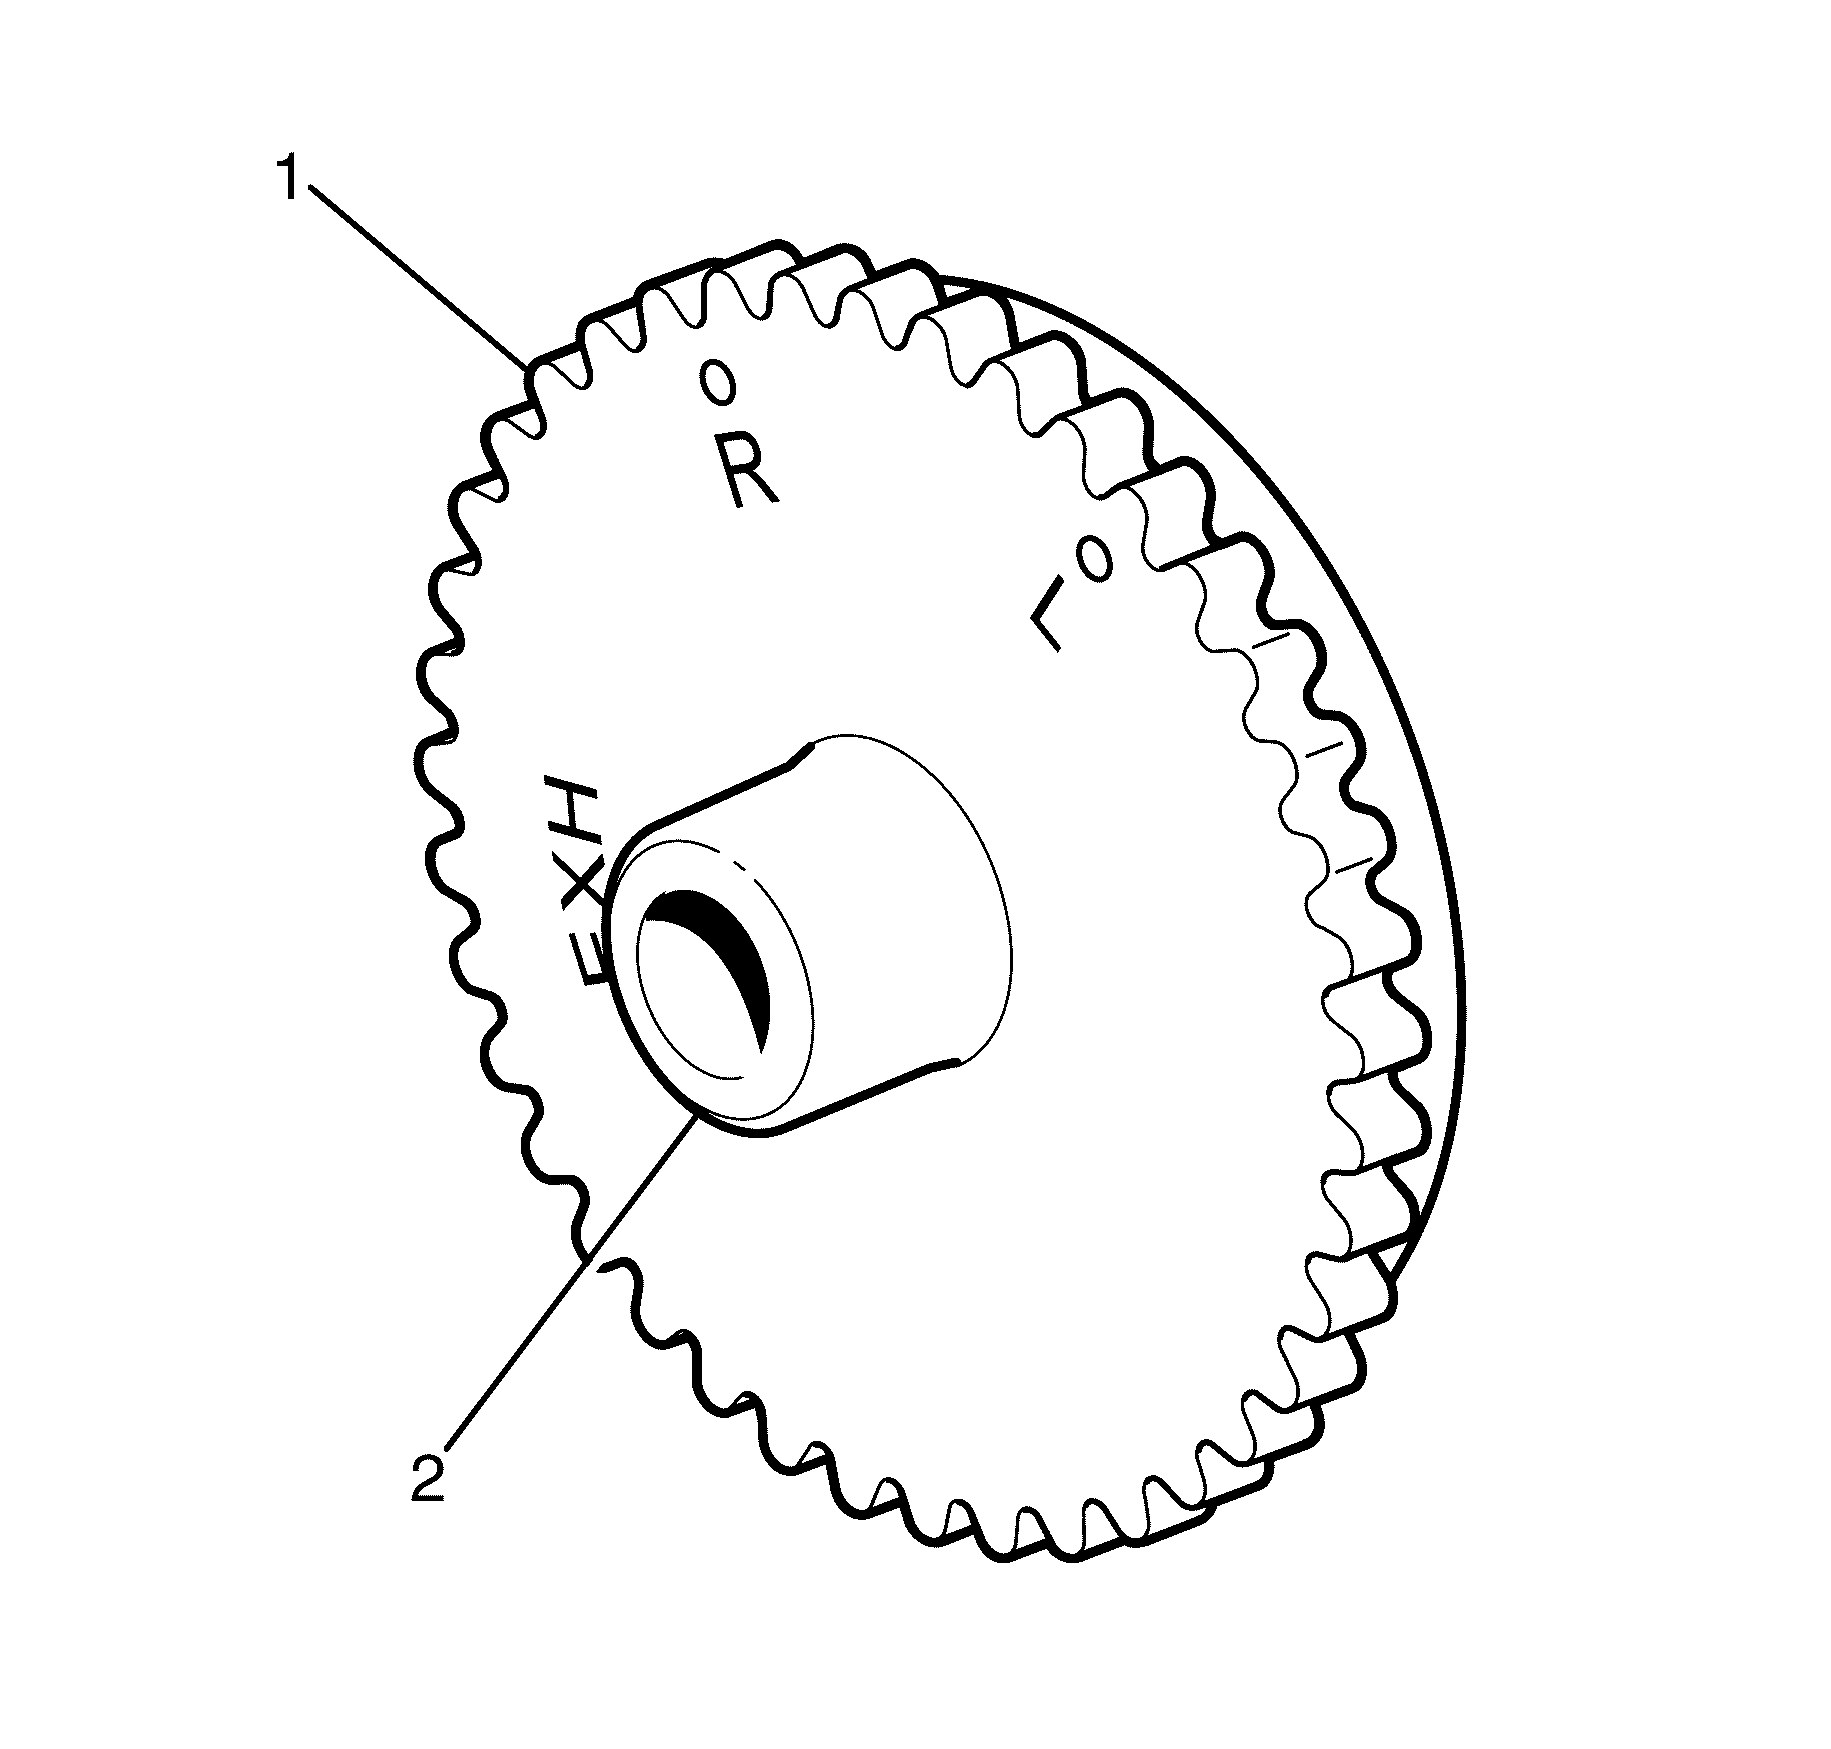
| • | Sprocket damage (1). |
| • | Exhaust camshaft sprocket bolt seating inner hub damage (2). |
| • | Sprocket damage (1). |
| • | Camshaft locating pin damage (2). |
| • | Camshaft seating/ sealing inner hub flange damage (3). |
| • | Sprocket damage (1). |
| • | Reluctor/sensor wheel damage (2). |
| • | Camshaft position actuator oil control valve bolt seating/sealing inner hub flange damage (3). |
| • | Sprocket damage (1). |
| • | Camshaft locating pin damage (2). |
| • | Camshaft seating/sealing inner hub flange damage (3). |
| • | Blockage to the oil passages (4). |
| • | Loose or missing housing bolts (5). |
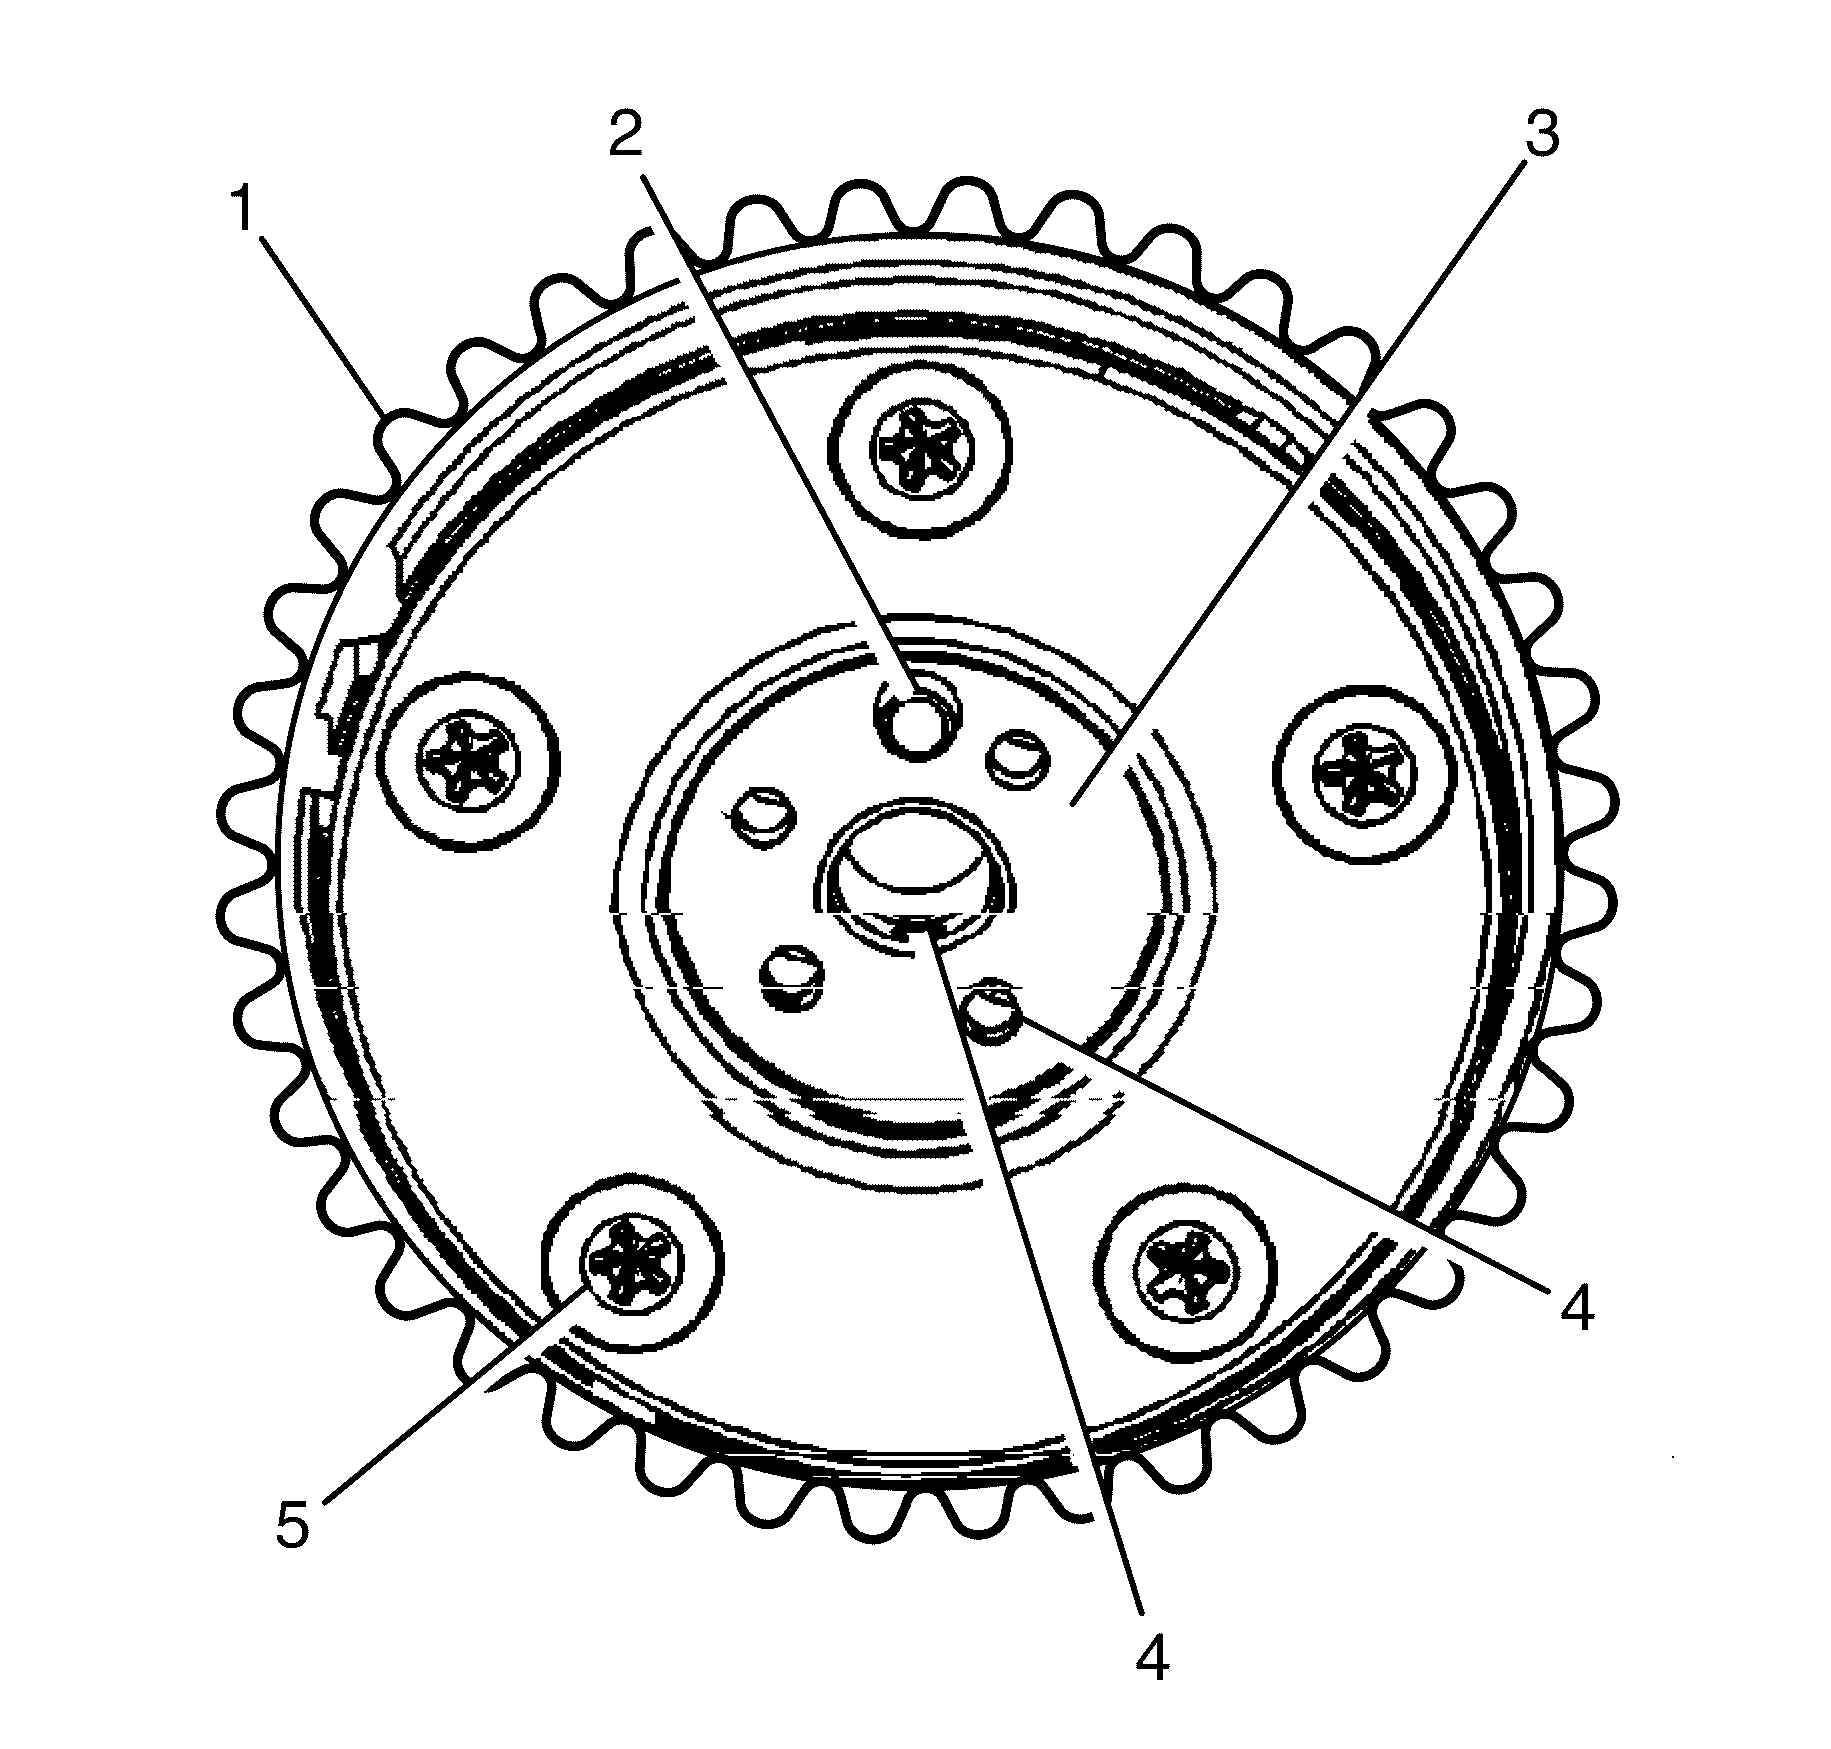
Camshaft Position Actuator Solenoids
- Inspect the camshaft position actuator solenoids for the following:
- Replace a damaged camshaft position actuator solenoid.
| • | Blockage to the oil passage (1). |
| • | Missing or damaged oil screen clip (2). |
| • | Blockage or damage to the oil screen (3). |
| • | Damage to the sealing surface for the camshaft position actuator solenoid oil seal (4). |
| • | Damage to the bracket (5). |
| • | Damage to the wiring harness connection and/or terminals (6). |
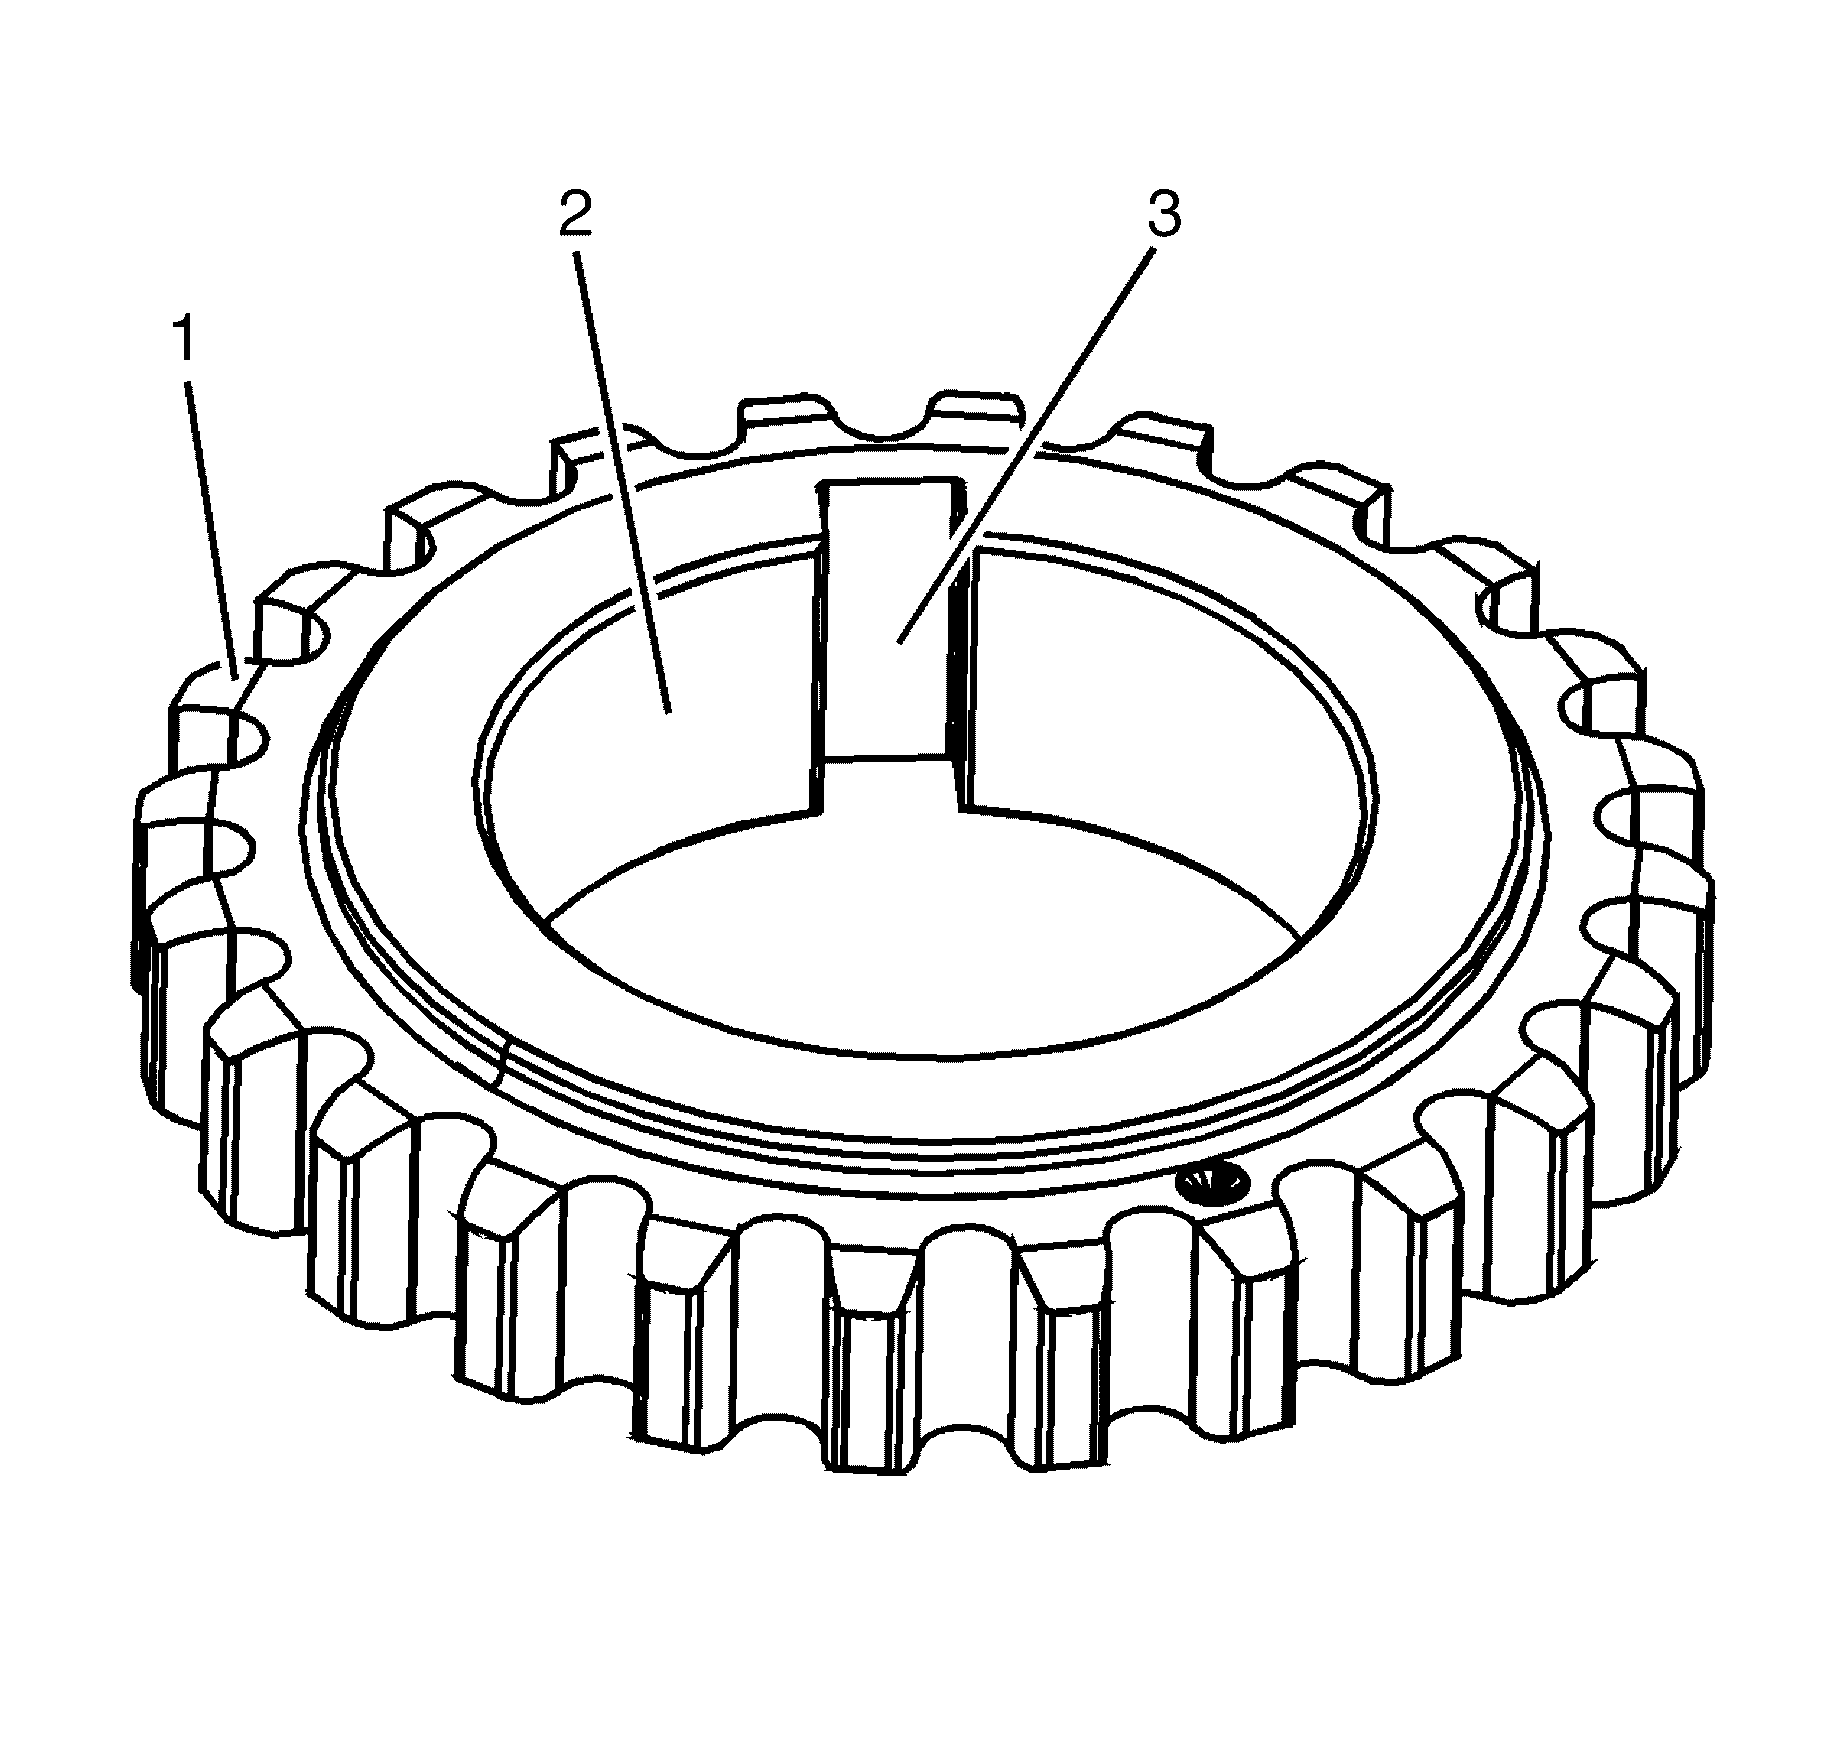
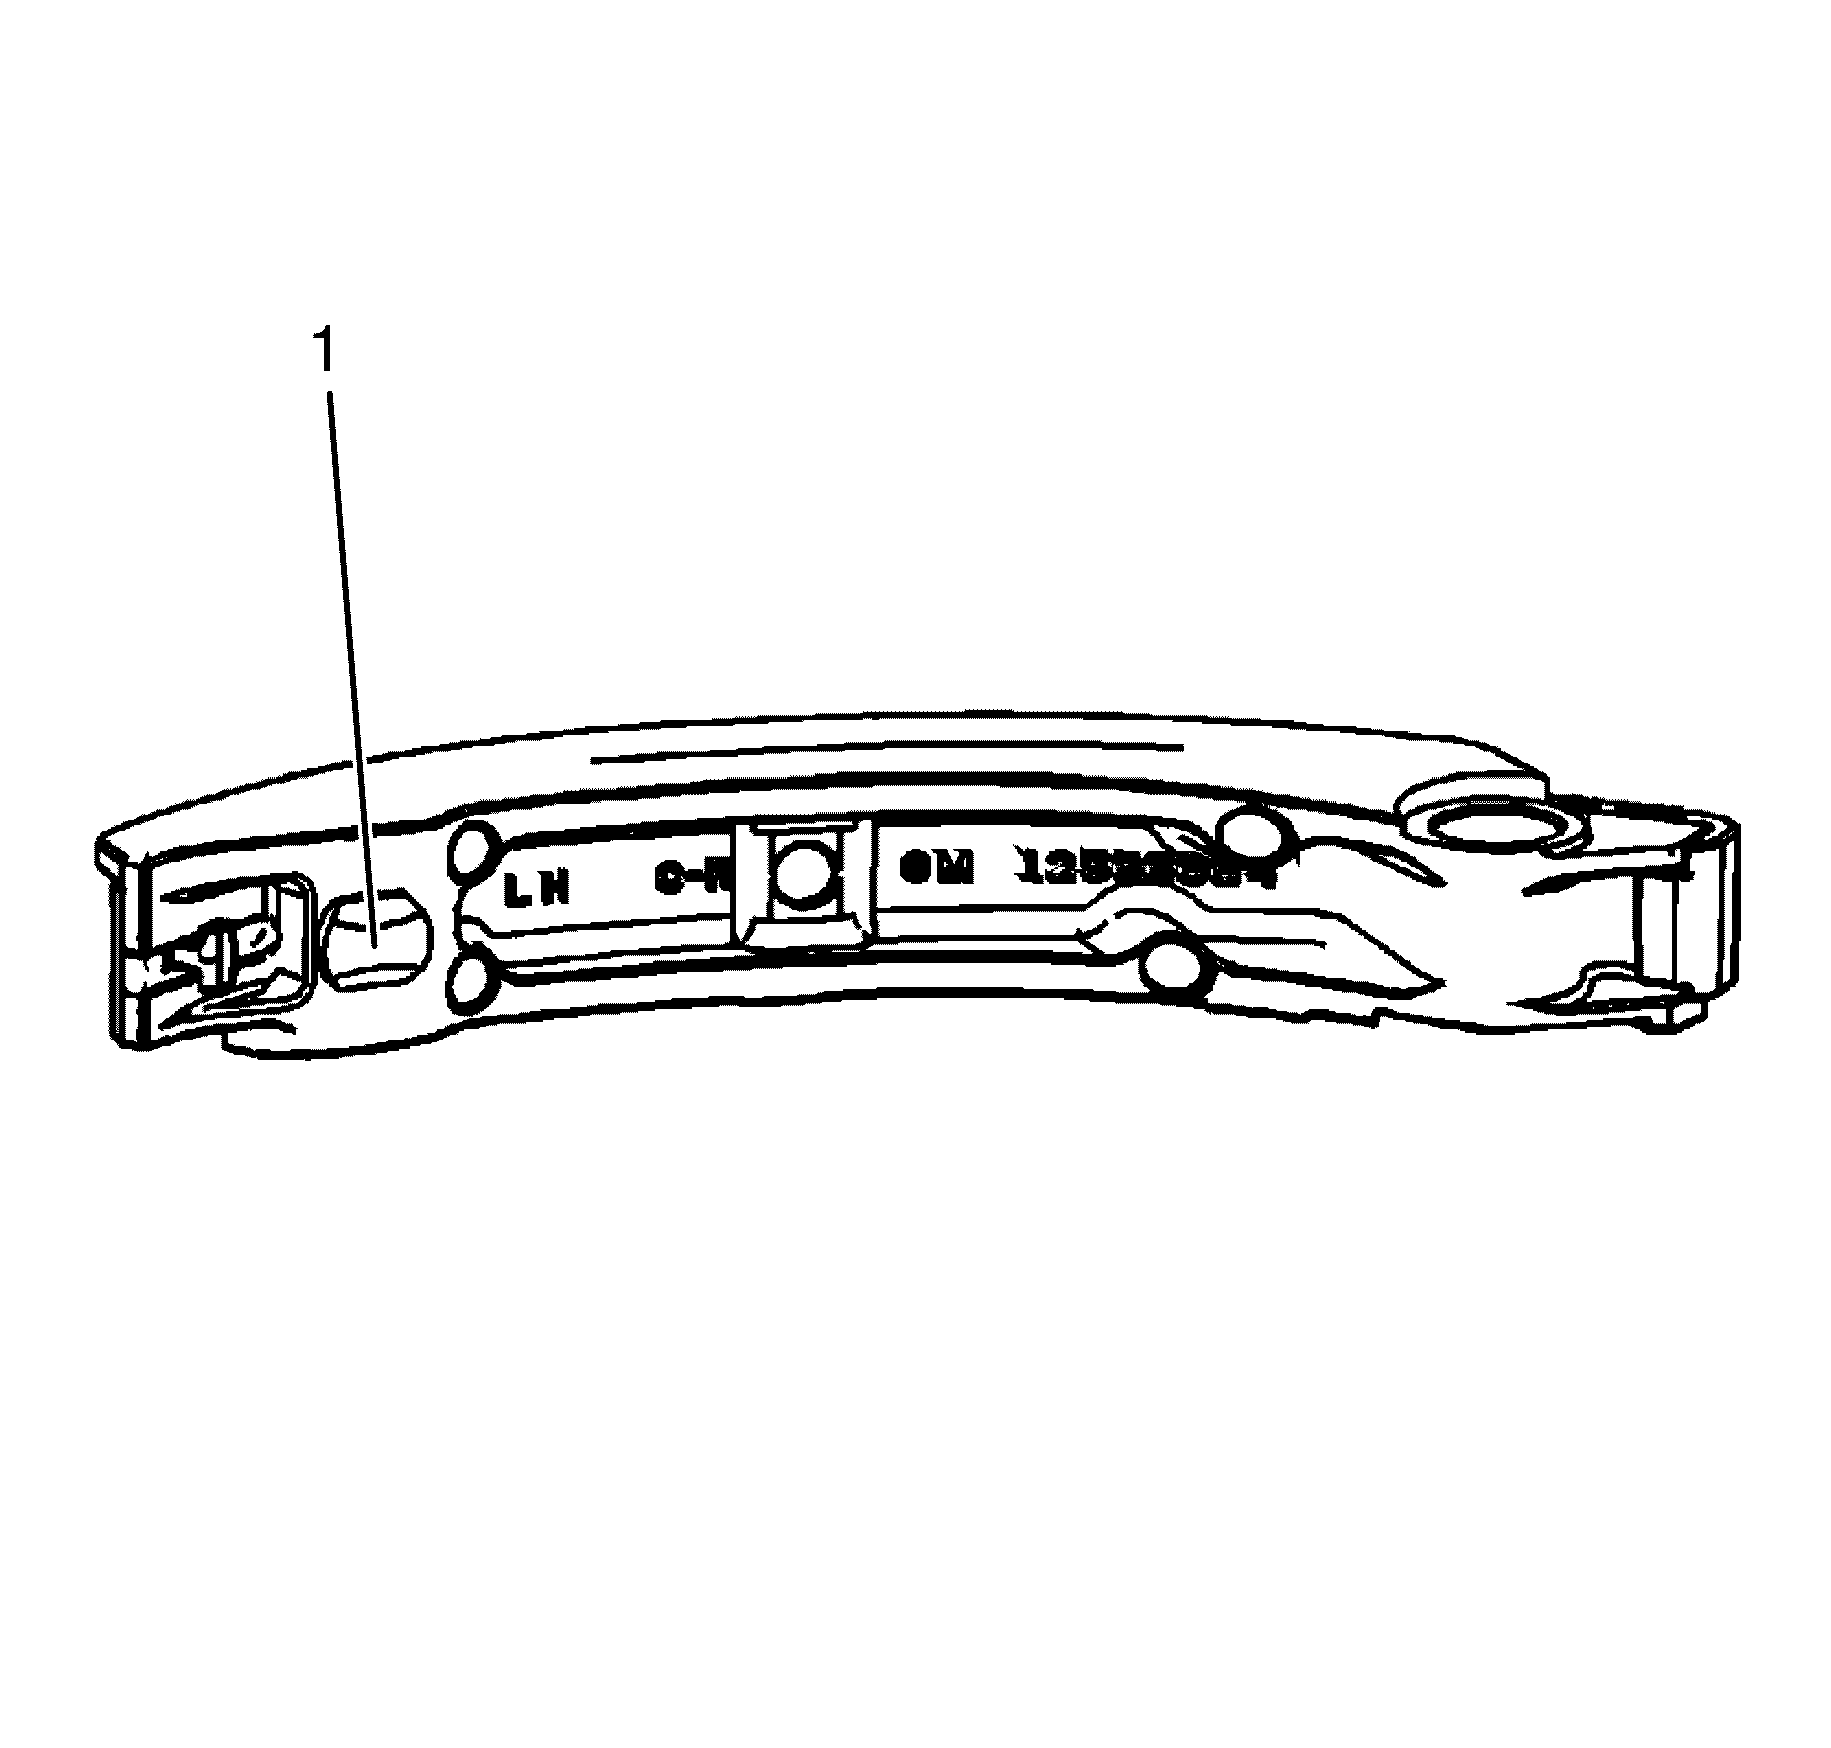
Left Intermediate Sprocket
- Inspect the front of the left intermediate sprocket for the following:
- Inspect the back of the intermediate sprocket for the following:
- Replace a damaged left intermediate sprocket.
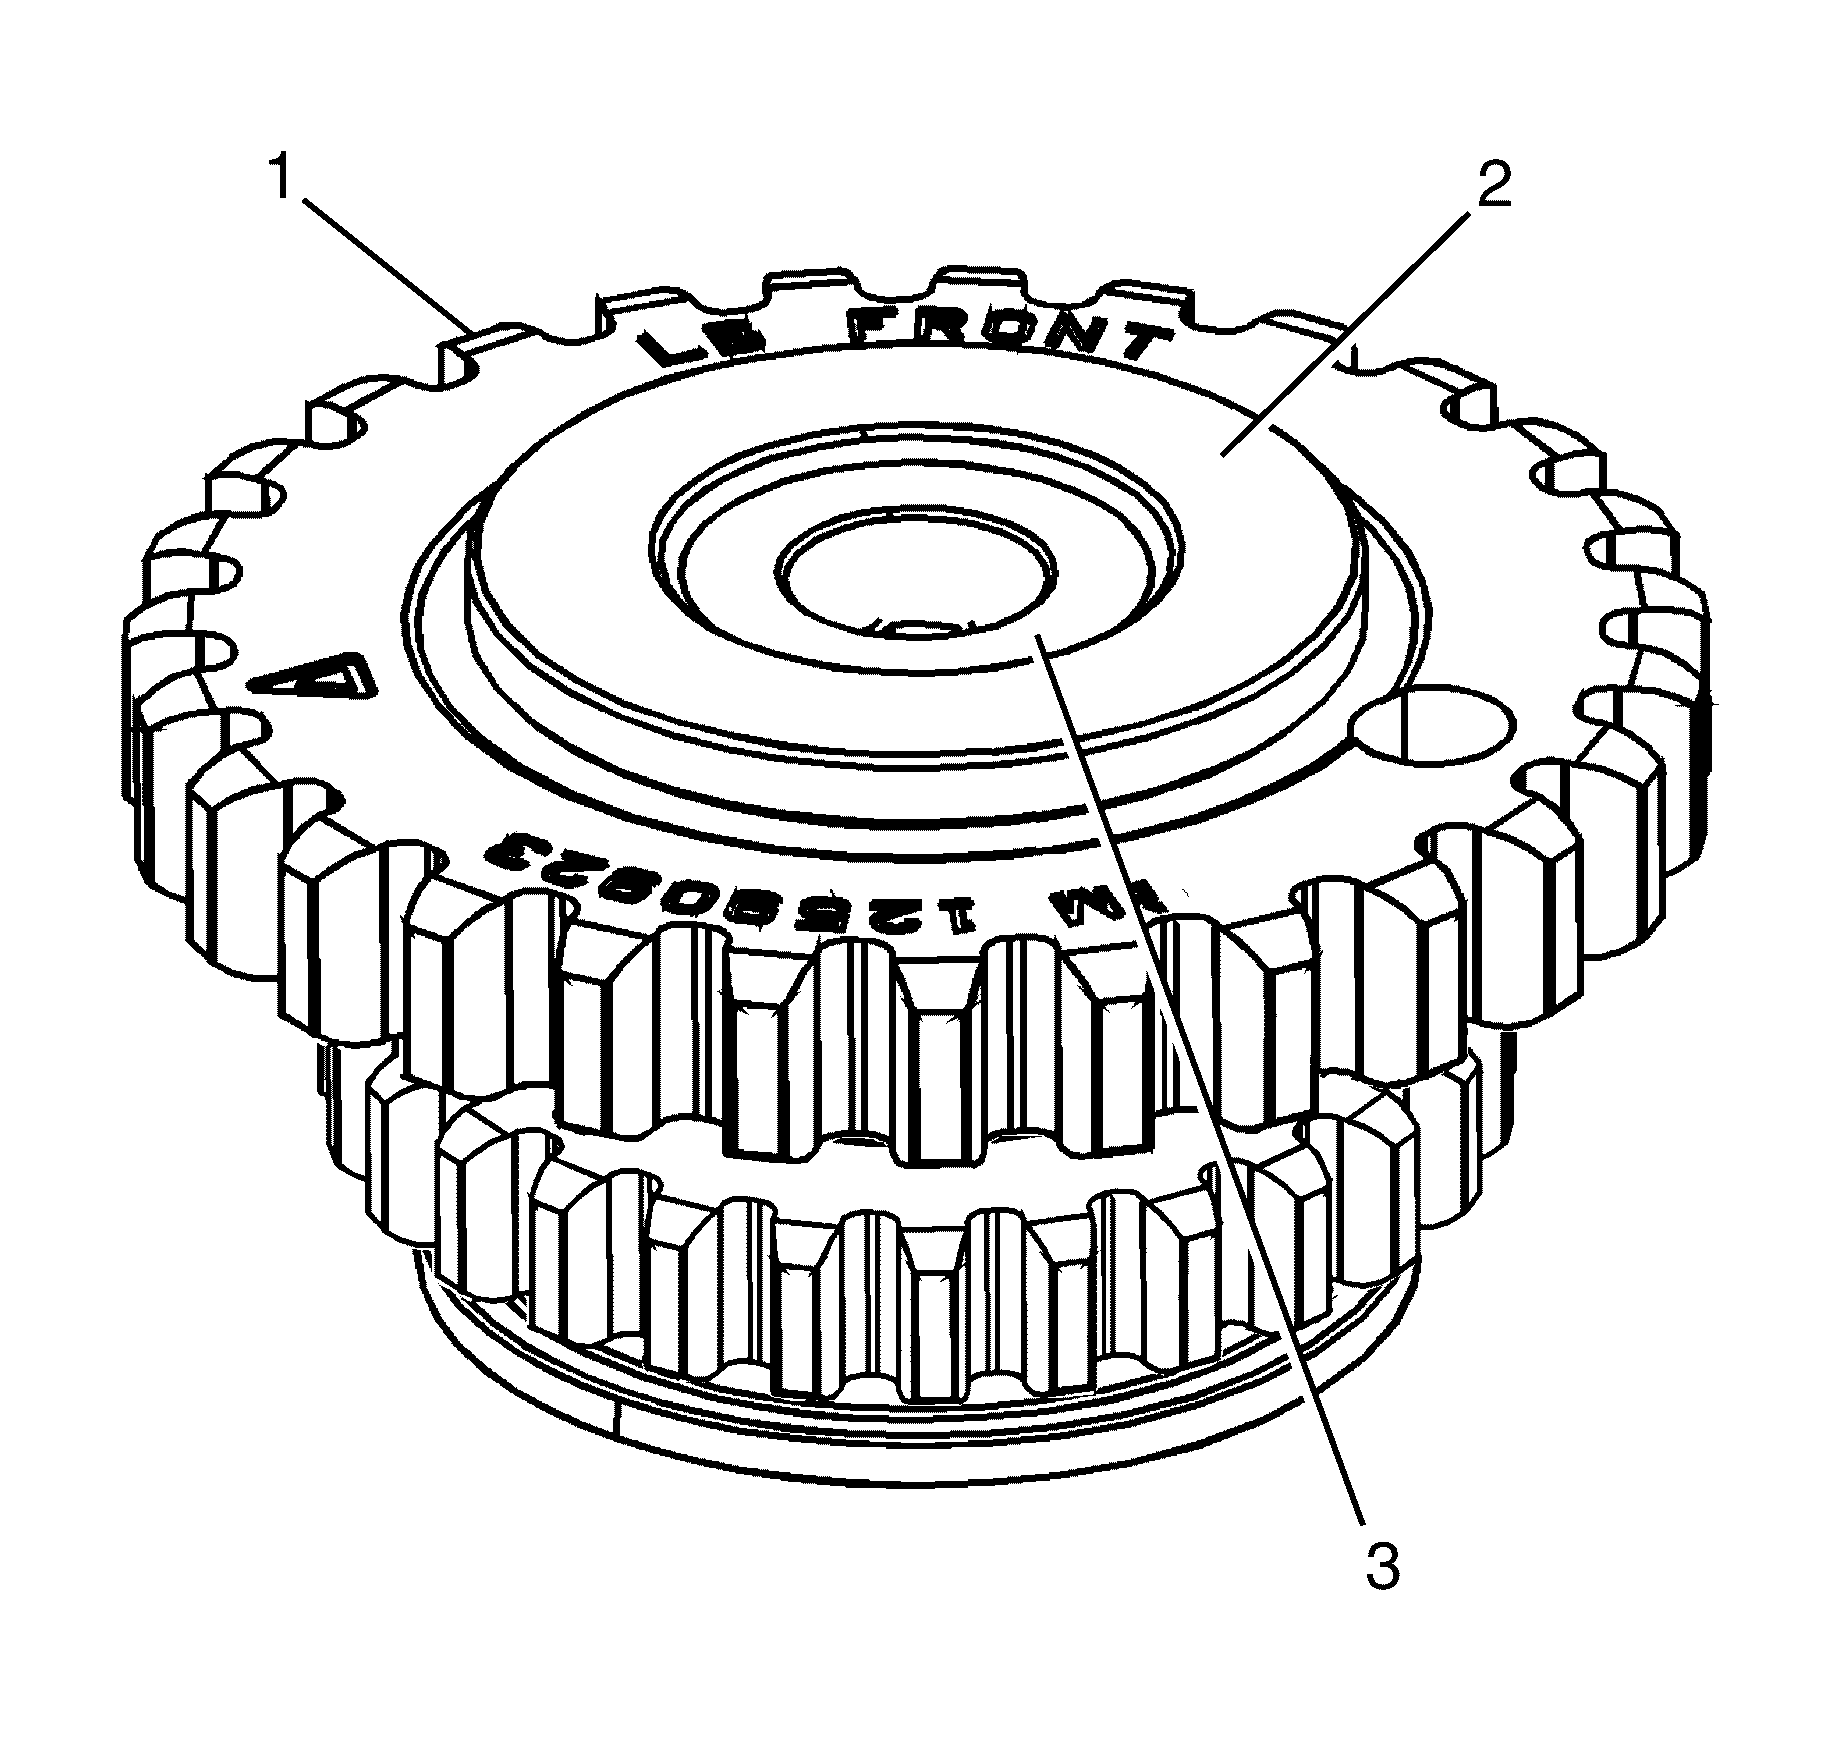
| • | Damage to the primary camshaft drive chain sprocket (1). |
| • | Damage to the hub bearing (2) -- Ensure the hub bearing spins freely. If the hub bearing wobbles, is noisy or feels rough when rotated replace the intermediate sprocket. |
| • | Damage to the bolt flange seating/sealing surface (3). |
| • | Damage to the left secondary camshaft drive chain sprocket (1). |
| • | Damage to the bearing hub-to-engine block sealing surface (2). |
Right Intermediate Sprocket
- Inspect the front of the right intermediate sprocket for the following:
- Inspect the back of the right intermediate sprocket for the following:
- Replace a damaged right intermediate sprocket.
| • | Damage to the right secondary camshaft drive chain sprocket (1) |
| • | Damage to the bearing hub bearing (2) -- Ensure the hub bearing spins freely. If the hub bearing wobbles, is noisy or feels rough when rotated replace the intermediate sprocket. |
| • | Damage to the bolt flange seating/sealing surface (3) |
| • | Damage to the primary camshaft drive chain sprocket (1) |
| • | Damage to the bearing hub-to-engine block sealing surface (2) |
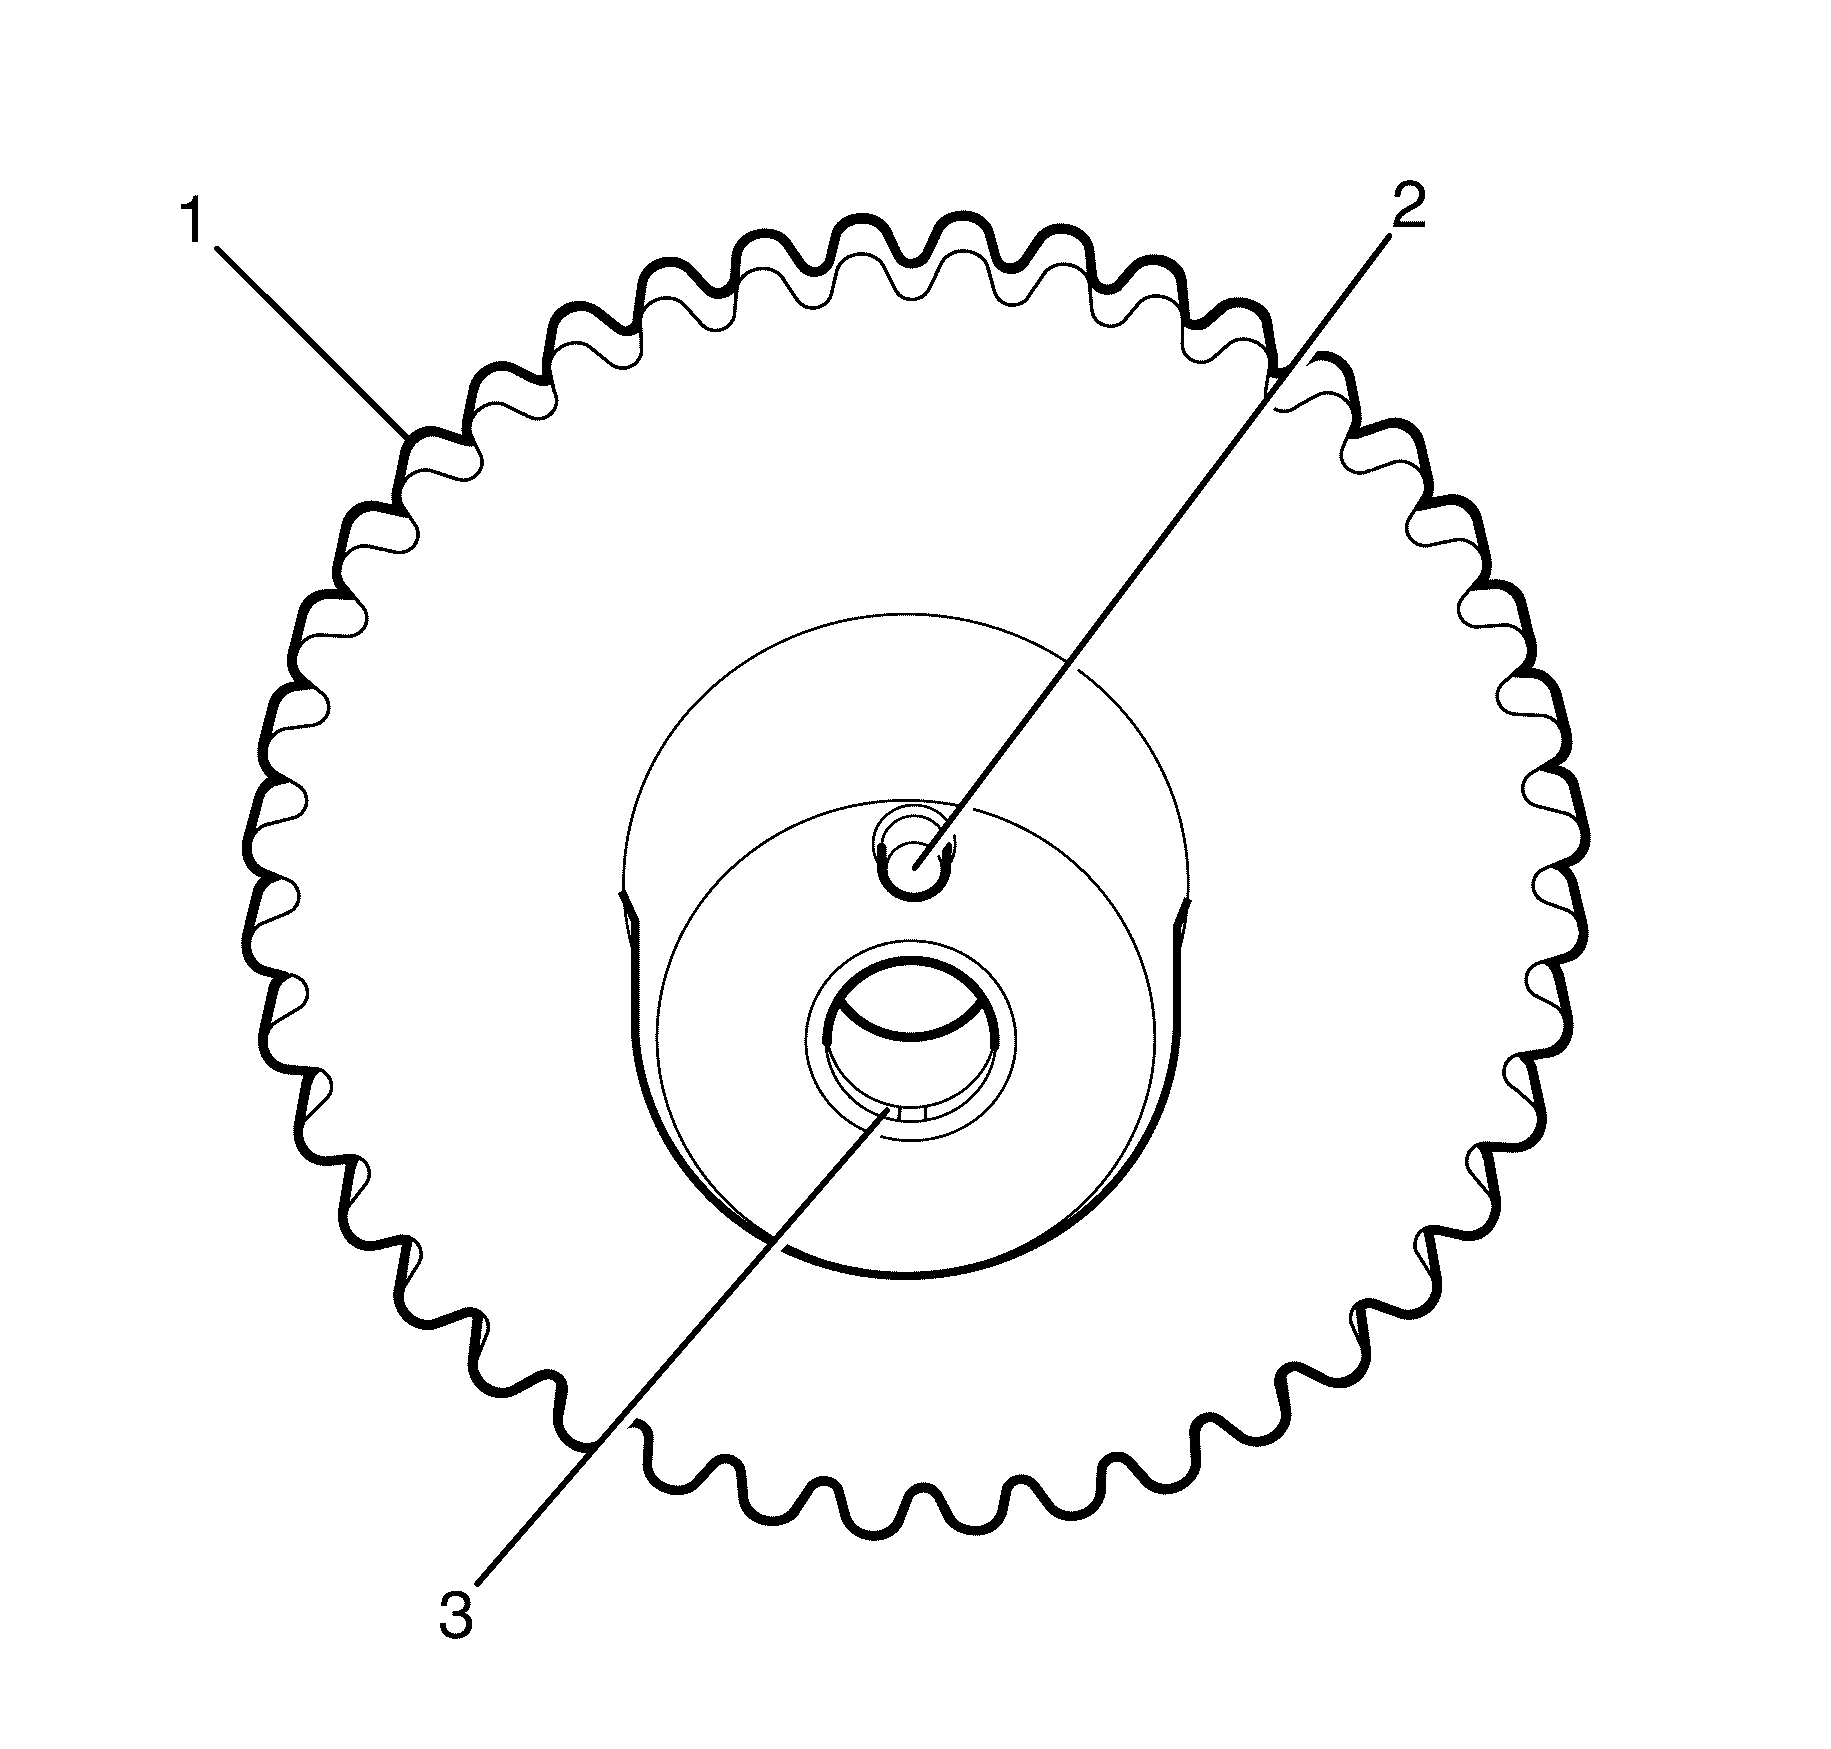
Crankshaft Sprocket
- Inspect the crankshaft sprocket for the following:
- Replace a damaged crankshaft sprocket.
| • | Sprocket damage (1) |
| • | Bore damage (2) |
| • | Keyway damage (3) |
Primary and Secondary Timing Chains
- Inspect the primary and secondary timing chains for the following:
- Replace a damaged primary timing chain.
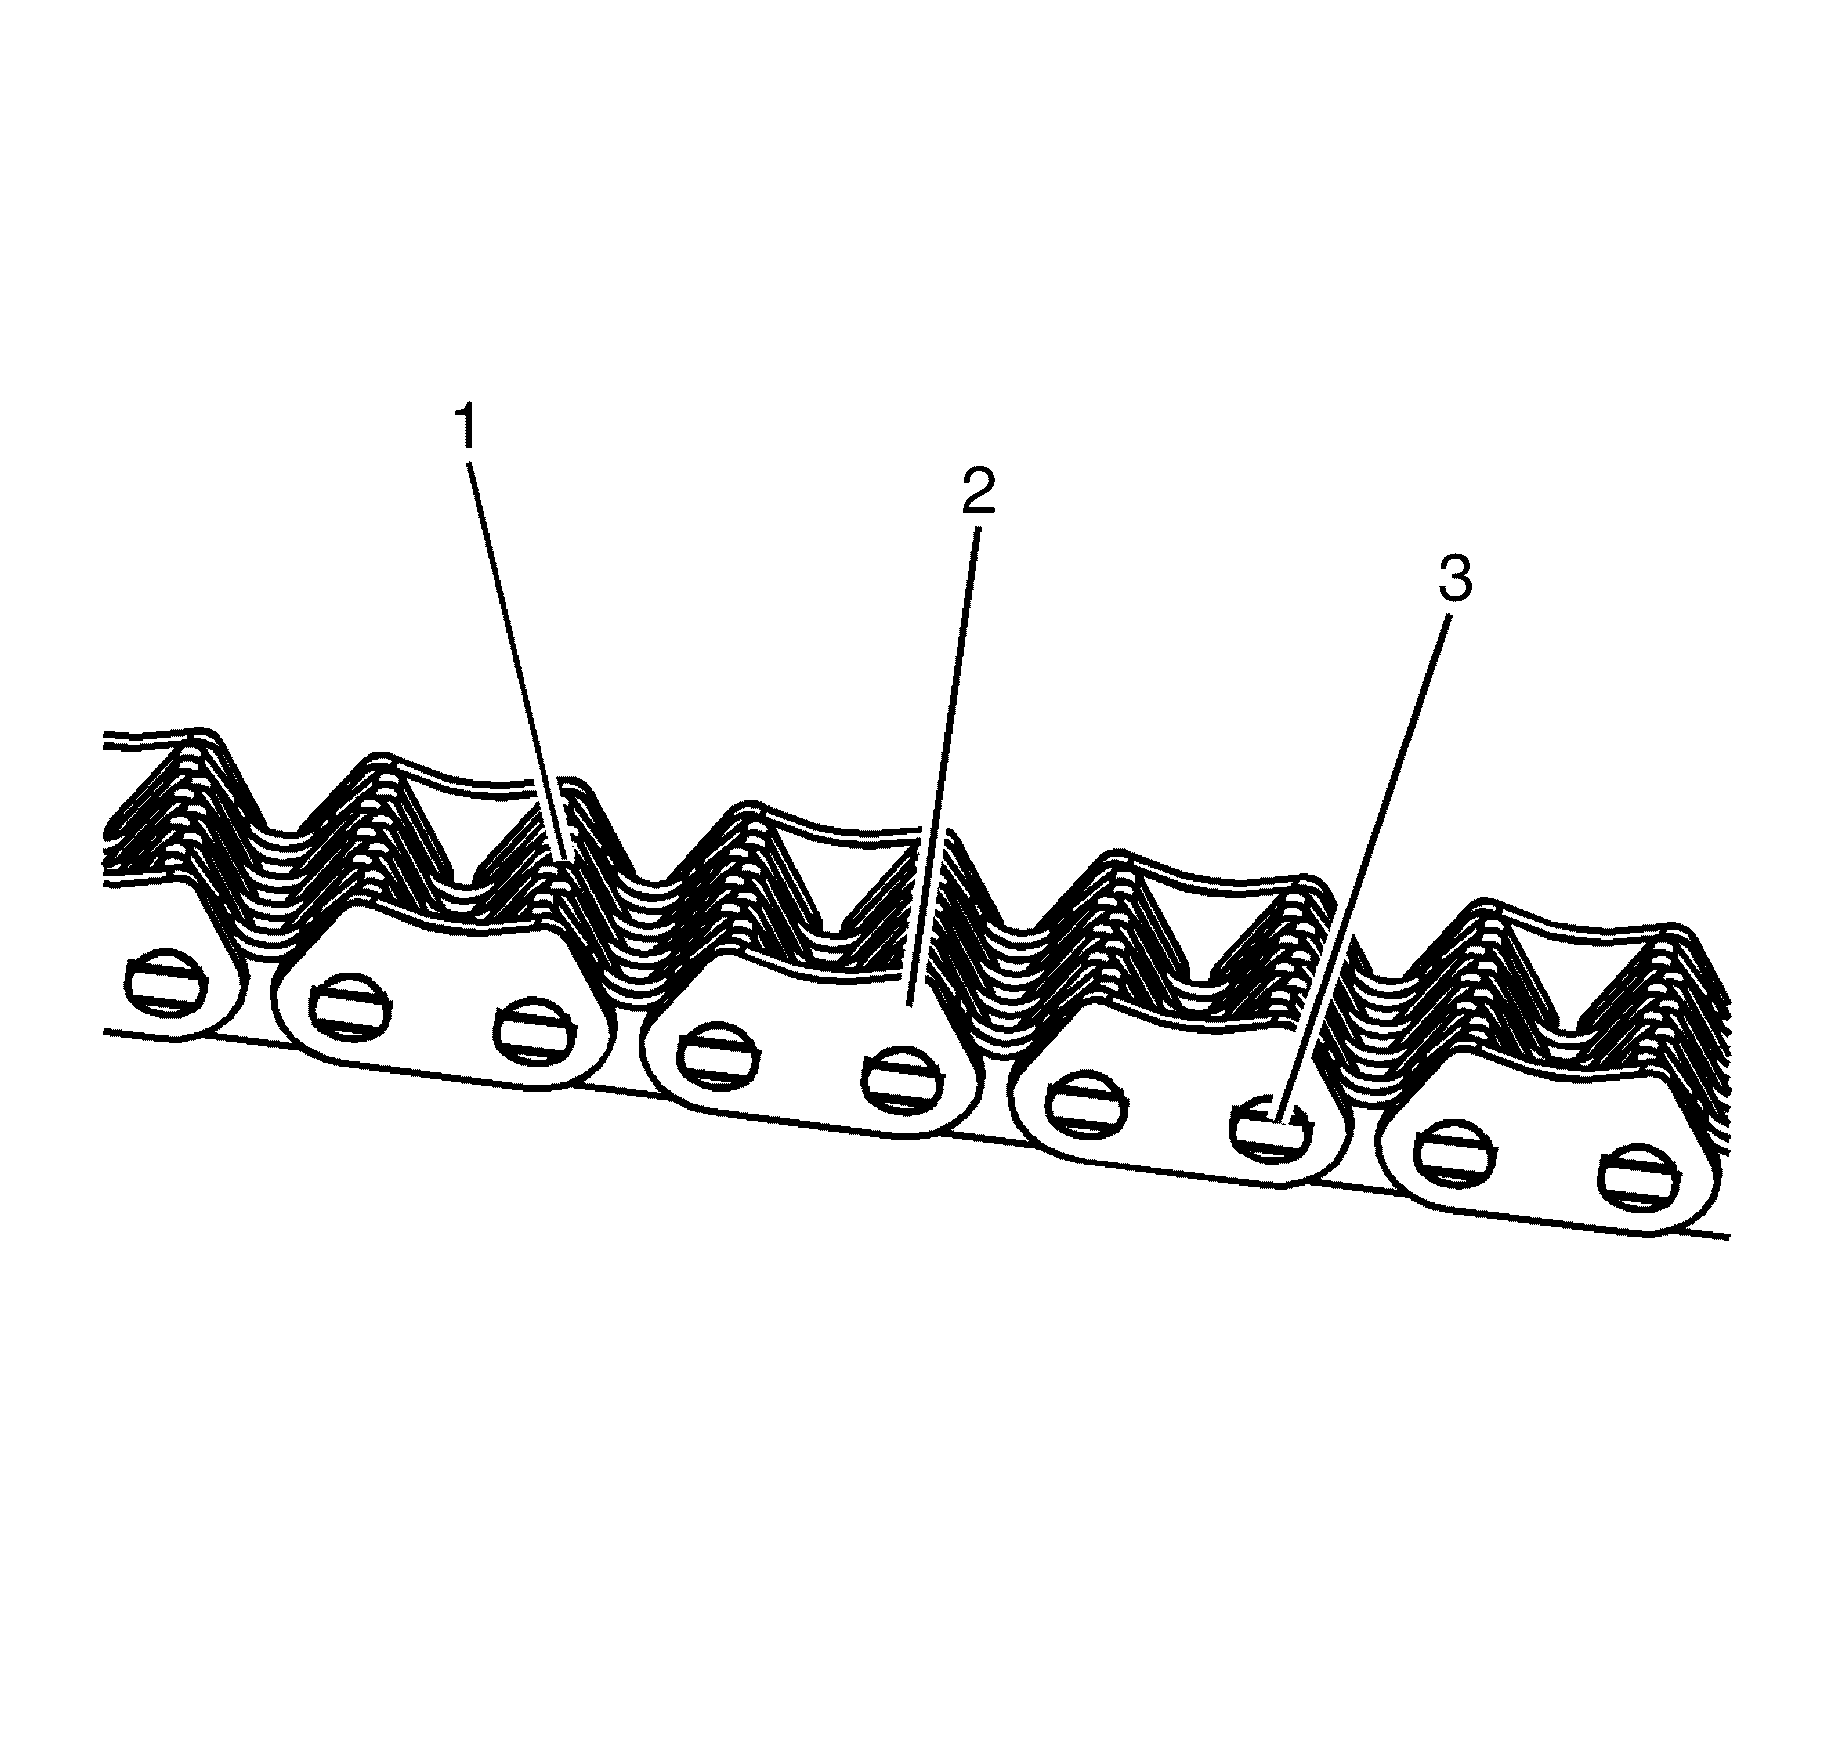
| • | Binding or worn links (1) |
| • | Loose links (2) |
| • | Loose pins (3) |
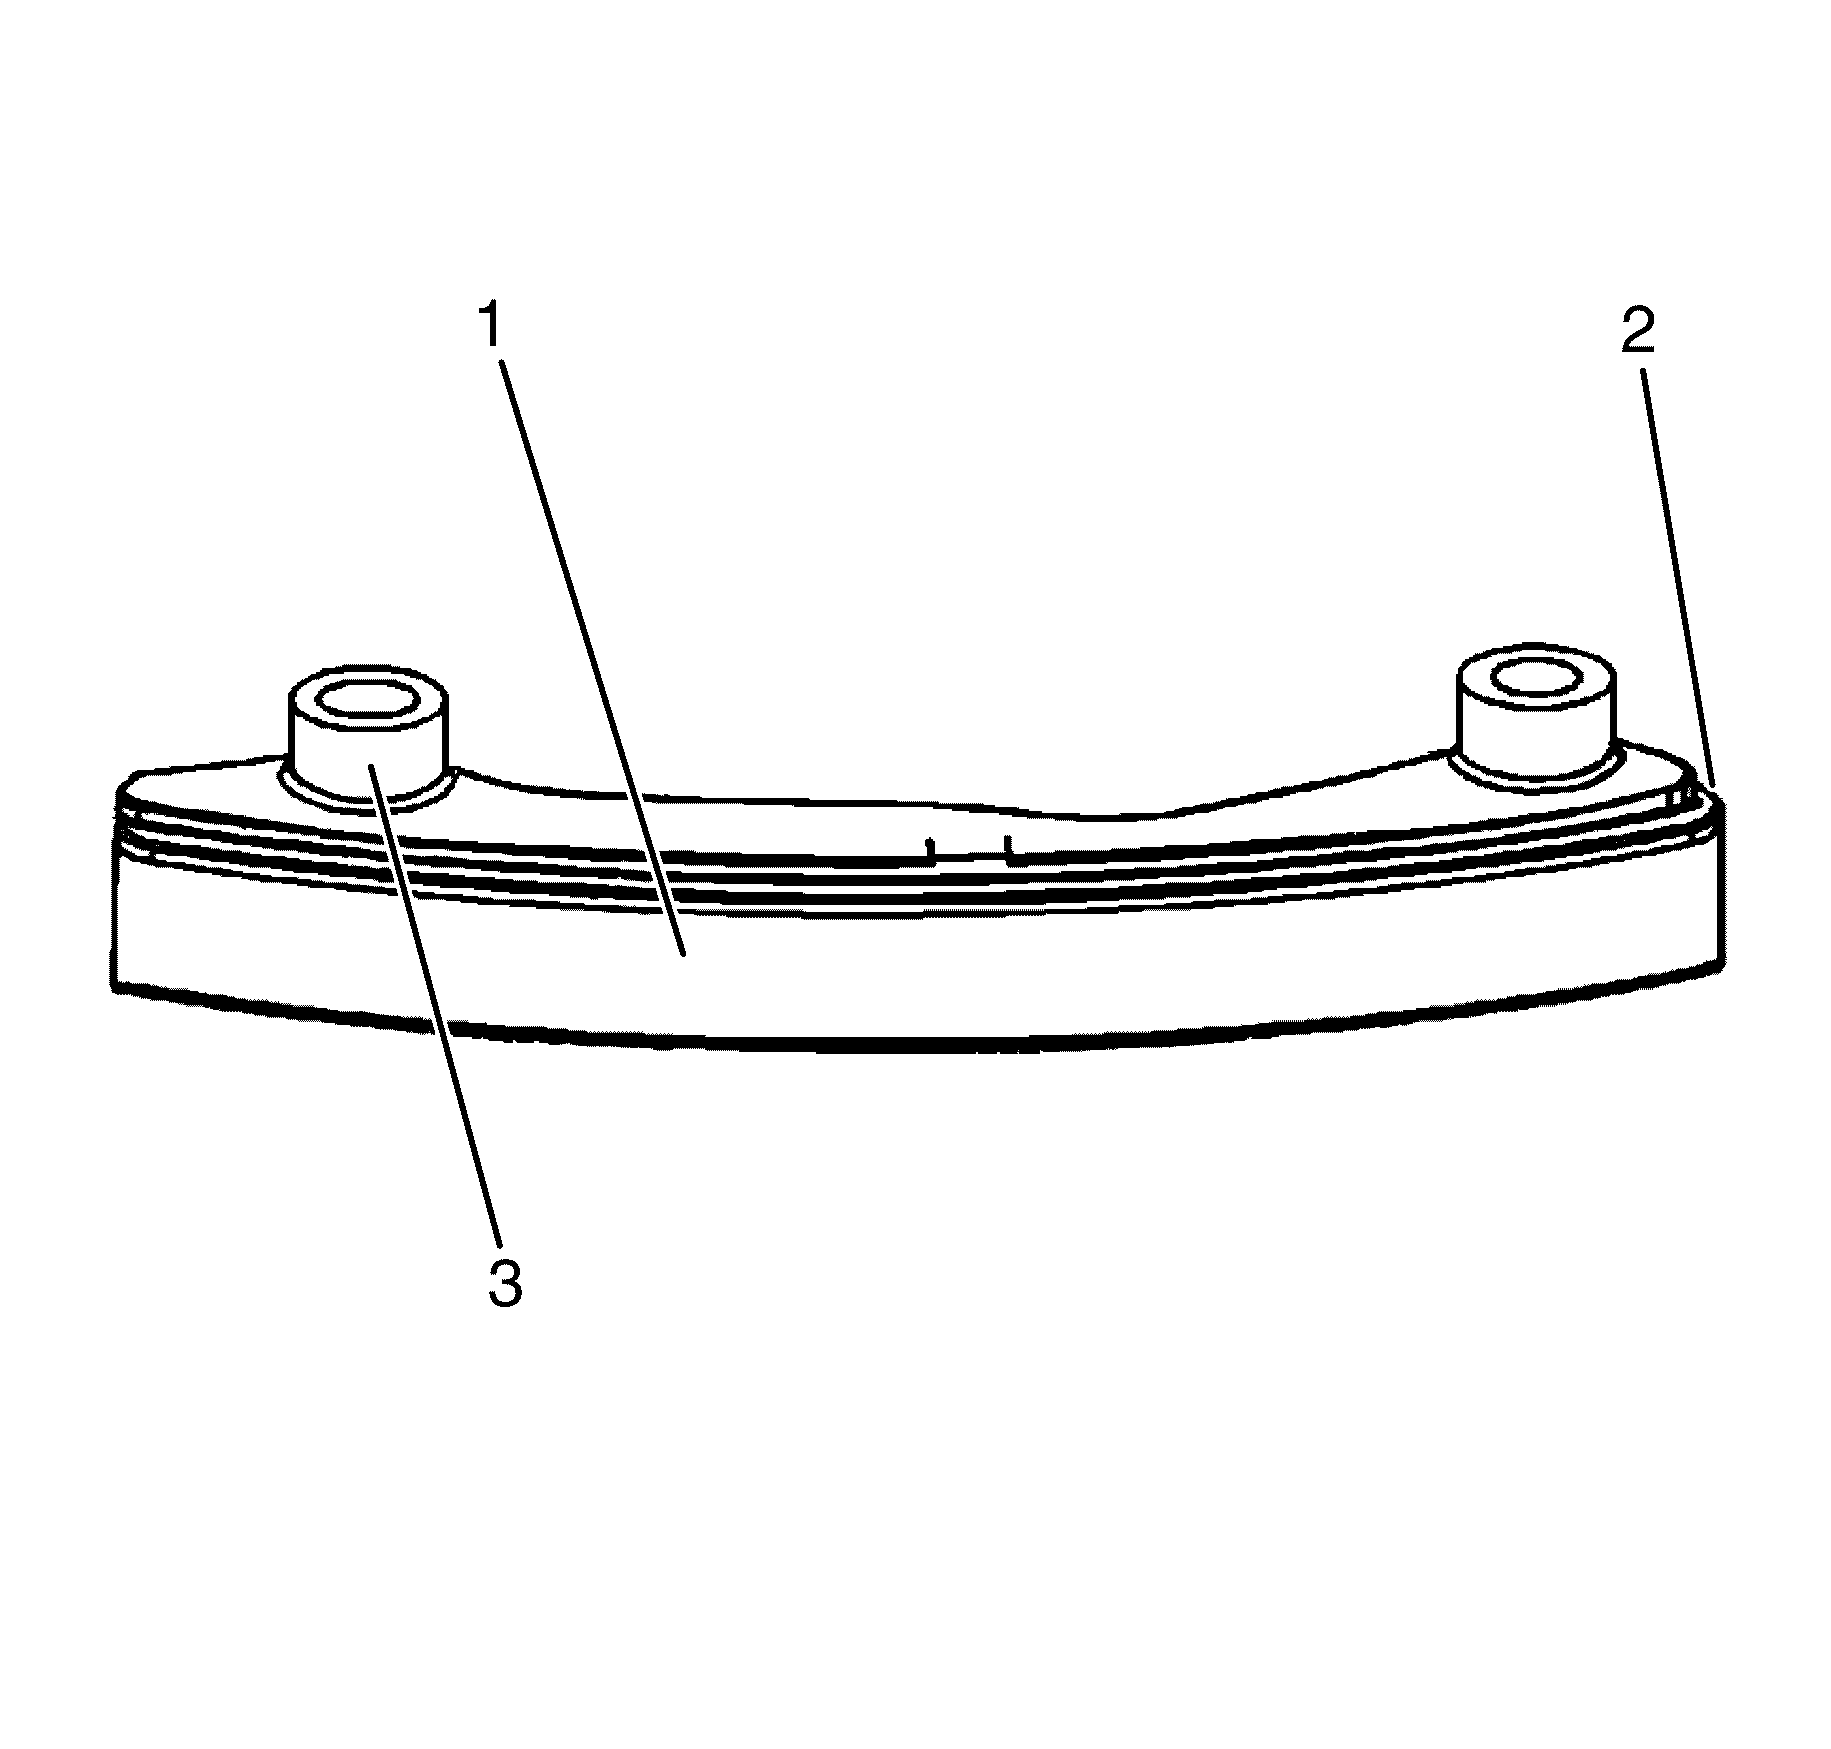
Primary Timing Chain Upper Guide
- Inspect the primary timing chain upper guide for the following:
- Replace a damaged primary timing chain upper guide.
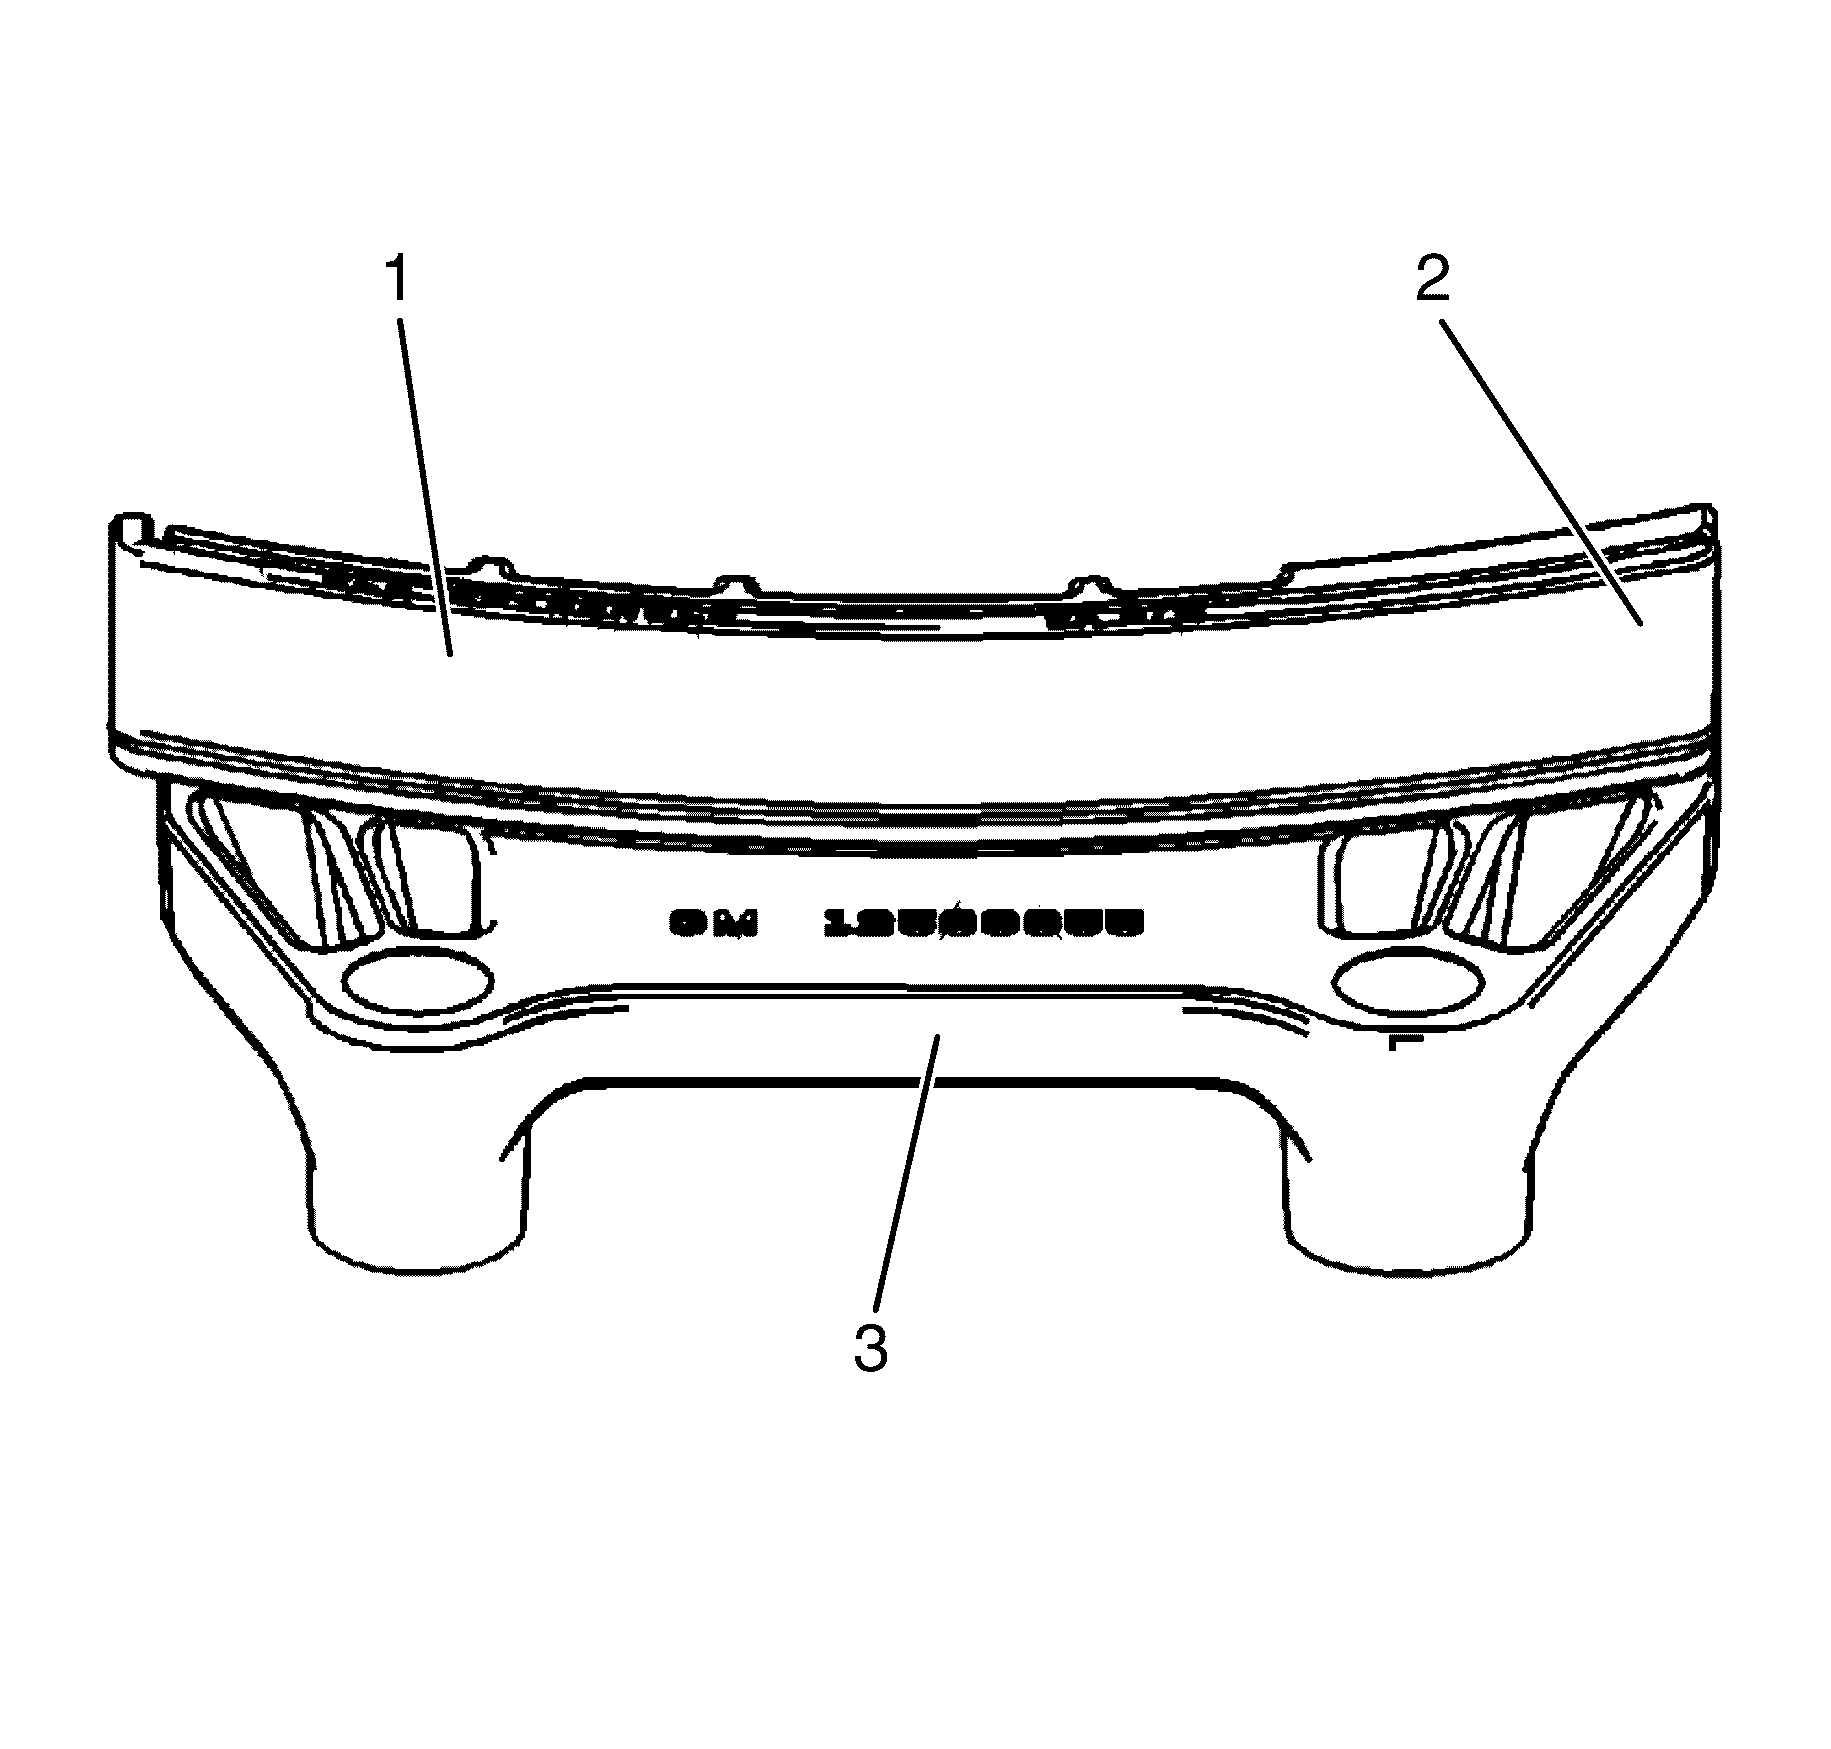
| • | Worn guide surface (1) |
| • | Cracked or broken guide surface (2) |
| • | Cracked or damaged guide base (3) |
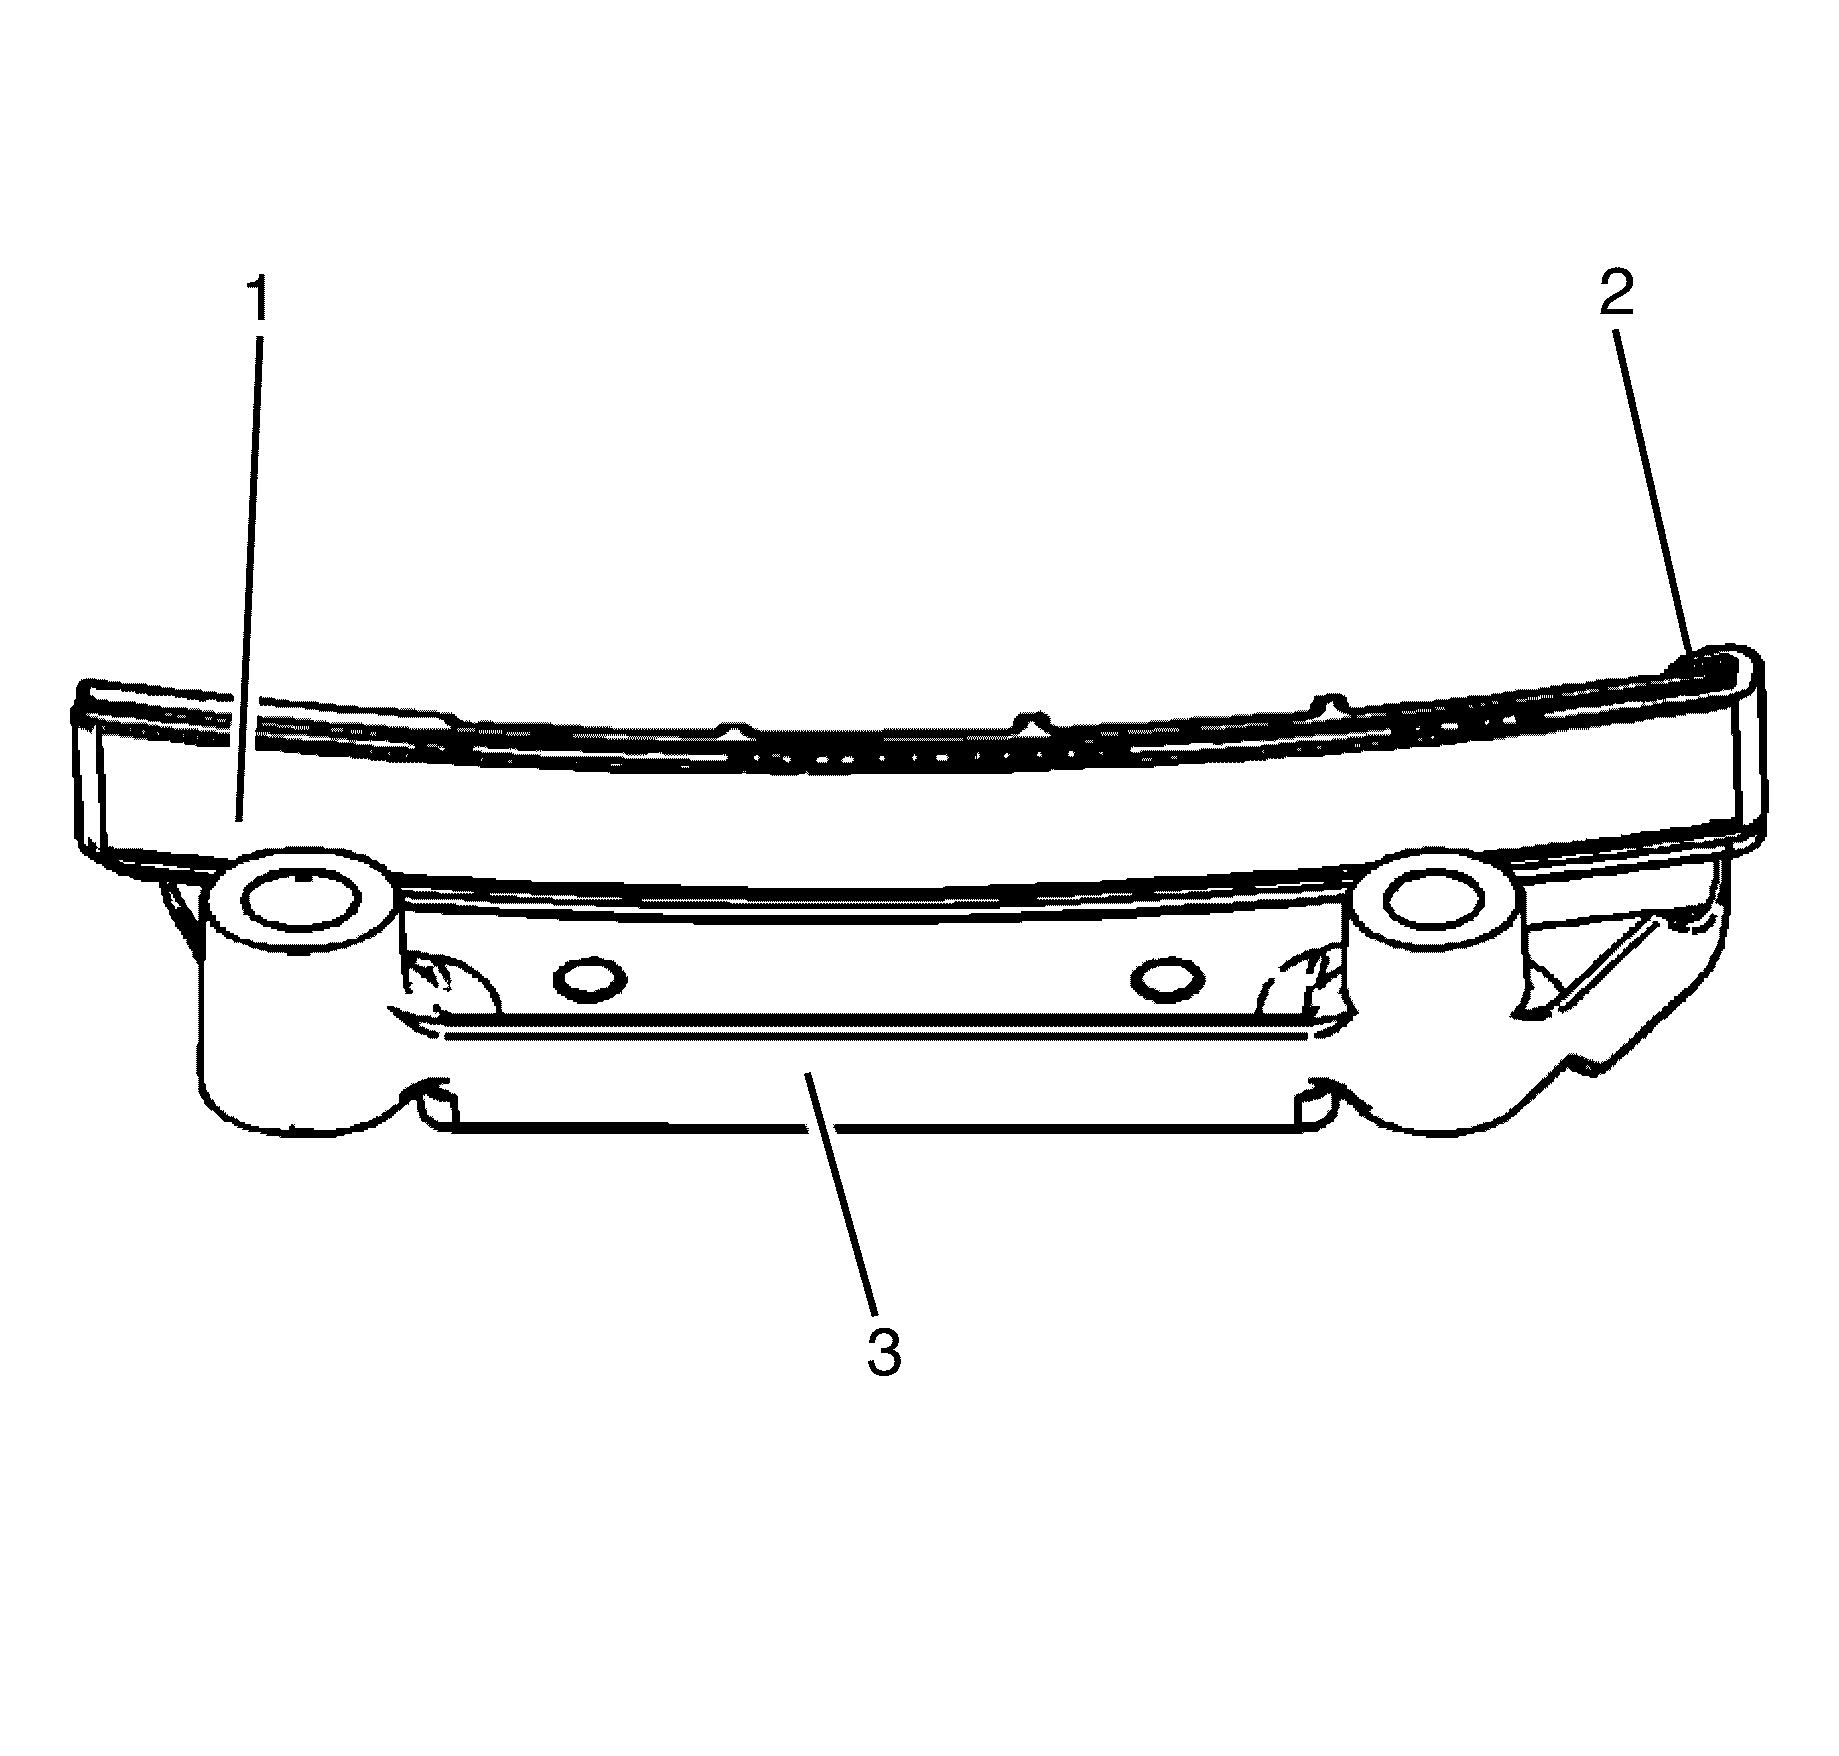
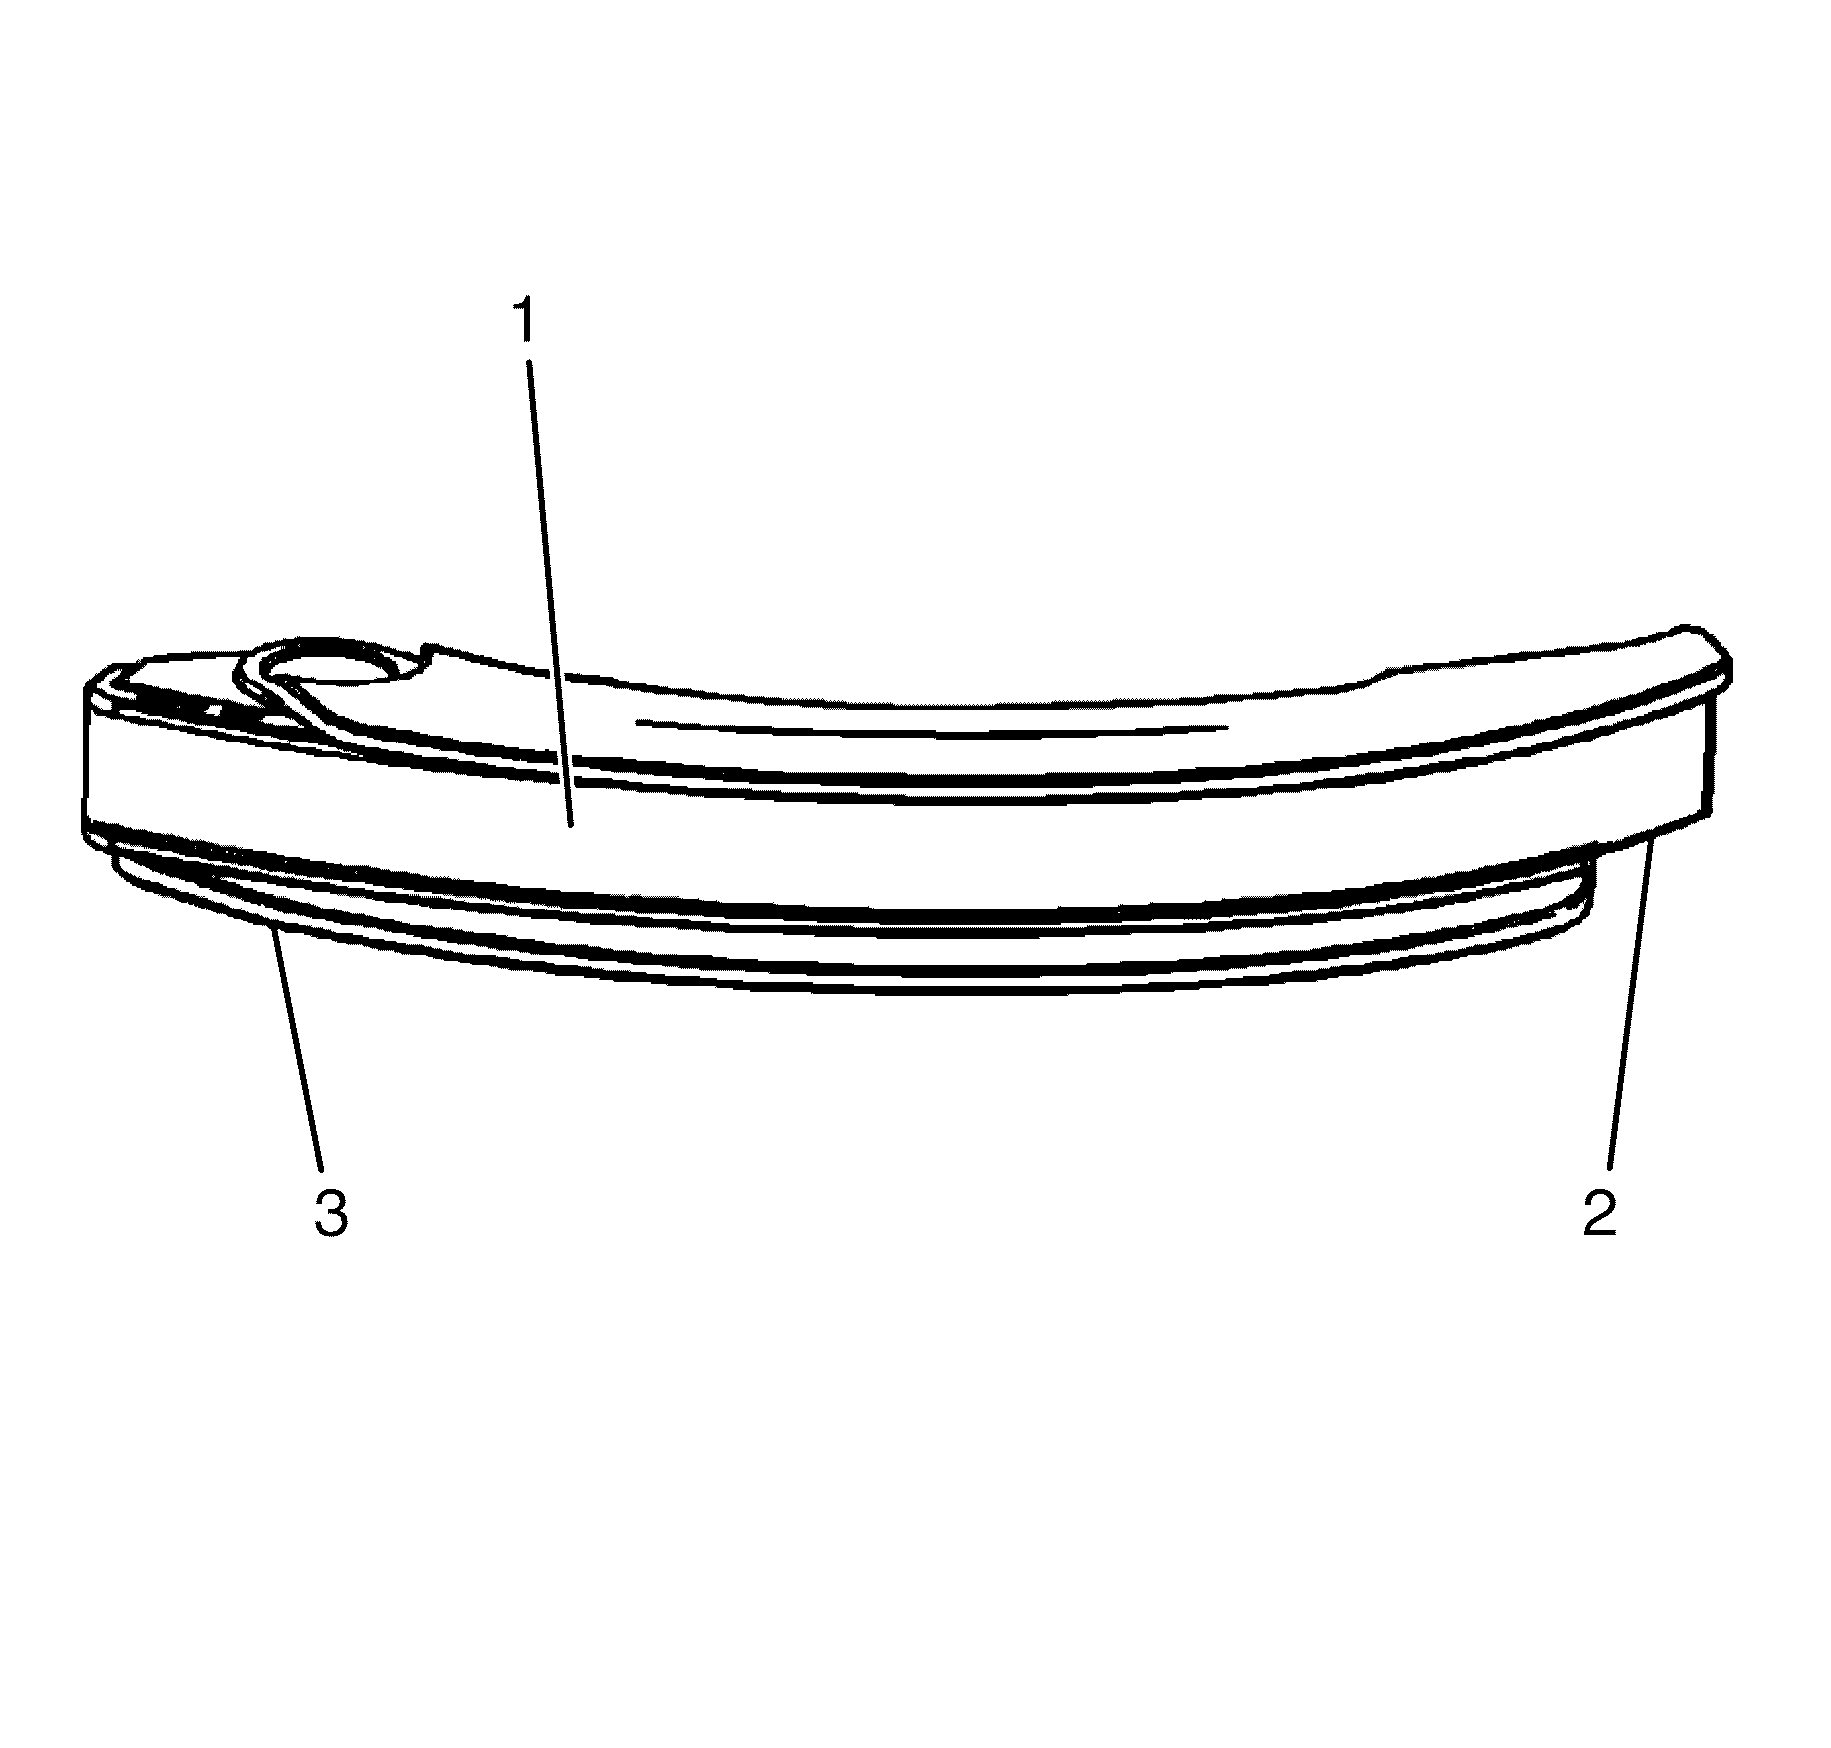
Primary Timing Chain Lower Guide
- Inspect the primary timing chain lower guide for the following:
- Replace a damaged primary timing chain lower guide by replacing the oil pump.
| • | Worn guide surface (1) |
| • | Cracked or broken guide surface (2) |
| • | Cracked or damaged guide base (3) |
Important: The primary camshaft drive chain lower guide is not a serviceable component. If the primary camshaft drive chain lower guide is to be reused, the primary camshaft drive chain lower guide is not to be removed from the oil pump cover. If the primary camshaft drive chain lower guide must be replaced, the oil pump must be replaced.
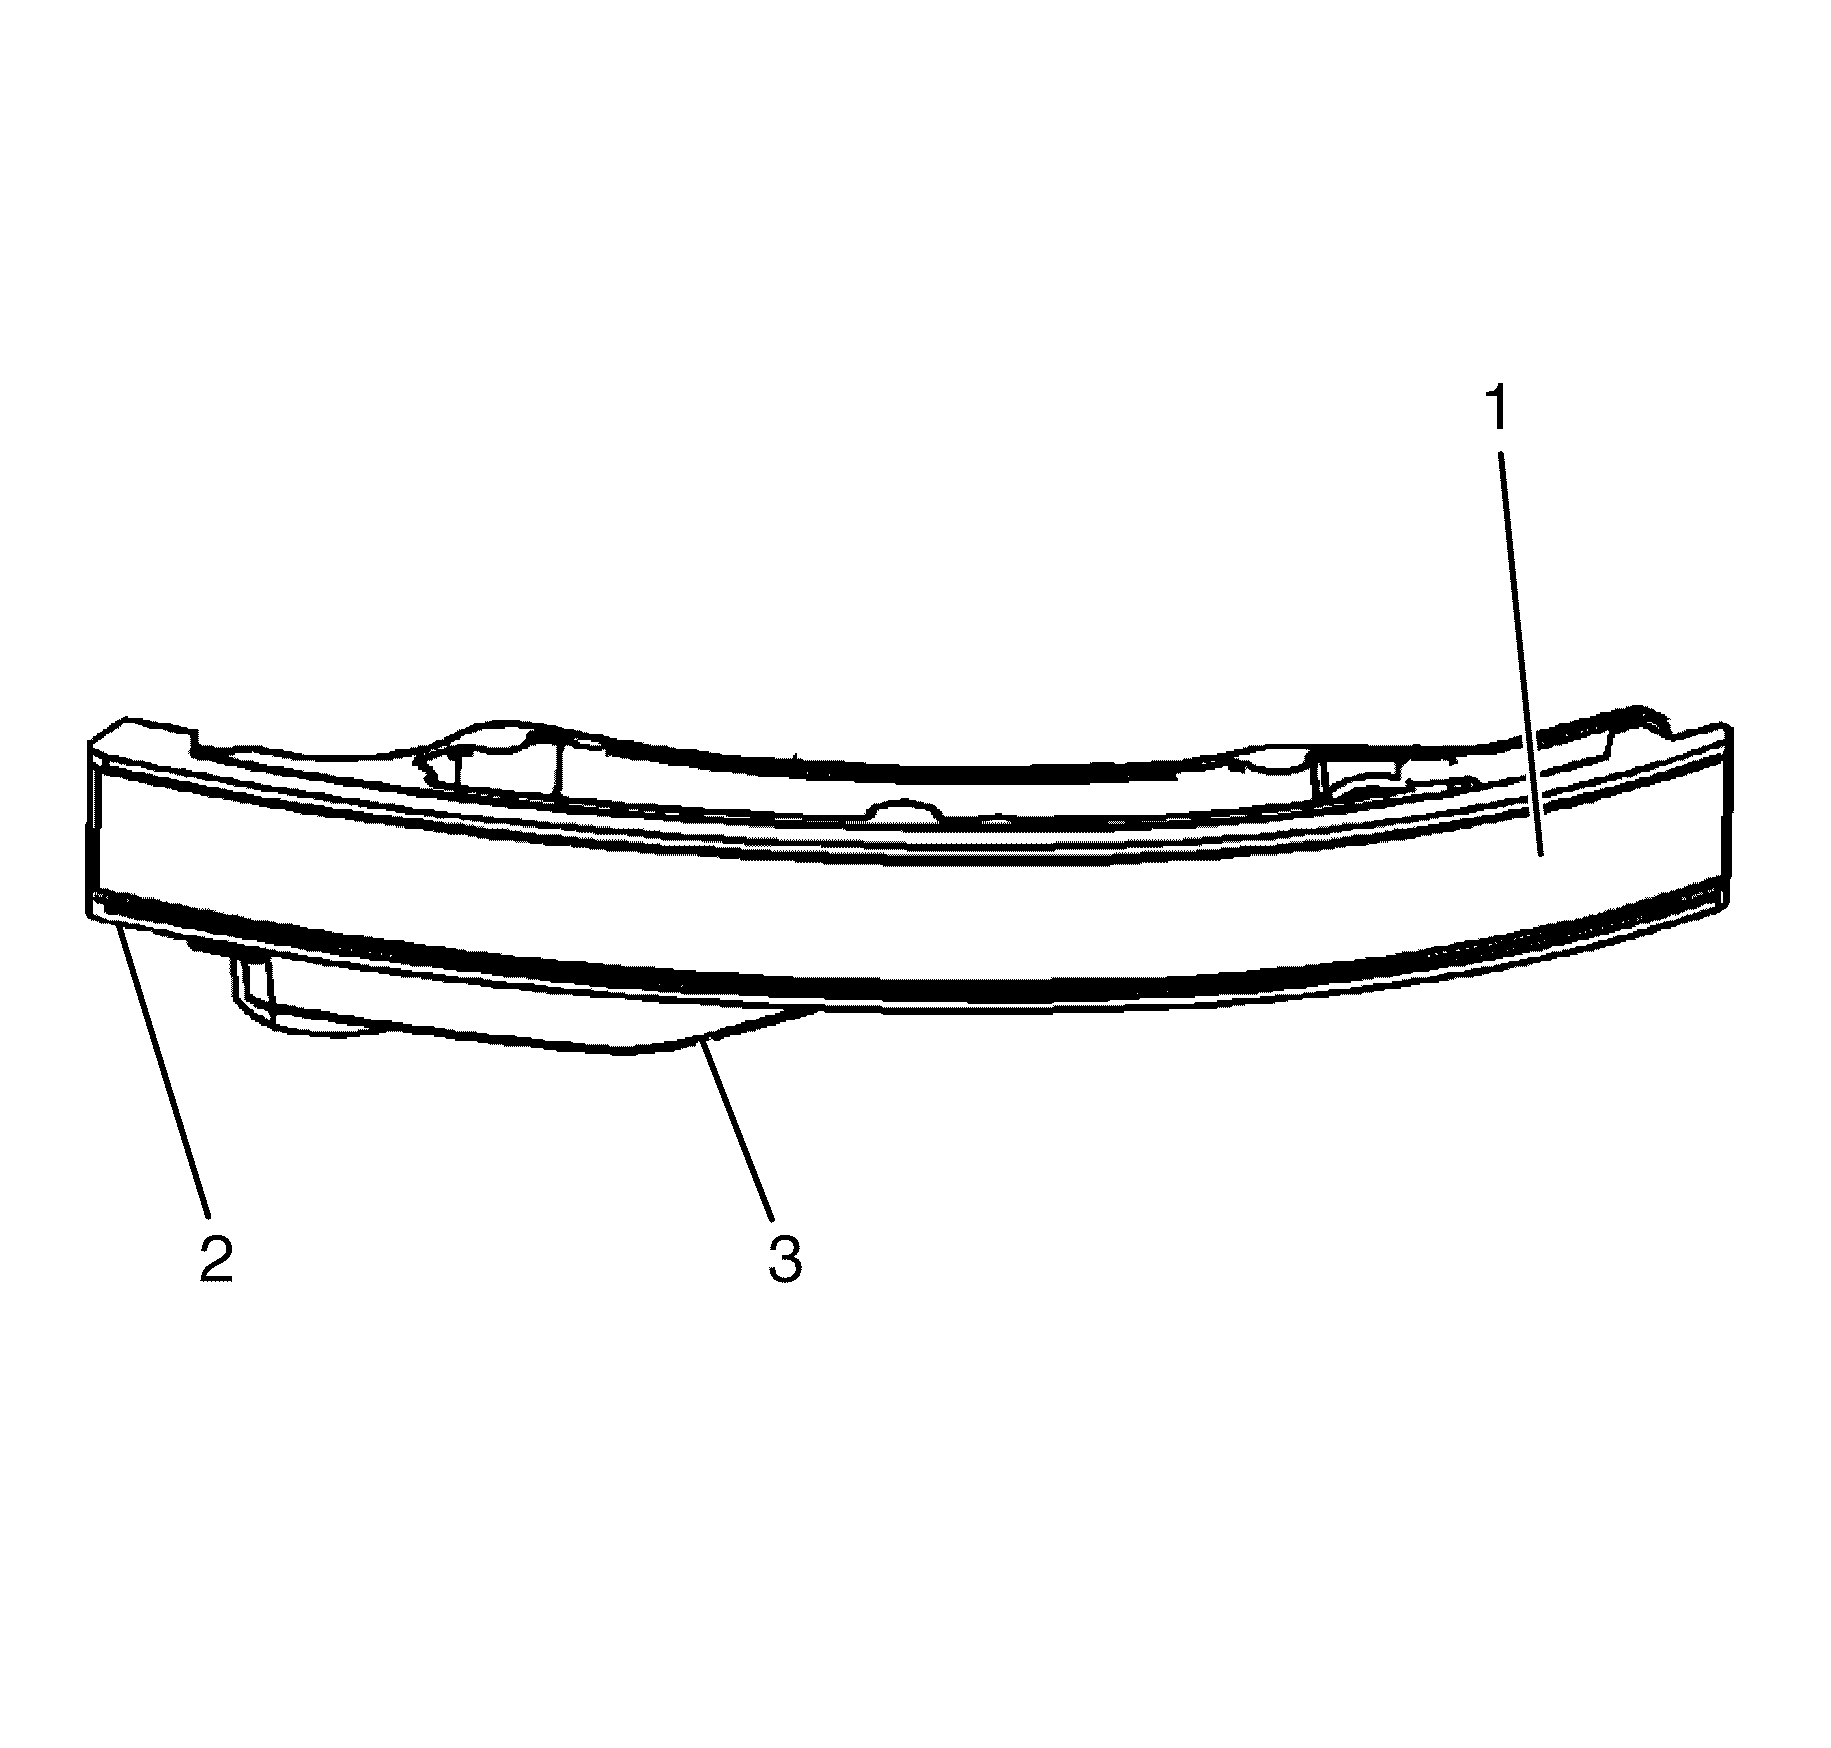
Left Secondary Timing Chain Guide
- Inspect the left secondary timing chain guide for the following:
- Replace a damaged left secondary timing chain guide.
| • | Worn guide surface (1) |
| • | Cracked or broken guide surface (2) |
| • | Cracked or damaged guide base (3) |
Right Secondary Timing Chain Guide
- Inspect the right secondary timing chain guide for the following:
- Replace a damaged right secondary timing chain guide.
| • | Worn guide surface (1) |
| • | Cracked or broken guide surface (2) |
| • | Cracked or damaged guide base (3) |
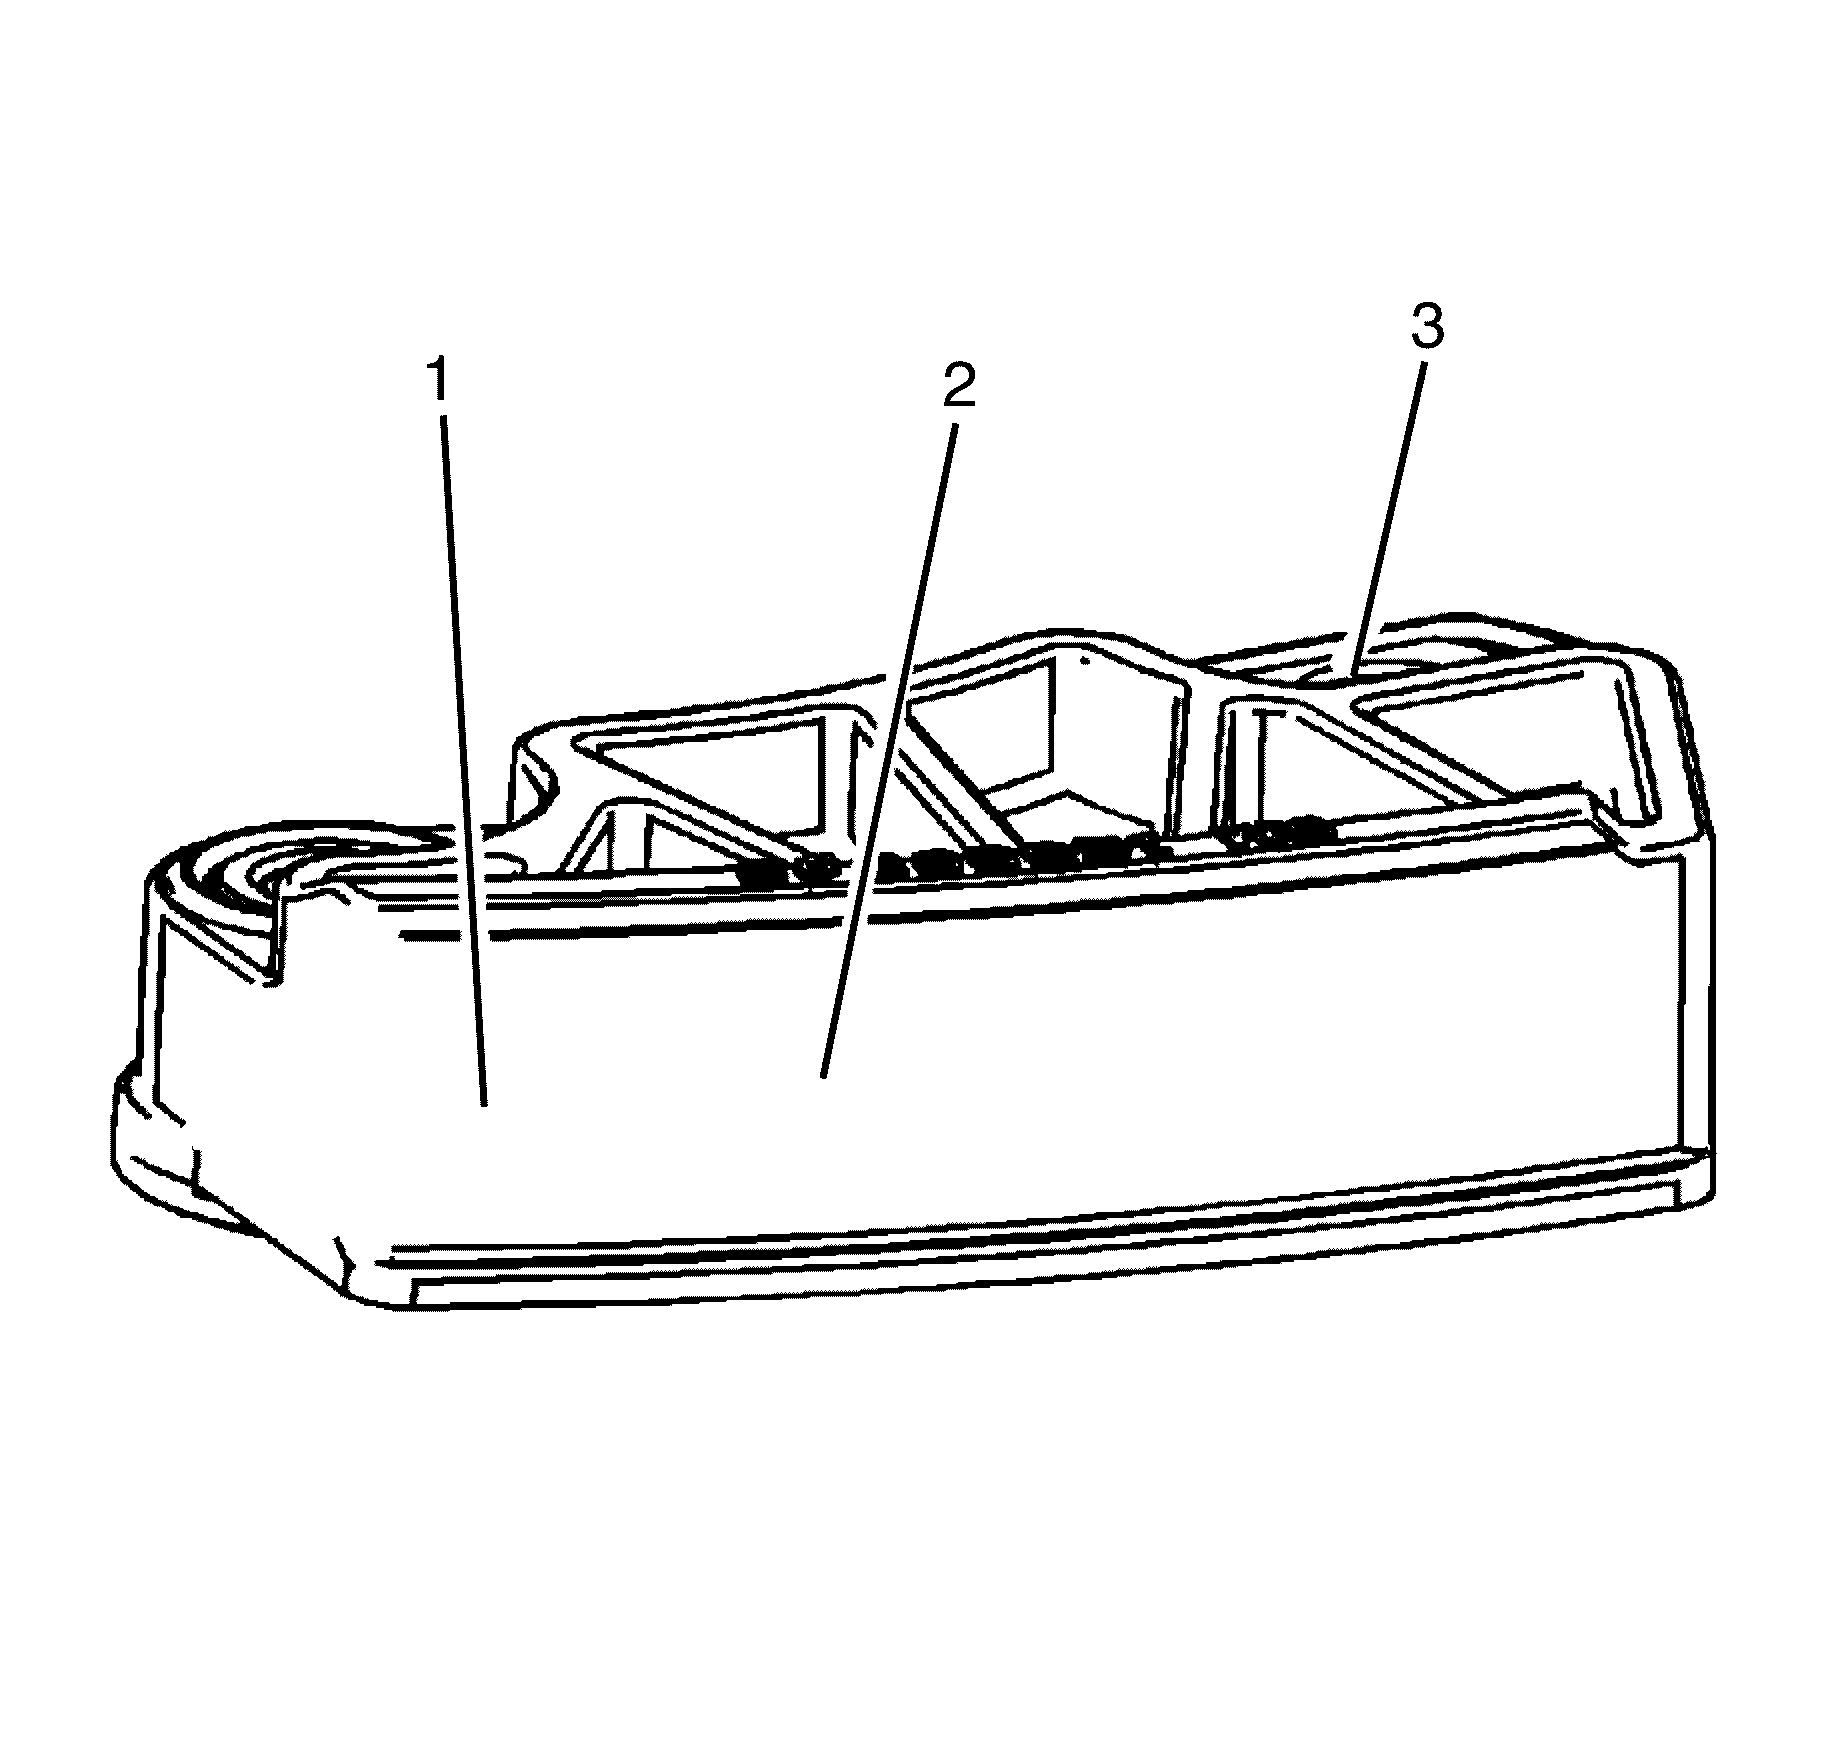
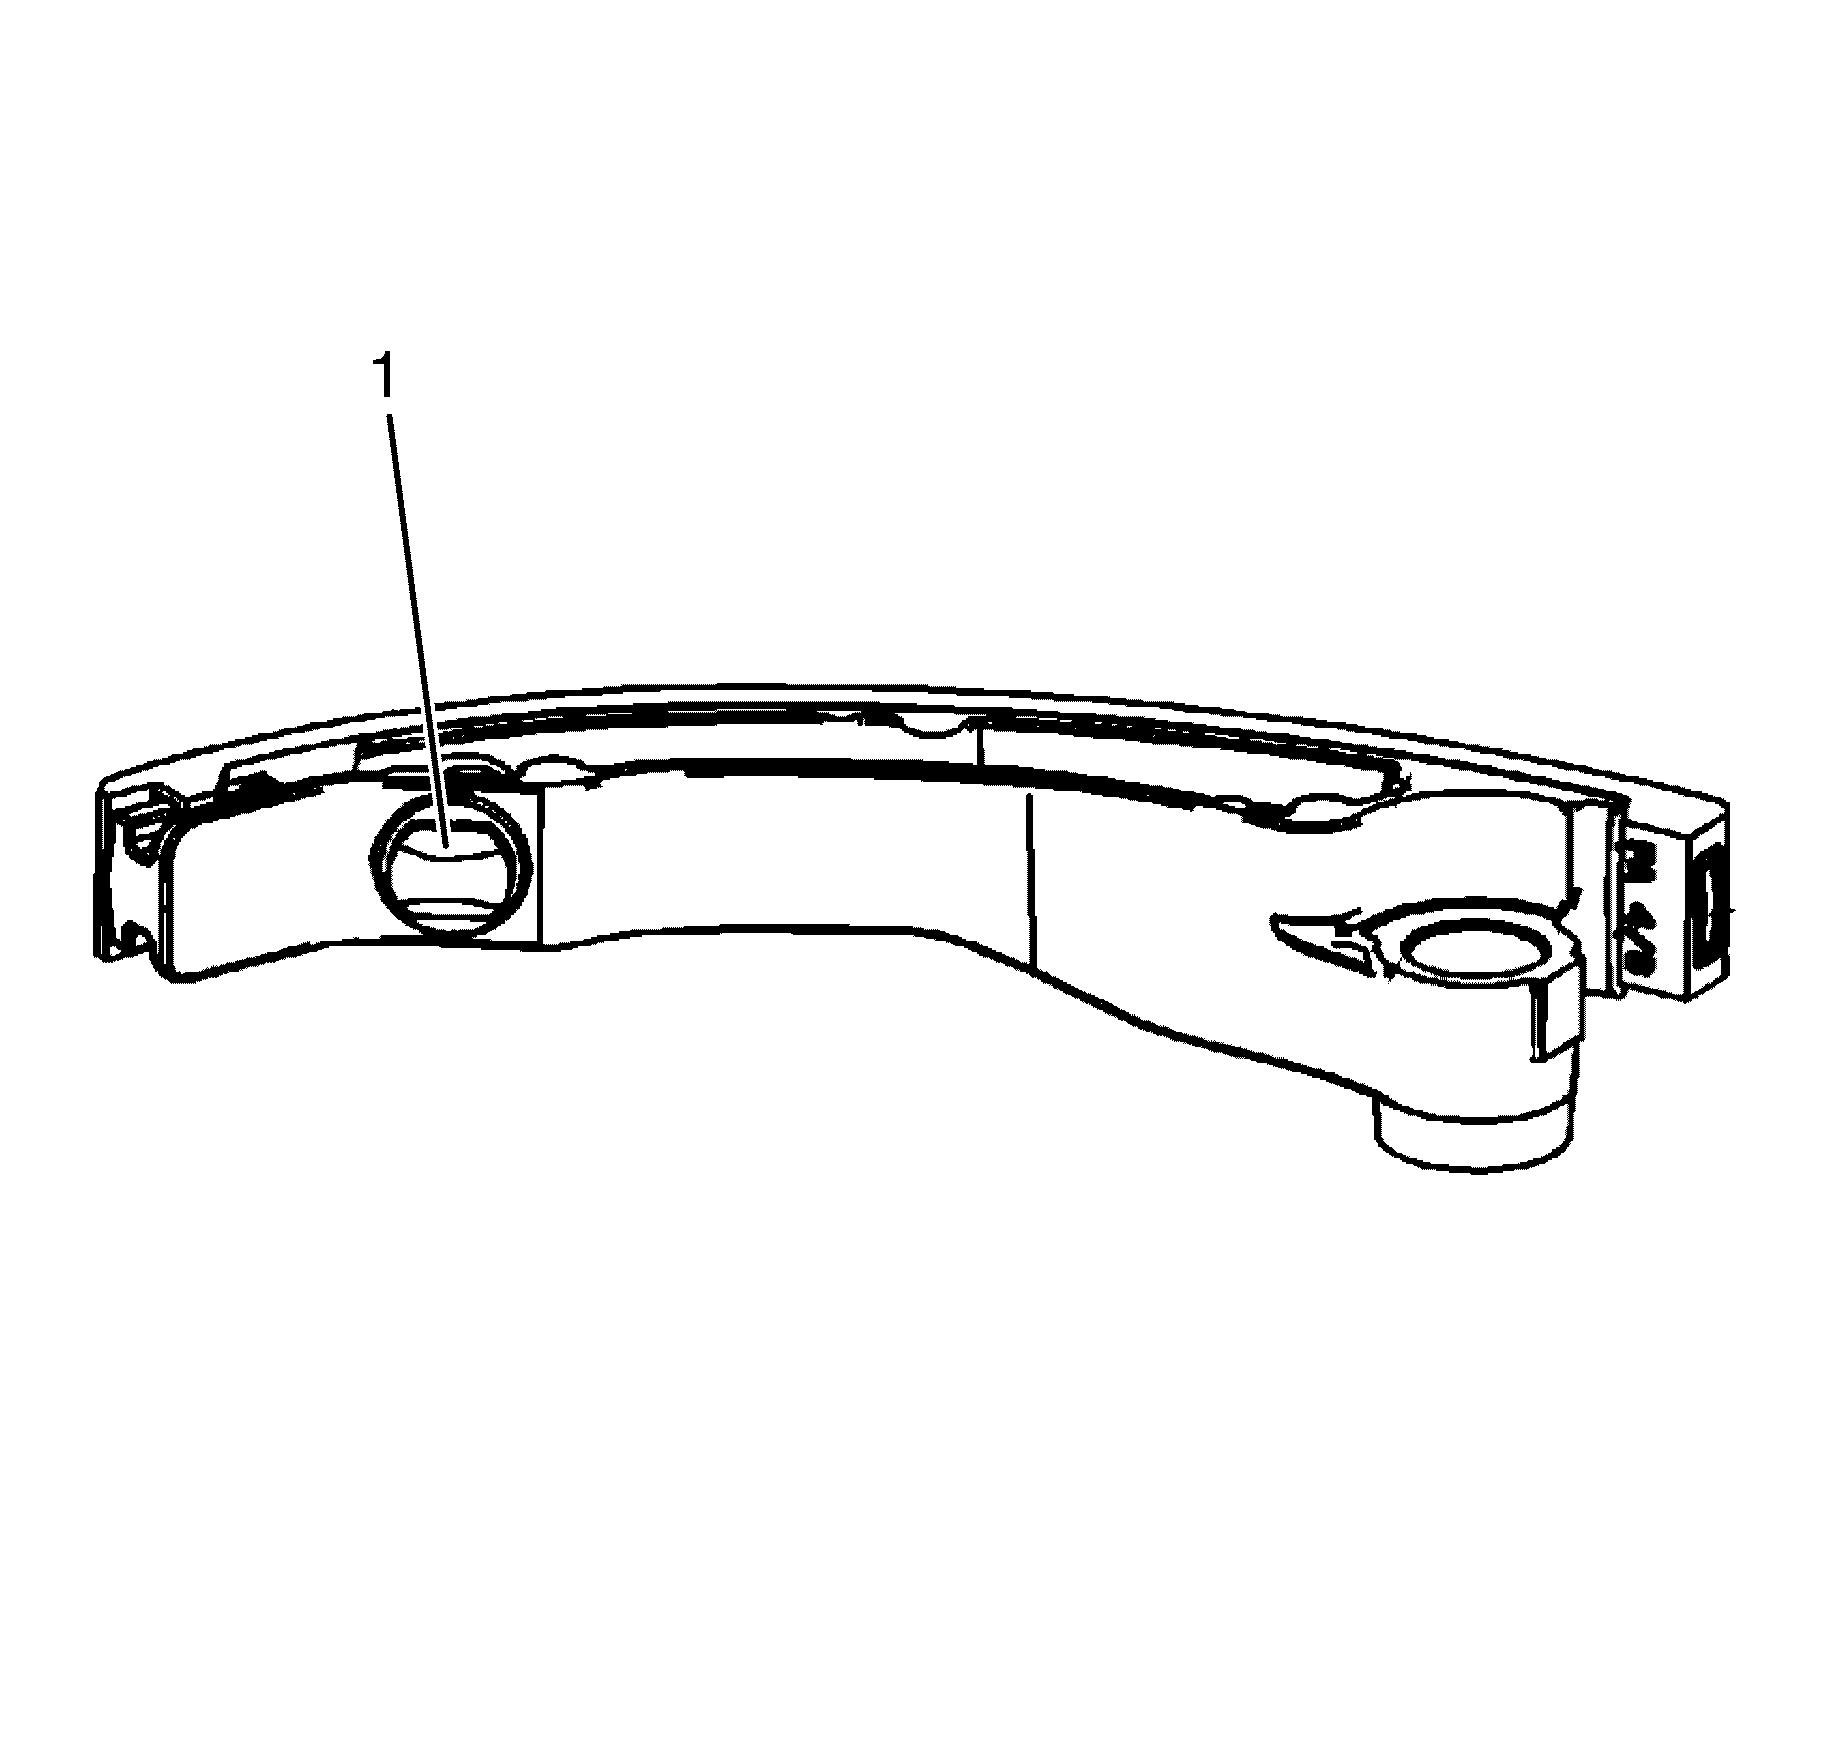
Left Secondary Timing Chain Shoe
- Inspect the front of the left secondary timing chain shoe for the following:
- Inspect the back of the left secondary timing chain shoe for a damaged, worn or missing left secondary timing chain tensioner contact pad (1).
- Replace a damaged left secondary timing chain shoe.
| • | Worn shoe surface (1) |
| • | Cracked or broken shoe surface (2) |
| • | Cracked or damaged shoe (3) |
Right Secondary Timing Chain Shoe
- Inspect the front of the right secondary timing chain shoe for the following:
- Inspect the back of the right secondary timing chain shoe for a damaged, worn or missing right secondary timing chain tensioner contact pad (1).
- Replace a damaged right secondary timing chain shoe.
| • | Worn shoe surface (1) |
| • | Cracked or broken shoe surface (2) |
| • | Cracked or damaged shoe (3) |
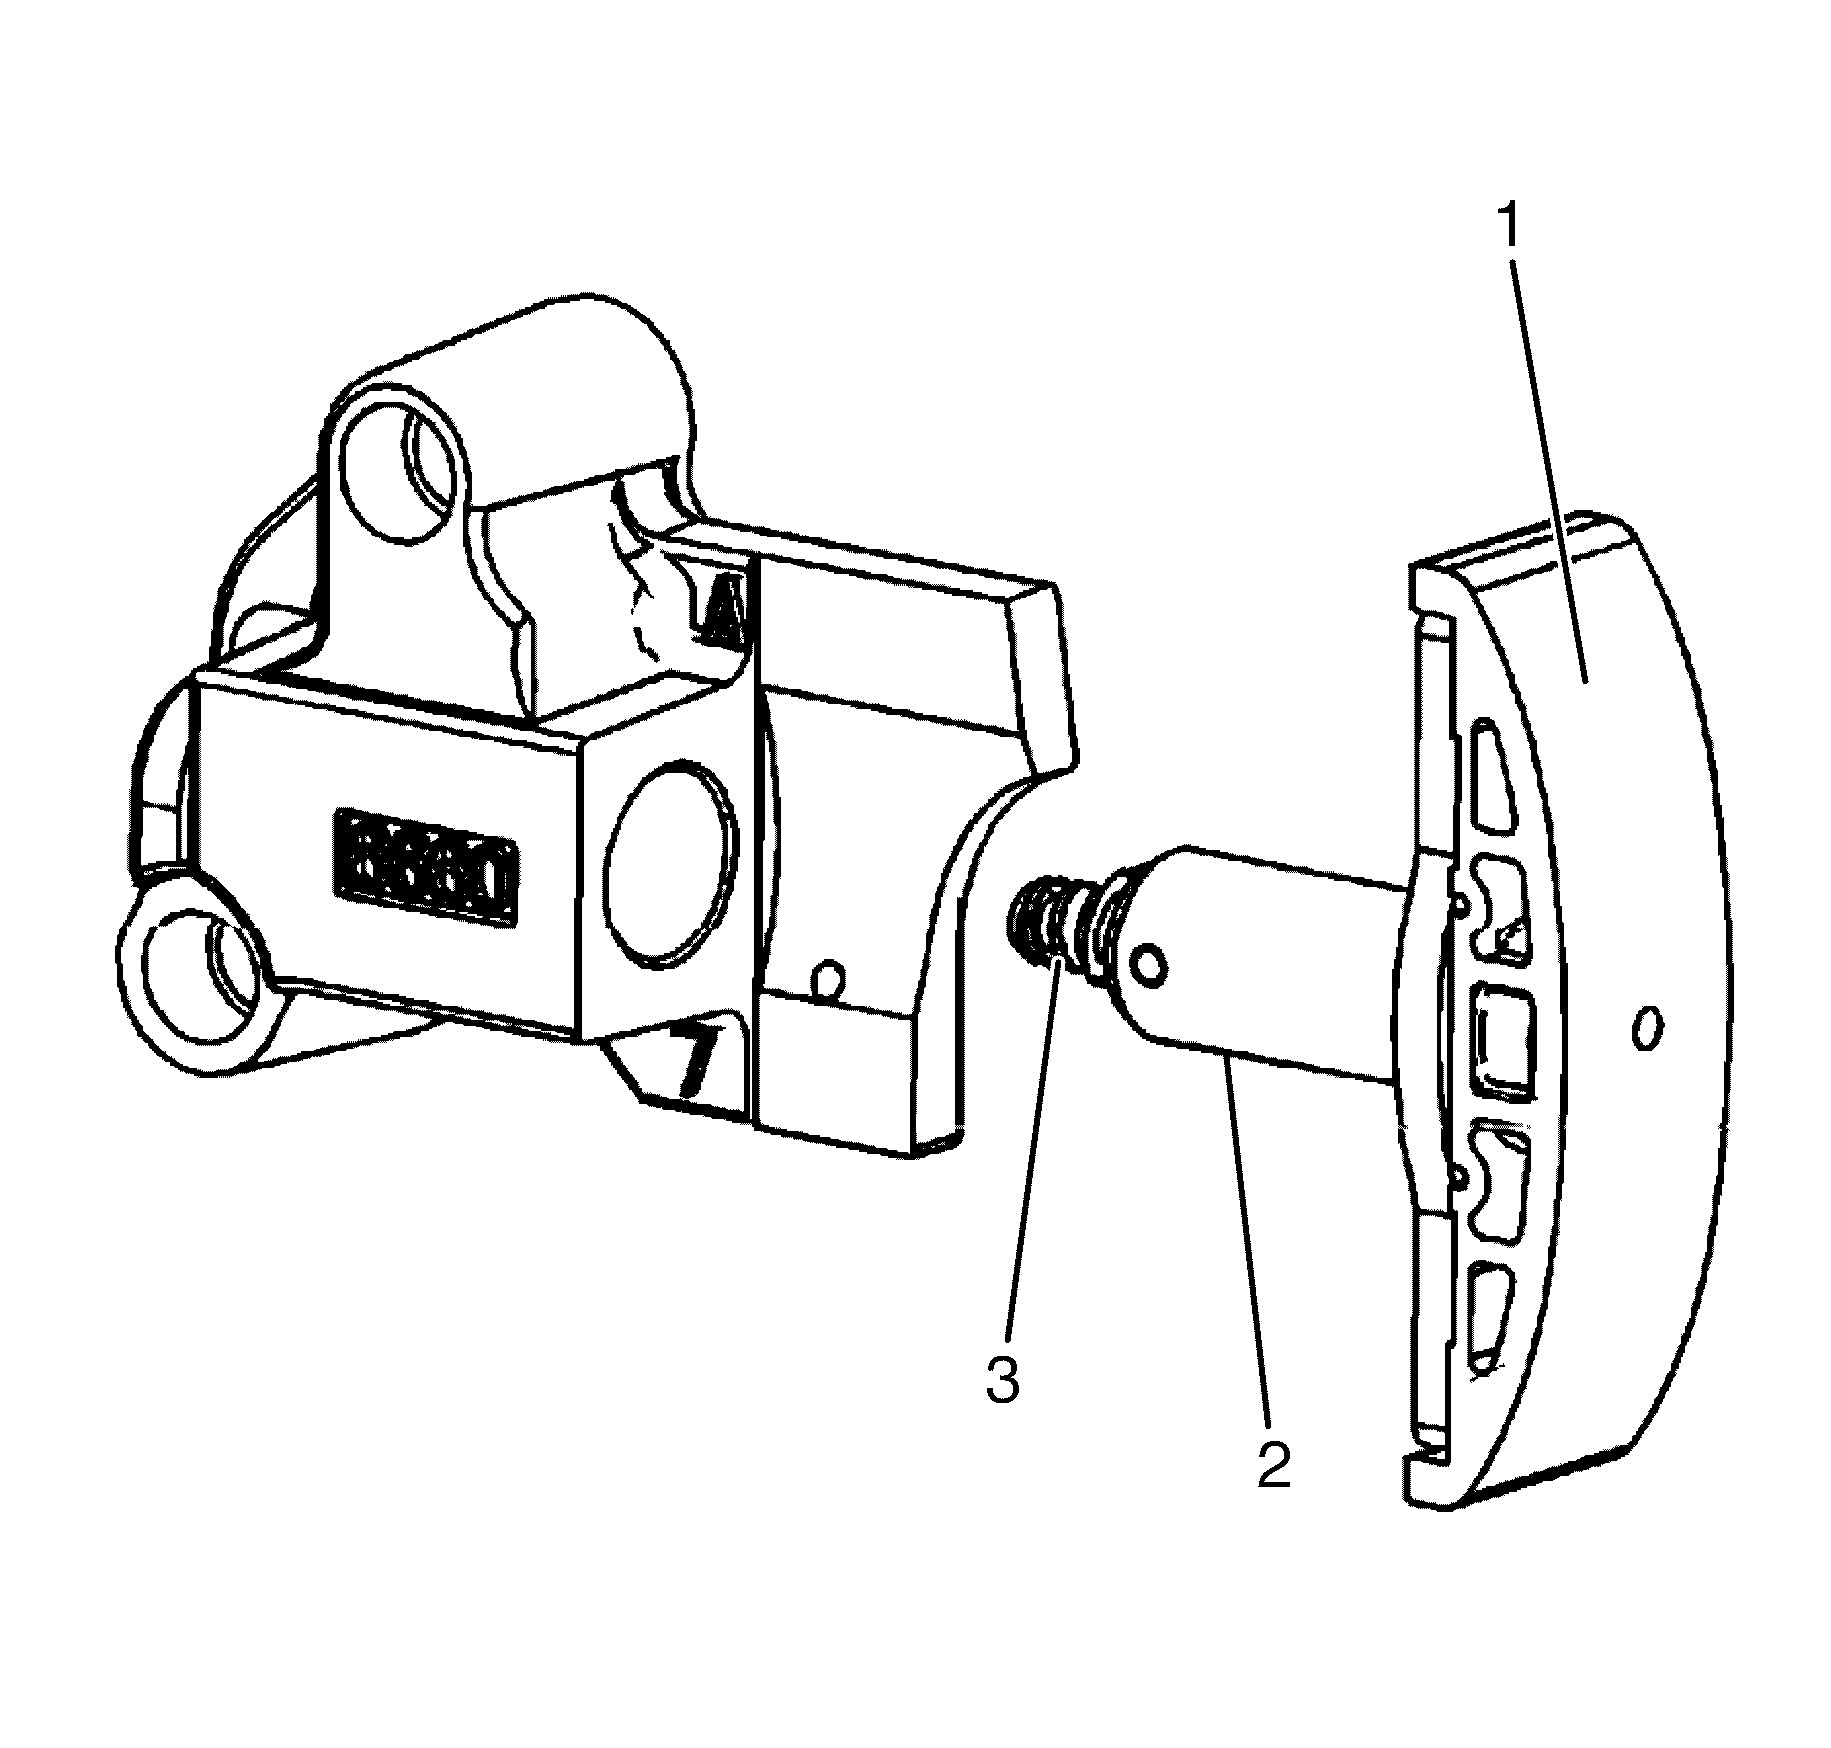
Primary Timing Chain Tensioner
- Inspect the primary timing chain tensioner for worn primary timing chain tensioner shoe surface (1).
- Inspect the primary timing chain tensioner for locked or binding timing chain tensioner. Reset the plunger (3) and ensure the plunger moves freely (2) in and out of the body of the tensioner. Refer to Primary Camshaft Intermediate Drive Chain Tensioner Removal.
- Replace a damaged primary timing chain tensioner.
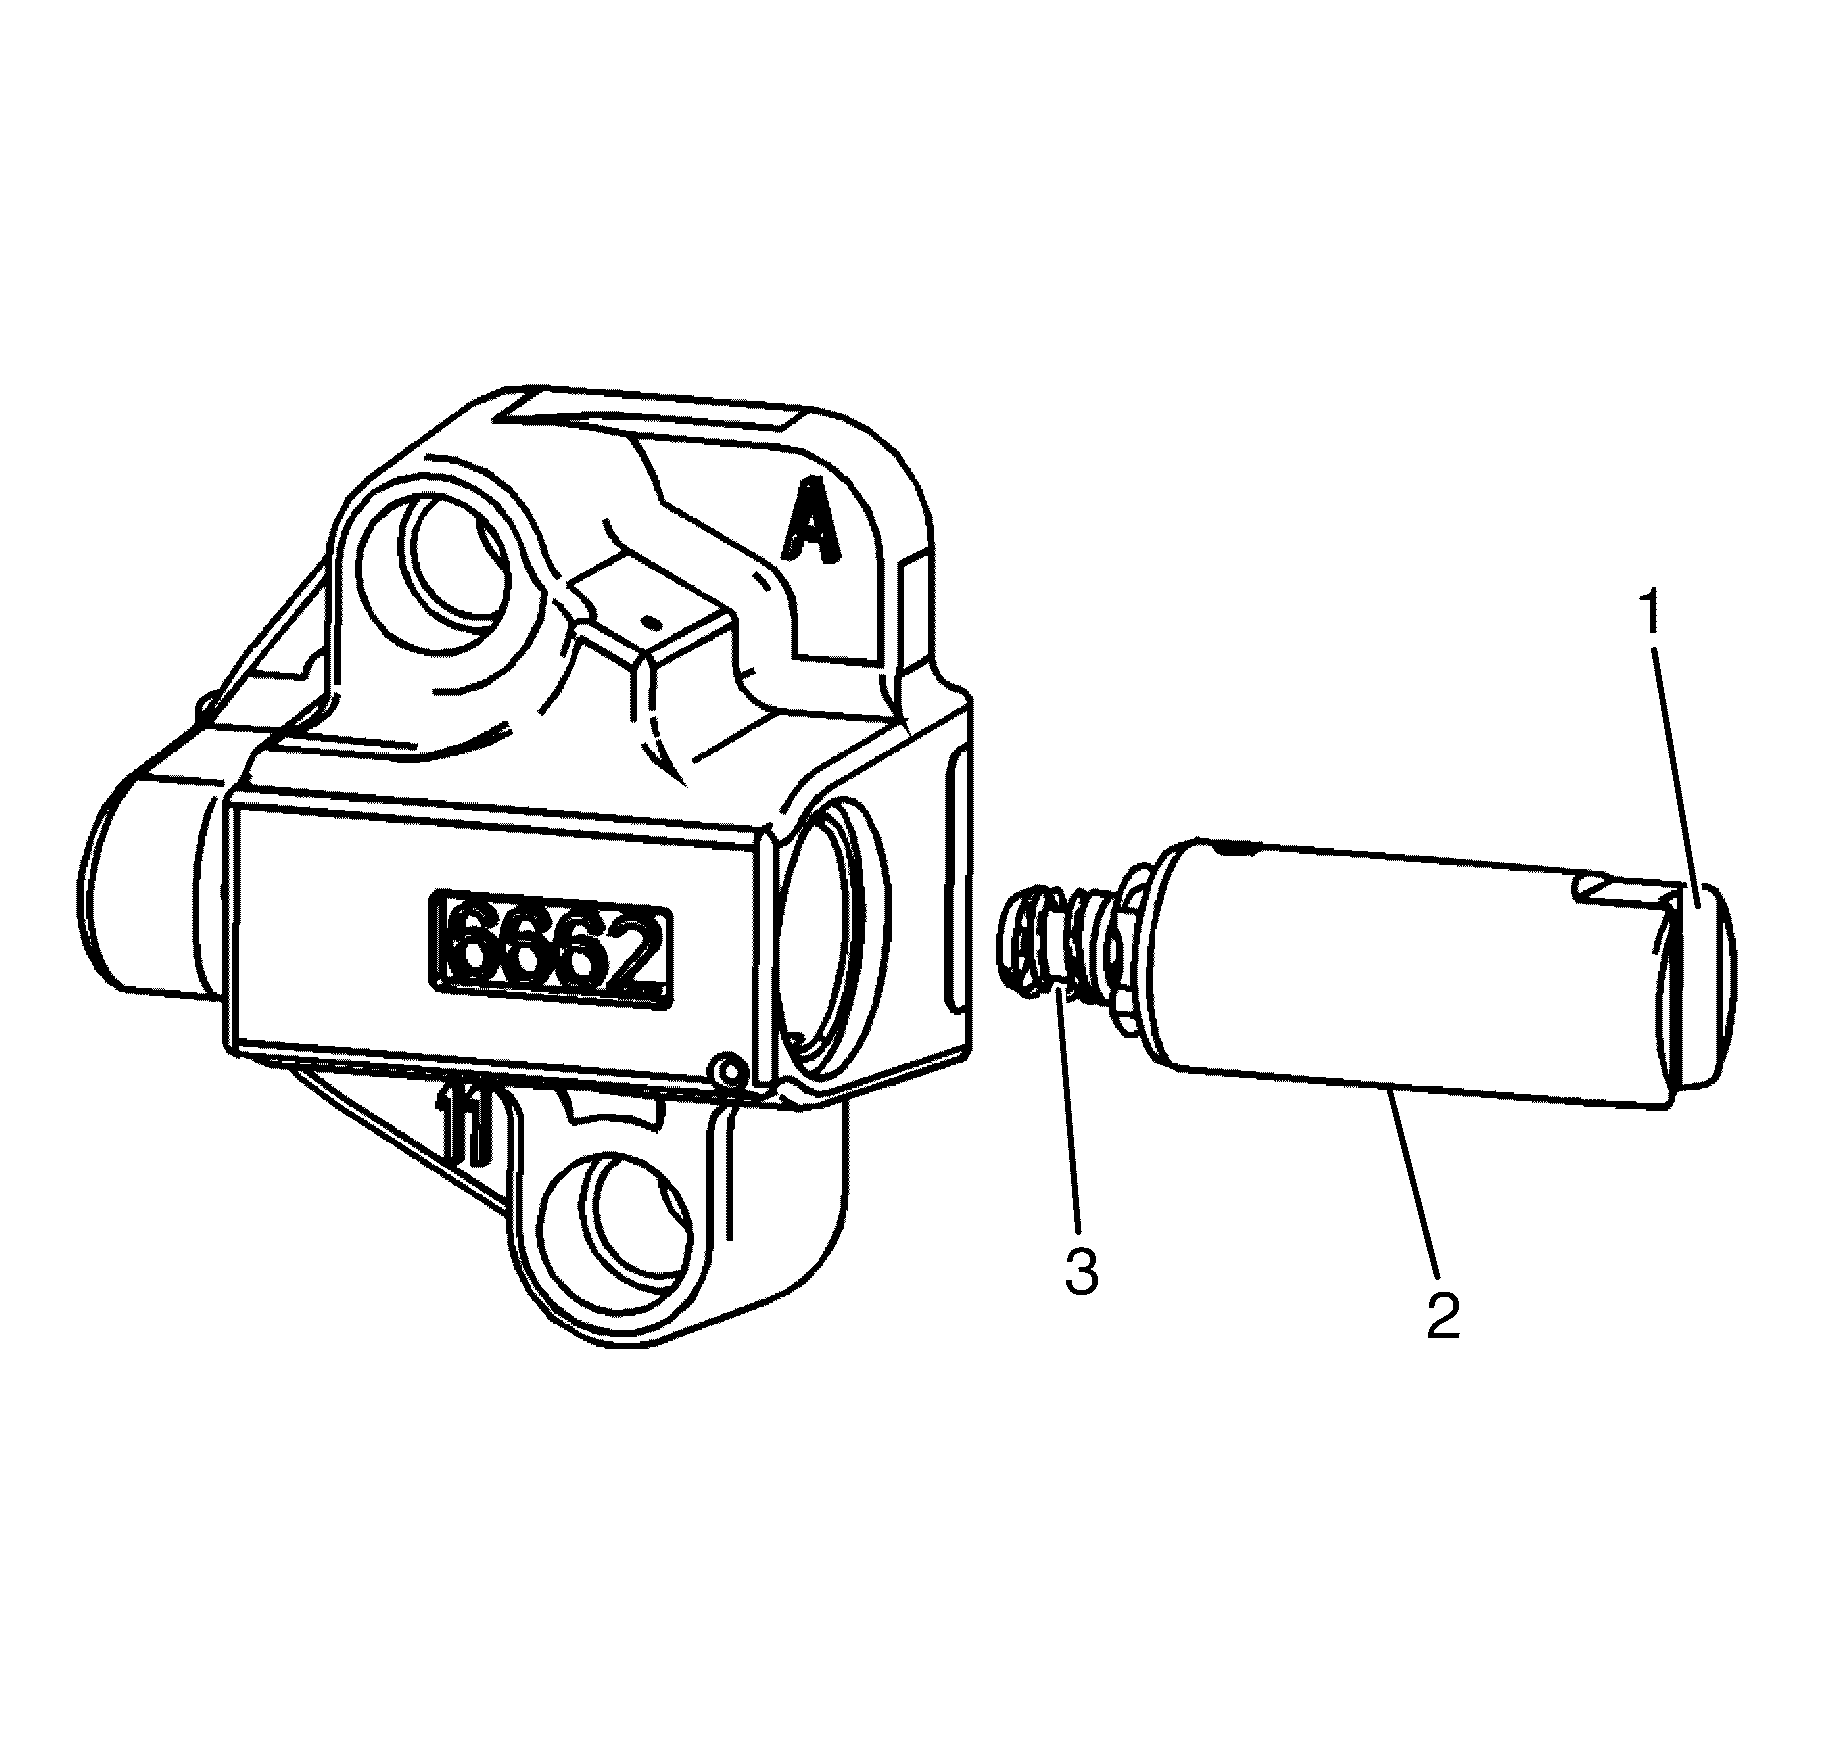
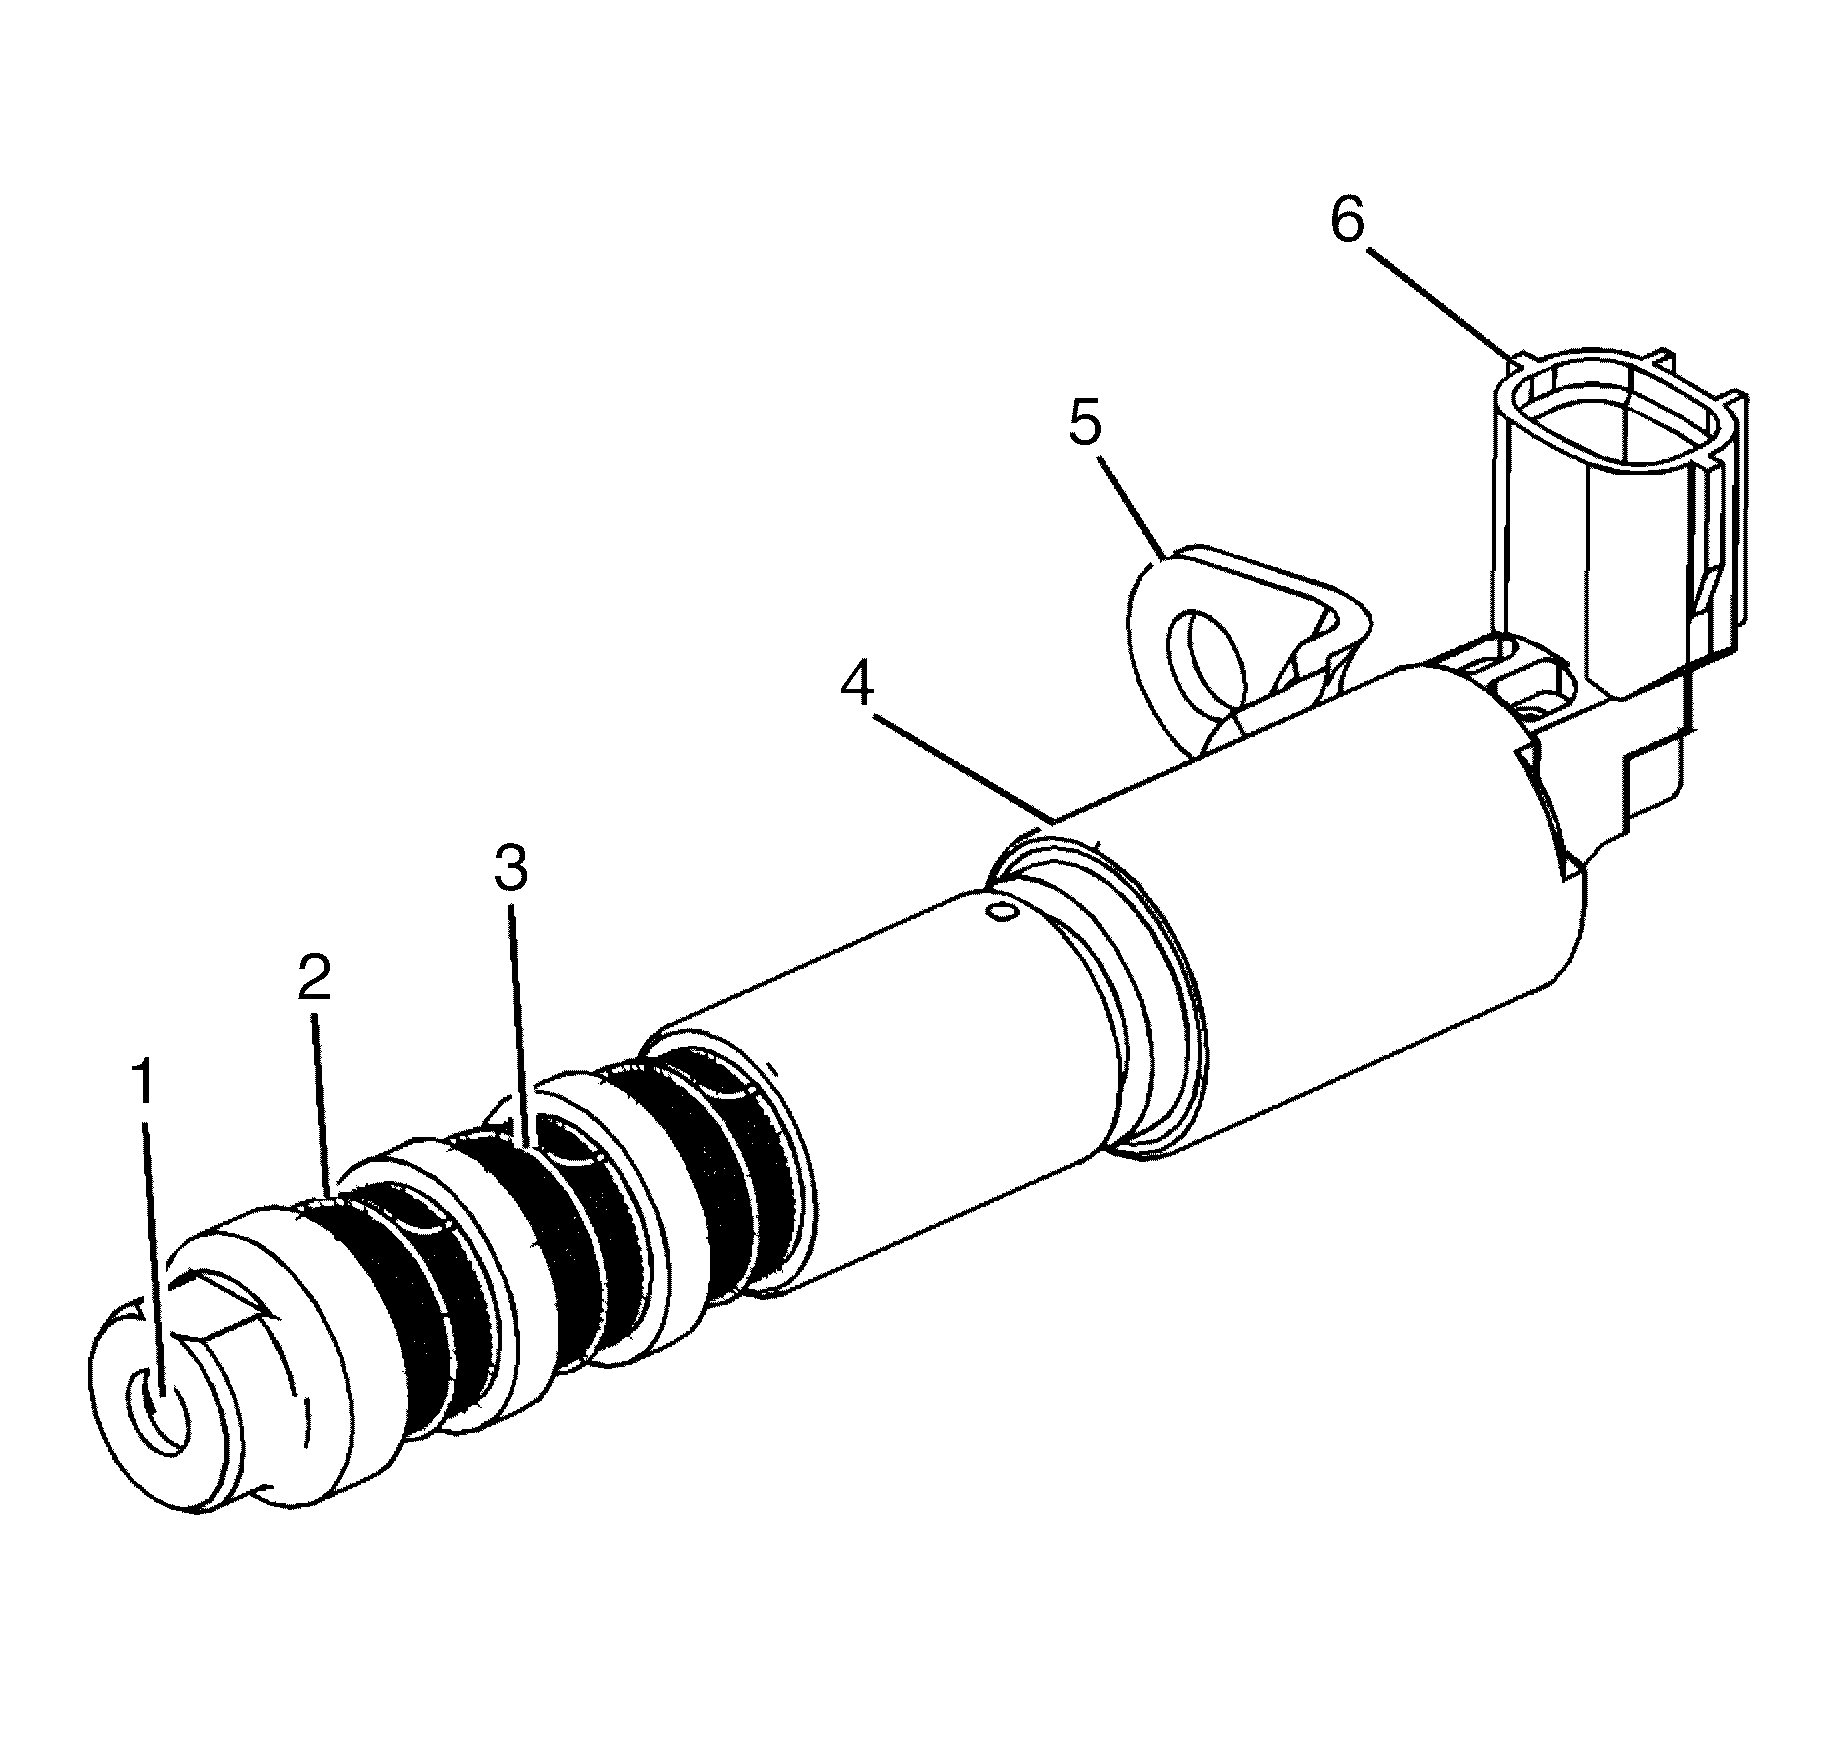
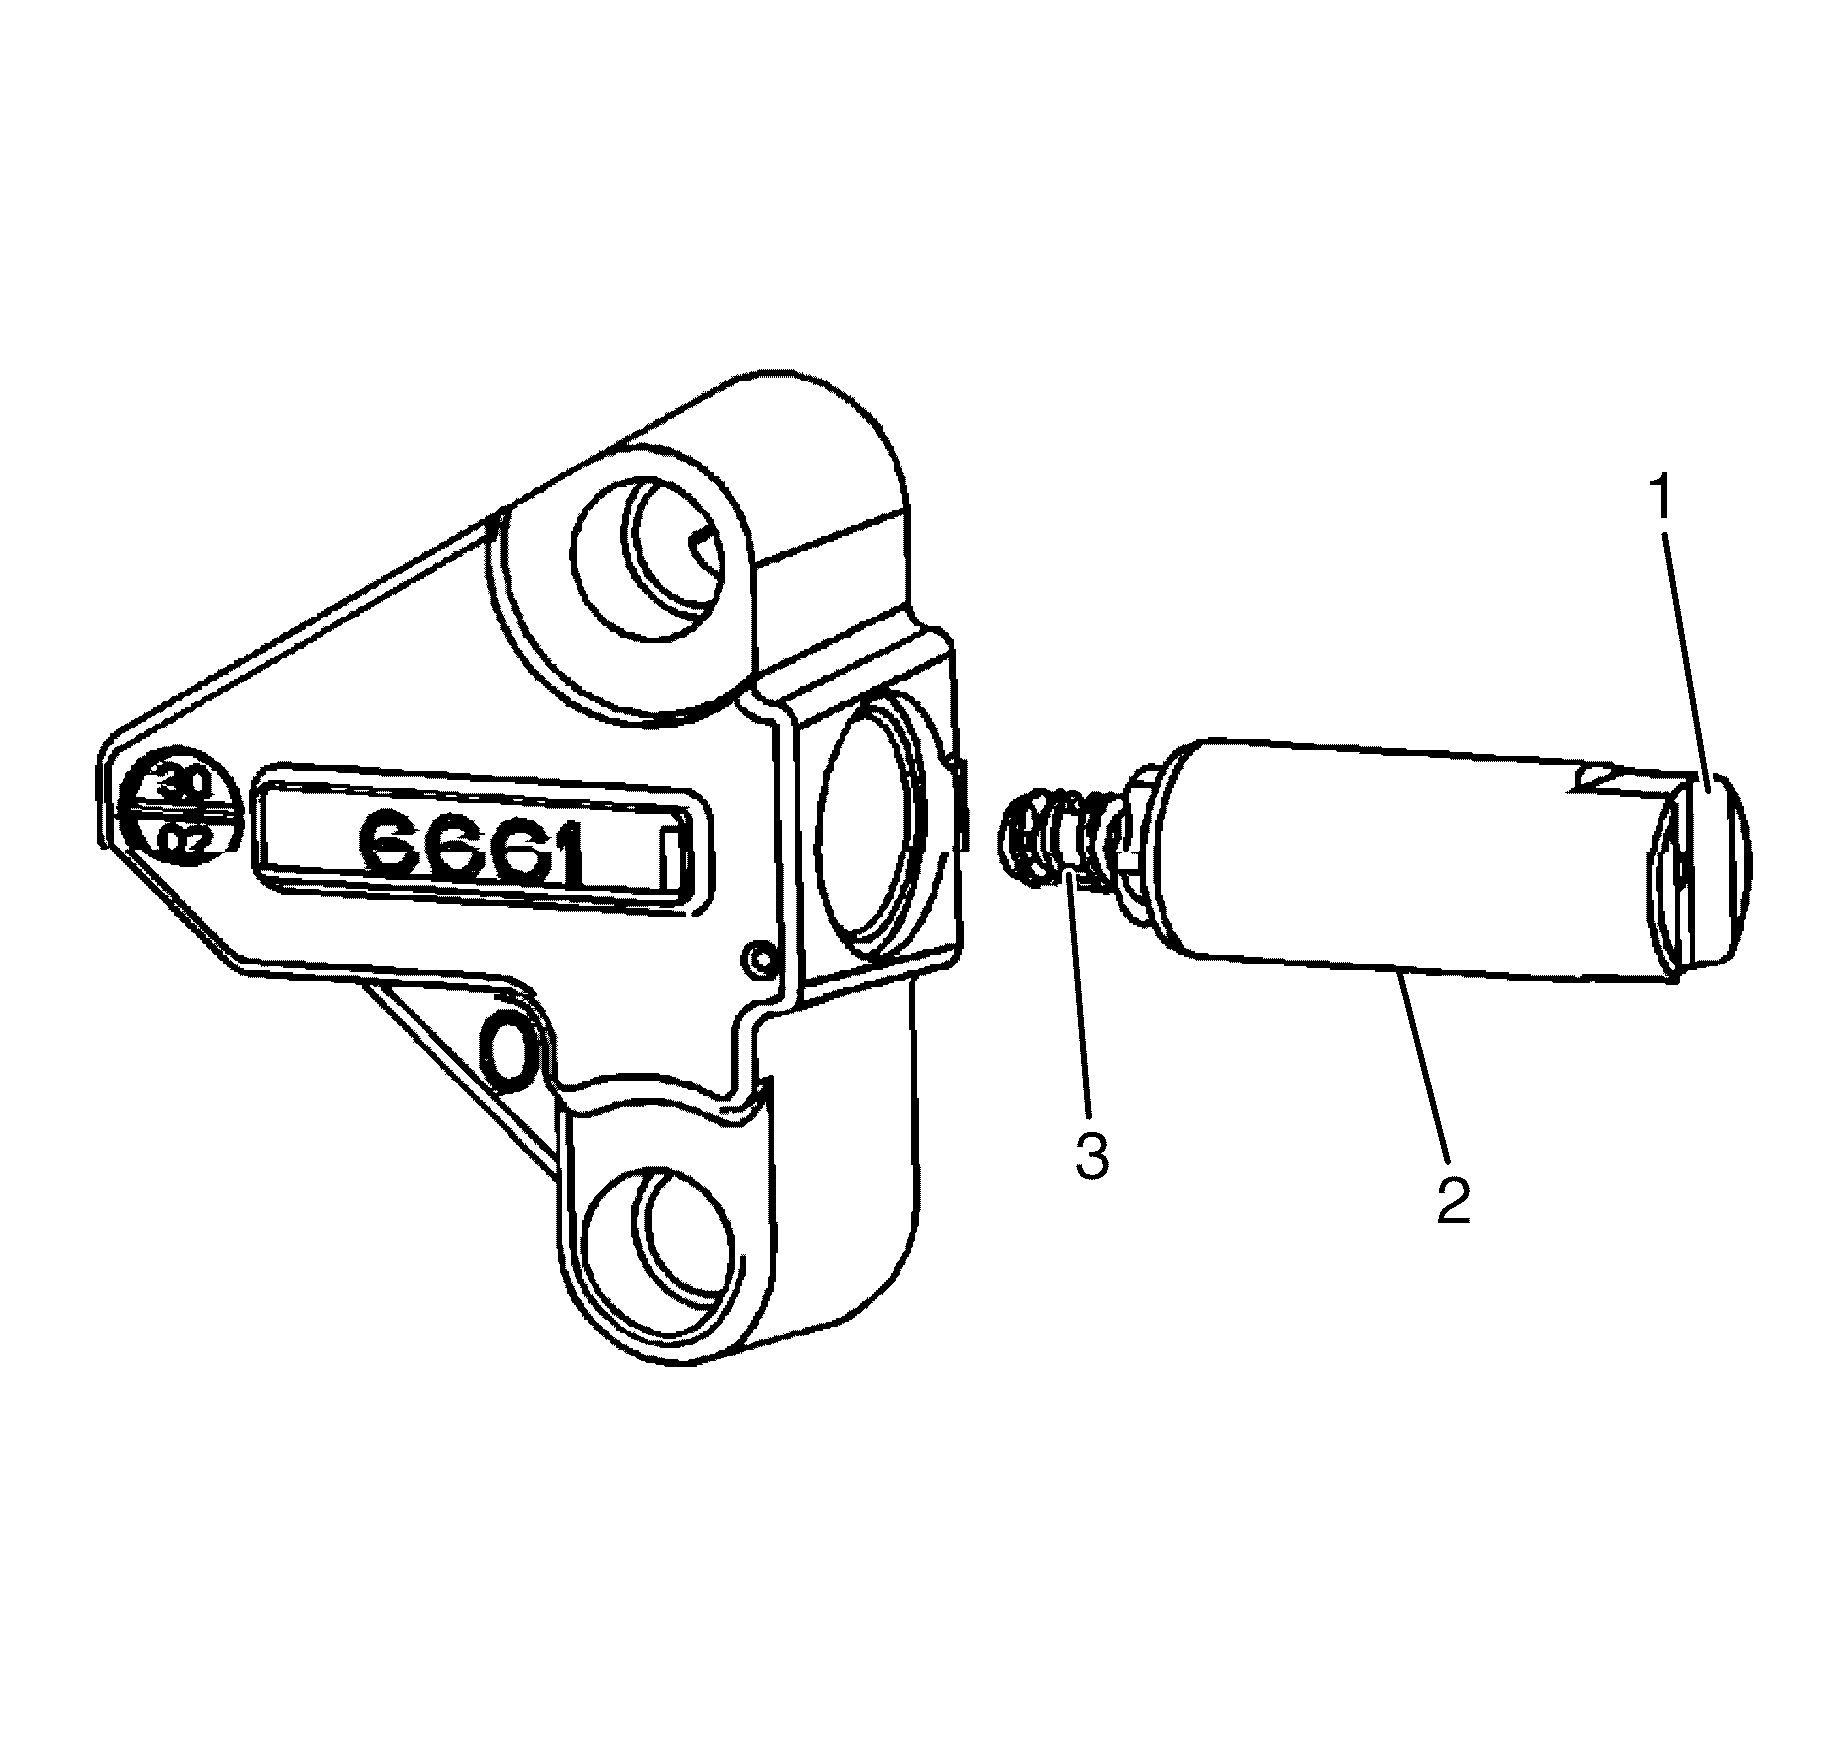
Left Secondary Timing Chain Tensioner
- Inspect the left secondary timing chain tensioner for damaged plunger-to-shoe contact surface (1).
- Inspect the left secondary timing chain tensioner for locked or binding timing chain tensioner. Reset the plunger (3) and ensure the plunger moves freely (2) in and out of the body of the tensioner. Refer to Secondary Camshaft Drive Chain Tensioner Installation - Left Side.
- Replace a damaged left secondary timing chain tensioner.
Right Secondary Timing Chain Tensioner
- Inspect the right secondary timing chain tensioner for damaged plunger-to-shoe contact surface (1).
- Inspect the right secondary timing chain tensioner for locked or binding timing chain tensioner. Reset the plunger (3) and ensure the plunger moves freely (2) in and out of the body of the tensioner. Refer to Secondary Camshaft Drive Chain Tensioner Installation - Right Side.
- Replace a damaged right secondary timing chain tensioner.